March 10th, 2014
| 1 Comment »
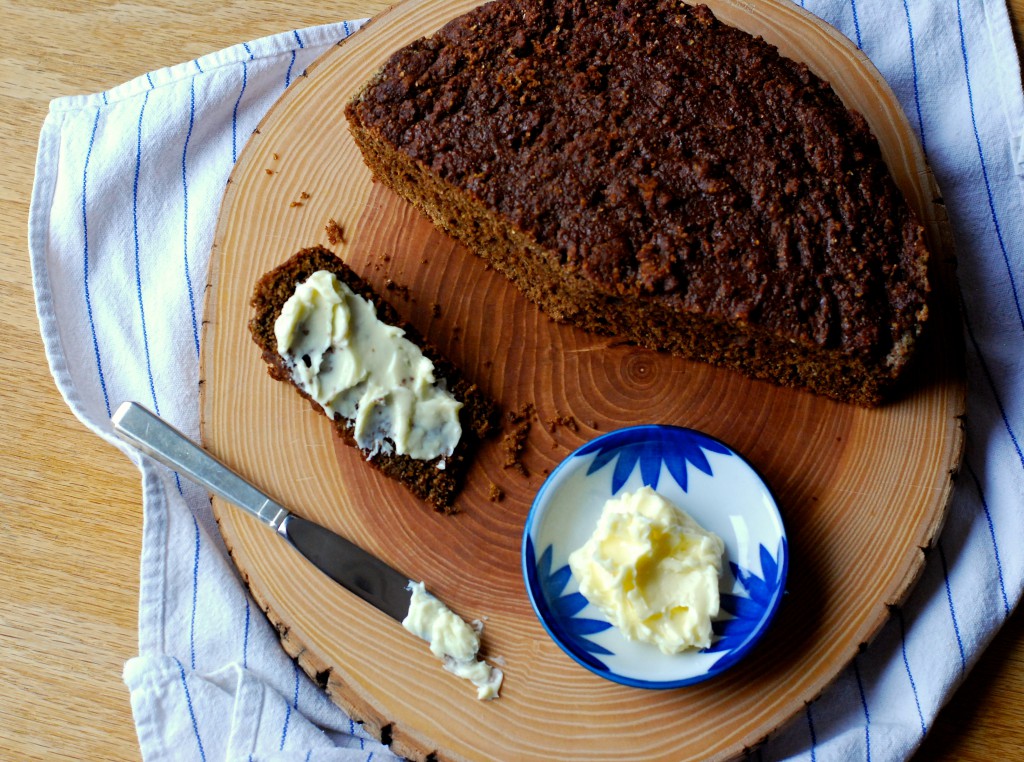
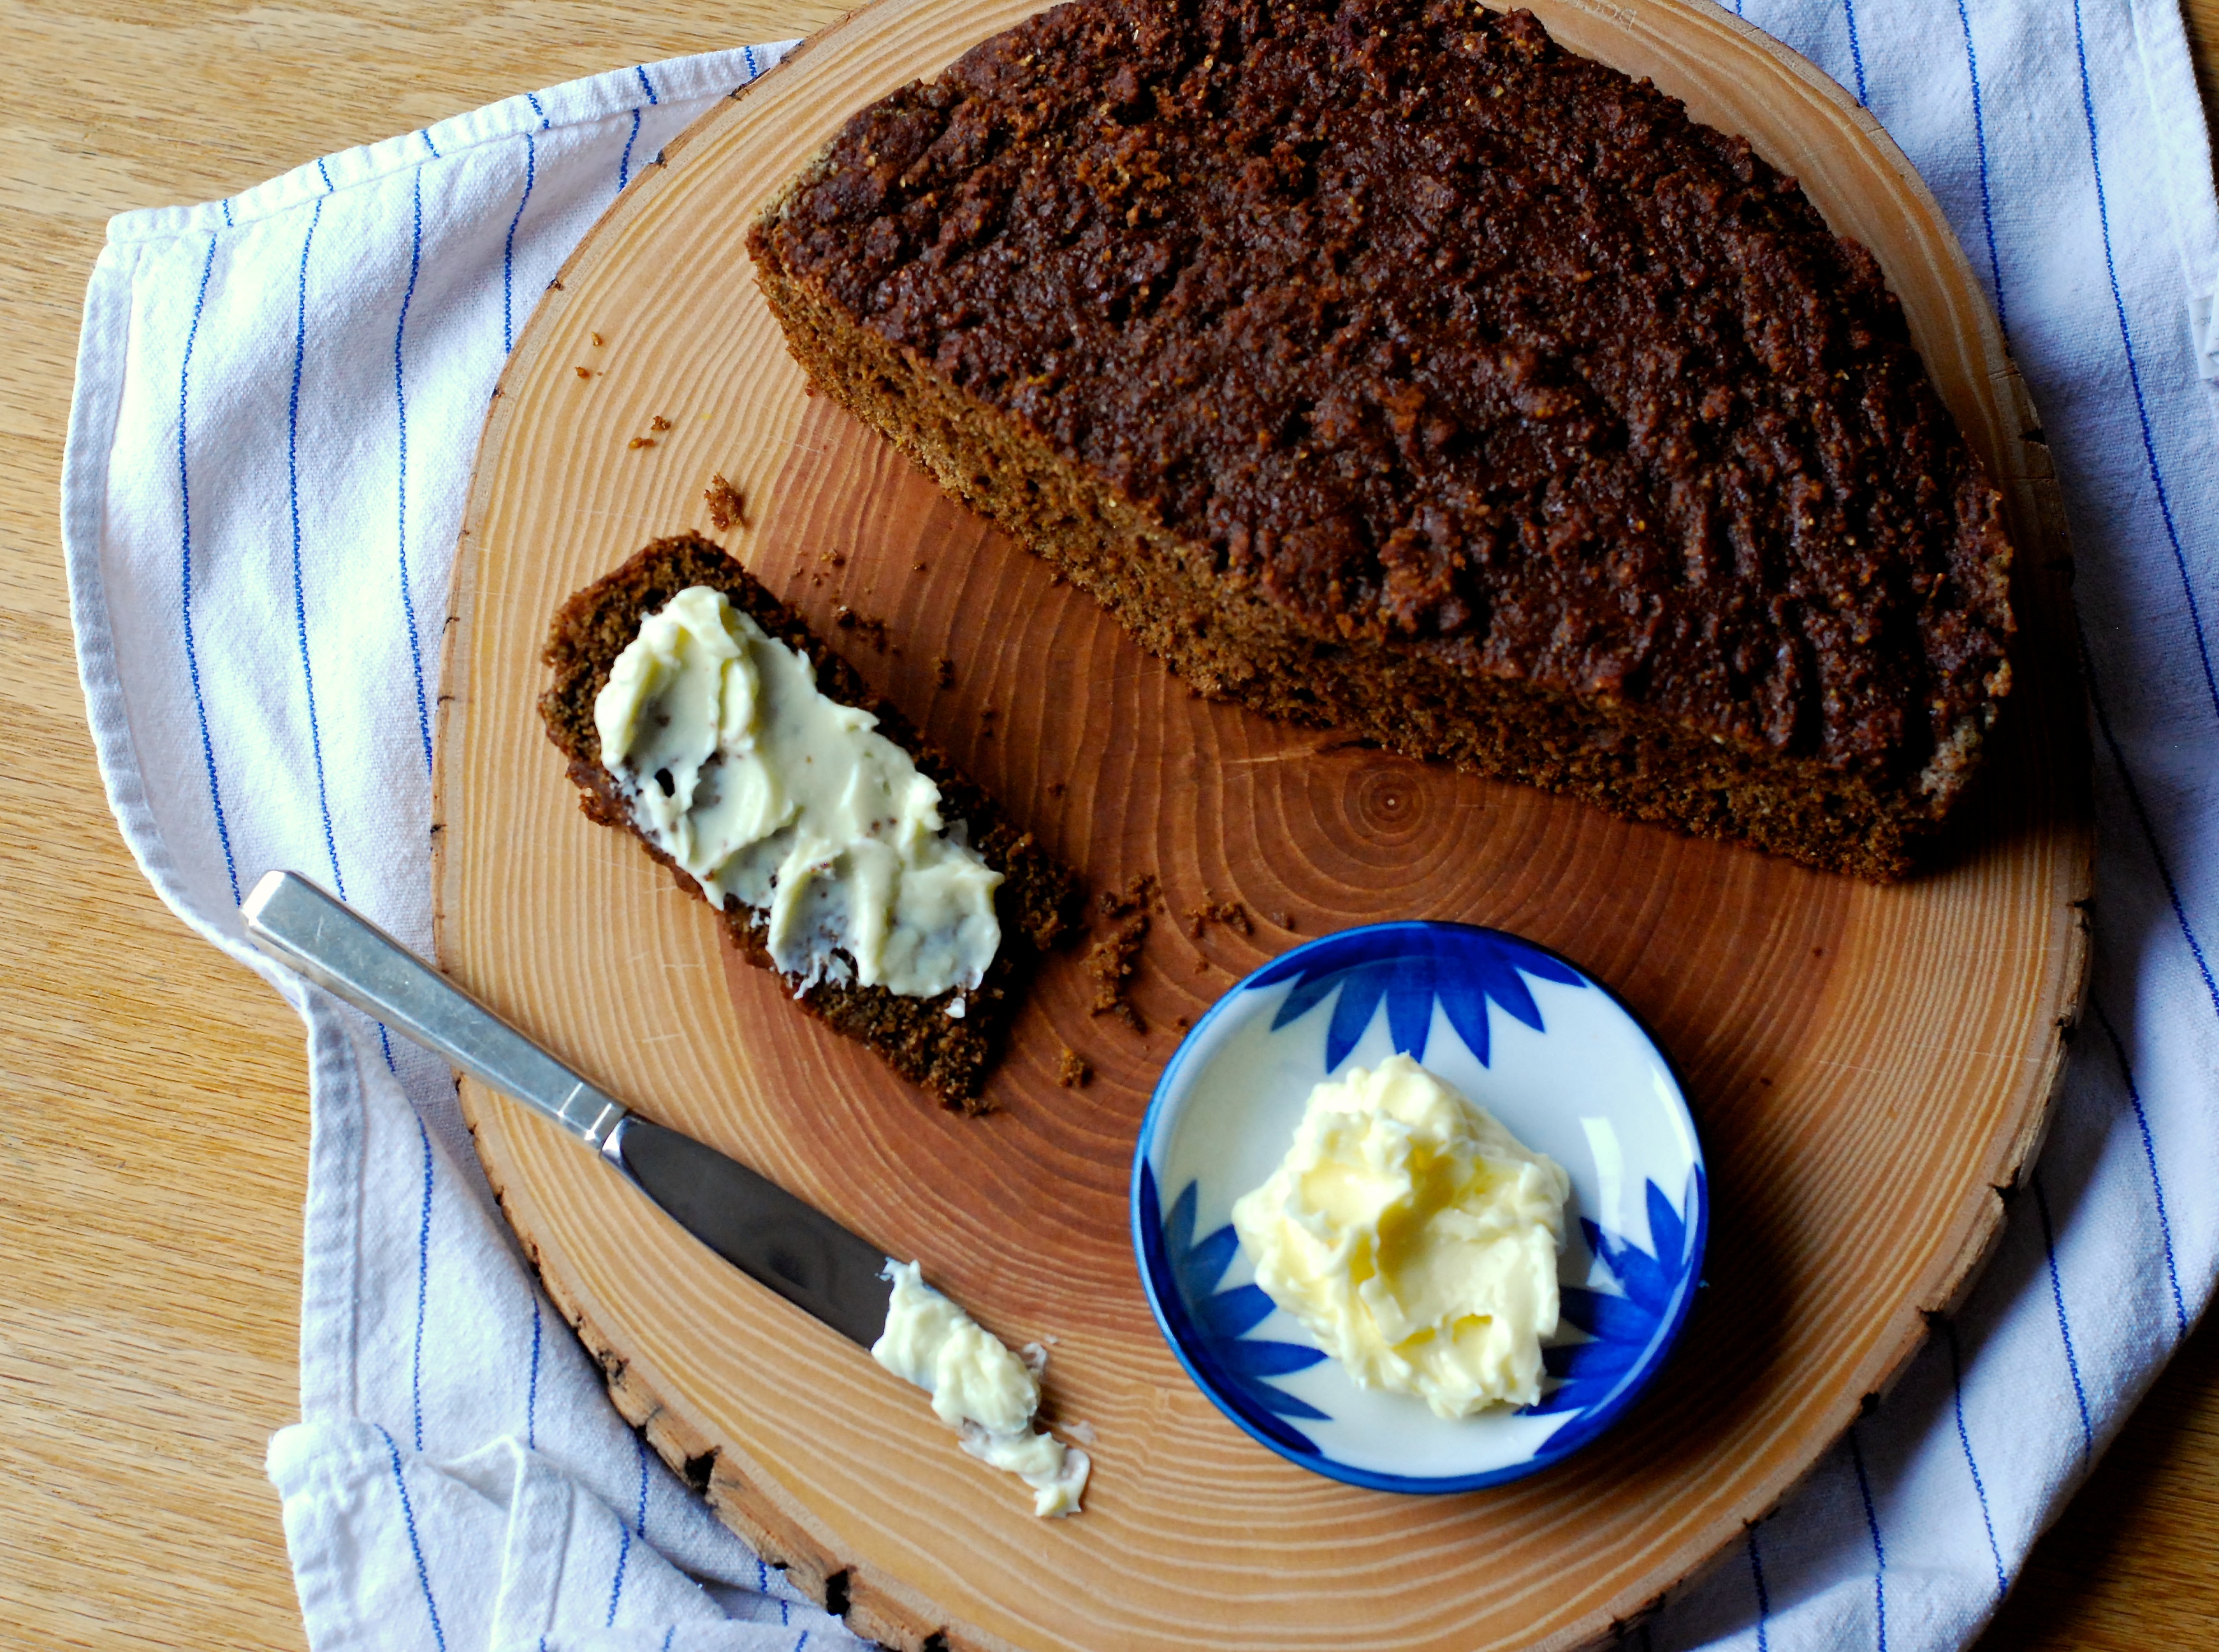
Sometimes you just need something like this bread; a dense, slightly sweet loaf, with a firm, pebbly crust and a texture that wakes up your mouth, giving it plenty to chew on. Something that seemingly defies convention, that marries best with thickly spread chilled butter and a steaming cup of coffee, that says straight away to your belly a soul-satisfying ‘Ahhhhhhh!’
Baked in a cast-iron skillet, this bread, with it’s molasses laced crumb, rich with rye, cornmeal and stone-ground wheat goes by multiple names depending on who you ask, or possibly, where you’re from. The recipe origin, from the Food52 folks, called it Yogurt Bread with Molasses. Ho hum. No offense to them, but this description doesn’t even come close to explaining the brilliance of this bread. In reading through the comments on the article, it was described as Boston Baked Brown Bread, others called it New England Brown Bread. There’s a fact that in one era, and possibly still existing, that this bread or it’s similar affiliates is sometimes baked in a coffee can. It’s created for holiday festivities, and Christmas isn’t the same without it. But that’s just what I read about it.
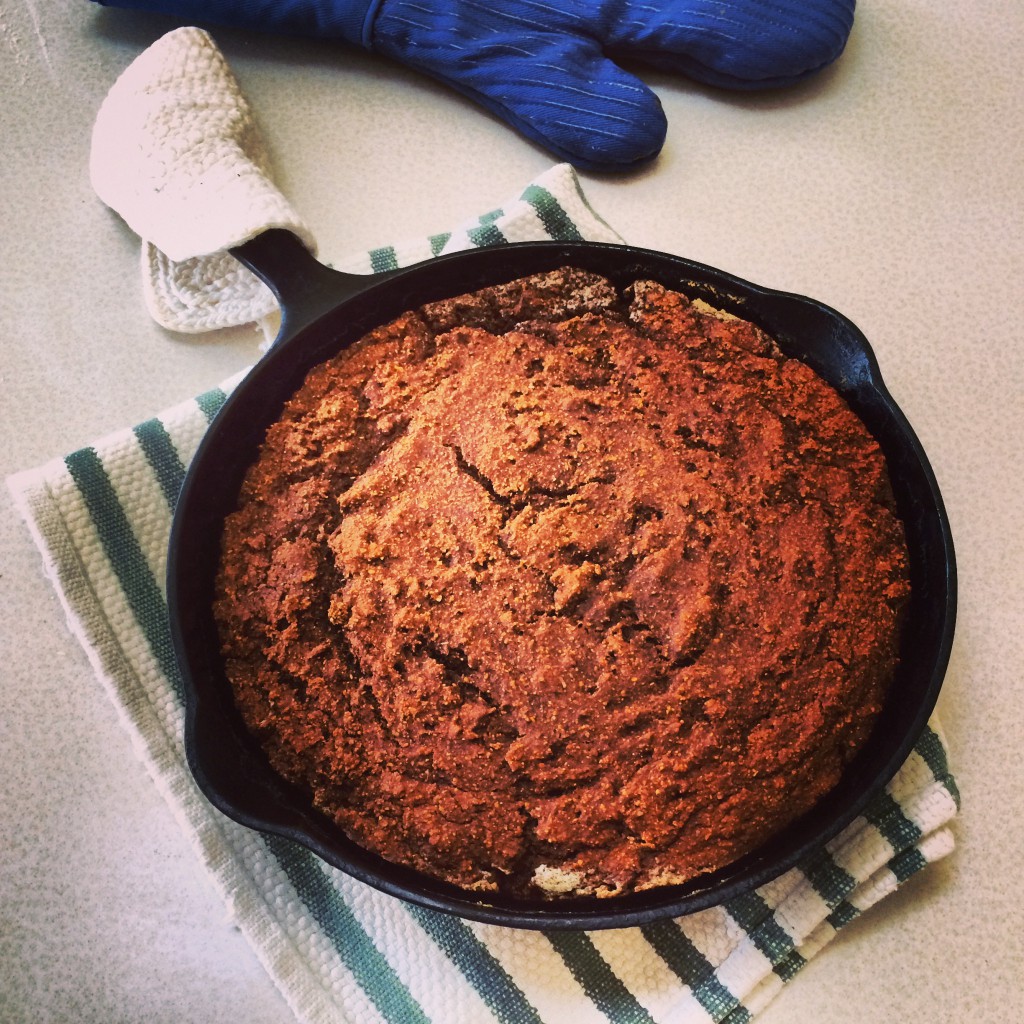
I’m pretty sure that my life changed the moment I cut my first aromatic wedge from the thick loaf that slipped from my beloved Griswold. Melted butter in the pan baked a delicious crust around the outer edge of the loaf, and I broke off a bit of it to test before the entire thing had cooled. It was divine, firing all the pleasure synapses in my brain and instead of defying recipe instructions to ‘Wait until cooled before slicing {Yes, I am serious}’ I slipped in to my cross country ski boots, gathered my equipment and drove to the golf course to take in a wildly beautiful day of ample sunshine, blue sky, and temps above zero {{what?? I know. It felt… foreign}}

I was practically snow blind when I returned home, but fully spent from 75 minutes on the trails. A shower rinsed away the evidence, and more of this bread made it’s way to my mouth, almost gaping open like a baby bird with Mama perched on the nest edge.
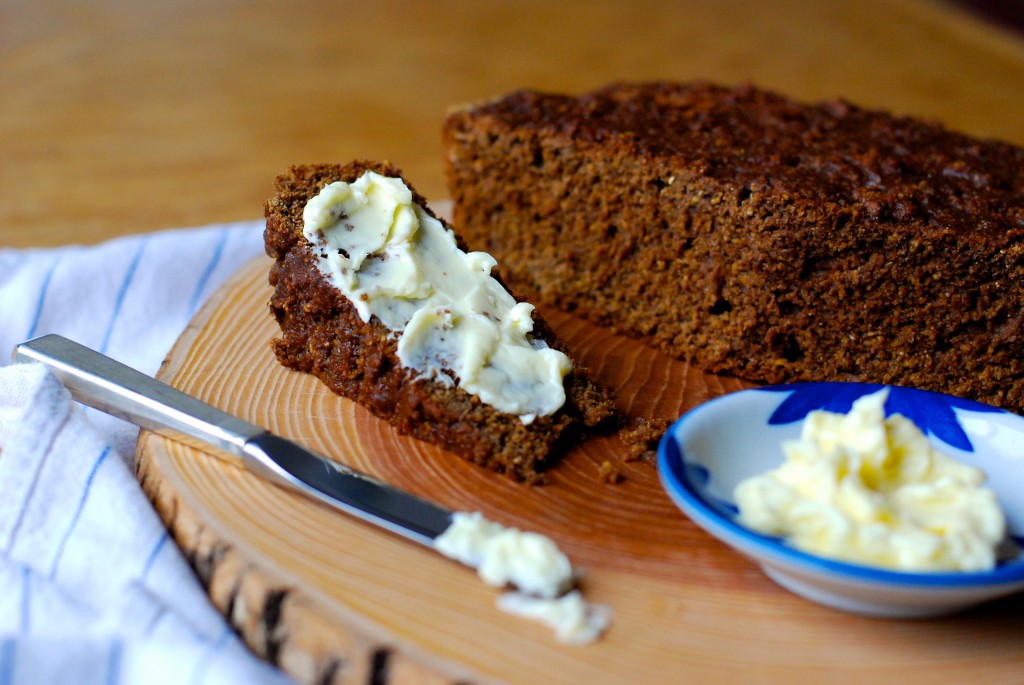
And what about that wheat it contains? Because, yes, I’ve been experimenting with wheat-free products and have to tell you, I’m not convinced it’s ALL wheat {or gluten, per se} that causes my issues, but more processed, preservative laced wheat, and wheat products like commercial breads and white flour that make my poor belly quake in fear. This bread, while I suppose may cause a problem if I consume the entire thing {but seriously, that might happen to anyone} so far, with a pure, organic, and stone-ground wheat and rye flour in it, I’m not finding it to be troublesome. Still, I’m holding myself to a small slice {or maybe two} of it daily. The bread keeps quite well in a sealed container, and the flavor and tenderness deepen over a few days. No yeast either, so it comes together fast. Just be sure NOT to over mix.
Boston Baked Brown Bread
1-1/4 c. stone ground wheat flour
1-1/4 c. stone ground rye flour
1/2 c. coarse ground cornmeal
1 t. kosher salt
1 t. baking soda
1-1/4 c. vanilla almond milk + 1/4 c. kefir or plain whole milk yogurt + 2 T. white or cider vinegar {use all milk if no kefir on hand; or sub what original recipe calls for; 1-1/4 c. plain whole milk yogurt}
1/2 c. molasses
Optional: 1-1/2 c. chopped dried fruit and nuts
Butter for greasing the pan.
Heat oven to 325°. If using milk and vinegar, whisk them together now in a 4-cup measuring cup.
In a medium bowl, whisk wheat and rye flours, cornmeal, salt and soda.
Stir the milk mixture to combine and add the molasses. Whisk well and pour half in with the dry ingredients. Using a rubber spatula, stir in wide strokes to mix, sweeping across the bottom of the bowl. When half mixed, add the remaining milk, dried fruit and nuts, if using, and continue to sweep the spatula around the bowl until just combined. DO NOT OVERMIX. The dough will be stiff and very thick.
Slice about 2 tablespoons of butter in to a standard loaf pan, or a 7-8″ cast-iron skillet. Place in warm oven and allow to melt. Remove from oven {remember…. it’s HOT} swirl butter to coat the entire pan and scrape the batter in to the pan. Spread slightly to fill and place the pan back in the oven.
Bake about an hour, then test the center of the loaf. It should be firm, spring back when touched, and a toothpick test will be clean with a few crumbs clinging to it. Remove it from the oven and let it cool completely before removing from the pan and slicing. I’m not kidding. It will fall apart, and you’ll be singing like a sad trombone if you don’t wait.
Bread can be kept in an air-tight container. The flavor improves after a few days, if you can wait that long. 🙂
December 17th, 2012
| 2 Comments »
")
The downside of shopping for your Christmas tree the day after a rare December rainstorm is that you’re bringing a soaking wet pine tree in to your home. As you set it up, it’s dripping down on your shoulders while you twist the screws on the stand in to place. You need a sheet underneath, an old one, to catch the water as it falls and those boxes you’ve stockpiled, filled with decades of memories and treasures and pressed tin icicles, baubles and bangles and bows now must sit and wait for your tree to dry.
Waiting is what the month of December is all about, it seems. We wait for the birth day of Christ, for the celebration and pageantry, for the singing of familiar songs and melodies. We wait for the lighting of candles, pans of latkes, stories of the past. We wait. And we wait. Our plans to put up our tree last weekend were derailed by a monster storm, and a death in the family, so we waited for a week of busy days to pass for a few free hours to seek out a perfect tree for us. We wait for cookies to bake. We wait for the celebrations that come. And we wait while aromatic fruit bread bakes in the oven, filling the home with nostalgic memories.
")
The first time I made this bread three years ago, the smell of dried fruit macerating in apple cider on the counter drove such a knife of remembrance through me that it stopped me cold. Try as I might, I couldn’t dredge up where it originated, what brought it on. Somewhere in a long ago year, most likely around Christmas and in the waiting, I was enveloped by a smell, or tasted a bread like this one, rich with dried fruit, sweet with a butter crumb. It made an impression on me that never left, though it dove deep beneath the surface to linger without my knowledge.
I find that happens a lot in December. Keeping company with our waiting are the memories of a lifetime of Decembers, wrapped up in dusty boxes that we pull out and unwrap, willingly remembered or the unplanned ones that throw us off kilter. I’m always surprised when I open the decorations from last year because there will always be something I’ve forgotten, a new ornament or tabletop decoration that came late to the party, or in the aftermath of Christmas that gets tucked away. I love these surprises, along with the waiting, and I love the way our brains can rightly kick out something at the most opportune time for us to recall with fondness or joy. I don’t know where the memory came from, triggered by the making of this sweet bread, but it left me feeling comforted and at ease, so I know it has to be from a happy time. Whatever the origin, I can draw on it’s feeling with one breath, and a simple recipe each December, enjoying this bread while I wait for the 25th to come.
Fruktkaka
4 oz. each dried figs, apricots and raisins- fine chop figs and apricots
1/2 c. dark rum (use apple cider for a non-alcoholic option)
1 T. orange zest
1-1/2 t. lemon zest
12 T. unsalted butter, softened
1-3/4 c. AP flour
1 t. baking soda
1 c. superfine sugar
4 eggs
Combine figs, apricots, raisins and both fruit zest with rum (or cider) and stir to combine. Cover and allow to sit at room temperature for up to 4 hours, and as long as overnight. Stir the mixture on occasion.
Heat oven to 350°. Grease the bottom and sides of a standard 9×5 loaf pan and dust with flour. Tap out excess and set aside.
Whisk flour and baking soda in a measuring cup and set aside. Combine the sugar and butter in the bowl of a stand mixer, and blend on medium speed until pale and fluffy, about 3-4 minutes. Scrape the bowl a few times to make sure it’s uniform. Add the eggs one at a time and blend thoroughly after each one. Add the fruit, then the flour mixture and blend until fully combined. Scrape the batter into the prepared pan, smooth the top and bake for 40-45 minutes, or until a toothpick inserted into the middle of the loaf comes out clean. Unmold cake after 15-20 minutes, then cool completely on a wire rack before slicing.
From the December 2009 issue of Saveur magazine
November 23rd, 2012
| 1 Comment »
Magic October is gone, the artist’s palette splashed vibrant and rich, in every direction we looked. The season of brown replaced it, and the darkness falls predictably, knocking us backwards in to quieter evenings, thicker clothes, retrospection. Thanksgiving came as early this year as it possibly could; beginning on a mild note in the morning with temperatures near 60 degrees. By afternoon, the wind had stripped the mild weather away, and as dusk fell across countless laden tables of bounty, snowflakes began dropping from the sky, making photos like this nothing but a memory.

I’ve been cooking quite a bit, but not jotting down recipes, or taking much beyond a quick iPhone photo for my Instagram page. Then, I’m not sharing those on Instagram Friday anymore, either. In struggling with the whys of this blog, and trying to figure out a method to jump-start my creativity again, I came across this post from Jacqui that sent my heart scurrying. If there could be truer words spoken about what is in my mind in the moment -although there’s far less about tacos than in Jacqui’s- I don’t know where I’d find it. In brief bullets, she knocked one out of the park, and has left me questioning even more which direction my little corner here is going.
And it’s now way deep in November. I’ve watched in previous years of my life how this 11th month has silently bound me to suffocation in a dark melancholy, but in recent years have seen a more forgiving approach to the slow decline of natural light. Have you ever read this essay from Jeanette Winterson? It’s all about embracing winter darkness and appreciating what happens after the sun goes down.
“We have all experienced negative darkness – those long stretches of the night when we can’t sleep, and worry about everything, and so we know that “dark time” can seem interminably long, compared with daytime. Yet this slowing of time can be the most relaxing and beautiful experience. Spending the evening in candlelight, and maybe by the fire – with no TV – talking, telling stories, letting the lit-up world go by without us, expands the hours, and alters the thoughts and conversations we have.”
Since finding it many years ago, there has been much more to discover about darkness; and I realize that fighting the cold, the brown and the ennui that November brings only tends to make those aspects of it more pronounced. This November has been very kind; it’s been mild, warm even, and there have been days of ample sunshine that the cats love to bask in. Really, there wasn’t much to complain about with this 11th month.


But I was pleased to see the snowflakes yesterday. Crazy as it sounds, I’ve been impatient for real cold. For my cross country skis and sweaters and candlelight twinkling against windows reflecting pale apparitions of white. I’m a girl of seasons, born deep in my blood and others may find Winter contentious and difficult, but it will arrive with it’s own fury and grace regardless, and welcoming the season without fight is far less tiresome.
And this blog? Well, I’ve got some ideas planned for the next six weeks or so, a fun giveaway for my readers and some good old fashioned Christmas treats to share. And then…. poof! The blog, as we know it, will be gone and once again a Phoenix will rise from the ashes, hopefully by the time the first month of 2013 ends. I’m churning with ideas and plans and am quite excited to see how it all comes out on the other end.
So…. how about a recipe? A perfect one for this time of year, these Sweet Potato Biscuits are wonderful to nibble on with morning coffee, or as an amazing addition to any holiday table (I can only imagine how delicious these would be with turkey and stuffing….) They’re a cinch to make too. Who doesn’t love that?

Sweet Potato Biscuits
Yield: 12 to 15 biscuits
One 3/4-pound red-skinned sweet potato (yam), peeled, cut into 1/2-inch cubes
1 3/4 cups all purpose flour
1 tablespoon (packed) dark brown sugar
2 1/2 teaspoons baking powder
1 teaspoon salt
1/2 teaspoon baking soda
Pinch of cayenne pepper
8 tablespoons (1 stick) chilled unsalted butter, cut into 1/2-inch cubes, plus 2 tablespoons butter, melted
1/3 cup chilled buttermilk
Cook sweet potato in medium saucepan of boiling salted water until tender, 8 to 10 minutes. Drain, cool, and mash.
Position rack in lower third of oven; preheat to 425°F. Butter bottom and sides of 8- or 9-inch cast iron skillet (or 8- or 9-inch round cake pan).
Whisk flour and next 5 ingredients in large bowl. Add cubed butter to flour mixture; toss to coat and rub in with fingertips until mixture resembles coarse meal. Whisk 3/4 cup mashed sweet potatoes and buttermilk in medium bowl. Add to flour mixture; toss with fork. Gather mixture in bowl, stirring gently until dough comes together. Using your fingers, press any remaining flour in to the dough, and gently turn it out in to the prepared pan, pressing it to fit. Score the biscuit dough in a pie wedge shape.
Brush tops with melted butter. Bake until puffed and golden on top and tester inserted into center biscuit comes out clean, about 22 minutes. Cool 10 minutes in pan. Turn biscuits out and gently pull them apart.
from The Kitchen Sink Recipes (and from Bon Appetit)
August 15th, 2012
| 2 Comments »
Happy birthday Julia Child!!
The culinary icon and towering personality would have been 100 years old today. And if she was alive, she no doubt would stick to her mantra in the kitchen, regardless of whom she was talking to:

And the thing is, this being fearless aspect of cooking, this devil-may-care mindset and learning from every mistake I make is how I approach each day in my kitchen. I’m not perfect by any means; I make a ton of mistakes still, even with the advanced skills I have. I still am full of anxiety when I try something new, but I keep trying, I keep figuring it out as I go and I keep entering that kitchen, day after day with fresh eyes and an eagerness that propels me forward. I’ll never tire of trying.
Never in the history of our culture has there been a time that is so saturated with every aspect of food. Our culture is obsessed with it’s food, some in a good, good way and others, not so much. There is more awareness now about food, from the way it’s grown and raised to the means of acquisition to the method it’s prepared; it’s on the minds and tongues of everyone and never before has there been such a desire for making and sharing good food.
Julia Child was one of the pioneer who started Americans out on this food adventure. The warbling, funny and iconic host of PBS’ The French Chef gave us permission to explore and expand our palates, to try out new foods and recipes. Her seminal work, Mastering the Art of French Cooking was first published in 1961 to critical acclaim, and is still in print today. She was a prolific cookbook author, as well as host of several other television shows. Her entire kitchen is on display at the Smithsonian National Museum of American History. Julia paved the way for so many other chefs through her inspiration, her urging people to just get in the kitchen and start somewhere, anywhere. Nobody could have imagined in the 1970’s, an era of bland, boring and uninspired eating that if we could consider ourselves fast-forward three decades that we’d be deeply embedded in a cultural revolution that embraces fresh, seasonal and sustainably sourced food. Julia herself likely could never have anticipated that, but here we are, and there she was, unknowingly a forerunner in a movement that’s spanned decades and shows no sign of slowing down.
So let’s pour an Angosoda, Julia’s favorite drink.


A shot of Perrier sparkling water and a few dashes of Angostura Bitters make up Julia’s favorite pick-me-up; Angosoda. The spritely bubbles give a sense of celebration. And the Bitters are well known for helping soothe a full belly.
And how about cake?? There can’t be a celebration without cake, can there?

This Honey Spice Cake, or Pain d’Épices is a lovely cross between cake and bread. Rich and moist from the honey, lush with spice and flavor, it’s perfect for a celebration with decadent whipped cream or rich gelato, wonderful with a cup of coffee in the morning or tea in the afternoon. And it ages beautifully, wrapped in plastic and forgotten in the freezer for a month, or even left on the countertop for a few days if you can muster up the courage to leave it alone. I can’t. We can’t. Quick breads such as this are my most favorite item to bake. This dense cake was fragrant and dark, bidding me ‘Good morning!!’ when I rose the day after baking it. A thick slice, a steaming rich cup of coffee and a rainy morning were a fine trifecta of celebration for a most beloved woman.
Thanks Julia, for paving our path on this delicious road, for urging us to be fearless, for teaching us to laugh off our mistakes, for continually inspiring us to try something new. For everything you’ve done, and continue to do with your lilting spirit, we raise a glass on your birthday in thanks and celebration.
BON APPETIT!!!
Honey Spice Cake (Pain d’Épices)
- 1¼ cups honey
- 1 cup light brown sugar
- ¾ cup boiling water
- 1 Tbsp baking soda
- ½ tsp fine sea salt
- 3½ cups whole wheat pastry flour (or unbleached all-purpose flour)
- ¾ cup almonds, ground fine
- 1 tsp almond extract
- ¼ cup dark rum
- ½ tsp each: ground cinnamon, cloves, ginger and nutmeg
- ¼ tsp ground white pepper
- 2 tsp grated fresh orange or lemon peel
- ½ cup each: dried apricots, chopped and golden raisins
Method:
- Preheat oven to 325 degrees.
- Generously butter bottom and sides of the springform or loaf pan. Set aside.
- In the bowl of a heavy-duty mixer with the paddle attachment, beat together the honey, sugar and water until the sugar is dissolved. Then beat in the baking soda and salt. Add half the flour and beat about a minute.
- Gradually add the remaining flour and continue to beat 2 minutes more on medium speed. The batter should be stiff and sticky.
- Reduce the speed on the mixer to slow and add the remaining ingredients. Mix until everything is well incorporated. Scrape the batter into the pan; smooth the top with a damp or spatula.
- Bake on the middle rack of the oven for 1 hour. The cake is done when it begins to pull away from the side of the pan and a toothpick inserted in center emerges clean.
- Cool the cake on a wire rack for 15 minutes. If using a springform, release the pan sides; otherwise unmold the cake and place on a rack, top-side up. Cool for about 2 hours or until completely cool, then wrap well in plastic.
Julia recommends waiting at least a day or more before serving. For the best flavor and texture, age the cake for 2 weeks in the refrigerator or 1 month in the freezer.
DISCLAIMER:
I was provided the Perrier and Angostura Bitters for free in exchange for exposure on the blog.
All opinions and words are my own.
April 21st, 2012
| 4 Comments »
If you hang around me and the blog long enough, you’ll realize that I really love quick breads. Scan my Recipe Index and you’ll see the spoils of a bowl of dry, a bowl of wet, a loaf pan or paper lined muffin tins and a hot oven. Some gals get their bake on through cookies, or lofty cakes slathered with buttercream; they perfect treats of sugar and spice, with fondant or piping, bars and brownies worth gloating over. I do love cake, and grew up with a Mom who never bought cookies from a store, rising in the summer before daybreak to bake prior to the sun releasing it’s intense heat on the day. But there’s something magical about a muffin, or tempting tea breads with a perfect moist crumb. I can’t get enough of them.
I’m always paying attention to quick bread recipes, but am often driven to dismay over ones that are choked with sugar and oil. I’ve managed to make a few of these into something a bit more healthy, but these days, I want recipes that offer abundant flavor without the tooth-aching sweetness.

I came across this muffin recipe on The Kitchn and immediately wanted to make it as I’ve sufficiently restocked on Coconut Oil for a while now, and in glancing over the ingredients I was impressed with the amount of flavor these muffins would have, without dumping a ton of sugar in them. They’ve got coconut oil! And flaked coconut!! A vanilla bean! Whole oats! Fruit! What’s not to love?? The original recipe called for mango, so I selected one from the store and a few days later when it was ripe, I began tossing flour and oats together, melting coconut oil and tenuously scraping down the ONE vanilla bean that I had remaining in my kitchen. Then I cut open the mango, and nearly started crying. It was stringy and bone dry inside. I angrily tossed in in the trash, envisioning a few dollars being dumped there, then glanced around my kitchen, studded with lined muffin pans, full bowls and an oven blinking its readiness. What now??
Thank goodness there lay several bananas in the utmost condition for baking in to a tropical themed muffin.

A few deft turns of a sharp knife, and swipes of a rubber spatula to pull it all together and soon I was being treated to the most amazing scent coming from my oven. I know that I should never think that I’ve ever found the most perfect muffin recipe because there is always something out there to top it. Guaranteed.
These moist and perfect muffins are one of the finest I’ve eaten. And I’ve consumed a great deal of muffins. The tender banana chunks in them get sweeter and more intense after a day or two, and the coconut, subtle taste of vanilla and the crunchy oats add oh so much goodness. Although I’m certain that a perfectly ripe and juicy mango would be utterly divine in them, having only a banana to work with was not a step down, by any means. I’d do these again, without one change. They’re that good.
Coconut Oat Banana Muffins
1/2 c. virgin coconut oil
3/4 c. wheat flour
3/4 c. oat flour (you can make this by grinding whole oats in a food processor or coffee grinder)
1/2 c. old fashioned whole oats
2 T. ground flaxseed
1-1/2 t. baking powder
1/4 t. kosher salt
1/2 c. unsweetened flake coconut (if you have the wide flakes, the original recipe called for those; I only had fine)
1 c. full fat sour cream, room temperature (I used Noosa Honey flavored yogurt and would do that again, hands down)
1/3 c. granulated sugar
1 large egg, room temperature
1 t. lemon zest
1 T. fresh squeezed lemon juice
1/4 c. milk of choice (I used vanilla almond milk)
1 split vanilla bean
1 c. diced banana (I used two bananas, which came out to be more than 1 cup)
1/4 c. shredded coconut to sprinkle on top of muffins, if desired
NOTE: You DO want the sour cream (or yogurt) and egg at room temp because if you mix those cold with the melted coconut oil, the oil will just seize back up again. Measure the sour cream and egg in a large 4-cup measuring cup, or small bowl and let it sit on the counter for a few hours.
Preheat the oven to 375°. Line two six-cup muffin tins with paper liners.
Split the vanilla bean and scrape the insides, adding it to the sour cream/egg mixture. Heat the coconut oil gently in a microwave safe container (I did about 40-50 seconds on 60% power) and add the vanilla bean shell to it. Allow the oil to cool, but not to the point of being solid again.
In a medium bowl, whisk both flours, the oats, flaxseed, baking powder and salt together. Stir in the half cup of unsweetened flake coconut.
To the sour cream/egg and vanilla bean mixture, add the sugar, milk, lemon zest and juice. Strain the coconut oil through a wire strainer right into the bowl and whisk to combine everything. Mix this with the dry ingredients until about halfway incorporated, then add the banana and fold gently until everything is uniform. Be sure to scrape across the bottom of the bowl with the spatula to get all the dried ingredients.
Scoop into the muffin tins. You can fill them pretty full, but if you don’t care to, you may need another tin. I filled 12 cups completely full and still had a bit of batter left in the bowl. Next time, I will make them smaller and use another six-cup tin.
Bake for 20-25 minutes until tops spring back when you touch them, or a toothpick inserted in the center comes out clean. Dare to wait until cool enough to eat; they will smell so enticing that you’ll find that to be a challenge.
Original recipe from The Kitchn, here with heavy modifications.
February 5th, 2012
| 4 Comments »
This post could also be aptly titled “The end of searching for the perfect banana bread” but that just seemed too long and a bit too final. I should never think I’ve ‘arrived’ at any destination, be it a quest for knowledge, a higher level of health and well-being or never-ending search for perfect banana bread, as somewhere out there, a recipe may exist that could bring this loaf to shame, but for now, I’m sticking with what I’ve got.

I grew up eating banana bread, from the earliest memories that I have. My Mom made it almost weekly, in fact, I’m pretty sure she bought way more bananas than she needed just so she’d have an excuse. She put walnuts in it, which I despised, so these days, my banana bread is always without nuts. When I got old enough to make my own banana bread, I turned to her tried and true recipe from my youth, and as an adult, I found it sorely lacking, so I moved on. And on. And on.
The goal that I’ve strived for, over recipes and time and growing older, was pure banana bread bliss and perfection that existed as a mental taste somewhere in my mind. And with the first bite of this grain-studded loaf, rich with banana flavor, I about leapt in the air with delight, shouting ‘Eureka!! I have found it!’ while my son chuckled in delight at my antics, he himself wide-eyed and excited over the taste of his piece. This IS pure banana bread delight, and I don’t say that lightly. Folks, I have made and eaten A LOT of banana breads in my lifetime, as I sought out that elusive fine balance of moist and tender crumb, ultimate banana taste and now, a higher level of health than a loaf crushing the scales with sugar and fat. After researching low-fat, and healthier banana bread options for over an hour, I settled on one recipe that gave me a pretty good start, and then started tweaking it to my liking.
I think my biggest disappointment with banana bread has always been that it just doesn’t have as much banana flavor as I want. I add more banana to any number of recipes, and I get mushy bread that turns soggy after a few days, so clearly, without some changes to the base, that’s not a workable option. And I needed a substantial heft other than what flour and leavening can offer in order to stand against that large dose of delicious bananas. When making muffins, I’ve turned to the use of cereals and grains to add more heft, and to make them a bit more nutritious. When faced with adjusting a banana bread recipe in the same way, that’s where I went as well. This recipe has whole rolled oats, All-Bran cereal and a commercial 10-grain cereal as a majority of the dry base. Cutting back on the use of eggs, I added some ground flaxseed for binder (you could also use unsweetened applesauce for this as well). The ricotta cheese, along with a small amount of milk, provides a richness in the texture that’s particularly pleasing to the mouth. The sugar was another matter; I took a gamble, using only a mere half cup in a recipe that makes two loaves. Most tea-bread recipes that I come across have, at least in my opinion, way, way too much sugar, and this amount was perfect. The end result is a bread without the teeth clenching sweetness, so the rich banana flavor just shines through. The cereal and grain base makes the texture nubbly and firm, and helps it retain a lot of moisture. Best of all, the loaves are simply packed with banana flavor.
A lot of this was pure kitchen chemistry, mixed with a lifetime of learning why the recipes I tried were so disappointing. After so many experiments, it’s nice to finally land on something that lifts your heart and elevates your taste-buds, all the while being reasonably healthy enough to enjoy without much guilt.
If you’re like me, when bananas get past the point of consumption in your house, they get tossed in the freezer to await a baking urge, and this recipe is perfect for when you’ve gotten a large stockpile of them.
Whole Grain Banana Ricotta Bread
Yield: Two loaves. It can easily be cut in half.
Preheat the oven to 350°. Spray two 9×5 standard loaf pans with cooking spray.
In a large bowl, mix together the following:
6 large, very ripe bananas, mashed
3/4 c. ricotta cheese
1/3 c. milk of choice
1/2 c. sugar
3 T. grape-seed oil (or other neutral flavored oil)
1 t. pure vanilla extract
1 egg
2 T. ground flaxseed
1/2 c. whole rolled oats
1/2 c. All-Bran cereal
1/2 c. commercial 10-grain cereal, such as Bob’s Red Mill (sub 7-Grain, or 5-Grain if you can only find those)
Whisk this until well blended and allow to sit for about 15 minutes to soften the grains.
In a large measuring cup, combine the following:
2 c. whole wheat flour
1 c. unbleached AP flour
1 t. sea salt
1-1/2 t. baking soda
2 t. baking powder
Add the dry ingredients to the bowl with the banana mixture, and with a rubber spatula, gently fold them together until all the dry ingredients are incorporated. Be careful not to overmix. The batter will be very thick.
Divide the batter between the two loaf pans and smooth the top. Drop the pans on the counter a few times to settle the batter and release any air pockets. Bake for 50-60 minutes, or until a toothpick inserted in the center comes out clean. Allow loaves to cool in pan for up to a half hour before turning them out to cool completely on a rack.
RECIPE NOTES: I use All-Bran cereal a lot in baking, and it keeps a long time in your cupboard. Bob’s Red Mill 10-grain cereal is not only a delicious breakfast cereal, but it’s wonderful for breads too, and I’ve also used it in muffins. I keep it in a plastic bag in the freezer and it lasts indefinitely. I also keep a baggie of ground flaxseed in the freezer.
If all you have on hand is whole rolled oats, this recipe would work just fine to use those in the full amount.
If you wish to cut the recipe in half, don’t use the flaxseed, as it acts as a second ‘egg’.
December 10th, 2011
| 4 Comments »
For starters, there are WAY too many vowels in this muffin description!!
But they are worth every twisted tongue and exhaustible explanation because they are fragrant, tropical and fabulous.

About a month ago I was contacted by a company called Oh! Nuts! and asked if I wanted some products to use for my holiday baking. I’d done some business with Oh! Nuts! before and was really pleased with the quality and freshness of their bulk nuts and dried fruits. Oh! Nuts! has a lot of attractive gift options for holiday giving, as well as fresh nuts, dried fruits, candy and other items for year-round baking. I highly recommend their products and can personally vouch for the quality. I was more than happy to have another chance to use some of their items.
For my personal use this time around, I requested Macadamia Nuts and Calymyrna Figs, and within a week, they landed on my doorstep. The figs are gigantic and sweet with a soft bite, and the macadamia nuts are perfectly tender and moist. I’ve been just tickled with both products and decided that before I gobble them all up in my adoration, I would at least make an attempt to bake something with them. It isn’t often you get a world class nut like macadamia gracing your pantry.

This muffin recipe has been hanging around my kitchen for some time now; originally it’s from the Fall 2006 issue of Eating Well magazine. And in a current frenzy through the recipe stack threatening to take over it’s designated drawer, I serendipitously came across it, magically having everything on hand to whisk up a batch of these to make a sunny, yet chilly December day feel a bit more cozy.
The recipe itself is without a great deal of fat or sugar, thankfully. But the muffin doesn’t suffer in the loss of theses tasty ingredients. They burst with blueberry taste, crunchy bits of chopped macadamia nuts and a hearty, nutty crumb that is moist but not at all cake like. If it’s supposed to be a muffin, I want a muffin, not a cupcake disguised as something else. With it’s crunchy streusel-like topping and tender fruit, this will be a repeat in my kitchen, a perfect means to use the frozen berries in my freezer, and to draw more warmth to our frozen landscape.

Blueberry Coconut Macadamia Nut Muffins
1/4 c. unsweetened flake coconut
3/4 c. + 2 T. AP flour (divided)
1/2 c. + 2 T. packed brown sugar (divided)
1/2 c. chopped macadamia nuts
3 T. good quality olive oil
1 c. whole wheat flour
2 T. ground flaxseed
1 t. baking powder
1/2 t. baking soda
1/8 t. sea salt
1 T. ground cinnamon
1 large egg
1 large egg white
3/4 c. skim milk
2 T. plain or vanilla lowfat yogurt
1 t. lemon extract (can sub vanilla, or coconut as well)
1-1/2 c. fresh or frozen (not thawed) blueberries
Heat your oven to 400°. Line two six-cup muffin tins with papers. Alternately, spray the muffin pans with non-stick cooking spray.
In a small bowl, combine the coconut with 2 Tablespoons each of AP flour and brown sugar with 2 Tablespoons of the chopped macadamia nuts. Drizzle this with one Tablespoon of the olive oil and stir to combine. Set aside for muffin topping.
Whisk together the remaining 3/4 cup of AP flour, the whole wheat flour, flaxseed, baking powder and soda, salt and cinnamon until well combined. In a large measuring cup, whisk the 1/2 cup of brown sugar, the egg and egg white, skim milk, yogurt and extract until smooth. Make a well in the dry ingredients and whisk in the wet until only just mixed. Add the blueberries, and the remaining macadamia nuts and carefully fold in until blended.
Spoon batter equally in to the muffin tins, then sprinkle a bit of the reserved coconut topping on each muffin. Press gently in to the batter, and bake for 20-25 minutes until golden brown and a tester inserted in the center comes out clean. Allow to cool in muffin pans for 15 minutes, then turn on to a wire rack to cool completely.
Original recipe from Eating Well magazine; posted here with heavy modifications.
DISCLAIMER:
Oh! Nuts! provided me with both the macadamia nuts and the calymyrna figs free of charge
and without expectation of any reciprocal endorsement. Everything stated in this post are
my own thoughts and are freely expressed.
November 13th, 2011
| 2 Comments »
There are dozens of recipes in my Recipe Index. I’ve been writing this blog for 5-1/2 years, and the content is huge, but my audience doesn’t go back that far. I could write forever about what’s been covered in the past, but instead, for this post, I’m culling together an entire array of quick bread baking options- muffins and tea breads alike- for you to enjoy. There are a lot of really good recipes for warming up your kitchen on these chilly November days.
I think there is nary a food item more perfect than a muffin; and I don’t mean a muffin so sweet and cloying that you might as well slap buttercream on it and call it a cupcake, I mean a MUFFIN. I real, honest to goodness muffin, made for breakfast, or a snack. I mean a substantial, hand held baked good. I’m talking MUFFINS, one of the baking world’s most perfect little foods, in my well-explored opinion. I love a good muffin, and have no less than eight in my Recipe Index. Muffins lend well to just about any flavor, take only a few minutes to put together and let’s face it, everyone loves them, right? Got flour, baking powder and a few spotty bananas? Make a muffin. Leftover grains from dinner? Make muffins! Blueberries? Raspberries? Nuts? Oats? Bulgur?? It’s all good for going in a muffin.
And oh, how I do love these fragrant and simple little things!!
Oatmeal Sweet Potato Muffins

Apple Bran Muffins

Fig Muffins with Honey-Lemon Cream Cheese

Whole Grain Blueberry Muffins

Squash and Quinoa Muffins with Toasted Coconut

Chocolate Graham Muffins

And then there are a few recipes without photos:
Pumpkin Maple Muffins
Apple Cheddar Muffins
And….. because quick breads are created the same way, only baked in a loaf pan, they too can be stellar muffin options and I have plenty of those as well.
Applesauce Banana Bread
Banana Chocolate Chip Bread
Cherry Fig Tea Bread
Moist Date Nut Bread
Harvest Tea Bread
Peanut Butter Banana Bread
Cranberry Orange Date Bread
What’s on YOUR plate this month??

November 10th, 2011
| 2 Comments »
The last two years for NaBloPoMo I’ve gone back in to my Recipe Index and re-introduced items that are worthy of a second look. Most people following my blog now weren’t doing so a year ago, and if readers are anything like I am, finding a new blog usually means going forward with what they post, not going back in the archives to find the hidden gems.

And it’s also a way for me to remember what I’ve posted to these pages over the past 5-1/2 years. There is a great deal of content in my Recipe Index; way more than one could ever browse through, and a lot of it from way back when contains poorly photographed foods that I would be a bit embarrassed to even show you. Part of me often thinks about re-doing some of these recipes, with updated photos of better quality, and that’s still in the back of my mind.
This bread made an appearance in my kitchen last Spring, and I loved it immensely, forgetting it until today, while scrolling through to find something interesting to share. Dried figs and cherries gave it a wide appeal of flavor, and tea breads are one of my favorite items to make because they are so simple to put together. Mix a bowl of wet ingredients, then a bowl of dried and blend them just so. A greased pan, a hot oven and an hour later, a steaming and fragrant loaf awaits you and a cup of tea or coffee. I could probably do a month alone on tea breads in all their various forms and still not exhaust this easy item.
What I love about this recipe is that it has a lot of healthier options for baking. I’ve tried to get away from using refined sugar in my baking for much of the past year or so, experimenting with honey or maple syrup, and actively seeking recipes that offer delicious flavor without a ton of food items that our bodies can do without. This recipe relies on the cooked dried fruit to provide sweetness, along with a small amount of honey. Whole wheat flour and wheat bran make for a healthier base too. I’m not fooling myself that this is good enough to eat all the time; the bread still has a lot of calories, but overall, if I’m going to make myself a treat, I want it to be better for me in any way I can manage.
Because deprivation just isn’t an option.
Do you have a favorite baked good that YOU like to make??
Cherry Fig Tea Bread
1 c. dried tart cherries
1 c. chopped dried figs
1 c. orange juice
2 c. whole wheat flour
1/2 c. honey
1/4 c. wheat bran
2 t. freshly grated orange zest
2 t. baking powder
1 t. baking soda
1/2 t. salt
2 large eggs
2/3 c. plain soy milk
3 T canola oil
1 t. pure vanilla extract
Preheat oven to 350°F. Coat a 9 1/2-by-5 1/2-inch loaf pan with cooking spray.
Combine cherries, figs and orange juice in a medium saucepan. Bring to a simmer over low heat. Simmer, covered, for 5 minutes. Strain, reserving 1/3 cup of the fruit-cooking liquid. Set the fruit and liquid aside in separate bowls.
Stir together flour, sugar, wheat bran, orange zest, baking powder, baking soda and salt in a large bowl. Whisk together eggs, buttermilk, oil, vanilla and the reserved 1/3 cup fruit-cooking liquid in another large bowl. Add to the flour mixture and stir with a rubber spatula until just combined. Fold in the reserved fruit. Turn the batter into the prepared pan.
Bake until the top is golden and a cake tester inserted in the center of the loaf comes out clean, 35 to 45 minutes. Let cool in the pan on a rack for 10 minutes. Loosen edges and invert the loaf onto a rack to cool. Serve warm or at room temperature.
Original recipe from Eating Well magazine.
What’s on YOUR plate this month??
March 6th, 2011
| 2 Comments »
Sometimes I come across a recipe by accident, through a bevy of channels found by clicking here, clicking there, following some promising links and then WHAM! you spot something that looks so delicious that you know you have to make it, right there and right now.

Of course, it helps when I have everything on hand to make it, with the bonus of it being a much healthier version of tea bread, which, let’s face it, is just a big oblong cake, isn’t it? Most tea bread recipes could easily be baked in a bundt pan, or as rounds, covered with frosting of any sort and masqueraded as a cake. No one would really know the difference.
But this tea bread, with it’s luscious compote of cooked sweet dried cherries and figs comes out as something else. It’s dense and moist, yes, but it’s much more bread-like than your typical rectangular 9×5 offering. And I’m kind of a sucker for anything with figs in it. Back to my childhood, when a Fig Newton, fresh and cakey filled with thick pureed figs was my most favorite store-bought cookie, to the now of my adult life, and the soft magical collapse of a fresh fig in my mouth, or the sweet bite of a dried one in my morning oatmeal, there really isn’t a time that I’ll pass up noshing on figs. The glorious fig has no fat whatsoever, no saturated fat, and no cholesterol or sodium. They’re loaded with calcium too, a half cup worth of dried figs fills your entire daily requirement for calcium intake. They’re a complex carbohydrate, rich in fiber and loaded with essential minerals like potassium and iron. Excellence all around.

The recipe comes, not surprisingly, from Eating Well magazine, a publication that consistently offers up health, nutrition and simple good taste. You don’t need much in the way of fancy ingredients or advanced cooking skills to make the majority of offerings in the magazines, and along with consistently good recipes, they offer plenty of up to date nutritional information and honest discourse about food trends.
And recipes with figs. Enough said.
Cherry Fig Tea Loaf
1 c. dried tart cherries
1 c. chopped dried figs
1 c. orange juice
2 c. whole wheat flour
1/2 c. honey
1/4 c. wheat bran
2 t. freshly grated orange zest
2 t. baking powder
1 t. baking soda
1/2 t. salt
2 large eggs
2/3 c. plain soy milk
3 T canola oil
1 t. pure vanilla extract
Preheat oven to 350°F. Coat a 9 1/2-by-5 1/2-inch loaf pan with cooking spray.
Combine cherries, figs and orange juice in a medium saucepan. Bring to a simmer over low heat. Simmer, covered, for 5 minutes. Strain, reserving 1/3 cup of the fruit-cooking liquid. Set the fruit and liquid aside in separate bowls.
Stir together flour, sugar, wheat bran, orange zest, baking powder, baking soda and salt in a large bowl. Whisk together eggs, buttermilk, oil, vanilla and the reserved 1/3 cup fruit-cooking liquid in another large bowl. Add to the flour mixture and stir with a rubber spatula until just combined. Fold in the reserved fruit. Turn the batter into the prepared pan.
Bake until the top is golden and a cake tester inserted in the center of the loaf comes out clean, 35 to 45 minutes. Let cool in the pan on a rack for 10 minutes. Loosen edges and invert the loaf onto a rack to cool. Serve warm or at room temperature.
This version was adapted slightly from the original one published by Eating Well magazine. To view that, please go here.
|