April 15th, 2012
| 1 Comment »
It’s been almost a year since we eliminated meat from our eating. I’m ecstatic over the way I’ve felt in the last year; I’ve got more energy even when I have a terrible time sleeping; my belly is superbly happy, and my skin looks so much better. Those pesky hot flashes are only a minor occurrence these days too, and I love that part of it the most.
I love the variety and simplicity of our meals too, the ease at preparing them now that we don’t have to wait for meat to cook, and it’s been wonderful to see Griffin expand the foods he eats and also to see that he’s learning to enjoy meatless meals so much more than I ever expected. I’m really proud of how he’s adapted to the changes; he still gets his meat too, so he has the best of both worlds.
One food item that he’s still on the fence about is greens. Mike and I have come to love greens like chard, beet greens and kale, but Griffin is still wary, only eating them in dishes where other flavors can mask their tastes. He’s trying greens, at least. That’s good enough for me right now. He’s also not a huge fan of gnocchi due to the texture, and that’s too bad all around because this Baked Pizza Gnocchi dish that I created is utterly divine in every way.
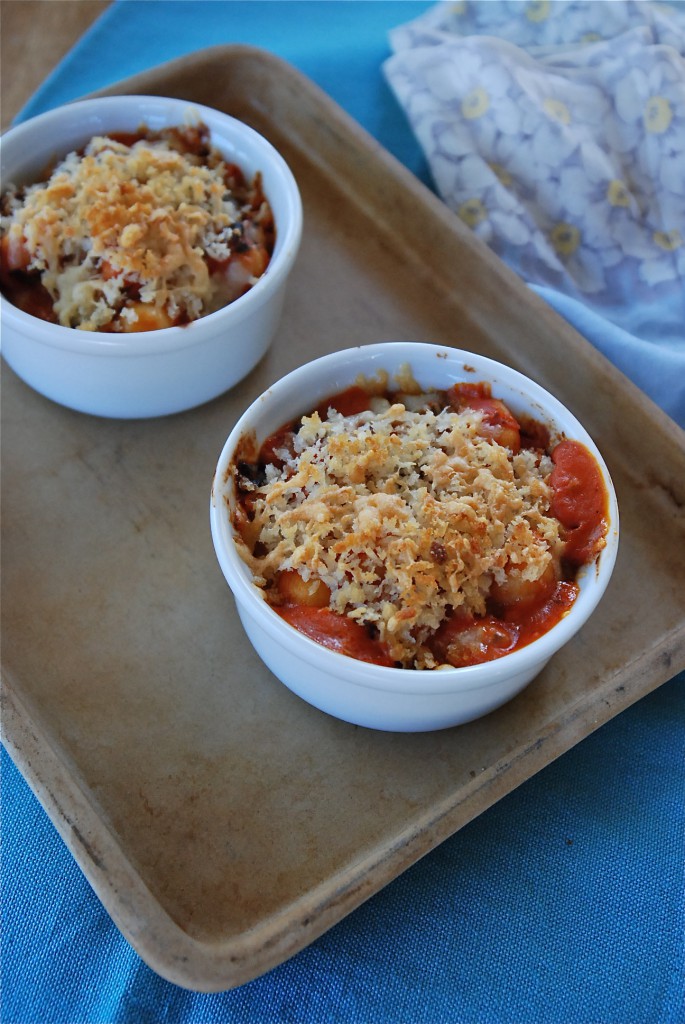
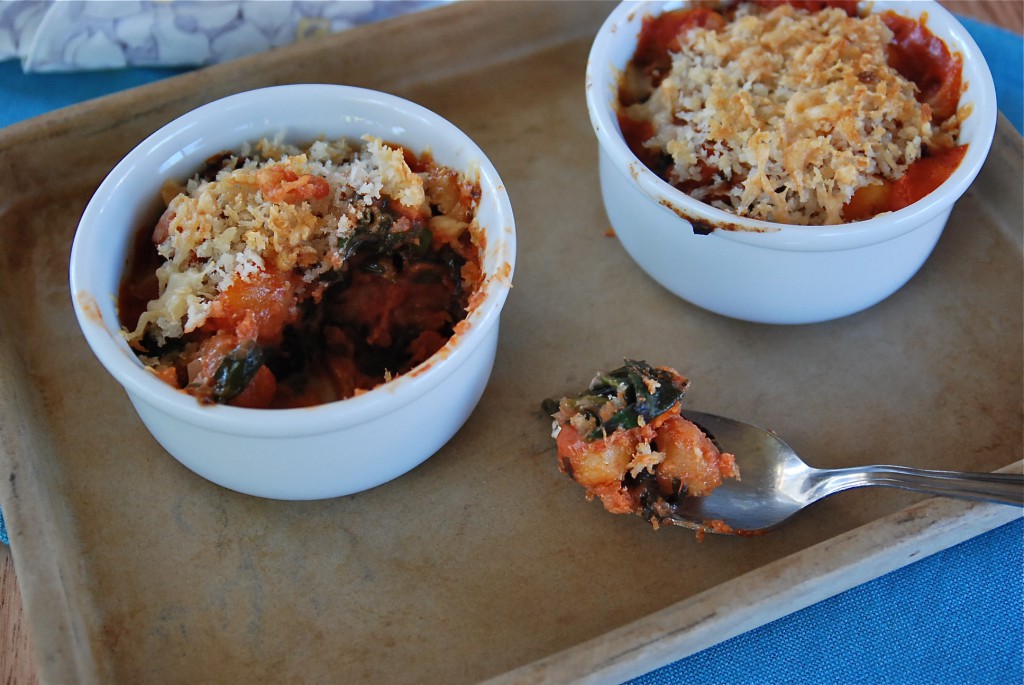
Recipes inspire me in the most fascinating way. I can read dozens of them and not have a spark of interest, and yet come across one that stirs my imagination and I’m suddenly inside my head putting ingredients together and dreaming of an outcome. That happened to me recently as I was browsing through my news feed on my phone and came across an article about using chard. One recipe for a Skillet Gnocchi with Chard sounded really delicious, and my creative spark was ignited.
Lately I’ve been thinking a lot more about meals with greens in them as I received an entire box of a wide variety of packaged and cleaned greens from Cut N Clean Greens to try out and it was probably the most exciting food stuff that’s landed on my door step because I just LOVE this product. It is so ridiculously easy to use greens with Cut N Clean Greens in your refrigerator. They’ve done all the work for you and the greens are ready to open and cook with. You don’t need to prep them, clean or do anything but enjoy. And for roughly the same price you’d pay for a bunch of greens, you get a great deal more yield and it goes a lot farther. Yet another wonderful thing to love about them.
(disclaimer: I received all the greens for free yet all opinions here are solely mine)
But…. back to this Gnocchi. Very simple and quick, rich with flavor and texture, this gratin came out fragrant, bubbling and with that perfect crunchy top to it. Grab a favorite pizza sauce (whether scratch or homemade) a package of shelf stable gnocchi (or…. knock yourself out and make a batch from scratch) and about a pound of good greens like chard, spinach or beet greens and give yourself about 15 minutes while the oven springs to life and heats up. It’s like pizza but it’s not; it resembles lasagna, but it’s better because it’s easier. The gnocchi become so incredibly soft and tender in the oven and it’s gorgeous enough for a special occasion, classy enough to taste like you really put out some effort.
I’ve noticed lately that when I write out my recipes here that I’m posting all sorts of side notes (in blue!) on what options you might do with your own version of the recipe. I hope this isn’t annoying. Is it? Because, here’s the thing; I don’t have the ego to think that the way I make anything would be exactly how someone else would make it. We all have our own tastes, right? We like different foods, flavors and we all have different methods, ovens that work differently, cookware and utensils that we love (go ahead, use that garlic press if it’s your way) and these recipes that slip through our computer screens in to our minds, making our mouths water, well they might mean something else entirely to another person. If I mention to saute your onions for 10 minutes and you think they should be cooked longer, or shorter, or if you don’t even like onions and don’t want to use them, then by all means, trust those instincts. Make the recipe your own. Learn the ways of your own stove, the cut of your favorite knife, dig through your cupboards and add your own flavor, spice, extra something that you love. This is how cooking should be. I’m thrilled to just be one of the stones you traverse in your own journey in the kitchen.
Baked Pizza Gnocchi with Greens
1 lb. gnocchi
1 15-oz can prepared pizza sauce (I love Muir Glen Organics)
2 small shallots, minced
2 cloves garlic, minced
1/2-3/4 lb. greens of choice (can be beet greens, spinach, chard or kale or a mix)
1/2 c. crumbled goat cheese (for a richer taste, use ricotta)
1/2 c. panko bread crumbs
2 T. melted butter (i used coconut oil)
1/4 c. grated parmesan cheese
1/4 c. mixed fresh herbs, like parsley, thyme, basil, oregano
Heat oven to 400°. Spray a 2-quart baking dish with cooking spray. Or live a little and rub butter in it.
In a deep skillet with a lid, heat oil of choice and add shallots, cooking for about 5 minutes while stirring over medium-high heat. Add the garlic, stir and cook for a few minutes, then begin adding the greens, a handful at a time and stirring so they begin to absorb some of the heat and oil and start to get a bit of wilt to the leaves. Once all the greens are in the pan and they’ve collapsed and are starting to soften, crumble in the goat cheese and stir to break it down. When it’s pretty well incorporated, add in the pizza sauce and about a half cup of water. (add the water to the can and swish to collect any remaining sauce). Stir the pan well, then bring it to a gentle simmer and cover it. Cook the greens until just tender. The timing will depend on which green you are using. Taste often so they don’t get away from you. When the greens are just tender, stir in the gnocchi, and turn off the heat. I used a mix of beet greens and chard and cooked them for maybe 10 minutes.
Mix the panko crumbs, butter and parmesan cheese together. Scrape the gnocchi in to the baking dish and sprinkle the top with the panko crumbs. Bake in the middle of the oven until bubbly, and the crumbs have browned nicely. Mine took about 20 minutes, and I rotated the dish a few times to brown the top evenly. Once removed from the oven, allow the dish to stand about 10 minutes before serving.
KATE’S NOTES: You can divide the gnocchi between individual ramekins if you want something fancier. But please keep in mind that your baking time will be drastically reduced. I baked a few ramekins, placing them on a baking sheet lest they rise up and bubble over the top. They didn’t. (whew)
You can double this for a crowd, baking it in a 9×13 pan. That’s a lot of greens, so add them patiently to the pan.
November 14th, 2011
| 3 Comments »
This has to be one of my most favorite recipes.
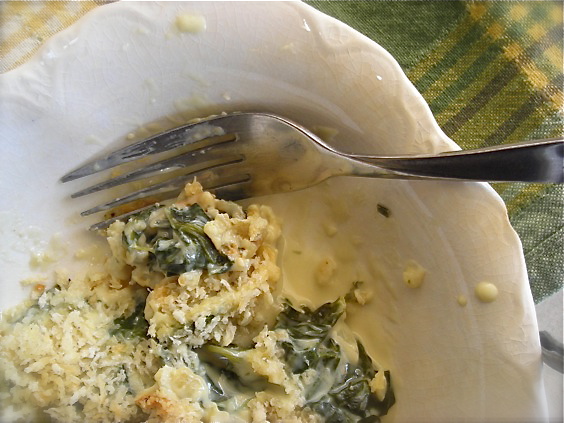 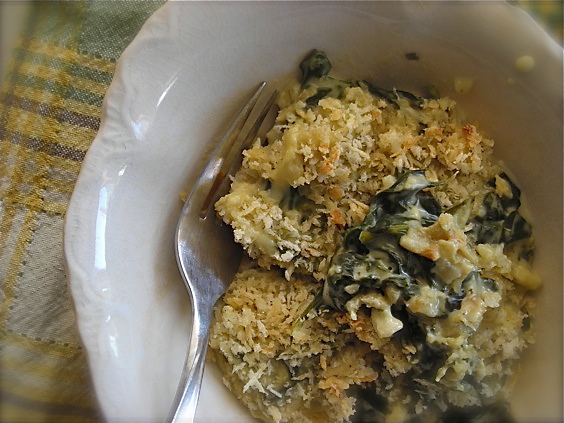
It’s rich, delectable and creamy….. I could go on and on. It would be equally welcome, that wealth of rich Boursin cheese sauce, when mixed with silky braised kale or chard too. Or! Or! Take an entire rainbow of vegetables and roast them, dress them to the nines with this coat of luscious sauce, topped with the toasted Panko crumbs and then a few minutes under a broiler to sputtering browned perfection and you’ve got a side dish worthy of any celebration. Or, just an ordinary dinner at home.
Believe me, there is nothing boring about this dish. Nothing run-of-the-mill, or plain or anything. This is one of those weapons in your recipe arsenal that you pull out for the good friends who grace your table, the ones who kick off their shoes without being asked, who bring wine while wearing faded blue jeans because you just don’t need to be fancy with your closest companions. And when they lift the first fork to their mouths, tasting the herbs, the seasoning of the succulent Boursin cheese, you know that smile that forms on their face tells it all. It’s impressive, yes. But simple and quick and anyone can make it. And it leaves you looking like a superstar, because it’s just that good.
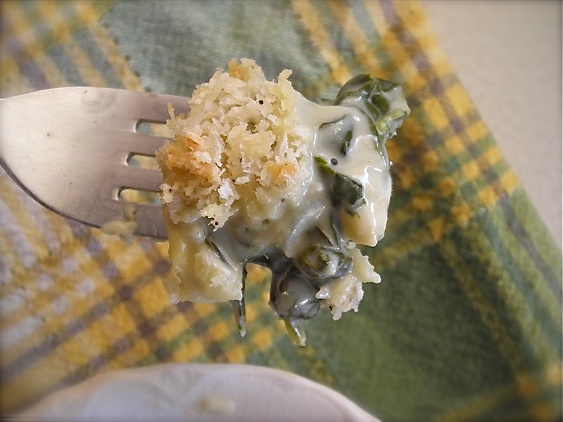
Boursin Spinach Gratin
1 bunch fresh spinach, destemmed, washed well and spun very dry ( sub in kale or chard too)
1 t. unsalted butter
1 small shallot, minced
3 T. AP flour
1-1/2 c. whole milk (alternately, use soymilk- it works perfectly!- or equivalent of 2%, or 1 c. skim & 1/2 c. heavy cream)
1 container Boursin Herb and Garlic cheese, 5.2oz
3 T. fresh shredded parmesan, or other hard cheese of choice
1 t. each fresh squeezed lemon juice and fresh grated lemon zest
2/3 c. panko bread crumbs
1 T. melted butter
Salt and pepper to tasteHeat oven to 425°In a medium oven proof skillet, melt butter and add shallot, cooking and stirring until soft, about 5 minutes. Stir in flour to coat and then slowly begin whisking in milk until fully incorporated. Stirring constantly, bring sauce to a gentle simmer to thicken slightly, then add in Boursin cheese, a small amount at a time, until all of it is blended into the sauce.Drop a handful of spinach leaves into sauce and stir to coat. Add more, a handful at a time, until all spinach is mixed well with the sauce. Bring to a simmer, cover and simmer for about 5 minutes. Mix panko, salt and pepper and melted butter, sprinkle over top of spinach and place pan, uncovered, into oven. Bake for 10 minutes, until bubbly and crumbs are browned. Remove from oven, allow to cool slightly (remember that pan handle is HOT!) and serve immediately, sprinkled with parmesan cheese.Alternately, mixture can be divided among smaller ovenproof ramekins to be baked. Divide spinach into ramekins before topping with bread crumbs. Baking time will be shorter.
What’s on YOUR plate this month??

July 16th, 2011
| 7 Comments »
People, I’ve madly fallen in love with radishes.
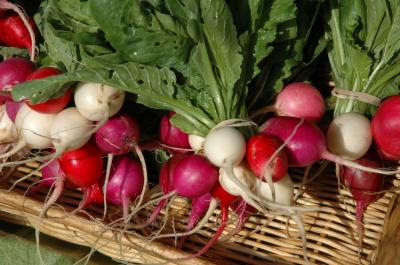 (photo courtesy of Really Natural) (photo courtesy of Really Natural)
I do remember not particularly liking them as a kid. But then again, I didn’t care for much then anyway, being raised on a typically 1970’s diet, I was your typically picky little thing. Fresh foods weren’t that present in our home so my exposure was lacking and my palate not particularly advanced; it’s no shock I wasn’t at all enamored with the radish’s peppery bite, a sting to the tongue that I found unpleasant. My sister Karen loved them, dragging them through a plate of table salt before popping them in her mouth. Even that typical dressing did nothing to take the edge off the flavor. So for the most part, I’d ignored them.
Then something happened a few years back. On a trip to the Farmers Market, I spied a large bunch of red, white and pink radishes- it was an enormous amount- and was only a dollar. I picked them up, passed a buck to the farmer and placed them in my bag. Once home, I stared at them and thought ‘Great. Now what?’ I ate one, and it was divine. Fresh, snappy, crisp and tart, but not harsh and sour like I recalled. Still, I didn’t leap headfirst into devouring them. I remained rather skeptical. And they languished in my fridge until I was forced to do something, anything, with them.
So I pickled them. On a whim. And went tuckus over teakettle for the crisp little discs, eating them on sandwiches, with my fingers and finally with a fork to grab the last little slices from the dredges of their vinegary brine. And it was soon after that when I first dragged a cold fresh radish through a slab of creamy butter to discover one of the best, and most surprising treats I’ve ever tasted. My eyes were now opened to the radish. Once again. Adulthood is a wonder around every corner, especially when discovering the foods from your childhood that once caused you to turn up your nose are now part of your regular gustatory delight.
So they’ve happily made a comeback; the inexpensive little things can be had sometimes on a 2-fer deal with any farmer willing to move their bounty. I scrub them down and place them in a baggie where they happily keep for days on end, willing that they last that long in my fridge. I eat them for breakfast a lot, sliced thick on good toasted bread with slices of butter, or most recently, this delicious sandwich creation that I’m thoroughly ga-ga over.
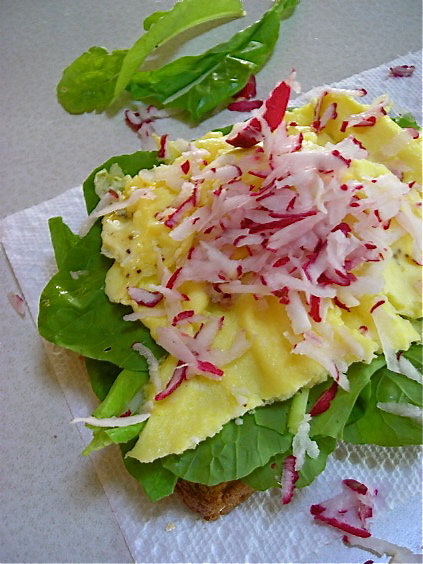
A cooked egg, nice and firm is placed a top a bed of greens on nicely toasted bread, and covered with several shredded radishes. The key is to shred the radish directly over the egg. Something about the fresh spray of liquid released makes for a much better flavor. I like spinach with this, but I’ve used spring greens, garden lettuce and romaine as well. This is a summery breakfast, if I’ve ever dreamed of one.
I took my radish love one step further too, recently, when I roasted an entire batch of them.
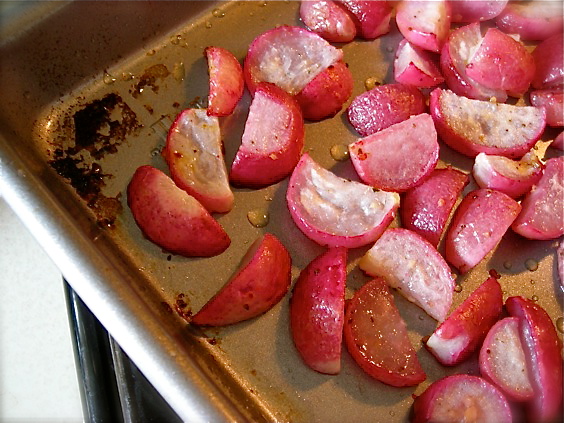
Roasting radishes takes the sharp flavor away, and replaces it with a mellow soft rendition that is palatable to anyone, even the most avowed radish hater. One would hope, anyway. I could have eaten these like candy, but instead, I caramelized a big pan of vidalia onions and made the two of them into a delicious tart atop a flaky puff pastry crust.
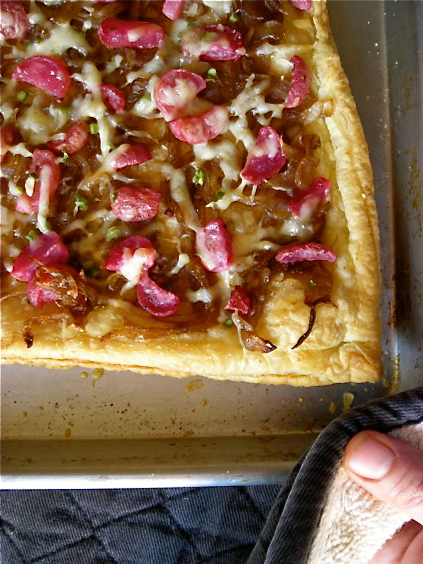 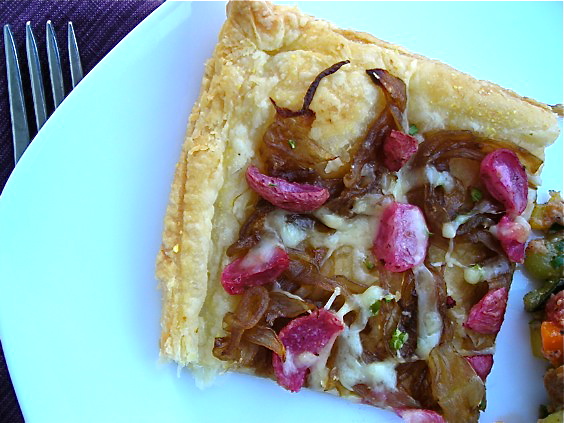
This was a sweet, tender and amazing hand held meal, soft like summer nights, fresh as the season and when topped with just a little Gouda cheese, a bit of savory tang that balanced the vegetables perfectly. Eating a slice of it, on my patio, with a lovely glass of Rosé wine and a perfect summer night surrounding me, I felt a million miles away from my life, but in the simplest way possible. I love how a good meal, with gentle ease can transform an ordinary day into something surreal and dreamy. That’s the magic in a plate of really, really good food.
So…. do you like radishes? What do you like to do with them?
Roasted Radish & Caramelize Onion Tart
Scrub one bunch of radishes well, removing tops and roots. Cut into halves or quarters and toss with a bit of seasoned oil of choice. Roast at 400° until tender. It won’t take too long, maybe 10 minutes.
Slice two Vidalia onions and place in a hot skillet. Cook onions over medium heat, turning frequently, until browned and tender, about 15 minutes. Reduce heat to low, add a few tablespoons of brown sugar (or a drizzle of good honey) a tablespoon of kosher salt and a dash or two of balsamic vinegar. This is my favorite way to caramelize onions, but you may have your own method. Continue cooking the onions for about 20-30 more minutes, or until they are very soft and richly browned. Stir them on occasion, and be careful not to let them burn.
Thaw one sheet of puff pastry. Roll out sheet to desired thickness on parchment paper, then transfer to baking sheet. Poke holes in pastry with a fork and place in 400° oven, baking until lightly browned, about 10-15 minutes. Remove from oven, spread caramelized onion over the crust then top with roasted radish and a small amount of a good sharp aged cheese of your choice. I used Gouda because I had a some on hand. Fontina and Gruyere would be good options too. Place back in oven and bake for about 15 more minutes, until edges of pastry are crisp and brown and toppings are hot. Allow to cool slightly, then serve. Can also be served at room temperature.
May 1st, 2011
| 7 Comments »
We’re trying so hard to go full steam ahead in to Spring. But around here, it seems like Mother Nature just wants to tease us, here with a lovely day then a blast of cold and rain, then yet another lovely day, then once again cold, and more rain. Lakes, streams, ponds, rivers and especially the people are overflowing their limits. We’ve had enough. Bring us the sunshine please, and for more than just one day.
So here we are, the first day of May. Our expected high likely won’t even reach 50 degrees. It feels weird to offer you a delicious crispy flatbread recipe, topped with a rich verdant pesto and some sassy caramelized onions because instinct is telling me to braise something hearty and warm. But it’s May and I refuse to get out my cast iron dutch oven anymore. In fact, I sure hope it got cleaned well the last time I used it because I’m desperately trying not to get reacquainted with it until October.
So, let’s move on to this, shall we?
 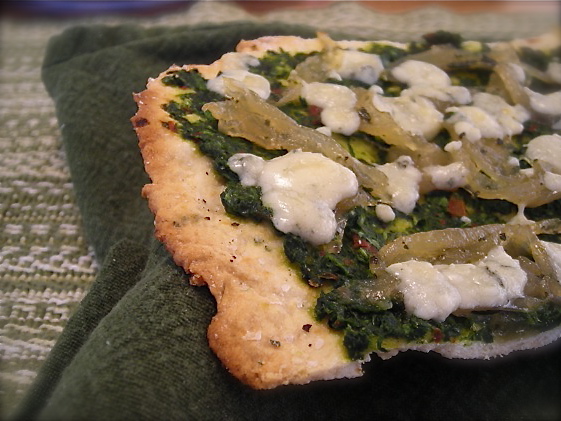
This was actually a recipe covered on this site back in November of 2009. For most of the year previous to that, I’d made this simple and delicious herb flatbread about a half dozen times for various meals, or really, even to just snap a piece off here and there to snack on. It’s ridiculously easy, it tastes amazing and it works for so many meal options, especially something very simple like being topped with fresh pesto, a smattering of caramelized Vidalia onions and several dollops of goat cheese. Run that under a broiler for a few minutes and the simplest meal is yours, delicious and light, packing a flavorful Spring-like medley for your mouth.
Every day I’m at work I pass a display of enormous Vidalia onions. It’s set up right by the entrance for easy access, and every day I see them I think about this flatbread, those golden burnished onions and the deep dark green of this pesto. I’ve experimented with lots of greens for pesto, and two of my most favorite ones are beet greens or spinach. Beet greens make the most earthy, dark and appealing pesto, and spinach offers a lighter, fresher touch. When fresh spinach is available at the Farmers Markets by the bucketful, I will buy several loads of it and make pesto, freezing it for future use.
I’ve done large batches of caramelized onions, slicing up to four of them at a time and slowly cooking them down to a glittering golden mass. They’ll keep in the fridge for up to a week, and you can freeze them too. The pesto freezes beautifully as well, or simply use your favorite commercial brand to make it even easier. A batch of this flatbread comes together in no time, so you can get out to find the sunshine.
Well, whenever it comes back, that is.
Herb Flatbread
1 3/4 c. unbleached flour
1 t. baking powder
1/2 t. salt
1-2 T. fresh herb of choice
1/2 c. water
1/3 c. oil
Heat oven to 450° with a pizza stone on middle rack. Combine dry ingredients and herbs. Make well in center and pour in oil and water. Stir with spoon until a soft dough forms. Turn out onto parchment paper and knead about 5-6 times to bring dough together. Can be divided into 2-3 small balls and rolled flat, or rolled out as one large circle. Drizzle olive oil over top, sprinkle with sea salt and more herb and transfer, parchment and all to heated stone. Bake until browned in spots and fragrant- time will depend on how thin dough is rolled. Remove from oven and cool (don’t cool on stone- it will continue to bake). Slice with pizza cutter and enjoy.
Recipe from Gourmet magazine
Spinach Pesto
4 c. washed spinach leaves, stemmed
1/3 c. olive oil
3 T. toasted pine nuts
1 clove fresh garlic, chopped
Place all ingredients in a food processor and process until smooth, scraping down sides as needed. This pesto can be frozen for quite some time with only minimal loss of flavor. Do not add cheese to pesto if planning to freeze, otherwise, add to taste your preferred hard cheese.
KATE’S NOTES:
Pine nuts are ungodly expensive right now. I love subbing cashews in pesto for the meaty flavor, and have dabbled with the idea of using almonds too, as they’re my favorite nut. And instead of using traditional parmesan in my pesto, I love the addition of Manchego or Trugole, which is really similar to Asiago, only creamier and with a milder taste.
February 16th, 2010
| 8 Comments »
Last year wasn’t my favorite year. Come to think of it, 2008 tossed some bombs my way and it all seemed to carry over, spreading out over time and trying to suck all the life out of me at every turn. As 2010 approached, and I looked back on the 12 months behind me, it was a bit sad to see that I’d paid far too much attention to the valleys in my life, and forgot to take in the view from the peaks.
Life is all about valleys and peaks. We’re up, we’re down and when we’re not, there’s the climbing out of the abyss and of course, slipping as we fall back into it. Sometimes our peaks are long, straight paths that resonate with light and glory, and we feel great. For a long time. Life is good and we breathe easy. But we slip, once more. The valleys can be dark. It’s hard sometimes to keep remembering that it doesn’t last forever. I’ve struggled to keep my chin up, part of me wishing fervently that this time of trial would just end already because really, I’ve had quite enough, thank you. Then I always realize that I’m climbing once again.
One aspect of 2010 that I’ve really wanted to do more of was to keep focused on the good, even when it seemed like there was nothing but darkness all around me. Fortunately, we’re only 6 weeks in, and what few dark moments that presented themselves passed rather quickly. It’s exciting to see the Earth changing around me, to notice with delight that there is still light at 5:45pm, that the tilt of the sun has changed enough to make 15° in February feel way different than it did in January. Or December. We’ve been absolutely dumped on in terms of the snowfall, and it’s given us quite a gorgeous landscape to look out over, and some stellar cross-country skiing. But beyond the natural turn that is happening, and the shorter amount of time between us and the arrival of Spring, it seems like there’s a whirlwind of good happening around me too. I hope to be able to share much more of what it entails as it pans out, but right now it’s slowly starting to twirl, like a tentative pirouette, moments of time pressing together and gradually expanding that are quietly whispering “Soon. Be Patient.”
The famous poem ‘Desiderata’ by Max Ehrmann has a line that says “… and whether or not it is clear to you, no doubt the universe is unfolding as it should.” For a long time it just never felt clear to me, it felt more like I was standing still while the world twisted and moved on around me. That’s changing, as is my perspective and I’m grateful. I’ve had this sensation inside me for a while now that I’m standing at the edge of a cliff, and everything in me knows that I just have to leap despite the voice in my head that’s saying “No- step back! You’re really scaring me!” I’m in my Indiana Jones moment, on the edge of that precipice. And this is my leap of faith. There is a bridge there that will catch me, even though I can’t see it.
There is one aspect of this extended time of trial in my life, and that is being available to just stop and enjoy those tiny moments along the way that can be so easily overlooked. Sitting down for a cup of tea one day really opened my eyes as the square cup seemed to fill my hands so perfectly. Moments of clarity that come from spending days with my almost 2-year old niece Nina,losing track of myself for awhile as I see life through her eyes. A Fall hike on a misty day that seems to leave the world around me at a standstill, smothered in the thick, wet air.
And with food too. Simple, easy and nourishing; stopping myself long enough to savor my lunch or an afternoon snack, taking the time to taste, smell and appreciate what’s in front of me.
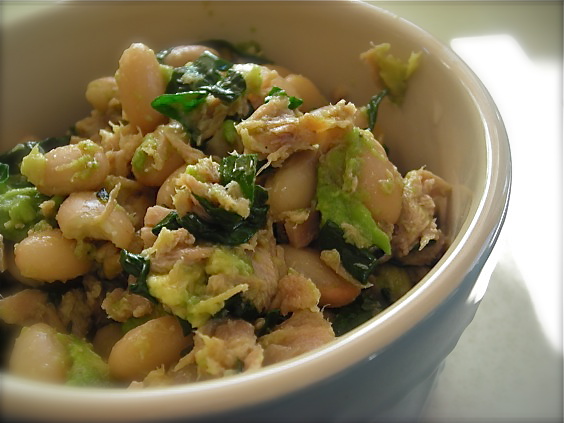
I’ve spoken out for these garlicky white beans before, urging you to try them and fall in love with their simplicity like I have, the endless ways they can be dressed up as a quick yet nutritious meal. One bright and sunny afternoon I set out to simply stir together this favorite of mine, and as I perused the pantry, fridge and countertop, I reached for a can of tuna, half an avocado and some washed spinach, which when paired this time with lime zest and juice instead of lemon, made yet another winning combination. Great taste, good for the body and with the first few bites, apparently very good for the soul.
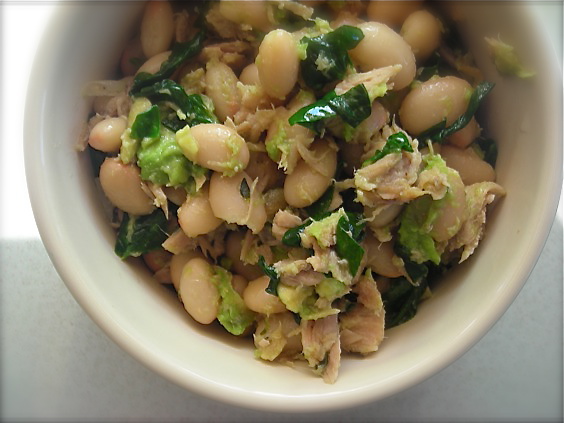
White Bean and Tuna Salad
by Kate
1 15-oz can great northern beans, drained and well rinsed
1 3-oz can of tuna, drained
2 cloves garlic, thinly sliced or minced
1/2 a ripe avocado, diced
1 c. fresh spinach, washed and chopped
Lime zest and juice to taste
Fresh thyme (optional)
In a medium skillet, warm about 3 tablespoons of oil and add garlic, sauteing gently until lightly browned. Add in the beans and tuna and warm, stirring to combine. When hot and steaming, add about half the spinach and stir until wilted slightly. Repeat with remaining spinach. Grate in some of the lime zest and squeeze in about 2 tablespoons of the juice. Stir and taste. Season with salt and pepper, more lime zest and juice if desired. Remove from heat and scrape into a bowl. Add the avocado and gently mix it in. Sprinkle with thyme and serve warm with rye crackers if you wish, or toasted pita bread.
June 8th, 2009
| 4 Comments »
Maybe I was a rabbit in another life. Or maybe it’s just my normal summertime affliction, but greens have dominated my meals as of late.
What fuels this obsession, and it can certainly be called one, is the availability of the ‘live’ lettuce heads my grocer has started carrying. I found these last summer and the love affair was ignited like an inferno; a big bunch of varied lettuces are packaged with the root ball intact. They can be planted and grown at home, or like I do, simply chopped off at the root, washed and held in the fridge. The amount of lettuce one gets in these offerings is grand, the quality is terrific and the price is exceptional, a bargain if there ever was one. I’ve bought two at a time and happily dug into their depths for countless meals, relishing the ease, the taste and the light fare. The bonus is that it’s a locally grown product by Minnesota’s own Bushel Boy.
Still, I’m chomping at the bit to get into Market season, where farmers by the score sell buckets of fresh lettuces for insanely cheap prices. A dollar gets me a five-quart buckets worth of fresh lettuces, almost more than I can manage, but that never seems to stop me. Once June is ever-present and the weather beckons me to other options, ones that don’t include standing over a stove, having fresh greens in the fridge gives me endless options for meals. I’m satisfied to have a plate of leafy goodness that hides all sorts of other crunchy vegetable options, a grain and legume for protein with a simple squeeze of a fresh lime and a dash of balsamic, and maybe a piece of chicken for Griffin to help his carnivorous cravings. With these offerings, and a few decent salad dressings, my young man surprised us all recently, including himself, when he ate a grilled chicken salad with amazing gusto and exclaimed “That was the best salad I’ve ever had. And I never expected to use the words ‘best’ and ‘salad’ together ever!!”
Well, neither did we, and it was an awfully nice thing to hear.
So it was with great anticipation that I awaited the start of one of my favorite local satellite Farmers Markets and drove towards it with excitement. Imagine my disappointment when the normally over-crowded parking lot where it is held instead was home to just about half a dozen vendors, with only one selling any type of green stuff. I felt like a slowly deflating balloon, but shouldered on, purchasing a sackful of organic spring greens, spinach and radishes. At least it was a good start, and while I was heading back home with my goodies, the sack of spinach, crammed full of dark green curly leaves, gave me the idea of making Spinach Pesto and then dinner was born.
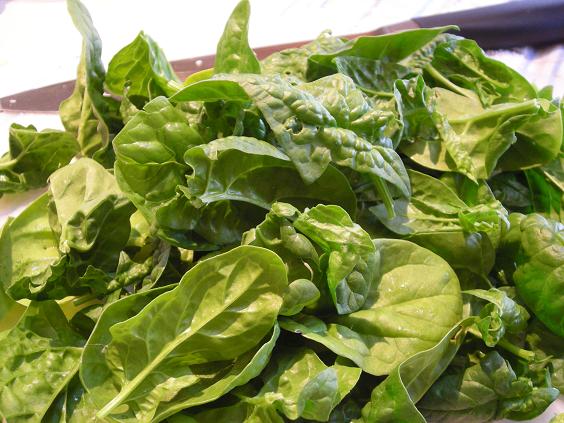
Pesto is a favorite around here, well- of the adults anyway. A few summers in the past, I had a garden bounty of basil that I turned into approximately 20 cups of pesto that I coveted in the freezer for months to come. I’ve been slow to experiment with other forms of pureed greens, but no more; this spinach pesto, combined with some remaining roasted red peppers that I found in the fridge, was so light, delicious and flavorful that now the craving for pesto, in any form, can be squelched with nary an effort outside of cleaning a bounty of my favorite leafy green.
 
And it turned a plain box of pasta into a superb weeknight meal.
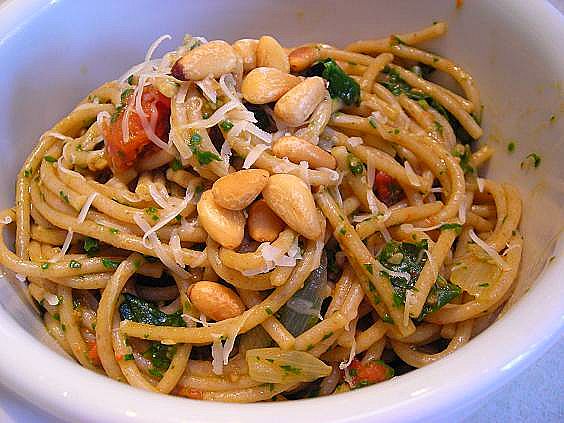
Spinach Pesto
by Kate
4 c. washed spinach leaves, stemmed
1/3 c. olive oil
3 T. toasted pine nuts
1 clove fresh garlic, chopped
Place all ingredients in a food processor and process until smooth, scraping down sides as needed. This pesto can be frozen for quite some time with only minimal loss of flavor. Do not add cheese to pesto if planning to freeze, otherwise, add to taste your preferred hard cheese.
For the Pasta-
Heat water to cook pasta.
I diced two ripe tomatoes and sliced a medium shallot. Sautè the shallot in olive oil, in a deep sided pan, until soft and starting to turn slightly golden. Reduce heat and add tomato, cooking over low heat until it begins to break down only slightly. Stir minimally.
When the pasta is ready, lift all the pasta with tongs straight from the cooking water and into the saute pan. Stir to coat with the tomato mixture, then spoon in about a half cup of the prepared pesto. Using a little of the pasta water, thin the pesto slightly and toss to coat. Add more pesto if so desired. Top with grated cheese and toasted pine nuts and season to taste.
I stirred about a cup of chopped spinach leaves into this as well for a little more color and texture.
Simple Tip of the Day:
When you use spaghetti for a pasta dish, do you break apart the strands before placing them in the boiling water? Does tiny shards of broken spaghetti fly all over the kitchen?
Try this instead:
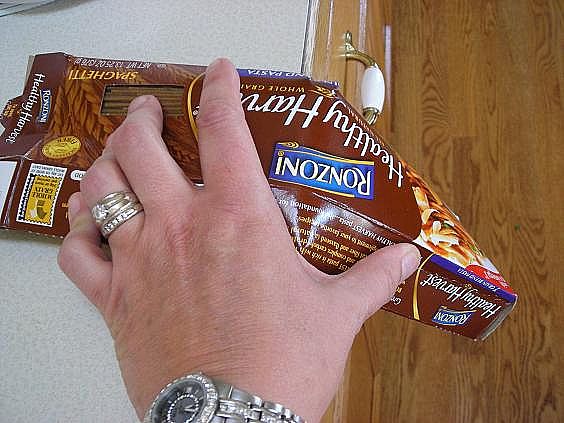
Leave the pasta in the box and bend the box over the edge of your counter. All the broken pieces stay in the box, eliminating the annoyance of finding them scattered around your kitchen for days to come. Also, if you salt your pasta water, pour the salt directly into the box with the pasta while you wait for the water to boil. That way, you’ll never forget to add it.
Pesto Magic!
Pesto is so endlessly versatile. Have you ever stirred pesto into burger meat? It’s one of my favorite ways to use it. The oil helps to keep the meat moist and it gives the finished product huge flavor. Griffin won’t eat pesto on pasta, but when I turn the remains into a grilled and fragrant burger, he spares no restraint in consuming it without question.
Pesto is also wonderful in a grilled cheese. We didn’t get around to utilizing this method with the spinach pesto this time, even with wonderful Jalapeno Cheddar bread available as a base, but in the foreseeable future, I’m pretty certain this will be dinner.
Spread some pesto on slices of french bread, a pocketed ciabatta or crusty semolina sesame and sprinkle a little grated hard cheese over the top. Try something different than parmesan or asiago- maybe manchego?- and then place the slices under the broiler for a few quick minutes. Watch carefully! This is an excellent appetizer. Thick slices of fresh tomato can also be spread with pesto and cheese and broiled to a sizzling snack.
Roasted vegetables get a nice enhancement from being served with pesto, especially potatoes.
Pesto salad dressing is wonderful. A tablespoon or two can be added to your standard oil/vinegar mix, or thinned slightly and simply tossed with your greens.
|


