July 27th, 2011
| 5 Comments »
Eventually, we all know it’s going to happen; the bounty of summer vegetables is going to begin to overwhelm home cooks. This rapid increase of summer heat has brought my tomato plants into full force growth, skyrocketing up in the garden and bursting out buds like crazy. If this keeps up, August is going to be both delicious and ridiculous. And zucchini? We all know that one plant per home garden is enough to keep a happy cook in oblong green delight, but the overly enthusiastic gardeners who tend several plants will one day walk out to their garden and be confronted with tons of zucchini. Mark my words. Then they’ll do whatever they can to pawn the excess off on anyone who’ll look their way. Then there’s eggplant. The purple orbs are everywhere once they’re ripe. My word. It’s craaaaa- zee. But in a good, good way.
Because I found The. Best. summer vegetable option once your countertop is over-flowing with fresh zucchini, tomato and eggplant.
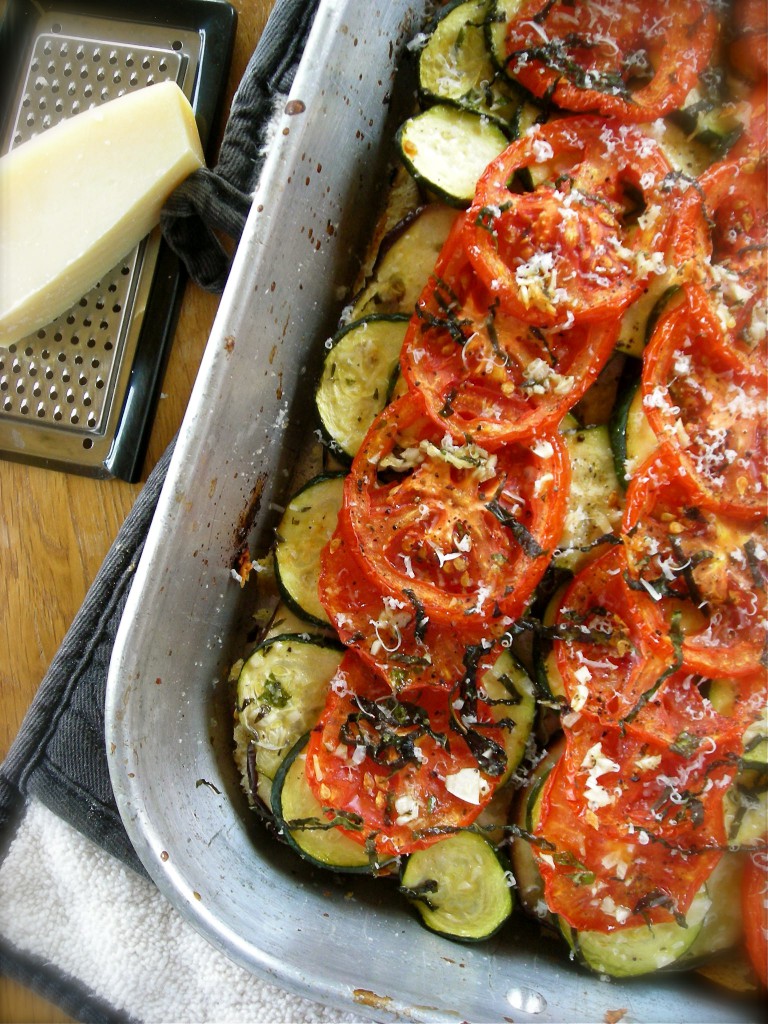 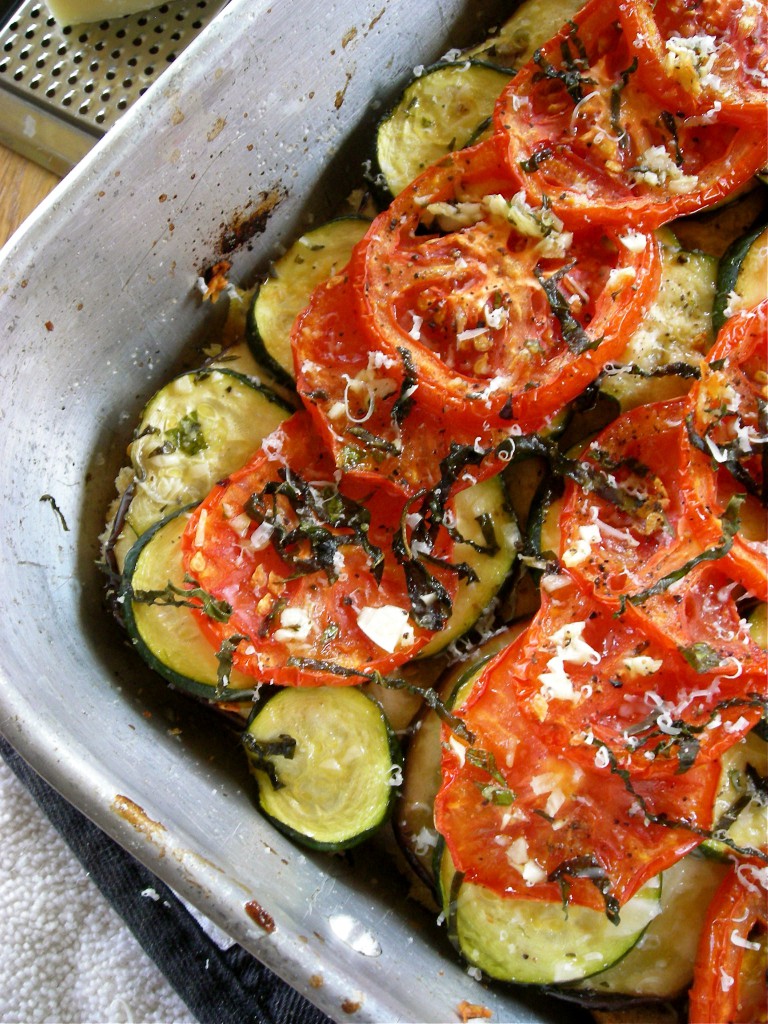
Provided your willingness to turn on your oven, here’s a dish that screams out “SUMMERTIME!!” in every bite, from the heady garlic and fresh herb infused olive oil that you drizzle over everything to the fresh vegetables that make up the bulk of this gratin. Get a really, really good loaf of bread for the base, a fine bottle of white wine for you, and enjoy a meal worthy of any fancy summer dinner party, or simply a way to ease yourself out of a hectic day.
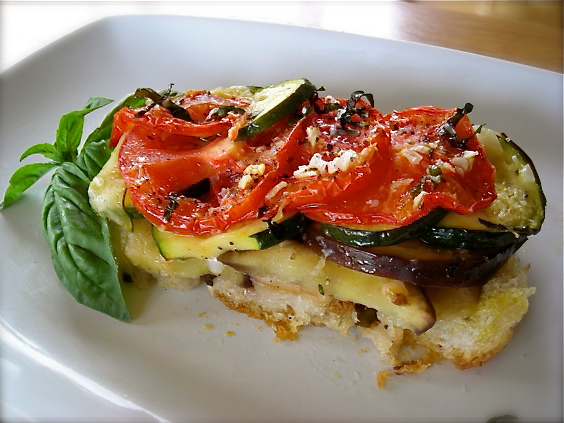
I spied this recipe on the Food & Wine website, searching for some new plant-friendly recipes to add to our eating repertoire. I knew we’d love it and I wasn’t disappointed. Once out of the oven, the smell was killing me. I could barely wait for it to cool enough to cut a slice and dig in. Mike came home from meeting with some of his clients, and despite having already eaten lunch, I pretty much shoved a slice at him and demanded that he try it. Which he did. He’s got the right attitude, hmm?
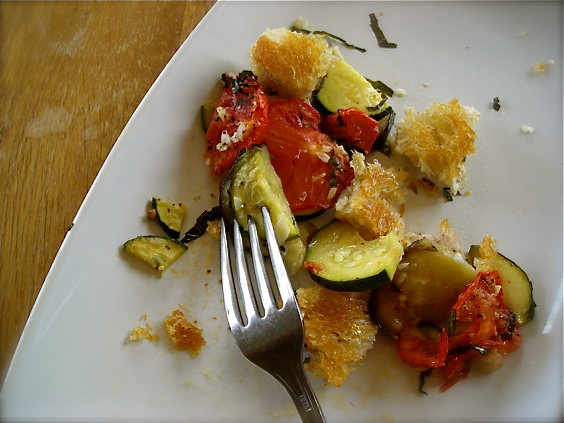
The base of this gratin is made from good rustic bread, torn in to pieces and drizzled with a heady blend of garlicky oil inundated with fresh herbs. It bakes up nice and crunchy, aromatic and flavorful, adding a nice contrast to the soft baked tomato, zucchini and eggplant slices gracing the top. A smattering of fresh basil, a spray of good parmesan cheese and a fork. Oh, and don’t forget the wine. It’s a dish that tastes of summertime, reeking of warm days, the scent of cut grass and the way the night air sulks around at dusk with the lingering scent of the day before finally giving way to the cool of night. If anything else smacks of good seasonal eating, show me, because I really want to know.
You know that day will come when you glance, overwhelmed, at the summer bounty before you and you think ‘Oh dear, what do I do NOW???’ Well I have the answer, my friends. You will make this dish. And with one bite, you will determine when you can make it again. And maybe, again.
Do you have any favorite ways to use zucchini and eggplant??
Ratatouille Gratin
1 medium eggplant, sliced 1/4″ thick
2 medium zucchini, sliced 1/4″ thick
3-4 medium tomato, sliced 1/4″ thick.
1/2 c. good olive oil
4 cloves garlic, minced extra fine
1 heaping tablespoon each fresh thyme, parsley and basil, minced fine, plus extra for finishing
1 1-lb loaf good quality artisan bread, torn in to 1-2″ pieces (i used a good sourdough, left in a paper bag overnight)
Stir olive oil, garlic and the heaping tablespoons of fresh herbs together in a small bowl. Whisk well to combine.
Toss eggplant and zucchini with 1-2 teaspoons of kosher salt and let stand for about 20-30 minutes. Drain any liquid and gently squeeze dry, if possible. Sprinkle tomato slices with salt and pepper.
Spray a 9×13 baking dish with cooking spray and arrange torn bread in bottom. Pack the bread in as tight as possible in one layer, using the entire loaf. Drizzle the bread with about 2 T. of the garlic/herb oil. Arrange the eggplant slices on top, then the zucchini, then the tomato. Drizzle the top of the vegetables with another tablespoon or two of the oil and sprinkle some thyme leaves over that.
Bake the gratin for 30-40 minutes, or until the vegetables are aromatic and slightly browned and the bread crust is crispy. Remove from oven and allow to stand for 10-15 minutes. Sprinkle with minced basil and parsley and fresh grated parmesan before serving, if desired. The gratin can be served warm, or at room temperature. To reheat, place gratin on a baking sheet and rewarm in a low oven.
From Food & Wine, with heavy modifications
June 5th, 2011
| 5 Comments »
I’m always on the look-out for quick and easy meal options, ideas for those nights that the guys take over dinner prep and want some good food to appear without a great amount of fuss. Long winded recipes don’t cut it with them, but these really easy Black Bean Tostadas make for a perfect summer dinner.
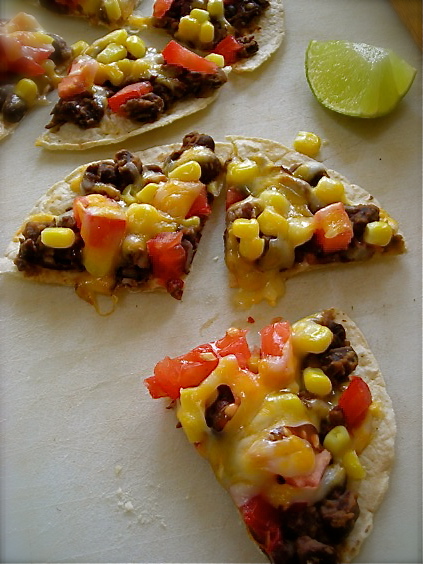
Based on this idea for a Black Bean and Corn Pizza, I took it one step more towards simple and used corn tortillas for the base, making a crispy shell that went from our toaster oven to my plate in about 10 minutes. The most time I spent was opening a can of black beans and shaking them under running water.
If you’ve got a toaster oven you’ve got the means to make this in a snap but are limited to only two at a time. Using a regular oven makes for more crowd appeal. Increase the amount of all ingredients as needed for the number of people you’re serving. I would imagine that adults could easily eat two or three of these. I myself managed to shotgun four without a blink of remorse.
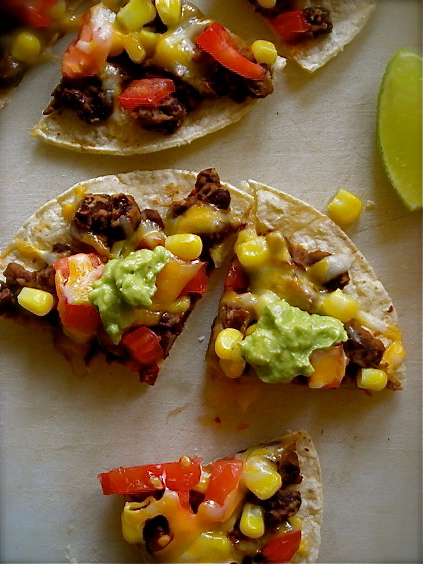
But I was stuffed. Happy. But stuffed. Delicious as a main meal, this would also be perfect for a nice appetizer, and could easily be done on a grill with tantalizingly smoky results. The black beans make for a hearty and filling addition and no one will miss any meat in this. Fresh tomato gave it a summery flavor, and a crumble of queso fresco would be a nice addition just prior to eating them.
Black Bean Tostadas
1 15-oz can black beans, drained and rinsed
2-3 t. chipotle en adobo
1-2 t. each ground cumin and chili powder
1 medium tomato, diced
1 c. frozen corn (no need to thaw)
1 avocado, diced
Corn tortillas
Pepper Jack, or Co-Jack cheese for topping
Lime wedges
Heat oven to 400°.
Place drained black beans in a small saucepan and add 1/3 cup of water, the chipotle en adobo, cumin and chili powder. Stir to combine and heat until simmering. Remove pan and mash beans coarsely with a sturdy wooden spoon. Add more water if needed to make beans spreadable, but not runny. You want them to be thick.
On a baking sheet, arrange corn tortillas and place in oven, turning once until tortillas are slightly firm. Remove pan from oven and carefully spread a few tablespoons of black bean mixture on them, then top with tomato, corn and diced avocado. Sprinkle a little cheese over them and return the pan to the oven. Bake until cheese is melted and tortillas are crispy around the edges, maybe 5 minutes. Squirt fresh lime juice over the tortillas before serving.
NOTE: Instead of using avocado chunks on the tostadas, mash the avocado with a little lime juice, salt and pepper and use either as a topping for the tostada when it comes out of the oven, or spread a thin layer atop the black beans before adding the other toppings and baking them. Either way you use it, it’s delicious.
May 13th, 2011
| 2 Comments »
Summer tomato season is heading our way. I don’t have a huge garden plot to grow produce in, but I always grow tomatoes as there is nothing finer on this earth than a homegrown organic tomato. Come August, we’re usually over-run with them, and are eating them in everything. And really, there’s nothing better than a fruit so delicious that you can slice it, grate a bit of fresh black pepper on it and eat it with a fork.
This year, we’ll be utilizing a lot more tomatoes in this delicious and simple Shrimp Panzanella Salad I’ve discovered
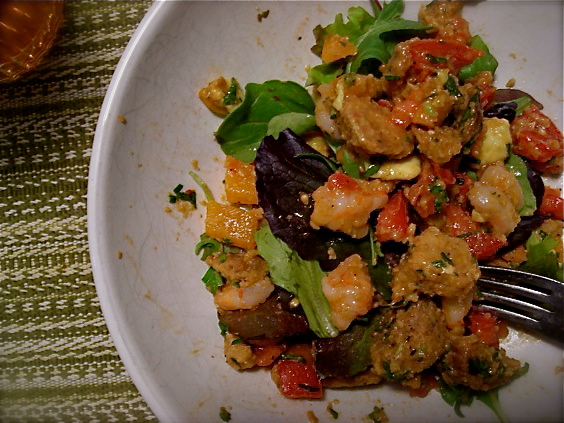
As luck would have it the night I made this, a gorgeous sunny day had turned dark and cloudy, with storms brewing, so this photo is nowhere near as bright and summery as this salad’s true appeal. Fresh chopped tomato and peppers, doused with a liberal amount of oil, a splash of good vinegar and a veritable shower of fresh parsley, basil and thyme and the taste that springs from your fork is all about Summer! Summer! Summer! Even when Spring! struggles to fully arrive here in Minnesota.
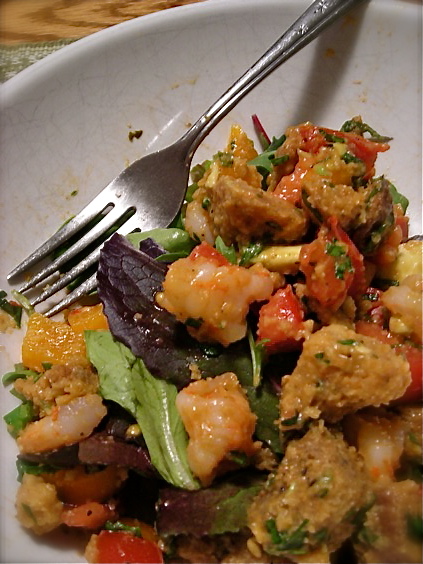
So imagine it yourself; the taste of a ripe juicy tomato, the crunch of seasoned and browned cubes of hearty bread, toasted to a firm crunch, the snap of bell pepper and the heady flavor of fresh herbs. Mix in pieces of perfectly cooked shrimp, doused with a bit of chili garlic sauce for spice, served over fresh spring greens and you’ve got a dinner salad with substance, not to mention a wild ride of textures, flavors and colors. I could have admired it in my bowl if I wasn’t so hungry.
And simple? This here’s an easy, quick dinner to have ready. With a few shortcuts like artisan croutons and cooked shrimp, you can get this together in about 15 minutes, yet it’s hearty enough to fill you up, but not leave you sluggish. It may even give you an extra burst of energy to head out after dinner for a gorgeous sunset walk.
Shrimp Panzanella Salad
4 c. multi-grain bread cubes, preferably day old. Or equivalent of pre-made croutons.
1# coarsely chopped cooked shrimp
4 large ripe but firm tomatoes
2 bell peppers, any color, chopped
3/4 c. fresh chopped parsley
1/4 c. fresh chopped basil
3 T. fresh thyme
1/4 c. pitted kalamata olives, plus 2-3 T. brine
3 T. red wine vinegar
1-1/2 t. fresh chopped chives
Spring greens of choice
Fresh ground black pepper and sea salt
If using fresh bread cubes, preheat oven to 350°. Place bread cubes in a large bowl and drizzle with 2-4 T. olive oil. Toss to coat and spread on a baking sheet. Bake the cubes, stirring every 5 minutes or so until they’re very crisp and dried, about 15-20 minutes. Watch them carefully. Allow them to cool completely before assembling the salad.
Combine the shrimp, tomato, bell pepper, fresh herbs, olives, brine and vinegar in a large bowl. Drizzle with 3-4 T. olive oil and toss to coat. Add cooled bread cubes, toss to combine. Season to taste with salt and pepper. Allow to sit for 15 minutes to mix flavors.
Serve over spring greens.
Adapted from Eating Well magazine.
July 23rd, 2010
| 11 Comments »
No, that isn’t a misprint. I made guacamole on the grill.
See?
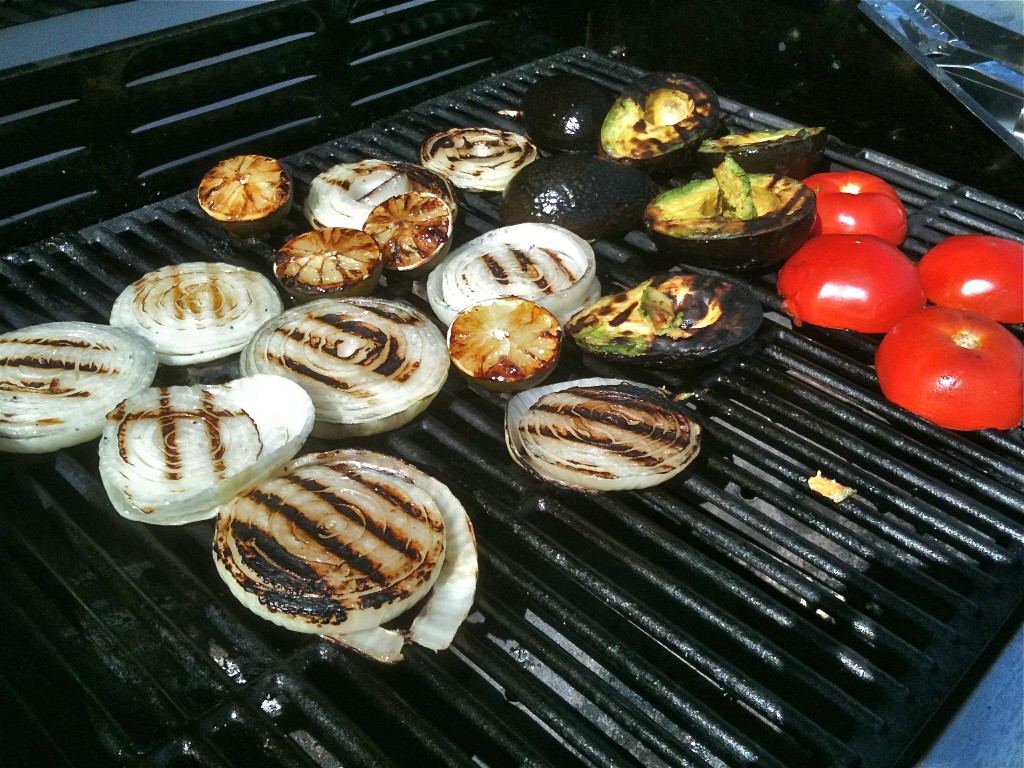
The idea came from The Minimalist’s 101 Grilling ideas column in the New York Times Dining section, and since we’re huge fans of Guacamole in this house, it wasn’t long before the desire to create it, and the assembled ingredients were ready for my initial attempt.
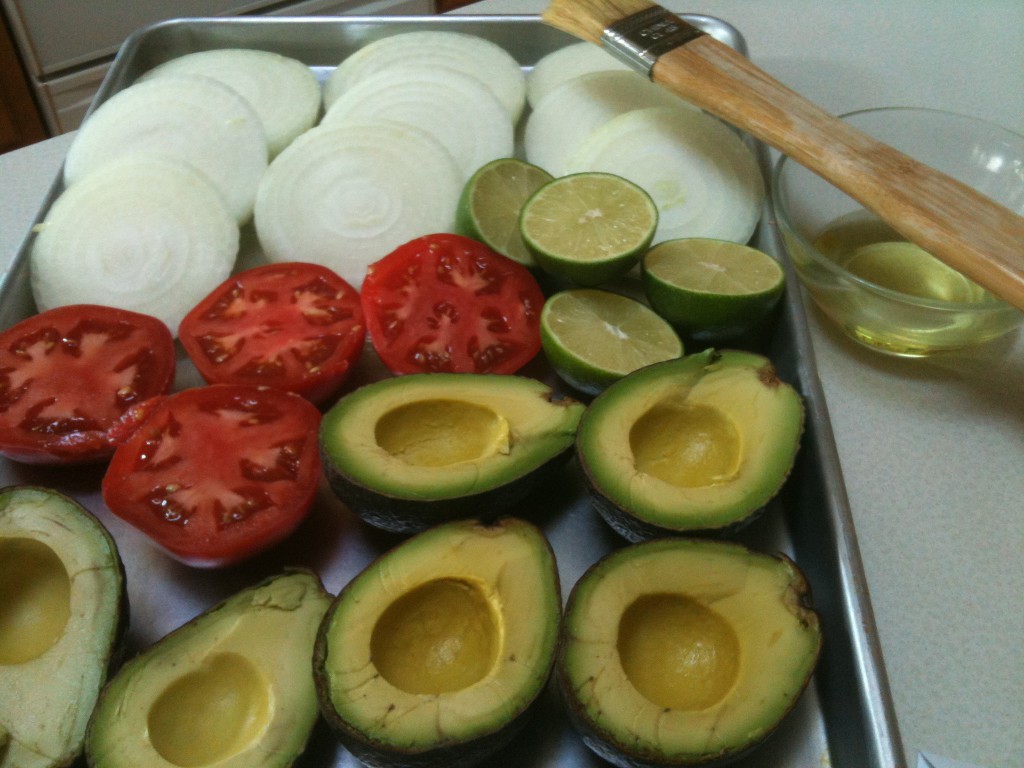
I’m no stranger to grilling onions or tomatoes. In previous summers, I’ve made a topping for bruschetta with grilled tomato and sweet onions that I’ve devoured shamelessly, and this summer for some reason, the desire for grilled onions on any number of dishes has been almost an obsession. I’m finding more and more to like about onions, whether they’re roasted, caramelized in a pan or like this, charred and slightly smoky from the grill.
There’s no technique to making this Guacamole at all. The key is mostly in preparing the items for the grill. Tomato and avocado should be ripe, but not too ripe due to the fact that they soften intensely on the grill. My avocados were more firm than I would have chosen for a standard preparation, but they worked beautifully in the intense heat of the grill. Carve them in half and remove the pit, then brush a little oil over them. Halve your tomatoes, and slice the onions into thick rounds so they are easy to handle. Give those a smear of oil too. And be sure not to forget the limes! They become a sweeter version of their usual tart self from the heat of the flames.
Place all the items face down on the grill. And here’s where your personal preference will come in. Do you like a lightly toasted taste? Or do you prefer a nice grill-marked char? Do be careful about the tomato; if you overdo it, it will collapse into the fire. I prefer to put the tomato on the hottest part of the grill and watch it carefully until I notice the edges beginning to soften just a little, becoming dark where it touches the grill. I flip it over and let it cook for a few more minutes, then remove it to a pan to rest. The skin usually comes off.
For the rest of the items, leave them in place until they are nicely marked and beginning to soften. Turn the avocado over so the peel side is down on the grate and cook them until they become soft and compliant. Flip over the lime halves too so the rind is down, and watch for the pulp to almost collapse. At this point, you’re not going to get juice from the limes, but you will get a deliciously smoky lime pulp for your Guacamole that gives it that familiar and tangy ‘Zing!’ that only a good lime can offer. And those onions can be cooked to any degree you wish.
Once you’ve got all the grilling done, allow everything to cool off. Chop the tomato and onion, scoop out the avocado and squeeze the limes into a bowl. Do be cautious of the amount of lime you put in; remember that the pulp will become more intense from being heated, and you may not need as much as you think. Add in whatever seasonings you prefer.
There was no photo of the finished version of this Guacamole because, well…. Guacamole all mixed up isn’t exactly photogenic. It didn’t look any different than what you would make normally, but the flavor was stunning. Smoky and rich, it had depth that I wouldn’t have imagined Guacamole could have. Everything became sweeter, and deeply flavorful from the heat and flames of the grill. Our love for Guacamole was definitely enhanced by this version. It didn’t last long at all and I can’t wait to make it again.
|


