August 28th, 2013
| 2 Comments »
Earlier this Spring, we took the leap and purchased a CSA share in the Bossy Acres farm. Bossy Acres, run by the team of Karla Pankow and Elizabeth Millard, grow organically on a farm in Northfield, and specialize in unique, heirloom varieties. Being a family of three, we decided to get the Mini share that would deliver every other week, plus an add-on share for fresh farm eggs and fresh roasted coffee.
Hands down, it was the best decision we made this year. In previous years, I would visit the Farmers Markets up to three times a week to keep a good stock of fresh vegetables on hand. In deciding on our CSA delivery, I figured that I would still be able to browse the markets on our off week from deliveries, but the wealth of vegetables showing up in our boxes keeps us chugging along in between delivery weeks, and only on a few occasions have I needed a quick visit to our local market to fill in around the edges. Our garden has also been producing well, and we’ve enjoyed broccoli, chard and a bounty of tomatoes from our own backyard, and the garden at our lake home.
In one delivery from Bossy Acres, complete with a copious harvest from the lake, I faced a counter full of cherry tomatoes that I desperately needed to do something with before they all started collapsing.
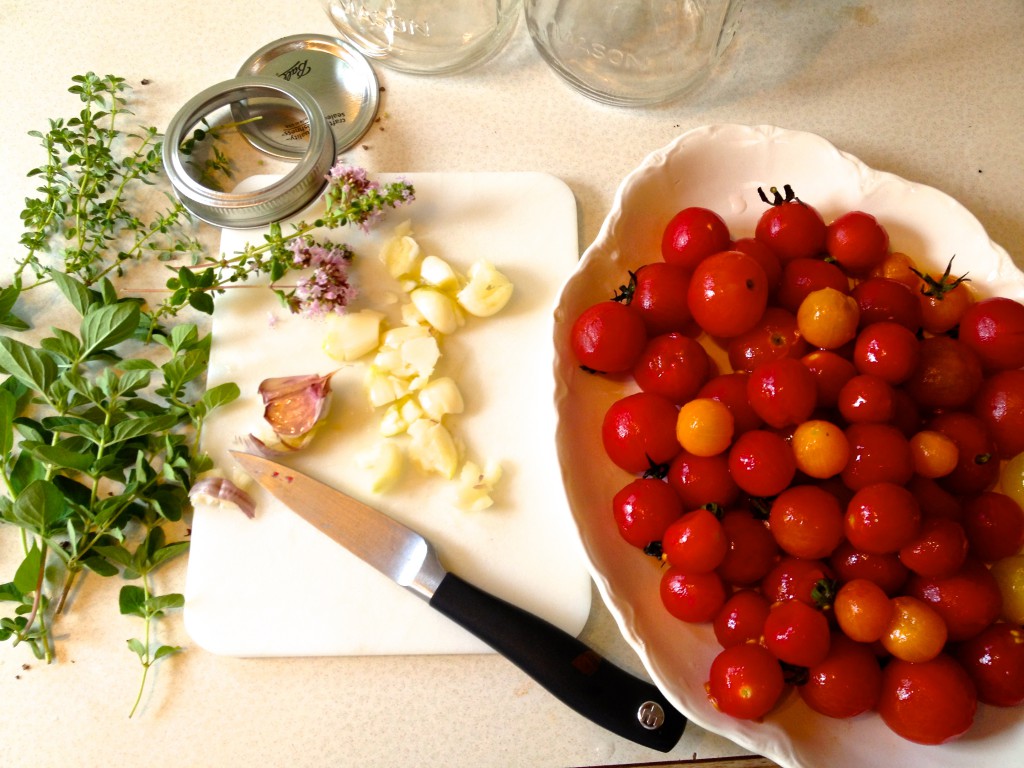
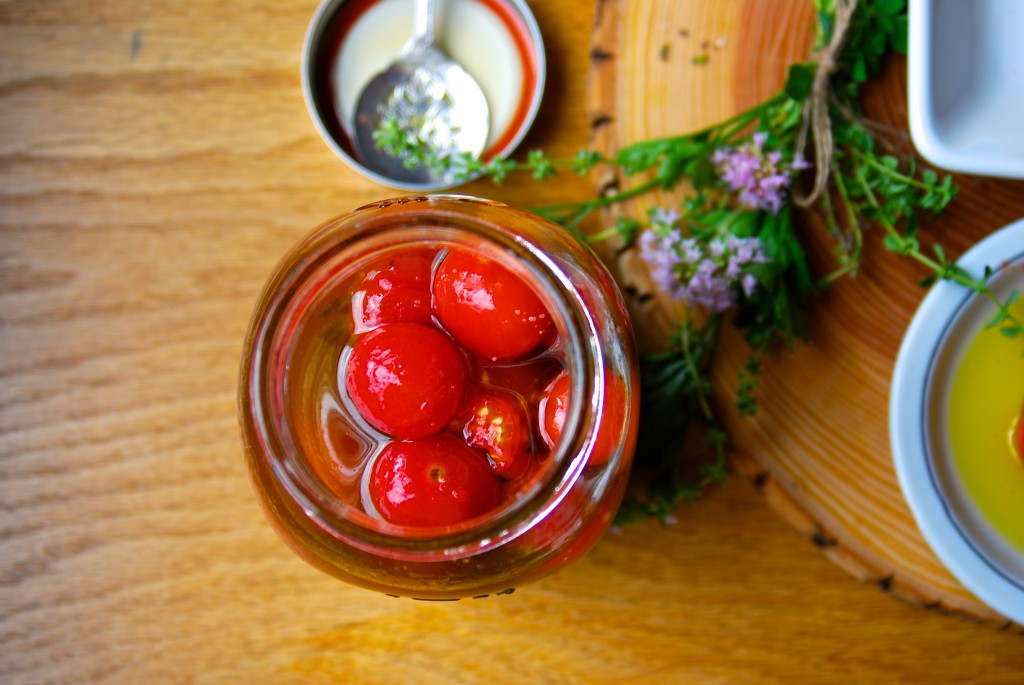
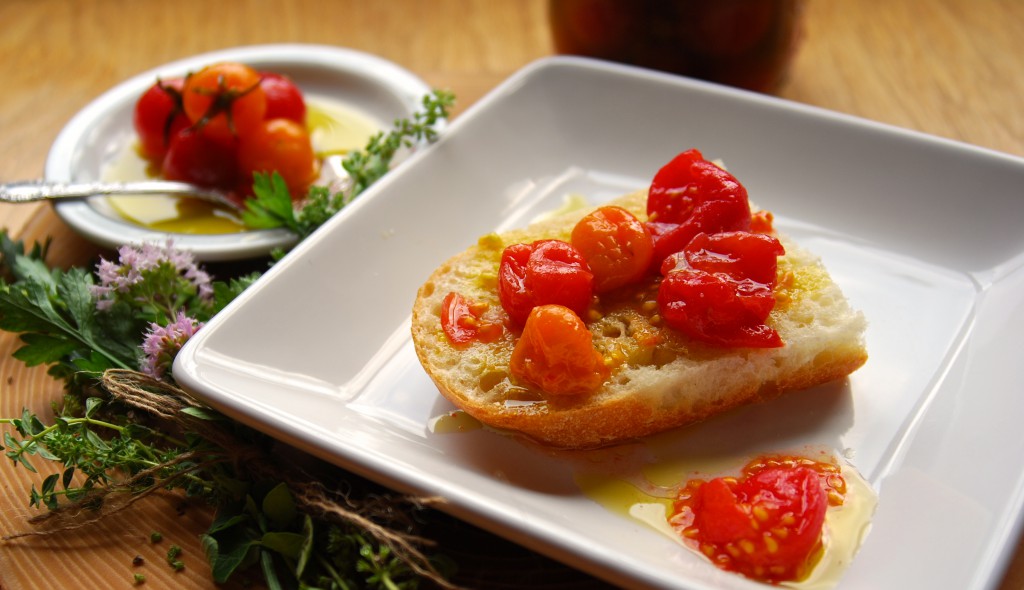
These simple marinated cherry tomatoes were a perfect option to take care of the bounty. One quart jar later, they were ready for a few days soaking in the refrigerator, redolent with fresh thyme, oregano and crushed cloves of aromatic garlic. The hardest part of the entire procedure was peeling the little things. The olive oil marinade even made enough to have some left over to fill an extra bottle for use on salads or drizzled over good bread.
A good marinated tomato has endless uses. I love using them on pizza, or you can toss them on your greens, too. Mashed and blended with vinegar, they make a simple vinaigrette, or like pictured here, scooped out and placed on bread, with some of the oil scattered over the top. Once the jar has had time to meld all the flavors together, what happens after that is only limited by your imagination and appetite.
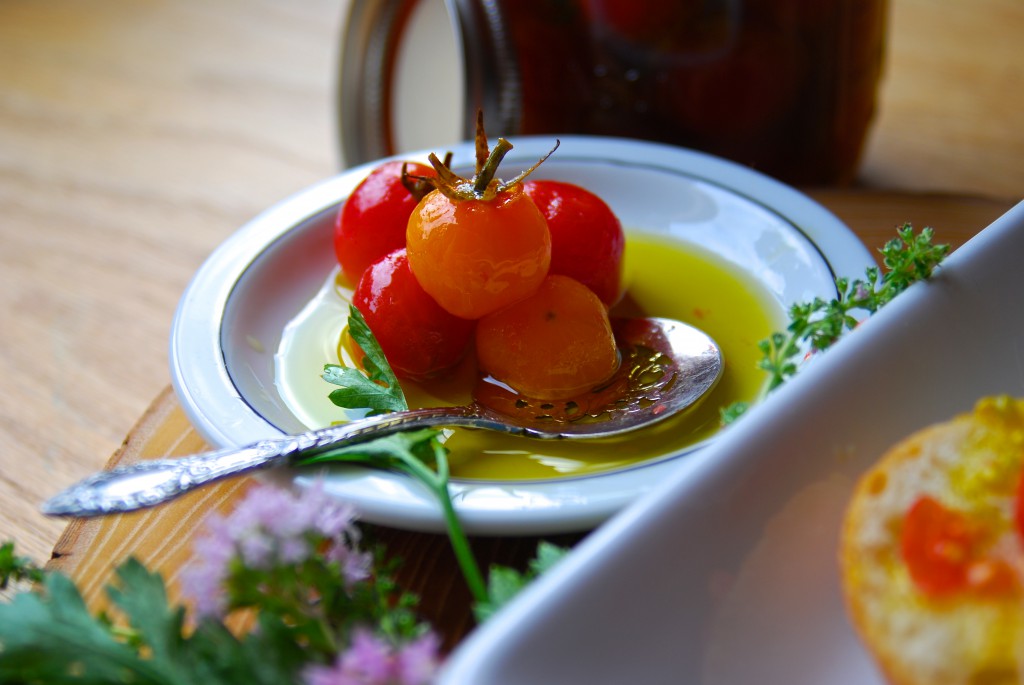
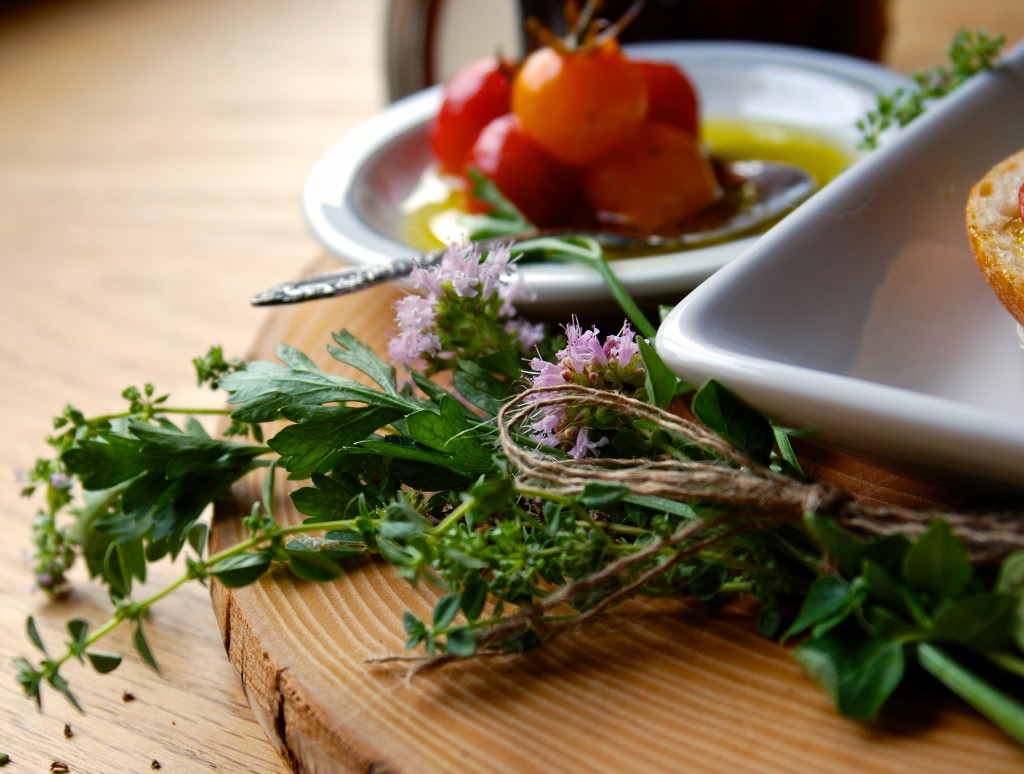
For your bounty of garden tomatoes, pack up a jar or two of these beauties. You will love them.
Herb Marinated Cherry Tomatoes
2 c. high quality olive oil
5 cloves garlic, crushed
1 t. crushed red pepper
2 sprigs each fresh thyme and oregano
1 t. mixed peppercorns
1 t. flaked sea salt (I used Maldon smoked)
2 pints Cherry Tomatoes
The Cherry tomatoes need to be peeled, and this was the most tedious part of the whole procedure. Score an X on the bottom of the fruit with a sharp knife and bring a pot of water to a boil. Place a large bowl of ice water nearby. Working in batches, drop the scored tomatoes in the boiling water for 15 seconds. With a slotted spoon, remove from the pot and immediately drop in the ice water. Once cooled, simply peel off the skins. Place the tomatoes in a quart canning jar with a few sprigs of fresh herbs. I liked using the flowering tops of the herbs in the jar.
In a small saucepan, warm the oil, garlic, red pepper, peppercorns and salt gently, stirring to dissolve the salt. Do not bring to a boil. Add the fresh herbs and remove from the heat. Allow to cool completely, then strain out the solids, pouring the oil over the tomatoes in the jar. Any remaining oil can be poured in to a carafe for other uses in the kitchen. Cover the jar and give a gentle shake, then allow to sit at room temperature for 2 hours. Refrigerate for up to two weeks. I doubt they’ll last that long.
You will see the oil solidify in the refrigerator. This is normal. Allow the jar to sit at room temperature for a short time before serving to bring the oil back to liquid.
September 4th, 2011
| 3 Comments »
I came away from a long visit to the Minnesota State Fair this year with two prominent thoughts:
#1- The absolute BEST way to attend such a gastronomic event, where most everything is deep fried, with enormous portions, not so very healthy and most always made with meat is to go with a big group of like-minded friends so you can share all the gustatory delights and not leave feeling bloated and ill.
#2- I went to the Fair, knowing all the above regarding the food offerings and I ate everything that I felt like eating- including meat- sort of as a means to remind myself why I prefer to fill my belly with healthy and nutritious foods instead of the crap that often constitutes the American diet.
And that night, after sharing in the consumption of fried cheese curds, an Asian style pork burrito, fried pickles, cajun french fries, honey sunflower ice cream, sweet corn ice cream (FOUR portions shared between six of us- wow, so darn good), falafel, gyros and a strange but satisfying vegetarian dish that included lentils, rice, pasta and fried onions, I went to bed with aching legs from the 7 hours of walking, and woke in the night with a fully expected belly-ache. And I mean a raging hurricane of complaints from the tummy, saying over and over and over again “What did you DO to me!!!???”
I mean, four months is not a lot when compared to a lifetime in terms of good eating. But four months IS a lifetime though, because really, it took me only two days at the start of those four months to realize that changing the eating game for me was really beneficial. And it doesn’t take but one day of eating lousy to send my body back into a whirlwind of pain and suffering. It’s that easy, and your body is pretty good at reminding you of what happens when you feed it junk. My poor belly whirled and twisted, like an angry toddler with flailing fists as if it just couldn’t believe what I’d done to it.
The harder part however, was fighting off the urge to continue eating more junk, despite the protesting belly. It was like a switch was flipped in my head, a switch that said ‘GIMME!!‘ with red-hot intensity, to grease and fat. One day of eating poorly and I suddenly was flooded with urges for food I hadn’t regularly eaten in years. Mike made oatmeal for breakfast and I couldn’t eat it. With my tummy still doing cartwheels over the previous days intake, a bowl of something warm and healthy was the last thing it wanted, but really what I was craving was a huge carb and fat feast the likes of which I haven’t consumed for a long time. I drank a protein shake instead and that sort of helped, but I still fought off intense cravings for junk all day long. By late afternoon, I gave in and devoured a partial bag of chips that was in the cupboard, then by dinnertime my stomach was pleading with me to give it something green and chock full of vitamins. I can’t recall ever feeling so desperate for something healthy. Ever. With my mind and body at war over the onslaught, I was disoriented and restless, feeling depressed and scattered. It was eye-opening and somewhat scary how quickly all that junk food took over my mind and belly and fought for domination.
But I am nothing short of stubborn.
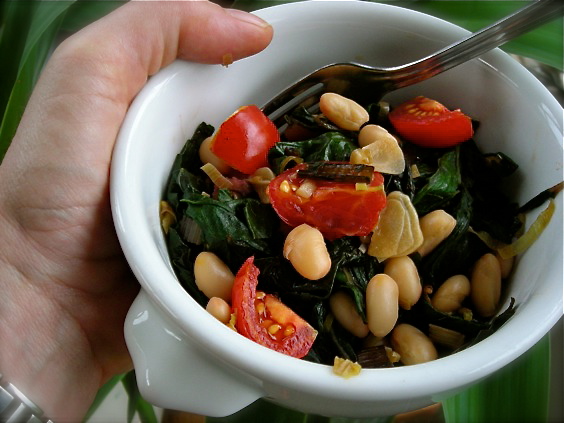
And my belly and mind can try and fight for domination over my heart and common sense but it won’t work. I knew what I needed and thankfully, it was all right there in the kitchen. A bag of chard, the remains of a container of cherry tomatoes and a can of great northern beans and soon I was happily consuming something green, sending my belly the message that those cries for help had been heard.
I even included the colorful and crunchy chard stems in my meal.
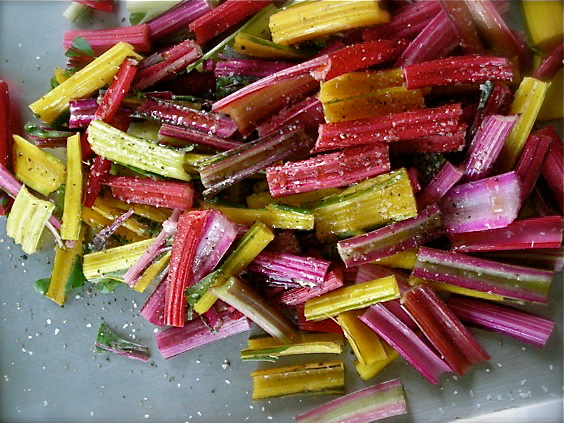
Tossed with a bit of oil and dusted with salt and pepper, I roasted this batch of stems until they were tender and nicely chewy, giving a pleasant added texture to the soft earthy chard. The stems are a really nice touch to any medley of roasted vegetables, especially tiny red potatoes and fresh carrots and they are rich with chard’s lush, dark flavor. This dish is quick to come together, making it a cinch to readily step up and cure what ails you, whether it’s a gastronomic overload of wanton delights or just a stressful, busy day.
Simple Chard Sauté
1 bunch chard, stems removed
1 15-oz can Great Northern beans, rinsed well
1 small leek, split, washed and sliced thin
2 cloves garlic, minced
1/2 pint cherry tomatoes
Wash the chard leaves thoroughly and spin them dry. To make them easier to cook and eat, rough chop them into manageable pieces. Wash the stems, trim the ragged edges and chop them in to bite sized pieces.
In a medium skillet with a lid, heat a small amount of oil and add the leek and chard stems. Season with a bit of sea salt and cook, stirring occasionally, until the chard stems are tender and the leek is browned slightly, maybe 10-15 minutes. Add the garlic and cook, stirring, for a few minutes, until the mixture is very fragrant.
Add the chard leaves by the handful, stirring the leaves to begin wilting them. Continue adding leaves and stirring until they cook down to a manageable size. Add about 1/3 cup of water to the skillet, stir in the beans and tomato and then cover the skillet. Allow to steam over medium-low heat for about 10 minutes undisturbed. Remove the cover, season with sea salt and fresh cracked pepper.
July 20th, 2011
| 6 Comments »
I do realize that’s a pretty strong statement, given the evolution of pizza from your basic tomato pie with sausage or pepperoni to the amazing creations available at any number of fancy wood and coal-fired joints around town. Pizza is one of those food items that’s tireless in it’s ability to transform itself, often gravitating out to an entire new plain before charging back to it’s humble beginnings once more. What’s old is new again, right? Pizza. Hand held food, and a very personal statement if ever one existed. Everyone has their own ideas about what makes good pizza; what kind of sauce tastes best, what toppings make for the most flavor, the amount of cheese, thin crust or thick, crunchy or soft.
My personal favorite was always sausage, green pepper and black olive. Something about that combination made perfect sense to my mouth. I could handle pepperoni, plain with no additions but given a choice, sausage ruled. The cheese had to be ample, enough to stretch happily out from the crust as I bit in to it, and it always, always needed several shakes of grated parmesan cheese on top. I can still put away a few slices of this perennial favorite, but my tummy wouldn’t be too happy with me. These days, I’m far more content to cover my pizza crust (thin, but not crispy) with a number of vegetables and a much less substantial amount of cheese. I’ve been known to eschew pizza sauce in favor or pesto, or no sauce at all. I’ve rubbed crushed roasted garlic over the crust before placing the toppings on it and I’ve tried lots of variations on the pizza theme, including dessert pizza. I may grow and evolve with my tastes, but I still love pizza. And often I think that I’ve tried most ways possible to eat the ultimate hand-held meal.
Then I made this pizza:
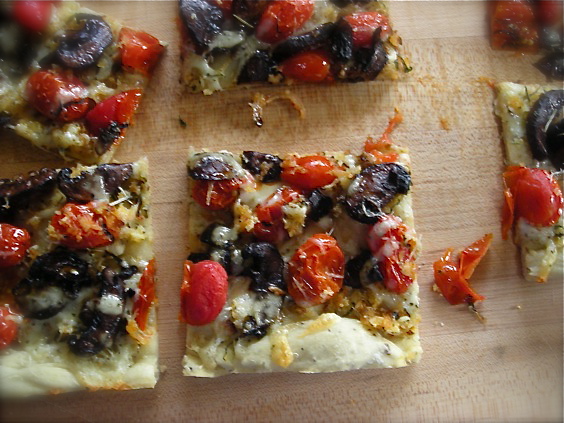
And wow, did I realize how wrong I was.
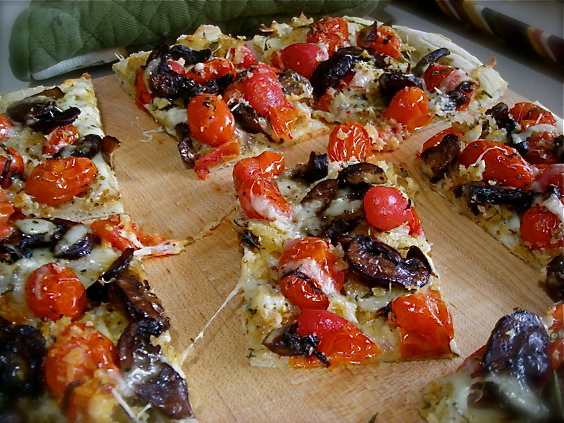
Because all the pizza I’d made involved creating a pie with toppings that baked in the oven. A scatter of diced red peppers, chunks of portabella mushrooms, spinach leaves etc etc…. you place them on the crust and let the oven do it’s work.
This pizza, however, required a bit of foresight. The tomatoes must be roasted ahead of time, and the mushrooms need a nice dousing of good balsamic vinegar and a turn on a superbly hot grill before they can be placed on your pizza crust, covered with a bit of cheese and given a quick dash in to a scorching 500° oven. But the prep is worth it; this pizza has more incredible flavor than what might normally be rendered from placing regular cherry tomatoes and portabella mushrooms on pizza crust.
Recently, I attended a dinner at Levain in Minneapolis, and one of the courses was served with roasted balsamic oyster and shiitake mushrooms. I’m learning to enjoy mushrooms in many forms, having been one of those foods that I simply could not eat for a very long time. But given that I grew up with canned mushrooms in my meals, really, can you blame me? I am a recent convert to balsamic grilled portabella mushrooms at home, loving how flavorful they are, and these mushrooms at Levain delighted me to no end. In fact, many of the other attendees to this dinner stated that these deliciously flavored mushrooms turned them around from their dislike of the fungi and made them happy fanatics. I was in heaven, savoring each tender, savory bite and in the days since, dreamed of those mushrooms gracing my dinner plate.
Then along came this pizza. With tomatoes slowly roasted in the oven until they sizzled and popped. But it needed something else, a rich deep something to balance that tender sweet flavor and these mushrooms, liberally doused in balsamic and olive oil, then cooked lickety-split on a searing hot grill made for a heavenly companion.
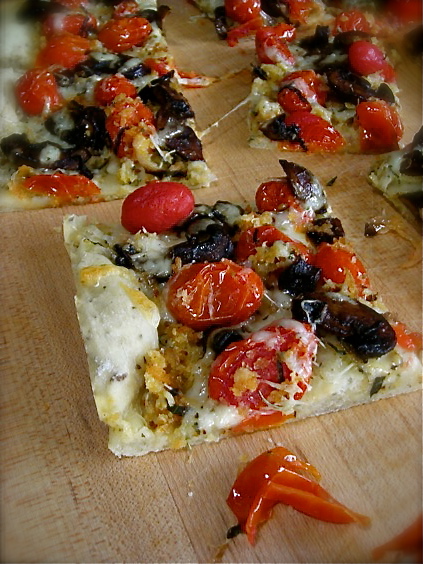
The cherry tomatoes themselves are created with enough flavor to please all on their own; a quick toss with crushed garlic, thinly sliced shallot and a generous handful of panko breadcrumbs, they are then dressed in a bit of olive oil and some fresh thyme and set under the broiler. The heat renders the cherry tomatoes sweeter than you could imagine, with a nice crumb mixture, bits of crunchy shallot and garlic, and here’s where I think the pizza reaches new heights because that browned, seasoned bread crumb on top of your pizza crust makes for a flavor you just can’t get from bread alone.
It all just requires a bit more thought. And every bite is worth it too. Even a few days later as I pulled the last slice from the fridge and ate it cold. It was all worth it.
What’s your absolute favorite way to eat pizza?
Pizza with Charred Cherry Tomato & Balsamic Mushrooms
2 pints cherry tomatoes, washed.
1/2 c. panko bread crumbs
4 cloves garlic, smashed and crushed
2 shallots, thinly sliced
1-2 t. fresh thyme
1 pkg Portabella mushrooms slices
1/4 c. olive oil
2 T. good quality balsamic vinegar
Pizza dough and cheese topping of choice
Preheat your broiler. In a bowl, combine the cherry tomato, panko, garlic, shallot and thyme. Season to taste with salt and pepper and drizzle the mixture with about 2-3 tablespoon of olive oil. Toss gently to coat. Spread mixture on a large cookie sheet and place under the broiler, watching carefully, until the tomatoes begin to sizzle, and brown in spots. It should take maybe 10 minutes or so, being careful not to allow the panko to burn. Remove from the oven and set aside.
Whisk 1/4 c. oil and the balsamic together until emulsified. Pour over the mushrooms in a bowl, and gently toss with a rubber spatula until all the emulsion is absorbed. Do not add more oil or vinegar. The mushrooms can be grilled, or they can also be broiled until they are richly browned and tender.
Heat your oven to 500° and if you have a pizza stone, heat it in the oven for up to 30 minutes. Roll out your pizza dough to desired size and thickness on parchment paper. Scoop some of the cherry tomato mixture on to the crust, then scatter the mushrooms. Add your cheese and place parchment on heated pizza stone. Bake the pizza until crust is golden and topping sizzle. It shouldn’t take long at all.
Original recipe from Food & Wine, with heavy modifications.
Kate says: I used a pizza dough recipe from Cooks Illustrated. Wish I could give it to you but they don’t like it when bloggers share their recipes, the meanies. Any scratch pizza dough you like will work.
|


