April 21st, 2012
| 4 Comments »
If you hang around me and the blog long enough, you’ll realize that I really love quick breads. Scan my Recipe Index and you’ll see the spoils of a bowl of dry, a bowl of wet, a loaf pan or paper lined muffin tins and a hot oven. Some gals get their bake on through cookies, or lofty cakes slathered with buttercream; they perfect treats of sugar and spice, with fondant or piping, bars and brownies worth gloating over. I do love cake, and grew up with a Mom who never bought cookies from a store, rising in the summer before daybreak to bake prior to the sun releasing it’s intense heat on the day. But there’s something magical about a muffin, or tempting tea breads with a perfect moist crumb. I can’t get enough of them.
I’m always paying attention to quick bread recipes, but am often driven to dismay over ones that are choked with sugar and oil. I’ve managed to make a few of these into something a bit more healthy, but these days, I want recipes that offer abundant flavor without the tooth-aching sweetness.
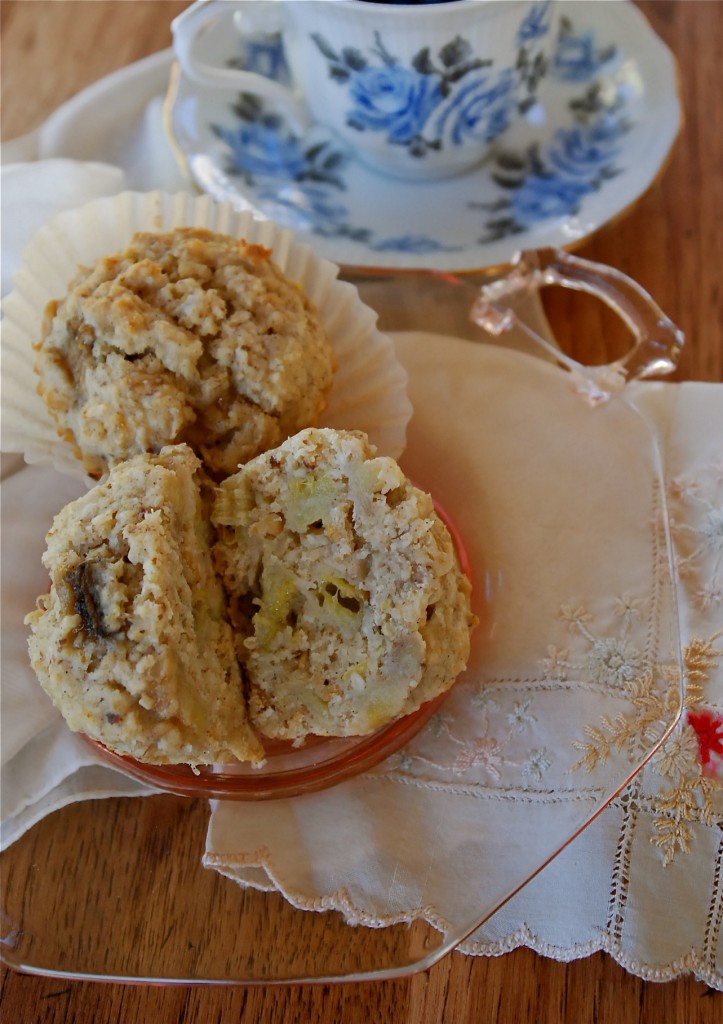
I came across this muffin recipe on The Kitchn and immediately wanted to make it as I’ve sufficiently restocked on Coconut Oil for a while now, and in glancing over the ingredients I was impressed with the amount of flavor these muffins would have, without dumping a ton of sugar in them. They’ve got coconut oil! And flaked coconut!! A vanilla bean! Whole oats! Fruit! What’s not to love?? The original recipe called for mango, so I selected one from the store and a few days later when it was ripe, I began tossing flour and oats together, melting coconut oil and tenuously scraping down the ONE vanilla bean that I had remaining in my kitchen. Then I cut open the mango, and nearly started crying. It was stringy and bone dry inside. I angrily tossed in in the trash, envisioning a few dollars being dumped there, then glanced around my kitchen, studded with lined muffin pans, full bowls and an oven blinking its readiness. What now??
Thank goodness there lay several bananas in the utmost condition for baking in to a tropical themed muffin.
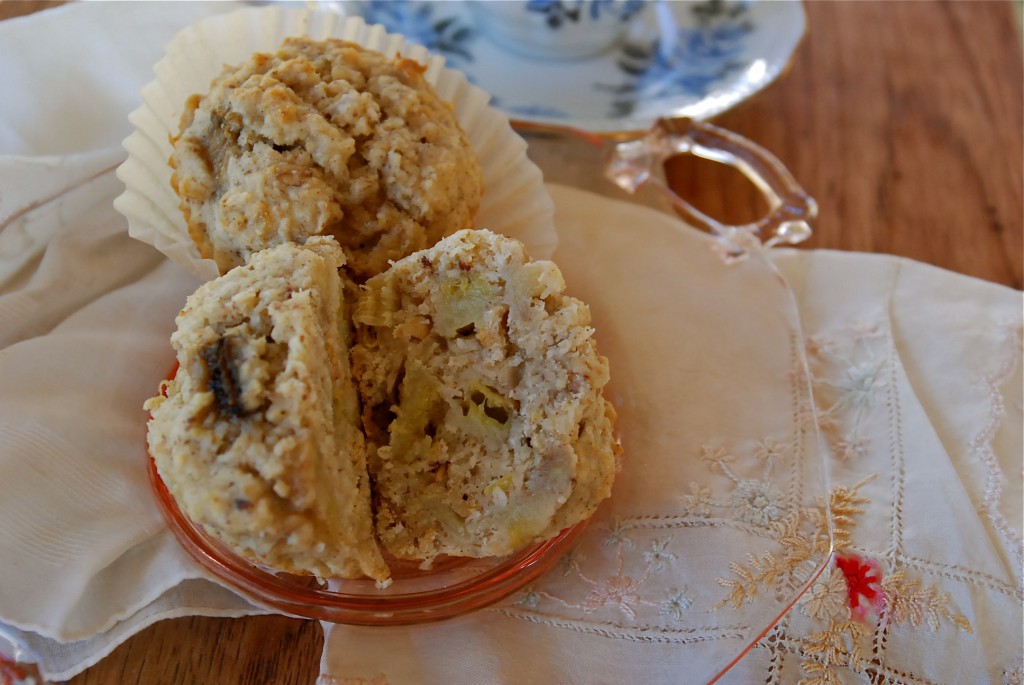
A few deft turns of a sharp knife, and swipes of a rubber spatula to pull it all together and soon I was being treated to the most amazing scent coming from my oven. I know that I should never think that I’ve ever found the most perfect muffin recipe because there is always something out there to top it. Guaranteed.
These moist and perfect muffins are one of the finest I’ve eaten. And I’ve consumed a great deal of muffins. The tender banana chunks in them get sweeter and more intense after a day or two, and the coconut, subtle taste of vanilla and the crunchy oats add oh so much goodness. Although I’m certain that a perfectly ripe and juicy mango would be utterly divine in them, having only a banana to work with was not a step down, by any means. I’d do these again, without one change. They’re that good.
Coconut Oat Banana Muffins
1/2 c. virgin coconut oil
3/4 c. wheat flour
3/4 c. oat flour (you can make this by grinding whole oats in a food processor or coffee grinder)
1/2 c. old fashioned whole oats
2 T. ground flaxseed
1-1/2 t. baking powder
1/4 t. kosher salt
1/2 c. unsweetened flake coconut (if you have the wide flakes, the original recipe called for those; I only had fine)
1 c. full fat sour cream, room temperature (I used Noosa Honey flavored yogurt and would do that again, hands down)
1/3 c. granulated sugar
1 large egg, room temperature
1 t. lemon zest
1 T. fresh squeezed lemon juice
1/4 c. milk of choice (I used vanilla almond milk)
1 split vanilla bean
1 c. diced banana (I used two bananas, which came out to be more than 1 cup)
1/4 c. shredded coconut to sprinkle on top of muffins, if desired
NOTE: You DO want the sour cream (or yogurt) and egg at room temp because if you mix those cold with the melted coconut oil, the oil will just seize back up again. Measure the sour cream and egg in a large 4-cup measuring cup, or small bowl and let it sit on the counter for a few hours.
Preheat the oven to 375°. Line two six-cup muffin tins with paper liners.
Split the vanilla bean and scrape the insides, adding it to the sour cream/egg mixture. Heat the coconut oil gently in a microwave safe container (I did about 40-50 seconds on 60% power) and add the vanilla bean shell to it. Allow the oil to cool, but not to the point of being solid again.
In a medium bowl, whisk both flours, the oats, flaxseed, baking powder and salt together. Stir in the half cup of unsweetened flake coconut.
To the sour cream/egg and vanilla bean mixture, add the sugar, milk, lemon zest and juice. Strain the coconut oil through a wire strainer right into the bowl and whisk to combine everything. Mix this with the dry ingredients until about halfway incorporated, then add the banana and fold gently until everything is uniform. Be sure to scrape across the bottom of the bowl with the spatula to get all the dried ingredients.
Scoop into the muffin tins. You can fill them pretty full, but if you don’t care to, you may need another tin. I filled 12 cups completely full and still had a bit of batter left in the bowl. Next time, I will make them smaller and use another six-cup tin.
Bake for 20-25 minutes until tops spring back when you touch them, or a toothpick inserted in the center comes out clean. Dare to wait until cool enough to eat; they will smell so enticing that you’ll find that to be a challenge.
Original recipe from The Kitchn, here with heavy modifications.
January 18th, 2012
| 7 Comments »
I did not grow up loving mushrooms. I didn’t even like them, not one little bit. But I surely can’t blame myself, for my only exposure to them as a child of the ’70’s was from a can. And I can’t imagine anything more disgusting than canned mushrooms to a kid. No wonder I was never a fan of the fungus.
As I got older, I allowed a bit of mushroom to pass my lips; I loved them sauteed on a burger, or with a grilled steak. Provided I could have something in my mouth with them, they became only slightly more palatable to me, but I still struggled with texture, and that rich, loamy earthiness to them. Cover them with good red wine, and sauté them in copious amounts of butter and it was ok. Just ok though. Still, they weren’t on my favorites list by any means.
Then I had an epiphany, last summer. A major turning point in my culinary taste occurred at one of the wonderful events I attended last year with the Minnesota Food Bloggers group. It was at Cafe Levain in Minneapolis, and Chef Adam Vickerman created grilled portabella mushrooms, richly glazed in balsamic vinegar. I took a few tentative bites of them and my eyes were opened. I was re-born, re-newed and suddenly, all-out crazy for mushrooms. And to Adam’s credit, I’ve been slightly obsessed, and eating them weekly, ever since.
Mushrooms fit well into a healthy eating plan, and that makes them far more desirable given my all-enveloping obsession. Mushrooms have been revered in Eastern culture for thousands of years for their nutritional properties. Mushrooms are low in calories, fat-free, cholesterol-free and very low in sodium, yet they provide important nutrients, including minerals like selenium, potassium, copper, and vitamins such as riboflavin, niacin (the all important B vitamins) and vitamin D. And then there’s beta-glucans- something I’d never heard of before, and according to Mushroom Info:
“Beta-glucans, found in numerous mushroom species, have shown marked immunity-stimulating effects, contribute to resistance against allergies and may also participate in physiological processes related to the metabolism of fats and sugars in the human body. The beta-glucans contained in oyster, shiitake and split gill mushrooms are considered to be the most effective.”
So I can feel good about the amount of mushrooms passing my lips, and I like that. I can incorporate mushrooms in to just about any dish, but I hadn’t really done much with them in a soup so it was fun to come across this amazing Wild Rice & Mushroom soup recipe on The Kitchn, even better that I stumbled upon it as the coldest air of the month landed on Minnesota, making for a perfect backdrop to a steaming bowl of this thick and hearty soup.
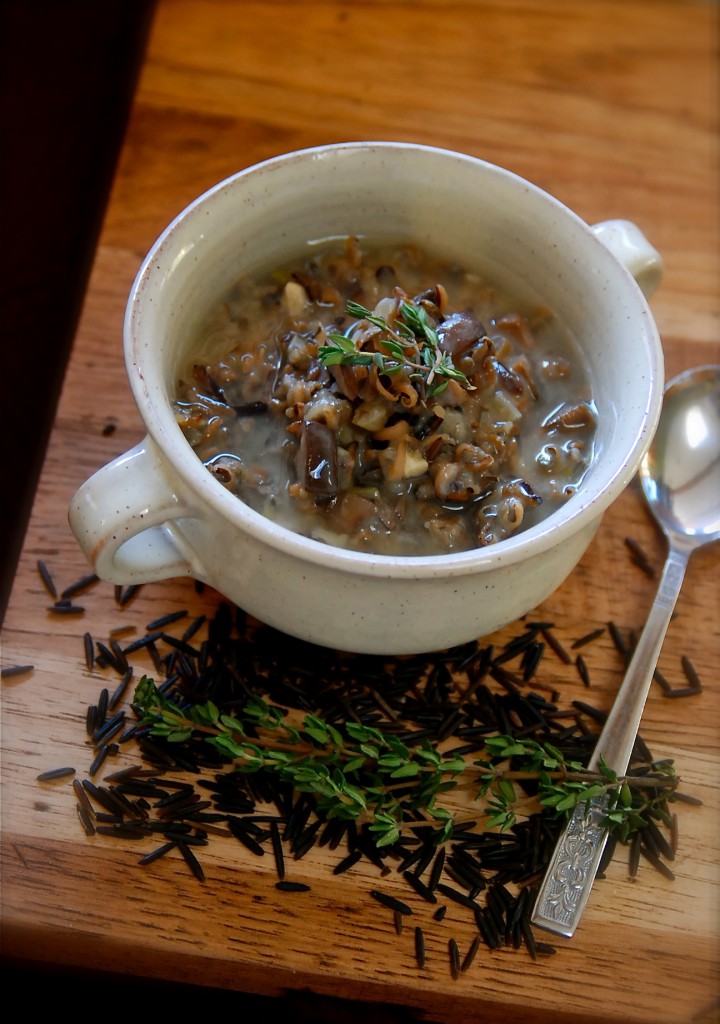
If you love a good wild rice soup with chicken, or turkey, you’ll love this lush recipe, which deeply browns mushrooms to develop their rich flavor. A bath of white wine and some good vegetable broth helps round out the simple but complex flavors. Wild rice was another food item I had to learn how to love, but thankfully, this wasn’t that difficult, and we’ve been enjoying wild rice soups for years. This one, with it deep earthy flavors and thick broth will be on repeat now. We all loved it, and soup is such a good leftover item to have on hand.
Wild Rice and Mushroom Soup
1 c. wild rice, washed
1 large onion, diced
4 celery stalks, diced (I love the flavor of the leaves and used a lot of those)
2 cloves garlic, minced
1 pound of mushrooms, rough chopped (I used baby portabella, but adding some porcini or oyster would be delicious)
1 t. fresh thyme
3 T. AP flour
1 c. white wine (I use pinot grigio in cooking. DO NOT use cooking wine from the grocer. Ugh)
1 Bay leaf
1-2 cheese rinds, optional
2 t. fresh rosemary, chopped
1 c. whole milk or heavy cream (I used a lot less, but adjust according to your taste)
1 T. cider vinegar
Salt and fresh ground pepper
Bring a pot of water to a boil and add the rice with 1 teaspoon of salt. Reduce to a simmer and cook for 40-50 minutes, or until the rice has burst open and is soft. You can leave it a bit underdone if you wish, and cook it to taste with the final soup. Drain the rice, reserving the cooking water to use in the soup if you wish. (I did this. Wow. What a flavor)
Meanwhile, heat a teaspoon of oil in a large dutch oven or stock pot over medium-high heat. Add the onions and celery with a pinch of salt and cook until softened and translucent, about 5-7 minutes. Turn the heat down to medium and add the mushrooms and another pinch of salt. Cook until the mushrooms have released their liquid and start to brown; this should take anywhere from 20-40 minutes depending on the size of your stock pot. I cooked them to a really deep brown. Don’t skip this step as this is where a lot of the flavor of your soup will come from.
Once they are nicely browned, add the garlic and thyme and cook for about a minute. Sprinkle the flour over the vegetables and stir to coat. Stir the flour until the mixture becomes sticky, and no visible dry flour remains. Increase the heat to medium-high and add the white wine. Stir and scrape the bottom of the pan, simmering until the wine has reduced and thickened.
Add the bay leaf, cheese rinds (if using) and stock or the cooking water from the rice. Bring to a boil, then reduce and simmer for about 20 minutes to blend the flavors. Add the rosemary, milk or cream and the wild rice, cooking for another 10-15 minutes, or until the soup has thickened to your liking. Stir in the cider vinegar, season with salt and pepper to taste.
Original recipe from The Kitchn, by Emma Christenson.
***This soup will thicken as it stands, and the rice absorbs more of the liquid. I’ve found that when re-heating it the next day, it tastes best to scoop out a serving and add water to loosen it up.
Linking up to Soupapalooza 2012!!
“Come join SoupaPalooza at TidyMom and Dine and Dishsponsored by KitchenAid, Red Star Yeast and Le Creuset”
January 5th, 2012
| 4 Comments »
The new year is starting out with a bit less motivation than I was expecting. This isn’t such a bad thing; I did have the last five days off work, and after the busy, frenetic pace of the holidays that was a very welcome change. Maybe the sloth that settled on me was just a reminder to take the time off wisely, to relax, regenerate and just be.
But I wanted to cook and I wanted to stretch. I’ve been lacking in the desire to stretch in the kitchen, to experiment with a few recipes that press against the norm of what I’ve been doing lately, which admittedly, isn’t a whole lot. That work thing sort of stunted my creativity for a while, and before that…. well, I was just coasting. But we’re on a fresh calendar page, with new beginnings for everyone; resolves to take a healthier approach to life, to strive for better in our personal lives; I’ve even seen people who are eager to expand their eating repertoire, promising to try one new food item each week. These are resolves I can get behind. And along with continuing on our meat-free journey, I need to explore more options for our meals. Because while soups, meatless chili and braised greens are all tremendous and satisfying, there is so much more in this vegetable world that can be taken on.
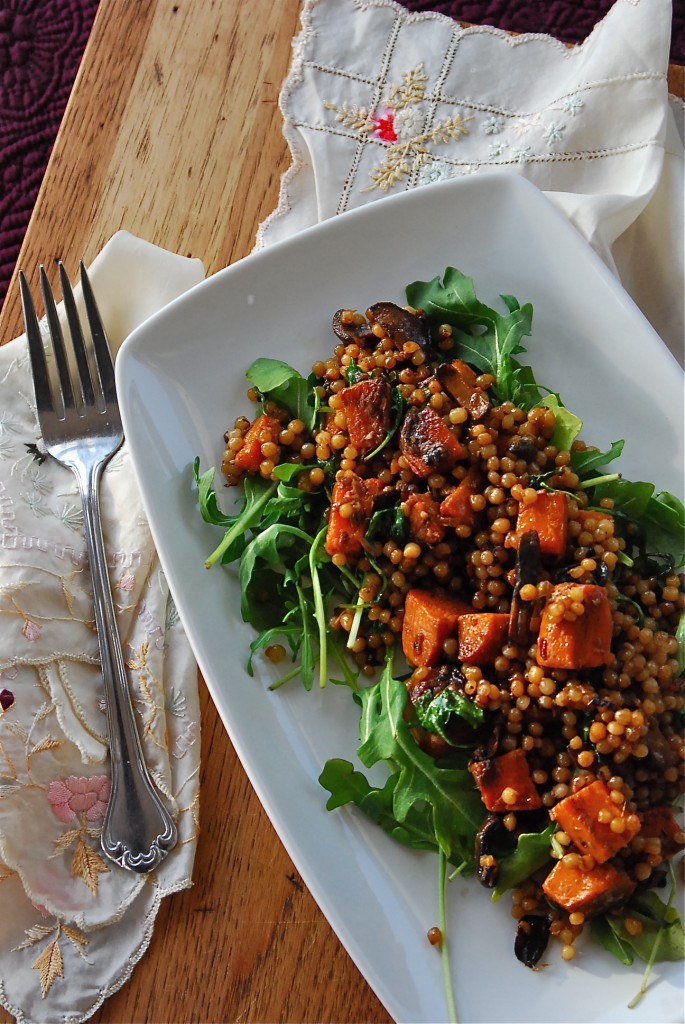
This recipe was bookmarked back in October, most likely. As is the norm, I’m just not sure why I don’t tackle these things as soon as they land in my radar. I could have been enjoying this dish on repeat each week, changing up the vegetables and inhaling it’s deeply dark and sweet flavor through these last few months, but as usual, it languished. And we missed out. That’s too bad. The flavor in this dish was incredible, invading our senses not only as it cooked, but as we gathered over our steaming bowls, forks poised in anticipation. I looked down at my bowl and turned to Mike. “This is a total restaurant dish.” and he nodded as the first bite crossed his lips. His eyes lit up and he smiled.
And there’s another reason why I kick myself for waiting so long to enjoy this. To miss out on seeing that is criminal.
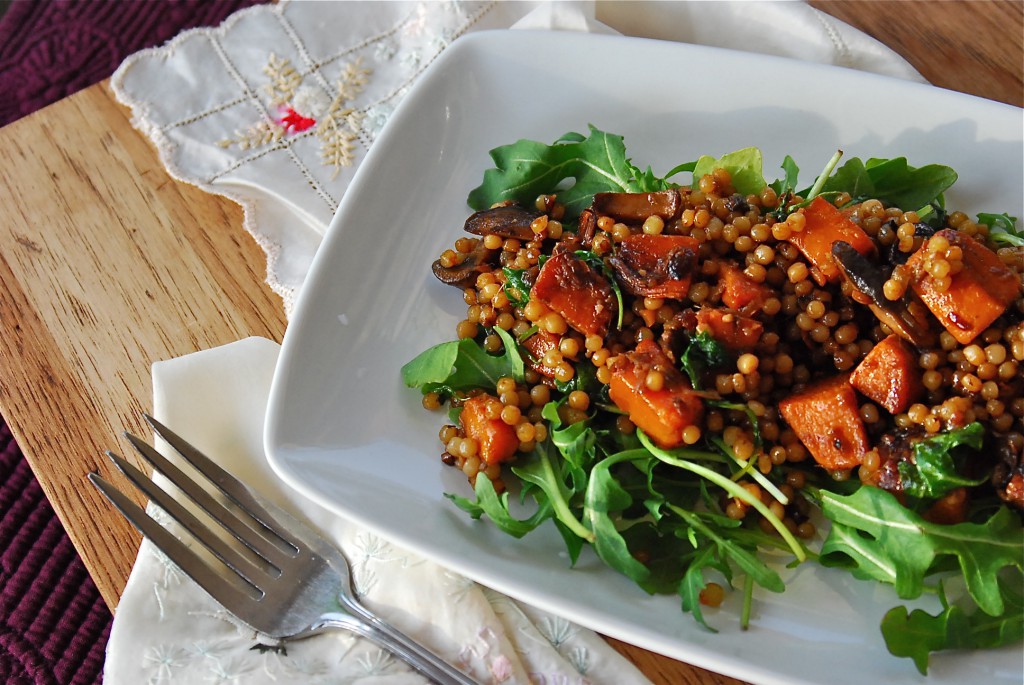
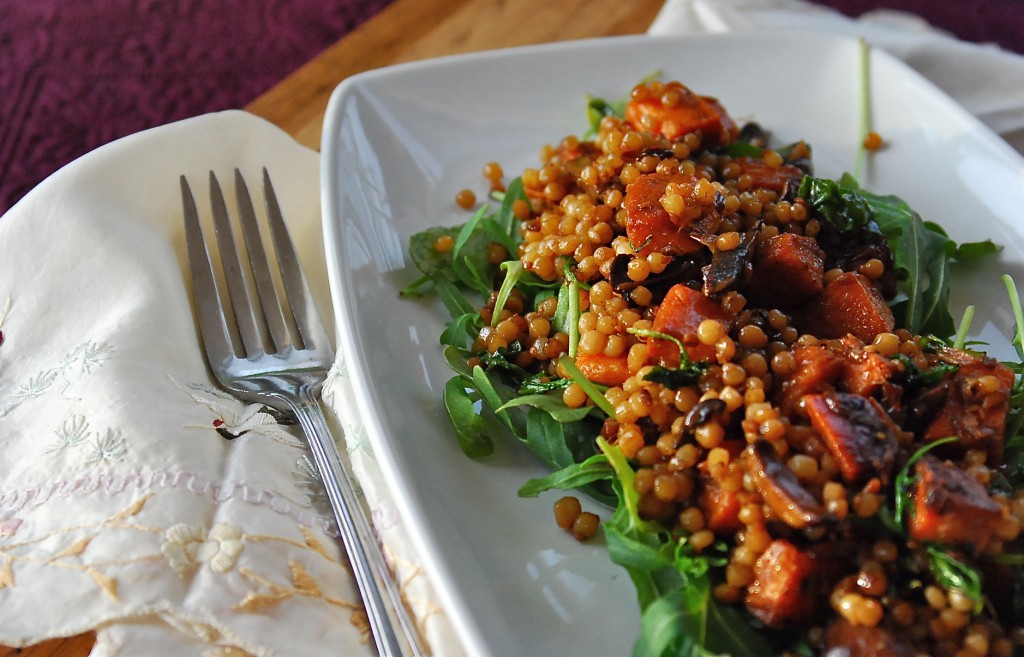
The creation of this dish isn’t difficult; it does require some attention as you methodically caramelize your vegetables in stages on the stovetop. I evolved the process from the original instructions to make it even easier for your average cook. You need a big pan with lots of surface area- I used a 12″ skillet with straight sides- and patience to allow the vegetables to cook, undisturbed, so they achieve that golden flavor and color. The original recipe calls for using orzo, but I’m slightly enamored of pearl couscous these days, so any excuse to throw that in the mix is fine with me. A good hearty brown rice would even work. While there are a lot of steps to this recipe, it flows very well so don’t let the length intimidate you.
Don’t you just love that color? Not only is the dish gorgeous all on it’s own, placing it in the morning sun, as it rose behind a thin band of clouds brought out all it’s burnished caramel-y tones. Even with it being 9:00am when I took these photos, I could have eaten this for breakfast without a second thought. Hmmmm….. don’t mind if I do.
Caramelized Vegetables with Pearl Couscous
Salt
2 c. pearl couscous
Grapeseed, peanut, or vegetable oil
1 large sweet potato (about 3/4 pound), peeled and diced, about 1/4″-1/2″
1 large onion (about 1 pound), finely diced
4 cloves garlic, minced
3-inch piece fresh ginger — peeled and chopped fine, about 1 tablespoon
1-8oz pkg portabella mushrooms, sliced, with stems removed
1 T. balsamic vinegar
2 T. soy sauce
3 big leaves chard or kale, stalks removed and leaves finely chopped — about 2 cups (I subbed in the equivalent of arugula)
Freshly ground black pepper
Parmesan, optional
Heat a large pot of water to boiling and salt it generously. Cook the couscous until barely al dente — about 5 minutes. Drain and toss with a generous drizzle of oil so that the grains are lightly coated with oil. Set aside.
Heat a large sauté or frying pan (the largest you have — you want plenty of room and hot surface) over high heat. Drizzle in a little grapeseed or vegetable oil (not olive oil — you want an oil with a high smoke point) and heat until very hot. Add the sweet potatoes and arrange them in one layer. Cook them over high heat until they are beginning to caramelize and turn brown — about 4 minutes. Flip them over and cook for another 3 minutes or so.
Turn the heat down to medium and add the onions, sprinkling them with about a teaspoon of salt. Cook, stirring occasionally, until the onions are beginning to turn brown. Add the minced garlic and chopped ginger and stir them into the onions. Push the sweet potato and onions to the edges of the pan, making room in the center.
Add the sliced portabella mushrooms to the hot center of the pan and cook them for 4 minutes without turning them. Then flip and stir them and cook for another 4 minutes. Once browned, stir them in to the sweet potato and onions. Keep the heat at medium, or slightly higher. Stir the vegetables occasionally. You want them richly browned.
At this point everything should be getting well-cooked; the onions should be quite dark brown and the garlic should be golden and soft. The potatoes should be softening.
Whisk together the vinegar, soy sauce, and 2 tablespoons of oil. Pour this into the pan with the vegetables and mix everything together, scraping the bottom as you go. Cook all the elements together for about 3 minutes on medium heat. Then turn the heat up to high, as high as it will go.
Add the couscous gradually, shaking in about a cup at a time, stirring and scraping constantly. Cook the couscous over high heat with the rest of the vegetables for about 5 minutes, letting the couscous get browned on the bottom of the pan, then scraping it up. You are developing a little more color and flavor on the pasta, and helping all the flavors combine. (I cooked this a bit longer to get more flavor in the couscous. The browning of it smells glorious)
Finally, toss the greens into the mix and cook for 1 more minute or until the greens are barely wilted. Turn off the heat and taste. Add salt and pepper if needed. Serve hot, with shavings of Parmesan if desired. (We didn’t even consider the parmesan. And I don’t think it even needed it.)
Original recipe from The Kitchn, by Faith Durand. Here with my own modifications.
December 27th, 2011
| 2 Comments »
There isn’t much now, that signifies Christmas was only two days ago, other than the abundance of chocolate in the house, the presence still of a tree with glittering ornaments and other holiday decor. The gift bags are empty and some treasured new items have been absorbed in to our days. Everyone seemed to have a good time this year. The stocking hunt was successful…..

The cats received fun new toys that they enjoyed…..
 
And there was plenty of gatherings, with laughter, delicious food and wine, more cookies than one could shake a leg at, and little children with bright happy faces. But just like that, the planning and preparing and decorating and plotting and going and coming and caroling and waiting waiting waiting was over…… *poof*…… just like that. You wake up on the 26th and it’s back to normal, back to reality, back to work (for some) and another Christmas is done. It seems like so much anticipation, and then in a blink it’s gone.
Some aspects remain, memories made and smiles shared and a new gift to use or enjoy. Or maybe, what remains most prominently is a smidgen of the amazing Cranberry Pound Cake that, on a whim, I whipped together and pushed in to the oven, before dashing upstairs to shower an hour before guests were due to arrive. It was still baking, rich and fragrant and eliciting all sorts of ‘What IS that in the oven?’ queries when my family arrived, and before coats were even shed.
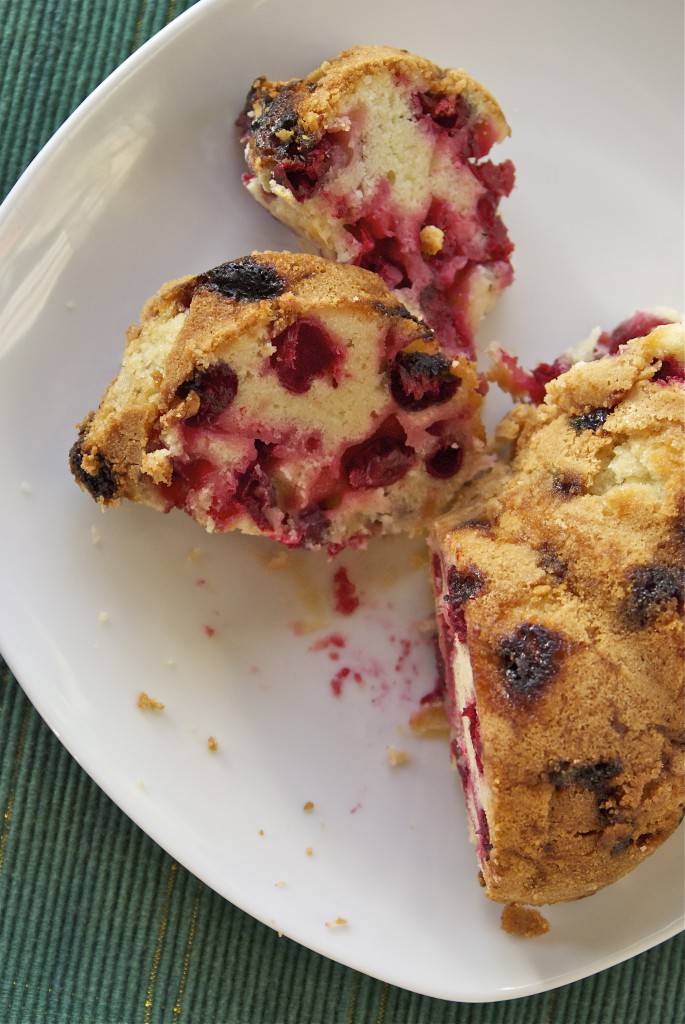
And me, nonchalantly trying to avoid panicking, since the cake seemed off when I shoved the pan in the oven and raced off with a prayer, I just shrugged and said ‘Cranberry cake’ as if I’d just, you know, trimmed a nail or something because I really had little confidence it was going to be worthy of Christmas dessert. It was a blind preparation, something I’d never made before and I had everything I needed and took a chance. It seemed simple enough.
And thankfully, the alchemy of eggs, sugar, butter, flour and a hot oven created a masterpiece that I can’t wait to make again.
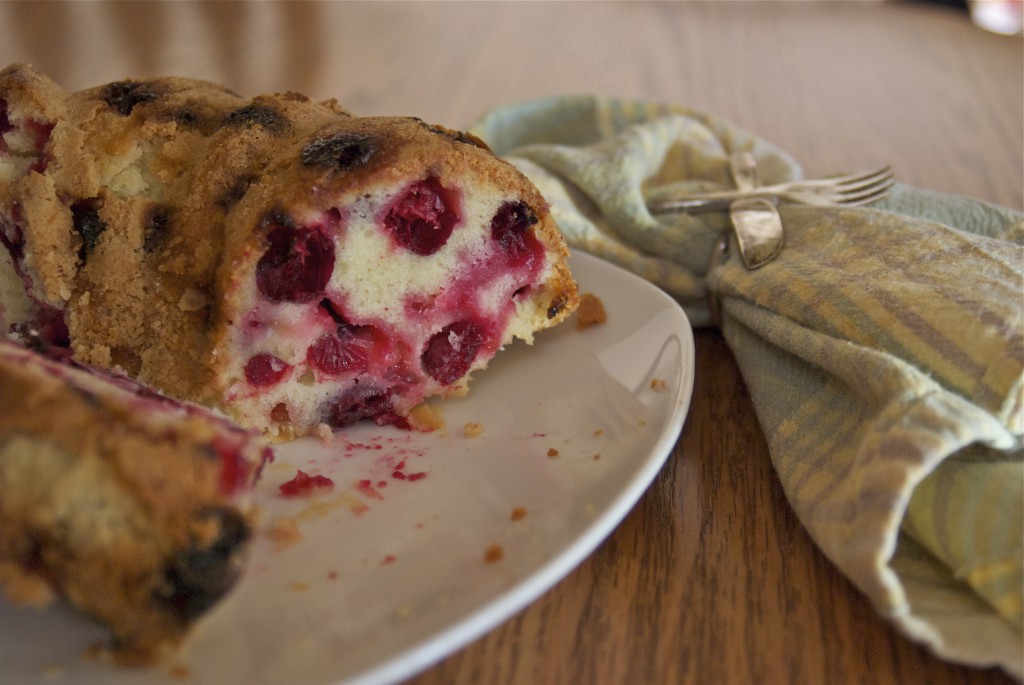
I get a bit overly excited each year when faced with orbs of fresh deep red cranberries in the store, and often stockpile as many bags as I dare in the freezer to use over the winter months. I spotted this recipe at Apartment Therapy (as usual….) and tucked it away to try, then of course, got caught up in the crazy whirlwind of pre-Christmas and neglected to make a dessert for our family gathering. But…. like I said, it worked despite a few reservations. In fact, it worked so well that I already am thinking about another go of it. I mean, by golly the initial cake isn’t even gone from it’s plate and I want another one. That HAS to be a good cake, right? It’s got an amazingly rich, yet light taste and a dense sponge to the cake, sweet but not cloying. Pops of deep cranberry flavor are laced with pure almond taste, and the crumbly sugary crust is simply divine. You could make this for an amazing dessert to impress, or you could just make it for yourself as a phenomenal treat.
Cranberry Cake
3 eggs
2 cups sugar
3/4 cup unsalted butter, slightly softened and cut into chunks
1 teaspoon vanilla
1 teaspoon almond extract (optional)
1 tablespoon kirsch (optional)
2 cups flour
2 1/2 cups cranberries (1 bag)
Preheat oven to 350°F. Lightly grease a 9×13 pan or a 10″ springform pan. You can also use a standard Bundt pan, or 10″ tube pan with removable bottom.
Beat eggs and sugar together for 8-10 minutes —no, this is not a misprint! …. the egg and sugar mixture should double in volume and turn pale yellow, leaving thick and shiny ribbons of batter when you lift the beaters. This is the only leavening in the cake so make it good and fluffy.
Add the butter and flavorings and beat for 2 more minutes. Stir in flour and fold in cranberries. Pour into greased pan.
Bake 45-50 minutes for a 9×13, or a little over an hour for the springform, bundt or tube pan. You made need to tent the cake with foil in the last 15 minutes or so to keep the top from browning too much.
Cool completely before serving.
Optional pecan topping:
1/4 cup butter
1/4 cup brown sugar
1 cup pecans, toasted
Heat the butter in a pan over medium-high heat. Add the sugar and stir. Add the toasted pecans and cook for several minutes, stirring, until the butter and sugar mixture is shiny and smooth and the nuts smell toasted. Spread over the cake batter and bake as above.
Original recipe, from Faith Durand at Apartment Therapy, The Kitchn.
~~~Next time I make this cake, I think the addition of fresh orange juice and freshly grated orange zest would be wonderful. Also, a scant 1/2 teaspoon of fresh grated nutmeg would also be marvelous. So many possibilities!!!
October 13th, 2011
| 2 Comments »
There’s something quite elegant about a dark, almost black molasses cake.
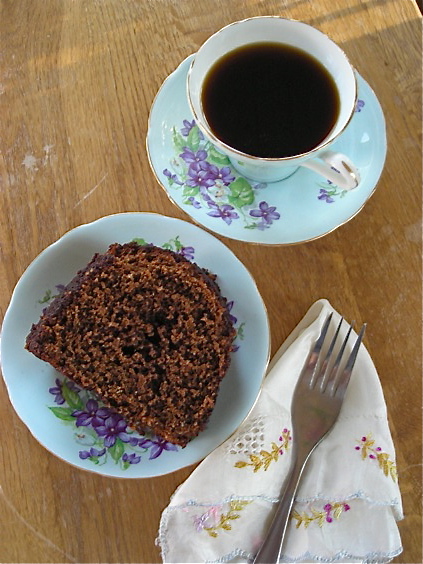
It’s a hallmark of Fall too, even though really, it’s good any time of year. But the cinnamon and ginger have the warm and tranquil feel of a blazing fire, or a maple tree in full color. They speak their spice words and the ones we hear the loudest is ‘Autumn’. Cooler weather means baking. A warm oven is the right means to chase the chill away, and a dark rich molasses cake sits on the counter, awaiting the moment when the dishes are done, the light is gone and the dessert plates come out, forks clinking in anticipation.
Call it gingerbread, call it molasses cake. It’s all the same in my head. And it’s a taste I’ve loved for an eternity, it seems. There is something about that flavor the moment that it lands in your mouth. It’s soothing, again; another impression that tells me of a passing season. A cake to usher in sweatshirt weather, and extra blankets on the bed. We all love these dark and inviting cakes, whether with a scoop of ice cream on top, or yogurt.
I’m not a recipe loyal cook. Ok, I recant; I can be a recipe loyal cook until I see something that I think would be even more amazing and then I try the new option and the old standby gets tossed aside. I’m easy like that. I like to experiment. I like to travel new gustatory paths and explore new tastes. This particular molasses cake has LOADS of molasses- a full 1-1/2 cups. And it strongly suggests you use blackstrap molasses to make it the richest, darkest most lush molasses cake of all time. I didn’t have blackstrap on hand. In fact, I’ve never bought blackstrap molasses. I might. Just to try this cake again in it’s original form, because, to this molasses cake crazy girl, this recipe was one that might never get replaced. It’s that good.
Coming from the kitchn, one can expect a recipe of extraordinary taste. I’ve been a bit hooked on what Faith Durand and Sara Kate Gillingham put forth, finding a great deal of recipes that stretch the limits of normal food items, a wide range of delicious and healthy vegetarian dishes that don’t read like a 1990’s restaurant menu and plenty of kitchen design upgrades that make even the most even-keeled, happy in her place person swoon in delight. And there’s never been a crashing dud in any of the recipes I’ve been bold enough to try. You need to really like your food to love what these ladies do with it, and I appreciate a place that wears like an old friend, a comfortable trustworthy feeling that brings a smile, a lightness to your heart. With so many slap-dash recipe sites out there, finding a trustworthy one that works is a gem.
So…. back to this cake. Did you think I’d forgotten?
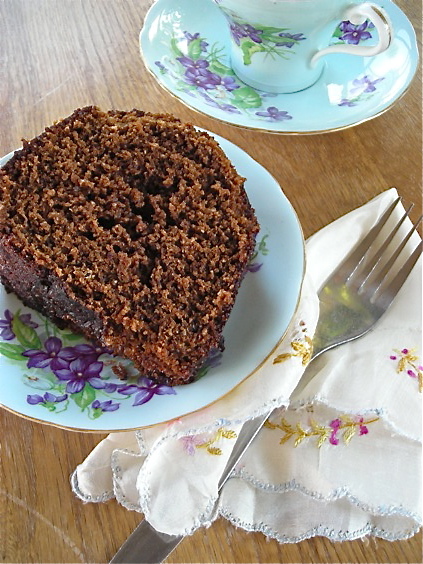
I would never forget to share such a treat with you. Are you a cake and ice cream fanatic? Because this works beautifully with vanilla, or mix it up a bit and go for pumpkin ice cream, cinnamon or when it’s available, try eggnog ice cream for a big decadent kick. It also works to eat it with yogurt, the richer and more dense, the better. A few brandied cherries on top wouldn’t be bad, nor would a turn in a microwave to warm it slightly, after which you drizzle a thin stream of pure maple syrup over the top. And whipped cream! If that’s your thing, you’re in luck. This cake does it all. All the parameters of a good dessert.
And if dessert isn’t your thing exactly, try a piece of this with your morning coffee. You’re welcome.
Dark and Damp Molasses Cake
12 T. unsalted butter, cut into chunks
1 1/2 c. unsulphured dark or unsulphured blackstrap molasses
3/4 c. brown sugar
1/3 c. white sugar
3 1/4 c. all-purpose flour
1/2 t. fine salt
2 1/2 t. baking soda
2 t. ground ginger
1/2 t. cinnamon
2 t. espresso powder (optional)
1 t. vanilla
2 large eggs, beaten
1 1/2 c. whole milk
Heat the oven to 350°F. Lightly butter or grease a standard bundt cake pan.
Place the chunks of butter in a 2-quart saucepan set over medium heat. Pour in the molasses and whisk in the brown sugar and white sugar. Whisk as the butter melts. When the butter has melted and is completely liquid, and the sugar has dissolved and is no longer grainy, give it a final stir and turn off the heat. Set the pan aside to cool. (The molasses will look slightly separated from the melted fat; they won’t be smoothly combined.)
Use a clean dry whisk to combine the flour, salt, baking soda, ginger, cinnamon and espresso powder in a large bowl. (The espresso powder is optional; it will lend one more dimension of flavor to your cake.)
Whisk the vanilla, eggs, and milk into the saucepan with the molasses and melted butter. When it is completely combined, pour this liquid slowly into the bowl of dry ingredients. Whisk thoroughly to combine, making sure there are no lumps.
Pour the thick batter into the prepared springform pan. Bake at 350°F for 45 to 50 minutes or until a tester inserted in the center of the cake comes out clean. Let cool for 20 or 30 minutes, then run a thin, flexible knife around the inside of the pan to help the cakes edges release. Remove the cake from the pan and let it cool completely on cooling rack.
recipe from the kitchn; for a delicious frosting to spread on top of this cake, follow the link here.
|


