January 27th, 2012
| 4 Comments »
January is drawing to a close and we’ve only just now received the first good snowfall to completely cover the landscape. And with only one brief cold snap, where temperatures dropped below zero for a day or two, it really just hasn’t felt much like winter at all. Still, the calendar doesn’t lie, the light still falls off before the dinner hour -although it gets later and later every day!!- and the hum of an oven, concealing something aromatic and delicious is still welcomed in any Minnesota home.
Lemon is everywhere right now. Those bright yellow orbs are certainly popular in the wintertime, bursting forth with that incredible fresh scent. Lemon is like sunshine, and not just from the sunny yellow color; that spritz of luscious lemony aroma that bursts from the rind when you cut into it is a wonderful tonic to the drab and gray of a winter day. I even feel sunnier eating lemon, like the light rays are just pouring through me. And citrus fruits are coming to the cold, lifeless mid-section of the country in all forms; gigantic globes of grapefruit, sunny tangerines, adorable little kumquats and key limes plus endless lemons.
I love to bake with lemon anything, and I particularly love the fresh zest paired with blueberries. But I have to admit that a lemon pound cake can make my knees weak. There is something about that tart bite, and the dense moist crumb that gets me, that makes it irresistible. But I’m not such a huge fan of the calories in pound cake, so finding a recipe that makes a lighter and less caloric version made me eager to try it out. But I had to ask myself…. would this even be worth it? We’ve all had those experiences of finding a less decadent way of baking a prized cake that simply falls flat. I couldn’t stand to be faced with a lemon cake that left me wanting more.
Needless to say, I was not at all disappointed.
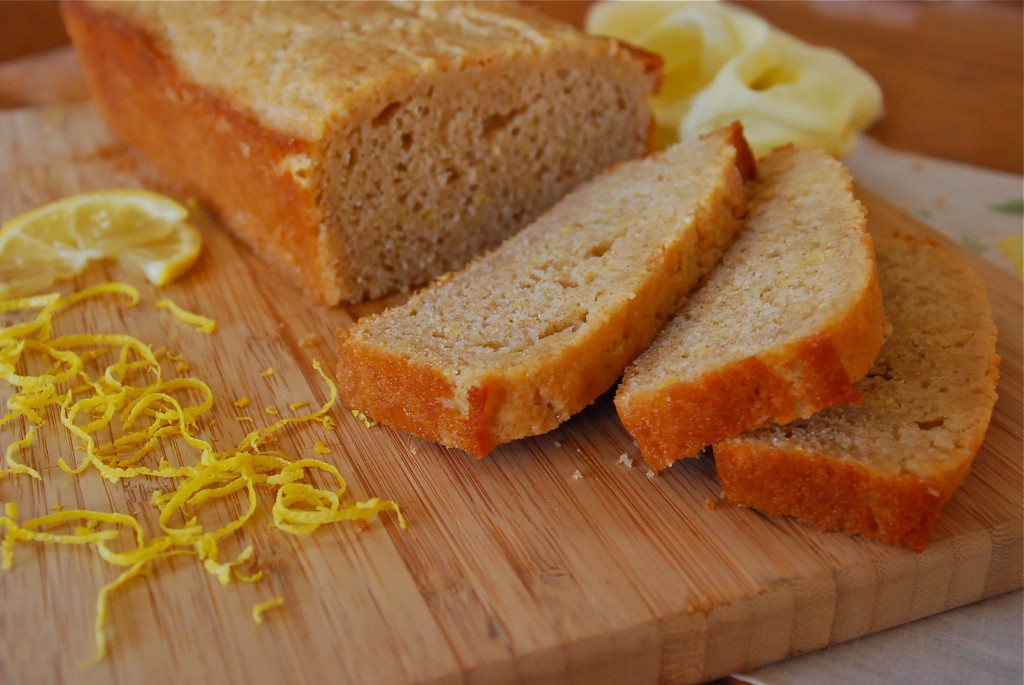
If you didn’t know that this cake wasn’t made with a ton of butter and sugar, you might not realize it at all. It still has that gloriously dense texture that’s rich and satisfying. It still shouts “LEMON!!” with every bite. It satisfies and satiates and makes for a luxurious treat that doesn’t leave you feeling too guilty. There’s a ‘just tart enough’ glaze brushed over the top of it to add even more of that lovely mouth-puckering taste, making the top of the cake nice and soft too, something I love about a good teacake.
The bright and sunny winter day even made the photos look like they were bathed in lemony light.
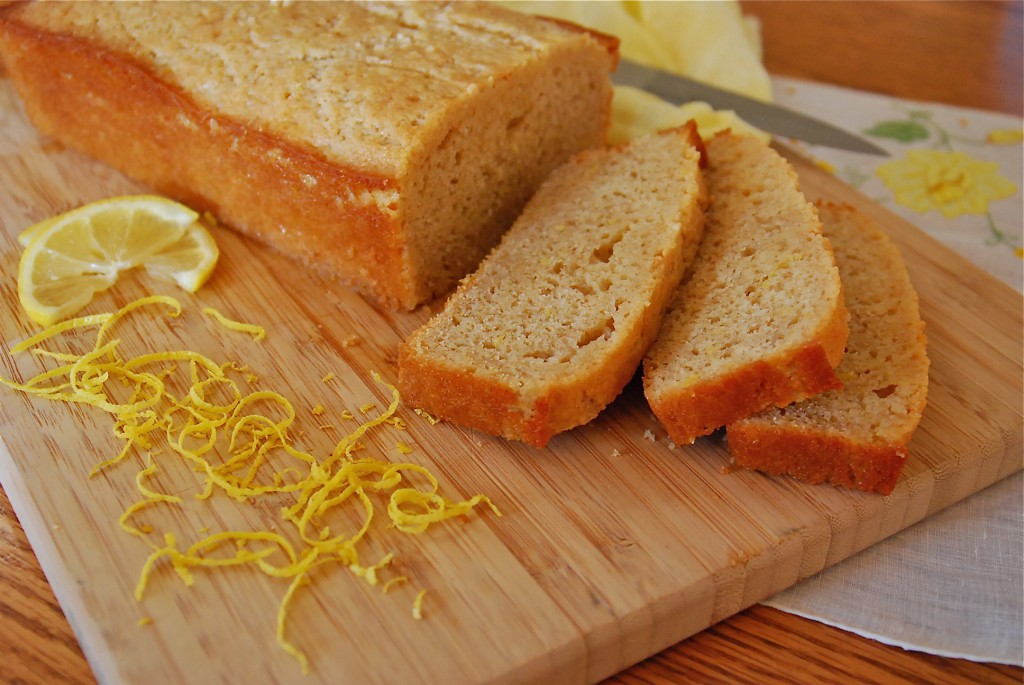
Lemon Pound Cake
- 1 cup whole-wheat pastry flour or white whole-wheat flour
- 3/4 cup all-purpose flour
- 2 teaspoons baking powder
- 1/4 teaspoon salt
- 3 large lemons, divided
- 1 1/4 cups sugar, divided
- 3 ounces reduced-fat cream cheese (Neufchâtel), at room temperature
- 2 tablespoons butter, at room temperature
- 3 large egg whites, at room temperature (see Tips)
- 1 large egg, at room temperature
- 1/2 cup reduced-fat milk
Preheat oven to 350°F. Coat a 9-by-5-inch (or similar-size) loaf pan with cooking spray; dust with flour and tap out any excess.Sift whole-wheat flour, all-purpose flour, baking powder and salt together into a medium bowl.
Finely grate 2 tablespoons zest from 2 of the lemons; set the lemons aside. Beat 3/4 cup sugar, cream cheese, butter and the zest in a large bowl with an electric mixer on medium-high speed until light and fluffy, about 2 minutes. Beat in egg whites, one at a time, beating well after each addition. Add the egg and beat well. Reduce speed to medium and beat in milk; the mixture will look curdled.
Reduce the mixer speed to low and add the flour mixture in 2 batches, beating just until combined and scraping down the sides of the bowl as necessary. Transfer the batter to the prepared pan and smooth the top with a rubber spatula.
Bake the cake until a wooden skewer inserted in the center comes out clean, 45 to 50 minutes. Cool in the pan on a wire rack for 15 minutes. Run a knife around the sides and turn the cake out onto the rack.
While the cake is cooling, squeeze 5 tablespoons juice from the zested lemons. Trim the ends off the remaining whole lemon and very thinly slice; discard any seeds. Heat the lemon juice and remaining 1/2 cup sugar in a small nonstick skillet over medium heat, stirring until the sugar is dissolved. Add the lemon slices and cook, stirring frequently, until softened, about 5 minutes. Reduce heat to maintain a simmer. Use a fork to transfer the lemon slices to a bowl. Continue simmering the syrup until slightly thickened and beginning to turn golden yellow, 2 to 4 minutes
Set the rack over a rimmed baking sheet. Poke holes all over the top of the warm cake with a wooden skewer, 1 1/2 to 2 inches deep. Spoon the glaze over the cake, poking more holes if the glaze does not sink in. Arrange the lemon slices on top. Let the cake cool completely before slicing.
Recipe Notes: I made my cake with the glaze, and not the candied lemon slices. I tried, but they fell apart in the syrup and looked strange so I didn’t put them on the cake. The glaze was good, but I think the cake doesn’t really need it either.
Recipe from Eating Well magazine, posted in original form.
December 27th, 2011
| 2 Comments »
There isn’t much now, that signifies Christmas was only two days ago, other than the abundance of chocolate in the house, the presence still of a tree with glittering ornaments and other holiday decor. The gift bags are empty and some treasured new items have been absorbed in to our days. Everyone seemed to have a good time this year. The stocking hunt was successful…..

The cats received fun new toys that they enjoyed…..
 
And there was plenty of gatherings, with laughter, delicious food and wine, more cookies than one could shake a leg at, and little children with bright happy faces. But just like that, the planning and preparing and decorating and plotting and going and coming and caroling and waiting waiting waiting was over…… *poof*…… just like that. You wake up on the 26th and it’s back to normal, back to reality, back to work (for some) and another Christmas is done. It seems like so much anticipation, and then in a blink it’s gone.
Some aspects remain, memories made and smiles shared and a new gift to use or enjoy. Or maybe, what remains most prominently is a smidgen of the amazing Cranberry Pound Cake that, on a whim, I whipped together and pushed in to the oven, before dashing upstairs to shower an hour before guests were due to arrive. It was still baking, rich and fragrant and eliciting all sorts of ‘What IS that in the oven?’ queries when my family arrived, and before coats were even shed.
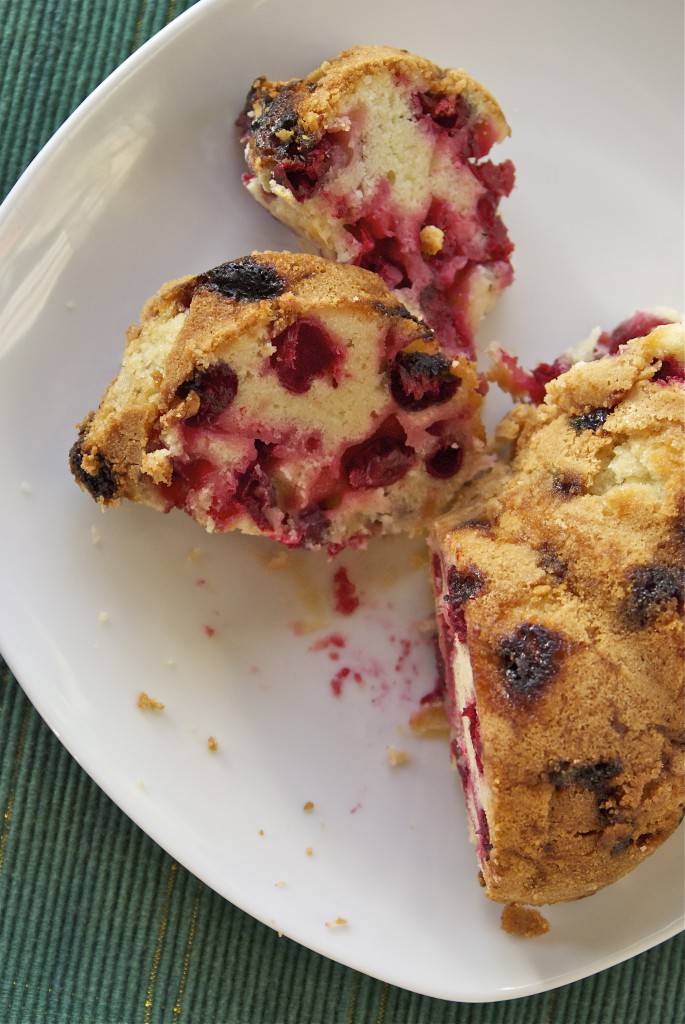
And me, nonchalantly trying to avoid panicking, since the cake seemed off when I shoved the pan in the oven and raced off with a prayer, I just shrugged and said ‘Cranberry cake’ as if I’d just, you know, trimmed a nail or something because I really had little confidence it was going to be worthy of Christmas dessert. It was a blind preparation, something I’d never made before and I had everything I needed and took a chance. It seemed simple enough.
And thankfully, the alchemy of eggs, sugar, butter, flour and a hot oven created a masterpiece that I can’t wait to make again.
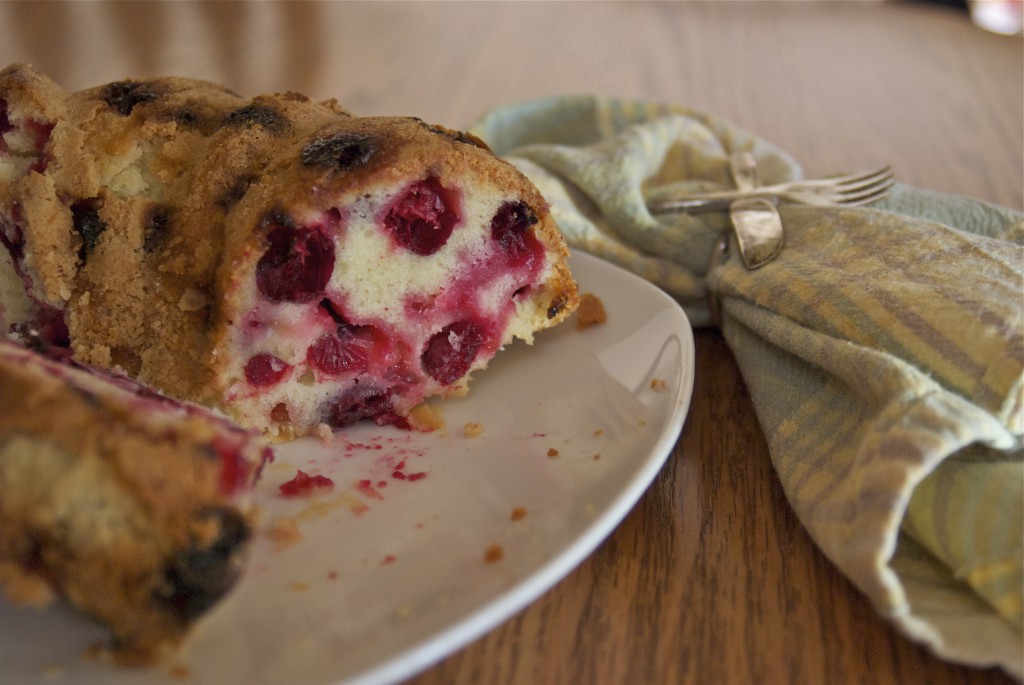
I get a bit overly excited each year when faced with orbs of fresh deep red cranberries in the store, and often stockpile as many bags as I dare in the freezer to use over the winter months. I spotted this recipe at Apartment Therapy (as usual….) and tucked it away to try, then of course, got caught up in the crazy whirlwind of pre-Christmas and neglected to make a dessert for our family gathering. But…. like I said, it worked despite a few reservations. In fact, it worked so well that I already am thinking about another go of it. I mean, by golly the initial cake isn’t even gone from it’s plate and I want another one. That HAS to be a good cake, right? It’s got an amazingly rich, yet light taste and a dense sponge to the cake, sweet but not cloying. Pops of deep cranberry flavor are laced with pure almond taste, and the crumbly sugary crust is simply divine. You could make this for an amazing dessert to impress, or you could just make it for yourself as a phenomenal treat.
Cranberry Cake
3 eggs
2 cups sugar
3/4 cup unsalted butter, slightly softened and cut into chunks
1 teaspoon vanilla
1 teaspoon almond extract (optional)
1 tablespoon kirsch (optional)
2 cups flour
2 1/2 cups cranberries (1 bag)
Preheat oven to 350°F. Lightly grease a 9×13 pan or a 10″ springform pan. You can also use a standard Bundt pan, or 10″ tube pan with removable bottom.
Beat eggs and sugar together for 8-10 minutes —no, this is not a misprint! …. the egg and sugar mixture should double in volume and turn pale yellow, leaving thick and shiny ribbons of batter when you lift the beaters. This is the only leavening in the cake so make it good and fluffy.
Add the butter and flavorings and beat for 2 more minutes. Stir in flour and fold in cranberries. Pour into greased pan.
Bake 45-50 minutes for a 9×13, or a little over an hour for the springform, bundt or tube pan. You made need to tent the cake with foil in the last 15 minutes or so to keep the top from browning too much.
Cool completely before serving.
Optional pecan topping:
1/4 cup butter
1/4 cup brown sugar
1 cup pecans, toasted
Heat the butter in a pan over medium-high heat. Add the sugar and stir. Add the toasted pecans and cook for several minutes, stirring, until the butter and sugar mixture is shiny and smooth and the nuts smell toasted. Spread over the cake batter and bake as above.
Original recipe, from Faith Durand at Apartment Therapy, The Kitchn.
~~~Next time I make this cake, I think the addition of fresh orange juice and freshly grated orange zest would be wonderful. Also, a scant 1/2 teaspoon of fresh grated nutmeg would also be marvelous. So many possibilities!!!
November 30th, 2011
| 5 Comments »
Pretty fantastic ending….. wouldn’t you agree???
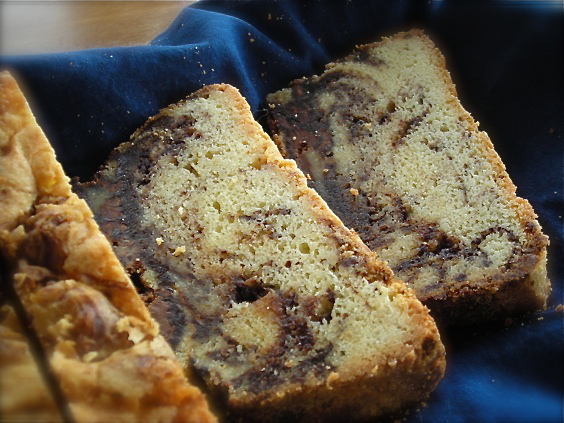
There is a class of food folks that live for dessert. No meal is complete without some amazing sweet at the end of it- a slice of cake, a bowl of ice cream, some creamy gelato, a chewy brownie or a few crisp cookies; there is just no way any good meal is worth it’s weight in gustatory delights without dessert.
I do love something sweet at the end of a meal, but it doesn’t need to be anything very fancy. A cookie or a piece of really good chocolate is sufficient. We don’t have cake around unless it’s a special occasion or I get fixated on bundt cakes, and I can make a slice of banana bread, or sweet potato bread into a delightful ending to a meal. Brownies? Hello! Love them. Still, once I’m through with a wonderful meal, and feel stuffed to the gills with good food, dessert becomes an afterthought.
This Nutella Pound Cake is an amazing dessert. It’s amazing any time of day; with coffee in the morning, with afternoon tea, as a late night snack. It’s perfect because it’s rich, luscious and indulgent, certainly not something out of an ordinary day. Don’t slaughter me…. but I’ve never really been on the whole Nutella bandwagon. I don’t get vapors over the stuff, and once I used part of the jar for this recipe, the rest sat in my fridge and languished, untouched. For more than a month, in fact. This cake was excellent, but it’s a pound cake. Butter. Sugar. What’s not to adore about that? The Nutella was a bonus.
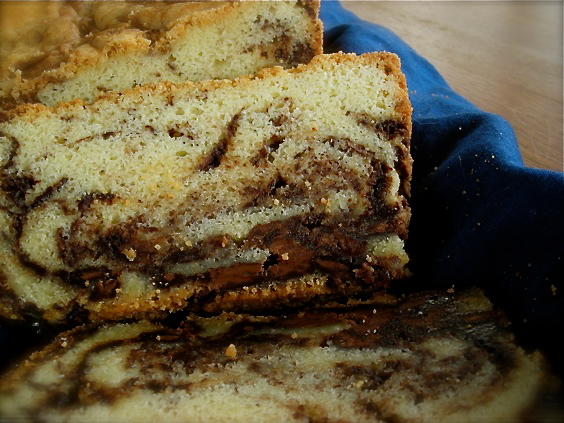
This recipe graced my blog just about two years ago. And I felt it to be a fitting end to National Blog Posting Month, my third go-round of posting every day for November. I’ve shared some good recipes with you, and this one needs another look. It’s that time of year when special treats are brought out, even ones as indulgent as a pound cake with half a jar of Nutella swirled through it. This would be a wonderful treat to make as a gift, or to bring to work to share with co-workers as a means of saying ‘Thank you’ for the past year. Share it with family. Bring a loaf to a treasured friend. Make one for a neighbor that needs a boost, or someone who hasn’t got the ability to make themselves a homemade treat. The recipe can be broken down in to smaller loaf pans, perfect for sharing. And any Nutella that’s left in your fridge? Well, I hope yours doesn’t sit for a month, ignored.
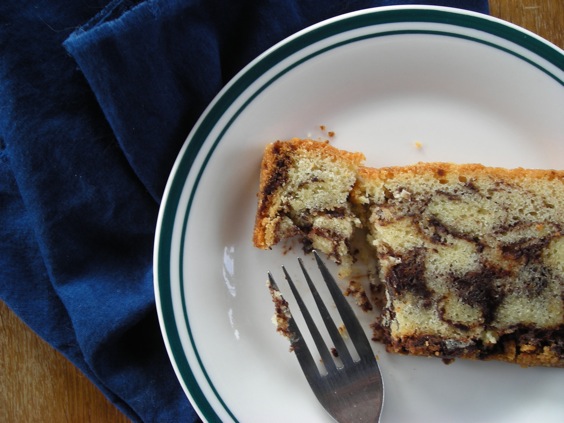
Onward in to December!!!!
Nutella Swirl Pound Cake
4 large eggs, at room temperature
2 t. pure vanilla extract
1-1/2 c. unbleached AP flour
3/4 t. baking powder
1/4 t. salt
1 c. butter, softened
1-1/4 c. sugar
1 13-oz jar Nutella spread
Heat oven to 325°. Spray a 9×5 cake pan with cooking spray. Dust with flour. Fill a bowl with hot tap water and place entire jar of Nutella in it to soften. Place the eggs and vanilla in a small bowl and whisk lightly to combine. Blend dry ingredients together in another small bowl.
In a stand mixer, blend the butter and sugar on medium speed until light and fluffy, about 3 minutes, scraping down the sides at least twice. Turn the mixer to medium-low and add the egg mixture in a steady stream, stopping to scrape down the bowl once or twice. Reduce mixer speed to low and add the flour mixture, about a half cup at a time, scraping the bowl after each addition. After the last addition, blend the full mixture together for 30 seconds on medium speed. {{Be sure to scrape across the bottom of the mixer bowl too. Lots of stuff gets unmixed down in there.}}
Scrape 1/3 of the batter into the prepared pan. Smooth with a spatula. With a clean spatula, spread half the Nutella on the batter and smooth. Add in another 1/3 of the cake batter, then the remaining Nutella. Spread the last of the cake batter on the top. With a clean butter knife, swirl the batter and Nutella together to create a marbling effect. Don’t overmix the two! {{Kate’s Notes: The ‘spreading’ of the Nutella is impossible; try warming the mixture and drizzling it for ease. And I think the cake would come out better if you DON’T swirl the mixture, but that’s just my thoughts}}
Bake the cake until it’s golden on top and a toothpick inserted in the center comes out clean. Cool for 15 minutes in the pan, then turn cake out onto a wire rack to cool completely. This cake tastes excellent after spending a night in the refrigerator, wrapped tight in plastic. I don’t know why. But trust me on that. {{Yes, trust us on this; WAY better chilled. As in OMG I could eat the entire thing COLD it’s so good.}}
From Food and Wine magazine, originally by Lauren Chattman, Cake Keeper Cakes

COMPLETED!!!!
November 17th, 2011
| 1 Comment »
Who doesn’t like a good cake?
 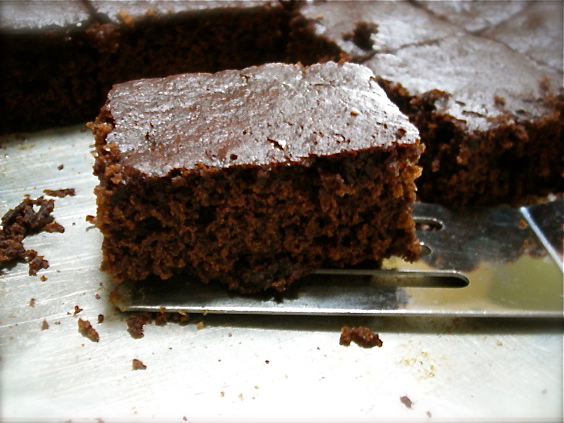
Especially one that combines the best of two important cake flavors; chocolate and gingerbread. I admit a bit of skepticism when I first saw the recipe, but I love chocolate and I adore gingerbread so I took a deep breath and cranked out the recipe.
And then over the course of two days, it magically kept disappearing every time I looked in the pan.
It’s from Martha. Can we really go wrong here? She doesn’t do much that makes me shrug with indifference. And I tend not to favor many of her recipes, but I loved this cake. My guys did too, hence the magic ‘poof and it’s gone’ act. It’s a snack cake, a breakfast cake, a perfect dessert with ice cream or yogurt and it just plain tastes delicious. It’s chocolate. It’s gingerbread. It’s a keeper.
Martha Stewart’s Chocolate Gingerbread Cake
- 4 tablespoons (1/2 stick) unsalted butter, melted, plus more for pan
- 1/4 cup unsweetened cocoa powder, plus more for pan
- 3/4 cup all-purpose flour (spooned and leveled)
- 1 teaspoon ground ginger
- 1 teaspoon pumpkin-pie spice
- 1/2 teaspoon baking soda
- 1/2 cup packed dark-brown sugar
- 1/4 cup unsulfured molasses
- 1 large egg
- 1/4 cup sour cream
- 1/2 cup semisweet chocolate chips
- confectioners’ sugar, for dusting (optional)
- Preheat oven to 350 degrees. Butter an 8-inch square baking pan. Line bottom with a strip of parchment paper, leaving an overhang on two sides; butter paper. Dust paper and sides of pan with cocoa; set aside. In a medium bowl, whisk together cocoa, flour, ginger, pumpkin-pie spice, and baking soda; set aside.
- In a large bowl, whisk together butter, brown sugar, molasses, egg, and sour cream until smooth. Add flour mixture; stir just until moistened (do not overmix). Stir in chocolate chips. Transfer batter to prepared pan; smooth top.
- Bake until a toothpick inserted in center comes out clean, 30 to 35 minutes. Transfer to a wire rack; let cool completely. Using paper overhang, lift gingerbread from pan. Transfer to a cutting board, and cut into 16 squares. Before serving, dust bars with confectioners sugar, if desired. (To store, keep in an airtight container at room temperature, up to 3 days.)
What’s on YOUR plate for November??
{{{Yesterday's post included a pretty awesome giveaway for a gift code to Red Envelope.
Go back and comment on the post for a chance to win. That's all you do!!}}}
October 28th, 2011
| 5 Comments »
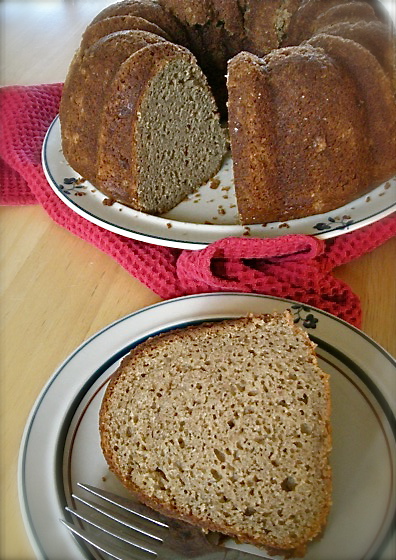
Yes. Another cake. Don’t be surprised if I share even more cake with you over time, as I do love a good moist and tender cake.
And I’m partial to a Bundt cake, for nostalgia reasons. It’s pretty easy to work with, that shape. You get a nice substantial cake that is easy to slice and portion out and with the wealth of lovely artistic bundt pans available, you can make something that looks masterful with nary a hint of extra effort.
And besides, bundt cakes make me think of my Mom. And she would have loved this Nutmeg Cake.
Nutmeg Cake. Not Spice Cake, although that would be appropriate, but no, the predominant flavor of this cake is Nutmeg, also known as Myristica fragrans, a spice that elicited so much adoration and excitement that bloody wars were executed over it to protect it’s production, and Emperor Henry VI had the streets of Rome fumigated with it during his coronation. In the 14th Century, a half a kilogram of nutmeg cost as much as three sheep, or one cow. The Nutmeg tree belongs to the Evergreen family, and as everyone knows, it consists of not one but two spices, as the feathery outer layer is ground up for Mace, while the seed itself is the Nutmeg.
The fruit is light yellow with red and green markings, resembling an apricot or a large plum. As the fruit matures, the outer fleshy covering (which is candied or pickled as snacks in Malaysia) bursts to reveal the seed. The seed is covered with red membranes called an aril, the mace portion of the nutmeg. The nut is then dried for up to 2 months until the inner nut rattles inside the shell. It is then shelled to reveal the valuable egg-shaped nutmeat which is the edible nutmeg. Second-rate nuts are pressed for the oil, which is used in perfumes and in the food industry.
Nutmeg is easily ground from it’s whole form, using a microplane, and purists argue that this is the best and only way in which it should be used. Pre-ground Nutmeg can easily lose it’s flavor, and when you need only a small dose of the spice, grating it fresh is simple; a few passes over the microplane and you’re done. But this recipe calls for 5 teaspoons of Nutmeg. I’d be standing with that microplane in hand for an eternity if I tried to freshly grate all that spice. And for me, Penzey’s West Indies Ground Nutmeg is perfect to keep on hand.
I came across this recipe in a recent issue of Saveur magazine and immediately snipped it out. Although I do know that Nutmeg is not a universally liked spice, for me it’s been a favorite since I was a kid, sprinkling my applesauce with cinnamon and nutmeg. I love it’s quick warm bite, the flick of flavor on my tongue that resonates around.
And it isn’t just for desserts, really. A few pinches of fresh ground nutmeg makes a wonderful addition to any dish with squash in it. It’s necessary for Spaetzle and can elevate a simple cream sauce on pasta to ultra-gastronomic levels. Add a dash of nutmeg to a fruit crisp, sprinkle it in smoothies, grate some on top of your oatmeal or other hot cereal (especially if you add blueberries- there is something so delightful about blueberries and nutmeg together) and of course, with cinnamon, cloves and allspice you get none other than perfect pumpkin pie flavor.
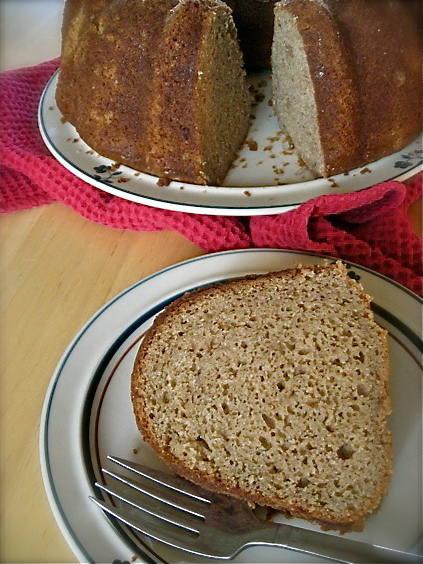
This cake made two appearances in my life in the exact same week. Two cakes, for two occasions. The first one was just the old standard “I Found A Recipe That I Can’t Wait To Try” deal, and the fact that it turned out so incredibly moist and oh so tender, and it was so darn easy to make that I quickly hit ‘Repeat’ and made another one for a ladies only gathering at our lake home. To be able to take a cake recipe and feed it to eight discriminating palates knowing that every one of them would adore it is a big feather in my cap. I loved watching their faces as they took that first bite. These ladies know their food.
And I know my nutmeg. So tell me …. do YOU like nutmeg??
Nutmeg Cake
3 cups flour
5 tsp. freshly grated nutmeg
2 tsp. baking powder
1 tsp. ground cinnamon
3/4 tsp. baking soda
1/2 tsp. kosher salt
12 tbsp. unsalted butter, chilled
2 cups packed light brown sugar
1 1/2 cups sour cream
1 cup milk
2 eggs, beaten
1/2 cup finely chopped walnuts (optional)
Confectioners’ sugar, for dusting
Preheat oven to 350°. Spray a standard bundt pan with cooking spray. You can also use a 9×13 baking pan.
In a medium bowl, whisk together the flour, nutmeg, baking powder, cinnamon, baking soda and salt. Cut the butter into cubes and add to the dry mixture. With a pastry blender (or two forks, or for a load of fun, your hands) cut the butter in to the flour mixture until it’s about the size of peas or smaller. Add the brown sugar and walnuts (if using) and blend with a fork.
In a large measuring cup, whisk together the sour cream, milk and eggs until very creamy. Add to the flour/butter mixture and gently fold together with a rubber spatula, carefully scraping the bottom of the bowl, until the batter is smooth and completely blended. It will be fairly thick. Pour batter into prepared pan. Run a knife through the batter to remove any air pockets, or you can gently drop the pan on the counter a few times for the same result.
Bake until a toothpick inserted in the center comes out clean, about 40-50 minutes for a bundt pan, 25-35 for a 9×13. Allow to cool for 20-30 minutes in the pan (if using a bundt pan) then run a knife around the edges to loosen and turn over on to a plate.
This cake is phenomenal when served warm.
original recipe from Saveur magazine, here with modifications.
March 20th, 2011
| 7 Comments »
More sugar. Must be winter’s end…..
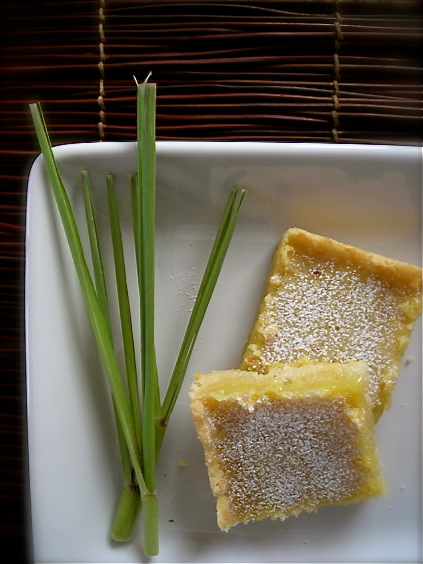
I’ve been lamenting a lack of fresh foods lately. The transition season is approaching rapidly; that between the depths of winter when root vegetables and long slow aromatic braises seem to be the elixir we all need to the first snap of green vegetables that promise warmer days and less outerwear. March comes along and it’s like we all draw a long slow breath, eagerly awaiting the day where the very air shifts and the warmth blows in and we forget about 85″ of snow, the endless drifts, the nerve-wracking commutes. Our winter has been memorable, and it’s a noticeable grimace when flakes continue to fall and the slack jaws at the produce counter scan the same old, same old and try to drum up a different beat for those carrots, the sweet potatoes and rutabagas.
For me, some respite came with one definitive twist of a channel knife, cutting through the thick zest of a fat lemon and releasing the minuscule spray, that spritz of aromatic citrus that at once says to my weary winter white brain ‘Sunshine!’ ‘Warmth!’ Because we all know that those golden orbs carry the very essence of the sun within their tart flesh; with a firm grip they release their juice, carrying an altogether different sensation to our nose. The white of winter, the stinging scent of a fresh snowfall and a glacial chill in the air is quite distinctive, and it settles into us with a thud as those flakes fall, fall and fall, but among that endless snow, the never-ending white, I twisted up a bowl of lemons, ground the zest off their hides and, in addition to all that sunshine filling my kitchen (if I closed my eyes I could see white sand, a hammock and the blue of the Caribbean) I crushed up three stalks of lemongrass, with it’s sharp citrus-y aroma and racy bite and turned it all into the most amazing and tantalizing Lemon Bar I’ve ever had the pleasure of biting in to. Spring is a tease in March; we have days of sunshine, fickle sun, torrents of rain and then a bone-chilling wind descends to remind us that we’re not quite out of the woods yet, so finding this Lemongrass Bar recipe in the current Bon Appetit, with it’s crumbly tender Coconut Shortbread crust was a perfect tonic for the weary landscape of white that turns gray and gritty as we slip through the doorway to another season.
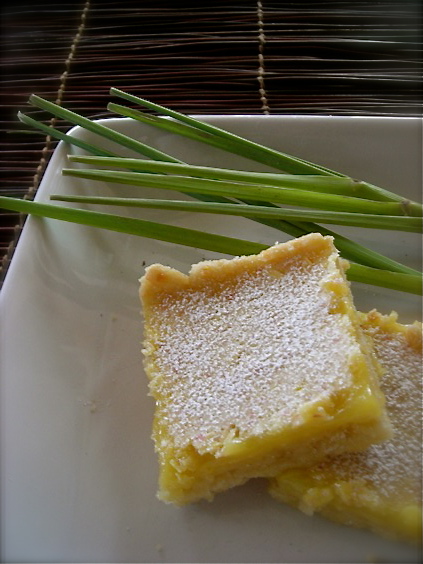
And yes, sugar. Sweet sugar and the tang of lemon, but cut with the flavor of lemongrass, a perennial grass native to the Philippines. Widely used in Asian cuisine is soups, teas and curries, it’s suitable for all meats, and can be made into lemongrass oil which is used as a pesticide and preservative, and is known to have anti-fungal properties. I’ve used lemongrass in savory recipes and love the simple flavor it adds, but the addition of it to these Lemon Bars was genius; the tender white bulb is ground fine with your sugar, then blended with eggs and a little flour to create a luscious filling. The bonus to these bars? Coconut in the crust.
Recently I was given several bags of sweetened shredded coconut that I tossed in the freezer to await inspiration. I do love coconut, but find the sweetened version too overwhelming to add to my oatmeal or muffins as I prefer, but in this recipe, cooked into a tender buttery shortbread crust, it was perfect. With the addition of the lemongrass in the filling, adding an extra level of flavor but without the cloying teeth-clenching sweetness of your standard Lemon Bar, these offered up a nice dose of Springtime to push all thoughts of late Winter faster to it’s timely demise.
Lemongrass Bars with
Coconut Shortbread Crust
Crust:
1-1/2 c. AP flour
1 c. sweetened shredded coconut
1/2 c. powdered sugar
1/2 c. (1 stick) unsalted butter, slightly chilled and cut into chunks
Filling:
1-1/4 c. sugar
3 lemongrass stalks, bottom 4 inches only, tough outer layer removed & finely chopped
6 T. fresh squeezed lemon juice
2 t. fresh grated lemon zest
3 large eggs
1/4 c. AP flour
Heat oven to 350° and spray a 13×9 cake pan with cooking spray.
For the crust, whisk flour, coconut and powdered sugar together, add butter and cut butter into mixture until it resembles fine crumbs. Use a pastry cutter, two forks or knives or your bare hands. Press dough onto bottom, and 1/2″ up sides of prepared pan. Bake crust until golden (edges will darken more) about 20-25 minutes.
For filling: Place sugar and lemongrass in food processor and blend until finely ground, about a minute. Add lemon juice and zest, pulse 3-5 times. Add eggs and pulse to blend. Add in flour, and a pinch of salt. Blend until smooth.
Pour filling over hot crust. Reduce oven to 325° and bake until filling is firm, 20-25 minutes. Cool bars completely in pan then cut to desired shape. Dust with powdered sugar, if desired, before serving.
Recipe: Bon Appetit magazine (with small modifications)
November 17th, 2010
| 1 Comment »
Brownies are awesome, let me just get this out of the way. I can’t think of anything I like more than a good chewy brownie. Especially one from the edge of the pan where there might be a bit of dense crust that gets a little hard, more intensely chewy. Those are the best ones. And a corner piece? Rapture.
I’ve always loved brownies, and all forms of them too. I like them with chocolate chips and without. I like them with toffee bits in them, I like them swirled with cheesecake, studded with some nuts or topped with a thick layer of ganache. I like brownies. And they have a special place in my heart in regards to my child too, because I have the fondest memory of my boy at the tender age of five, with a very loose tooth on the bottom- his first to be exact- and he had taken a brownie that was a little harder than normal since it was a few days old. He was sitting at our tiny little kitchen table happily chewing away when he suddenly got this look on his face that was a combination of panic and elation.
“My tooth came out!” He exclaimed loudly. Then he opened his brownie filled mouth, reached in and withdrew his tooth, holding it out to me in the palm of his hand, thoroughly covered in chocolate. He was thrilled and smiled widely, while chocolate-y drool seeped over his lips. Then he did what any kid in his place does; out of sheer excitement, he opened his mouth to show me the empty gap. Yep. His mushed up brownie filled mouth. He was five. What else do you do but smile and praise him?
And then tell that story over and over again for the next 11 years. I couldn’t help it. What a memory!
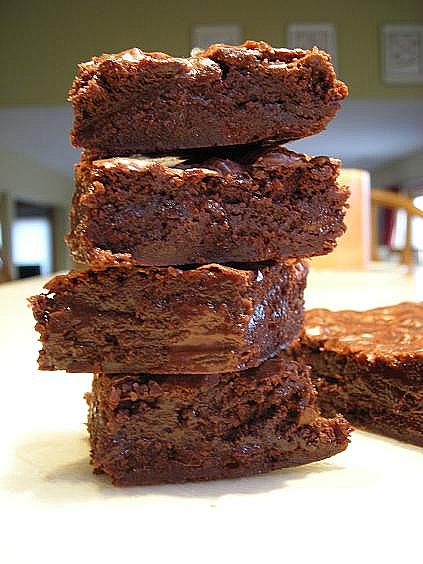
These Brownies likely won’t ever cause a tooth to come out; they’re fudgey, moist and perfectly dense with a delectable chocolate taste. What they are, also, is really low in fat. I like that in a brownie, and I like even more when you get a product that’s low in fat that doesn’t taste that way at all. These are a quintessential brownie experience, a blast of rich chocolate, a sure-fire solution to that sullen mood, crappy day or the loudly demanding desire for something deliciously chocolate.
Indulge at your own risk, and don’t say I didn’t warn you.
Dark Fudgy Brownies
from Eating Well magazine, Jan/Feb 2007
3/4 cup all-purpose flour
2/3 cup confectioners’ sugar
3 tablespoons unsweetened cocoa powder, American-style or Dutch-process
3 ounces dark or bittersweet chocolate (50-72% cacao), coarsely chopped, plus 2 1/2 ounces chopped into mini chip-size pieces, divided
1 1/2 tablespoons canola oil
1/4 cup granulated sugar
1 1/2 tablespoons light corn syrup blended with 3 tablespoons lukewarm water
2 teaspoons vanilla extract
1/8 teaspoon salt
1 large egg
1/3 cup chopped toasted walnuts, optional
Position rack in center of oven; preheat to 350°F. Line an 8-inch-square baking pan with foil, letting it overhang on two opposing sides. Coat with cooking spray.
Sift flour, confectioners’ sugar and cocoa together into a small bowl. Combine the 3 ounces coarsely chopped chocolate and oil in a heavy medium saucepan; place over the lowest heat, stirring, until just melted and smooth, being very careful the chocolate does not overheat. Remove from the heat and stir in granulated sugar, corn syrup mixture, vanilla and salt until the sugar dissolves. Vigorously stir in egg until smoothly incorporated. Gently stir in the dry ingredients. Fold in the walnuts (if using) and the remaining 2 1/2 ounces chopped chocolate just until well blended. It will be VERY thick. Turn out the batter into the pan, spreading evenly.
Bake the brownies until almost firm in the center and a toothpick inserted comes out with some moist batter clinging to it, 20 to 24 minutes. Let cool completely on a wire rack, about 2 1/2 hours.
Using the overhanging foil as handles, carefully lift the brownie slab from the pan. Peel the foil from the bottom; set the slab right-side up on a cutting board. Cut into desired size. Can be frozen. In fact, they are amazing from the freezer. Like killer good fudge.
NUTRITION INFORMATION: Per brownie: 86 calories; 3 g fat (1 g sat, 1 g mono); 11 mg cholesterol; 15 g carbohydrate; 2 g protein; 0 g fiber; 19 mg sodium; 25 mg potassium.
1 Carbohydrate Serving Exchanges: 1 other carbohydrate

November 8th, 2010
| 3 Comments »
From scratch. Yes. Crank up your exercise resolve if you make it.
The Teen and I were searching for some hot fudge to put into a batch of Rice Krispie Bars, and…..
What? Of course, you heard me right!! Silly- I wouldn’t fib about this. Most people just go ahead and use Cocoa Krispies to make a rich chocolate-y version of Rice Krispie Bars, but that’s just SO not me. I go all out people. In the race to decadence, I am the one at the end stretching herself out to knock everyone else out of the running.
But yeah, back to that Hot Fudge. All we found in the store were jars with high fructose corn syrup. I relented and got one that had less of the evil ingredients over the others; still, it wasn’t my first choice. Because you see, I’d forgotten that I had this recipe.
And with thousands of recipes under my belt, do you blame me?
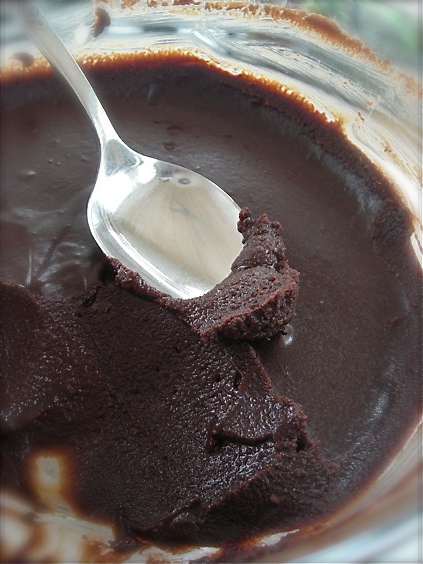
Decadent Hot Fudge Sauce
(from The Silver Palate Cookbook, with adaptations)
4 1-oz squares unsweetened Bakers Chocolate
3 T. unsalted butter (NO substitutions- be WILD people!)
2/3 c. water
1/3 c. sugar
1/3 c. light corn syrup
Pinch sea salt
1 T. pure vanilla extract (or get even more crazy and add real rum, cognac, amaretto……you get the idea)
In a small saucepan over very low heat, melt the chocolate and butter together. Do not stir, but occasionally agitate the pan to distribute the heat. Alternately, you can use a double boiler. In another small pan, bring the water to a boil.
When the chocolate is fully melted, pour the boiling water into it, then stir in the sugar and corn syrup. Stir to combine and bring back to a boil. Reduce the heat so that it simmers gently, but not violently, and allow to boil for about 10 minutes. You can stir it occasionally, but it’s really not necessary. After 10 minutes, remove it from the heat and stir in the flavoring. Allow to cool for 20 minutes or so, then spoon it over ice cream.
This can be chilled too, and reheated in the microwave. Stir to combine before serving. Enjoy it immensely.
A Note From Kate: I do realize this has corn syrup in it. BUT…. it also has ZERO unpronounceable ingredients. I’ll take that over a jar any day.

November 15th, 2009
| 7 Comments »
If you saw a recipe for Nutella Swirl Pound Cake, you’d probably think like I did….
“That has to be amazing…..”
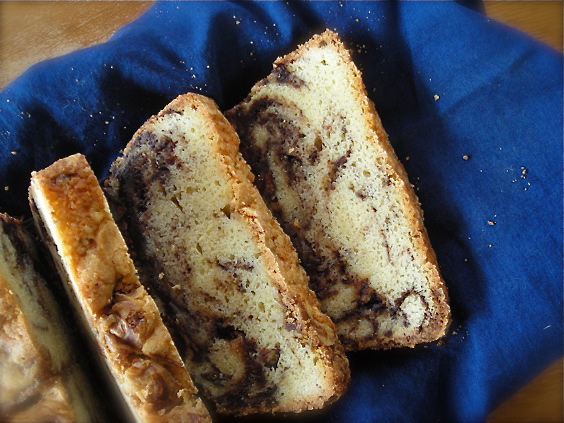 
It was amazing. In fact, amazing or fantastic or decadent or incredible might just begin to scratch the surface of expectation for something with Pound Cake and Nutella in the title. If you’ve got a better description, please share it with me, preferably over a slice of this cake and some dark coffee. I could use some help in making this disappear.
I don’t make pound cakes much at all. I mean, a cake in all it’s sponge-y glory is bad enough, the butter laden, sugar sweetened lofty treat. But a POUND cake? Equal gobs of butter, eggs and sugar that all come together to create a glorious dense concoction not only tastes amazing, but can do incredible things to your thighs. And not many of them good. And with Nutella on top of all that sugar. And butter. To have that temptation around, or get my guys used to such decadence would be evil for all of us. We have no resistance, no self control. I think I’ll stick to cookies. My feet can’t possibly handle all the cardio I would need to do to work off the calories in a cake such as this. I like my waistline.
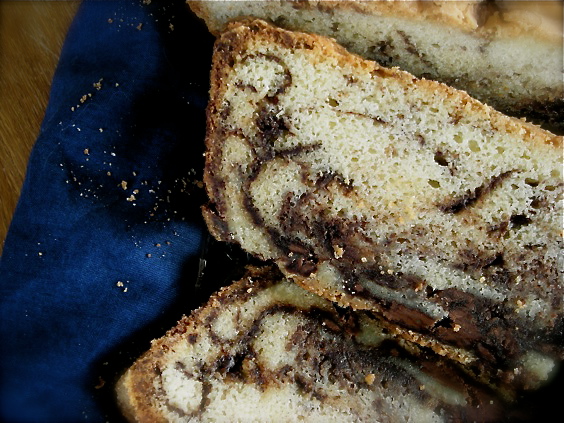
This cake came out of the oven, however, looking anything but fabulous. The top sunk, the crust was really crumbly and it seemed quite fragile. The bottom of the cake fell off as I tipped it out of the pan. But, it was utterly delicious, superbly rich and proof that even when it looks sad and forlorn, what it’s really all about anyway is how it dances across your tongue. It was so tantalizing in fact, once I was done photographing it’s sturdy swirled slices, I promptly wrapped the remainder of it tight and placed it in the freezer. If the threat of tooth-breakage looms, I won’t be so quick to indulge in a stolen bite or two. And my thighs will be pretty grateful for that. I’ll pull it out for Thanksgiving, maybe, or when there’s a need to share something that the comfort of chocolate and sugar, a close friend and a cup of tea can provide is the only requirement necessary.
 
Nutella Swirl Pound Cake
From Food and Wine magazine, originally by Lauren Chattman, Cake Keeper Cakes
4 large eggs, at room temperature
2 t. pure vanilla extract
1-1/2 c. unbleached AP flour
3/4 t. baking powder
1/4 t. salt
1 c. butter, softened
1-1/4 c. sugar
1 13-oz jar Nutella spread
Heat oven to 325°. Spray a 9×5 cake pan with cooking spray. Dust with flour. Fill a bowl with hot tap water and place entire jar of Nutella in it to soften. Place the eggs and vanilla in a small bowl and whisk lightly to combine. Blend dry ingredients together in another small bowl.
In a stand mixer, blend the butter and sugar on medium speed until light and fluffy, about 3 minutes, scraping down the sides at least twice. Turn the mixer to medium-low and add the egg mixture in a steady stream, stopping to scrape down the bowl once or twice. Reduce mixer speed to low and add the flour mixture, about a half cup at a time, scraping the bowl after each addition. After the last addition, blend the full mixture together for 30 seconds on medium speed.
Scrape 1/3 of the batter into the prepared pan. Smooth with a spatula. With a clean spatula, spread half the Nutella on the batter and smooth. Add in another 1/3 of the cake batter, then the remaining Nutella. Spread the last of the cake batter on the top. With a clean butter knife, swirl the batter and Nutella together to create a marbling effect. Don’t overmix the two!
Bake the cake until it’s golden on top and a toothpick inserted in the center comes out clean. Cool for 15 minutes in the pan, then turn cake out onto a wire rack to cool completely. This cake tastes excellent after spending a night in the refrigerator, wrapped tight in plastic. I don’t know why. But trust me on that.
KATE’S NOTES:
I may be labeled insane, but using the entire jar of Nutella is kind of overkill. The first issue is something I saw in all the photos of this cake across the internet, and is evident in mine. The Nutella sinks. It caused the bottom of my cake to scorch slightly, and the bottom fell off when I took the cake out of the pan. I think the same marbling affect could be achieved with less Nutella, and without the end result of it sinking. I think that the Nutella would be utilized better if drizzled over the layers of cake batter, and not swirled with a knife. This is just an opinion. I probably won’t make the cake again to see if it actually would make a difference. Although I might. If I’m desperate.
However, should the bottom of your cake fall off too, do what I did: I used a large spatula to gently scrape the stuck parts out of the pan and then I replaced them on the bottom of the cake. Once wrapped up and chilled, which I can’t recommend enough, it sort of glued itself back together. And despite how high and lofty your cake will look when it comes out of the oven, for whatever reason, it will sink. All the cakes I saw on the internet had the same sunken tops. Don’t despair. It isn’t your fault. It still tastes delicious.
|


