September 20th, 2011
| 6 Comments »
Summer ends when the season ends, some time in the midst of every September. The 22nd? 21st? The sun crosses a time line and the word ‘summer’ is an afterthought, yet for most people, Labor Day signals the official end of the best season Minnesota has to offer. I’m more optimistic. I like to step outside the box, and while others are saying ‘Fall’ when school buses roll down the streets again, I’m still crowing ‘Summer’. I will gracefully extend my white flag of surrender to that mentality, that a season can be marked by milestones instead of days on a calendar, while I straddle the seasons, try to push summer to extend just a bit farther.
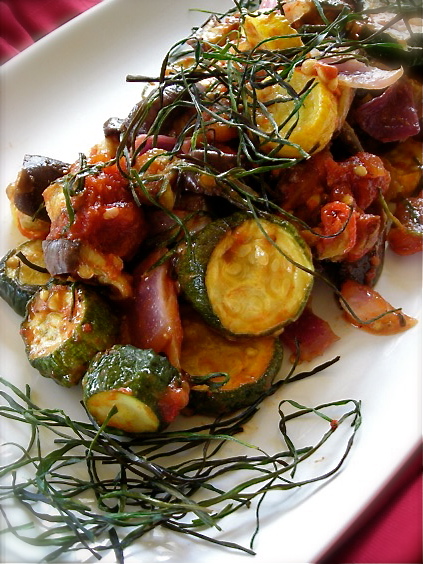 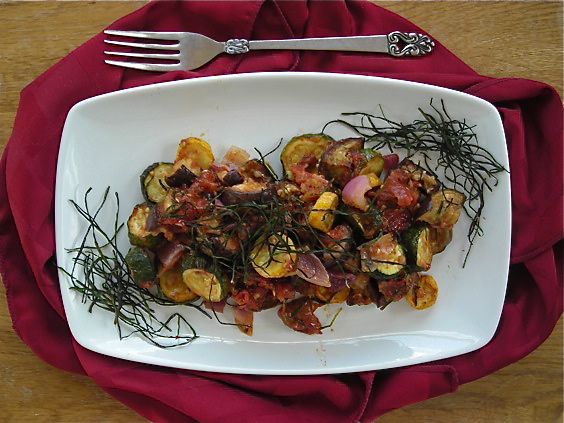
It’s not hard to do when a plate of this Roasted Ratatouille is staring back at you, loaded with late summer tomatoes softened to a deeply flavorful mass, chunks of hearty zucchini and eggplants so perfectly round and unblemished that they look false and plastic, yet yield to a tender flesh so delicious it makes your eyes roll back. I can have my face in Summer, my cheeks enjoying the warmth of the days, while my head and heart charge towards Fall, cool air, a warm humming oven and a comforting meal when the air chills and sweatshirts come out.
This dish, once again as is the case with so many in my adult years, was not something I’ve loved forever, and maybe that’s part of it’s appeal. My Mom used to make Ratatouille when I was young, and my sisters ate it but it always turned me off completely. That which held ruby red tomato and a vegetable with the word ‘egg’ in it just sounded like it would be horrible. I was a picky child mostly due to texture issues, as I have learned; foods like mushrooms, tomato, squashes of all kinds and especially eggplant (an egg? a plant?) are now foods that sweep themselves across my plate on a regular basis, bursting with flavor when once they would make me shudder. I’m so glad to have grown up to learn of their wonder.
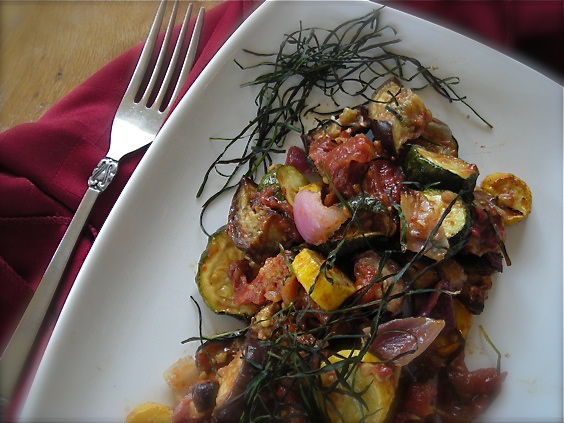
Roasting vegetables is quite possibly my most favorite way to eat them, except for right off the vine. With an enormous bounty of fresh from the Farmers Market zucchini and onions, and the aforementioned eggplants, along with the fattest and juiciest Black Krim heirloom tomatoes to come out of my tiny postage stamp garden, this dish was so loaded with flavor that it made my eyes water in joy. Tomato flavor intensified from the heat of the oven, while the eggplant and zucchini became tender-crisp and then just to make it more interesting, I mix everything together and let it sit overnight in the fridge, just to tease a bit more flavor out, a deeper marriage of September’s taste of the vine. The bowl needed nothing else; no salt or pepper, no added oil or seasoning. Topped with the amazing find of crisp strips of chive thrown on top of the vegetables on a whim, it was a dish that slowly spread a Cheshire grin over my face with each bite.
What a personality too. There’s no stodginess involved here, no set way to consume such a meal; we ate this mixed with pearl couscous (because I am, truly, having a love affair with those tiny grains of pasta) and we ate it atop heady and aromatic polenta studded with corn kernels and flecks of fresh herbs. It would be just at home too, stuffed inside a crisp and warm baguette, layered with provolone cheese for an incredible, messy delicious sandwich. Serve it on rice, or with a simple risotto. Warm it slightly and place it on garlicky crostini for a hearty appetizer or light meal. Or toss it, chilled, with greens and a shower of fresh grated asiago cheese for a salad unlike any other. Mix it with pasta, please; make sure you add a good turn of hard cheese. And if you find yourself late at night, in the kitchen with a fork in hand, a few dips in to the bowl while no one is watching is ok too.
And are you like every other gardener in the state- a pile of chives growing in your garden that you don’t know what to do with? I foolishly planted chives many years ago, which went to seed without me doing anything about it (big, BIG mistake) and now, well now I am fighting off chives with a blowtorch practically, and did you know that if you pluck them they just grow faster? Neither did I, but I’m learning that the hard way. Another thing I learned about chives is that you can blast them to kingdom come with Round-Up, but the little buggers just come back, shiny green and taunting. I’ve learned to hate chives, but a handful of them tossed atop these roasting vegetables made for a crispy and delicious garnish that just might make me a bit softer towards this evil relentless herb. Surprise awaits in the strangest places, doesn’t it?
Roasted Ratatouille with Crispy Chives
2-3 medium tomatoes
1 large eggplant
3-4 small zucchini or yellow squash (2 if they’re larger)
1 large red onion
3 garlic cloves
A generous handful of fresh chives
Olive oil, sea salt and fresh ground pepper
Preheat your oven to 400°. Slice the tomatoes into quarters and place on a baking sheet. Drizzle with about a tablespoon of good olive oil, sprinkle with a bit of salt and a few grinds of fresh pepper. Place pan in hot oven and roast, watching carefully, until the tomatoes begin to soften and the skins wrinkle. You want them to retain much of their shape, but release some of their luscious juices. I don’t roast them for more than 10-15 minutes at that temp. Remove the pan and allow them to cool, then slip the skins off.
Dice the zucchini and eggplant, slice the onion and crush the garlic, placing all of these on two baking sheets. Drizzle with a bit of olive oil, add salt and pepper and roast until the vegetables begin to soften, about 15 minutes. Stir carefully, then return pan to oven for about 10 more minutes. Scatter chives over the top of the vegetables, then roast about 10 minutes more, or until the chives are crisp and toasty, but not black and charred. Remove pans and allow vegetables to cool.
In a large bowl, combine tomato (with any juice from the roasting pan), eggplant, zucchini, onion, garlic and about a third of the crispy chives, reserving the rest for garnish. Gently mix together (I like to use my hands to avoid breaking everything down), taste and season with more salt and pepper if desired. The ratatouille can be eaten as is, warm or at room temp. For deeper flavor, chill the mixture overnight, and allow to warm to room temp the next day before serving.
August 26th, 2011
| 2 Comments »
August is almost over.
And even writing that out doesn’t feel like it’s real. But it is; the month is over next week, then September comes and summer fades into the rear view mirror, leaving it’s fingerprints in our memory, waning like a summer tan. It has truly been an amazing and beautiful summer.
But it’s been a glorious August in Minnesota, a perfect end to this fleeting season. Despite June’s cool weeks, July roared in with it’s searing heat and choking humidity, and storm after storm after storm charged across the sky, darkening the hours, drowning us in rain. And what a delight too. I didn’t water my grass once this summer and it’s stayed lush and green through all the record-breaking heat. That’s pretty rare here. And the abundant rain has turned our surroundings in to a thick rainforest of growth, with a fresh earthy smell that’s nearly intoxicating. August ushered out the heat, and brought us gorgeous sun, endless blue sky and cool nights with fresh breezes. I’ve just fallen in love with August this year. If summer in Minnesota was like this month has been, no one would ever see the need to complain.
Then there’s the bounty, the amazing bounty sagging the tables at the Farmers Markets every week. It’s staggering how much produce is weighing down those tables, with over-loaded trucks parked behind, waiting to dispel their goods. I can take a $20 dollar bill and bring home two big sacks stuffed with food each week. My last trip was so fruitful that I could hardly stagger to the car with my load. And for only $28 dollars, I could have collapsed our kitchen island with the weight.
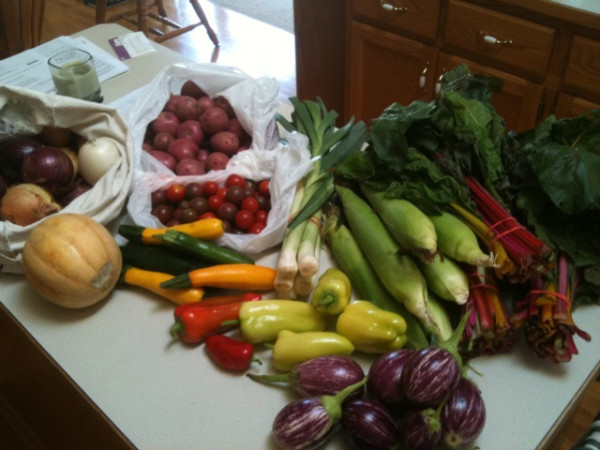
The one item I’ve been a bit disappointed with this season has been the sweet corn. I’ve had more misses with my ears than I’ve had wondrously sweet experiences, and one farmer I spoke to said that the intense heat and heavy rain can cause such quick ripening of the corn that it’s difficult to get it at that sweet tender state that so many people like.
A recent batch of corn that I purchased was a bit too starchy and dry for my liking, but mixed with red pepper, dark green kale and a few handfuls of good cheese, it turned in to a delightful dish that took the focus off the chewy over-ripe corn.
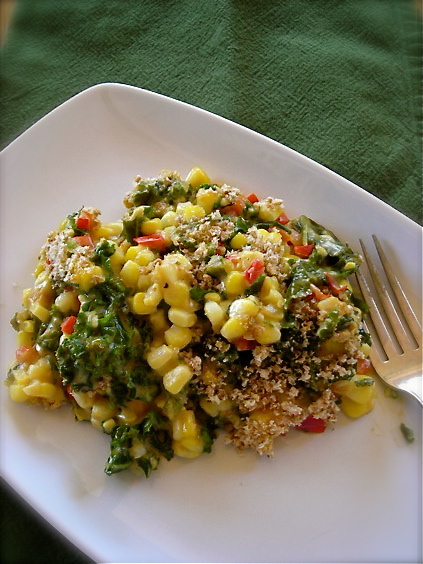
This cheesy baked dish was so yummy, rich with fresh summer flavor. I’d love to try it again, adding more vegetables to it, maybe change the cheese to something stronger, or try it with chard since I seem to have glided up and over the moon for this particular dark leafy green. Did you see in that photo that I bought THREE bunches of it? I am crazy.
But that’s what I need to do; dive head first into these seasonal delights and enjoy them while I can. Like summer, and August, they’ll be fading all too quickly, and I’ll be back in the produce aisle of the grocer, surveying my options, rubbing my arms from the cold, wishing I was dodging sunlight, an overstuffed sack slung on my bare shoulder.
Cheesy Corn and Kale Bake
1 red bell pepper, diced
1 medium leek, sliced thin (or an onion, if you wish)
2 garlic cloves, minced
1 large bunch of curly leaf kale, washed and spun dry then chopped
4 c. fresh corn kernels
2 T. unsalted butter
2 T. AP flour
1 c. milk (i used soy)
1 c. freshly grated cheddar cheese (or mix it up a bit with pepper jack)
1 T. cream cheese (I used sour cream)
Pinch of cayenne pepper
Salt and black pepper to taste
Preheat oven to 375°
In a deep cast iron skillet, or other oven proof skillet, sauté the leek and pepper in a bit of olive oil until soft. Add the garlic and cook, stirring, for about a minute or two. Add in the kale and stir until it’s coated with the oil, then cover the pan and cook for about 5 minutes, stirring once or twice. Scrape veggies in to a bowl and set aside.
In same pan, melt the butter, then add the flour and stir to make a roux. Cook, stirring, for about two minutes to cook out the raw flour taste. Slowly whisk in the milk until smooth, then cook, stirring constantly until the mixture is very thick. It may look a bit reddish brown from the pepper, but that’s just fine. Mix the cheese in a little at a time until you have a nice cheese sauce, stir in the cream cheese and cooked pepper mix, and then the corn kernels. It will be very thick. Season with salt, pepper and the cayenne and spread it evenly in the pan. Place the pan, uncovered, in to the oven and bake until hot and bubbly, about 30 minutes.
Original recipe is from The Kitchn website; I made heavy modifications.
You can use frozen corn in this if you wish, just be sure to run it under cold water to thaw it out, and shake all the extra moisture out before adding it to the cheese sauce mixture.
July 23rd, 2010
| 11 Comments »
No, that isn’t a misprint. I made guacamole on the grill.
See?
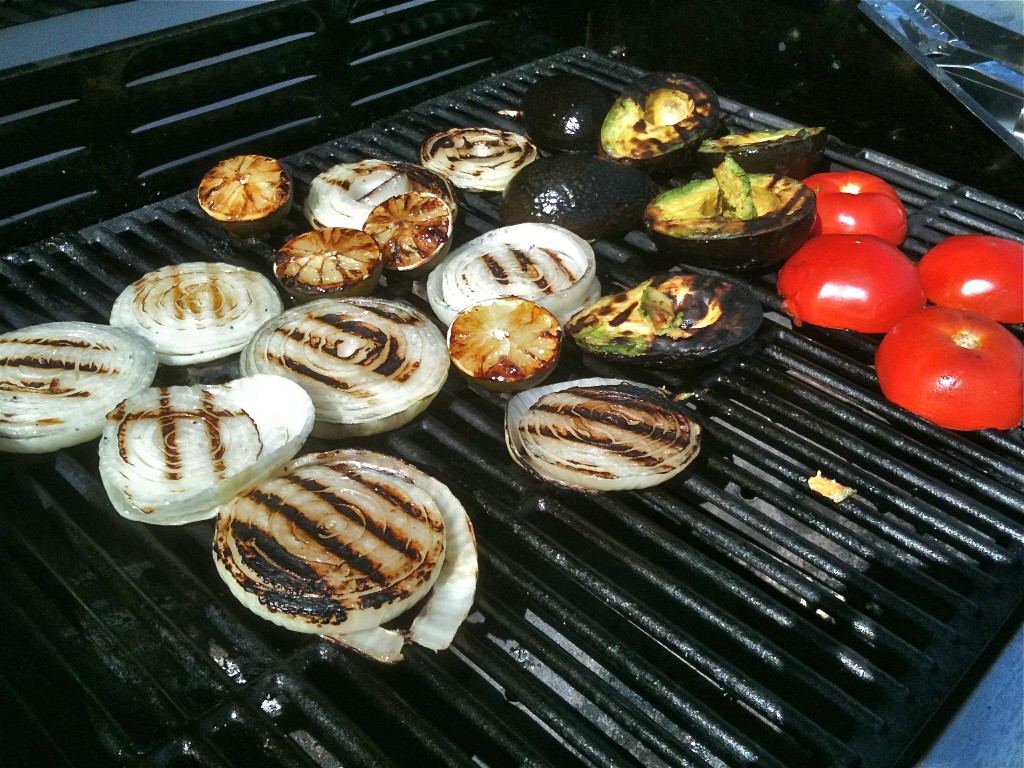
The idea came from The Minimalist’s 101 Grilling ideas column in the New York Times Dining section, and since we’re huge fans of Guacamole in this house, it wasn’t long before the desire to create it, and the assembled ingredients were ready for my initial attempt.
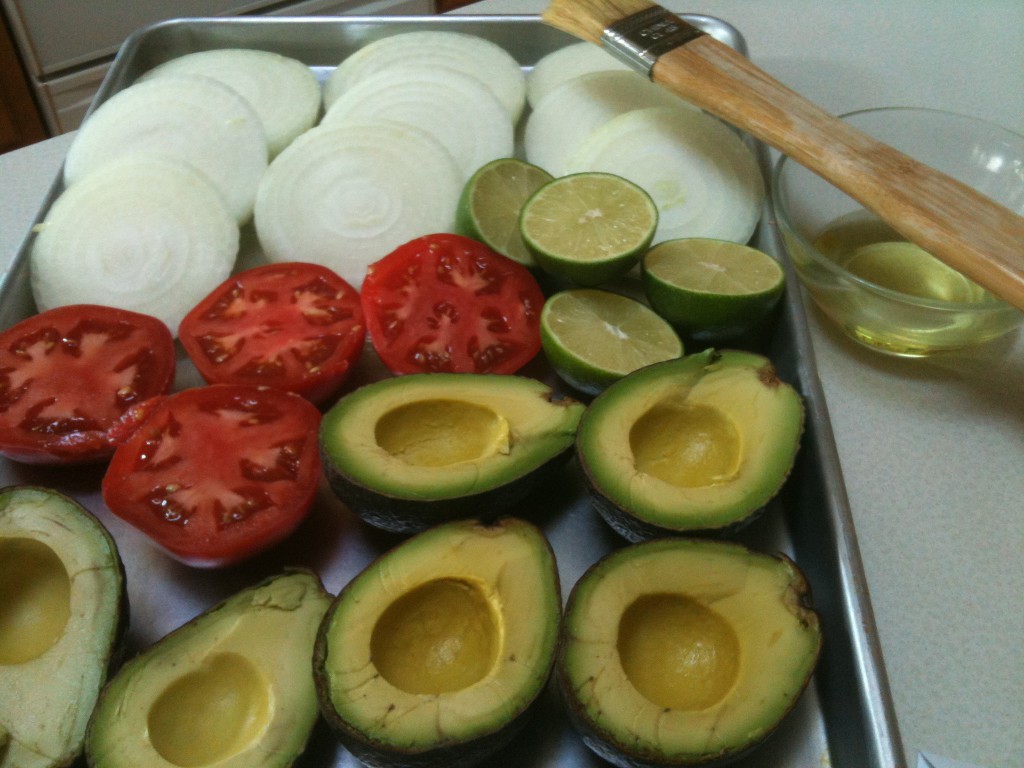
I’m no stranger to grilling onions or tomatoes. In previous summers, I’ve made a topping for bruschetta with grilled tomato and sweet onions that I’ve devoured shamelessly, and this summer for some reason, the desire for grilled onions on any number of dishes has been almost an obsession. I’m finding more and more to like about onions, whether they’re roasted, caramelized in a pan or like this, charred and slightly smoky from the grill.
There’s no technique to making this Guacamole at all. The key is mostly in preparing the items for the grill. Tomato and avocado should be ripe, but not too ripe due to the fact that they soften intensely on the grill. My avocados were more firm than I would have chosen for a standard preparation, but they worked beautifully in the intense heat of the grill. Carve them in half and remove the pit, then brush a little oil over them. Halve your tomatoes, and slice the onions into thick rounds so they are easy to handle. Give those a smear of oil too. And be sure not to forget the limes! They become a sweeter version of their usual tart self from the heat of the flames.
Place all the items face down on the grill. And here’s where your personal preference will come in. Do you like a lightly toasted taste? Or do you prefer a nice grill-marked char? Do be careful about the tomato; if you overdo it, it will collapse into the fire. I prefer to put the tomato on the hottest part of the grill and watch it carefully until I notice the edges beginning to soften just a little, becoming dark where it touches the grill. I flip it over and let it cook for a few more minutes, then remove it to a pan to rest. The skin usually comes off.
For the rest of the items, leave them in place until they are nicely marked and beginning to soften. Turn the avocado over so the peel side is down on the grate and cook them until they become soft and compliant. Flip over the lime halves too so the rind is down, and watch for the pulp to almost collapse. At this point, you’re not going to get juice from the limes, but you will get a deliciously smoky lime pulp for your Guacamole that gives it that familiar and tangy ‘Zing!’ that only a good lime can offer. And those onions can be cooked to any degree you wish.
Once you’ve got all the grilling done, allow everything to cool off. Chop the tomato and onion, scoop out the avocado and squeeze the limes into a bowl. Do be cautious of the amount of lime you put in; remember that the pulp will become more intense from being heated, and you may not need as much as you think. Add in whatever seasonings you prefer.
There was no photo of the finished version of this Guacamole because, well…. Guacamole all mixed up isn’t exactly photogenic. It didn’t look any different than what you would make normally, but the flavor was stunning. Smoky and rich, it had depth that I wouldn’t have imagined Guacamole could have. Everything became sweeter, and deeply flavorful from the heat and flames of the grill. Our love for Guacamole was definitely enhanced by this version. It didn’t last long at all and I can’t wait to make it again.
October 18th, 2006
| 5 Comments »
Enchiladas
Saute one pound of chicken strips or boneless chicken breast until browned, and most of pink is gone. Remove from pan, allow to cool slightly and chop into bite sized pieces. Add one medium chopped onion to pan and saute 5 minutes. Add two chopped bell pepper of your choice and saute 5 more minutes. Stir in one can drained (not rinsed) black beans, one can drained tomatoes, one can drained hominy and one can chopped green chilies. Cook for about 10 minutes to blend the flavors.
Spray a 9×13 pan with non-stick cooking spray. Lay a tortilla in the pan and fill with about a half cup of filling. Sprinkle on about 2 tbsp. shredded cheese. Roll up tightly with the seam down. Repeat until pan is full, or you run out of tortillas or filling. (as an aside- this filling tasted wonderful on a tortilla chip, and we saved some of it for munching!) Pour enchilada sauce over top and add shredded cheese. Bake at 375d until hot and bubbly.
This would be just as good without chicken, and the vegetables can be modified to whatever you like. I have used zucchini, frozen corn and chunks of leftover squash with equally good results. It’s all about what you like.
|


