April 11th, 2012
| 1 Comment »
There’s nothing, really, to making a pan of enchiladas. Tortillas, filling, sauce and cheese, a bit of time in a hot oven and you’ve got a dinner that should please just about anyone. I probably don’t even need to give you a recipe, do I? (but I will…..)
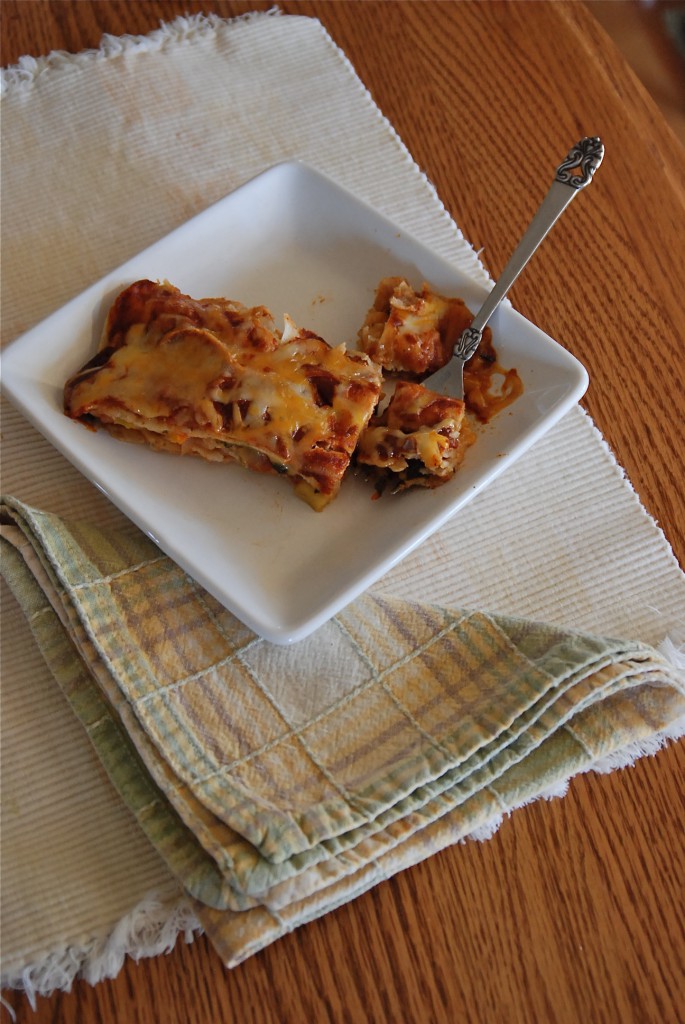
What enchiladas are though, is reliable. At least in my home they are. I know they’re something that all of us will eat without a shred of complaining. And we all need those types of meals in our homes, on our tables and in our back pockets, don’t we? The ones that no one whines over, or rolls their eyes. A meal that everyone will gobble down with reckless abandon. I know with a few peppers, canned beans, frozen corn, a pack of tortillas and a bit of time, that a meal will land in our midst and pull us together, drawing the day to a close. And long before we stopped eating meat, I could make Vegetable Enchiladas and Griffin wouldn’t care one whit about them. Thankfully, that’s still true.
We’ve slipped back to somewhat more normal weather these days, now that April has come and set her softly budding Spring on us. March’s heat wave gave us all a taste of warmth and summer and we all want it back, but these days, the nights come cold and brisk and for me, this past week of frost warnings and cold sunshine was enough to want the oven humming and a warming dish in our bellies. I know soon enough that it won’t feel like these comforting dishes will be necessary, so along with our old reliable Enchiladas, I wanted to have one last send off of a favorite meal before the heat comes and dinner plates are full of fresh and lighter meals.
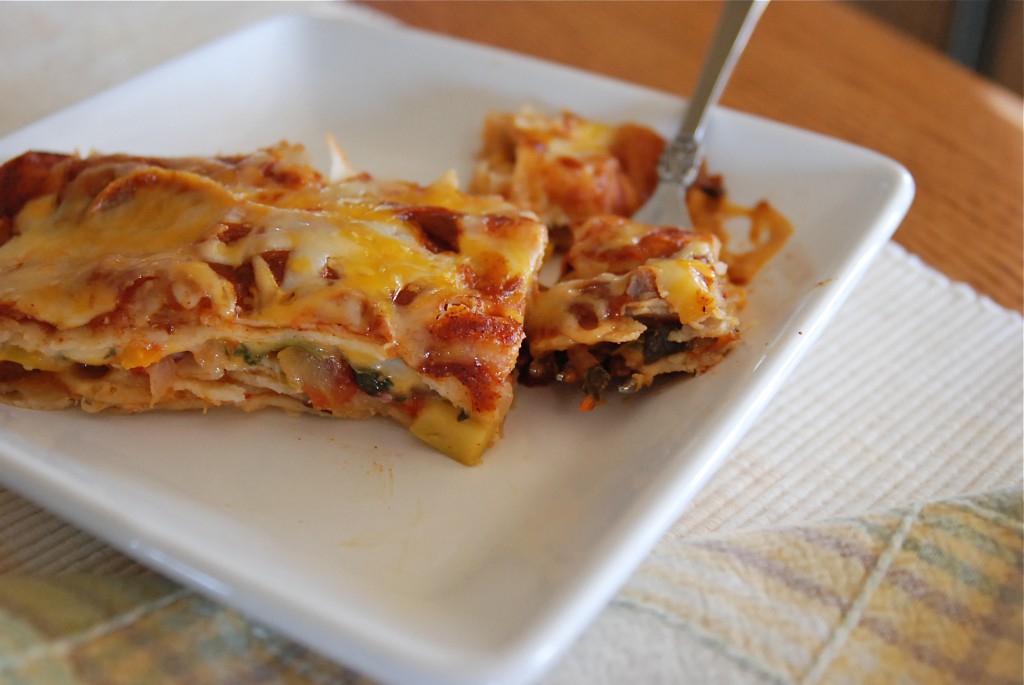
There’s really two ways you can make Enchiladas, outside of choosing between corn and flour tortillas; you can roll up the filling inside the tortillas, or you can layer the filling between the tortillas, creating a more ‘lasagna’ style dish that’s equally as good, and sometimes a bit easier to negotiate out of the pan. I like them both ways, and the ‘lasagna’ method is a bit less work, but if you’ve got willing hands to help, the rolling part happens pretty fast. The best part of this meal is having LOTS of good leftovers, and I think the flavor gets much better overnight.
And as for sauces….. I’ve never made an enchilada sauce from scratch that even came close to tasting like a few canned varieties I’ve found. My go-to brand of enchilada sauce is Carlita; it’s a deep, rich red sauce that’s got just the right amount of seasoning and spice. Las Palmas is another good option; they’ve got both red and green enchilada sauce, and have a Mild, Medium or Hot option. The Medium is plenty for us, and their green enchilada sauce is really amazing.
(disclaimer: nobody paid me to say that, or gave me free products to say that. Just so you know)
Vegetable Enchiladas
2 bell peppers, cored, seeded and diced (any color you choose)
1 large yellow onion, diced
2 cloves garlic, minced
1 jalapeno pepper, cored, seeded and diced (like it spicier? make it a serrano)
2 small zucchini, peeled and diced
1 c. frozen corn kernels
1 15-oz can black beans, drained and rinsed (can sub any kind, really)
1 15-oz can fire roasted tomatoes
1 T. chili powder (can sub in canned chipotle in adobo if you have it on hand- it’s a wonderful flavor)
1 T. ground cumin
2 c. washed and finely chopped spinach, chard or beet greens (optional, but it adds a good amount of flavor and nutrition)
8-oz shred cheese of choice
1 15-oz can enchilada sauce of choice (you can use two if you like a lot of sauce)
Tortillas of choice (use the small 6″ corn, or the 8″ flour; you’ll need 12-15 corn, 10-12 flour)
Oil of choice for cooking
Spray a 9×13 baking pan with cooking spray. You may have enough filling to make more enchiladas, so have a smaller pan at the ready, like an 8×8. Heat the oven to 400°. Have your tortillas on the counter to warm slightly as they’ll roll better, but if you’re using corn tortillas, don’t leave them uncovered or they will dry out.
In a deep skillet with a cover, heat a bit of oil and add the onion. Cook about 10 minutes, or until softened and then add the bell pepper and jalapeno. Cook, stirring occasionally until the peppers begin to soften. Add in the garlic, zucchini, frozen corn and canned beans. Stir it all together and get it simmering. Cover the pan and cook for about 10 minutes. Stir in the greens, cover and turn off the heat. Let stand for about five minutes.
Place a tortilla in the pan and drop a few tablespoons of shred cheese down the middle. Spoon some of the filling in (the amount depends on the size of your tortilla) and spread it to the edge. Gently roll the tortillas up, making sure the seam side is down. Repeat until the pan is full. The tortillas can be moved closer to one another as your roll. You want them pretty snug, but not crammed in the pan or it will be impossible to get them out.
Spoon the sauce down each tortilla, spreading it out as you go. They should be well covered. Sprinkle the top with cheese and cover with foil. Bake for about 20 minutes, then take the foil off and allow the cheese to brown just a bit more. Thirty minutes should be plenty of time. If you allow the Enchiladas to sit for 10-15 minutes, they are A LOT easier to get out of the pan.
These are delicious served with avocado, sour cream, or both.
KATE’S NOTES: To make Enchiladas ‘Lasagna’ style, lay the tortillas on the bottom of the baking pan. Spread some filling over them, then top with a bit of cheese and a drizzle of sauce. Layer more tortillas and repeat. You should be able to get at least three layers, finishing with sauce over the top, and cheese before baking. Allow this to also sit for a spell before cutting in to squares.
If you wish to add meat to the filling, please do so. I used to make these all the time with chicken, and once in a while with pork or beef. One pack of boneless skinless chicken breasts is perfect; dice them, and sear the meat in with the onions, then proceed with the remaining steps.
Any leftover filling is wonderful for breakfast. I had about 1-1/2 cups left from this meal, and for breakfast I heated it in a pan then cracked two eggs in it, covered the pan and cooked it for about five minutes. I scooped it on to a plate that had a handful of tortilla chips on it. It was the finest breakfast I’ve had in a long time.
February 10th, 2012
| 4 Comments »
There is something so perfect about a pot of soup, one that steams and seems to sing from the stovetop, humming it’s warmth throughout my kitchen, through my skin and right in to my bones. I feel the need for soup, sometimes as deep as the roots of my hair and permeating outward, and as any good Midwestern girl knows, when the cold winds scour you down and the light is so flat and gray and weak that it makes you weary and drawn, then soup, in all it’s aromatic glory and flavor, can be a shot of lifeblood that runs through you, chasing the chill away.
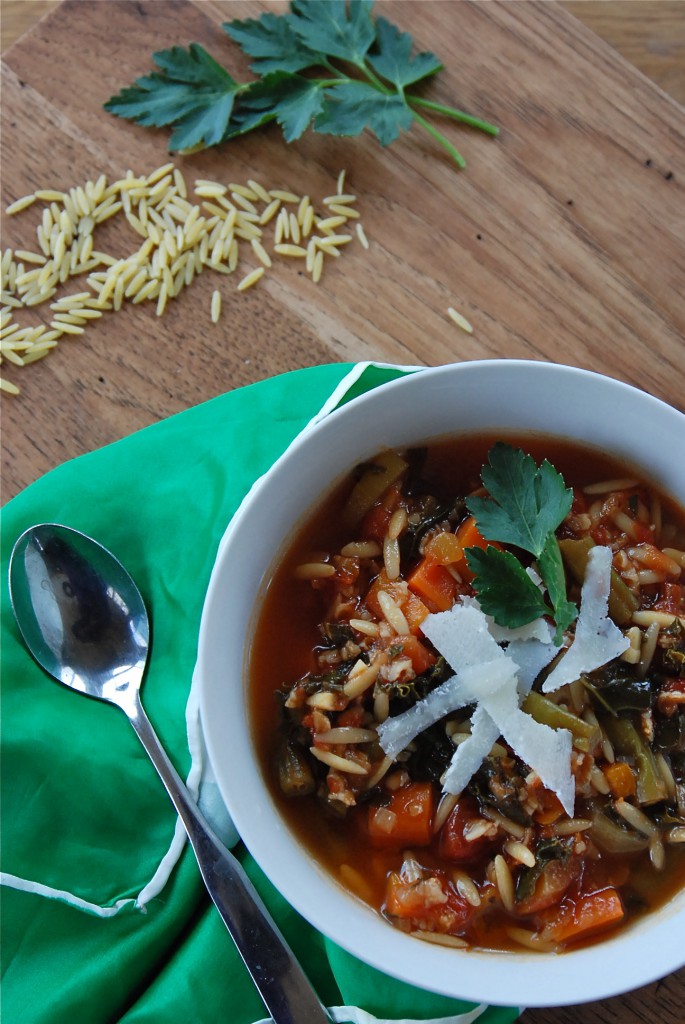
Soup has but a few simple secrets to making it shine, such as taking some time to caramelize the vegetables to form a flavor base, a good broth or stock to add more depth and a shot of love, really, to not rush the process. But good soup really starts from need. Or craving and desire.
I used to not be all that good at making soup, mostly because I just didn’t understand why a recipe that looked so simple could often turn out so darn wrong. I wanted depth, a rich flavor that penetrated the spoon and it’s contents, making it something so much more than broth and vegetables. All I really needed was a bit of patience, a lot of practice and tad more salt. Don’t be afraid of a shake of salt over that simmering pot, as it is the one ingredient that can transform a simple pot of soup to one that shimmers it’s warmth right down to your toes.
This Minestrone soup, as all Minestrone soups go, really has no clear outline, no real etymology. It creates itself for the most part, out of what you have on hand, and what you like in your soup. Or, like me on this particular cold January night, it leapt from under my hands out of sheer need. I couldn’t get warm, couldn’t shake a chill that had settled in my core like a wicked internal frost. Somehow, this chill and it’s accompanying rattle in my brain sounded like it was saying, over and over “Make Minestrone!” and I moved, on automatic it seemed, from fridge to stove to cupboard, seeking and searching ingredients. There were the green beans languishing in the drawer and in dire straits, there was Pomi tomatoes (my favorite packaged tomato- so amazingly fresh and flavorful) and there were thick, deeply orange carrots, fat tear-jerking onions, a partial box of orzo, a few zucchini beginning to look slightly sorry for themselves, just enough kale, a bounty of fresh oregano and parsley. And while the fragrance filled the house, and the soup simmered it’s coherent and rhythmic blup-blup-blup on the stove, a quick search for dunking material in the freezer yielded a container of croutons, spiked with herbs and olive oil, that I’d made from a loaf of stale semolina bread. Did I mention another key ingredient to perfect soup just might be a touch of serendipity?
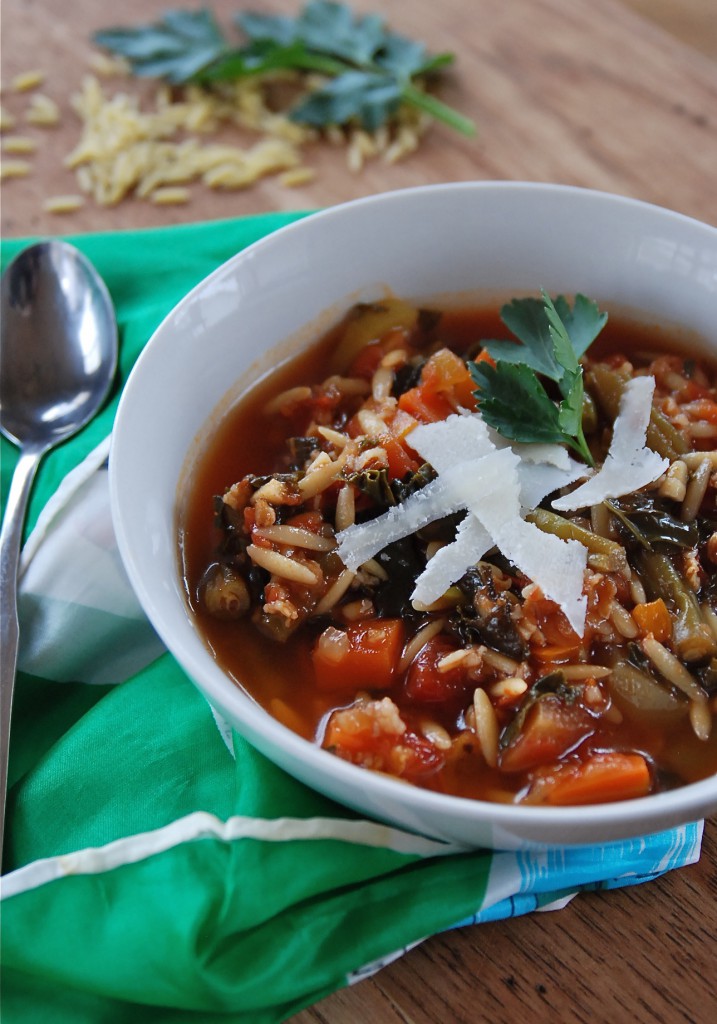
Minestrone requires little of the hard and fast rules; you add what you’ve got, really. What is in season, what is available, what it is you like. It needs a good tomato-y base, without a doubt. But beyond that, it lives for your interpretation. Thick or thin, meat or not, one, two or three vegetables or a whole produce aisle of them, pasta, legumes or rice- it’s all up to you. This version that served to warm my very cold, rattling bones on that damp, chilly night made light of too many singular remnants from the fridge; bits and pieces of plans that maybe fell through or were forgotten, or the one too many of any vegetable that hadn’t been used up yet. It had oceans of freshly chopped oregano and parsley tossed casually over it all, with thick shavings of sharp parm-reggiano. It was like planning a party at the last moment, not so confident of how it will all turn out and right in the middle of it, you realize that everyone in attendance has created an impeccable presence that elevates the whole of it to something utterly sublime. Well, that was my Minestrone that night; a delicious party in a stockpot, gathered with fingers crossed. My intensely perfect Minestrone.
Rounding it all out were the crunchy croutons, oiled, herbed and perfect for soaking up the broth. Beyond that, my perfect soup needed little else but a spoon, a quiet table with two smiling handsome faces, because no day in my life is complete without it ending right there, with them. The darkness settles, chasing out the light with violet and gold tones. The first spoonful I lift easily helps me cross the threshold from day to night, pushing the cold away, warmly coursing through me. There is a sigh, with half-closed eyes, a look and a feel that says “Perfect. This is just what I need.”
Kate’s Minestrone
1 large onion, diced
3 carrots, peeled and diced
3 celery stalks, with leaves, diced
4 cloves garlic, minced (adjust to taste, I am a garlic lover)
2 small zucchini, peeled and diced
1/2# fresh green beans, cut to 1/2″ pieces
1 bunch fresh kale, rough stems removed and chopped (sub chard, collards, or spinach)
1 32-oz pkg Pomi Tomatoes (use equivalent of your choice)
1/2 c. Orzo pasta (use small pasta of choice)
1/4 c. bulgur (optional, but I like the heft and nutrition it adds)
1/4 c. fresh chopped parsley and oregano (basil and thyme are also good)
Parm-Reggiano shavings
In a large stockpot, heat a small amount of oil and add the onions. Cook over medium heat, stirring occasionally, for about 5 minutes, or until the onions are opaque. Add the carrots, celery and green beans and cook, stirring, until the vegetables begin to brown a little, maybe 10-15 minutes. Moderate the heat to prevent them from scorching.
Add the garlic and a pinch of kosher salt. Stir to incorporate and cook for a few minutes until it’s wonderfully fragrant. Add the zucchini and the tomatoes and a quart of broth or water. Bring to a simmer and cook until the vegetables are tender enough to pierce with a fork, but not completely soft.
Add the kale, the pasta and the bulgur, if using. Depending on what pasta shape you use, cook until the pasta is al dente. Taste the soup and season with salt and pepper. Make sure the pasta is cooked, but also remember that it will continue to absorb liquid as the soup sits.
Ladle soup into bowls and top with a sprinkling of the fresh herbs and some shavings of cheese. Serve with a good bread, if desired.
RECIPE NOTES: This soup is wide open to interpretation, and can be modified in a multitude of different ways. Brown some good sausage and use the fat rendered to cook the vegetables for an added punch of flavor. This was a favorite way to make this soup back in my meat eating days.
Legumes can be added to this as well, and most Minestrone soups have them. Use a good quality white bean, such as Great Northern or Cannellini. Chickpeas would also be a good option.
As is the case with most soups, it develops a lot of flavor as it sits overnight in the fridge, but it will also absorb a lot of liquid in to the pasta and the bulgur (if you use the bulgur). Adding a little water to the soup before reheating will help loosen it.
Linking up to Soupapalooza 2012!!
“Come join SoupaPalooza at TidyMom and Dine and Dish; sponsored by KitchenAid, Red Star Yeast and Le Creuset”
January 5th, 2012
| 4 Comments »
The new year is starting out with a bit less motivation than I was expecting. This isn’t such a bad thing; I did have the last five days off work, and after the busy, frenetic pace of the holidays that was a very welcome change. Maybe the sloth that settled on me was just a reminder to take the time off wisely, to relax, regenerate and just be.
But I wanted to cook and I wanted to stretch. I’ve been lacking in the desire to stretch in the kitchen, to experiment with a few recipes that press against the norm of what I’ve been doing lately, which admittedly, isn’t a whole lot. That work thing sort of stunted my creativity for a while, and before that…. well, I was just coasting. But we’re on a fresh calendar page, with new beginnings for everyone; resolves to take a healthier approach to life, to strive for better in our personal lives; I’ve even seen people who are eager to expand their eating repertoire, promising to try one new food item each week. These are resolves I can get behind. And along with continuing on our meat-free journey, I need to explore more options for our meals. Because while soups, meatless chili and braised greens are all tremendous and satisfying, there is so much more in this vegetable world that can be taken on.
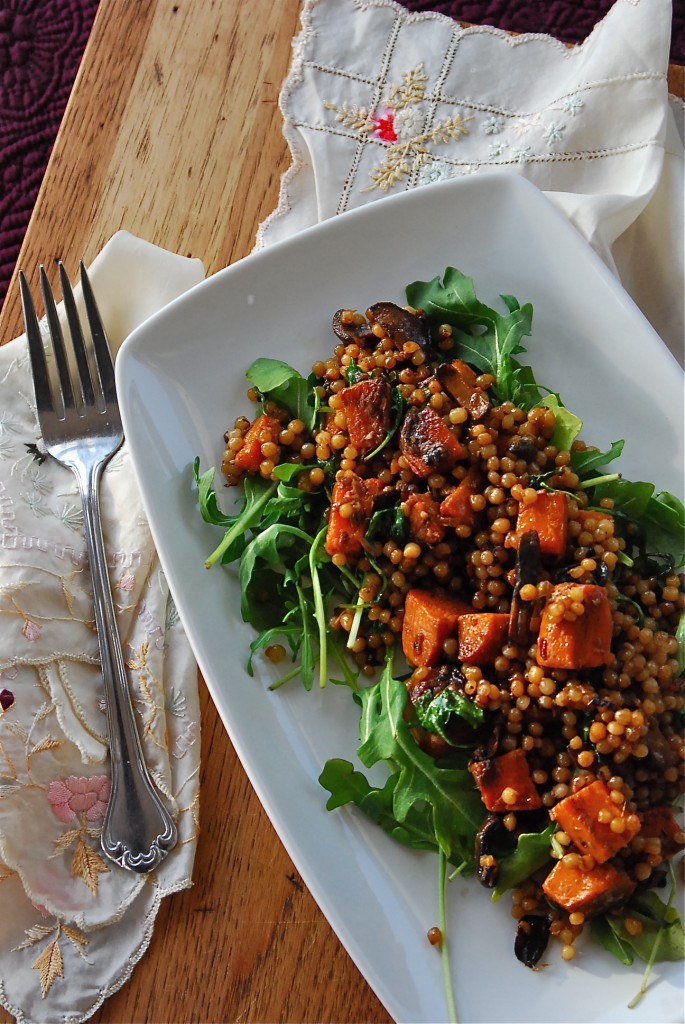
This recipe was bookmarked back in October, most likely. As is the norm, I’m just not sure why I don’t tackle these things as soon as they land in my radar. I could have been enjoying this dish on repeat each week, changing up the vegetables and inhaling it’s deeply dark and sweet flavor through these last few months, but as usual, it languished. And we missed out. That’s too bad. The flavor in this dish was incredible, invading our senses not only as it cooked, but as we gathered over our steaming bowls, forks poised in anticipation. I looked down at my bowl and turned to Mike. “This is a total restaurant dish.” and he nodded as the first bite crossed his lips. His eyes lit up and he smiled.
And there’s another reason why I kick myself for waiting so long to enjoy this. To miss out on seeing that is criminal.
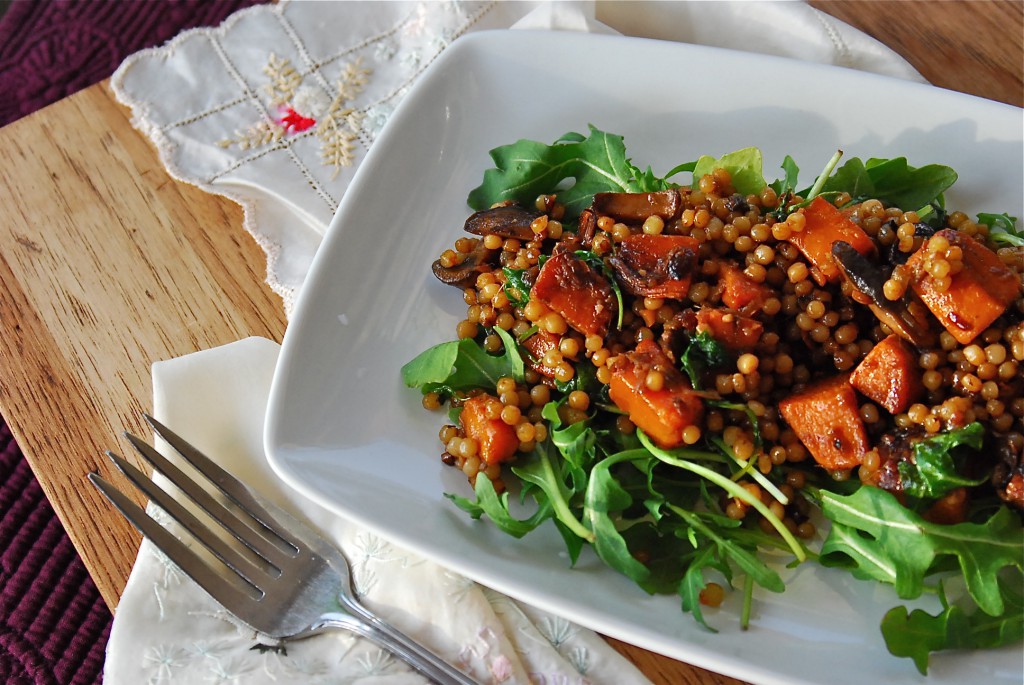
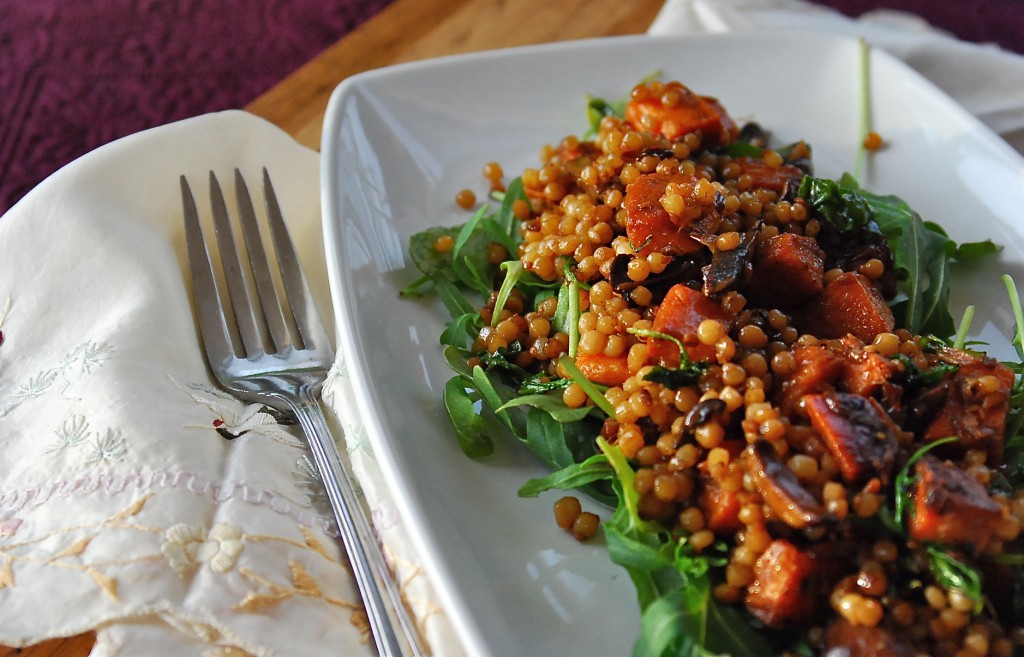
The creation of this dish isn’t difficult; it does require some attention as you methodically caramelize your vegetables in stages on the stovetop. I evolved the process from the original instructions to make it even easier for your average cook. You need a big pan with lots of surface area- I used a 12″ skillet with straight sides- and patience to allow the vegetables to cook, undisturbed, so they achieve that golden flavor and color. The original recipe calls for using orzo, but I’m slightly enamored of pearl couscous these days, so any excuse to throw that in the mix is fine with me. A good hearty brown rice would even work. While there are a lot of steps to this recipe, it flows very well so don’t let the length intimidate you.
Don’t you just love that color? Not only is the dish gorgeous all on it’s own, placing it in the morning sun, as it rose behind a thin band of clouds brought out all it’s burnished caramel-y tones. Even with it being 9:00am when I took these photos, I could have eaten this for breakfast without a second thought. Hmmmm….. don’t mind if I do.
Caramelized Vegetables with Pearl Couscous
Salt
2 c. pearl couscous
Grapeseed, peanut, or vegetable oil
1 large sweet potato (about 3/4 pound), peeled and diced, about 1/4″-1/2″
1 large onion (about 1 pound), finely diced
4 cloves garlic, minced
3-inch piece fresh ginger — peeled and chopped fine, about 1 tablespoon
1-8oz pkg portabella mushrooms, sliced, with stems removed
1 T. balsamic vinegar
2 T. soy sauce
3 big leaves chard or kale, stalks removed and leaves finely chopped — about 2 cups (I subbed in the equivalent of arugula)
Freshly ground black pepper
Parmesan, optional
Heat a large pot of water to boiling and salt it generously. Cook the couscous until barely al dente — about 5 minutes. Drain and toss with a generous drizzle of oil so that the grains are lightly coated with oil. Set aside.
Heat a large sauté or frying pan (the largest you have — you want plenty of room and hot surface) over high heat. Drizzle in a little grapeseed or vegetable oil (not olive oil — you want an oil with a high smoke point) and heat until very hot. Add the sweet potatoes and arrange them in one layer. Cook them over high heat until they are beginning to caramelize and turn brown — about 4 minutes. Flip them over and cook for another 3 minutes or so.
Turn the heat down to medium and add the onions, sprinkling them with about a teaspoon of salt. Cook, stirring occasionally, until the onions are beginning to turn brown. Add the minced garlic and chopped ginger and stir them into the onions. Push the sweet potato and onions to the edges of the pan, making room in the center.
Add the sliced portabella mushrooms to the hot center of the pan and cook them for 4 minutes without turning them. Then flip and stir them and cook for another 4 minutes. Once browned, stir them in to the sweet potato and onions. Keep the heat at medium, or slightly higher. Stir the vegetables occasionally. You want them richly browned.
At this point everything should be getting well-cooked; the onions should be quite dark brown and the garlic should be golden and soft. The potatoes should be softening.
Whisk together the vinegar, soy sauce, and 2 tablespoons of oil. Pour this into the pan with the vegetables and mix everything together, scraping the bottom as you go. Cook all the elements together for about 3 minutes on medium heat. Then turn the heat up to high, as high as it will go.
Add the couscous gradually, shaking in about a cup at a time, stirring and scraping constantly. Cook the couscous over high heat with the rest of the vegetables for about 5 minutes, letting the couscous get browned on the bottom of the pan, then scraping it up. You are developing a little more color and flavor on the pasta, and helping all the flavors combine. (I cooked this a bit longer to get more flavor in the couscous. The browning of it smells glorious)
Finally, toss the greens into the mix and cook for 1 more minute or until the greens are barely wilted. Turn off the heat and taste. Add salt and pepper if needed. Serve hot, with shavings of Parmesan if desired. (We didn’t even consider the parmesan. And I don’t think it even needed it.)
Original recipe from The Kitchn, by Faith Durand. Here with my own modifications.
July 16th, 2011
| 7 Comments »
People, I’ve madly fallen in love with radishes.
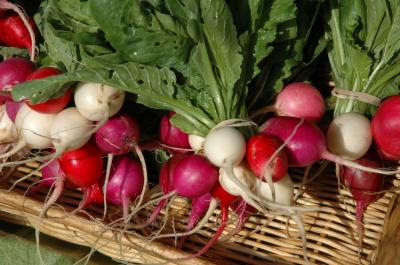 (photo courtesy of Really Natural) (photo courtesy of Really Natural)
I do remember not particularly liking them as a kid. But then again, I didn’t care for much then anyway, being raised on a typically 1970’s diet, I was your typically picky little thing. Fresh foods weren’t that present in our home so my exposure was lacking and my palate not particularly advanced; it’s no shock I wasn’t at all enamored with the radish’s peppery bite, a sting to the tongue that I found unpleasant. My sister Karen loved them, dragging them through a plate of table salt before popping them in her mouth. Even that typical dressing did nothing to take the edge off the flavor. So for the most part, I’d ignored them.
Then something happened a few years back. On a trip to the Farmers Market, I spied a large bunch of red, white and pink radishes- it was an enormous amount- and was only a dollar. I picked them up, passed a buck to the farmer and placed them in my bag. Once home, I stared at them and thought ‘Great. Now what?’ I ate one, and it was divine. Fresh, snappy, crisp and tart, but not harsh and sour like I recalled. Still, I didn’t leap headfirst into devouring them. I remained rather skeptical. And they languished in my fridge until I was forced to do something, anything, with them.
So I pickled them. On a whim. And went tuckus over teakettle for the crisp little discs, eating them on sandwiches, with my fingers and finally with a fork to grab the last little slices from the dredges of their vinegary brine. And it was soon after that when I first dragged a cold fresh radish through a slab of creamy butter to discover one of the best, and most surprising treats I’ve ever tasted. My eyes were now opened to the radish. Once again. Adulthood is a wonder around every corner, especially when discovering the foods from your childhood that once caused you to turn up your nose are now part of your regular gustatory delight.
So they’ve happily made a comeback; the inexpensive little things can be had sometimes on a 2-fer deal with any farmer willing to move their bounty. I scrub them down and place them in a baggie where they happily keep for days on end, willing that they last that long in my fridge. I eat them for breakfast a lot, sliced thick on good toasted bread with slices of butter, or most recently, this delicious sandwich creation that I’m thoroughly ga-ga over.
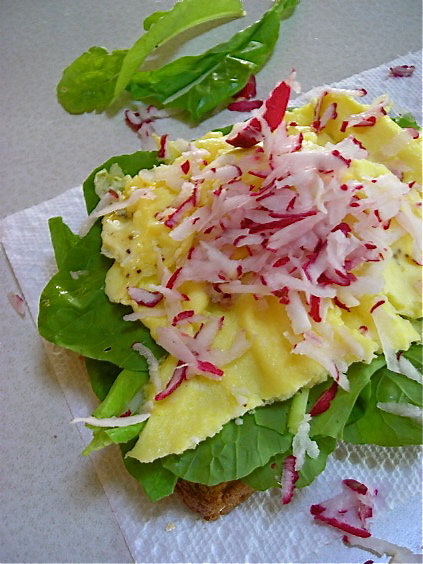
A cooked egg, nice and firm is placed a top a bed of greens on nicely toasted bread, and covered with several shredded radishes. The key is to shred the radish directly over the egg. Something about the fresh spray of liquid released makes for a much better flavor. I like spinach with this, but I’ve used spring greens, garden lettuce and romaine as well. This is a summery breakfast, if I’ve ever dreamed of one.
I took my radish love one step further too, recently, when I roasted an entire batch of them.
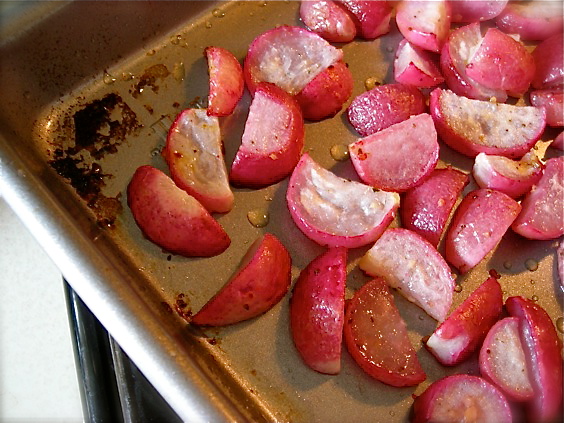
Roasting radishes takes the sharp flavor away, and replaces it with a mellow soft rendition that is palatable to anyone, even the most avowed radish hater. One would hope, anyway. I could have eaten these like candy, but instead, I caramelized a big pan of vidalia onions and made the two of them into a delicious tart atop a flaky puff pastry crust.
 
This was a sweet, tender and amazing hand held meal, soft like summer nights, fresh as the season and when topped with just a little Gouda cheese, a bit of savory tang that balanced the vegetables perfectly. Eating a slice of it, on my patio, with a lovely glass of Rosé wine and a perfect summer night surrounding me, I felt a million miles away from my life, but in the simplest way possible. I love how a good meal, with gentle ease can transform an ordinary day into something surreal and dreamy. That’s the magic in a plate of really, really good food.
So…. do you like radishes? What do you like to do with them?
Roasted Radish & Caramelize Onion Tart
Scrub one bunch of radishes well, removing tops and roots. Cut into halves or quarters and toss with a bit of seasoned oil of choice. Roast at 400° until tender. It won’t take too long, maybe 10 minutes.
Slice two Vidalia onions and place in a hot skillet. Cook onions over medium heat, turning frequently, until browned and tender, about 15 minutes. Reduce heat to low, add a few tablespoons of brown sugar (or a drizzle of good honey) a tablespoon of kosher salt and a dash or two of balsamic vinegar. This is my favorite way to caramelize onions, but you may have your own method. Continue cooking the onions for about 20-30 more minutes, or until they are very soft and richly browned. Stir them on occasion, and be careful not to let them burn.
Thaw one sheet of puff pastry. Roll out sheet to desired thickness on parchment paper, then transfer to baking sheet. Poke holes in pastry with a fork and place in 400° oven, baking until lightly browned, about 10-15 minutes. Remove from oven, spread caramelized onion over the crust then top with roasted radish and a small amount of a good sharp aged cheese of your choice. I used Gouda because I had a some on hand. Fontina and Gruyere would be good options too. Place back in oven and bake for about 15 more minutes, until edges of pastry are crisp and brown and toppings are hot. Allow to cool slightly, then serve. Can also be served at room temperature.
May 1st, 2011
| 7 Comments »
We’re trying so hard to go full steam ahead in to Spring. But around here, it seems like Mother Nature just wants to tease us, here with a lovely day then a blast of cold and rain, then yet another lovely day, then once again cold, and more rain. Lakes, streams, ponds, rivers and especially the people are overflowing their limits. We’ve had enough. Bring us the sunshine please, and for more than just one day.
So here we are, the first day of May. Our expected high likely won’t even reach 50 degrees. It feels weird to offer you a delicious crispy flatbread recipe, topped with a rich verdant pesto and some sassy caramelized onions because instinct is telling me to braise something hearty and warm. But it’s May and I refuse to get out my cast iron dutch oven anymore. In fact, I sure hope it got cleaned well the last time I used it because I’m desperately trying not to get reacquainted with it until October.
So, let’s move on to this, shall we?
 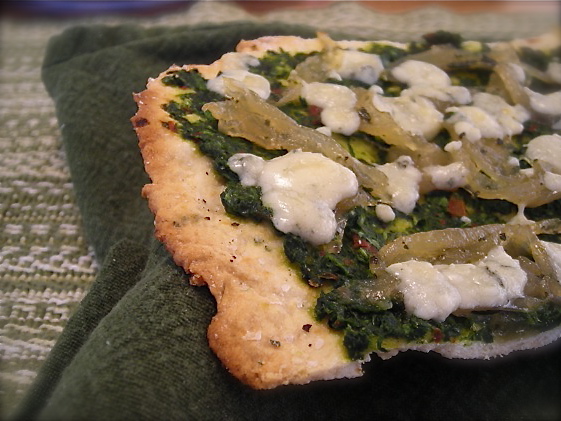
This was actually a recipe covered on this site back in November of 2009. For most of the year previous to that, I’d made this simple and delicious herb flatbread about a half dozen times for various meals, or really, even to just snap a piece off here and there to snack on. It’s ridiculously easy, it tastes amazing and it works for so many meal options, especially something very simple like being topped with fresh pesto, a smattering of caramelized Vidalia onions and several dollops of goat cheese. Run that under a broiler for a few minutes and the simplest meal is yours, delicious and light, packing a flavorful Spring-like medley for your mouth.
Every day I’m at work I pass a display of enormous Vidalia onions. It’s set up right by the entrance for easy access, and every day I see them I think about this flatbread, those golden burnished onions and the deep dark green of this pesto. I’ve experimented with lots of greens for pesto, and two of my most favorite ones are beet greens or spinach. Beet greens make the most earthy, dark and appealing pesto, and spinach offers a lighter, fresher touch. When fresh spinach is available at the Farmers Markets by the bucketful, I will buy several loads of it and make pesto, freezing it for future use.
I’ve done large batches of caramelized onions, slicing up to four of them at a time and slowly cooking them down to a glittering golden mass. They’ll keep in the fridge for up to a week, and you can freeze them too. The pesto freezes beautifully as well, or simply use your favorite commercial brand to make it even easier. A batch of this flatbread comes together in no time, so you can get out to find the sunshine.
Well, whenever it comes back, that is.
Herb Flatbread
1 3/4 c. unbleached flour
1 t. baking powder
1/2 t. salt
1-2 T. fresh herb of choice
1/2 c. water
1/3 c. oil
Heat oven to 450° with a pizza stone on middle rack. Combine dry ingredients and herbs. Make well in center and pour in oil and water. Stir with spoon until a soft dough forms. Turn out onto parchment paper and knead about 5-6 times to bring dough together. Can be divided into 2-3 small balls and rolled flat, or rolled out as one large circle. Drizzle olive oil over top, sprinkle with sea salt and more herb and transfer, parchment and all to heated stone. Bake until browned in spots and fragrant- time will depend on how thin dough is rolled. Remove from oven and cool (don’t cool on stone- it will continue to bake). Slice with pizza cutter and enjoy.
Recipe from Gourmet magazine
Spinach Pesto
4 c. washed spinach leaves, stemmed
1/3 c. olive oil
3 T. toasted pine nuts
1 clove fresh garlic, chopped
Place all ingredients in a food processor and process until smooth, scraping down sides as needed. This pesto can be frozen for quite some time with only minimal loss of flavor. Do not add cheese to pesto if planning to freeze, otherwise, add to taste your preferred hard cheese.
KATE’S NOTES:
Pine nuts are ungodly expensive right now. I love subbing cashews in pesto for the meaty flavor, and have dabbled with the idea of using almonds too, as they’re my favorite nut. And instead of using traditional parmesan in my pesto, I love the addition of Manchego or Trugole, which is really similar to Asiago, only creamier and with a milder taste.
January 17th, 2011
| 9 Comments »
And I don’t just say that to reel you in. If you enjoy a good creamy and altogether crazy delicious flavorful spread for that corn chip addiction in your life, then look no further than this recipe. Because once you lifted that first chip to your mouth, dripping with this vegetable laden, kicky dip, my friends, you will never again look at bean dip the same way.
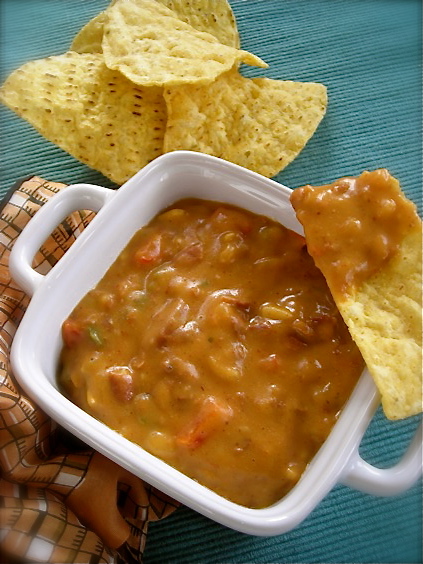
And what better option to have on hand for the any upcoming major sporting events, you know, like Football or something? As I was making this, and then after that first heady bite, where I swooned and ‘Oooh’d and ‘Aaaah’d myself into a tizzy, I had this thought that it was too bad we weren’t football folks, because this dip would be a welcomed addition to any snack table, kept warm in a crock-pot, ready for copious scooping. So if you like throwing a big gathering to cheer on your favorite team, you can’t really go wrong with this.
The key for the extreme delicious flavor is two things: one, you use Chili flavored beans to make it, and two, you stir creamy mexican style cheese dip into the final product, creating a 1-2 punch of taste, worthy of swooning and lots of compliments. Not to mention corn chips. Although any gooey cheese dip will work, I can’t recommend enough making a cheese dip from scratch, and not only from scratch, but from the authority of all things Texan in style, please do yourself the Rio Grande favor of making Lisa’s Chile Con Queso as it too will knock your socks off. With that recipe bubbling on the stove, you make this fantastic bean dip, whisk some of the Queso into it and you’ll have not one, but TWO awesome options for the next party that graces your house. Or just a delicious snack to chase away a chilly winter evening.
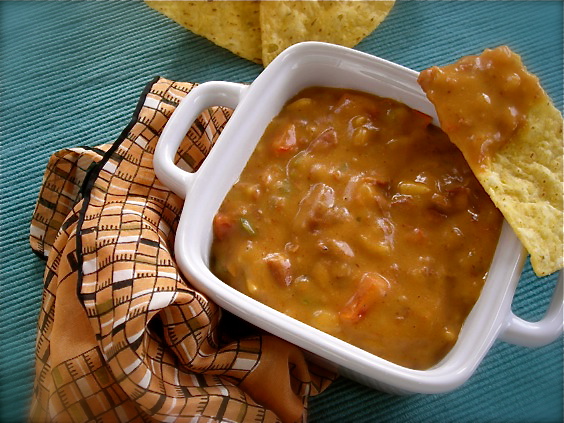
Chili Bean & Queso Dip
1 red bell pepper, chopped
1 poblano pepper, chopped
1 jalapeno pepper, chopped
1 medium onion, chopped
2 cans chili flavored beans (DO NOT drain)
1/2 c. frozen corn kernels
1 can Hunts Fire Roasted Tomatoes (or equivalent)
1 T. chiopotle en adobo sauce (optional)
2 t. ground cumin
Approximately 2 cups Chile Con Queso cheese sauce, either scratch made or commercial.
In a deep skillet, saute chopped onion and peppers until very soft and beginning to turn brown in spots, about 10-15 minutes, stirring occasionally. Add the beans with their liquid, scraping the cans with a rubber spatula, and stir them into the vegetables. Heat for about 5 minutes. Using a heavy spoon or potato masher, mash the mixture until most of the beans are broken up and smooth. Leave some pieces whole for good texture. Stir in the corn, tomato, chipotle and cumin. Heat until bubbling.
When bean mixture is hot all the way through, add in about 1 cup of the cheese sauce. Stir quickly to incorporate the cheese into the bean dip, making sure no lumps are left behind. Add the remaining cup and stir to mix this in as well. Heat through and taste to adjust seasonings. Make it spicier if you like it that way.
The dip can be kept warm in a crock pot, or on the stove. Stir occasionally to keep blended. This reheats beautifully.
November 9th, 2010
| 9 Comments »
Here’s the thing about the works going on in my kitchen; they aren’t perfect or always balanced although I do strive for the most nutritional value I can find. We don’t dine exquisitely, sampling wonderful fare every night. I don’t pore through cookbook after cookbook stuffing pages with notes, markings, tabs and ratings. Sometimes I don’t cook at all. Sometimes we graze. Sometimes I just look at my husband and ask him to go get us a pizza. Sometimes he does.
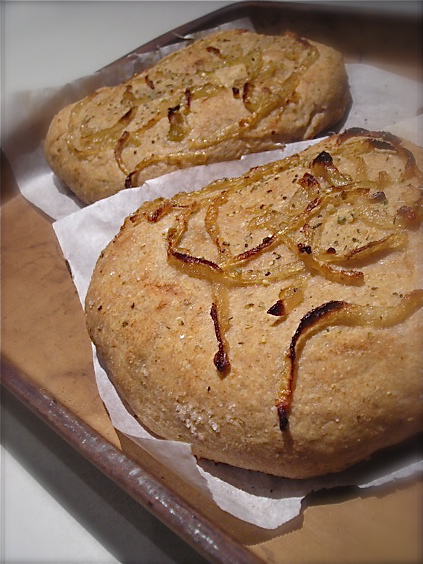
This is a Calzone stuffed with veggies and cheese and made with scratch dough. Mike did not bring this home.
I make burgers from scratch, and lots of soup. We do make our own pizza including dough for the crust, so those pizza seeking forays I send Mike on are fairly uncommon. We eat a lot of chicken, and we eat fish and pork. Beef is rare in our house but on occasion I will splurge on a good steak dinner for The Carnivore and I. I stock a good pantry with lots of canned goods like beans, tomatoes, tuna, salmon, rice and grains and other items that can help me to put a good meal together if I get stuck. I get stuck a lot. My husband loves vegetables and doesn’t care for much meat. My Teen loves meat. Every day. He eats vegetables but only grudgingly. Making these two happy isn’t always the easiest feat. But I do the majority of the cooking so I make what I want. If they don’t want to eat it, it’s not my problem. I’m no one’s short order cook. It works for us. I understand that it doesn’t work that way for everyone. But please don’t ask me what to do about your picky eater because I probably will tell you and you probably won’t like it.
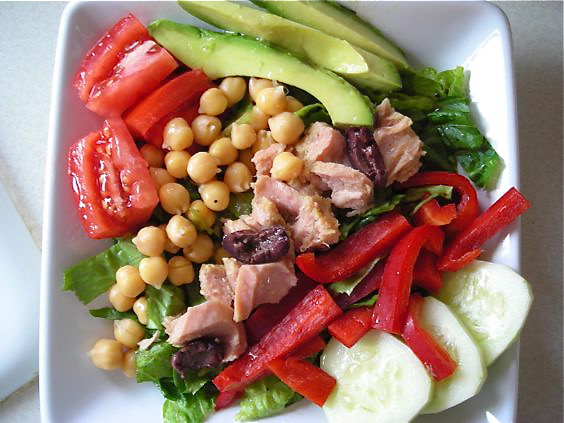
That’s a Mediterranean Tuna Antipasto Salad. It was stellar.
Keeping a well-stocked kitchen, including pantry and freezer is vital to making dinnertime less of a hassle. Outside of a good stocked pantry, I keep my chest freezer full. I buy frozen vegetables like peas, green beans and corn (the only ones I think taste good from their frozen state). I keep lots of bread in the freezer, and hamburger buns, always stocking up when it’s on sale. I keep packages of frozen tilapia on hand. The brand I buy has individually wrapped filets in it that thaw quickly, making it a good option for last minute ideas. Like yesterday. At 4:00pm I had no clue what I was making for dinner. But by 5:30, we were eating Fish Tacos with rice and a Chipotle Corn Relish. And it all came out of the pantry or the freezer. On the plus side, I used up a few leftover items in the refrigerator from previous meals so there was utilization there as well. I’m not the type of cook that makes up two meals and freezes the second one, although sometimes I have. It’s nice when I do. I wish I was prone to do more of that.
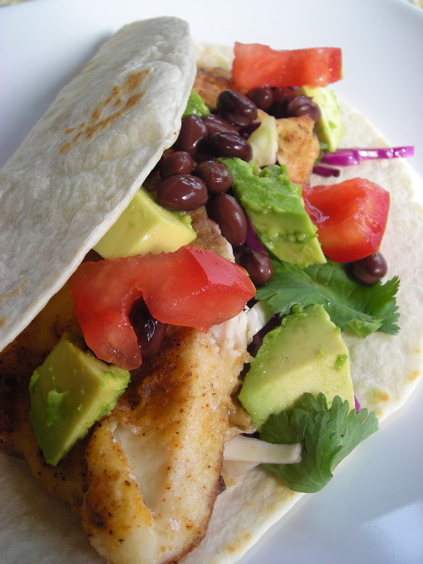
This is version 1.0 of the Fish Taco. This is not last night’s Fish Taco,
I don’t write menu plans each week, opting instead to make a large list of foods that I wish to cook. These are ideas that are not regular occurrences in our kitchen, options that may require some ingredient to be on hand in order to make the dish. Like our favorite Healthy Sloppy Joes. Or Thai Thighs. Or Griffin’s favorite Indian Chicken, or the Jambalaya he loves. This list is where I try out new recipes and ideas. Some of them work. Some do not. If they’re wonderful and I think others would enjoy them too, then I will blog about them. I don’t blog about everything we eat or cook because that would be ridiculous. We have lots of repeats in our meals, and there are always food items on hand to make these repeats. The list is a guideline, and I shop from this list so I know what I can make based on what’s available.
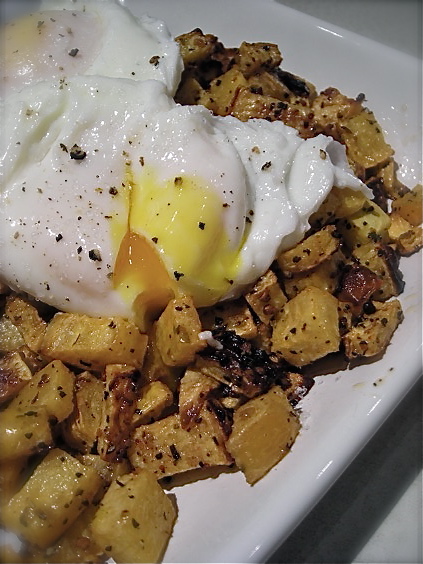
That’s Roasted Rutabaga topped with Poached Eggs. Simple. Divine. Perfect.
And grocery shopping; we have a budget that we try to stick with. Sometimes we do, sometimes we don’t. We don’t eat out much due to financial constraints. When we do eat out, I like it to be at places that make food I can’t make at home so often our choices for dining out run to ethnic restaurants. We don’t do fast food although Griffin will eat it. When I grocery shop I use a list 90% of the time and I stick to it, avoiding any aisles that I don’t need to wander down. I rarely buy on impulse although I will purchase items on sale if I find them and then I try to utilize them if they aren’t on my meal list. I look at grocery ads but I don’t use coupons because I rarely find any that are for foods we eat. If I see a good sale at the grocer, I will stock up. I will make a special trip for it too if it’s worth it. Boneless chicken breasts on sale 2-for-1 is worth a trip. Kleenex on sale is not.
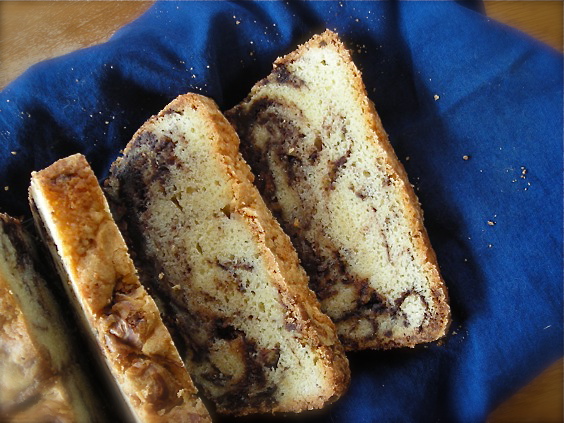
Nutella Pound Cake anyone?
I bake too, although not as much as I wish because I think my thighs are already a bit too chunky. But I make muffins, scones, quick breads, cakes, cookies and all other manner of yummy sweet treats. Many of these are for special occasions, like the cakes. My favorite items to bake are the muffins and quick breads. Griffin is good at making cookies and enjoys it a lot.
And speaking of that boy, he’s really stepped up his game in the kitchen and lately has made us some incredible meals. His confidence is much, much better and his skill is increasing exponentially. I love it when he cooks. Love. It.
I have a cupboard of cookbooks and I love them all but I don’t utilize them as much as I should. I have some go-to books for everything and my most favorite one is the Cooks Illustrated Best New Recipe. It’s a freaking monster of a book but it’s loaded with CI’s anal and detail oriented works and I know that the recipes are fool-proof and perfect. I have books I use for adding healthier recipes to our diet; I have ones that steer me towards comfort foods that I crave on occasion and cookbooks that I turn to for fancier inspiration. I have a few reference books to help me with questions, like the Food Lovers Companion. I have a few books that help me figure out substitutions if I somehow run out of an ingredient. I have some ethnic cookbooks that make me sigh with delight. A great deal of the inspiration I find for our meals comes from my food magazines – I get Eating Well, Bon Appetit and Saveur – and of course, the amazing and varied talent of my fellow food blogging friends.
Like these ladies. Just a handful of the local crew- fom left to right: Kelli, Amanda, Shaina, Stephanie, me and Crystal.

The wealth of information about food and cooking is staggering out there, and there’s something for everyone. It’s both overwhelming, frustrating (because there is a lot of BAD stuff out there too, and plenty of misinformation) and yet it’s also wonderful, varied, engaging and encouraging. This post is just about what I do, and as I said, it doesn’t work for everyone but this is what works for us. Our kitchen is truly the hum that resonates throughout our entire home, and also out into the world via this blog.
And just for kicks, I’m passing along one of my favorite and quick pantry recipes for 3-Bean Chili.
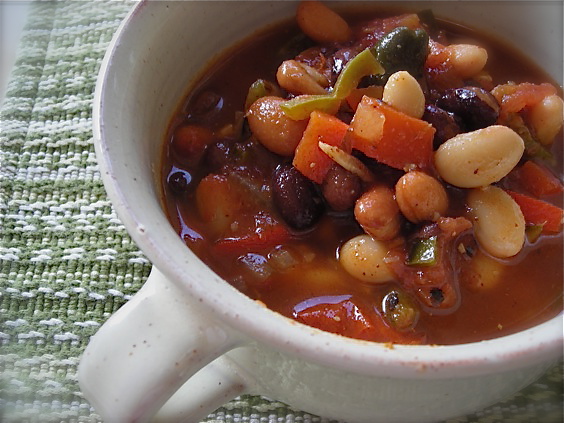
I love this steaming and soothing pot of chili and it comes together so fast (well, if you have the items on hand) and yet it tastes like it simmered all day. Full of fresh peppers, along with three kinds of canned beans and a big can of tomatoes, it’s so satisfying and good for you. Skip the bacon if it isn’t your thing. We never use it in this recipe but I imagine it adds amazing flavor.
Quick Three Bean Chili
From Food and Wine magazine, April 2008
2 tablespoons vegetable oil
3 slices of bacon, cut crosswise into 1/4-inch strips
1 onion, cut into 1/4-inch dice
2 jalapeños, seeded and cut into 1/4-inch dice
2 garlic cloves, minced
1/4 cup chili powder
One 15-ounce can Great Northern beans, drained and rinsed
One 15-ounce can pinto beans, drained and rinsed
One 15-ounce can black beans, drained and rinsed
One 28-ounce can diced tomatoes
2 cups chicken stock or low-sodium broth
Kosher salt and freshly ground pepper
Chopped cilantro and sour cream, for serving
In a medium soup pot, heat the oil until hot. Add the bacon, onion, jalapeños and garlic and cook over moderately high heat until the onion is softened and the bacon fat has been rendered, about 5 minutes. Add the chili powder and cook over moderate heat until fragrant, about 1 minute. Stir in the beans, tomatoes and stock and bring to a simmer. Simmer the chili over moderately low heat until thickened, about 15 minutes. Season with salt and pepper and serve with cilantro and sour cream.Kate’s Notes: I used a can of chili beans- pinto beans in chili spices, unrinsed! – in place of regular pinto beans; I had it on hand and it worked beautifully. I also reduced the chili powder to 2 tablespoons due to the presence of the chili spices in the beans.

|


