August 23rd, 2013
| 1 Comment »
There’s only a few foods that I simply can’t imagine not having on hand. Can you guess???
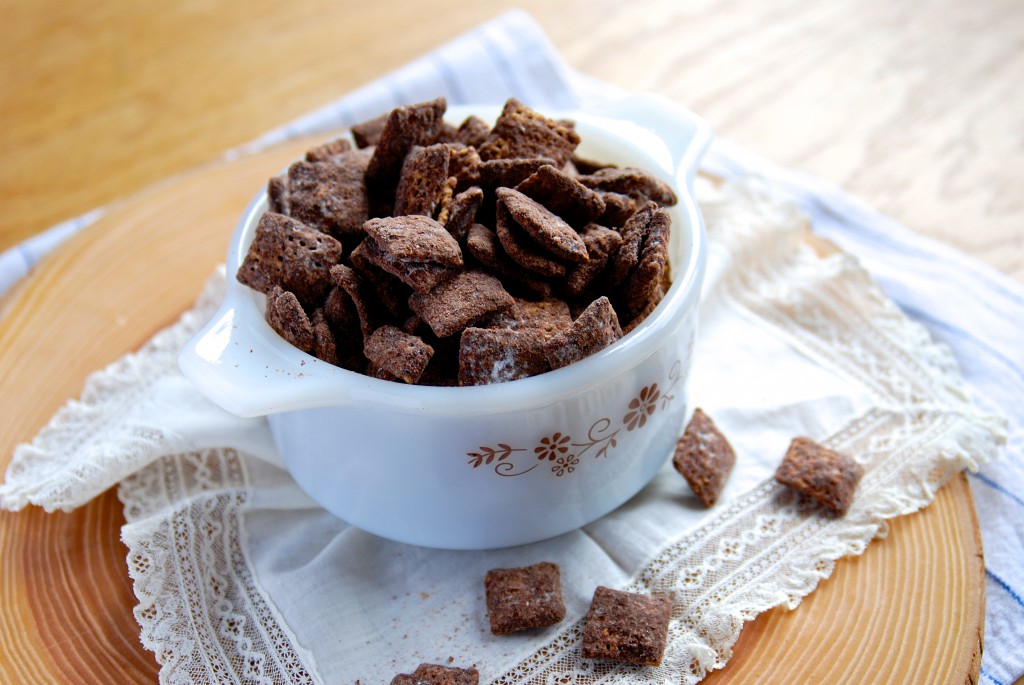
At the top of the list is peanut butter. But I bet you thought I was going to say Nutella, didn’t you?
Come in to my kitchen…
December 10th, 2011
| 4 Comments »
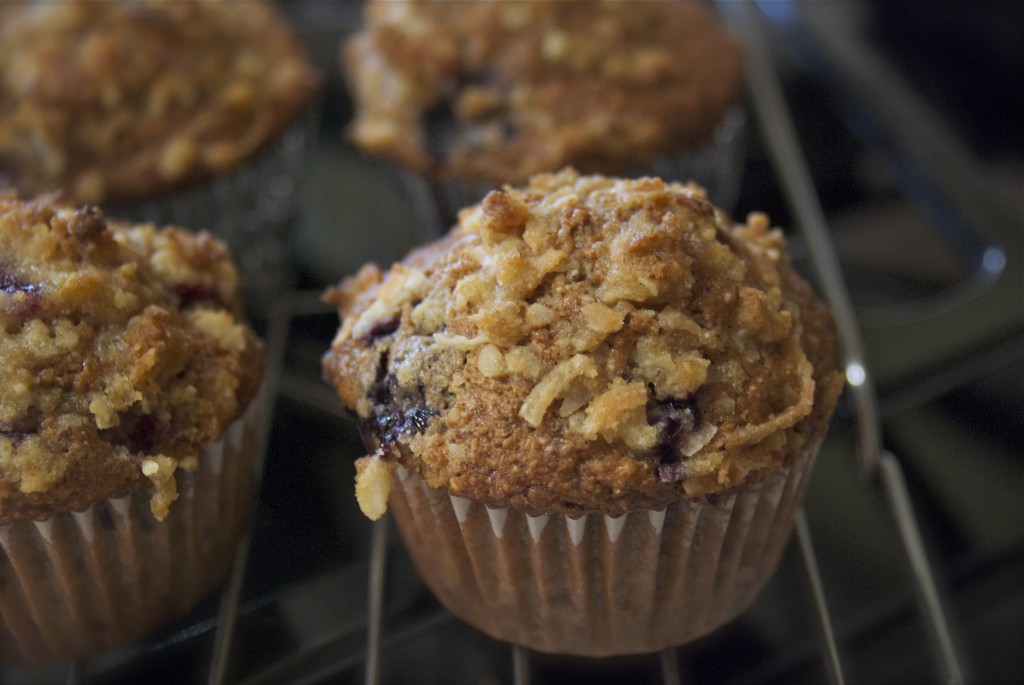
For starters, there are WAY too many vowels in this muffin description!!
But they are worth every twisted tongue and exhaustible explanation because they are fragrant, tropical and fabulous.
About a month ago I was contacted by a company called Oh! Nuts! and asked if I wanted some products to use for my holiday baking. I’d done some business with Oh! Nuts! before and was really pleased with the quality and freshness of their bulk nuts and dried fruits. Oh! Nuts! has a lot of attractive gift options for holiday giving, as well as fresh nuts, dried fruits, candy and other items for year-round baking. I highly recommend their products and can personally vouch for the quality. I was more than happy to have another chance to use some of their items.
For my personal use this time around, I requested Macadamia Nuts and Calymyrna Figs, and within a week, they landed on my doorstep. The figs are gigantic and sweet with a soft bite, and the macadamia nuts are perfectly tender and moist. I’ve been just tickled with both products and decided that before I gobble them all up in my adoration, I would at least make an attempt to bake something with them. It isn’t often you get a world class nut like macadamia gracing your pantry.
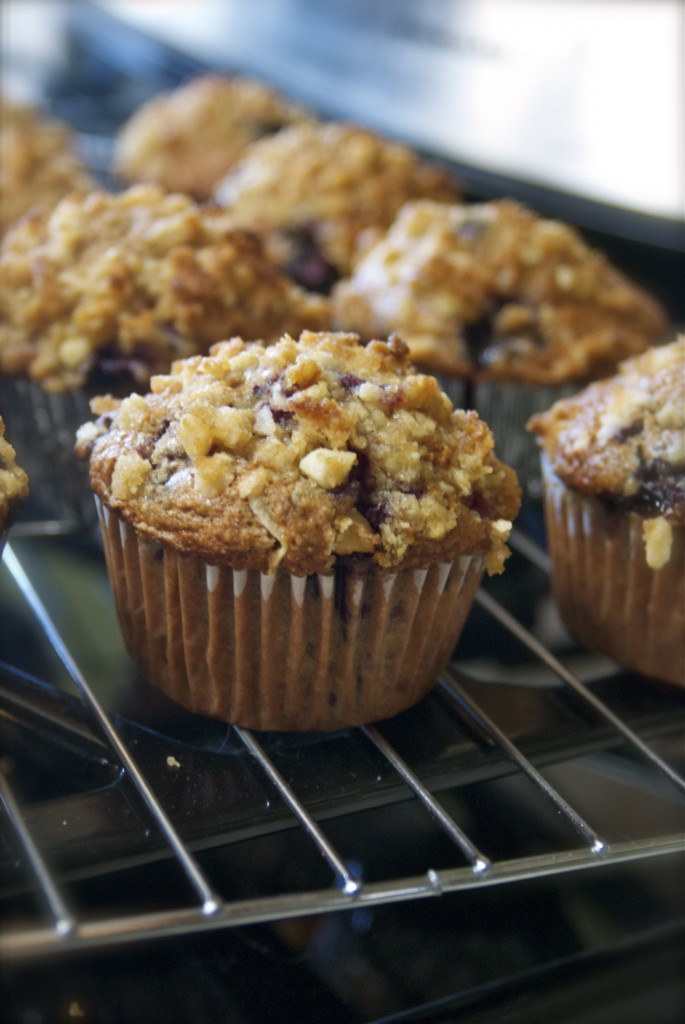
This muffin recipe has been hanging around my kitchen for some time now; originally it’s from the Fall 2006 issue of Eating Well magazine. And in a current frenzy through the recipe stack threatening to take over it’s designated drawer, I serendipitously came across it, magically having everything on hand to whisk up a batch of these to make a sunny, yet chilly December day feel a bit more cozy.
The recipe itself is without a great deal of fat or sugar, thankfully. But the muffin doesn’t suffer in the loss of theses tasty ingredients. They burst with blueberry taste, crunchy bits of chopped macadamia nuts and a hearty, nutty crumb that is moist but not at all cake like. If it’s supposed to be a muffin, I want a muffin, not a cupcake disguised as something else. With it’s crunchy streusel-like topping and tender fruit, this will be a repeat in my kitchen, a perfect means to use the frozen berries in my freezer, and to draw more warmth to our frozen landscape.
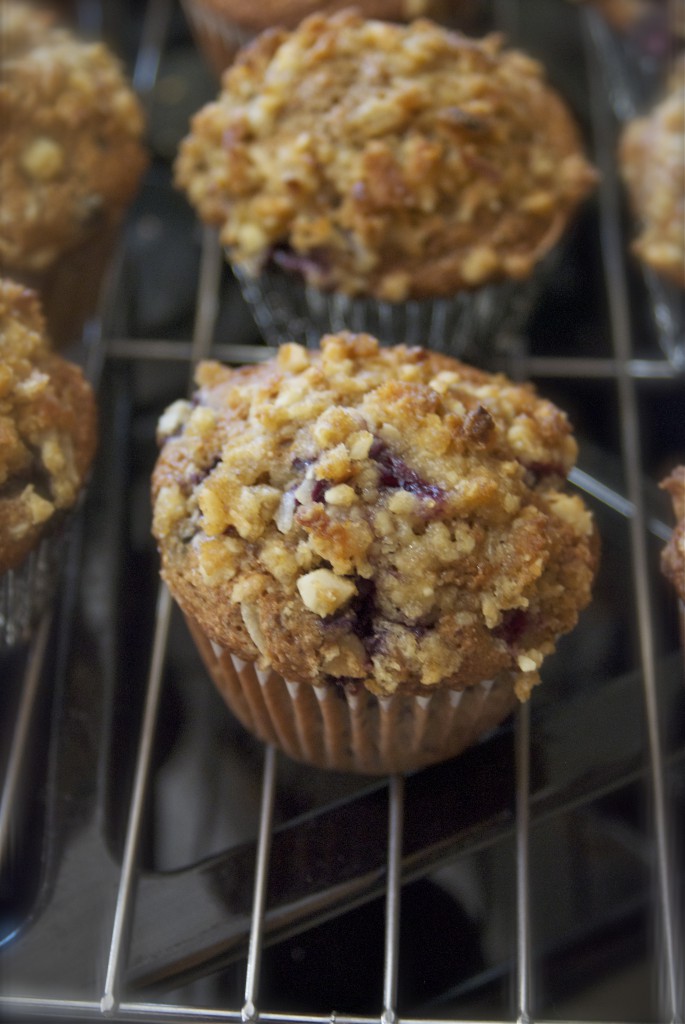
Blueberry Coconut Macadamia Nut Muffins
1/4 c. unsweetened flake coconut
3/4 c. + 2 T. AP flour (divided)
1/2 c. + 2 T. packed brown sugar (divided)
1/2 c. chopped macadamia nuts
3 T. good quality olive oil
1 c. whole wheat flour
2 T. ground flaxseed
1 t. baking powder
1/2 t. baking soda
1/8 t. sea salt
1 T. ground cinnamon
1 large egg
1 large egg white
3/4 c. skim milk
2 T. plain or vanilla lowfat yogurt
1 t. lemon extract (can sub vanilla, or coconut as well)
1-1/2 c. fresh or frozen (not thawed) blueberries
Heat your oven to 400°. Line two six-cup muffin tins with papers. Alternately, spray the muffin pans with non-stick cooking spray.
In a small bowl, combine the coconut with 2 Tablespoons each of AP flour and brown sugar with 2 Tablespoons of the chopped macadamia nuts. Drizzle this with one Tablespoon of the olive oil and stir to combine. Set aside for muffin topping.
Whisk together the remaining 3/4 cup of AP flour, the whole wheat flour, flaxseed, baking powder and soda, salt and cinnamon until well combined. In a large measuring cup, whisk the 1/2 cup of brown sugar, the egg and egg white, skim milk, yogurt and extract until smooth. Make a well in the dry ingredients and whisk in the wet until only just mixed. Add the blueberries, and the remaining macadamia nuts and carefully fold in until blended.
Spoon batter equally in to the muffin tins, then sprinkle a bit of the reserved coconut topping on each muffin. Press gently in to the batter, and bake for 20-25 minutes until golden brown and a tester inserted in the center comes out clean. Allow to cool in muffin pans for 15 minutes, then turn on to a wire rack to cool completely.
Original recipe from Eating Well magazine; posted here with heavy modifications.
DISCLAIMER:
Oh! Nuts! provided me with both the macadamia nuts and the calymyrna figs free of charge
and without expectation of any reciprocal endorsement. Everything stated in this post are
my own thoughts and are freely expressed.
November 30th, 2011
| 5 Comments »
Pretty fantastic ending….. wouldn’t you agree???
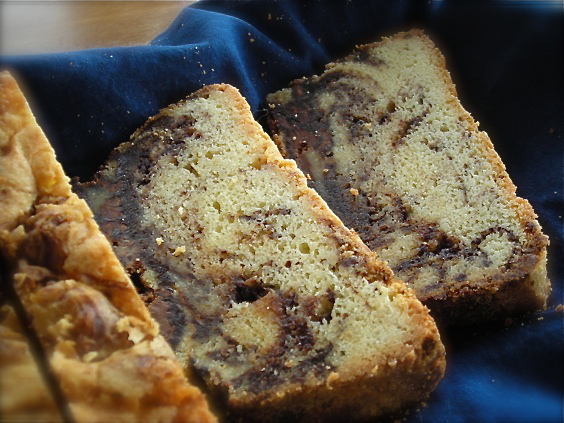
There is a class of food folks that live for dessert. No meal is complete without some amazing sweet at the end of it- a slice of cake, a bowl of ice cream, some creamy gelato, a chewy brownie or a few crisp cookies; there is just no way any good meal is worth it’s weight in gustatory delights without dessert.
I do love something sweet at the end of a meal, but it doesn’t need to be anything very fancy. A cookie or a piece of really good chocolate is sufficient. We don’t have cake around unless it’s a special occasion or I get fixated on bundt cakes, and I can make a slice of banana bread, or sweet potato bread into a delightful ending to a meal. Brownies? Hello! Love them. Still, once I’m through with a wonderful meal, and feel stuffed to the gills with good food, dessert becomes an afterthought.
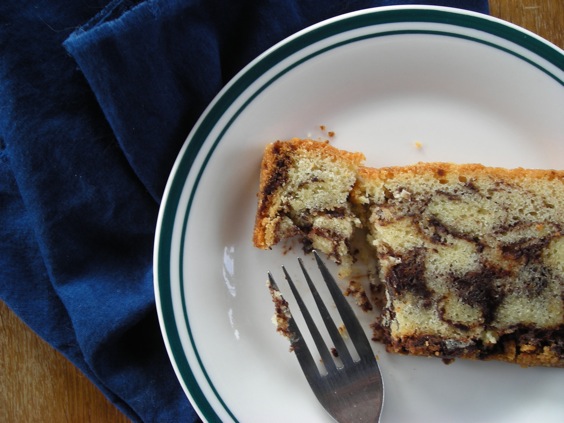
This Nutella Pound Cake is an amazing dessert. It’s amazing any time of day; with coffee in the morning, with afternoon tea, as a late night snack. It’s perfect because it’s rich, luscious and indulgent, certainly not something out of an ordinary day. Don’t slaughter me…. but I’ve never really been on the whole Nutella bandwagon. I don’t get vapors over the stuff, and once I used part of the jar for this recipe, the rest sat in my fridge and languished, untouched. For more than a month, in fact. This cake was excellent, but it’s a pound cake. Butter. Sugar. What’s not to adore about that? The Nutella was a bonus.
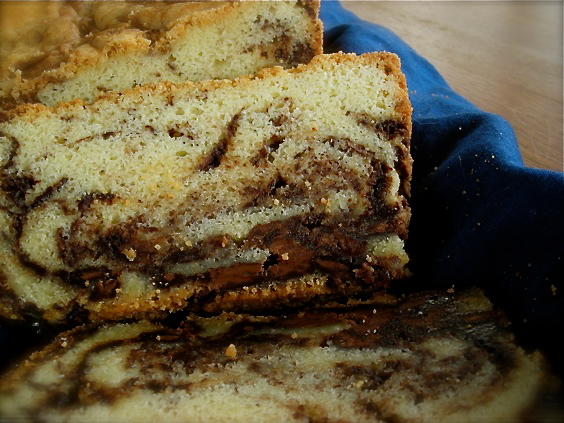
This recipe graced my blog just about two years ago. And I felt it to be a fitting end to National Blog Posting Month, my third go-round of posting every day for November. I’ve shared some good recipes with you, and this one needs another look. It’s that time of year when special treats are brought out, even ones as indulgent as a pound cake with half a jar of Nutella swirled through it. This would be a wonderful treat to make as a gift, or to bring to work to share with co-workers as a means of saying ‘Thank you’ for the past year. Share it with family. Bring a loaf to a treasured friend. Make one for a neighbor that needs a boost, or someone who hasn’t got the ability to make themselves a homemade treat. The recipe can be broken down in to smaller loaf pans, perfect for sharing. And any Nutella that’s left in your fridge? Well, I hope yours doesn’t sit for a month, ignored.
Onward in to December!!!!
Nutella Swirl Pound Cake
4 large eggs, at room temperature
2 t. pure vanilla extract
1-1/2 c. unbleached AP flour
3/4 t. baking powder
1/4 t. salt
1 c. butter, softened
1-1/4 c. sugar
1 13-oz jar Nutella spread
Heat oven to 325°. Spray a 9×5 cake pan with cooking spray. Dust with flour. Fill a bowl with hot tap water and place entire jar of Nutella in it to soften. Place the eggs and vanilla in a small bowl and whisk lightly to combine. Blend dry ingredients together in another small bowl.
In a stand mixer, blend the butter and sugar on medium speed until light and fluffy, about 3 minutes, scraping down the sides at least twice. Turn the mixer to medium-low and add the egg mixture in a steady stream, stopping to scrape down the bowl once or twice. Reduce mixer speed to low and add the flour mixture, about a half cup at a time, scraping the bowl after each addition. After the last addition, blend the full mixture together for 30 seconds on medium speed. {{Be sure to scrape across the bottom of the mixer bowl too. Lots of stuff gets unmixed down in there.}}
Scrape 1/3 of the batter into the prepared pan. Smooth with a spatula. With a clean spatula, spread half the Nutella on the batter and smooth. Add in another 1/3 of the cake batter, then the remaining Nutella. Spread the last of the cake batter on the top. With a clean butter knife, swirl the batter and Nutella together to create a marbling effect. Don’t overmix the two! {{Kate’s Notes: The ‘spreading’ of the Nutella is impossible; try warming the mixture and drizzling it for ease. And I think the cake would come out better if you DON’T swirl the mixture, but that’s just my thoughts}}
Bake the cake until it’s golden on top and a toothpick inserted in the center comes out clean. Cool for 15 minutes in the pan, then turn cake out onto a wire rack to cool completely. This cake tastes excellent after spending a night in the refrigerator, wrapped tight in plastic. I don’t know why. But trust me on that. {{Yes, trust us on this; WAY better chilled. As in OMG I could eat the entire thing COLD it’s so good.}}
From Food and Wine magazine, originally by Lauren Chattman, Cake Keeper Cakes

COMPLETED!!!!
October 28th, 2011
| 5 Comments »
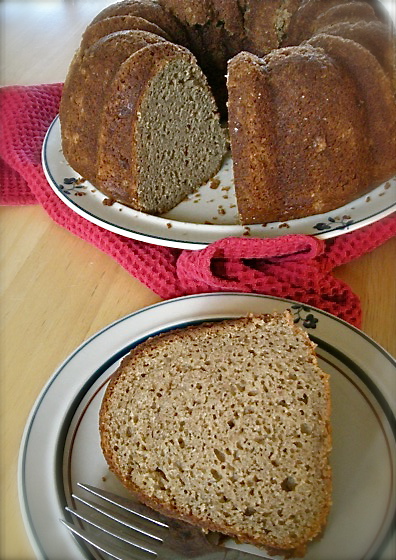
Yes. Another cake. Don’t be surprised if I share even more cake with you over time, as I do love a good moist and tender cake.
And I’m partial to a Bundt cake, for nostalgia reasons. It’s pretty easy to work with, that shape. You get a nice substantial cake that is easy to slice and portion out and with the wealth of lovely artistic bundt pans available, you can make something that looks masterful with nary a hint of extra effort.
And besides, bundt cakes make me think of my Mom. And she would have loved this Nutmeg Cake.
Nutmeg Cake. Not Spice Cake, although that would be appropriate, but no, the predominant flavor of this cake is Nutmeg, also known as Myristica fragrans, a spice that elicited so much adoration and excitement that bloody wars were executed over it to protect it’s production, and Emperor Henry VI had the streets of Rome fumigated with it during his coronation. In the 14th Century, a half a kilogram of nutmeg cost as much as three sheep, or one cow. The Nutmeg tree belongs to the Evergreen family, and as everyone knows, it consists of not one but two spices, as the feathery outer layer is ground up for Mace, while the seed itself is the Nutmeg.
The fruit is light yellow with red and green markings, resembling an apricot or a large plum. As the fruit matures, the outer fleshy covering (which is candied or pickled as snacks in Malaysia) bursts to reveal the seed. The seed is covered with red membranes called an aril, the mace portion of the nutmeg. The nut is then dried for up to 2 months until the inner nut rattles inside the shell. It is then shelled to reveal the valuable egg-shaped nutmeat which is the edible nutmeg. Second-rate nuts are pressed for the oil, which is used in perfumes and in the food industry.
Nutmeg is easily ground from it’s whole form, using a microplane, and purists argue that this is the best and only way in which it should be used. Pre-ground Nutmeg can easily lose it’s flavor, and when you need only a small dose of the spice, grating it fresh is simple; a few passes over the microplane and you’re done. But this recipe calls for 5 teaspoons of Nutmeg. I’d be standing with that microplane in hand for an eternity if I tried to freshly grate all that spice. And for me, Penzey’s West Indies Ground Nutmeg is perfect to keep on hand.
I came across this recipe in a recent issue of Saveur magazine and immediately snipped it out. Although I do know that Nutmeg is not a universally liked spice, for me it’s been a favorite since I was a kid, sprinkling my applesauce with cinnamon and nutmeg. I love it’s quick warm bite, the flick of flavor on my tongue that resonates around.
And it isn’t just for desserts, really. A few pinches of fresh ground nutmeg makes a wonderful addition to any dish with squash in it. It’s necessary for Spaetzle and can elevate a simple cream sauce on pasta to ultra-gastronomic levels. Add a dash of nutmeg to a fruit crisp, sprinkle it in smoothies, grate some on top of your oatmeal or other hot cereal (especially if you add blueberries- there is something so delightful about blueberries and nutmeg together) and of course, with cinnamon, cloves and allspice you get none other than perfect pumpkin pie flavor.
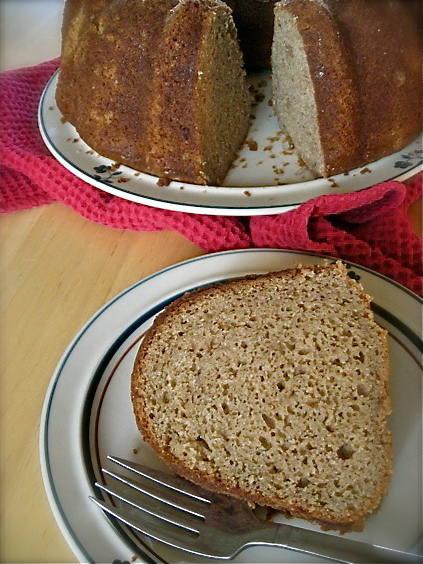
This cake made two appearances in my life in the exact same week. Two cakes, for two occasions. The first one was just the old standard “I Found A Recipe That I Can’t Wait To Try” deal, and the fact that it turned out so incredibly moist and oh so tender, and it was so darn easy to make that I quickly hit ‘Repeat’ and made another one for a ladies only gathering at our lake home. To be able to take a cake recipe and feed it to eight discriminating palates knowing that every one of them would adore it is a big feather in my cap. I loved watching their faces as they took that first bite. These ladies know their food.
And I know my nutmeg. So tell me …. do YOU like nutmeg??
Nutmeg Cake
3 cups flour
5 tsp. freshly grated nutmeg
2 tsp. baking powder
1 tsp. ground cinnamon
3/4 tsp. baking soda
1/2 tsp. kosher salt
12 tbsp. unsalted butter, chilled
2 cups packed light brown sugar
1 1/2 cups sour cream
1 cup milk
2 eggs, beaten
1/2 cup finely chopped walnuts (optional)
Confectioners’ sugar, for dusting
Preheat oven to 350°. Spray a standard bundt pan with cooking spray. You can also use a 9×13 baking pan.
In a medium bowl, whisk together the flour, nutmeg, baking powder, cinnamon, baking soda and salt. Cut the butter into cubes and add to the dry mixture. With a pastry blender (or two forks, or for a load of fun, your hands) cut the butter in to the flour mixture until it’s about the size of peas or smaller. Add the brown sugar and walnuts (if using) and blend with a fork.
In a large measuring cup, whisk together the sour cream, milk and eggs until very creamy. Add to the flour/butter mixture and gently fold together with a rubber spatula, carefully scraping the bottom of the bowl, until the batter is smooth and completely blended. It will be fairly thick. Pour batter into prepared pan. Run a knife through the batter to remove any air pockets, or you can gently drop the pan on the counter a few times for the same result.
Bake until a toothpick inserted in the center comes out clean, about 40-50 minutes for a bundt pan, 25-35 for a 9×13. Allow to cool for 20-30 minutes in the pan (if using a bundt pan) then run a knife around the edges to loosen and turn over on to a plate.
This cake is phenomenal when served warm.
original recipe from Saveur magazine, here with modifications.
October 13th, 2011
| 2 Comments »
There’s something quite elegant about a dark, almost black molasses cake.
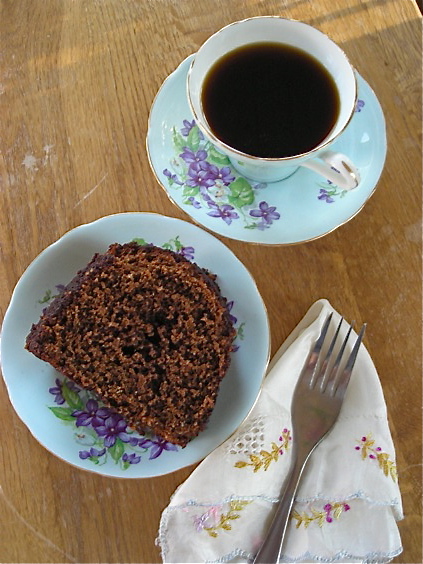
It’s a hallmark of Fall too, even though really, it’s good any time of year. But the cinnamon and ginger have the warm and tranquil feel of a blazing fire, or a maple tree in full color. They speak their spice words and the ones we hear the loudest is ‘Autumn’. Cooler weather means baking. A warm oven is the right means to chase the chill away, and a dark rich molasses cake sits on the counter, awaiting the moment when the dishes are done, the light is gone and the dessert plates come out, forks clinking in anticipation.
Call it gingerbread, call it molasses cake. It’s all the same in my head. And it’s a taste I’ve loved for an eternity, it seems. There is something about that flavor the moment that it lands in your mouth. It’s soothing, again; another impression that tells me of a passing season. A cake to usher in sweatshirt weather, and extra blankets on the bed. We all love these dark and inviting cakes, whether with a scoop of ice cream on top, or yogurt.
I’m not a recipe loyal cook. Ok, I recant; I can be a recipe loyal cook until I see something that I think would be even more amazing and then I try the new option and the old standby gets tossed aside. I’m easy like that. I like to experiment. I like to travel new gustatory paths and explore new tastes. This particular molasses cake has LOADS of molasses- a full 1-1/2 cups. And it strongly suggests you use blackstrap molasses to make it the richest, darkest most lush molasses cake of all time. I didn’t have blackstrap on hand. In fact, I’ve never bought blackstrap molasses. I might. Just to try this cake again in it’s original form, because, to this molasses cake crazy girl, this recipe was one that might never get replaced. It’s that good.
Coming from the kitchn, one can expect a recipe of extraordinary taste. I’ve been a bit hooked on what Faith Durand and Sara Kate Gillingham put forth, finding a great deal of recipes that stretch the limits of normal food items, a wide range of delicious and healthy vegetarian dishes that don’t read like a 1990’s restaurant menu and plenty of kitchen design upgrades that make even the most even-keeled, happy in her place person swoon in delight. And there’s never been a crashing dud in any of the recipes I’ve been bold enough to try. You need to really like your food to love what these ladies do with it, and I appreciate a place that wears like an old friend, a comfortable trustworthy feeling that brings a smile, a lightness to your heart. With so many slap-dash recipe sites out there, finding a trustworthy one that works is a gem.
So…. back to this cake. Did you think I’d forgotten?
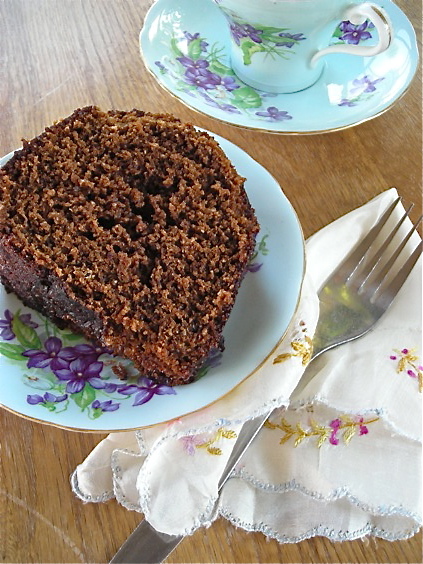
I would never forget to share such a treat with you. Are you a cake and ice cream fanatic? Because this works beautifully with vanilla, or mix it up a bit and go for pumpkin ice cream, cinnamon or when it’s available, try eggnog ice cream for a big decadent kick. It also works to eat it with yogurt, the richer and more dense, the better. A few brandied cherries on top wouldn’t be bad, nor would a turn in a microwave to warm it slightly, after which you drizzle a thin stream of pure maple syrup over the top. And whipped cream! If that’s your thing, you’re in luck. This cake does it all. All the parameters of a good dessert.
And if dessert isn’t your thing exactly, try a piece of this with your morning coffee. You’re welcome.
Dark and Damp Molasses Cake
12 T. unsalted butter, cut into chunks
1 1/2 c. unsulphured dark or unsulphured blackstrap molasses
3/4 c. brown sugar
1/3 c. white sugar
3 1/4 c. all-purpose flour
1/2 t. fine salt
2 1/2 t. baking soda
2 t. ground ginger
1/2 t. cinnamon
2 t. espresso powder (optional)
1 t. vanilla
2 large eggs, beaten
1 1/2 c. whole milk
Heat the oven to 350°F. Lightly butter or grease a standard bundt cake pan.
Place the chunks of butter in a 2-quart saucepan set over medium heat. Pour in the molasses and whisk in the brown sugar and white sugar. Whisk as the butter melts. When the butter has melted and is completely liquid, and the sugar has dissolved and is no longer grainy, give it a final stir and turn off the heat. Set the pan aside to cool. (The molasses will look slightly separated from the melted fat; they won’t be smoothly combined.)
Use a clean dry whisk to combine the flour, salt, baking soda, ginger, cinnamon and espresso powder in a large bowl. (The espresso powder is optional; it will lend one more dimension of flavor to your cake.)
Whisk the vanilla, eggs, and milk into the saucepan with the molasses and melted butter. When it is completely combined, pour this liquid slowly into the bowl of dry ingredients. Whisk thoroughly to combine, making sure there are no lumps.
Pour the thick batter into the prepared springform pan. Bake at 350°F for 45 to 50 minutes or until a tester inserted in the center of the cake comes out clean. Let cool for 20 or 30 minutes, then run a thin, flexible knife around the inside of the pan to help the cakes edges release. Remove the cake from the pan and let it cool completely on cooling rack.
recipe from the kitchn; for a delicious frosting to spread on top of this cake, follow the link here.
December 16th, 2010
| 7 Comments »
Baking has always been about connections for me, most importantly, to my Mom. I treasure many of the delicious recipes that defined my childhood and love seeing some of those old favorites show up in the multiple blogs I follow. Cookies like Chocolate Crackles, a moist fudgey cake-like cookie with a powdered sugar coating,
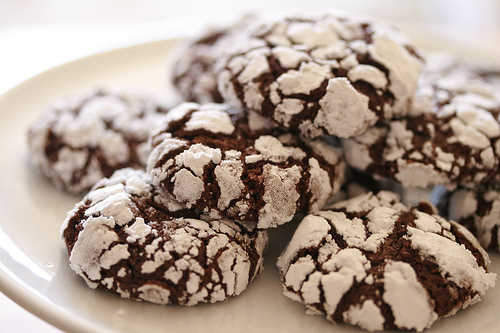 {photo courtesy of Food Librarian} {photo courtesy of Food Librarian}
and Nainamo Bars, or as we grew up with, Three Layer Bars, a superbly decadent blend of nuts, chocolate, coconut and vanilla pudding, carefully constructed into a glamorous tower that delights not only the eye but the tastebuds as well.
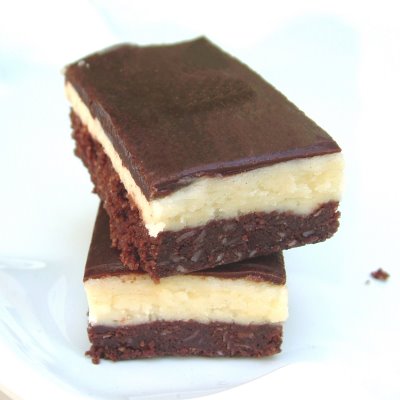
{photo courtesy of small home, big start}
These treats played a significant role in our lives, and it’s been such a joy to re-create these for family gatherings and be able to see my siblings once again appreciate some of the tastes of our past.
I personally have been searching for yet another taste of childhood, one that’s eluded me up until now- the taste of my Mom’s Date Bars. She made these especially for me, and for my sister Karen. We both loved the chewy date filling and crunchy oat topping. I was known to seek out the treasured edge pieces where the dates caramelized in the baking process, becoming firm and chewy, like date jerky if you will. I loved how it kind of stuck in my teeth, a sugary toffee feel in my mouth and I loved the anticipation of how the topping would crumble as I bit into it, catching the errant bits in my hand as they fell.
My Mom’s recipe box sits in my cupboard, but no matter how many times I combed through it, I never found that particular recipe, the only one over the years that’s been outside my grasp. I’ve tried several other versions that have passed my eyes and not one has even been close. It was probably one of those recipes that came on a carton of oatmeal, that she made a few times and somehow lost it in a move, or quite possibly, it was something she’d memorized, a small part of my growing up that went dark when she passed away. I could make her Peanut Butter Fingers, and the Coffee Toffee Bars that we loved; I could make the Sour Cream Drop cookies with the mocha frosting and pan after pan of Oatmeal Scotchies, even a batch of her famous Banana Bread but I could never find a recipe that brought back those Date Bars. I scanned dozens of them, and each one was cast aside, as I knew just looking at it that it would never be what I expected.
Then I happened upon a recipe that sounded like the siren call bringing me back to that sunny kitchen, my Mom’s smiling face and those chewy caramelized edges of a bar that was just perfect.
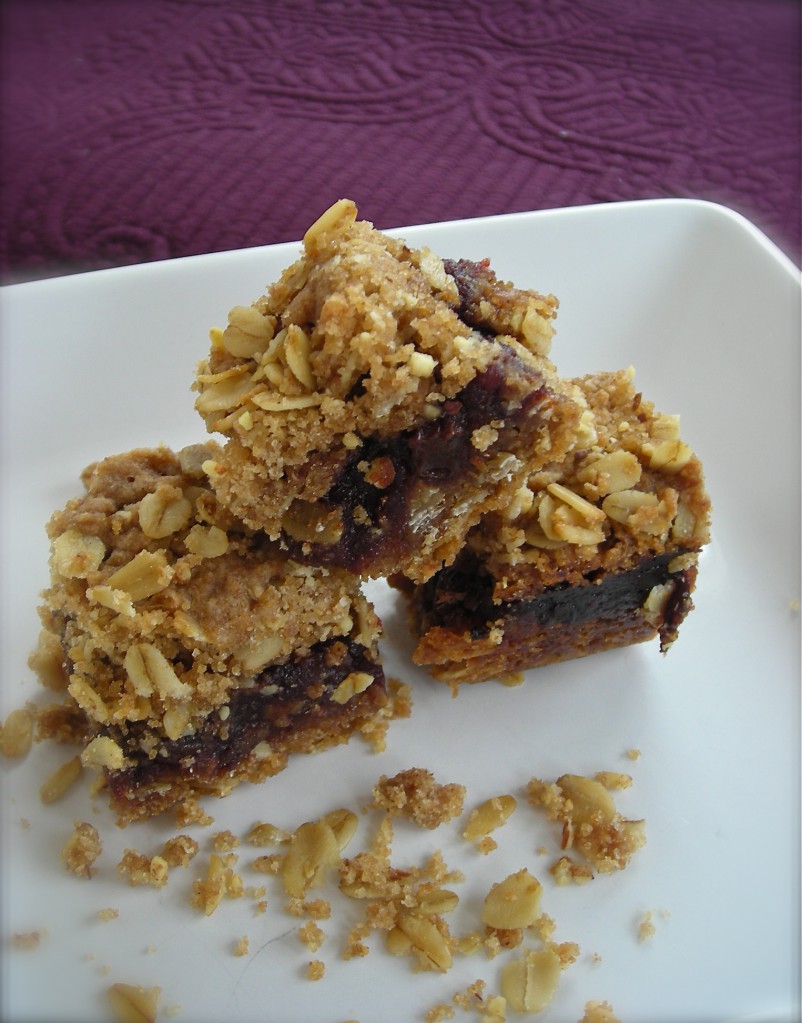
And years of wishing for one thing, one perfect treat from a time when I was small enough to lean an arm on the kitchen counter and be soothed by a crunchy and chewy bar made just for me, well that all fell away as I lifted the parchment sheet holding the thick mass out of the pan in my own sunny kitchen. The smell of these fragrant date bars made its way to my nose and the memory caught in my throat, threatening to send the tear ducts into overdrive. Smell and taste are so powerful in us, so driving us to seek those parts of our lives that have faded, sometimes too far for us to even recognize any longer. But this one had stayed, regardless of how long it had been, how far back I had to go to retrieve it, one whiff of this recipe and I was a tiny girl again, watching my Mom, with the scent of cooked dates in my head and the anticipation of that first bite, the shards of crunchy oats falling to my open palm, and her smile warm in my eyes.
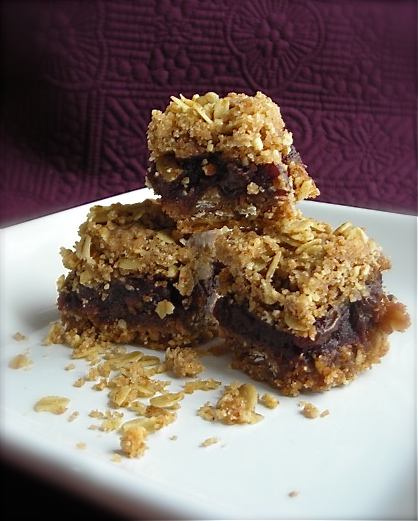
And I happily welcome back this treasured memory. I’ve been patiently waiting for it to return and now it will have a permanent spot in my kitchen.
Oat and Nut Date Squares
adapted from an original recipe, author unknown.
1 8-oz package chopped dates (or equivalent of fresh)
1/4 c. black raisins
1 c. water
Zest from half a clementine (you can use orange zest, but measure 2 teaspoons for equivalent)
1-2 t. clementine juice (use 1 t. fresh orange juice)
1/2 c. ground almonds ( sub in walnuts or pecans if desired)
1/2 c. each whole wheat flour and all-purpose flour
1/2 t. table salt
1/2 t. baking soda
1 t. ground cinnamon
1/2 t. ground nutmeg
1/8 t. ground cloves
1 c. packed brown sugar
1-1/2 sticks unsalted butter, diced, softened but still fairly cold.
1 c. old fashioned rolled oats
Preheat oven to 350° and spray an 8×8 baking pan with cooking spray. Line with parchment paper so that it hangs over edge of pan.
In small saucepan, combine dates, raisins and water. Bring to a boil, then reduce heat and simmer, stirring occasionally until all liquid has been absorbed and fruit is a thick, concentrated paste. This should take about 10 minutes. Remove from heat, stir in clementine zest and juice and blend well. Scrape onto a plate and spread to cool.
In the bowl of a food processor, place ground almonds, both flours, salt, soda and spices. Pulse to combine. Add in brown sugar and pulse to blend. Scatter butter over top and pulse until mixture is like coarse uneven meal. There should be lumps of butter in all sizes. Pour this into a large bowl and stir in the oats.
Press 2/3 of the mixture into the prepared pan, pressing down firmly. Spoon cooled date mixture over, spreading it to cover crust completely. Sprinkle remaining oat mixture over the top. Bake until top crust is golden brown and crisp, 30-40 minutes.
Cool bars completely on a rack, still in the pan. Once bars are at room temperature, gently lift them out of the pan using the parchment paper. Slice into 2″ squares to serve. These bars are delicious when chilled. Keep in airtight container or refrigerated.
October 26th, 2006
| 8 Comments »
Chewy Cheesecake Cookies (NOT a low fat recipe)
Blend together one stick of room temperature butter (no subs!), with one 3-oz package of softened cream cheese until creamy. Gradually add in one cup of white sugar until light and fluffy. Stir in one cup of AP flour until incorporated. Do not overmix. Scoop by tablespoon onto ungreased baking sheets and bake at 375 until slightly browned around the edges, about 10-12 minutes. Allow them to cool for several minutes before removing them from the sheets.
|