May 30th, 2014
| 12 Comments »
The blog turns 8 years old this year. And it’s finally come to pass that my time is this space is over.
Actually, it was probably over 2-3 years ago. It was around this time that the traffic died off pretty drastically, but the faithful still kept stopping by to visit. My goal, as it has always been, is to be authentic and real in this space, to not doctor up the reality of my foods, to not dress them in excessive plating or backdrops or props that mean nothing to what I’m eating, but to just make honest, real food and take a photo or two of how it looks in my kitchen, right at that moment.
And that, apparently, is not what people want to see. No one wants real. So many food blogs now just look like online magazines, and many that you see all look the same- the same type of props, the same food styling, commercialized posts that sound trite and phony, sidebars so clogged with badges and icons that it’s almost impossible to find the actual content. Food blogging has become big bucks business, and you’re not in the game if you don’t play by the rules. The moment I realized there were rules to food blogging {which seems so utterly ridiculous that I can barely type it}, I should have been signing off once and for all.
Thankfully there is a whole new aspect to food blogging that is quietly turning the tide on the old ways, blogs that are stunningly gorgeous, yet simply done, with evocative photography and incredible, fresh, wholesome foods.
I so love this new wave of blogging. This is something I can happily get behind.
Here’s the thing: I do not begrudge for one moment those bloggers who fuss and primp and tidy their photos to be museum-worthy, who follow the rules, fuss over SEO, stats and where they rank on Google, those who’ve made it a business that makes them an enviable income. I am in awe of them, for the most part. But that’s not me. It’s not my style to pretend this space is anything but a window in to my kitchen and the foods I like to eat. It’s not a gasp producing photo that I want to share with you, nor a rightly worded document designed to lift some random number. I’ve never wanted to be a commercial for anyone, to display ‘Brand Ambassador’ badges, to shill for someone who pays me money.
I’ve done it, yes; but it’s always just felt wrong.
What I’ve wanted is to share my life in the kitchen with those interested in listening. But when it’s clear that no one is listening any longer, it becomes so much harder to think about what to say.
And what I was doing was spending all my free time trying to create something blog-worthy, something that wasn’t found on a thousand other sites, a unique and fresh approach to the sustenance we all need, a story to resonate deep within us, and I was not excelling at any of it, least of all, my increasing need to just be present and enjoy my life, my friends, the foods I love and the people I share it with, without photos, without capture of a single forkful, without thinking ‘This should go on the blog’.
In fact, it’s been a long time since I’ve been moved to write about the food I’m eating,
and that right there is all the motivation I need to be done.
And this space of mine has really served me well. I’ve learned so much from these past 8 years, from the people I’ve met, the friends I’ve made, near and far all over the globe. I look through the Recipe Index and see where it’s taken me, and often, it’s been far ahead of anyone else, charging out there and trying new foods, new methods, always seeking out something different to share. I’ve never been afraid to put myself out there, to show everyone what worked, and what didn’t. I’ve never shied away from an opinion, good or bad. Over time, and changes to the site, I’ve deleted aspects of this space that stopped being productive and concentrated on the food, the stories that go along with it and the way it’s made me feel.
That interest will never change, the desire to capture the words within our food. But in this space, it’s done.
There will be another space, another site for me to explore a wider aspect of myself, for writing {lots of writing} and sharing photos of my life, maybe a recipe or two, but a space that isn’t limited by only one part of the whole of who I am.
To all of you, I have only a few words I really want to say:
Thank you. Thank you so, so very much.
For listening, for sharing my recipes with others, for coming alongside this journey, however long you’ve been hanging around.
I’ve so appreciated your company.
If you haven’t already, come alongside me on Instagram, Twitter {{new Twitter name!!}}, Facebook and Pinterest.
If you know me, you know that I have a lot to say and share.
May 27th, 2014
| 2 Comments »
I’m just slipping in here to show you a few of my previous posts for wonderful Spring recipes now that our season has really taken off. It’s green, flowering, rainy, then sunny, and now, finally it’s getting warm.
One benefit of having a food blog for almost 8 years is the huge Recipe file filled with so many luscious treats. There are a lot of great options for Spring, and instead of having to peruse the Recipes and decide for yourself, I’ll share some of my favorites from Spring seasons past.
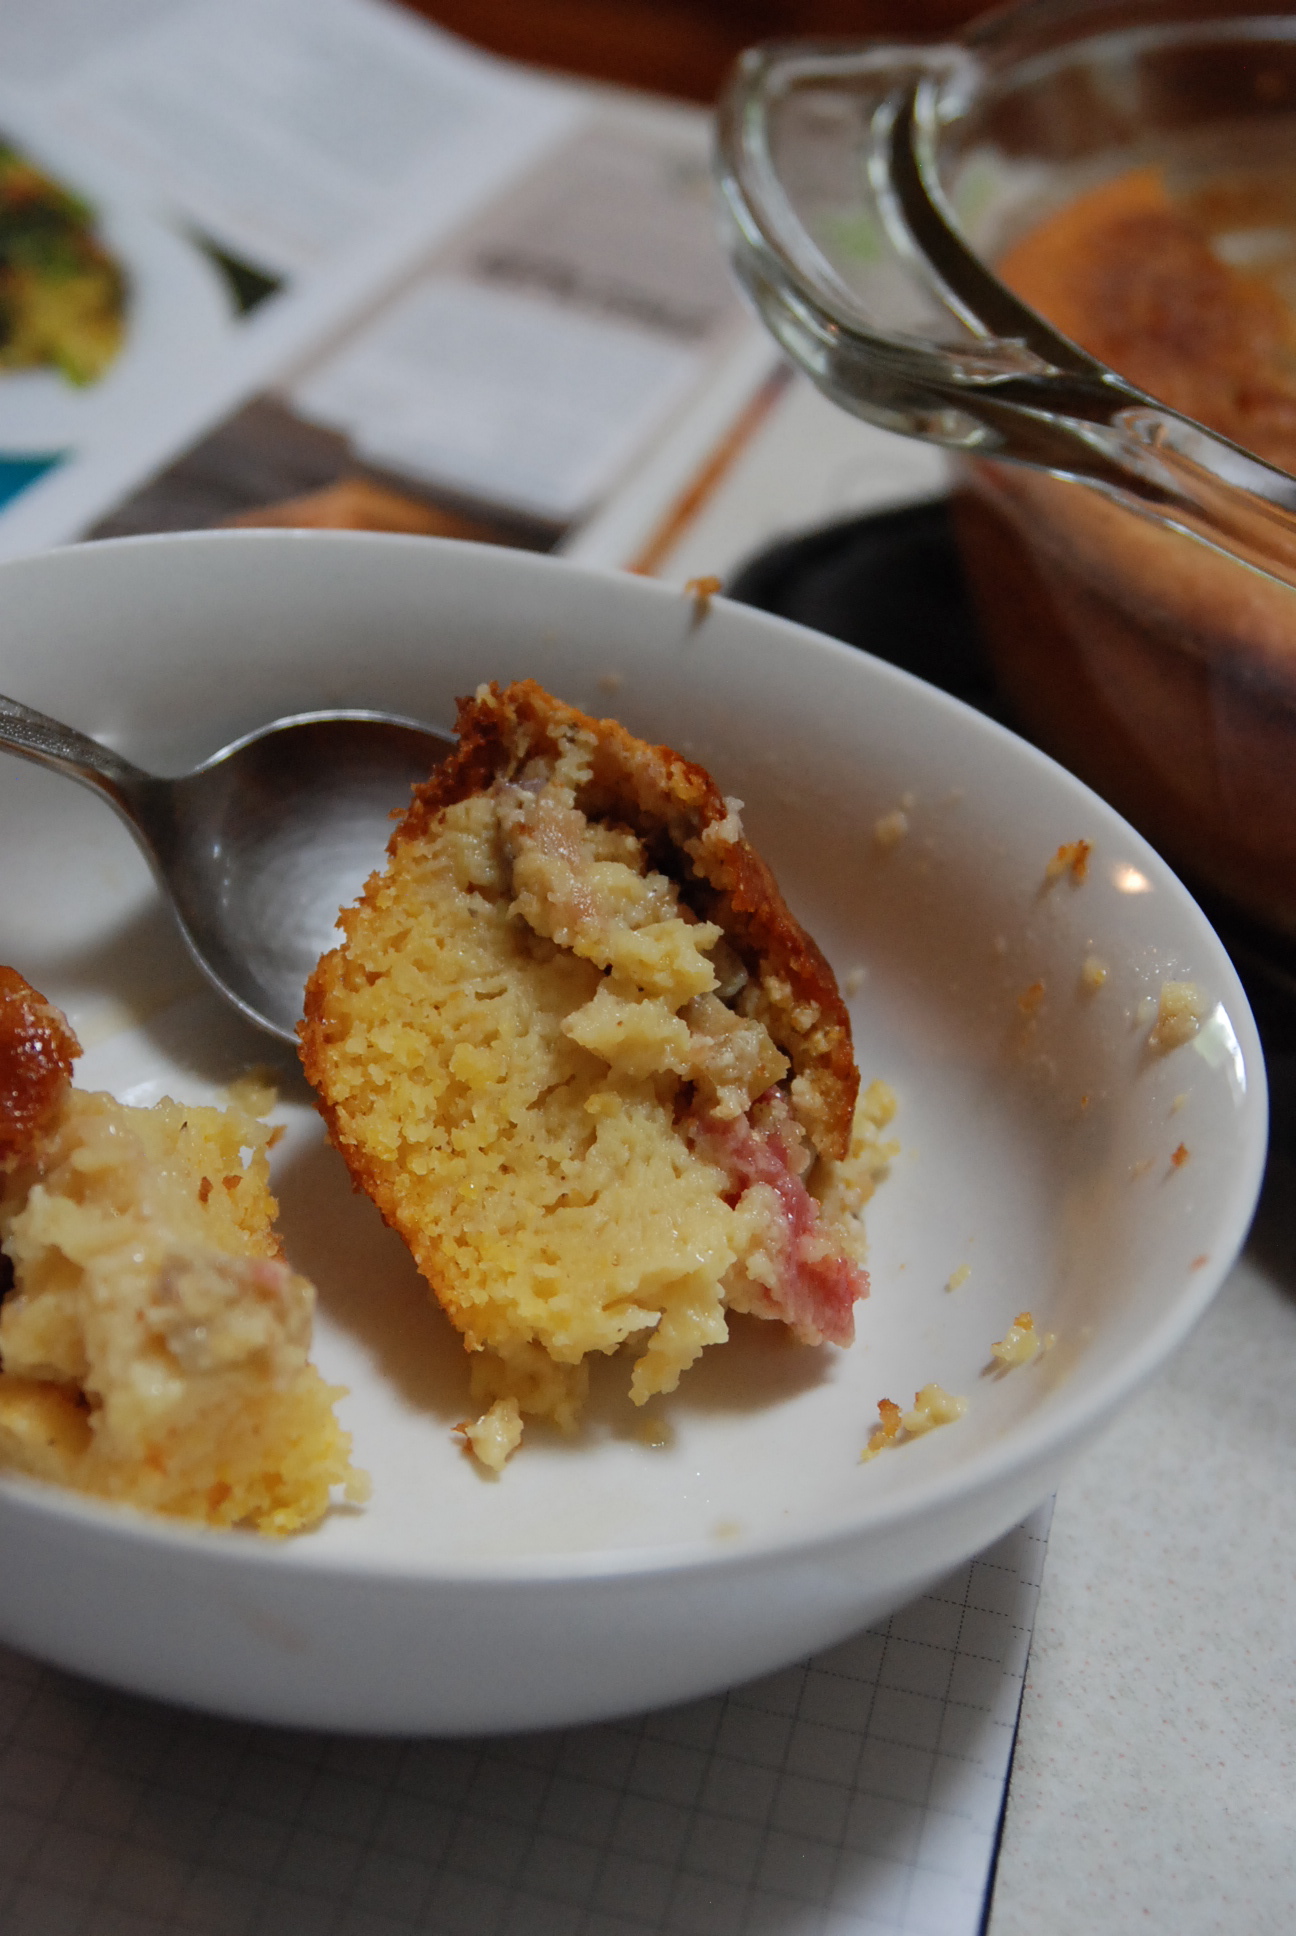
Almost two years ago to the day, this wonderful Rhubarb Spoon-Bread graced my kitchen. It was dreamy and creamy, tender and delicious. The downside was that I was the only one who liked it so I haven’t made it again, but I hope someone else can enjoy this delectable treat.

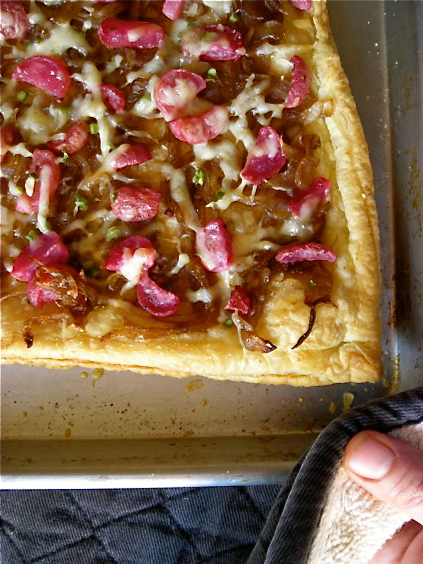
Ever roasted radishes?? You’ll love how the peppery bite is mellowed with the heat. This Roasted Radish & Caramelized Onion Tart is light and fresh tasting.
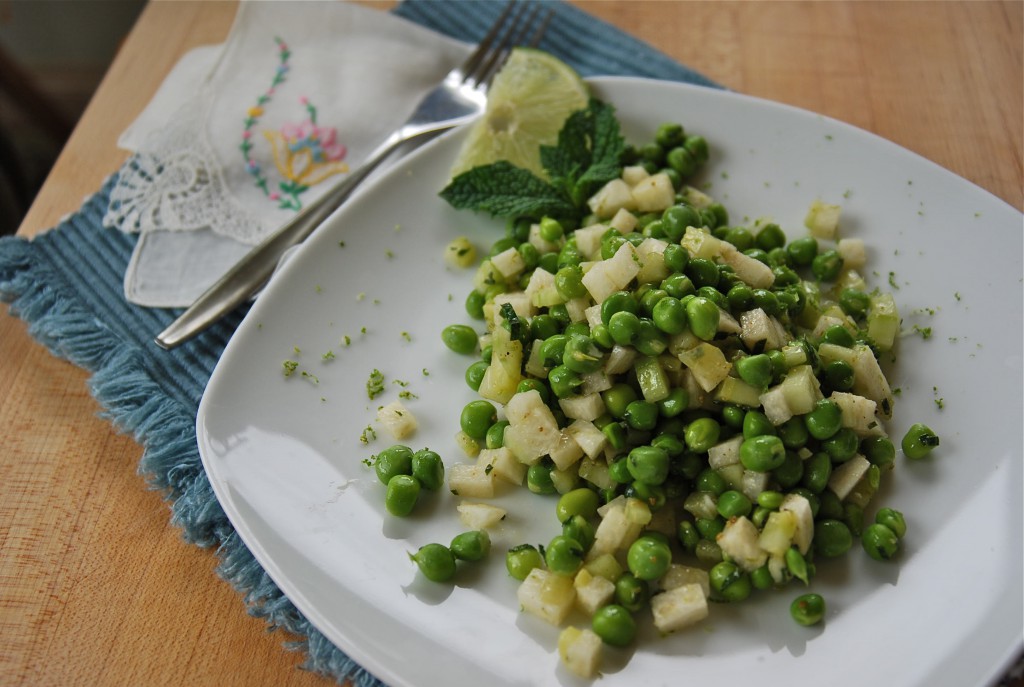
One of my most favorite, and often repeated salads every Spring is this Raw Pea Salad with Jicama, Cucumber & Mint. It satisfies one’s need for crunch, freshness and flavor all in one bite.
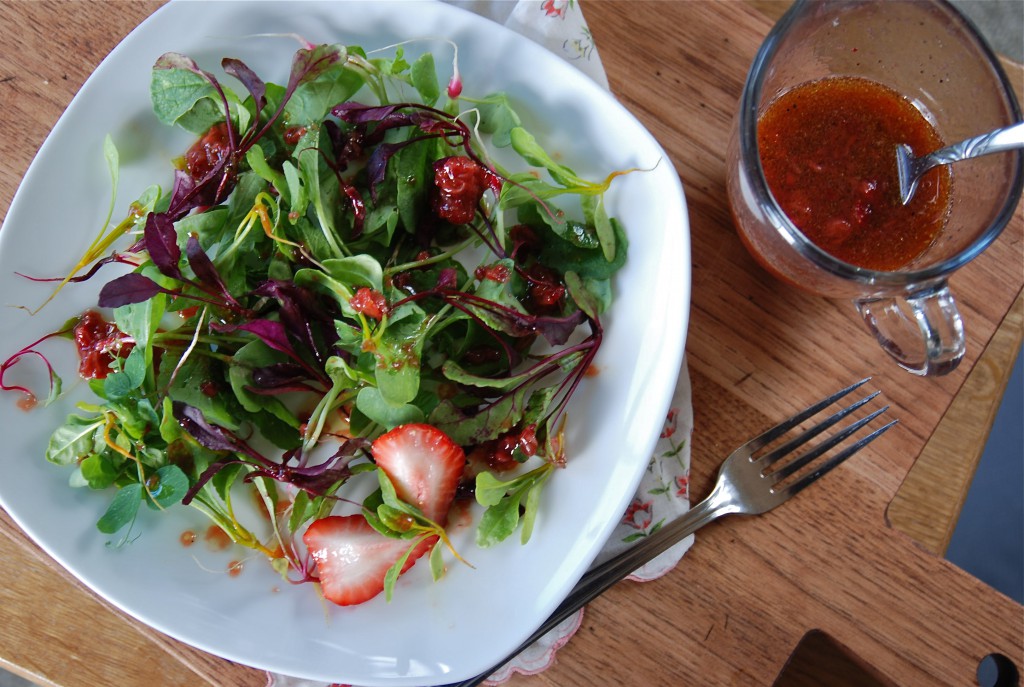
Looking for something different to do with your strawberries? Make a delightful and simple Strawberry Vinaigrette to dress your freshest of Spring greenery.
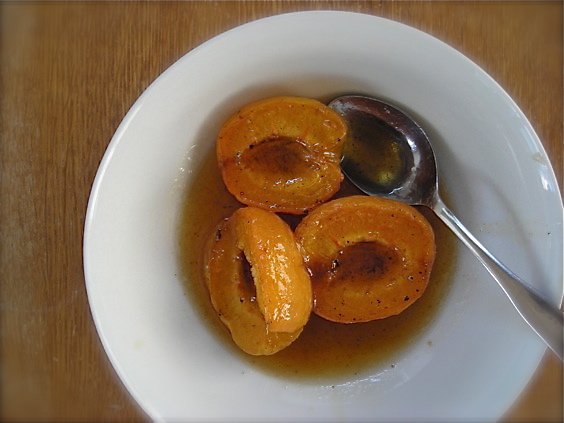
Apricots are one of the sweetest, and most fleeting of the stone fruits, with a season that is so quick you can miss out if not careful. A fresh apricot, tender and juicy is a delight all on it’s own, but these Roasted Apricots in Cardamom Brown Sugar Glaze are an amazing and buttery treat you won’t want to miss.
While it’s not quite yet Nectarine season, you can find some awfully good ones in the markets if you know where to look. I love this easy and light Ginger Nectarine Cake for showcasing yet another of the finest stone fruits.

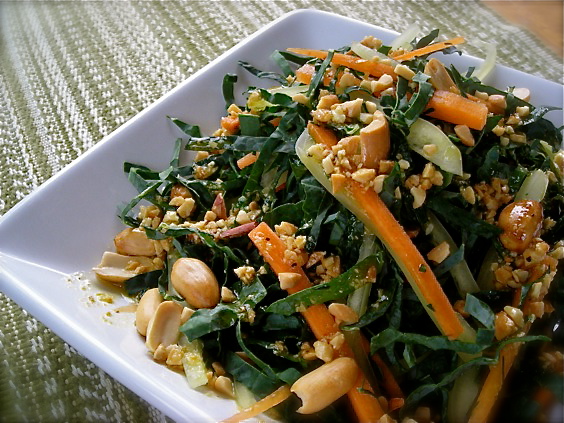
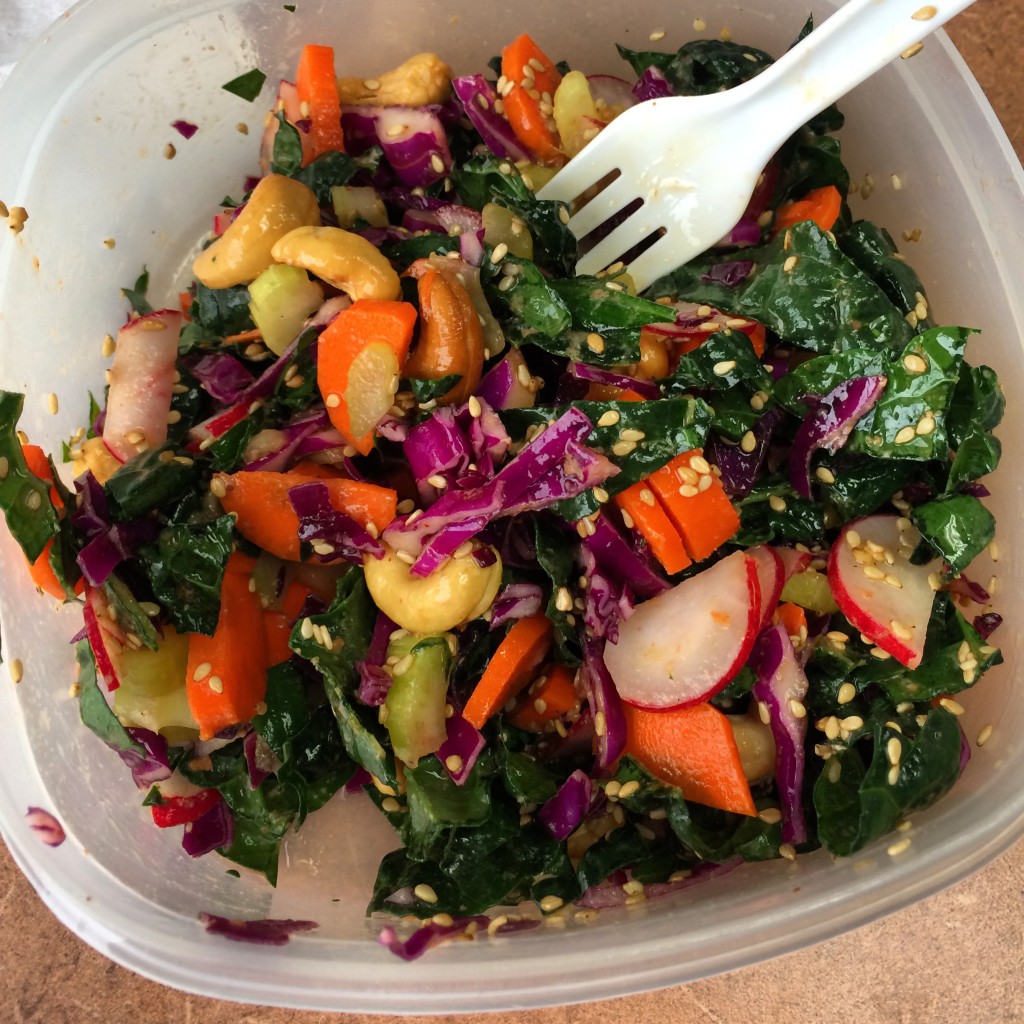
For a warm weather option, I love a good salad with a different twist from the standard lettuce and veggies. This Kale Slaw with Peanut Dressing is one of my favorites styles, and I’ve been making a variation of it regularly since it’s first creation in 2011.
And outside of this space, I’ve used these references for endless inspiration on warm weather dining:
Mark Bittman’s 101 Simple Salads for the Season and Summer Express: 101 Simple Meals Ready in 10 Minutes or Less.
May 9th, 2014
| 2 Comments »
I spent a precious 27 hours in my most favorite of places, my lake home in Western Wisconsin, taking just a short window of time to draw away from the battlements and the never-ending stream of life and gaze out instead over a body of water. The ebb and flow of the wind, the constantly changing surface of the lake seems to calm my ever-present rumination on life and ease the stress. I love the lake and the feel of this place, listening to the profound quiet of mid-week, early season lake life before the docks go in, the boats come out, where early mornings feel like a gift, sipping coffee on the screen porch while the birds sing and chatter.


Come in to my kitchen…
April 30th, 2014
| 2 Comments »
Unique food items always intrigue me, and I tend to have an eagle eye out for anything different from the mainstream offerings available. This is becoming more and more difficult, as the food scene in Minnesota has expanded exponentially to include food items from various cultures, with ethnic markets, gourmet food shops, fine spices, and artisan products of all kinds at the ready, with a willingness to drive being your only obstacle to finding what you want.
NAR Gourmet contacted me about trying some of their unique handmade food items, all sourced locally in Anatolia, (formally known as Turkey), and embodying the rich flavors of the Mediterranean. With a North American option of purchasing their products on Amazon, NAR Gourmet can begin spreading it’s gorgeous flavors and packaging beyond the local borders, bringing these beautiful, delicious and rarely found foods to US customers.
{I have no affiliation with NAR Gourmet, or Amazon, and am not receiving any compensation for this post.
The products from NAR Gourmet were free; all opinions of them are my own.
I will not receive anything from Amazon for any purchase of NAR Gourmet products made on their site.}
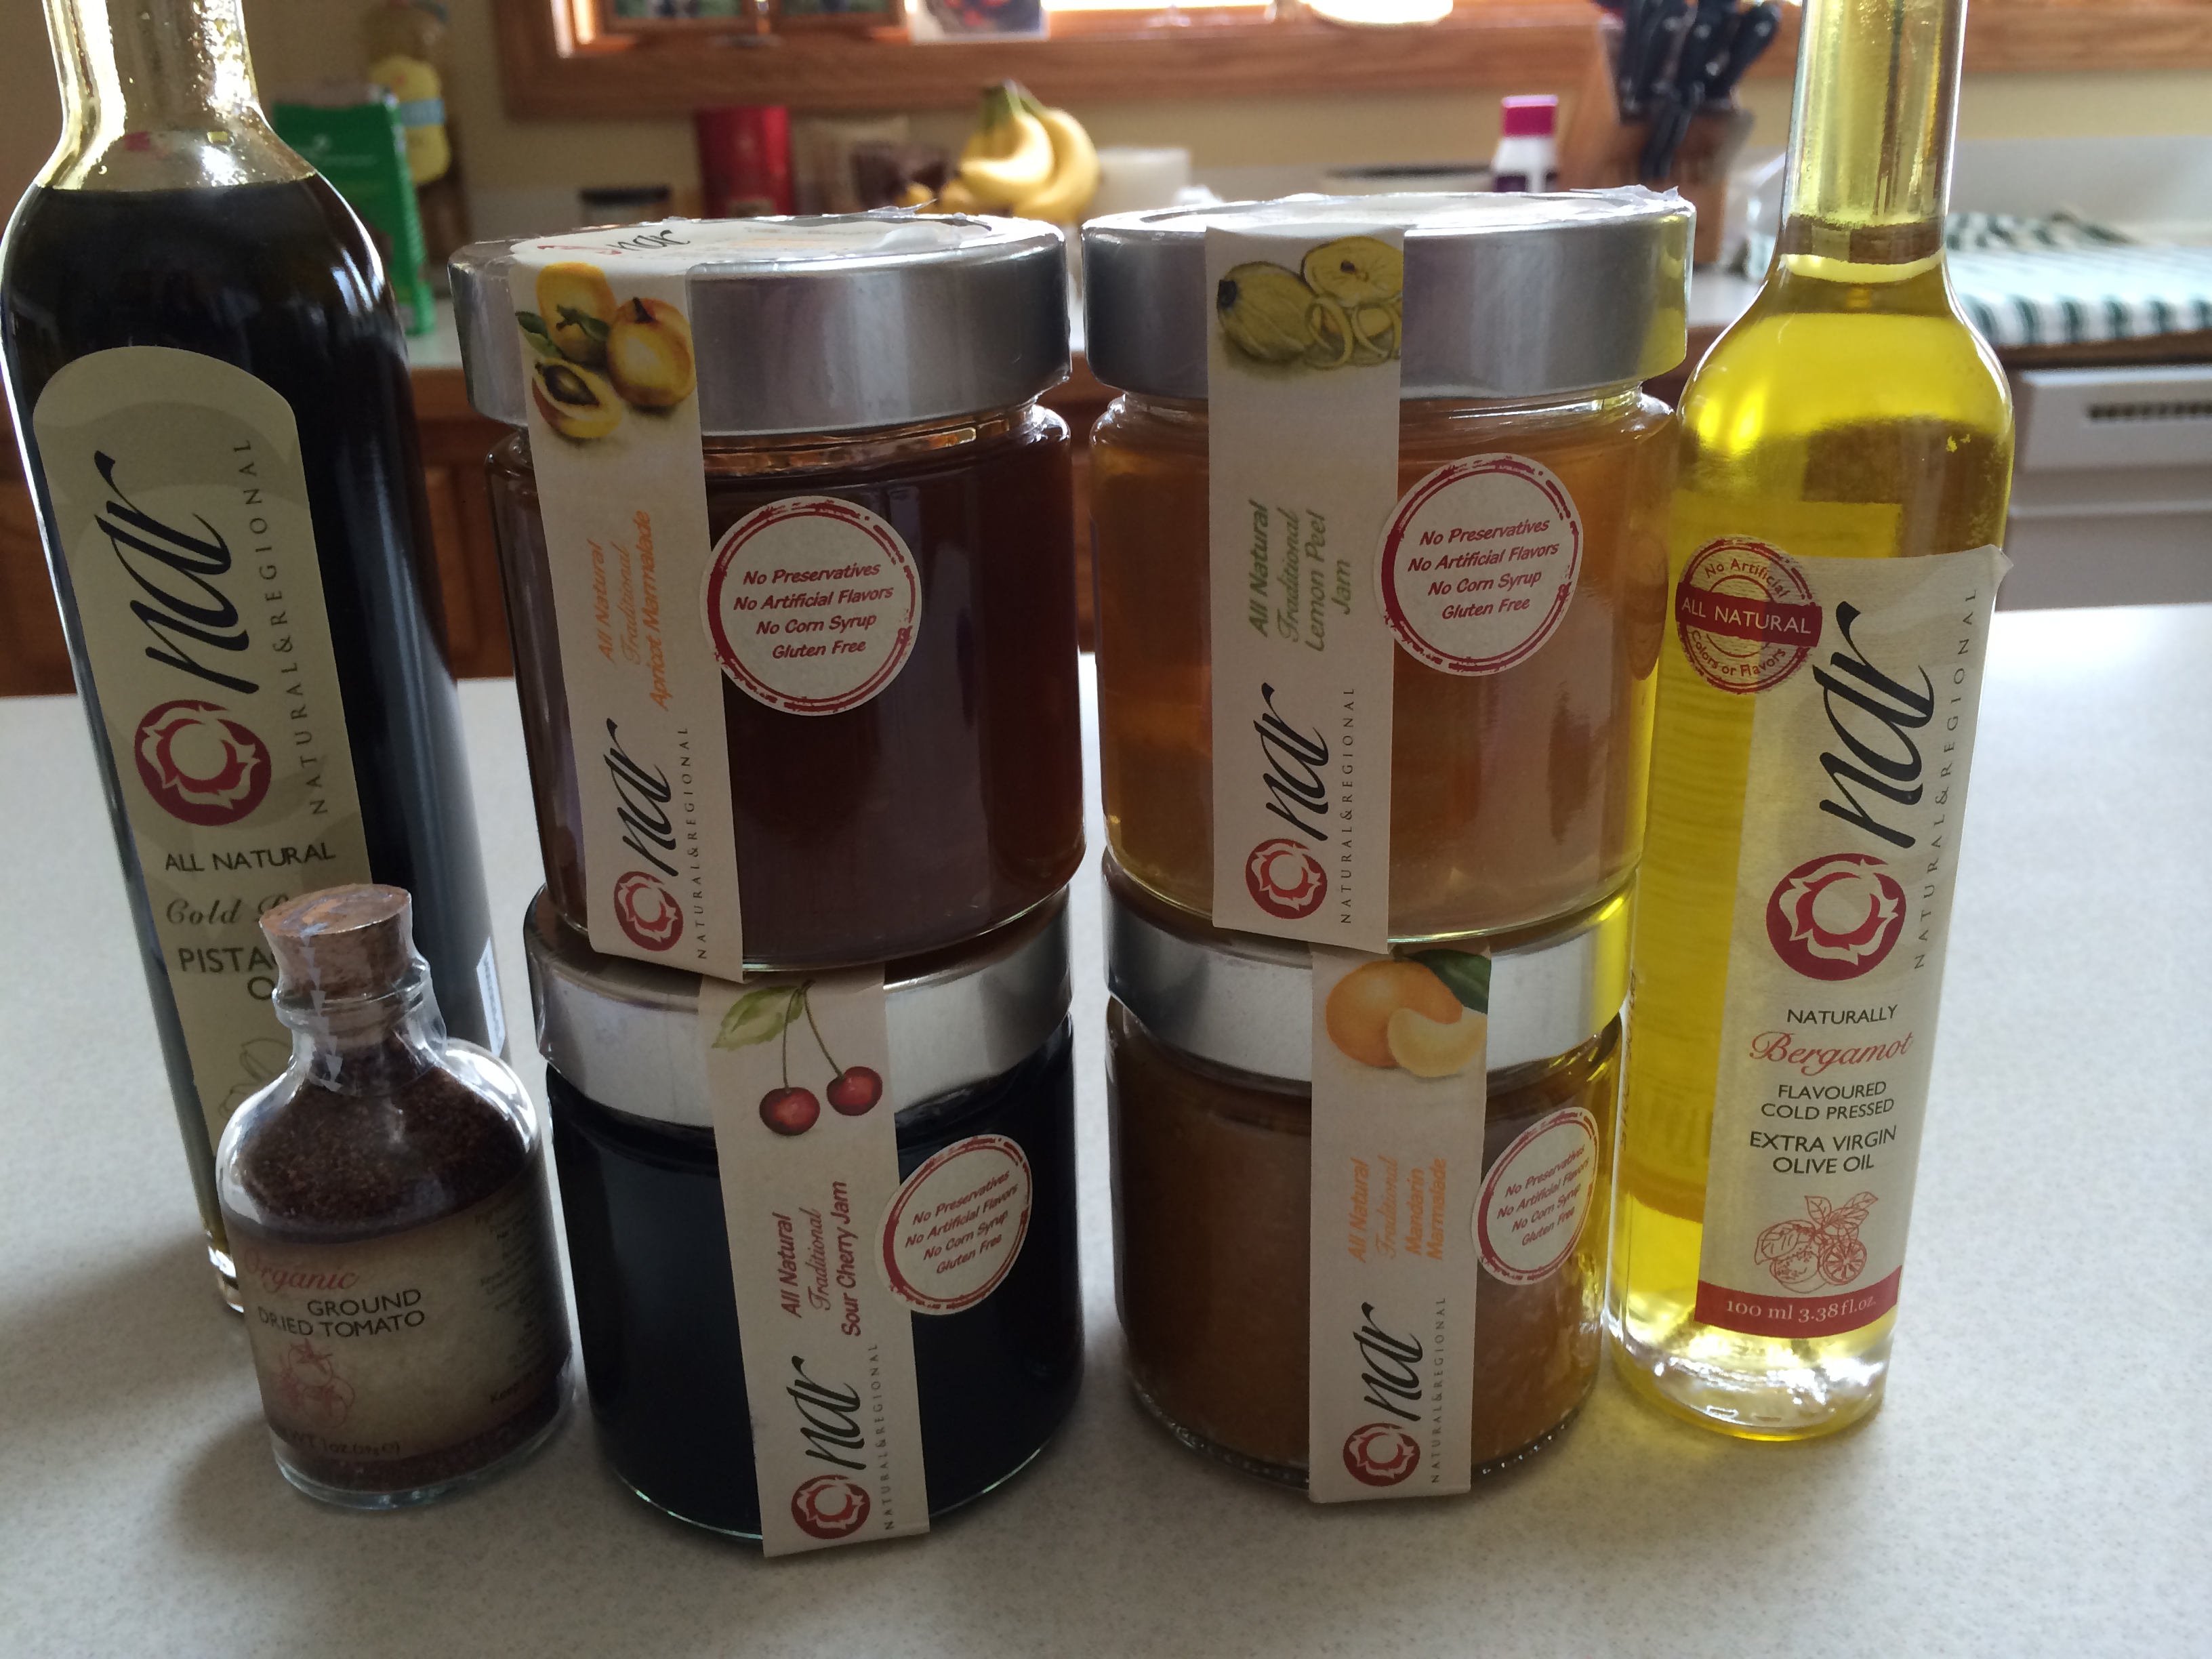
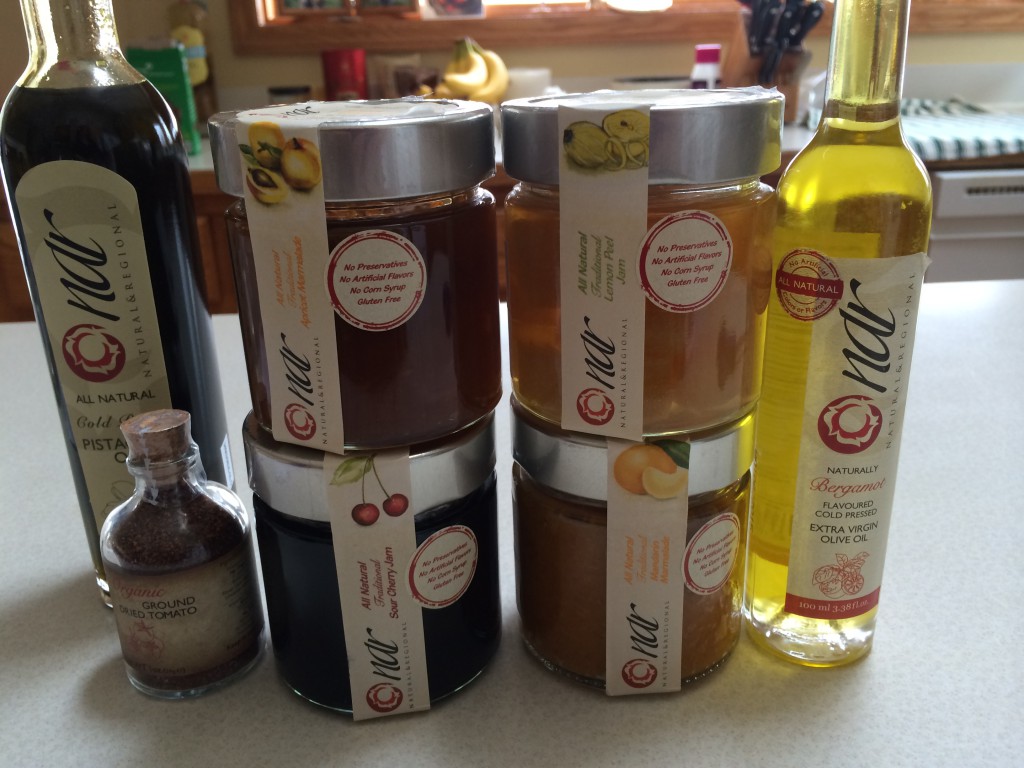
First thing I noticed about these products upon opening the box was the beautiful packaging and jars. These are the kind of jars that you can wash and re-use in your kitchen, with fabulous thick, sturdy lids. I received Bergamot flavored Olive oil {the light colored oil on the right} and I absolutely loved the long, lean bottle. The oil was phenomenal drizzled on salads. It’s very light, but cleanly flavored and the taste is pure and fresh. Bergamot Oranges are grown mostly in southern Italy and France and used for essential oils; the fruit grown in Anatolia is primarily used for flavoring food-grade oils and making marmalades.
Another oil that arrived was Pistachio oil, a deep green oil that is also wonderful on salads or drizzled over roasted vegetables. It’s flavor is rich and nutty, and it’s actually a good oil to use on your skin as well. For more kitchen uses of this gorgeous oil, check out this article on The Kitchn. One suggestion was brushing the oil on fresh apricots, then grilling them; with apricot season just around the corner, you can bet I’m going to try that.
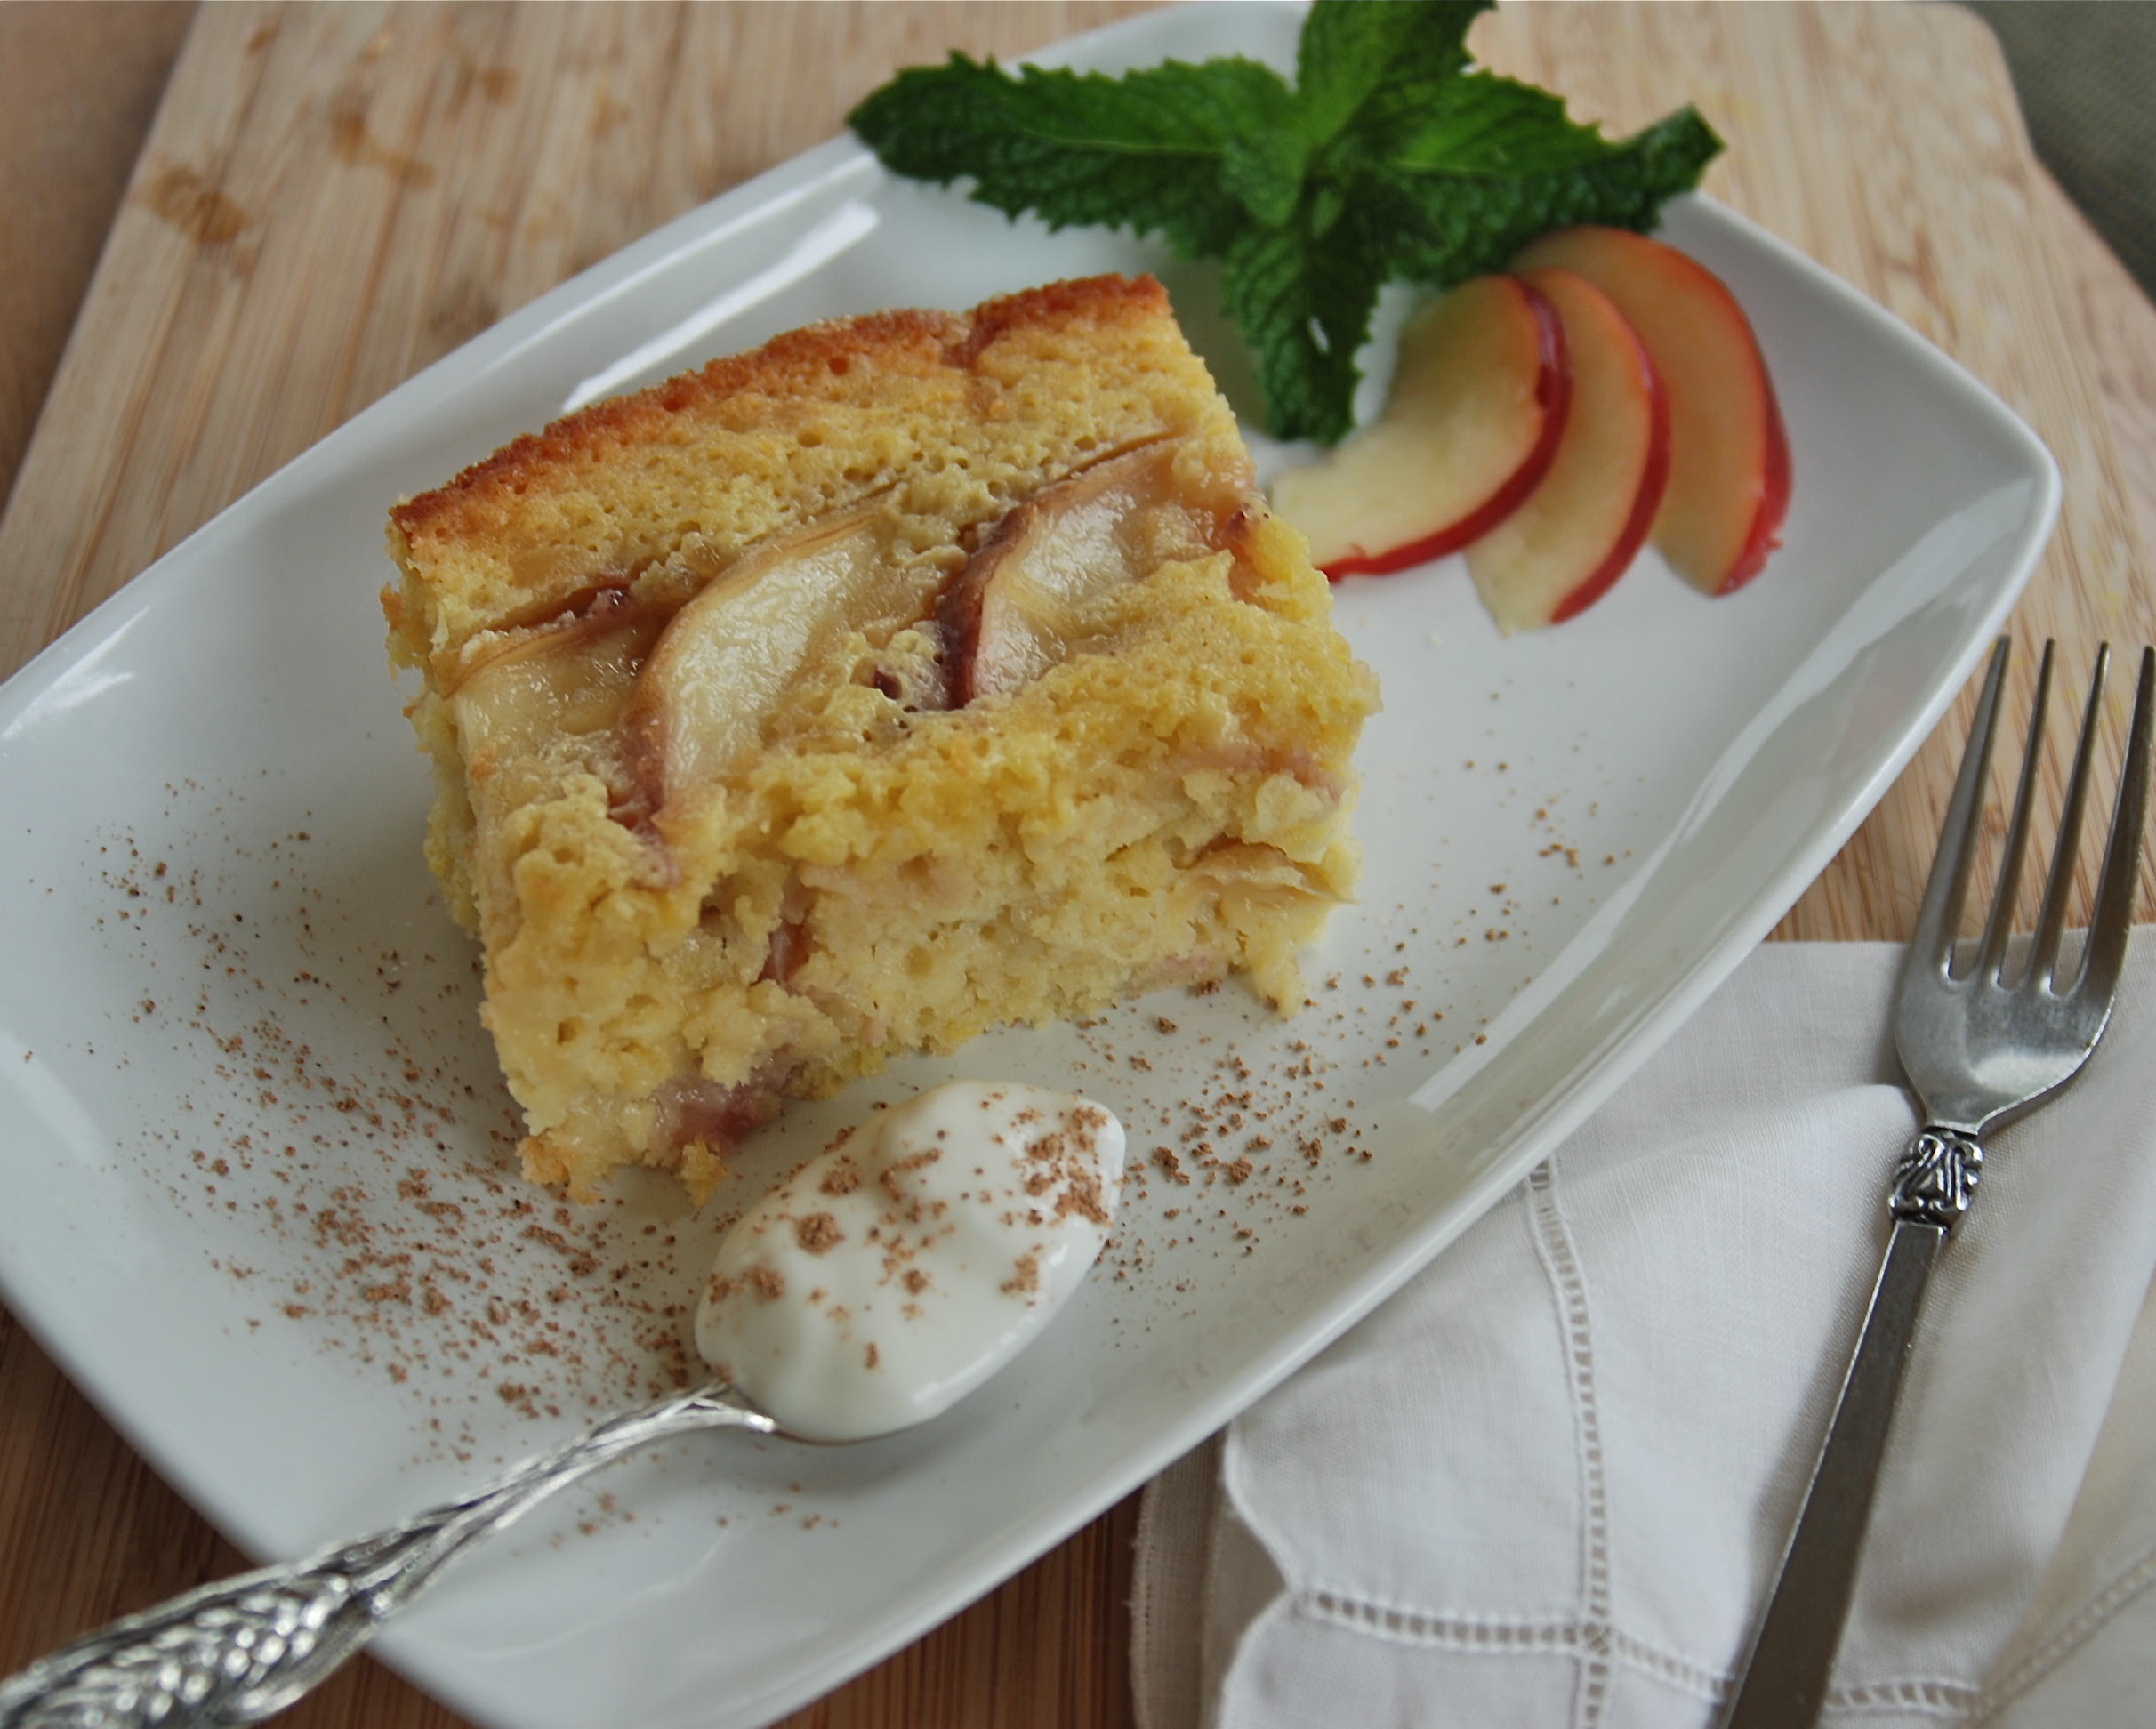
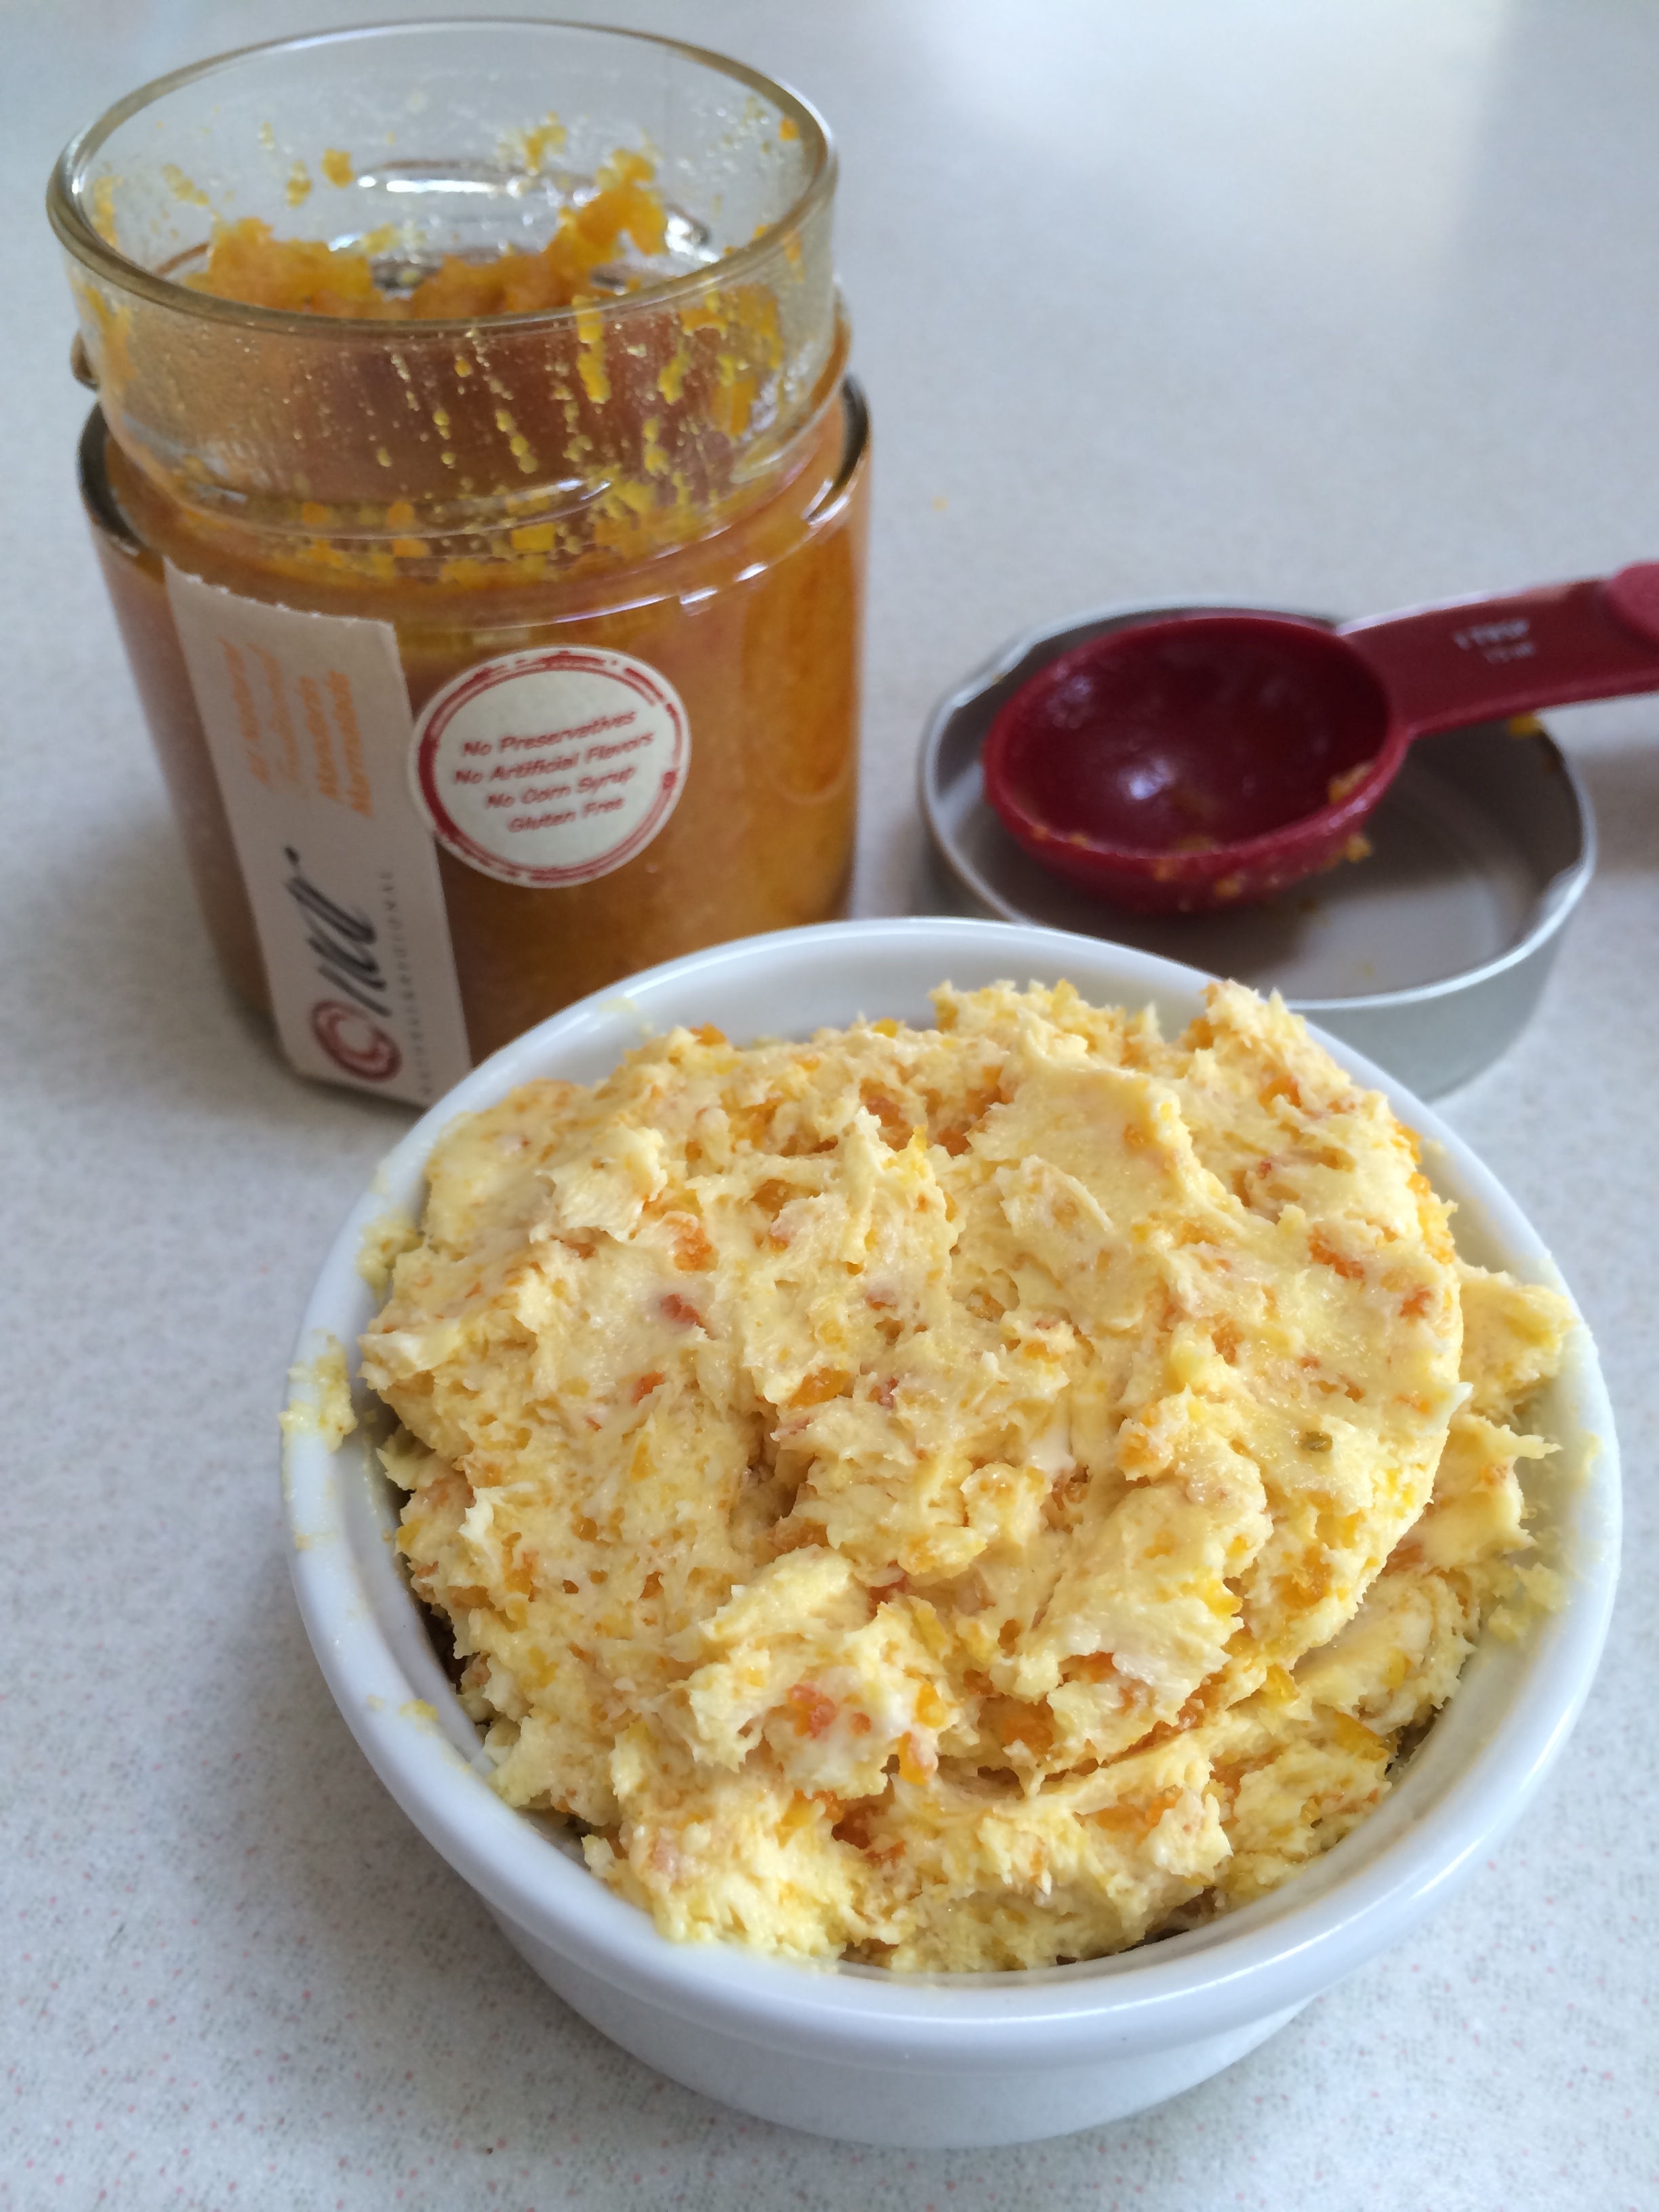
I received two jars of marmalade- Mandarin and Apricot. The Apricot marmalade went in to a delicious tea cake recipe I found on The Yellow House, one of my blog reads. The cake was tender and delicious, with a bright spark of flavor and a sunny color. It vanished like a snowflake in July. The Mandarin marmalade was made in to Marmalade Butter on two occasions, spread on toast and pancakes with plenty of oooohs and aaaaahs to compliment the wonderful taste.

The recipe for this is simple: soften one stick of butter and add two heaping tablespoons of your favorite marmalade, then mix with a fork to combine. Adjust more or less to taste and keep tightly covered on your counter for spreadability. Trust me… this will not last long. I added a touch of Maldon Smoked Sea Salt for flavor and it did not disappoint. Try it on sourdough toast, or crisp waffles.
Other items I received were Sour Cherry Jam and Lemon Peel Preserves. These have yet to be opened, as I’m still determining the best route to use for them. The Lemon Peel Preserves have huge chunks of whole lemon rind in it. Another item, Ground Dried Tomato, has been making it’s way in to various dishes and toppings, such as mixed with olive oil and brushed on vegetables for roasting, mixed in to lentils when cooking or sprinkled over potatoes. It’s texture is soft between your fingers; I expected it to be crumbly and dry but it’s very fresh, the scent is much like sun-dried tomato, and the flavor is very subtle. A little goes a long way and I know this will get a lot of use in my kitchen.
NAR Gourmet has a huge line of products, with lots of jams, oil, spices and other food products like vinegars and teas, as well as candies and pure, natural soaps. The line on Amazon is strictly food items, and is not a full list of what NAR Gourmet offers, but there is something for every taste available there.
April 27th, 2014
| 1 Comment »
{{In the midst of radio silence on the blog, I’m re-posting this terrific Crackerbread recipe from last Spring,
along with a bittersweet story of my beloved rolling pin}}
I have a rolling pin in my kitchen that I suspect is older than I am. It belonged to my Mom, and when she passed, I wordlessly picked it up, a flood of childhood memories racing through me; winter afternoons in our kitchen, the laminate tabletop covered in flour and pie tins at the ready. My sisters and I, our eyes eager, would watch our Mom as she pressed, turned, rolled and spun that rolling pin over a disc of fragrant pie dough. The pin whizzed as she pushed, a thwack on the counter as it dropped back on the dough, amidst the crackle of wax paper and the gentle song of a heating oven.

Come in to my kitchen…
April 7th, 2014
| 1 Comment »
I have a tendency not to share these dishes we eat, mostly thrown together with ingredients from the fridge that likely need to be used up before they become this years compost material. This ‘Cowboy Cooking’, as Mike calls it, is a strange gift that I have, an ability to see what’s available and be able to make something delicious from it. Plenty of people do it, I’m sure.
I just need to share it more often. Because the results are often pretty spectacular.
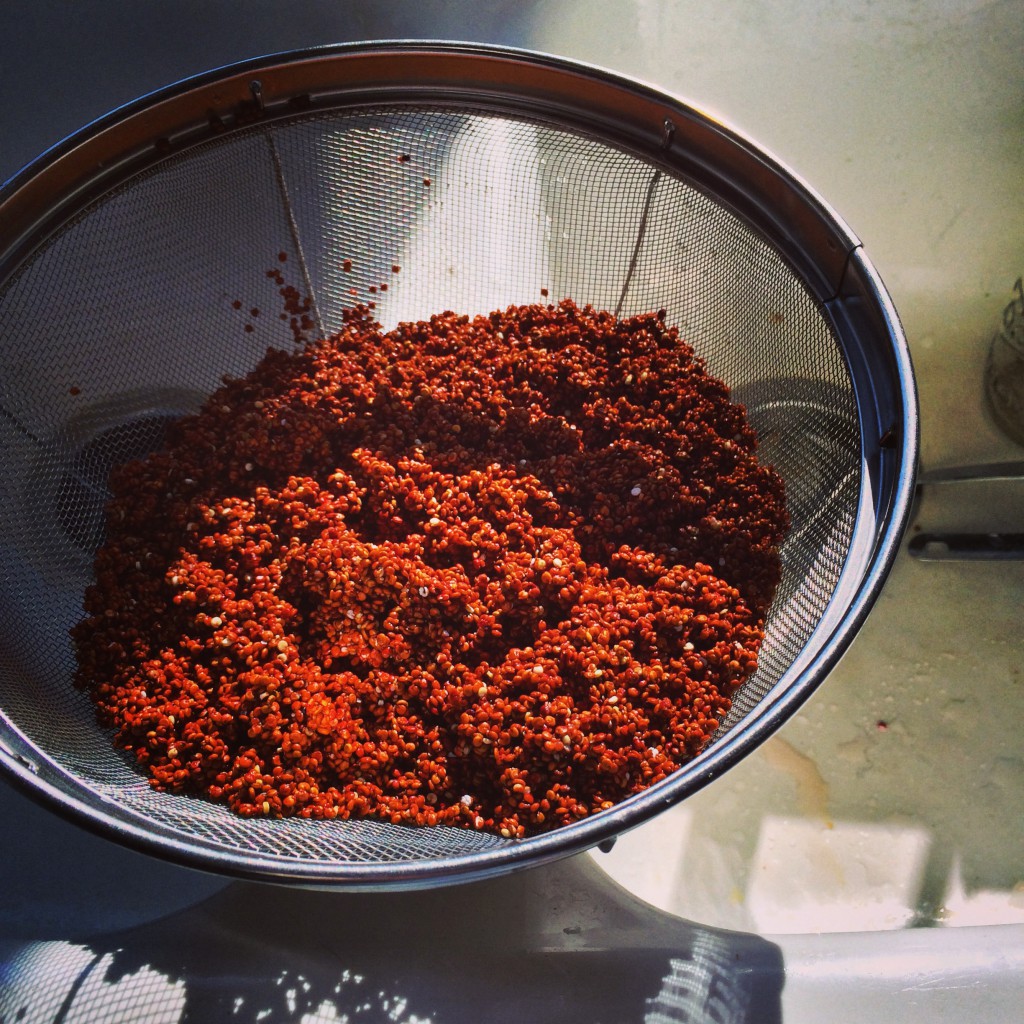
On one of my last trips through CostCo, I came across a 4-lb bag of red quinoa for $15.99. At $4 a pound, this gorgeously colored grain was significantly less expensive than any bulk option I’d ever seen anywhere, and I snatched a sack off the shelf as if they might vaporize right in front of my eyes. Cooking off a large pan at a time, I freeze what I don’t use, which then helps the ‘Cowboy Cooking’ at some point down the road. My favorite means of preparing this delicious grain is to use half coconut water and half coconut milk, along with smoked paprika and turmeric, as it creates a flavor bomb that blows off the top of your head in delight, as well as mixing in that beautiful yellow color that turmeric is known for, making the end result even more gorgeous. Pretty food makes everything better, doesn’t it?
I realize that everything about this dish screams of the current love of all things kale and roasted cauliflower and blah, blah blah with the addition of the ubiquitous quinoa, and more blah, blah, blah coconut water, and where is the creativity or uniqueness in any of that?? You’re right. There isn’t any. Maybe you’ve already done this dish; tossed together a pan of burnished cauliflower with your own uniquely cooked quinoa, and a pan of silky, slowly braised kale that’s pungently scented with garlic and thought that you were a million ways brilliant like I did. There’s nothing to it. And that’s part of why I want to share this delicious and superbly easy dish. There IS nothing to it. Which means you don’t need a whole resume of skills to get a fantastic dinner on the table. Or really, a lot of hands-on time.
Let’s take that quinoa: it’s one of the simplest grains ever to cook. Forget that whole 2:1 ratio of water to grain, though; with quinoa, it’s wrong, and will result in a mushy, unappetizing food that no one in your house will want to touch. Here’s the deal: one cup of quinoa needs 1-1/4 cups of liquid. That’s it. It needs a simple simmer, and then…. here’s the easiest part; it needs about 15 minutes of you ignoring it on a hot pad when it’s done. Yup. Take it off the heat when the water is absorbed, set it aside, covered, and ignore it. You can ignore it for an hour and it won’t care. In fact, it LOVES to be ignored. You can cook it in the morning and ignore it all day until dinner and it won’t care. Your result, however, will be a toothsome bite to the grain that reveals all of quinoa’s beautiful tastes. Nothing mushy here, folks.
And that kale? Have you ever found curly kale to be tough and chewy? Not to your liking? Try a slow braise of it, on the lowest heat setting your stove will offer, with just a tiny bit of liquid. I promise you this method will render the toughness right out of this nutritional bomb, making it silky, smooth and delicious to eat. Start with a small onion, or shallot, add a few cloves of garlic, then drop the chopped kale in the pan, stir for a few minutes, add enough liquid to cover the bottom of the pan, a pinch of kosher salt, and cover it to cook. You can ignore this one too for a while and it’s ok. Curly kale doesn’t mind. Stir it a few times, and after about 20 minutes or so, the kale will start to show you it’s better side. If it still tastes tough when you sample a leaf, give it more time. Add another pinch of salt, too. It helps break down the cellular walls and tenderize the leaves.
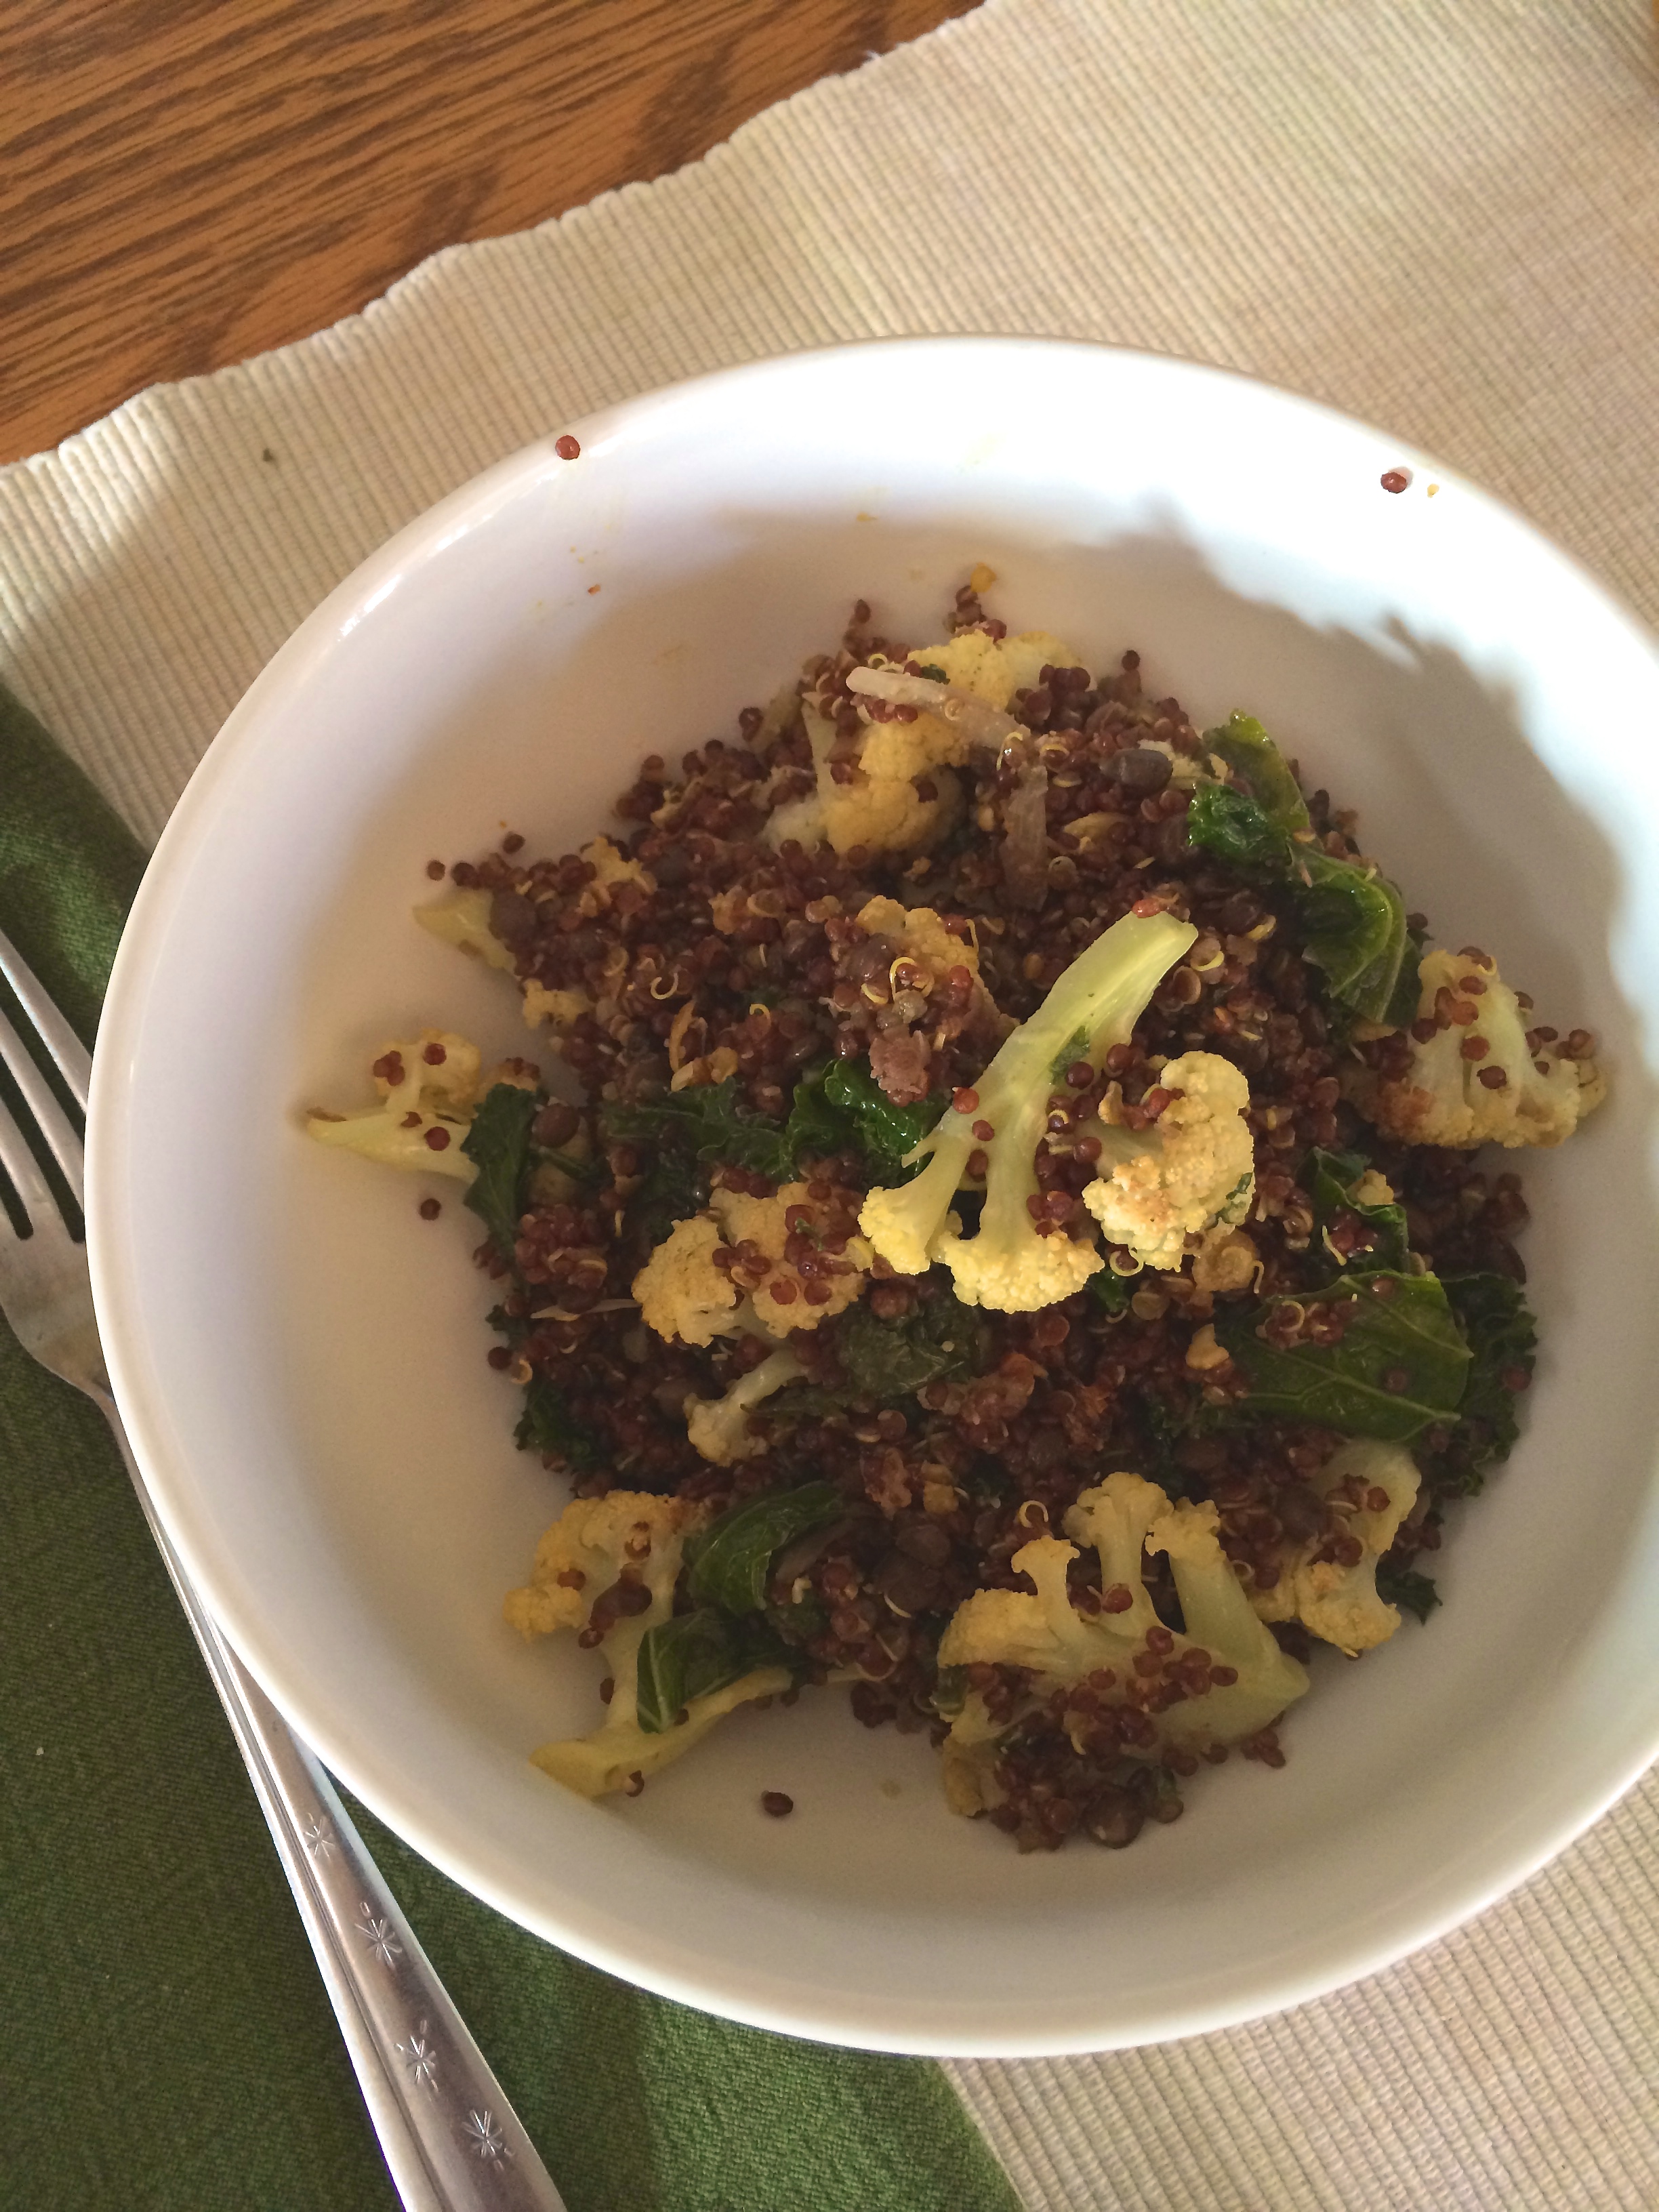
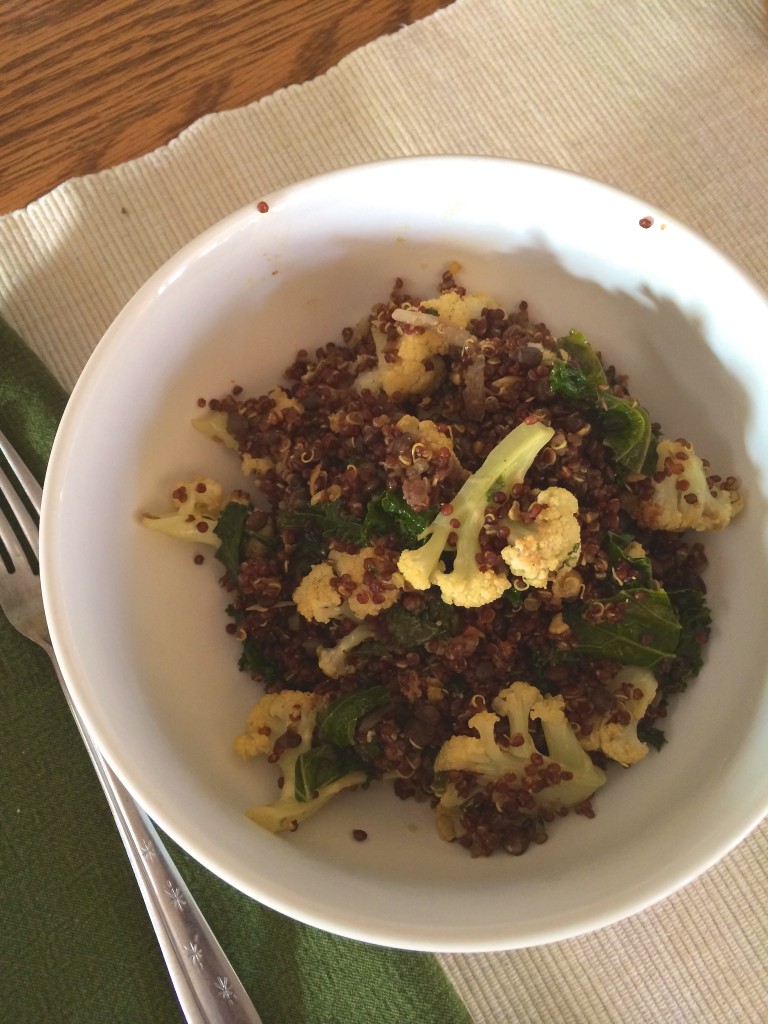
The tender cauliflower, nutty grain and silky kale make for a mouth-awakening dish. And just for fun, I dumped in a bunch of cooked lentils that I had in the fridge to add to all the lip-smacking goodness. This dish…. it’s good when it’s hot; it tastes great at room temperature, and it’s wonderful chilled too. Easy. Endlessly versatile. Colorful. Healthy. It’s got it all. Now YOU need to get it all.
Red Quinoa, Braised Kale & Roasted Cauliflower
1 c. red quinoa, washed well and drained (regular white is fine, too)
1-1/4 c. water (or combination of equal liquids such as coconut water & coconut milk)
1 T. ground turmeric
1 T. smoked paprika
1 bunch curly Kale, washed and de-stemmed
1 medium shallot, minced
2 cloves garlic, minced
1 head Cauliflower, washed and broken in to bite sized pieces.
Salt and pepper to taste.
In a small saucepan, bring water or liquids to a boil. Add the quinoa, turmeric and smoke paprika and stir to combine. Bring to a boil, reduce to simmer, cover and allow to cook until the liquid has been absorbed. Keep covered, remove from heat and set aside for at least 15 minutes, or up to several hours. No need to chill. Fluff the grains before utilizing.
Meanwhile, heat your oven to 400°. Place cauliflower on a baking sheet and drizzle with a bit of olive oil and a sprinkle of kosher salt. Mix well and place in hot oven. Stir occasionally and roast until fork-tender and browned in spots.
In a medium skillet, heat a small amount of oil and sear the shallot and garlic until tender and slightly browned. Add the kale and stir until coated. Pour about 1/3 cup of water in the pan, sprinkle a pinch of kosher salt on the kale and stir to combine. Cover the pan, reduce to the lowest heat setting and allow to cook, stirring once or twice, for 20-25 minutes. Taste a kale leaf; if it still tastes chewy, cook for 5-10 more minutes. The kale should be silky and tender in your teeth. Keep the heat LOW.
Combine the quinoa, cauliflower and kale in a large bowl and taste for seasoning, adding more salt or pepper if desired.
{NOTE: I don’t include cooking times for this recipe, or any of mine really, because your oven and stovetop is not the same as mine. Instinct, as a cook, is a necessity; your browned cauliflower might look different than mine. Your onions could cook quicker, and your Low setting on your stove could be higher than mine and cook that kale faster. Trust. Taste as you go. And trust some more. Your mouth will tell you when it’s done.}
March 25th, 2014
| 1 Comment »
Did you know that the Chocolate Lava Cake was an accident? In a rush to provide a warm dessert, the chef who created it took the cake out of the oven too soon, and when a fork was pressed in to it, the soft, melty interior slipped out. The chef was aghast, but the customer loved it. Boom. Herald the ubiquitous appearance of it on restaurant menus for decades, and a spot in the Dessert Hall of Fame.
This Smoky Blood Orange vinaigrette was also an accident. A delicious and colorful accident.
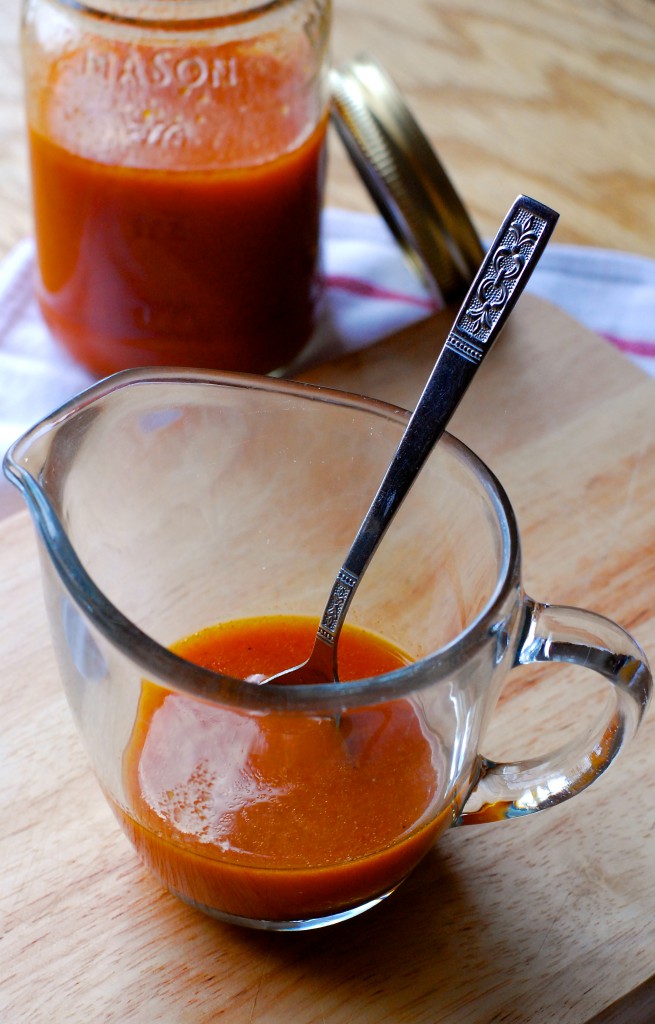
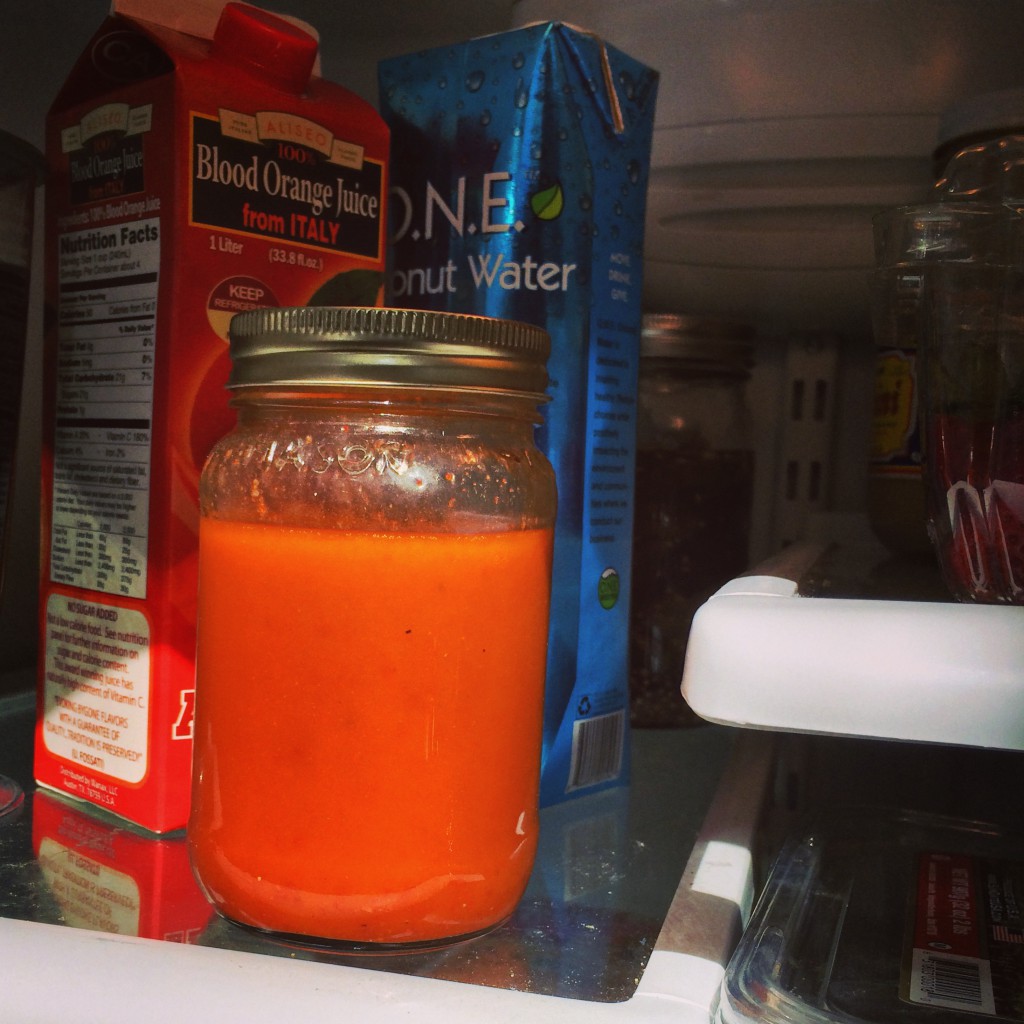
Back at the beginning of the month I had a dinner party to celebrate my 50th birthday, and invited some of my closest friends. It was a wine-soaked feast full of amazing food and so much laughter. My friend Mellissa brought a Greek salad with a stunning Blood Orange vinaigrette and I kind of glommed on to that vinaigrette and wanted to pour it over everything I ate. I even bought a container of Aliseo Blood Orange juice so I could whip some up for every salad I ate. During one of these moments, I grabbed a container of smoked spanish paprika off the shelf and shook a little in to the measuring cup.
Then I had that moment much like Chocolate Lave Cake Chef, where I was aghast, and thought ‘Oh dear…. that can’t possibly work, can it?’ I mean, I’ve been putting smoked paprika in a lot of foods because it tastes just so darn good and it was more like habit to reach for the dark red bottle on the spice shelf. Shrugging off concern, I whisked it, tasted, adjusted and tasted again. Then I poured it over a pile of lacinato kale and a bevy of other beautiful vegetables.
The first bite was a revelation. And another happy accident became an amazing delight. There was the tart citrus, the smoky paprika and a hint of sweetness from coconut palm sugar. I use brown mustard, minced shallot and some garlic, salt and pepper. It’s really nothing to make a vinaigrette from scratch, and the taste of your homemade salad dressings is far and away better {and better for you} than anything you can get in a bottle on the grocer’s shelf.
And besides…. it looks so pretty inside your refrigerator.
Smoky Blood Orange Vinaigrette
1/2 c. top quality olive oil
1/3 c. blood orange juice
1 T. whole grain mustard
1 small shallot, very finely minced
2 cloves garlic, very finely minced
1 t. coconut palm sugar (or sub in any sweetener of preference)
1/2 t. cracked black pepper
1 t. fine grain sea salt
1 T. smoked spanish paprika
In a 1-pint glass jar (or other vessel of equal size), measure all ingredients. Shake or whisk well until fully emulsified. Taste and adjust seasonings to your liking- more sweet, more salty, a bit more juice….. I’ve found this vinaigrette needs more juice than the standard 2-1 ratio of a basic vinaigrette, but I want to taste the bold flavor of the blood orange juice. You may like it with less pizzazz. I recommend chilling it thoroughly before using, and tasting it again to see if it needs any more flavor adjustments.
March 17th, 2014
| 2 Comments »
Just 10 days ago, I underwent LASIK eye surgery and my life shifted in ways that I’m still learning to understand. I’m trying to make sense of it all, but only those who’ve been under the burden of eyeglasses for their entire life, then freed from the need in a quick, 7 minute procedure would be able to know why this is such a huge, life-changing shift.
So for the rest of you, I’ll just talk about pasta. Because that’s just not that big of a deal, right? But this dish I created recently, well, this IS a big deal.
I’ve been pasta-less most of the past year, and not for the standard ‘I’m carb-free’ or ‘I don’t DO pasta’ whine whine that this basic staple is devil spawn. We went through a long period where pasta was standard in our dinner repertoire, and I just became tired of it. Then, lately, there’s been that nagging sense that something was causing pure belly sadness and pasta, being cloaked in wheat, was ignored. Finally, I realized that I missed a steaming bowl of carb goodness. It was March in Minnesota, after all. Enough said.

After the first few days post-LASIK, where my eyes felt like being perpetually stuck behind dirty contacts, hazy edges of everything and light that nearly pierced my brain in it’s brightness, I hadn’t experimented with just how my new means of vision would translate in the kitchen, and my need to clearly see my hands. Mike had brought home a box of gluten-free pasta that promised in large, persuasive text that it had a ‘White Pasta Taste!’ and my family would never know the difference. I craved a bowl of buttery noodles, covered in a thin layer of shaved parmesan, a salve for the body that was now rendered off in a new direction, brain and eyes communicating after a lifetime of silence. Everything was new. And I needed something old and familiar.
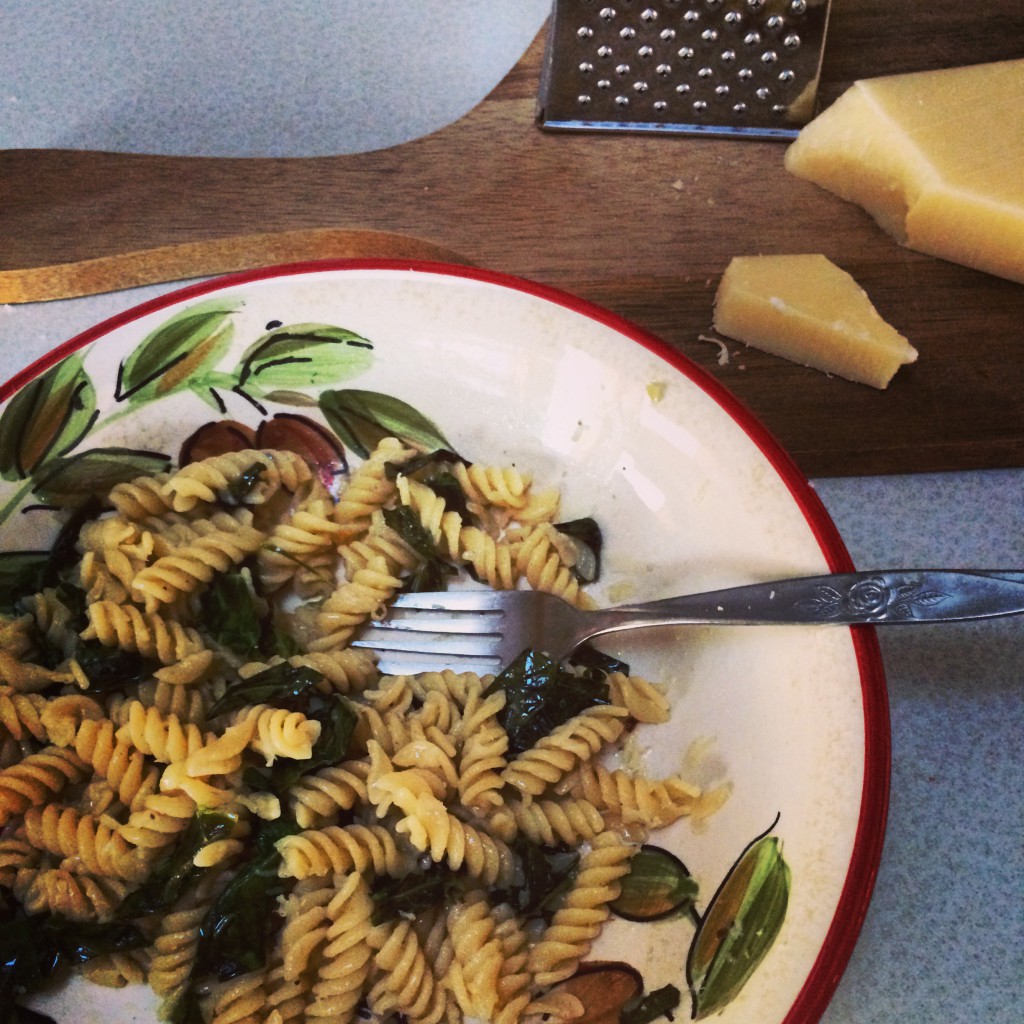
But this dish turned out to be anything but, yet, at the same time, it soothed immensely. It was buttery noodles. There was lots of fresh shaved parmesan cheese, just as I desired. But there were sautéed collard greens, a deeply burnished bed of shallots and garlic, and all of it was bathed in the deep umami of a thick anchovy fillet, melted in a puddle of olive oil. Skipping over the familiar, I added a dose of the here and now, trying to pull together two sides of my life that were now in conflict inside my head. I wish I could explain it better than that, but there’s so much to comprehend from this simple procedure that I never anticipated, so much emotion- being able to read the labels on the bottles in my shower, seeing the texture of the ceiling when I awake, pressing my cheek to my husband’s without the pinch of eyeglasses between us- the simplest of life moments that so many take for granted and never think about that suddenly are part of my life. I’m close to weeping every day at this wonderful, unfamiliar and amazing world. I can’t wait to leap in to a lake or pool this summer and come up with clear vision. I may break down crying at how great that will feel.
My boy wandered in the kitchen, dressed for his Wednesday night youth group at church and stuck his nose in the pot of pasta I was stirring together, clinging to thin sheets of collards and tiny chunks of allium, steam rising from the glistening spirals. His eyebrows rose in anticipation and he drew two forks from the drawer, and together we stuck a few noodles to the tines and lifted them to our mouths. I shaved the parm on his bowl, then mine, and we bent our elbows to the island in our kitchen, shoulder to shoulder and dipped our forks. This act of simple consumption with he and I is a need for both of us, to connect over a bowl of modest food, leaning together in companionable silence except for the clink of silverware, a swift moment to just be. It added to the familiar that my brain was seeking. He sighed as he scooped up the last noodle, moving it around the bowl to grab the last drops of oil and butter, the remaining bits of cheese. He smiled at me and leaned his shoulder in to mine, his gesture of thanks well received, another wave of the familiar among a week of new discoveries.
This pasta was so good; simple, deeply flavorful and crazy easy to make. If you haven’t experimented with anchovies in pasta dishes, I urge you to just try it, as they add immense depth.
Pasta with Collard Greens and Anchovy
1# pasta, cooked
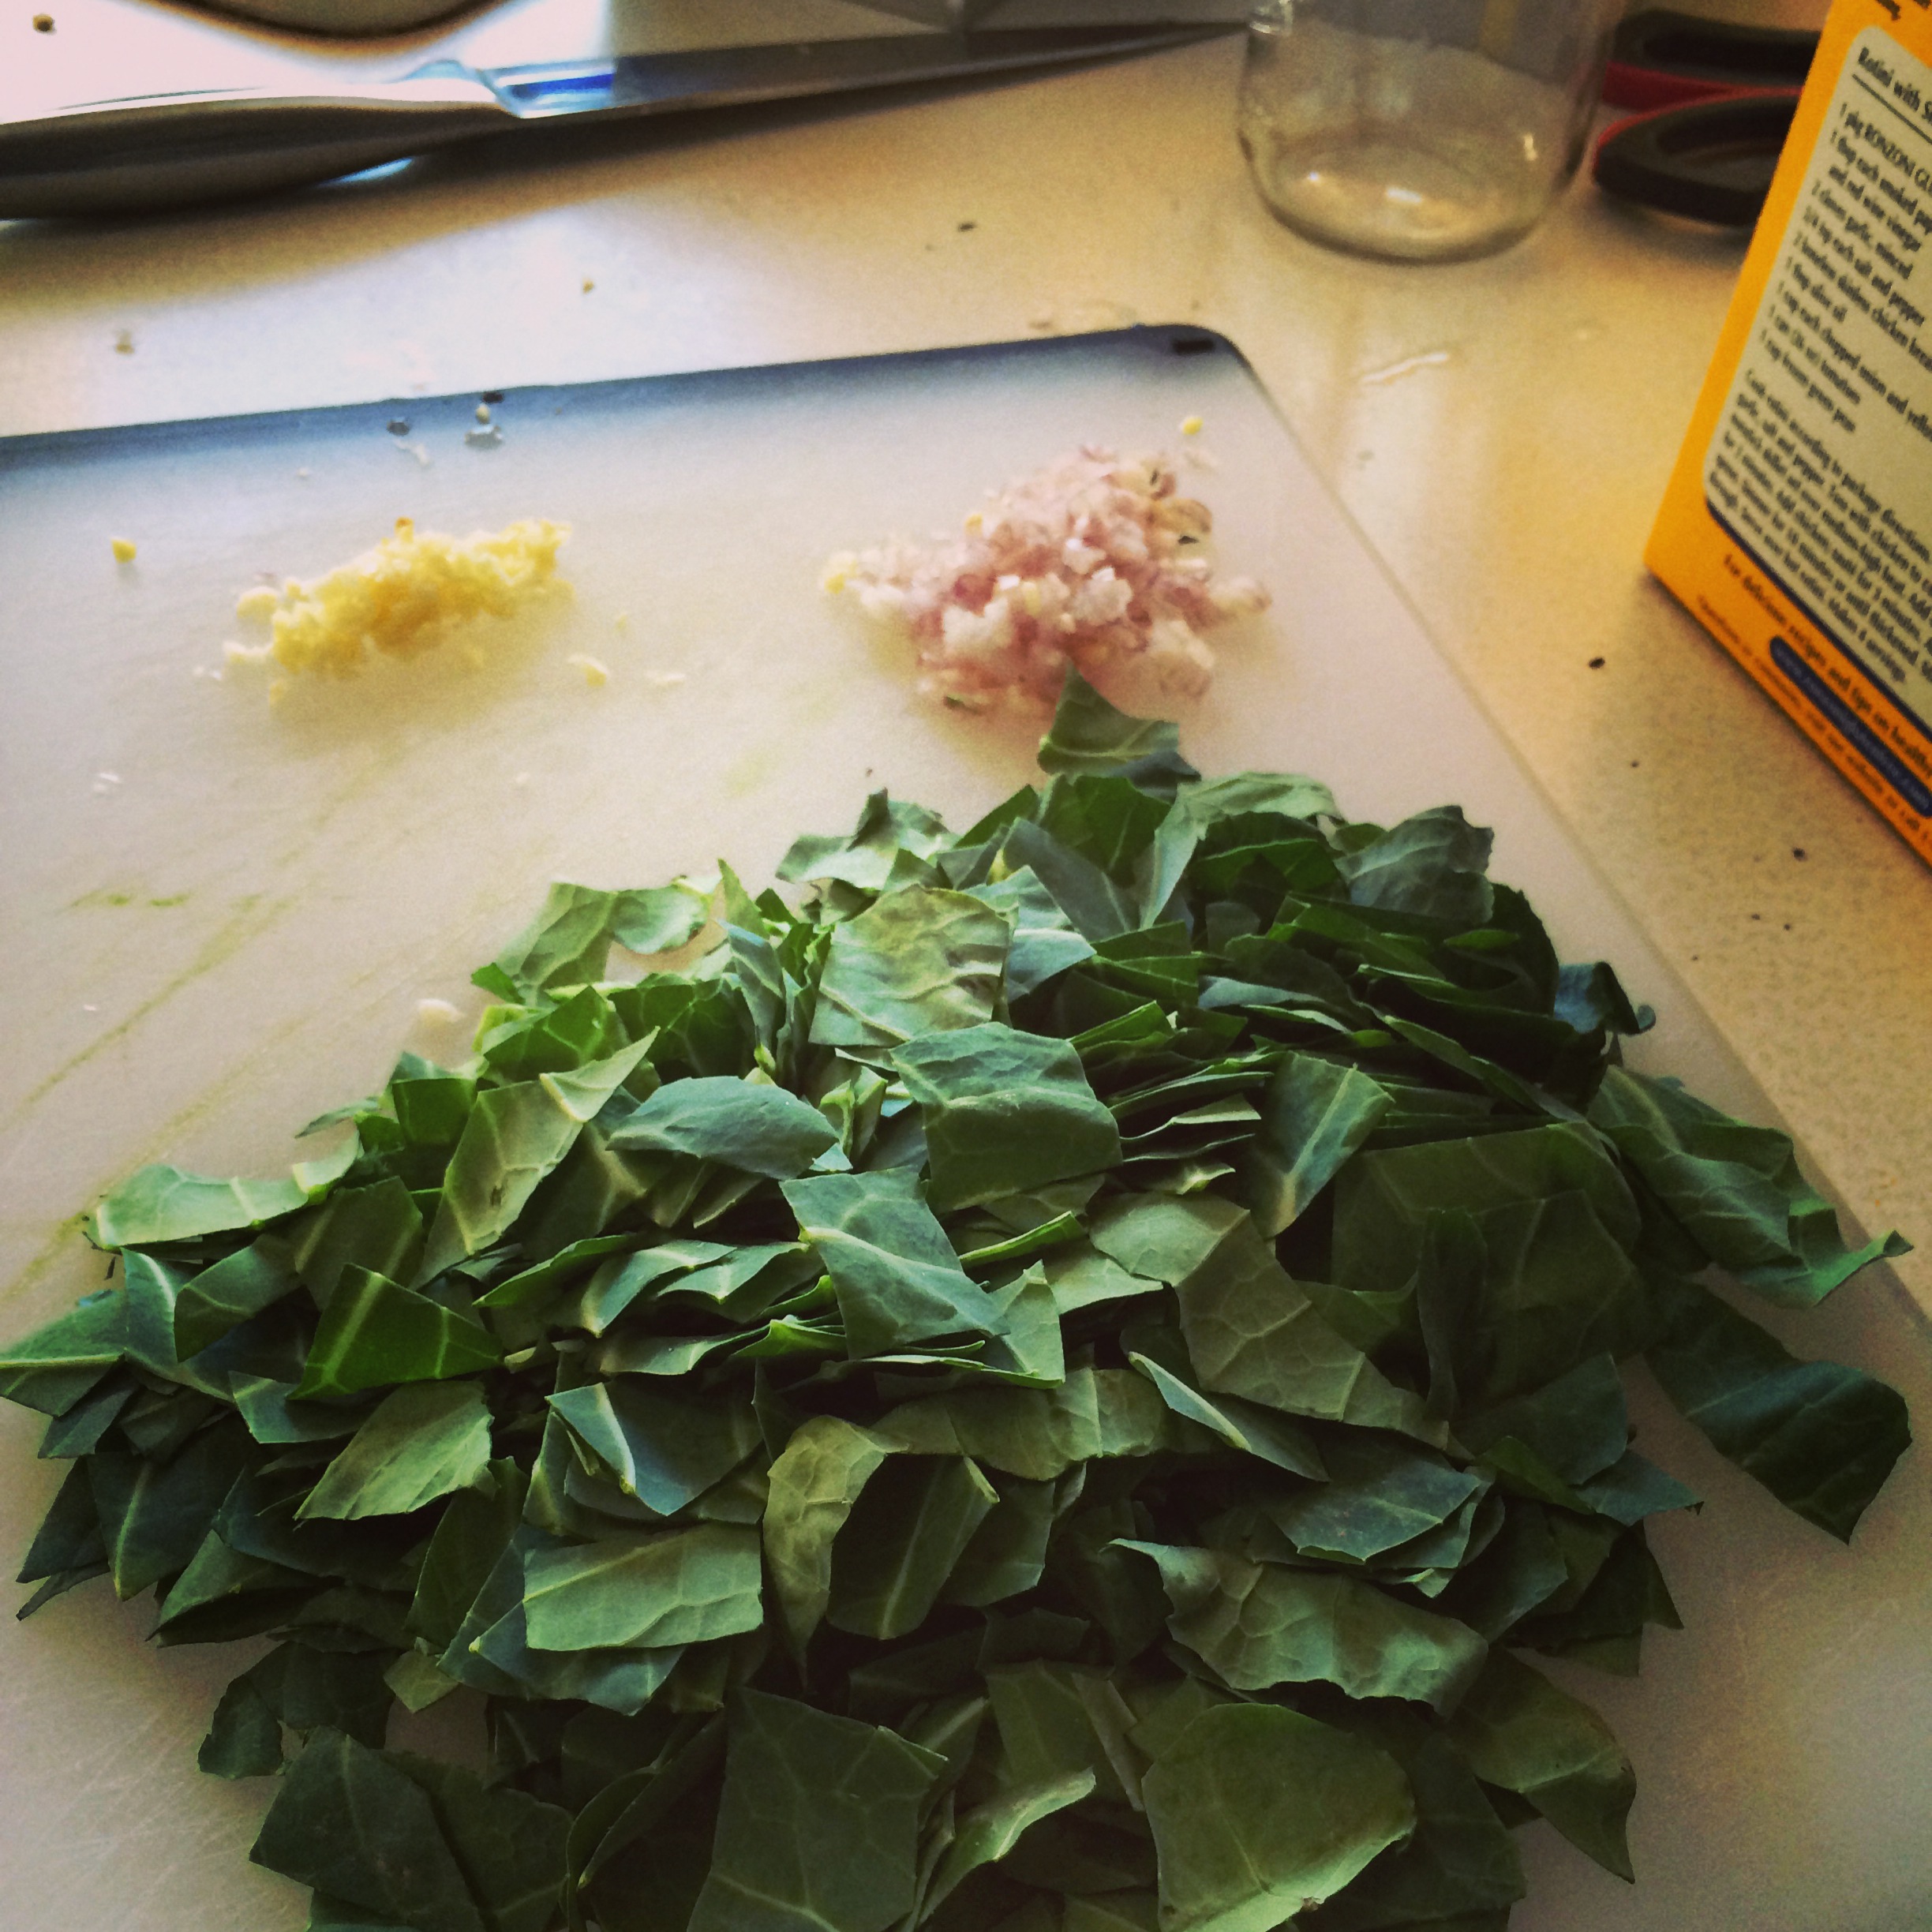
1 thick bunch Collard Greens, stems removed, washed and rough chopped
1 medium shallot
2 cloves garlic
1 Anchovy fillet (or two, depending on size; I used Wild Planet White Anchovies, and they are BIG)
Butter and olive oil for cooking.
Parmesan cheese to taste
Cook pasta according to personal taste. While the pasta is cooking, heat a large, deep skillet and add a knob of good butter, along with a drizzle of olive oil. Sauté the shallot and garlic, stirring frequently, until golden in color. Add the anchovy fillet and mash with a spoon to break it up. Stir in the collard greens to coat, add about 1/4 cup of water, then cover the pan and reduce the heat to medium-low. Cook until the collards are soft, but still retain some texture.
Drain pasta, reserving a small amount of liquid. Add pasta to pot with collards and stir well to combine. Grind some black pepper over it, along with a few shakes of sea salt, stir some more and taste for seasoning. Adjust if you like. Add another drizzle of olive oil, or some more butter if you prefer, or some of the pasta water if it seems too dry. Spoon in to serving bowls and top with shaved parmesan cheese to taste. Grab a fork, and someone you love.
March 10th, 2014
| 1 Comment »
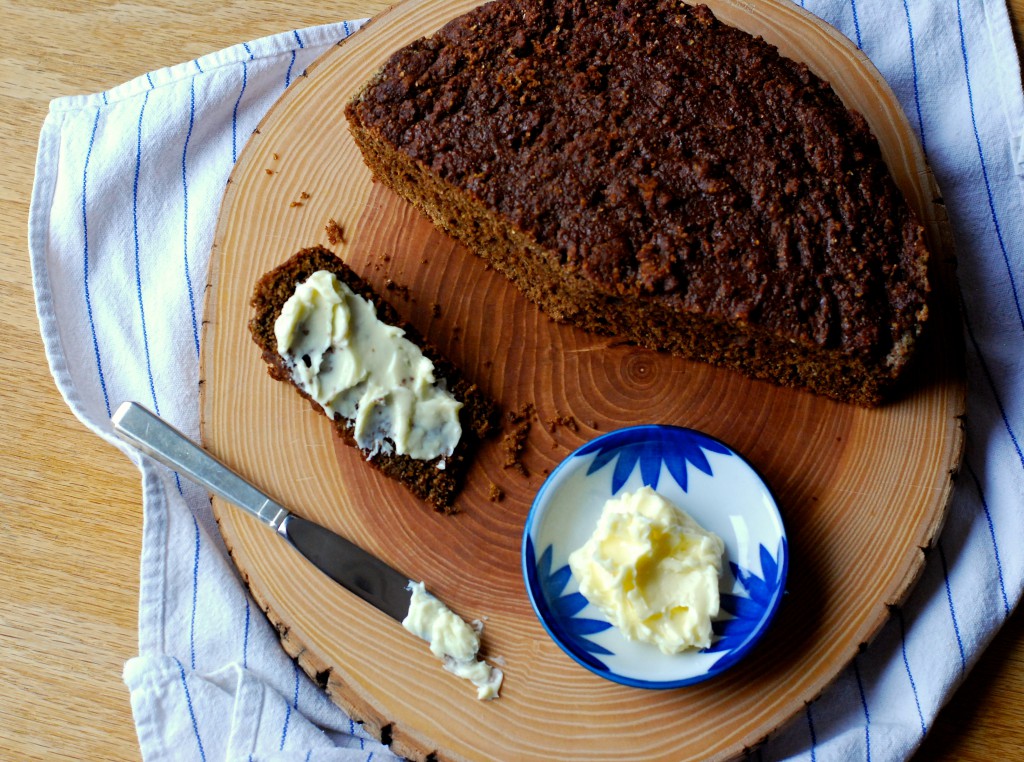
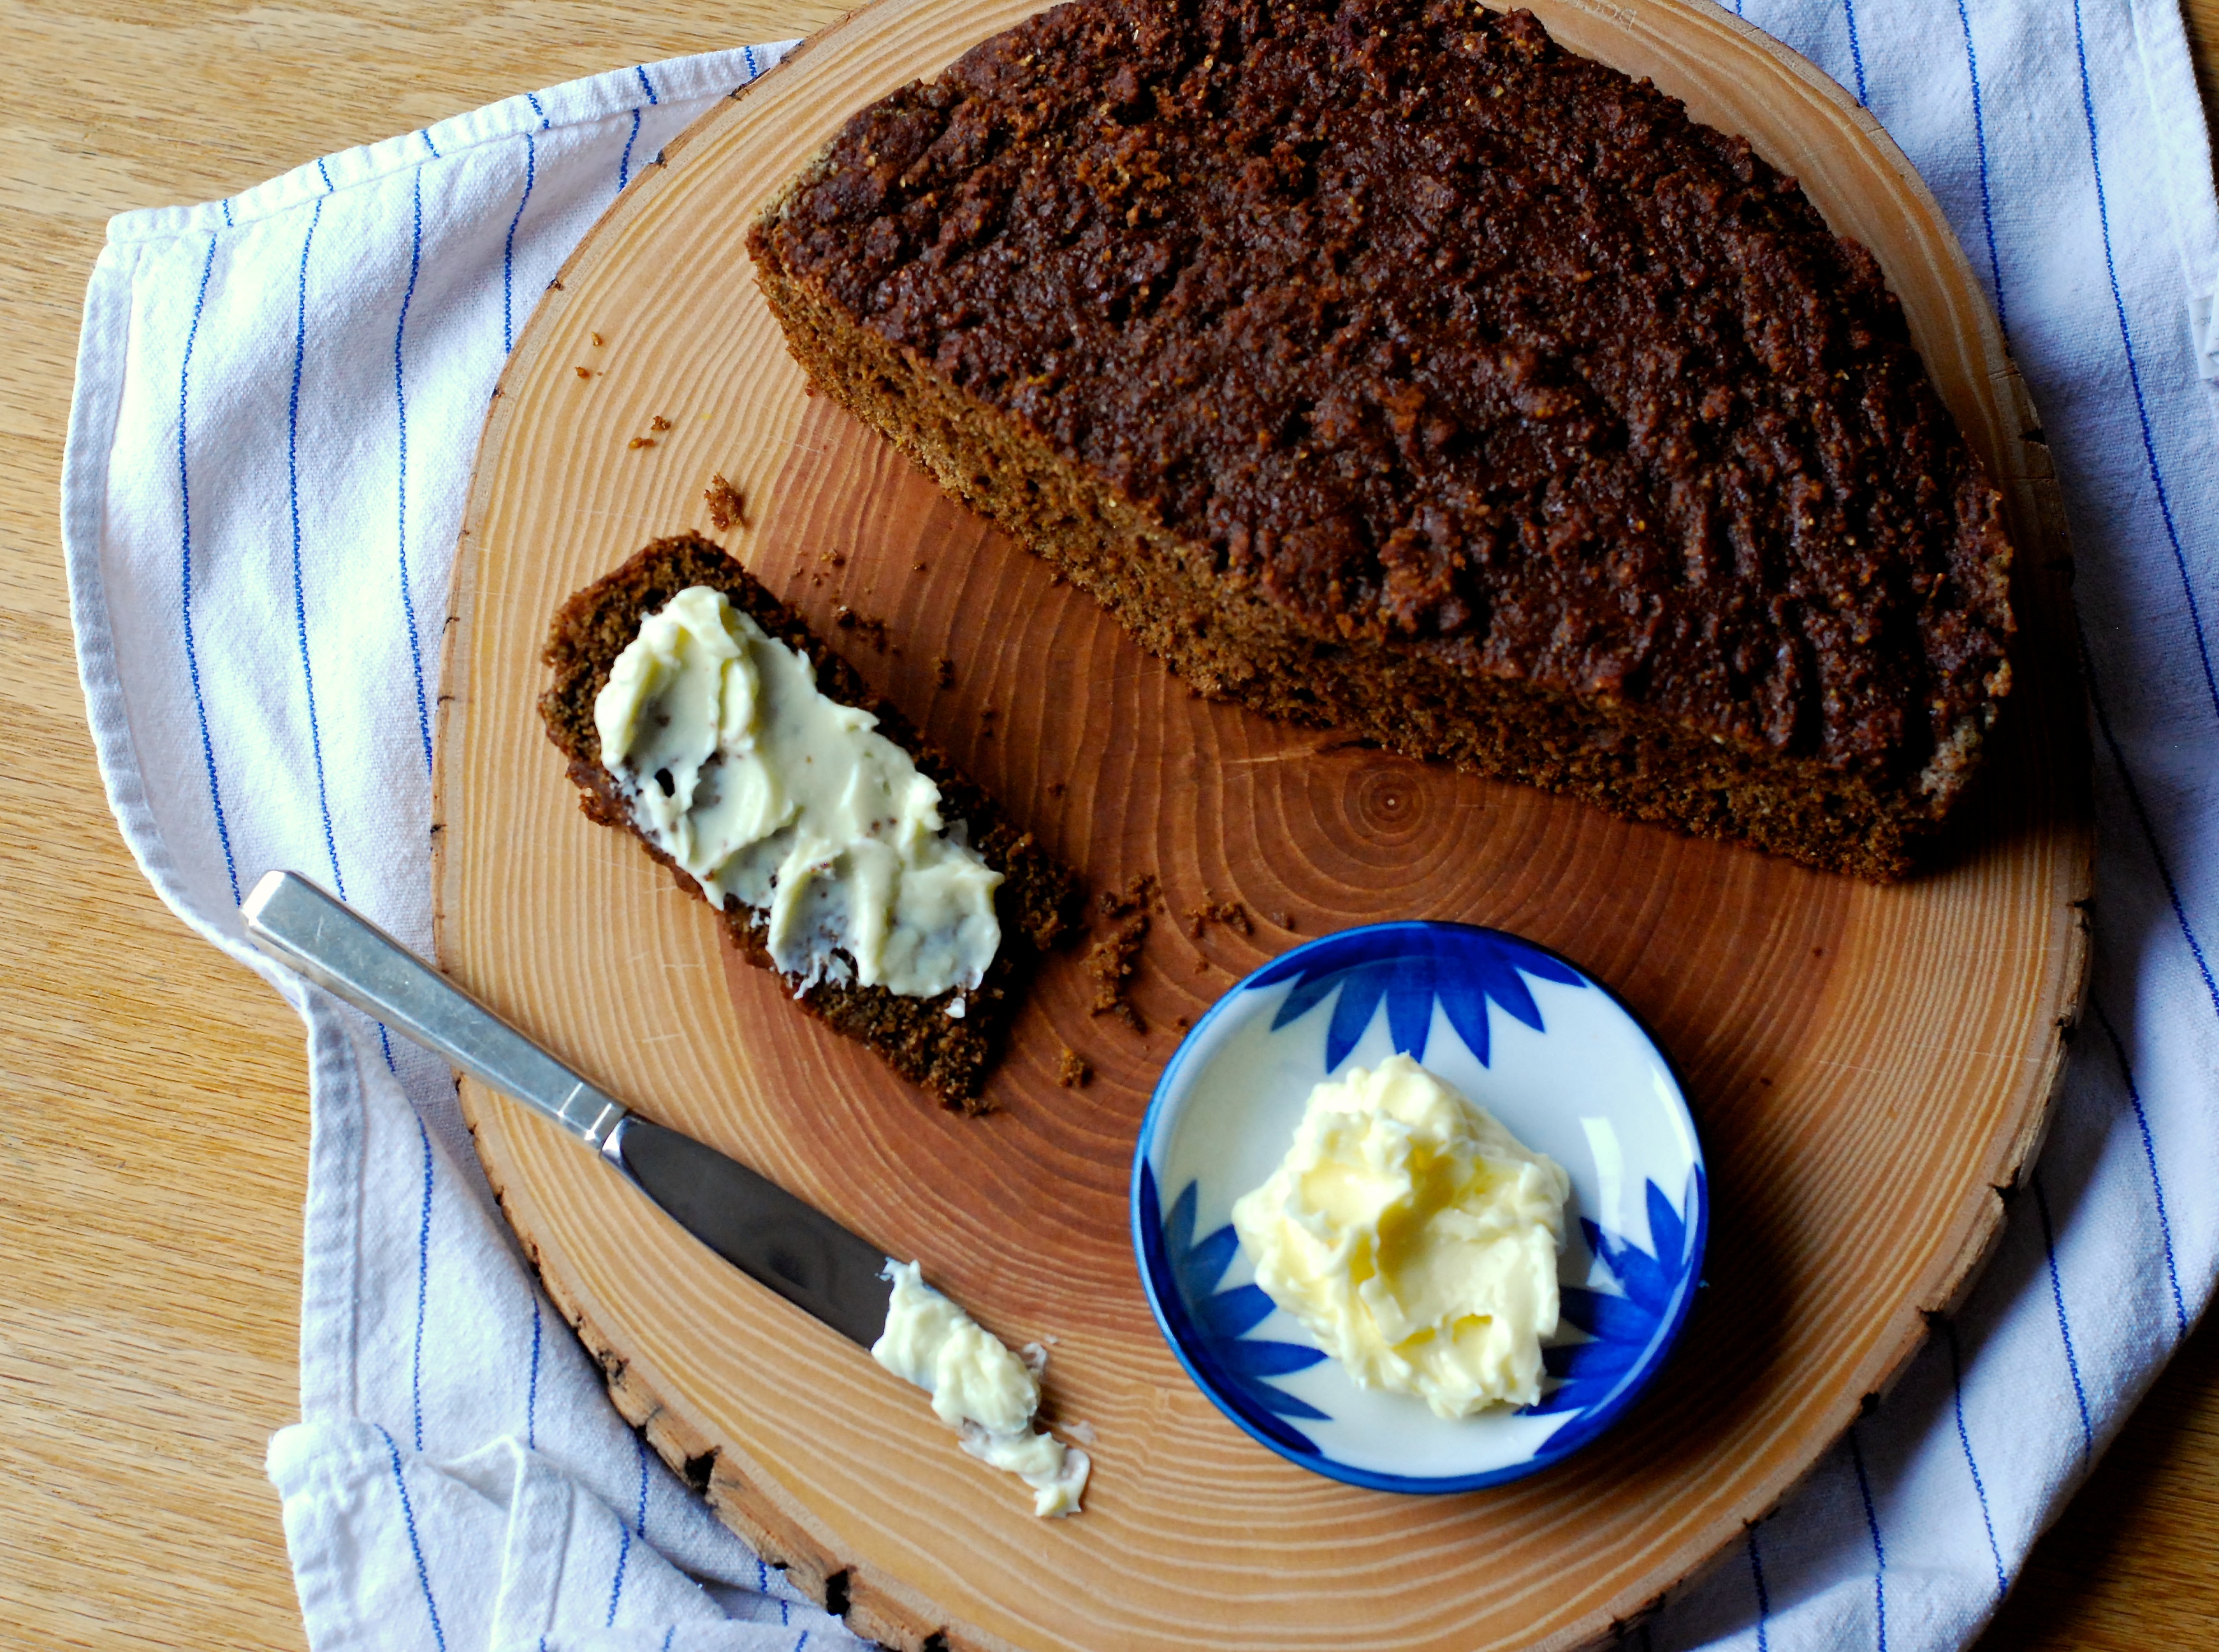
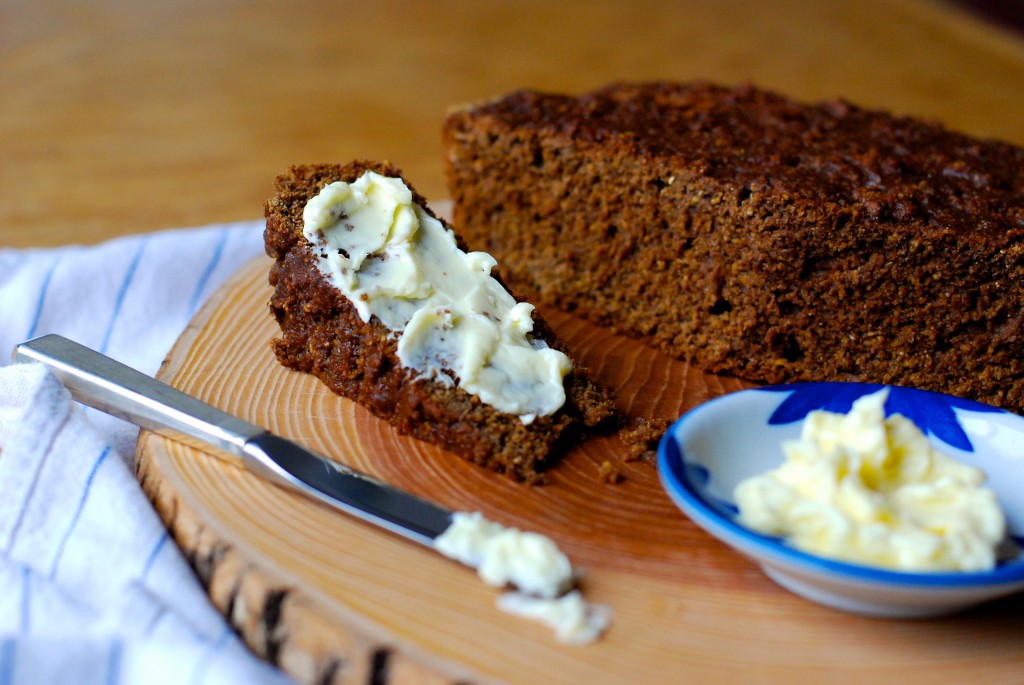
Sometimes you just need something like this bread; a dense, slightly sweet loaf, with a firm, pebbly crust and a texture that wakes up your mouth, giving it plenty to chew on. Something that seemingly defies convention, that marries best with thickly spread chilled butter and a steaming cup of coffee, that says straight away to your belly a soul-satisfying ‘Ahhhhhhh!’
Baked in a cast-iron skillet, this bread, with it’s molasses laced crumb, rich with rye, cornmeal and stone-ground wheat goes by multiple names depending on who you ask, or possibly, where you’re from. The recipe origin, from the Food52 folks, called it Yogurt Bread with Molasses. Ho hum. No offense to them, but this description doesn’t even come close to explaining the brilliance of this bread. In reading through the comments on the article, it was described as Boston Baked Brown Bread, others called it New England Brown Bread. There’s a fact that in one era, and possibly still existing, that this bread or it’s similar affiliates is sometimes baked in a coffee can. It’s created for holiday festivities, and Christmas isn’t the same without it. But that’s just what I read about it.
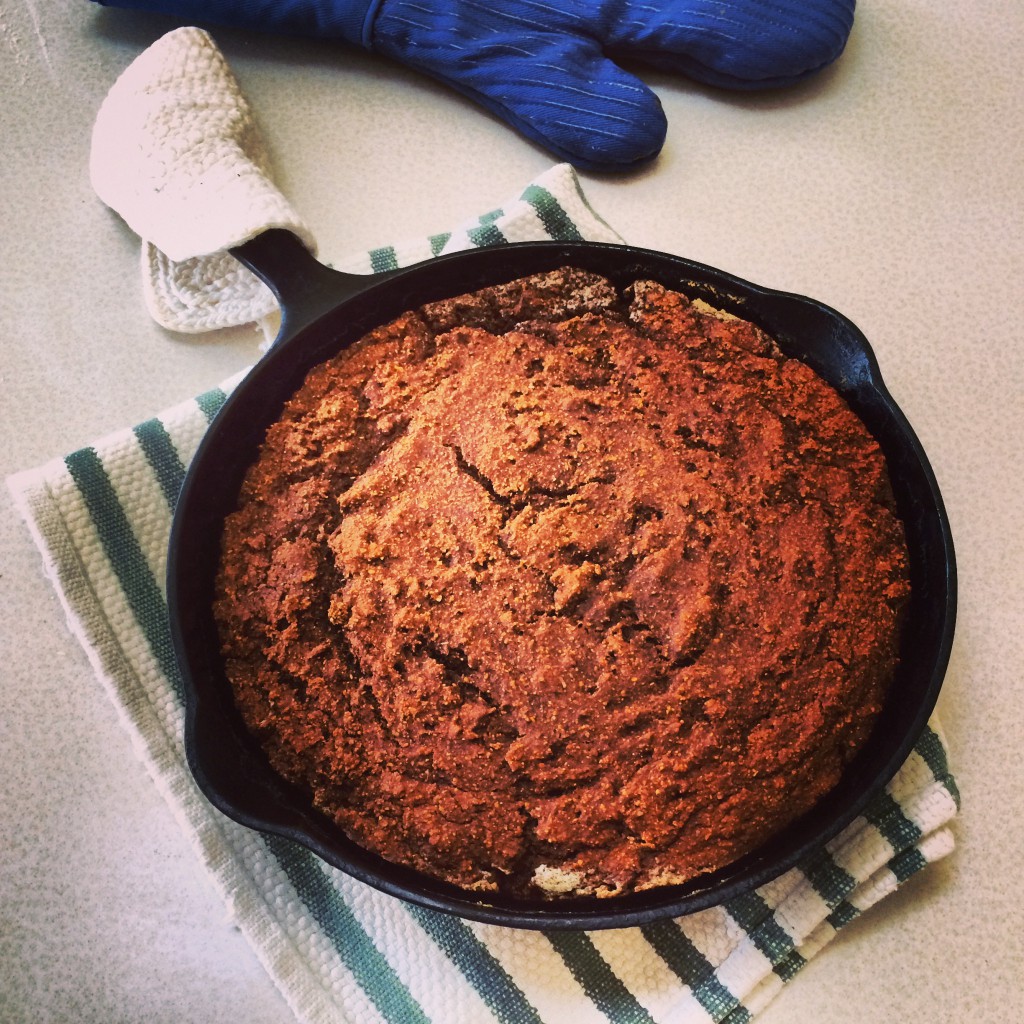
I’m pretty sure that my life changed the moment I cut my first aromatic wedge from the thick loaf that slipped from my beloved Griswold. Melted butter in the pan baked a delicious crust around the outer edge of the loaf, and I broke off a bit of it to test before the entire thing had cooled. It was divine, firing all the pleasure synapses in my brain and instead of defying recipe instructions to ‘Wait until cooled before slicing {Yes, I am serious}’ I slipped in to my cross country ski boots, gathered my equipment and drove to the golf course to take in a wildly beautiful day of ample sunshine, blue sky, and temps above zero {{what?? I know. It felt… foreign}}

I was practically snow blind when I returned home, but fully spent from 75 minutes on the trails. A shower rinsed away the evidence, and more of this bread made it’s way to my mouth, almost gaping open like a baby bird with Mama perched on the nest edge.
And what about that wheat it contains? Because, yes, I’ve been experimenting with wheat-free products and have to tell you, I’m not convinced it’s ALL wheat {or gluten, per se} that causes my issues, but more processed, preservative laced wheat, and wheat products like commercial breads and white flour that make my poor belly quake in fear. This bread, while I suppose may cause a problem if I consume the entire thing {but seriously, that might happen to anyone} so far, with a pure, organic, and stone-ground wheat and rye flour in it, I’m not finding it to be troublesome. Still, I’m holding myself to a small slice {or maybe two} of it daily. The bread keeps quite well in a sealed container, and the flavor and tenderness deepen over a few days. No yeast either, so it comes together fast. Just be sure NOT to over mix.
Boston Baked Brown Bread
1-1/4 c. stone ground wheat flour
1-1/4 c. stone ground rye flour
1/2 c. coarse ground cornmeal
1 t. kosher salt
1 t. baking soda
1-1/4 c. vanilla almond milk + 1/4 c. kefir or plain whole milk yogurt + 2 T. white or cider vinegar {use all milk if no kefir on hand; or sub what original recipe calls for; 1-1/4 c. plain whole milk yogurt}
1/2 c. molasses
Optional: 1-1/2 c. chopped dried fruit and nuts
Butter for greasing the pan.
Heat oven to 325°. If using milk and vinegar, whisk them together now in a 4-cup measuring cup.
In a medium bowl, whisk wheat and rye flours, cornmeal, salt and soda.
Stir the milk mixture to combine and add the molasses. Whisk well and pour half in with the dry ingredients. Using a rubber spatula, stir in wide strokes to mix, sweeping across the bottom of the bowl. When half mixed, add the remaining milk, dried fruit and nuts, if using, and continue to sweep the spatula around the bowl until just combined. DO NOT OVERMIX. The dough will be stiff and very thick.
Slice about 2 tablespoons of butter in to a standard loaf pan, or a 7-8″ cast-iron skillet. Place in warm oven and allow to melt. Remove from oven {remember…. it’s HOT} swirl butter to coat the entire pan and scrape the batter in to the pan. Spread slightly to fill and place the pan back in the oven.
Bake about an hour, then test the center of the loaf. It should be firm, spring back when touched, and a toothpick test will be clean with a few crumbs clinging to it. Remove it from the oven and let it cool completely before removing from the pan and slicing. I’m not kidding. It will fall apart, and you’ll be singing like a sad trombone if you don’t wait.
Bread can be kept in an air-tight container. The flavor improves after a few days, if you can wait that long. 🙂
March 4th, 2014
| 4 Comments »
How pretty is this dish??

Now that we’re in to March, the month where Spring makes it’s appearance on the calendar, I’m hoping for a speedy turnaround to the cold. Although my cats would likely argue for the continuing need for cozy, warm lap snuggles, I argue for lighter, greener, and crunchier.
To anyone committed to eating better foods, we know that spending a bit more money is sometimes the means to achieving our goals. I enjoy having cans of tuna around for a quick meal, but have become more particular about what canned tuna I’m willing to buy. Wild Planet has become a favorite, even with the cost being around $5 a can. No, I am not kidding. I grew up with Charlie, the Starkist Tuna, bathed in thick mayo on white bread. Not anymore, though. Wild Planet tuna is the real deal; it’s sustainable, line-caught tuna that eliminates the life and sea draining by-catch, and you get a thick fillet packed in non-BPA cans it’s own juices. While the price eliminates it being a regular offering in my kitchen, when I do feel like eating tuna, this is the one I want. {{No endorsements here…. I just love the product.}}
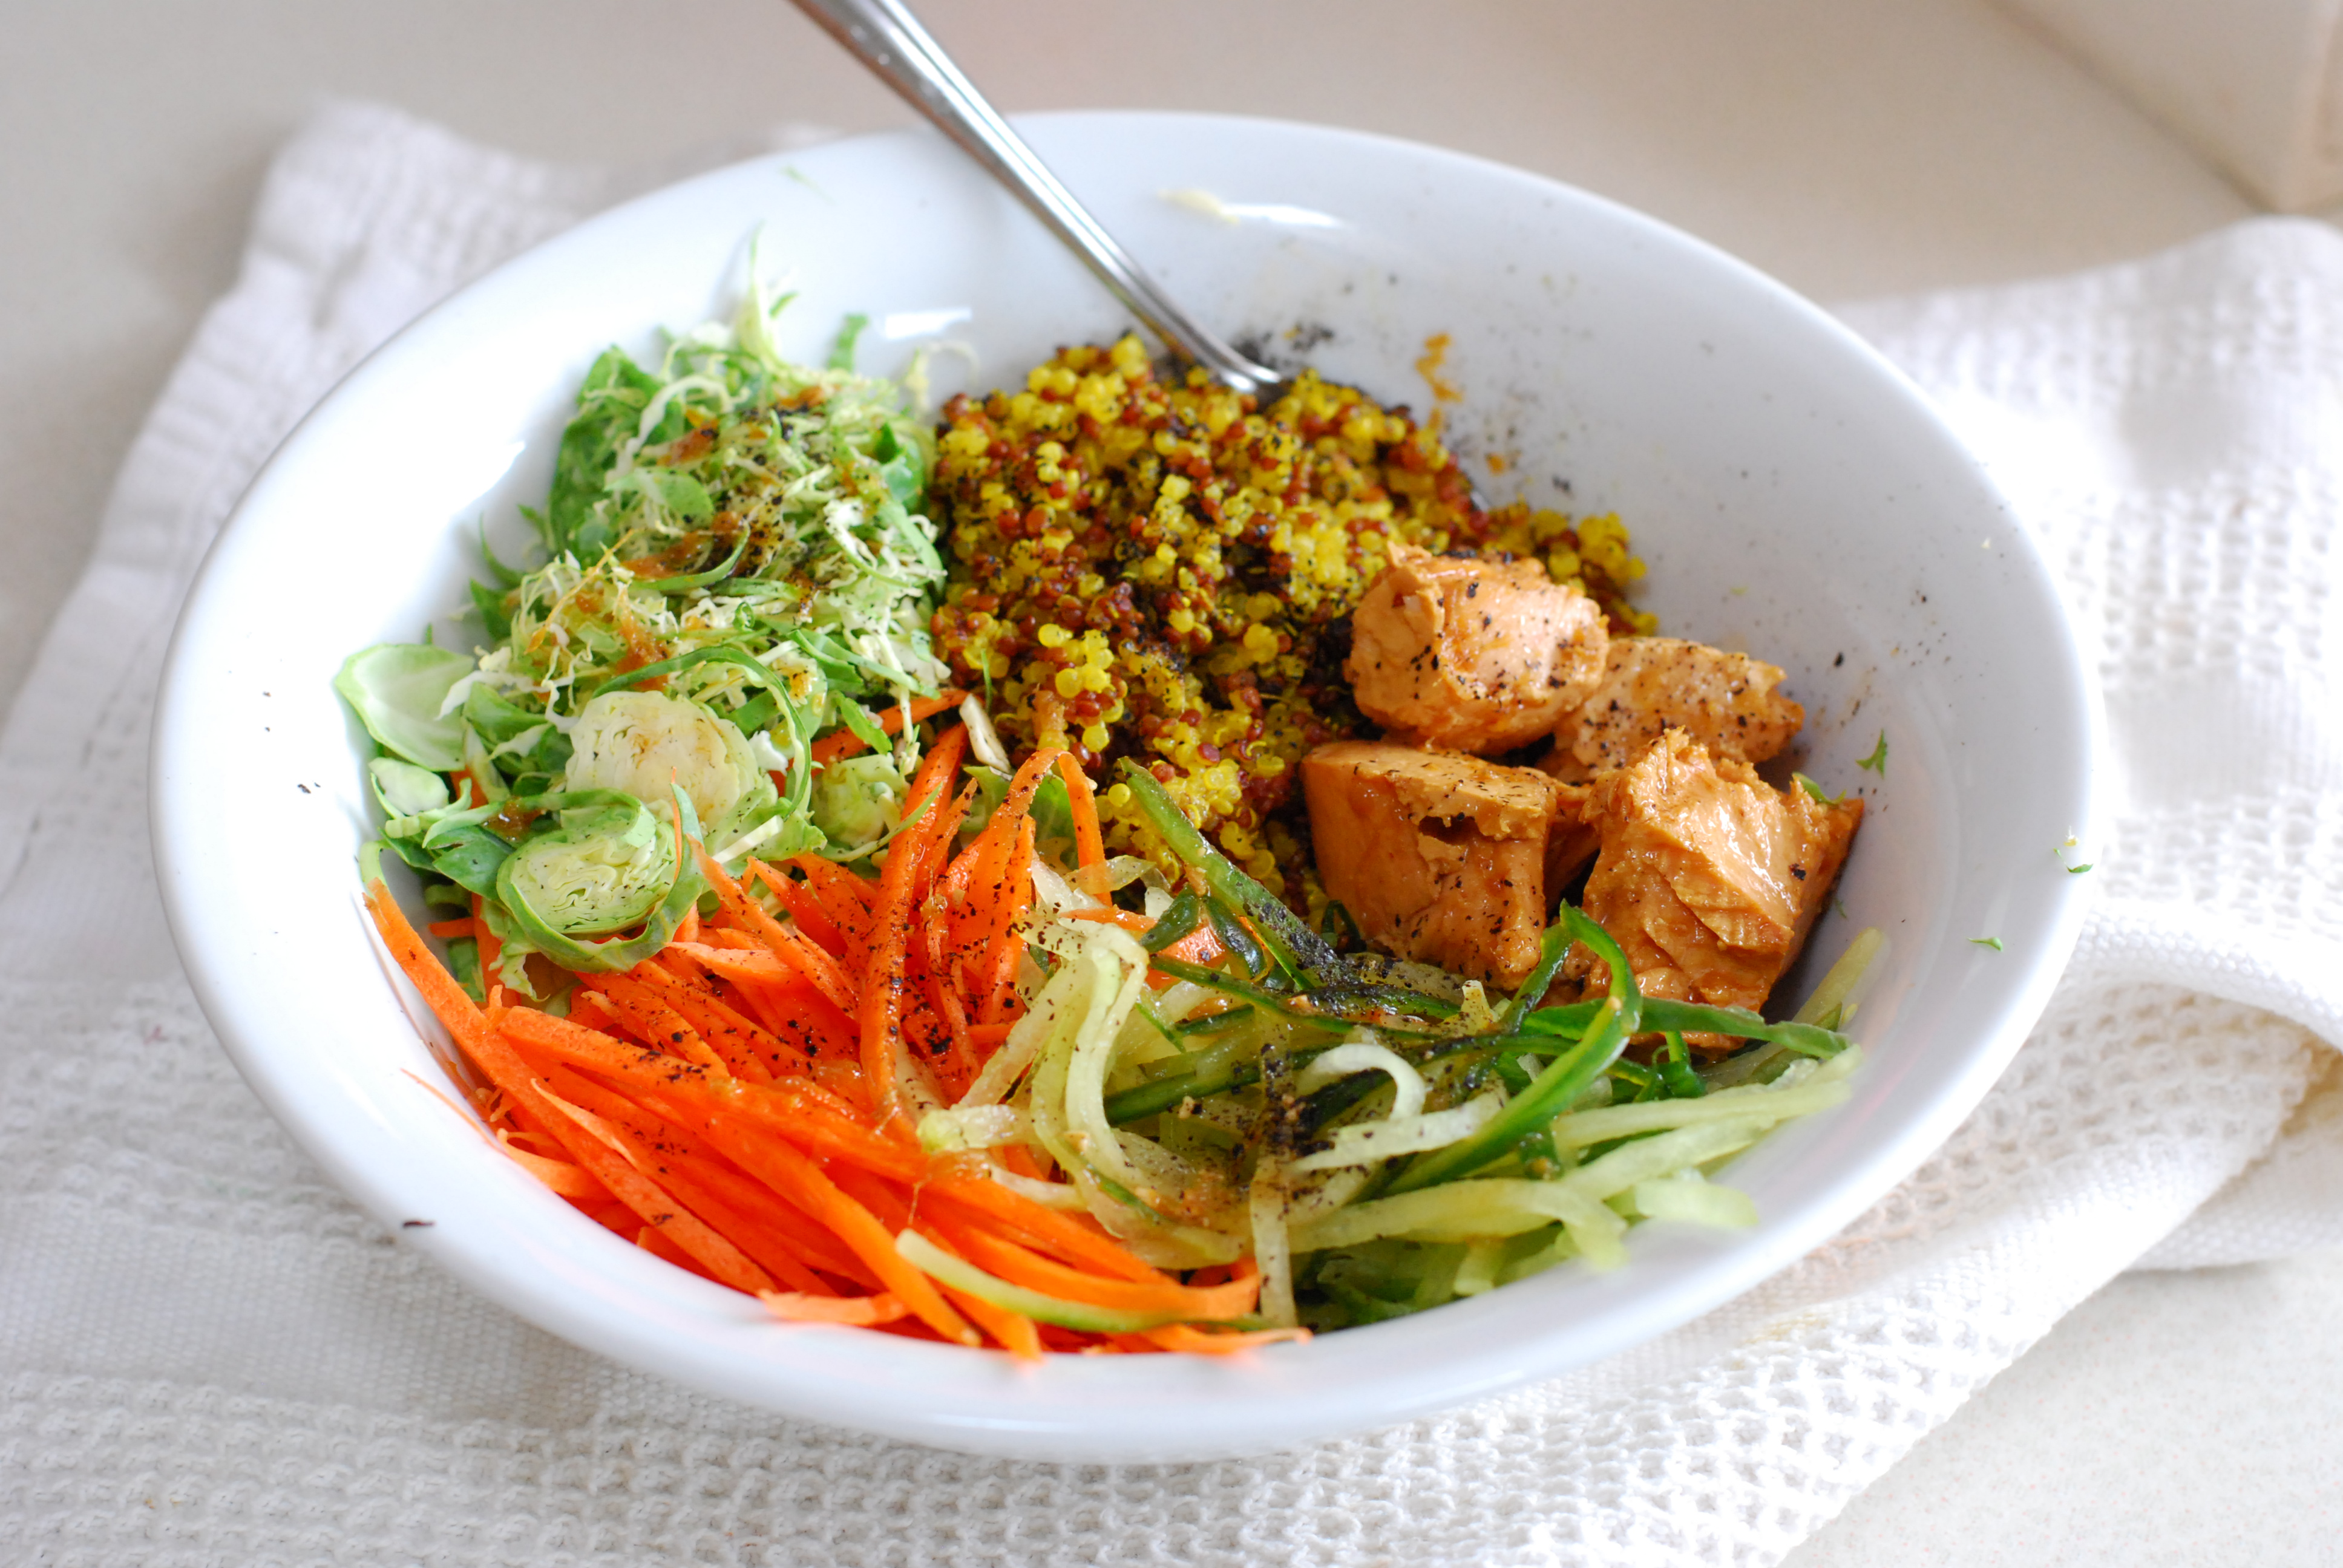
The current issue of Eating Well magazine has a section on bowl dinners- which is quickly becoming ‘the thing’ throughout Blogland to pile everything in a big, wide bowl- and the very first recipe listed was this Tuna Tataki Quinoa Bowl, of which I had everything on hand to quickly put it together. I’d recently found a 4-lb bag of organic Red Quinoa at Costco, and mixed it 50-50 with white quinoa, adding coconut milk, water and turmeric to create a deeply colorful option that added a lot of vibrancy to the plate. Er. Bowl. A can of Wild Planet Albacore tuna was used in place of fresh, marinating it in the same pungent and tasty broth.

Outside, the wind was really howling, once again. The sky shone a deep blue and the feigned warmth of the sun lulled me in to disbelief over the current state of the air outside. The lime juice and ginger lifted a fragrant scent, and I fished around in the drawer for my julienne peeler, scrubbing down carrots and keeping an eye on the simmering quinoa on the stove. Thin strips of carrot and cucumber dropped to the cutting board under my hands. Even before the quinoa finished cooking, my meal was ready to put together. After piling everything artfully in the bowl, sprinkling it with a bit of nori powder and taking a few photographs, I stirred the ingredients together with a fork and sat down. It was light, delicious, and really satisfying, with crunchy texture and bright, bold flavors. I love lime juice and ginger together, and although I’m sure a fresh tuna steak, or even sushi-grade salmon would have added a lot more flavor, the alternative was still delicious, not to mention so much easier and convenient.
One note on preparing quinoa: Eating Well lists, as many other recipes do, to cook quinoa in a 2-1 ratio of liquid to grain. In my experience, this makes for a very mushy and tasteless end product. Quinoa shouldn’t be mushy when you eat it; it should retain it’s shape, be toothsome but not crunchy, and you should be able to taste it’s texture. I have always cooked one cup of quinoa to 1-1/4 cups of liquid until all is absorbed, then remove the pan from the heat to sit for 10-15 minutes. It always comes out just fine.
For the original recipe, please follow the link to Eating Well’s site. This is my version:
Ginger-Lime Tuna with Coconut Quinoa
1 c. quinoa (I mixed red and white together)
3/4 c. coconut milk, whisked smooth*
1/2 c. water
1 T. ground turmeric
1/4 c. tamari soy sauce (or regular if it’s what you have)
3 T. fresh squeezed lime juice
1 T. fresh ginger, mashed
1 t. chili garlic sauce
1 can Albacore tuna
2 medium carrots, scrubbed
Half an English Cucumber
1 sheet fresh Nori, snipped in to pieces (I used Nori powder as I have a small bag of it)
In a small saucepan, combine the coconut milk and water and bring to a boil. Rinse the quinoa well in a wire mesh strainer and add to the pan with the turmeric, stirring to combine. Bring back to a boil, reduce the heat and cover, allowing to simmer gently until the liquid is absorbed. Remove from heat and let stand for 15 minutes.
While the quinoa is cooking, whisk the soy sauce, lime juice, ginger and chili garlic sauce together and add the tuna, breaking it in to bite sized pieces. Stir to coat and set aside.
With a julienne peeler, or a sharp knife, slice the carrot and cucumber (minus the seeds) in to thin strips.
When the quinoa is ready, place about a half cup in a large bowl and mound the tuna, carrot, and cucumber around it. Drizzle with a bit of the marinade and sprinkle with the pieces of Nori. This recipe made two sizable meals.
*- Coconut milk can be very thin, or very thick depending on the brand. The particular can I used this time was really thick and flavorful, but had I used it alone to cook the quinoa it would have never worked. I mixed it with water until it was thinner, but if you have thin enough coconut milk, you may be able to use it straight without adding water.
|