January 8th, 2014
| 2 Comments »
We’re on the upswing of some pretty intensely cold weather. Thankfully it was brief, only a few days, but the deep freeze shut down the state in ways that I haven’t seen in almost 20 years.
I’m old enough to well recall the last two deep freeze spells that came through Minnesota; the last one, in 1996 caught me inside a superbly drafty, old house and my poor baby, barely even 2 years old, was wrapped up so tight in layers that he could barely toddle around. We spent a lot of time snuggled in blankets watching PBS and reading books. And prior to that, in 1994, I was carrying him around on my insides, and so toasty warm with extra weight and hormones that I walked to the bus stop in -20 temperatures, with a cruel wind to boot, in an open winter coat that flapped in that vicious breeze. And I was still too warm. I didn’t get any frostbite, but I sure got some weird looks.
And here’s the thing; yes, by golly, it’s cold. But that just means more layers, more awareness when going out. I was outside on both of our recent cold days and although I could certainly vouch for the bone-chilling wind, I was dressed properly and felt just fine. Not fine enough for being out very long, taking a walk or getting out the nordic skis, but there was no fear in running errands and going about my business. Working in a grocery store led me to witness some pretty bizarre behaviors in people buying up supplies like an apocalypse was upon us, but quite frankly, I’m more fearful of being out in a blizzard than I am of dealing with a polar vortex. Cold is not so bad if you aren’t afraid of it.
We did have a big hiccup with Mike’s car, though, as he willingly allowed Griffin to park his car in our garage overnight so that when he had to leave for work at 4:30am, his car might start a bit easier. Which it did. But, as you can imagine, Mike’s car wouldn’t start after being out overnight in -50 wind chills. After multiple attempts to get the engine running, he disconnected the battery and brought it inside to warm up, keeping it connected to an electric charger. The next morning, the car roared to life as it should. Bottom line: if your car has to be outside, try taking the battery inside on those brutal nights. It’s a little extra work that might save you from a dead vehicle. And an electric charger should be in everyone’s arsenal.
Our fireplace got a lot of use over the past week, too. It’s gas, which isn’t our favorite, but you can’t beat it for ease and for incredible warmth. The fireplace has a blower that sends the warm, heated air out in to the room, and I curl up on the sofa in front of it, cats draped across my lap, my knitting in hand and a movie or TV show on Netflix and can pretty much forget that’s it’s not a fit night for anyone outside our windows.

At the top of every coping mechanism, however, is the food we love to consume when the weather bottoms out. You all know that I love soup, almost beyond words, and for one of our bitterly cold night, I made a simple pot of simmered beet greens, chickpeas and red-skinned potatoes from our Fall Storage CSA share. Simmered in turmeric-laced coconut milk, spiked with red curry paste, it was enough to cut through even the most bone-rattling cold, warming us right to our toes. Beet greens {and all hearty greens, like kale, mustard greens, collard greens, and chard) become silky smooth, nearly melting in your mouth when simmered slowly, and this method has made me a huge fan of just about any dark, leafy green, loaded with the iron our bodies need. This soup is pretty similar to my popular Braised Kale & Chickpeas recipe, with a few tweaks here and there. The addition of turmeric adds lovely color, and the wonderful anti-inflammatory properties that turmeric offers.
We’re expected to warm up in to the low 30’s by the weekend, and I can’t even imagine how delightful that’s going to feel after this last blast of arctic air, but, sadly, weather patterns hint at the brutal cold returning all too soon. There’s lots of Winter left. Plenty of soup to be made, I imagine.
Greens, Potatoes & Chickpeas in Coconut Milk
1 large bunch dark, leafy greens such as Beet, Collard, Chard or Kale, washed, de-stemmed & rough chopped
1/2# red-skinned potatoes, scrubbed and cut to 1/2″ {leave the peels on}
2 c. cooked chickpeas {equal to 1 15-oz can, rinsed well}
1 15-oz can coconut milk {use full fat for best flavor}
1 c. water
2 T. ground turmeric
2 T. red curry paste {optional, but you’ll love how it warms you from the inside}
1 large shallot, minced
3 cloves garlic, minced {use less, or more, to taste}
In a deep skillet, warm oil of choice and sauté the shallot and garlic with a big pinch of salt until softened, about 5 minutes.
Add in the greens by the handful, stirring to help them wilt slightly. When all the greens are added, pour in the coconut milk and water, and stir to combine. You won’t have a ton of broth, and you don’t need a lot. Add the curry paste and whisk to incorporate, then sprinkle the turmeric over everything and stir until combined. Bring to a simmer, add the potatoes and chickpeas, then cover and cook over low heat until the potatoes are just fork tender, stirring occasionally. Don’t cook them to the point of falling apart. The greens should be silky smooth.
Season to your taste with salt and pepper, then ladle in to bowls.
July 10th, 2013
| 2 Comments »
We rolled right in to July with perfect Summer weather. Our CSA share started too, and we’ve been enjoying a lot of wonderfully fresh organic fare, including some large and sumptuous heads of Bok Choy (Joi Choi). I promptly split one in half, dropped it on a searing hot grill and called it dinner.
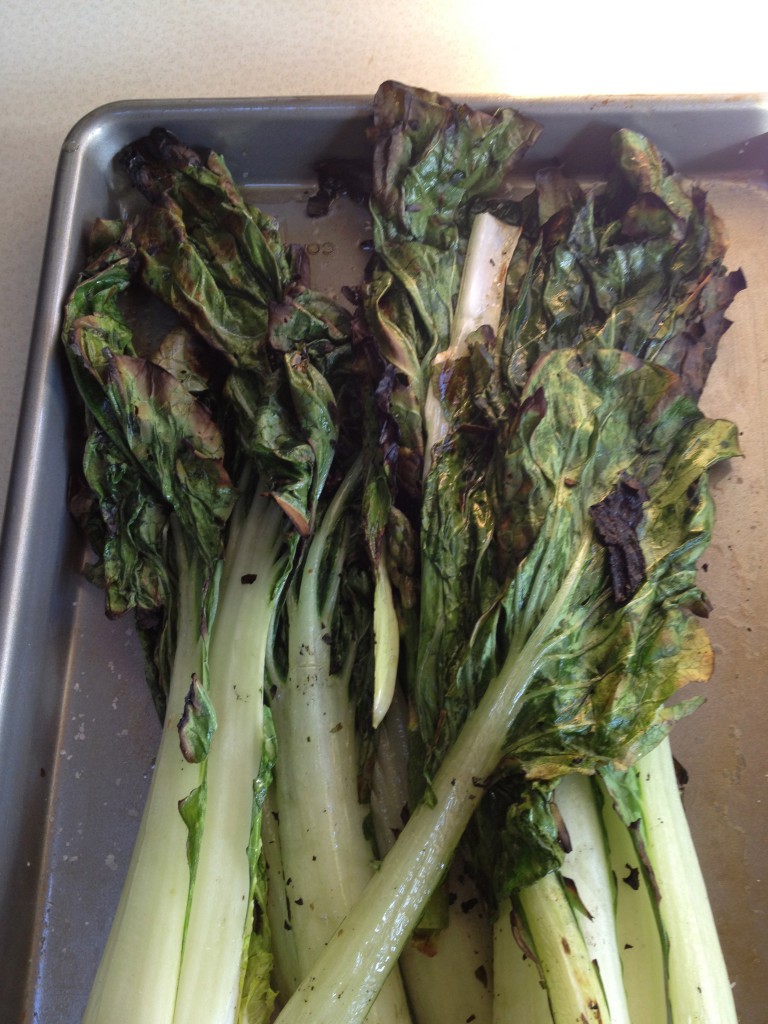
Come in to my kitchen…
November 14th, 2011
| 3 Comments »
This has to be one of my most favorite recipes.
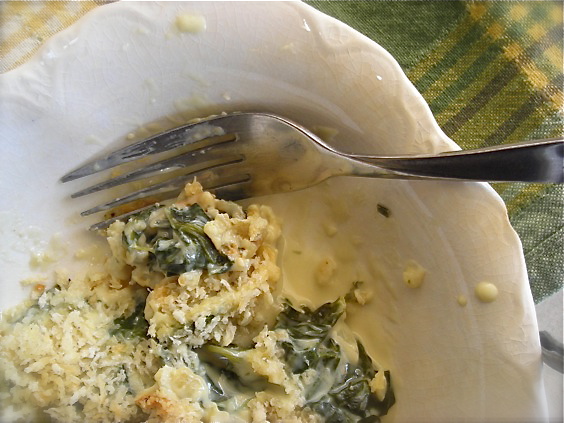 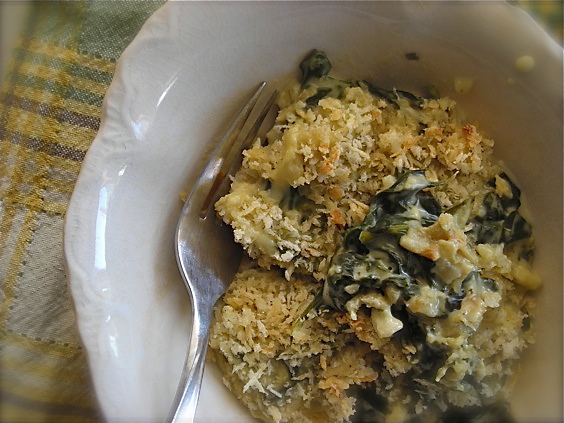
It’s rich, delectable and creamy….. I could go on and on. It would be equally welcome, that wealth of rich Boursin cheese sauce, when mixed with silky braised kale or chard too. Or! Or! Take an entire rainbow of vegetables and roast them, dress them to the nines with this coat of luscious sauce, topped with the toasted Panko crumbs and then a few minutes under a broiler to sputtering browned perfection and you’ve got a side dish worthy of any celebration. Or, just an ordinary dinner at home.
Believe me, there is nothing boring about this dish. Nothing run-of-the-mill, or plain or anything. This is one of those weapons in your recipe arsenal that you pull out for the good friends who grace your table, the ones who kick off their shoes without being asked, who bring wine while wearing faded blue jeans because you just don’t need to be fancy with your closest companions. And when they lift the first fork to their mouths, tasting the herbs, the seasoning of the succulent Boursin cheese, you know that smile that forms on their face tells it all. It’s impressive, yes. But simple and quick and anyone can make it. And it leaves you looking like a superstar, because it’s just that good.
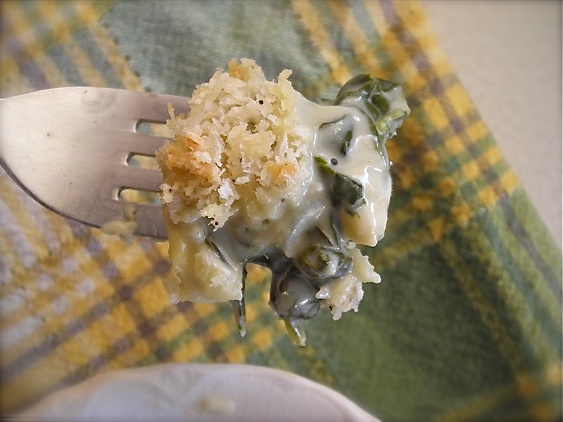
Boursin Spinach Gratin
1 bunch fresh spinach, destemmed, washed well and spun very dry ( sub in kale or chard too)
1 t. unsalted butter
1 small shallot, minced
3 T. AP flour
1-1/2 c. whole milk (alternately, use soymilk- it works perfectly!- or equivalent of 2%, or 1 c. skim & 1/2 c. heavy cream)
1 container Boursin Herb and Garlic cheese, 5.2oz
3 T. fresh shredded parmesan, or other hard cheese of choice
1 t. each fresh squeezed lemon juice and fresh grated lemon zest
2/3 c. panko bread crumbs
1 T. melted butter
Salt and pepper to tasteHeat oven to 425°In a medium oven proof skillet, melt butter and add shallot, cooking and stirring until soft, about 5 minutes. Stir in flour to coat and then slowly begin whisking in milk until fully incorporated. Stirring constantly, bring sauce to a gentle simmer to thicken slightly, then add in Boursin cheese, a small amount at a time, until all of it is blended into the sauce.Drop a handful of spinach leaves into sauce and stir to coat. Add more, a handful at a time, until all spinach is mixed well with the sauce. Bring to a simmer, cover and simmer for about 5 minutes. Mix panko, salt and pepper and melted butter, sprinkle over top of spinach and place pan, uncovered, into oven. Bake for 10 minutes, until bubbly and crumbs are browned. Remove from oven, allow to cool slightly (remember that pan handle is HOT!) and serve immediately, sprinkled with parmesan cheese.Alternately, mixture can be divided among smaller ovenproof ramekins to be baked. Divide spinach into ramekins before topping with bread crumbs. Baking time will be shorter.
What’s on YOUR plate this month??

July 16th, 2011
| 7 Comments »
People, I’ve madly fallen in love with radishes.
 (photo courtesy of Really Natural) (photo courtesy of Really Natural)
I do remember not particularly liking them as a kid. But then again, I didn’t care for much then anyway, being raised on a typically 1970’s diet, I was your typically picky little thing. Fresh foods weren’t that present in our home so my exposure was lacking and my palate not particularly advanced; it’s no shock I wasn’t at all enamored with the radish’s peppery bite, a sting to the tongue that I found unpleasant. My sister Karen loved them, dragging them through a plate of table salt before popping them in her mouth. Even that typical dressing did nothing to take the edge off the flavor. So for the most part, I’d ignored them.
Then something happened a few years back. On a trip to the Farmers Market, I spied a large bunch of red, white and pink radishes- it was an enormous amount- and was only a dollar. I picked them up, passed a buck to the farmer and placed them in my bag. Once home, I stared at them and thought ‘Great. Now what?’ I ate one, and it was divine. Fresh, snappy, crisp and tart, but not harsh and sour like I recalled. Still, I didn’t leap headfirst into devouring them. I remained rather skeptical. And they languished in my fridge until I was forced to do something, anything, with them.
So I pickled them. On a whim. And went tuckus over teakettle for the crisp little discs, eating them on sandwiches, with my fingers and finally with a fork to grab the last little slices from the dredges of their vinegary brine. And it was soon after that when I first dragged a cold fresh radish through a slab of creamy butter to discover one of the best, and most surprising treats I’ve ever tasted. My eyes were now opened to the radish. Once again. Adulthood is a wonder around every corner, especially when discovering the foods from your childhood that once caused you to turn up your nose are now part of your regular gustatory delight.
So they’ve happily made a comeback; the inexpensive little things can be had sometimes on a 2-fer deal with any farmer willing to move their bounty. I scrub them down and place them in a baggie where they happily keep for days on end, willing that they last that long in my fridge. I eat them for breakfast a lot, sliced thick on good toasted bread with slices of butter, or most recently, this delicious sandwich creation that I’m thoroughly ga-ga over.
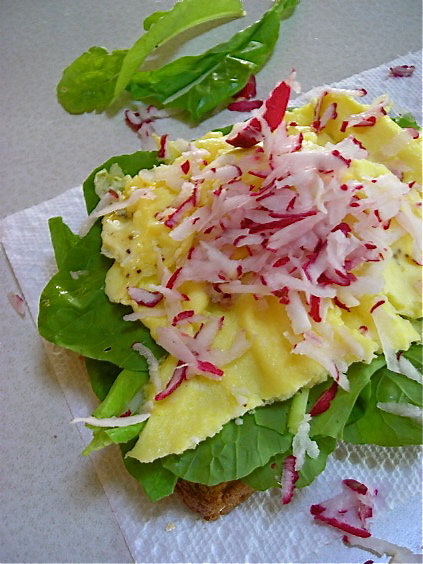
A cooked egg, nice and firm is placed a top a bed of greens on nicely toasted bread, and covered with several shredded radishes. The key is to shred the radish directly over the egg. Something about the fresh spray of liquid released makes for a much better flavor. I like spinach with this, but I’ve used spring greens, garden lettuce and romaine as well. This is a summery breakfast, if I’ve ever dreamed of one.
I took my radish love one step further too, recently, when I roasted an entire batch of them.
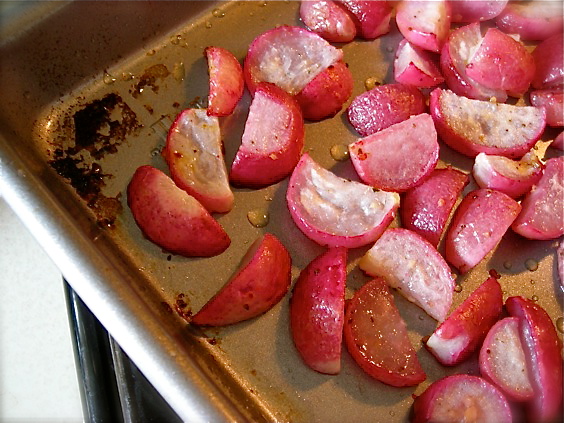
Roasting radishes takes the sharp flavor away, and replaces it with a mellow soft rendition that is palatable to anyone, even the most avowed radish hater. One would hope, anyway. I could have eaten these like candy, but instead, I caramelized a big pan of vidalia onions and made the two of them into a delicious tart atop a flaky puff pastry crust.
 
This was a sweet, tender and amazing hand held meal, soft like summer nights, fresh as the season and when topped with just a little Gouda cheese, a bit of savory tang that balanced the vegetables perfectly. Eating a slice of it, on my patio, with a lovely glass of Rosé wine and a perfect summer night surrounding me, I felt a million miles away from my life, but in the simplest way possible. I love how a good meal, with gentle ease can transform an ordinary day into something surreal and dreamy. That’s the magic in a plate of really, really good food.
So…. do you like radishes? What do you like to do with them?
Roasted Radish & Caramelize Onion Tart
Scrub one bunch of radishes well, removing tops and roots. Cut into halves or quarters and toss with a bit of seasoned oil of choice. Roast at 400° until tender. It won’t take too long, maybe 10 minutes.
Slice two Vidalia onions and place in a hot skillet. Cook onions over medium heat, turning frequently, until browned and tender, about 15 minutes. Reduce heat to low, add a few tablespoons of brown sugar (or a drizzle of good honey) a tablespoon of kosher salt and a dash or two of balsamic vinegar. This is my favorite way to caramelize onions, but you may have your own method. Continue cooking the onions for about 20-30 more minutes, or until they are very soft and richly browned. Stir them on occasion, and be careful not to let them burn.
Thaw one sheet of puff pastry. Roll out sheet to desired thickness on parchment paper, then transfer to baking sheet. Poke holes in pastry with a fork and place in 400° oven, baking until lightly browned, about 10-15 minutes. Remove from oven, spread caramelized onion over the crust then top with roasted radish and a small amount of a good sharp aged cheese of your choice. I used Gouda because I had a some on hand. Fontina and Gruyere would be good options too. Place back in oven and bake for about 15 more minutes, until edges of pastry are crisp and brown and toppings are hot. Allow to cool slightly, then serve. Can also be served at room temperature.
July 5th, 2011
| 2 Comments »
I’m learning a lot on this plant-friendly journey, with the biggest lesson being that all plants based meals, while gorgeous in color, aren’t always the easiest to photograph.
Take this Farro and Greens dish……
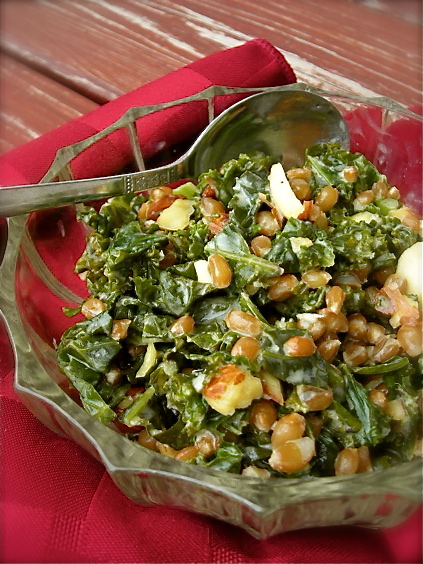
It was delicious, satisfying and full of textures and tastes. But when I tried to plate it to photograph, I stared down at it’s curly leaves of kale, it’s burnished grains and hearty nuts and said “Dang, you’re kind of homely.” Because it was, through no fault of it’s own though.
Thankfully I didn’t hurt it’s feelings.
I ended up having to take it outside into full on natural light, not the light through the west window in my sunroom where I usually set up my shots. Even then, outside it took about 8 shots before I really started getting the angle right, the focus firm and the shot like I wanted. And I was talking to it. Outside. On my patio steps, hunched over to get the right angle and mumbling to my food. Yeah. I’m THAT kind of blogger.
But enough already….. delicious? Did I mention that? Wow with a capital “W” !!! It was good at room temperature after I tossed all the ingredients together. It was fine, oh so fine, when I ate it cold for lunch the very next day. And it was still good heated up a day or two after that.
And that’s another thing I’m learning; plant-based foods can manage a patient wait in your fridge so much longer than a dish with meat. (yeah, I know…..duh) And they can happily sit on your counter for a while (like over an hour when you, ahem, forget about them there) and really there’s no loss to you, or risk in it at all.
And quick….. quick! Plant based meals are lickety-split quick, people. I had this done in the time it took to slowly simmer the kale to a great tenderness, all of 15 minutes. A recent lunch with red chard and great northern beans took maybe 5 minutes to pull together. A side salad, those amazing chickpeas I just talked about? Less than 10. My humongous salads topped with a whole rainbow of crunchy veggies? Well, if I take the time to prep all of it ahead of time and keep them in containers, I can have a giant heaping bowl of a masticator’s delight in maybe 5 easy minutes. I made Peanut Noodles, and in the time it took to boil water and cook the noodles, the pepper, cucumber, green onion and carrot were done and sitting on the counter.
So yeah…. quick. And delicious. And healthy….. I still feel so amazing, and the best part? Even on those nights I don’t sleep so good, which seems to be the story of my life, I still am energetic enough to get through the day without collapsing. I feel tired, but the exhaustion that I had come to expect just isn’t there anymore. I feel pretty humbled by this little experiment, and so grateful for the ability to swiftly change directions, to move into even better health and well-being and to be able to talk about it and share it with you.
Now if only these pretty, colorful and healthy little meals would step up their game under my camera lens.
Toasted Farro with Greens and Tahini
1 c. cooked farro, or wheatberries, cooled and chilled.
2 T. tahini
2 T. extra virgin olive oil
2 c. tightly packed greens, chopped- you can use kale, spinach, chard, mustard, collard, turnip… whatever you like
1/2 c. parsley leaves
2 T. fresh lemon juice
1/2 c. chopped nuts, such as pecans or almonds (optional)
Salt and pepper to taste
Whisk the tahini and olive oil with two tablespoon of water and set aside.
Heat a deep skillet over medium heat. When very hot, add the chilled farro. Don’t mind if a little moisture causes it to hiss or sizzle. It will cook off as you toast the grain. Shake the pan often, heating the grains until they’re very warm and fragrant, maybe 5 minutes. Be very careful not to burn them. When hot and toasty, remove grains to a bowl. To empty skillet, add 1/3 cup of water and the greens, stirring and cooking until they’re tender but still have a bit of toothy bite. Add the farro and the tahini mix, and stir to combine. Allow to cook for a few minutes to blend the flavors. Stir in the lemon juice, and season with salt and pepper. Serve topped with nuts, if using.
Source: Food and Wine magazine, with heavy modifications
KATE’S NOTES: I used wheatberries for the farro in the recipe as I had some already cooked in the freezer and farro is often hard to find. They make a perfect substitute. You could also sub in cilantro in place of the parsley, or add more fresh herbs, like thyme or oregano. I also added in lemon zest to make the overall flavor brighter.
|


