Go to Home Page

perfect cornmeal waffles

November 5th, 2011 | 2 Comments »

It’s November again. And this morning when I arose, in the dark still silence, to the hum of the furnace and an noisy, eager cat face, the air smelled definitively of the impending winter. Never mind that it might reach near 60 today, or that the sun burns bright in that kind of blue sky that hurts your eyes, the wind that touched my face when I let out our early riser told me ‘You know, I could snow at any minute.’

We’re pretty fortunate that our Fall has been both spectacular and snowless. The only month without recorded snowfall in Minnesota is July, and with the frost that came so early in September, I felt certain that a drifting white mass would come sooner or later. I’ve been happy to be so, so wrong.

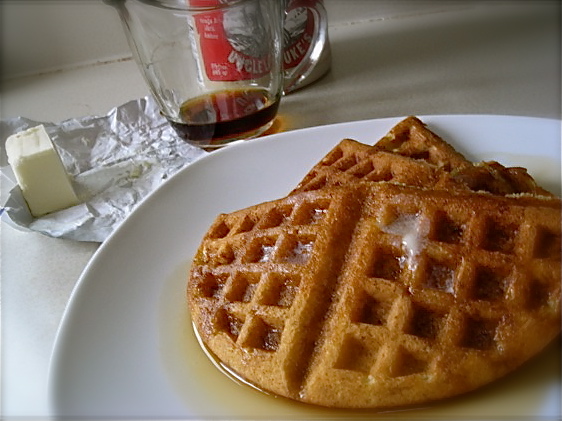
These Cornmeal Waffles are a favorite cold weather breakfast. First crafted and enjoyed on a crackling, numbingly cold day in January of 2010, they’ve gained a permanent foothold in my breakfast rotation, the waffle recipe I turn to time and again. With their crisp edges, and the sharp tang of buttermilk contrasting with the deep, rich maple syrup, it’s a dance of flavors to awaken you and set you upright, not to mention bolstering you against cold and wind.

The inevitable Winter is just around the corner. Shore up your weekends with foods that bring warmth to your home and fuel for the internal furnace. These waffles freeze beautifully. I always make a double, or even a triple batch so that we have lots of extras on hand.

Do you have a preference for Waffles or Pancakes??


Buttermilk Cornmeal Waffles

1 cup sifted all-purpose flour (sift before measuring)
1 cup yellow cornmeal, preferably stoneground
2 teaspoons baking powder
1 teaspoon baking soda
1/4 teaspoon salt
3 large eggs
2 cups well-shaken buttermilk
6 tablespoons vegetable oil plus additional oil for brushing waffle iron

Into a large bowl sift together flour, cornmeal, baking powder, baking soda, and salt. Repeat sifting 2 more times.

In another large bowl whisk together eggs, buttermilk, and oil. Add flour mixture all at once and whisk just until combined.

Preheat a waffle iron and preheat oven to 200 °F.

Brush waffle iron lightly with additional oil. Spoon batter into waffle iron, using 1/4 cup batter for each 4-inch-square standard waffle and spreading batter evenly, and cook according to manufacturer’s instructions. Transfer waffle to a baking sheet and keep warm, uncovered, in middle of oven. Make more waffles with remaining batter in same manner, brushing waffle iron with more oil before adding each batch.

Serve waffles with syrup.


(from Kristin at The Kitchen Sink Recipes, slightly adapted from Gourmet magazine)


What’s on YOUR plate this month??
andean bean stew with squash and quinoa

November 4th, 2011 | 2 Comments »

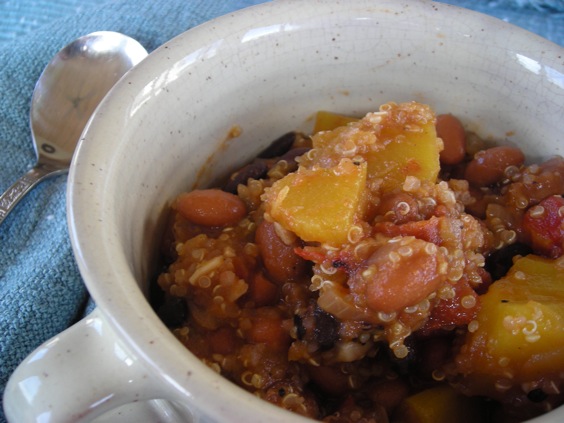
This is a perfect stew for right now, for November, for cool nights and for filling your house with warmth. I made this two years ago and we loved it; this being long before we passed on meat in favor of hearty vegetable dishes and grains. So bringing it up again serves more than a purposeful means to introduce you to something I loved, but to reintroduce myself to a great idea, once more.

I’m giving you the Weeknight Version of this hearty and delicious stew, ready in about as much time as it takes for your squash to cook in the pan. If you are so inclined, use dried beans instead, with the proper soaking. As with many soups or stews, this dish tastes better with a day in the fridge, but it also thickens substantially so you’ll want to add more broth or liquid the next day.

Delicious and hearty, with a good healthy twist and terrific for a cool weather meal, what’s NOT to love about this??


Andean Bean Stew with Winter Squash and Quinoa

1 winter squash of choice, peeled and cut into 1/2″ chunks
2 cans pinto beans, drained and rinsed
1 medium onion, chopped
1 T. sweet paprika
4 garlic cloves, minced
1 can fire-roasted tomatoes, with liquid (use regular if you don’t have these available)
1/2 c. quinoa, rinsed well
1 bay leaf
3 T. chopped basil or parsley

In a sturdy stockpot, brown the onion in oil of choice, about 10 minutes or so. Add the paprika and stir to coat, cooking for a minute. Add in garlic and stir, cook for 30 seconds or until very fragrant. Add in tomatoes and their juice and cook for a few minutes to combine flavors. Stir in the beans and squash. Fill the tomato can with water and empty into the pot. The solids should be only just covered with liquid. This is a thick stew. Add more if necessary and put the bay leaf in the pot. Bring to a boil and then allow to simmer, covered, until the squash is tender, but not thoroughly cooked- 30 minutes or so. Stir in the quinoa and simmer until the grain is translucent and the tiny thread appears- about 10-15 minutes more. Season to taste with salt and pepper. Serve topped with basil or parsley.

from The New York Times, Recipes for Health and Nutrition, Nov. 2008


What’s on YOUR plate this month??

sugar cookie love

November 2nd, 2011 | 3 Comments »

It’s November, so that means one thing in the blogging world.


What’s on YOUR plate for November??

{{And you thought I meant Thanksgiving, didn’t you?}}

That’s my cute little badge for NaBloPoMo 2011, which is blog lingo for National Blog Posting Month. You post every day for a month. That’s all it is. It’s also National Novel Writing Month, or NaNoWriMo, an epic adventure in which you write a 50,000 word novel in 30 days. If I had the month free with zero obligations, I might give that one a shot. That’s a lot of words, isn’t it?

I’ve done NaBloPoMo twice; in 2008, when I highlighted a different food holiday each day for the month of November, and again last year, in 2010 when I culled through the 4-1/2 years of archived posts on my site and re-introduced some favorites. That’s my plan this year as well. There is A LOT of good content in my archives, recipes that are perfect for this time of year that no one finds anymore, plus with Just Write Tuesdays, I’ve got more than enough content to fill 30 days in a row. Piece o’ cake.

{{by the way, my sweet husband Mike made that sweet badge for me. He’s awesome that way.
And he accepts food for payment!! Hi honey!!}}

Today is about cookies, though. Sugar Cookies to be exact. It is, hands down, my all time favorite cookie and I don’t say that lightly. There are a lot of amazing cookies out there; chewy Oatmeal Raisin, decadent Chocolate Cookies, Pumpkin cookies with thick cream cheese frosting. There are no limits to what can be scooped up and baked on a sheet pan. But a good sugar cookie is one of life’s simplest pleasures; buttery, chewy and rich with vanilla, I can tell a sugar cookie made with love over a mass-produced butter-flavored fake any day of the week. My Sugar Cookies evoke sighs of joy, and eye rolls and ‘Mmmmmm’ responses from everyone who tries them. And it’s a well honed taste too, going back to my childhood, and a beloved bakery from the golden days of neighborhood bakeries, where a sugar cookie always waited for me. If you want to read the whole story, please go <HERE>

And if you just want the recipe, here it is.


Sugar Cookies


1 c. softened butter, no substitutes (reserve one of the wrappers)
1-1/2 c. white sugar  (plus more for rolling)
2 t. pure vanilla extract
1 egg
2-3/4 c. AP flour
1 t. baking soda
1/2 t. baking powder

Heat the oven to 375° and line two cookie sheets with parchment paper. Place about 1/3 of a cup of white sugar on a small plate and set aside.

Cream butter and the 1-1/2 cups of sugar together until very light and fluffy. Add in egg and vanilla extract and blend thoroughly until smooth and creamy. You really can’t overmix at this point. You want a base that is smooth and creamy as it makes the end result stupendous. Stir together flour, baking soda and powder, and with mixer on low, gradually add to butter until fully incorporated and mixture is in large, somewhat dry chunks. It will not be a smooth batter, but granular, like pie crust. The dough should hold together when pressed between your fingertips. If it doesn’t, take the bowl off the mixing stand and turn the dough gently with your hands, pressing any loose flour in to the dough to incorporate. Chill the dough for 20-30 minutes before scooping. It’s a lot easier to work with that way.

Using a small scoop (I used a #60 sized) press dough tight into a ball and drop onto cookie sheet. With your butter wrapper, wipe the bottom of a smooth glass, then dip the glass onto the sugar you’ve set aside. Gently press down on the cookie dough, dipping the glass before each one. If any dough falls loose, lightly push the pieces into the sides of the cookie.

The cookies will bake up just fine if you don’t wish to flatten them; that’s just my preferred method. Bake for 8-10 minutes, reversing trays from front to back, and swapping top to bottom about halfway through. I’ve tried this with the convection feature on my oven and they browned too quickly so I don’t recommend that method.

I like to remove the cookies right way, on the parchment to a cooling rack. These are pretty sturdy once baked, and will slip off the parchment easily with a gentle nudge. You simply must eat at least a few of them warm. Of course, a glass of cold milk, or a nice cup of coffee or tea is an excellent accompaniment. The cookies will become firmer as they sit for a day or two.


KATE’S NOTES: I began using the super-fine baking sugar for all my baking needs and find that it makes for better creaming and a nicer crumb on the finished product. Most grocers carry it in the baking aisle, in a sturdy carton. It’s called ‘Bakers Sugar’ and it’s very, very fine grain. I used it in these cookies and they were even better than I recall.

The addition of a bit of nutmeg (about 1/2 a teaspoon) in the batter makes for wonderful flavor, or you can add ground nutmeg to the sugar used for rolling the cookies in.