August 28th, 2013
| 2 Comments »
Earlier this Spring, we took the leap and purchased a CSA share in the Bossy Acres farm. Bossy Acres, run by the team of Karla Pankow and Elizabeth Millard, grow organically on a farm in Northfield, and specialize in unique, heirloom varieties. Being a family of three, we decided to get the Mini share that would deliver every other week, plus an add-on share for fresh farm eggs and fresh roasted coffee.
Hands down, it was the best decision we made this year. In previous years, I would visit the Farmers Markets up to three times a week to keep a good stock of fresh vegetables on hand. In deciding on our CSA delivery, I figured that I would still be able to browse the markets on our off week from deliveries, but the wealth of vegetables showing up in our boxes keeps us chugging along in between delivery weeks, and only on a few occasions have I needed a quick visit to our local market to fill in around the edges. Our garden has also been producing well, and we’ve enjoyed broccoli, chard and a bounty of tomatoes from our own backyard, and the garden at our lake home.
In one delivery from Bossy Acres, complete with a copious harvest from the lake, I faced a counter full of cherry tomatoes that I desperately needed to do something with before they all started collapsing.
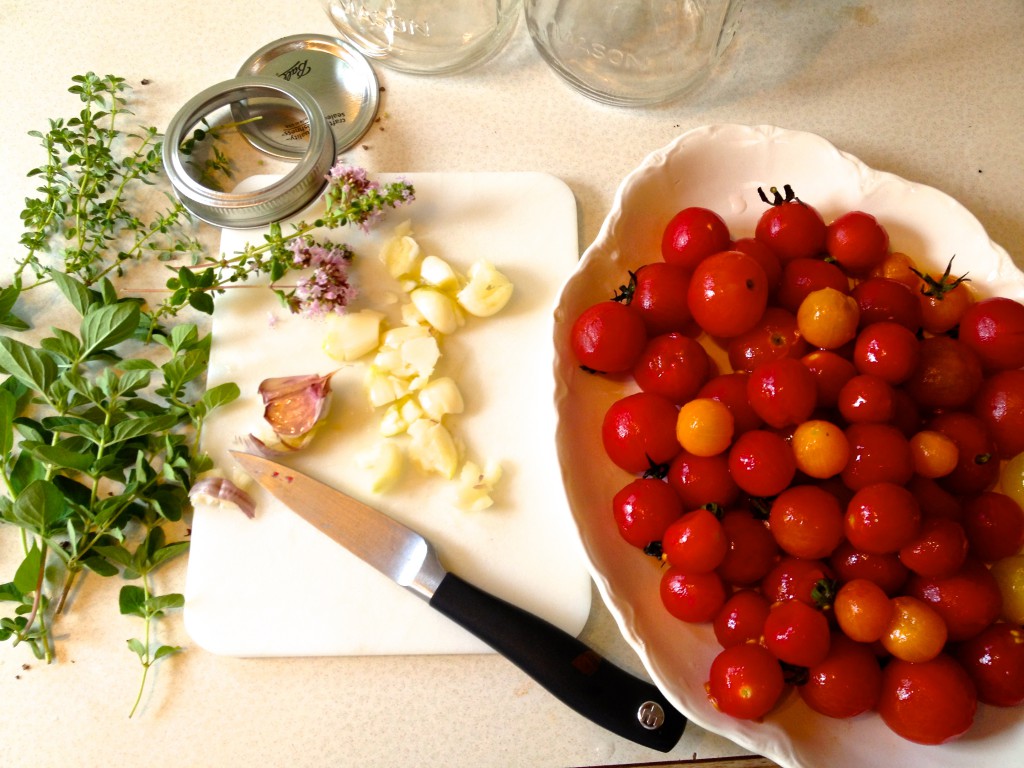
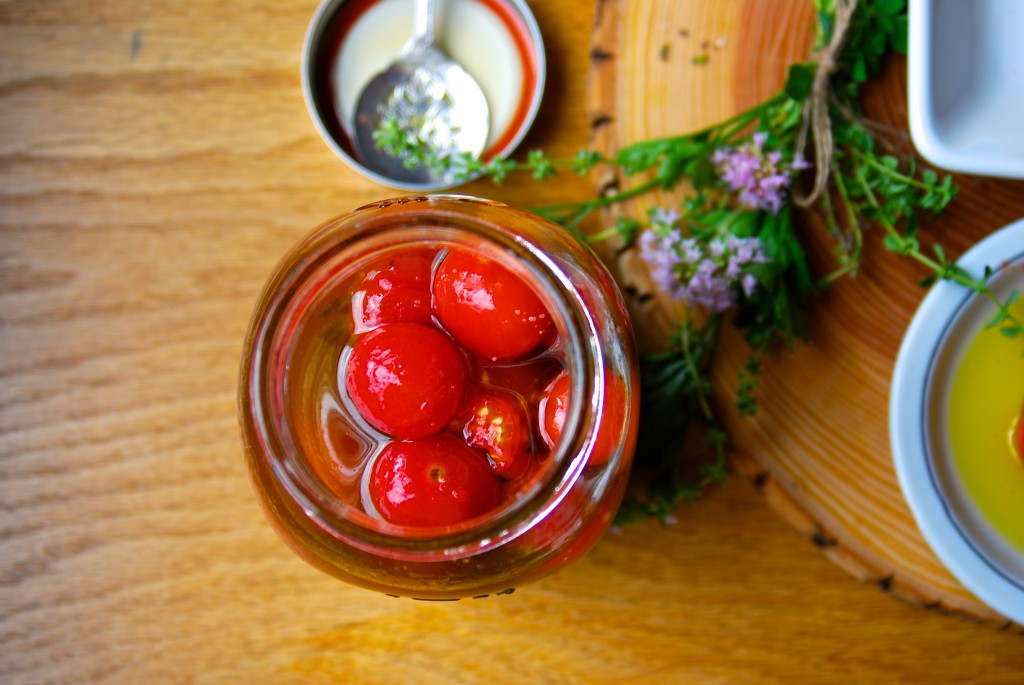
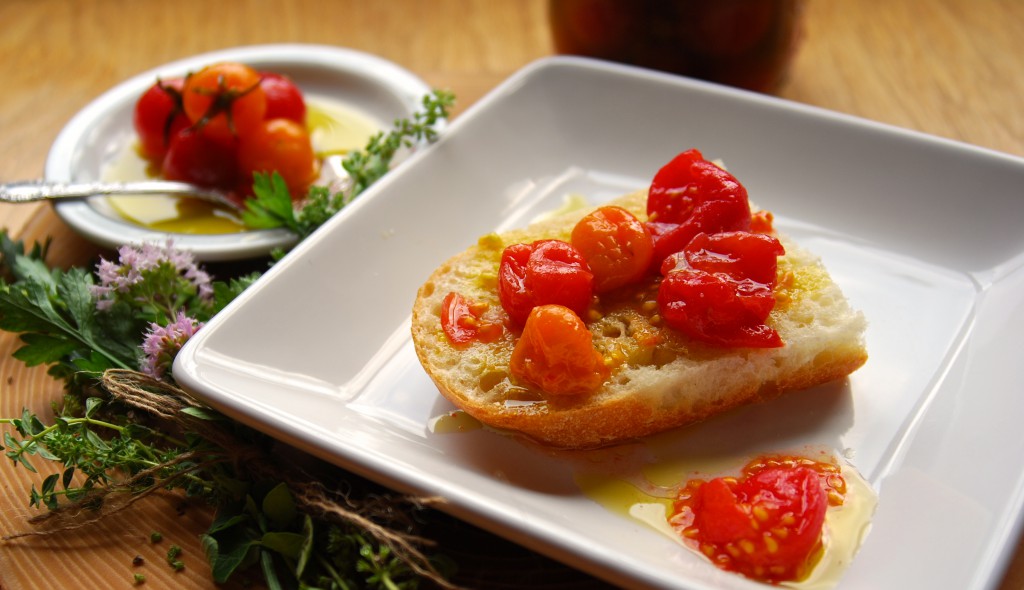
These simple marinated cherry tomatoes were a perfect option to take care of the bounty. One quart jar later, they were ready for a few days soaking in the refrigerator, redolent with fresh thyme, oregano and crushed cloves of aromatic garlic. The hardest part of the entire procedure was peeling the little things. The olive oil marinade even made enough to have some left over to fill an extra bottle for use on salads or drizzled over good bread.
A good marinated tomato has endless uses. I love using them on pizza, or you can toss them on your greens, too. Mashed and blended with vinegar, they make a simple vinaigrette, or like pictured here, scooped out and placed on bread, with some of the oil scattered over the top. Once the jar has had time to meld all the flavors together, what happens after that is only limited by your imagination and appetite.
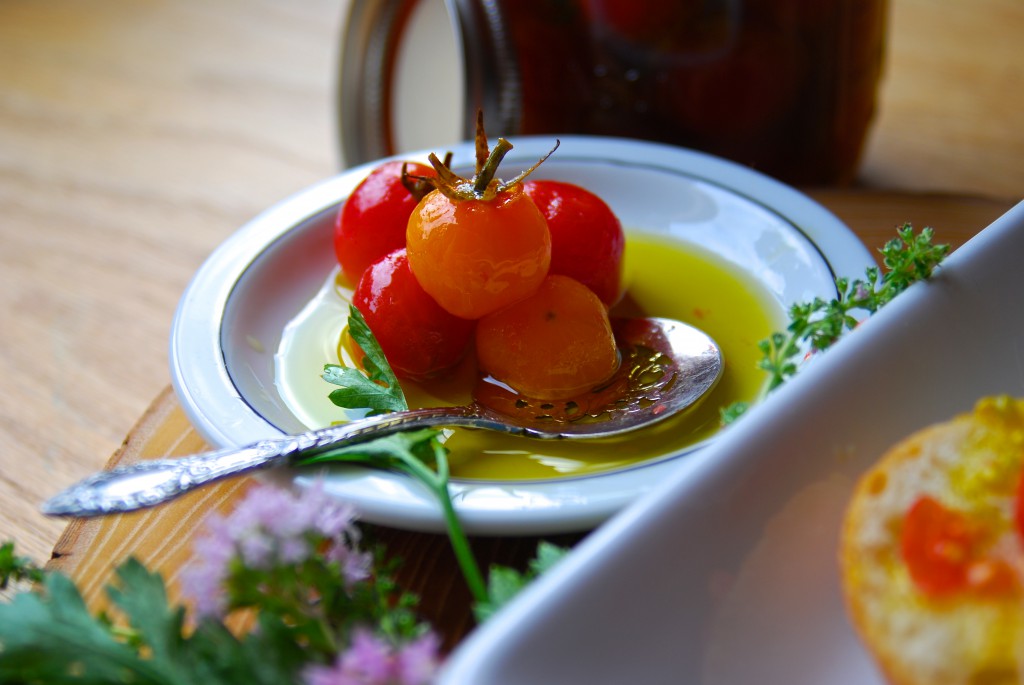
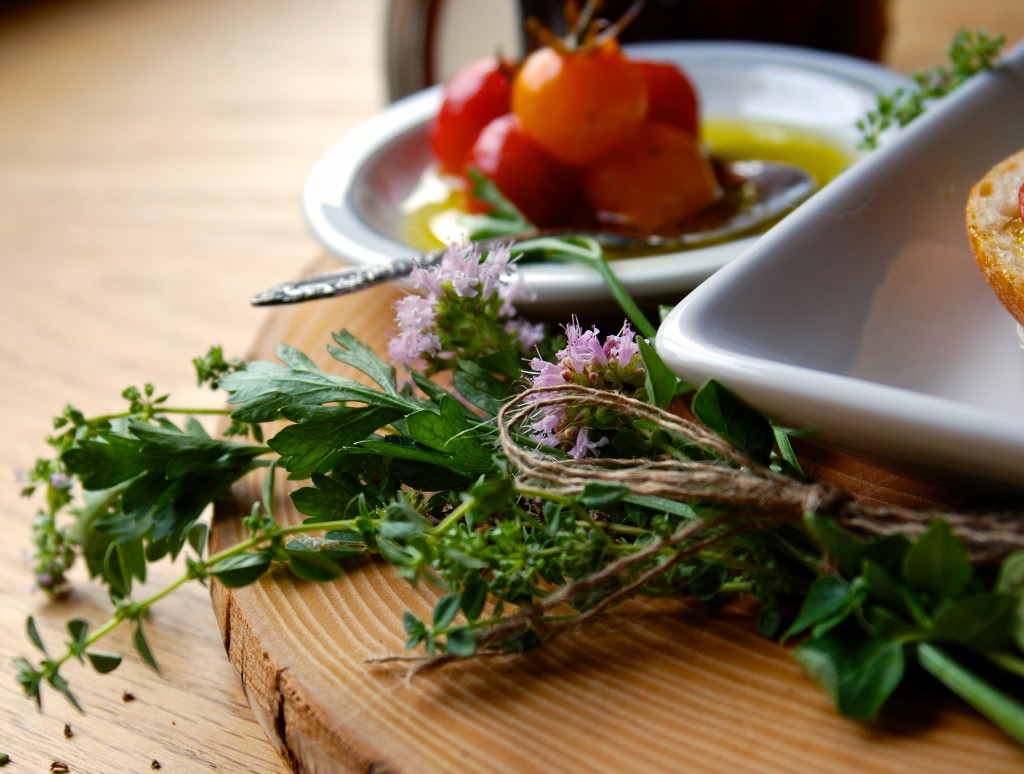
For your bounty of garden tomatoes, pack up a jar or two of these beauties. You will love them.
Herb Marinated Cherry Tomatoes
2 c. high quality olive oil
5 cloves garlic, crushed
1 t. crushed red pepper
2 sprigs each fresh thyme and oregano
1 t. mixed peppercorns
1 t. flaked sea salt (I used Maldon smoked)
2 pints Cherry Tomatoes
The Cherry tomatoes need to be peeled, and this was the most tedious part of the whole procedure. Score an X on the bottom of the fruit with a sharp knife and bring a pot of water to a boil. Place a large bowl of ice water nearby. Working in batches, drop the scored tomatoes in the boiling water for 15 seconds. With a slotted spoon, remove from the pot and immediately drop in the ice water. Once cooled, simply peel off the skins. Place the tomatoes in a quart canning jar with a few sprigs of fresh herbs. I liked using the flowering tops of the herbs in the jar.
In a small saucepan, warm the oil, garlic, red pepper, peppercorns and salt gently, stirring to dissolve the salt. Do not bring to a boil. Add the fresh herbs and remove from the heat. Allow to cool completely, then strain out the solids, pouring the oil over the tomatoes in the jar. Any remaining oil can be poured in to a carafe for other uses in the kitchen. Cover the jar and give a gentle shake, then allow to sit at room temperature for 2 hours. Refrigerate for up to two weeks. I doubt they’ll last that long.
You will see the oil solidify in the refrigerator. This is normal. Allow the jar to sit at room temperature for a short time before serving to bring the oil back to liquid.
August 1st, 2012
| 4 Comments »
It isn’t much, I admit. This spread, or dip or whatever you wish to call it was a lightning bolt of inspiration one night when I was craving something different to put on our favorite grilled dinner item- a loaf of pillowy ciabatta bread stuffed with an assortment of grilled vegetables.
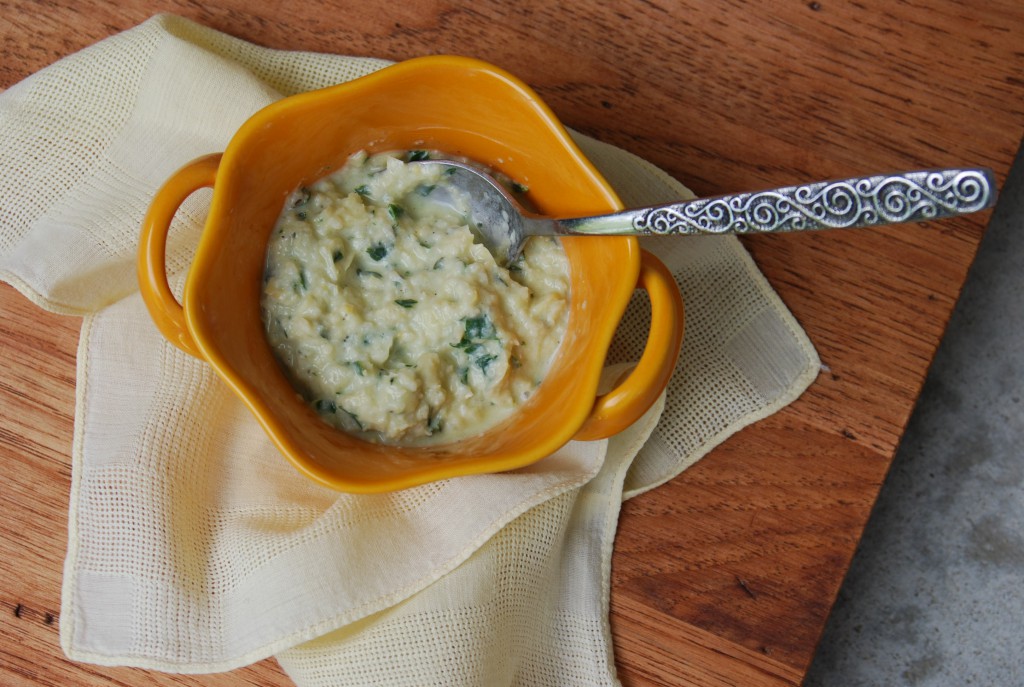
Sweet corn is in that stage of ripeness and availability right now that finds it everywhere you turn, and we’re consuming it several times a week, as well it should be. We’re so blessed in Minnesota to have an abundant crop of the good stuff, ready on road side stands, in the Farmers Market and a few select amazing Minnesota grown varieties in the local grocers as well. Sweet corn that bursts when you bite it, needing little besides a drizzle of butter and salt to make it wonderful. Have you tried mashed avocado on sweet corn? You must. It’s simply divine. And this creamy, slightly tart-sweet spread also lends itself highly to corn, hot from the grill or bubbling stock pot of water.
Beyond the goat cheese and sweet corn kernels, stripped from the cob, you could do any additions to this, with endless possibility. Fresh herbs are a must; I used lemon thyme, oregano and parsley (my basil is overgrown and bitter from the heat- big sad eyes here) but if you have good basil, by all means, use it in this spread. Add a pinch of sugar to balance the tart; combine some Southwestern flavors like cumin, lime juice and zest and chili powder for a big ol’ kick. Add curry powder and lime juice for an altogether different interpretation. Since the sweet corn supply is endless, your variations on this could be as well.
Sweet Corn & Goat Cheese Spread with Fresh Herbs
1 ear sweet corn, cooked and kernels stripped
2 oz soft plain goat cheese
1 T. fresh squeezed lemon juice
1 t. fresh lemon zest
3 T. mixed fresh herbs
Pinch of brown sugar
Salt and pepper to taste
Place all ingredients in the work bowl of a food processor and process until fully combined, scraping bowl occasionally. Taste for seasoning, and add more salt and pepper if it’s too sweet, or a bit more sugar if too tart.
Just a note on this: I have a tiny little food processor, like a quart sized one and it was perfect for making this spread. In a larger bowl type of processor, you may not have a confined enough space to get it to mix properly. Try it in a regular blender, or in a deep pyrex measuring cup with an immersion blender if you have either of those options. This made about a cup’s worth of spread, but if you want to make more, increase the ingredients accordingly.
April 15th, 2012
| 1 Comment »
It’s been almost a year since we eliminated meat from our eating. I’m ecstatic over the way I’ve felt in the last year; I’ve got more energy even when I have a terrible time sleeping; my belly is superbly happy, and my skin looks so much better. Those pesky hot flashes are only a minor occurrence these days too, and I love that part of it the most.
I love the variety and simplicity of our meals too, the ease at preparing them now that we don’t have to wait for meat to cook, and it’s been wonderful to see Griffin expand the foods he eats and also to see that he’s learning to enjoy meatless meals so much more than I ever expected. I’m really proud of how he’s adapted to the changes; he still gets his meat too, so he has the best of both worlds.
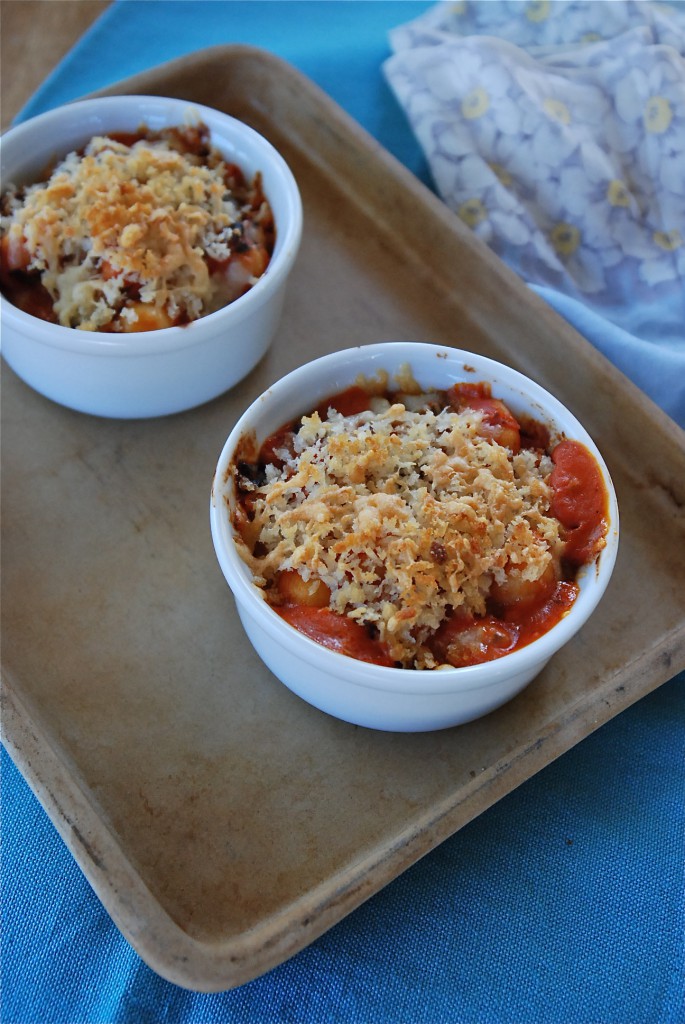
One food item that he’s still on the fence about is greens. Mike and I have come to love greens like chard, beet greens and kale, but Griffin is still wary, only eating them in dishes where other flavors can mask their tastes. He’s trying greens, at least. That’s good enough for me right now. He’s also not a huge fan of gnocchi due to the texture, and that’s too bad all around because this Baked Pizza Gnocchi dish that I created is utterly divine in every way.
Recipes inspire me in the most fascinating way. I can read dozens of them and not have a spark of interest, and yet come across one that stirs my imagination and I’m suddenly inside my head putting ingredients together and dreaming of an outcome. That happened to me recently as I was browsing through my news feed on my phone and came across an article about using chard. One recipe for a Skillet Gnocchi with Chard sounded really delicious, and my creative spark was ignited.
Lately I’ve been thinking a lot more about meals with greens in them as I received an entire box of a wide variety of packaged and cleaned greens from Cut N Clean Greens to try out and it was probably the most exciting food stuff that’s landed on my door step because I just LOVE this product. It is so ridiculously easy to use greens with Cut N Clean Greens in your refrigerator. They’ve done all the work for you and the greens are ready to open and cook with. You don’t need to prep them, clean or do anything but enjoy. And for roughly the same price you’d pay for a bunch of greens, you get a great deal more yield and it goes a lot farther. Yet another wonderful thing to love about them.
(disclaimer: I received all the greens for free yet all opinions here are solely mine)
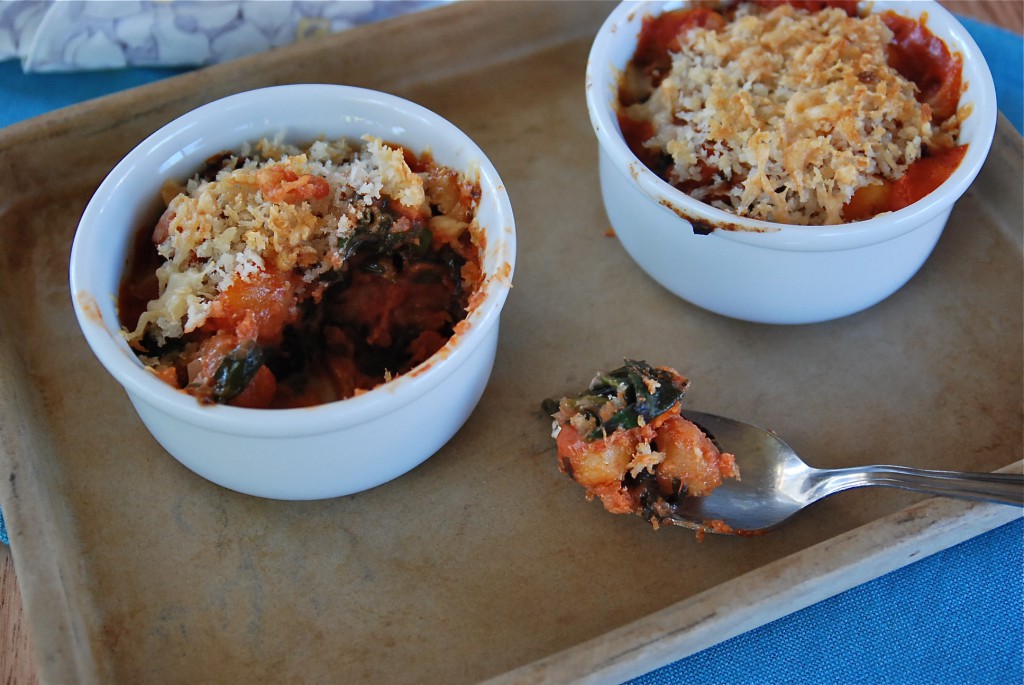
But…. back to this Gnocchi. Very simple and quick, rich with flavor and texture, this gratin came out fragrant, bubbling and with that perfect crunchy top to it. Grab a favorite pizza sauce (whether scratch or homemade) a package of shelf stable gnocchi (or…. knock yourself out and make a batch from scratch) and about a pound of good greens like chard, spinach or beet greens and give yourself about 15 minutes while the oven springs to life and heats up. It’s like pizza but it’s not; it resembles lasagna, but it’s better because it’s easier. The gnocchi become so incredibly soft and tender in the oven and it’s gorgeous enough for a special occasion, classy enough to taste like you really put out some effort.
I’ve noticed lately that when I write out my recipes here that I’m posting all sorts of side notes (in blue!) on what options you might do with your own version of the recipe. I hope this isn’t annoying. Is it? Because, here’s the thing; I don’t have the ego to think that the way I make anything would be exactly how someone else would make it. We all have our own tastes, right? We like different foods, flavors and we all have different methods, ovens that work differently, cookware and utensils that we love (go ahead, use that garlic press if it’s your way) and these recipes that slip through our computer screens in to our minds, making our mouths water, well they might mean something else entirely to another person. If I mention to saute your onions for 10 minutes and you think they should be cooked longer, or shorter, or if you don’t even like onions and don’t want to use them, then by all means, trust those instincts. Make the recipe your own. Learn the ways of your own stove, the cut of your favorite knife, dig through your cupboards and add your own flavor, spice, extra something that you love. This is how cooking should be. I’m thrilled to just be one of the stones you traverse in your own journey in the kitchen.
Baked Pizza Gnocchi with Greens
1 lb. gnocchi
1 15-oz can prepared pizza sauce (I love Muir Glen Organics)
2 small shallots, minced
2 cloves garlic, minced
1/2-3/4 lb. greens of choice (can be beet greens, spinach, chard or kale or a mix)
1/2 c. crumbled goat cheese (for a richer taste, use ricotta)
1/2 c. panko bread crumbs
2 T. melted butter (i used coconut oil)
1/4 c. grated parmesan cheese
1/4 c. mixed fresh herbs, like parsley, thyme, basil, oregano
Heat oven to 400°. Spray a 2-quart baking dish with cooking spray. Or live a little and rub butter in it.
In a deep skillet with a lid, heat oil of choice and add shallots, cooking for about 5 minutes while stirring over medium-high heat. Add the garlic, stir and cook for a few minutes, then begin adding the greens, a handful at a time and stirring so they begin to absorb some of the heat and oil and start to get a bit of wilt to the leaves. Once all the greens are in the pan and they’ve collapsed and are starting to soften, crumble in the goat cheese and stir to break it down. When it’s pretty well incorporated, add in the pizza sauce and about a half cup of water. (add the water to the can and swish to collect any remaining sauce). Stir the pan well, then bring it to a gentle simmer and cover it. Cook the greens until just tender. The timing will depend on which green you are using. Taste often so they don’t get away from you. When the greens are just tender, stir in the gnocchi, and turn off the heat. I used a mix of beet greens and chard and cooked them for maybe 10 minutes.
Mix the panko crumbs, butter and parmesan cheese together. Scrape the gnocchi in to the baking dish and sprinkle the top with the panko crumbs. Bake in the middle of the oven until bubbly, and the crumbs have browned nicely. Mine took about 20 minutes, and I rotated the dish a few times to brown the top evenly. Once removed from the oven, allow the dish to stand about 10 minutes before serving.
KATE’S NOTES: You can divide the gnocchi between individual ramekins if you want something fancier. But please keep in mind that your baking time will be drastically reduced. I baked a few ramekins, placing them on a baking sheet lest they rise up and bubble over the top. They didn’t. (whew)
You can double this for a crowd, baking it in a 9×13 pan. That’s a lot of greens, so add them patiently to the pan.
March 4th, 2012
| 1 Comment »
This time of year is a hard one.

I seem to start slipping off the tightrope each February. Bored, restless, tired and too stunted by the dull landscape, I stand on the figurative ledge and think ‘Ugh.’ as I look around. The vertigo makes me twitchy, and thankfully, a trusted friend is there to pull me back and say ‘You know, you go through this every year at this time.’. I’m grateful for someone standing outside of me, who can rationalize this wandering mind, drawing it back to the reality that it’s just late winter and I could use some green and some color in my life.


Surrounding myself with a few hours of plant life, of colorful flowers, weeping ferns and a warmth that left me sweaty certainly helped a great deal, and it seems to become more important in the last gasp of winter to put sunny, warm foods in to the body, like an infusion of heat and sunshine that lights us up from the inside. Like this lemony pasta.
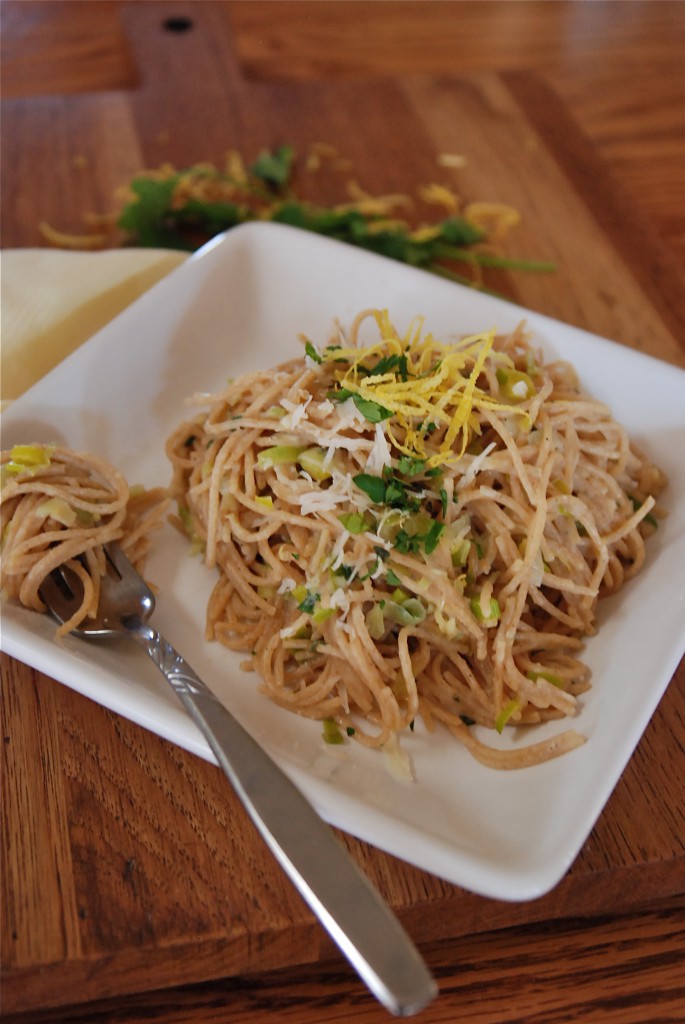
Eating anything with lemon in it is like ingesting sunshine, it’s so bright and engaging. This couldn’t be simpler to make, with a few leeks, a juicy lemon and a shower of fresh herbs, and parmesan cheese. I’ve done so much with lemons in my baking, like this Lemon Pound Cake, these intense Lemongrass Bars, and a delicious Lemon Ricotta Cookie, but adding sparkling citrus flavor to savory dishes has been few and far between, with maybe the exception of these exceptional Garlicky Lemon White Beans. That’s to an end though, after discovering this bright and lively pasta dish.
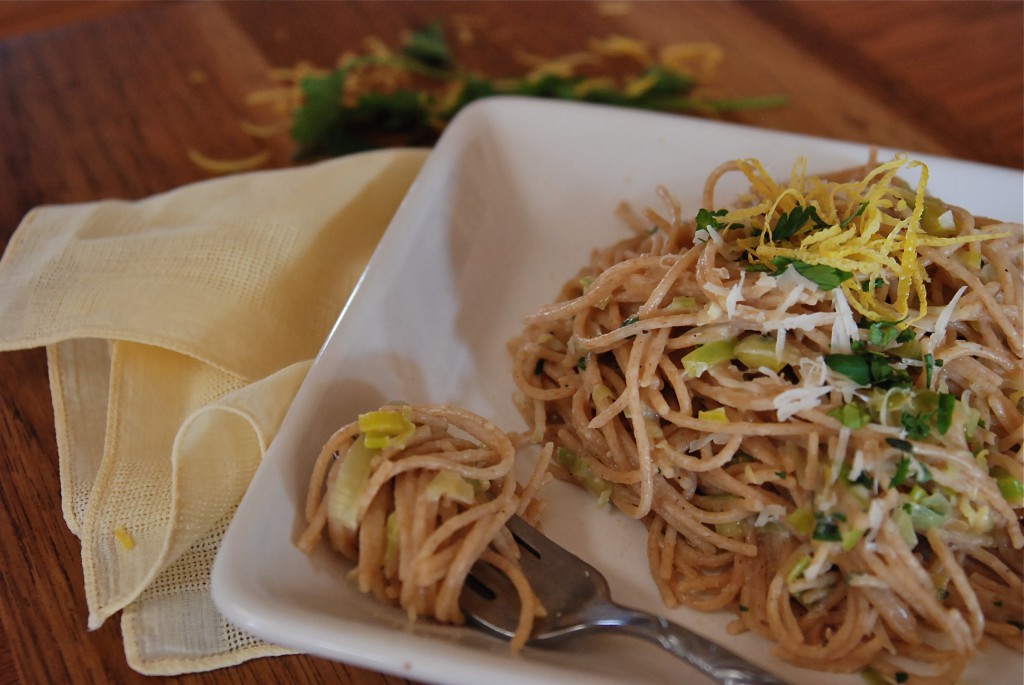
From the February issue of Eating Well magazine, resplendent with juicy lemon slices on it’s cover, this is a quick and easy recipe to put together. In the time it takes you to make a pot of pasta, you can have the leeks sauteed, ready and waiting. A few turns in the pan, with a splash of that ever-important pasta water and dinner is served.
Leek and Lemon Pasta
1# whole-wheat linguine or thin spaghetti
2 large lemons, plus lemon wedges for garnish
2 medium leeks (white and pale green parts only), thinly sliced and rinsed well
2 tablespoon extra-virgin olive oil
1/2 cup chopped flat-leaf parsley, divided
2 cloves garlic, crushed
1/4 teaspoon salt
1/8 teaspoon freshly ground pepper
3/4 cup finely grated Parmesan cheese, divided
1/4 cup snipped fresh chives, divided (I used thyme and it was delicious)
Cook pasta in a large pot of boiling water until just tender or according to package directions. Reserve 1-1/2 cups of the cooking liquid and drain the pasta in a colander.
Meanwhile, finely grate the zest from one lemon and squeeze juice from both lemons; set the juice aside. Pat leek slices dry. Heat oil in a large nonstick skillet over medium-high heat. Add the leek, the lemon zest, 1/4 cup parsley, garlic, salt and pepper. Cook, stirring frequently, until the leek is lightly browned and softened, about 6 minutes.
Add the pasta, 1 cup of the reserved cooking liquid, 1/4 cup of the lemon juice and the remaining 1/4 cup parsley to the pan. Cook, stirring constantly, until the liquid is mostly absorbed, 30 seconds to 1 minute. Add the remaining 1/2 cup liquid, or more lemon juice, if desired. Remove from the heat. Toss the pasta with 1/4 cup Parmesan and 2 tablespoons chives. Transfer to a serving bowl or bowls; sprinkle with the remaining Parmesan and 2 tablespoons chives and serve with lemon wedges, if desired.
Recipe in full, from Eating Well magazine, February 2012.
RECIPE NOTES: A simple reminder to yourself to catch the pasta water when draining it is to place a pyrex measuring cup in the bottom of your strainer when you put it in the sink. Pour some of the pasta water in it, set it aside, then drain the pasta completely. Another method, which I prefer, is to remove the cooked pasta from the water with tongs and add it directly to the skillet. It takes a bit of timing to get it right, but instead of draining all that beneficial starch away, it clings to the pasta and helps to create the pan sauce needed.
This dish would be wonderful with a broiled mild fish, such as Cod or Tilapia, some seared Scallops or Shrimp would also taste good. If you like chicken, a good lemon-herb rub and a run under the broiler would make a perfect accompaniment to this pasta.
February 10th, 2012
| 4 Comments »
There is something so perfect about a pot of soup, one that steams and seems to sing from the stovetop, humming it’s warmth throughout my kitchen, through my skin and right in to my bones. I feel the need for soup, sometimes as deep as the roots of my hair and permeating outward, and as any good Midwestern girl knows, when the cold winds scour you down and the light is so flat and gray and weak that it makes you weary and drawn, then soup, in all it’s aromatic glory and flavor, can be a shot of lifeblood that runs through you, chasing the chill away.
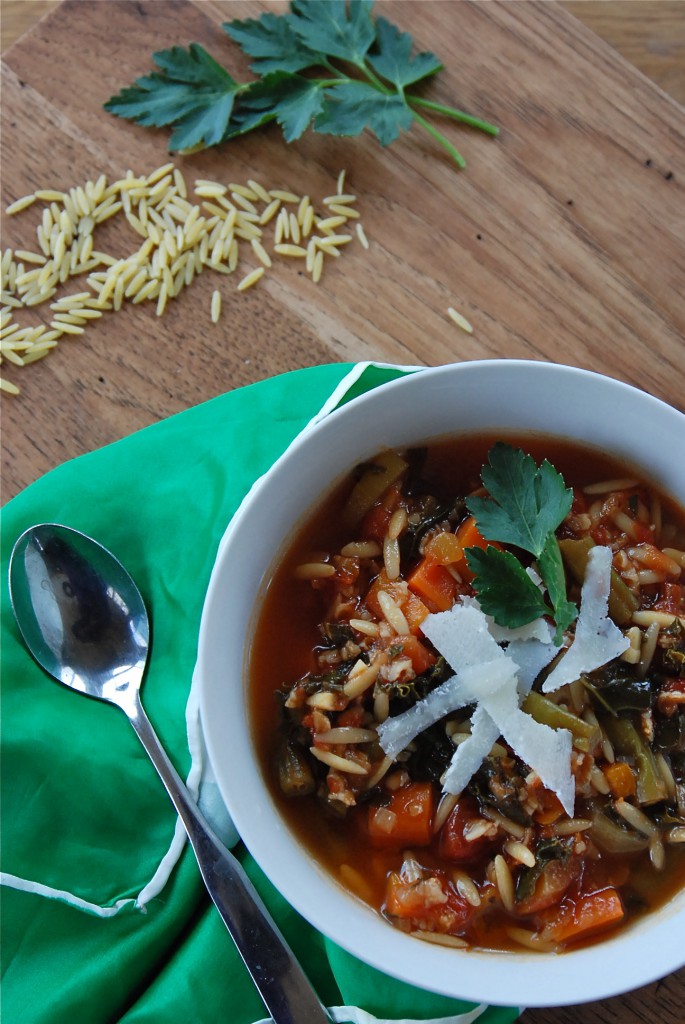
Soup has but a few simple secrets to making it shine, such as taking some time to caramelize the vegetables to form a flavor base, a good broth or stock to add more depth and a shot of love, really, to not rush the process. But good soup really starts from need. Or craving and desire.
I used to not be all that good at making soup, mostly because I just didn’t understand why a recipe that looked so simple could often turn out so darn wrong. I wanted depth, a rich flavor that penetrated the spoon and it’s contents, making it something so much more than broth and vegetables. All I really needed was a bit of patience, a lot of practice and tad more salt. Don’t be afraid of a shake of salt over that simmering pot, as it is the one ingredient that can transform a simple pot of soup to one that shimmers it’s warmth right down to your toes.
This Minestrone soup, as all Minestrone soups go, really has no clear outline, no real etymology. It creates itself for the most part, out of what you have on hand, and what you like in your soup. Or, like me on this particular cold January night, it leapt from under my hands out of sheer need. I couldn’t get warm, couldn’t shake a chill that had settled in my core like a wicked internal frost. Somehow, this chill and it’s accompanying rattle in my brain sounded like it was saying, over and over “Make Minestrone!” and I moved, on automatic it seemed, from fridge to stove to cupboard, seeking and searching ingredients. There were the green beans languishing in the drawer and in dire straits, there was Pomi tomatoes (my favorite packaged tomato- so amazingly fresh and flavorful) and there were thick, deeply orange carrots, fat tear-jerking onions, a partial box of orzo, a few zucchini beginning to look slightly sorry for themselves, just enough kale, a bounty of fresh oregano and parsley. And while the fragrance filled the house, and the soup simmered it’s coherent and rhythmic blup-blup-blup on the stove, a quick search for dunking material in the freezer yielded a container of croutons, spiked with herbs and olive oil, that I’d made from a loaf of stale semolina bread. Did I mention another key ingredient to perfect soup just might be a touch of serendipity?
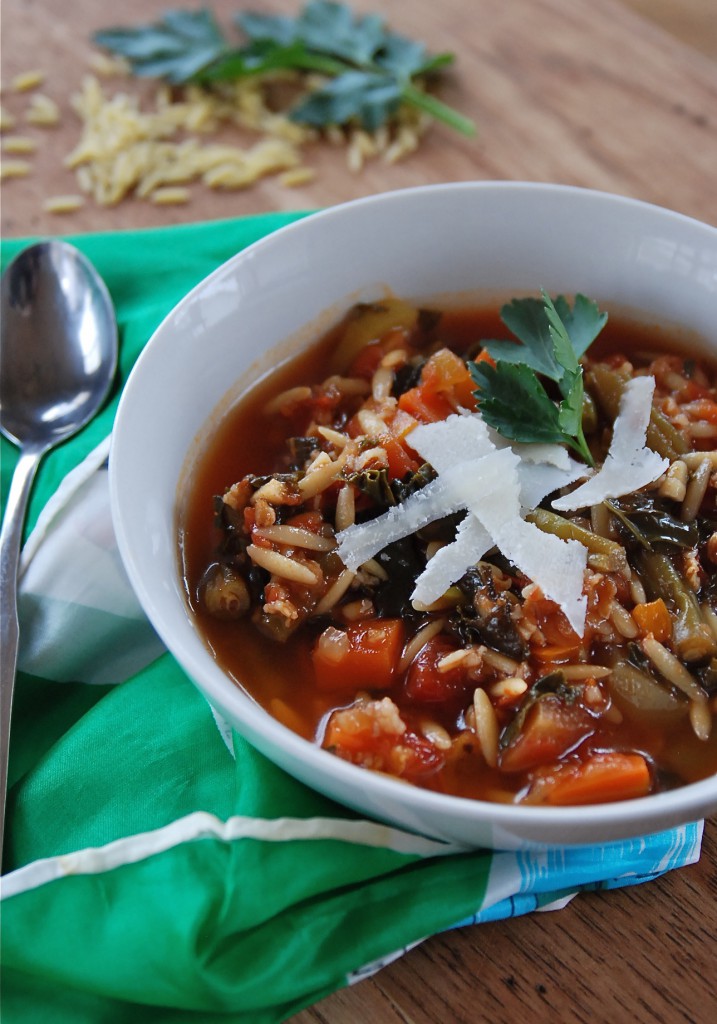
Minestrone requires little of the hard and fast rules; you add what you’ve got, really. What is in season, what is available, what it is you like. It needs a good tomato-y base, without a doubt. But beyond that, it lives for your interpretation. Thick or thin, meat or not, one, two or three vegetables or a whole produce aisle of them, pasta, legumes or rice- it’s all up to you. This version that served to warm my very cold, rattling bones on that damp, chilly night made light of too many singular remnants from the fridge; bits and pieces of plans that maybe fell through or were forgotten, or the one too many of any vegetable that hadn’t been used up yet. It had oceans of freshly chopped oregano and parsley tossed casually over it all, with thick shavings of sharp parm-reggiano. It was like planning a party at the last moment, not so confident of how it will all turn out and right in the middle of it, you realize that everyone in attendance has created an impeccable presence that elevates the whole of it to something utterly sublime. Well, that was my Minestrone that night; a delicious party in a stockpot, gathered with fingers crossed. My intensely perfect Minestrone.
Rounding it all out were the crunchy croutons, oiled, herbed and perfect for soaking up the broth. Beyond that, my perfect soup needed little else but a spoon, a quiet table with two smiling handsome faces, because no day in my life is complete without it ending right there, with them. The darkness settles, chasing out the light with violet and gold tones. The first spoonful I lift easily helps me cross the threshold from day to night, pushing the cold away, warmly coursing through me. There is a sigh, with half-closed eyes, a look and a feel that says “Perfect. This is just what I need.”
Kate’s Minestrone
1 large onion, diced
3 carrots, peeled and diced
3 celery stalks, with leaves, diced
4 cloves garlic, minced (adjust to taste, I am a garlic lover)
2 small zucchini, peeled and diced
1/2# fresh green beans, cut to 1/2″ pieces
1 bunch fresh kale, rough stems removed and chopped (sub chard, collards, or spinach)
1 32-oz pkg Pomi Tomatoes (use equivalent of your choice)
1/2 c. Orzo pasta (use small pasta of choice)
1/4 c. bulgur (optional, but I like the heft and nutrition it adds)
1/4 c. fresh chopped parsley and oregano (basil and thyme are also good)
Parm-Reggiano shavings
In a large stockpot, heat a small amount of oil and add the onions. Cook over medium heat, stirring occasionally, for about 5 minutes, or until the onions are opaque. Add the carrots, celery and green beans and cook, stirring, until the vegetables begin to brown a little, maybe 10-15 minutes. Moderate the heat to prevent them from scorching.
Add the garlic and a pinch of kosher salt. Stir to incorporate and cook for a few minutes until it’s wonderfully fragrant. Add the zucchini and the tomatoes and a quart of broth or water. Bring to a simmer and cook until the vegetables are tender enough to pierce with a fork, but not completely soft.
Add the kale, the pasta and the bulgur, if using. Depending on what pasta shape you use, cook until the pasta is al dente. Taste the soup and season with salt and pepper. Make sure the pasta is cooked, but also remember that it will continue to absorb liquid as the soup sits.
Ladle soup into bowls and top with a sprinkling of the fresh herbs and some shavings of cheese. Serve with a good bread, if desired.
RECIPE NOTES: This soup is wide open to interpretation, and can be modified in a multitude of different ways. Brown some good sausage and use the fat rendered to cook the vegetables for an added punch of flavor. This was a favorite way to make this soup back in my meat eating days.
Legumes can be added to this as well, and most Minestrone soups have them. Use a good quality white bean, such as Great Northern or Cannellini. Chickpeas would also be a good option.
As is the case with most soups, it develops a lot of flavor as it sits overnight in the fridge, but it will also absorb a lot of liquid in to the pasta and the bulgur (if you use the bulgur). Adding a little water to the soup before reheating will help loosen it.
Linking up to Soupapalooza 2012!!
“Come join SoupaPalooza at TidyMom and Dine and Dish; sponsored by KitchenAid, Red Star Yeast and Le Creuset”
August 20th, 2011
| 2 Comments »
What’s that saying? ‘Necessity is the mother of invention?’
Many amazing recipes occur when the frantic need for something to add to dinner comes up and I wildly glance in the pantry to see what I’ve got. What odds and ends are laying about in the fridge? What needs to get used up? What tastes good together?
I fling a lot of ingredients in a pan, or a bowl and I cross my fingers a lot when I cook. Whether it’s out of ‘necessity’ like the quote, or just curiosity, it’s not often that I follow a recipe. More likely, I am making something up as I go. Thankfully, more often than not the results are pretty tasty.
The worst part of it all is that if I don’t write down what I did, I rarely remember it to be able to recreate the dish.
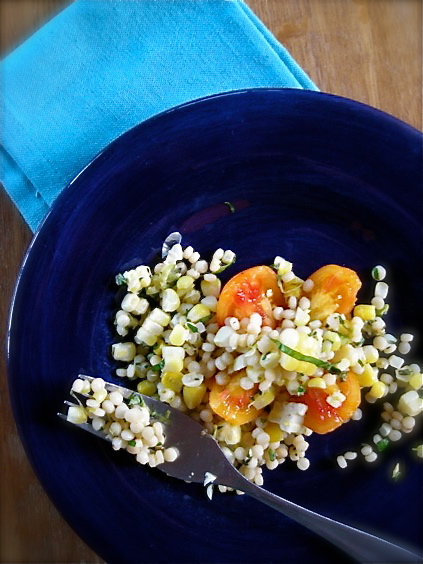
This one, however, did not get away from me.
Side dishes have always been a favorite of mine, and lately I’ve been on this kick of filling my plate with nothing but ‘side’ dishes. The nice thing about removing the focus of meat from our meals is that just about everything we do now can either be termed a ‘main’ dish, or a ‘side’ dish. And sometimes, all of what is being served at our table, technically, are sides.
Griffin was making fish for dinner recently (yes, we eat fish) and we both really wanted something unique on the side. I keep a lot of rice and grains handy, but we were short on time and didn’t want to wait for brown rice, or wild rice to cook. He was digging through our pantry and pulled out a jar of pearl couscous, asking me ‘What’s this?’ And as with necessity, and invention was born.
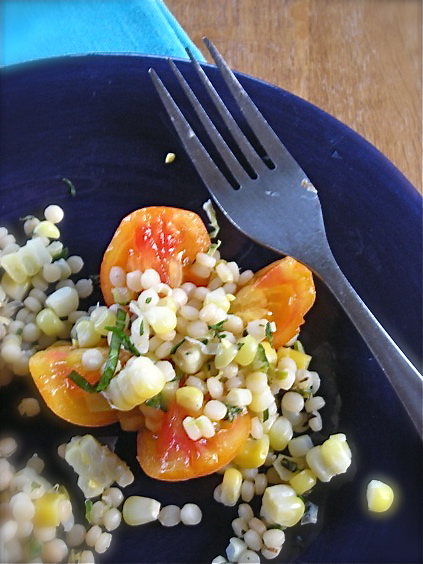
Pearl couscous, mostly recognized as Israeli couscous, is the thicker version of the tiny semolina grains that most people know best. Couscous isn’t really a ‘grain’ like farro, or quinoa; it’s pasta in minutiae form. The instant version of couscous cooks in a flash by adding the tiny beads to boiling broth. The larger form takes a bit longer, but still is quick enough to make for an easy dinner. We used chicken broth, some frozen corn and a generous handful of fresh herbs from the garden and the result was surprising to all of us. It’s light and flavorful and wondrously versatile, but not heavy like larger pasta shapes. I think some form of this will be making regular appearances on our dinner table. With enough fresh vegetables added to it, the dish becomes a meal in itself, or you can serve it over a garden fresh tomato for a perfect salad option. It actually tastes wonderful cold too.
Did you notice the new print button feature??? Pretty cool, huh??
Pearl Couscous Pilaf
1 c. pearl couscous
1-1/4 c. well seasoned broth (can use vegetable, mushroom, chicken….)
1 medium leek, or 2 small ones, sliced and washed well (can sub a finely diced onion)
2 cloves garlic, crushed
1/2 c. vegetable of choice (we used corn; try diced zucchini or other fresh seasonal vegetables)
1/4 c. fresh herbs, finely chopped (we used thyme, oregano and basil, then parsley to finish)
In a deep skillet with a cover, heat a few tablespoons of oil. Add the leek and cook, stirring regularly, until softened and beginning to brown in some places. Add in the garlic and cook, stirring for about a minute. Add the corn (or whatever vegetable you are using) and stir to coat with the oil mixture, then add the couscous and cook, stirring, for about 5 minutes. Pour in the broth, stir to combine and bring to a boil. Then reduce the heat so it simmers, cover the pan and allow to cook, undisturbed, until the couscous absorbs all the broth. It should take about 10 minutes. Allow it to sit for about 5 more minutes, off heat. Before serving, toss the fresh herbs in and stir to combine, seasoning with salt and fresh pepper. Top with parsley as a garnish.
August 15th, 2011
| 3 Comments »
Not even five minutes into my Sunday morning hike and already my shoes are soaked from the dew. I have to make a split second decision as I feel cool, wet water seeping through my socks; turn back or keep going. There might be blisters at the end, surely some chafing from my hiking shoes, but it’s a glorious August morning and the sun is glaring down on me. I can’t go back. Ignoring my wet feet, I move on.
I’m in Otter Lake Regional Park and this is my glory place, my church of the great outdoors. Plopped in the middle of White Bear Township, it’s a tiny little park, with a very nice nature center and hiking trails that make you feel like you’re miles from the outer world. It’s where I cross country ski in the winter time, and for the other three seasons, I roam it’s trails and discover more and more every day to love about it. On this particularly beautiful morning, in the high season of summer, I take to the trails, dew and all to seek out something I can’t find among the concrete.
My favorite path is cut short by standing water; it’s unusually low in that area, and during the Spring thaw, the trail is often impassable, but it always dries out. But this summer, with it’s abundant rainfall, it’s a no-mans land. I keep on the path that leads me around the back of the newly constructed natural classroom and head in to the swamp. This trail will lead me to the northwest section of the park where the hardest challenge of my hike lies. In there, the path cuts through a sanctuary of birch and towering oak trees, dipping down sharply, then rising just as fast to offer a heart-pounding, blood racing interval that I love. I can’t even consider going on this trail in the wintertime, on my skis. It’s challenging enough on foot, but I can’t stay away. The majestic oak trees line the path, like sentries that silently watch me pass, breathing deep, as the smaller of the two lakes in the park wink it’s shimmer of blue through the tree line. I try to challenge myself to run hard up a few of these short but steep hills. I’m ignoring my damp shoes.


Coming out on the other end, I’ve broken a sweat and wish I had my water bottle. The sun has rose high enough now to pound on my skin, and the wind swirls around me. It’s not strong enough to keep the flies at bay, and I impatiently swat away at them, mentally reminding myself to bring bug spray the next time I come here. This section of the path, through the heart of the park is high and open. No trees hide the sun out here and as I push on, beads of sweat slip down my temples.
The best part of being out here isn’t the nature. It isn’t hearing the hum of the highway along the western edge of the park, or the sound of the trains in the distance, blasting their whistles as they through the crossing. It isn’t the flash of deer, startled from their morning graze, leaping through the trees with white tails whipping, nor the fox, visible only by it’s bright red bushy tail twisting as it runs. It isn’t the small brown snake that lifts it’s head as I approach, watching me closely. “I’m no threat.” I murmur, slowing down to gaze at it’s tiny eyes. It doesn’t even flinch as I carefully step over it, and turning back as I move on, I see it’s watching me.
It isn’t any of these things, nor the rustle of the grass, or the continual droning hum of the insects. It isn’t the fluttering butterflies that skip along the path ahead of me, all shapes, sizes and colors. It’s isn’t any of it, and it’s all of it. Because out here, with the open skies and clean air, coupled with my footsteps and steady, hard breathing, it’s all of it at once that tames the voices inside, the swirl of life in my head that becomes a cadence of regular disruption. I come out here and it all disappears. My head clears, while the constant motion in it stops and I can breathe, relax, feel my blood pound and just let go. I am in sync with myself on this path, instead of at war with trying to figure out what’s next.
Then the trail dips down to the larger lake, and winds around to the north. It’s really uneven here, and now I am fully aware of my hiking shoe rubbing on my right ankle. The arthritis in my feet is apparent, but it will never stop me; it’s just more noticeable where the path is the least stable. The grass is tall and it tickles my legs. I swat the flies, wipe the sweat and keep going because soon, there will be the boardwalk leading me around the side of the lake, and at the other end is the thickest, densest trees and a hard packed dirt path that will take me back to the place I began. I’m on the last leg and those woods, with the tall maples and cool shadows will feel really, really good after the heat and sunshine. I feel the temperature drop as I enter here, and the slight chill rejuvenates me. Sunlight is dripping through the high tree canopy. And it’s glorious with bird song.

But the mosquitos in here are terrible. I can’t stop, or even slow down. I want to grab a few photographs to chronicle this morning, but I am swarmed with nibblers if I try to catch my breath. My feet feel better, but the rubbing on my ankle is a chronic annoyance. Because it’s cool in here though, the sweat slows down and I don’t have to wipe my face so much. My heart and lungs are on full power now; I’ve been hiking hard for 45 minutes by the time this trail leads me back out to the blacktop path that I started on. The nature center is in sight, and the parking lot, where my car and my water bottle await, is beyond that. My head feels soothed and I take a deep breath, once again. I’m back to the car, stripping off my soaking wet shoes and socks, wiping down my feet with the wipes I keep in my car and toweling off the sweat. My water bottle is half empty already. I stretch out the tension, drop in to a few yoga positions to re-focus and eventually climb in to my car to head home. In less than an hour I hiked nearly 4 miles.

And I’m so hungry now.
At home is waiting the simplest of simple summer salads, perfect for these heady days of heat and sun. The farmers markets are absolutely bursting with a mind-boggling bounty of fresh food and I am crazy in love with sweet corn, fresh tomato, zucchini for the grill, tiny purple eggplants and dark, dark greens. Every meal tastes like sunshine, each bite bursts with flavor. I snip handfuls of herbs from the garden to crush and sprinkle over everything and even after washing my hands I can still smell the thyme, the parsley and basil, the volunteer oregano that sprung up from last years plants.
 
And this salad…. this salad awaits my gnawing stomach, the hunger driven out of a vigorous hike, deep gulps of clean morning air and the need to still my mind. It’s simple, quick and so delightful; the snap of fresh tomato, fresh zucchini chunks, crunchy corn kernels that still taste like a farm field and lots and lots of tiny thyme leaves. A few scattered pieces of lemony goat cheese makes it complete.
My shoes are drying in the hot sun, outside on the patio and I need a shower. My ankle didn’t blister, thank goodness, and while my body is energized from it’s workout, my mind is at rest. This is a good place to be. Like August, with it’s wellspring of fresh vegetables.
What’s on your summer table these days??
(Notice anything new down below here?? There’s a print button for my recipes now!!)
Herbed Sweet Corn and Tomato Salad
4 ears sweet corn, shucked, cooked and stripped of kernels
4 medium tomatoes, or 1 pint fresh cherry tomatoes, as ripe as you can find
2 small zucchini, diced
1/2 c. fresh chopped herbs, such as basil, thyme, parsley and oregano (use rosemary if you like it)
2 T. good quality olive oil
Fresh ground black pepper and sea salt
Combine all ingredients in a medium bowl and drizzle with olive oil. Season to taste with salt and pepper. Allow to stand for 5-10 minutes to combine flavors. Serve topped with goat cheese, if desired.
My Notes: I used half a pint of purple cherry tomato, and one good sized orange heirloom tomato for my version of this dish. I also diced up a fresh heirloom pepper that I had on hand. I think one of the best parts about this dish is how colorful it can be with the variations available now. As the salad stands, it will release plentiful juices which are delicious if you dip fresh toasted bread into them, then sprinkle a bit of sea salt over before eating.
July 27th, 2011
| 5 Comments »
Eventually, we all know it’s going to happen; the bounty of summer vegetables is going to begin to overwhelm home cooks. This rapid increase of summer heat has brought my tomato plants into full force growth, skyrocketing up in the garden and bursting out buds like crazy. If this keeps up, August is going to be both delicious and ridiculous. And zucchini? We all know that one plant per home garden is enough to keep a happy cook in oblong green delight, but the overly enthusiastic gardeners who tend several plants will one day walk out to their garden and be confronted with tons of zucchini. Mark my words. Then they’ll do whatever they can to pawn the excess off on anyone who’ll look their way. Then there’s eggplant. The purple orbs are everywhere once they’re ripe. My word. It’s craaaaa- zee. But in a good, good way.
Because I found The. Best. summer vegetable option once your countertop is over-flowing with fresh zucchini, tomato and eggplant.
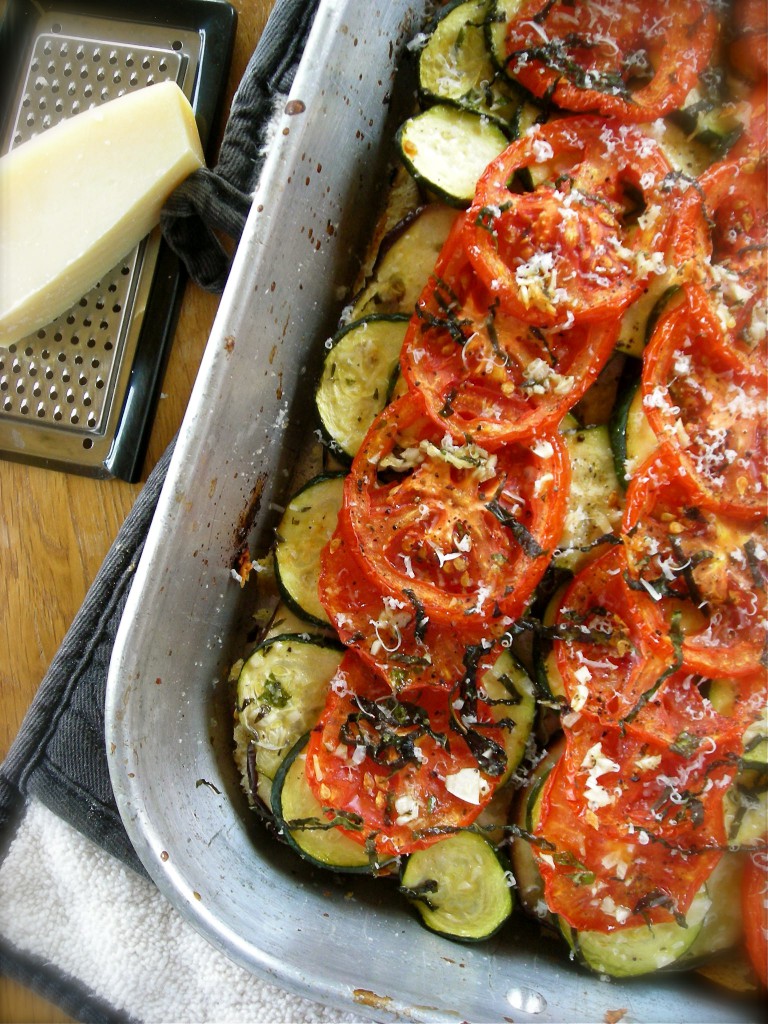 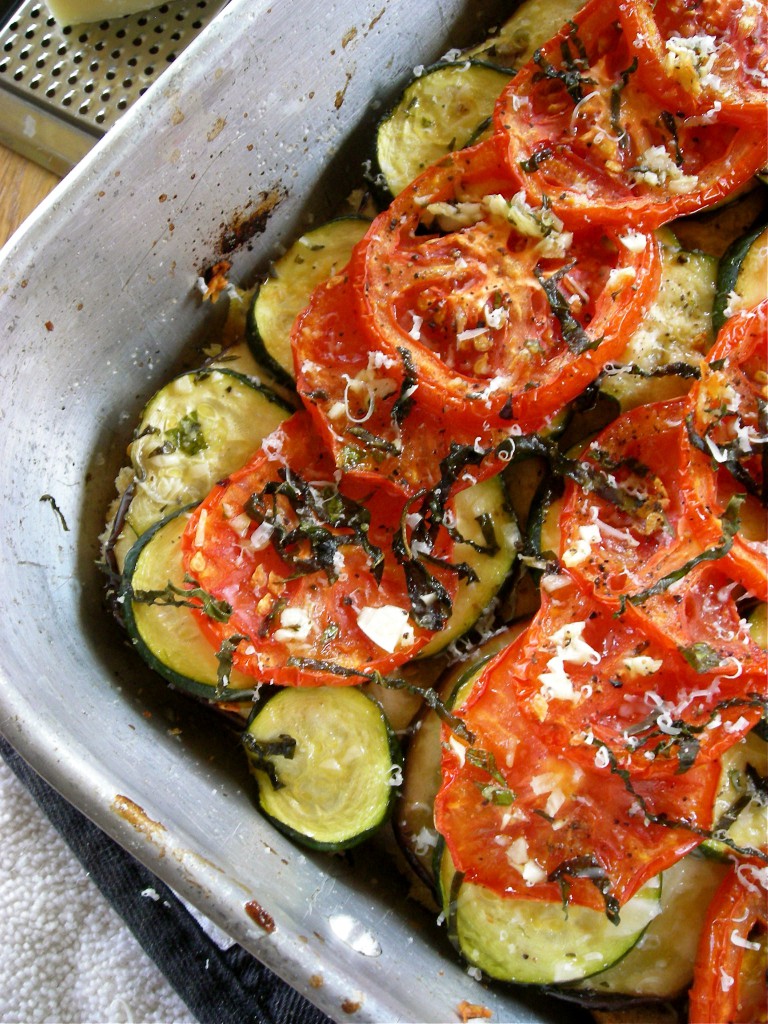
Provided your willingness to turn on your oven, here’s a dish that screams out “SUMMERTIME!!” in every bite, from the heady garlic and fresh herb infused olive oil that you drizzle over everything to the fresh vegetables that make up the bulk of this gratin. Get a really, really good loaf of bread for the base, a fine bottle of white wine for you, and enjoy a meal worthy of any fancy summer dinner party, or simply a way to ease yourself out of a hectic day.
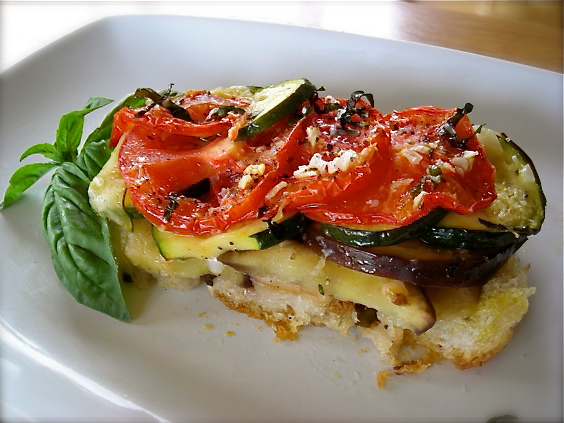
I spied this recipe on the Food & Wine website, searching for some new plant-friendly recipes to add to our eating repertoire. I knew we’d love it and I wasn’t disappointed. Once out of the oven, the smell was killing me. I could barely wait for it to cool enough to cut a slice and dig in. Mike came home from meeting with some of his clients, and despite having already eaten lunch, I pretty much shoved a slice at him and demanded that he try it. Which he did. He’s got the right attitude, hmm?
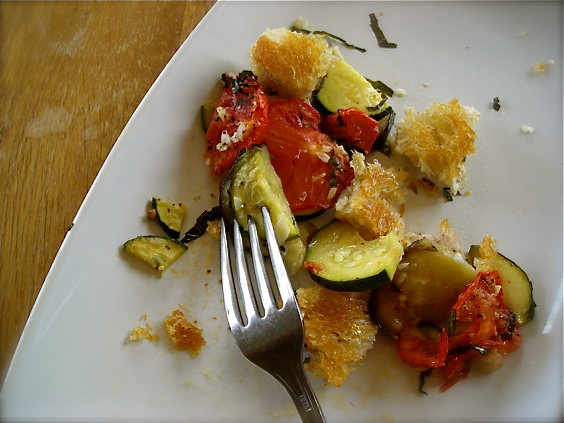
The base of this gratin is made from good rustic bread, torn in to pieces and drizzled with a heady blend of garlicky oil inundated with fresh herbs. It bakes up nice and crunchy, aromatic and flavorful, adding a nice contrast to the soft baked tomato, zucchini and eggplant slices gracing the top. A smattering of fresh basil, a spray of good parmesan cheese and a fork. Oh, and don’t forget the wine. It’s a dish that tastes of summertime, reeking of warm days, the scent of cut grass and the way the night air sulks around at dusk with the lingering scent of the day before finally giving way to the cool of night. If anything else smacks of good seasonal eating, show me, because I really want to know.
You know that day will come when you glance, overwhelmed, at the summer bounty before you and you think ‘Oh dear, what do I do NOW???’ Well I have the answer, my friends. You will make this dish. And with one bite, you will determine when you can make it again. And maybe, again.
Do you have any favorite ways to use zucchini and eggplant??
Ratatouille Gratin
1 medium eggplant, sliced 1/4″ thick
2 medium zucchini, sliced 1/4″ thick
3-4 medium tomato, sliced 1/4″ thick.
1/2 c. good olive oil
4 cloves garlic, minced extra fine
1 heaping tablespoon each fresh thyme, parsley and basil, minced fine, plus extra for finishing
1 1-lb loaf good quality artisan bread, torn in to 1-2″ pieces (i used a good sourdough, left in a paper bag overnight)
Stir olive oil, garlic and the heaping tablespoons of fresh herbs together in a small bowl. Whisk well to combine.
Toss eggplant and zucchini with 1-2 teaspoons of kosher salt and let stand for about 20-30 minutes. Drain any liquid and gently squeeze dry, if possible. Sprinkle tomato slices with salt and pepper.
Spray a 9×13 baking dish with cooking spray and arrange torn bread in bottom. Pack the bread in as tight as possible in one layer, using the entire loaf. Drizzle the bread with about 2 T. of the garlic/herb oil. Arrange the eggplant slices on top, then the zucchini, then the tomato. Drizzle the top of the vegetables with another tablespoon or two of the oil and sprinkle some thyme leaves over that.
Bake the gratin for 30-40 minutes, or until the vegetables are aromatic and slightly browned and the bread crust is crispy. Remove from oven and allow to stand for 10-15 minutes. Sprinkle with minced basil and parsley and fresh grated parmesan before serving, if desired. The gratin can be served warm, or at room temperature. To reheat, place gratin on a baking sheet and rewarm in a low oven.
From Food & Wine, with heavy modifications
July 10th, 2011
| 5 Comments »
Beyond the deep green of spinach, and now kale, I hadn’t yet moved towards other deep green leafy vegetables, such as collards, mustard greens, or chard of any variety. But I’m working slowly to incorporate more of this incredibly nutritional vegetable in to my diet though. It’s a work in progress, for sure. So, in consideration that I didn’t just wake up one morning in a “Hallelujah!!” moment and love spinach to death, or eat one bite of kale and declare myself transformed, trying out Chard, and finding that I liked it on the first attempt was somewhat surprising.
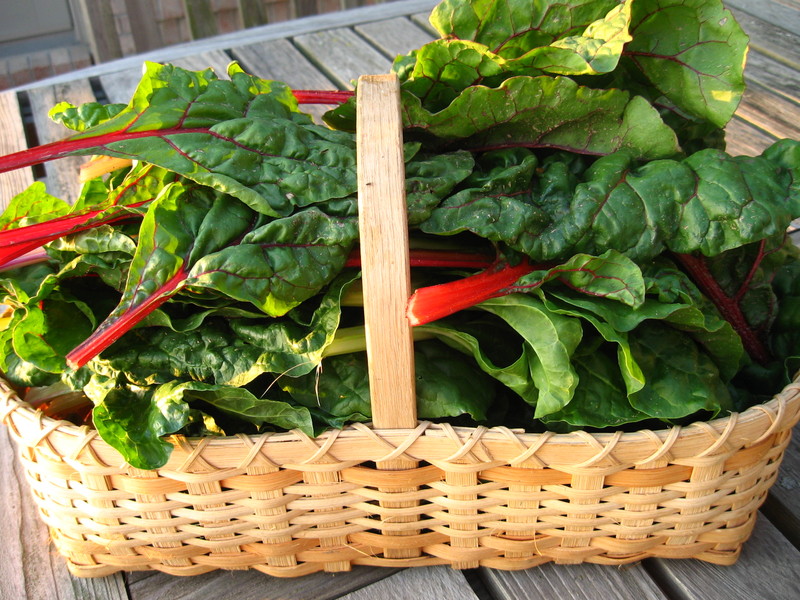 ( photo courtesy of Going Local ) ( photo courtesy of Going Local )
I’m exploring a lot more offerings on the tables at the Farmers Market these days. And really, I’m loving the results. Approaching my favorite organic farmer one afternoon, I spied a small bunch of delicate baby red chard sitting on his table, with it’s lush deep red veins and crisp, exceptionally dark leaves and something in my mind went “Get that now!” and so I held out a few dollars and walked away with this thick bunch of greens thinking “I have no clue what to do with this.”
But thankfully, that’s never stopped me before. And we learn a lot through often just following our will in to adventure; listening to the voice that tells us to turn left at the crossroads, even when you have no idea where ‘Left’ goes. I trust my gut instinct. And this bundle of red chard was that gut instinct telling me to branch out. So I sauteed the chard one morning, and topped it with a poached egg. I’d been making this breakfast for a while now, only with leafy braised kale and loving how energizing and delicious it was. It seemed the next logical step was to try it with chard.
And I was devouring – devouring – the last bite when I realized that I should have maybe tried to take a picture of it. So trust me, ok? It was divine.
The next week when I went back, there sat my favorite farmer, again with bunches of Red Chard on his table, although much larger and leafier than before. I told him how delicious that tiny bunch had been and his eyes lit up. You see, my very first experience with chard years ago, and subsequent experiences since then were not favorable. Maybe I wasn’t ready at that point to be going ‘Left’ in my exploration of leafy greens, of appreciating the merits of good health that they offered. It hadn’t left a very good impression, but that little bunch of organic chard, at this point in my life where I am firmly rooted in learning, exploring and embracing a plant-based eating plan, well that impulse purchase had Wow-ed me, and I happily handed over a few more dollars and stuffed another huge bunch in my sack. When I made it again, it was lunch for Mike and I.
And I remembered to take a picture.
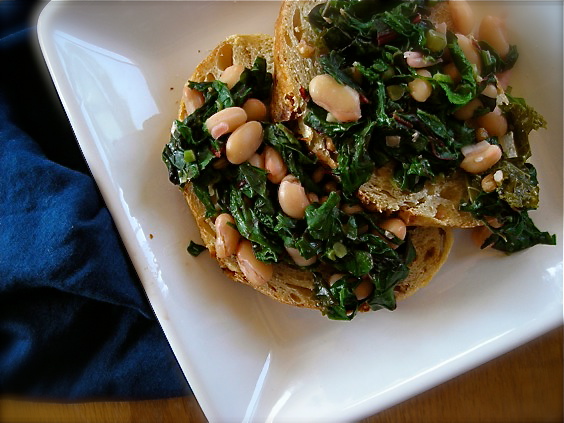
But like spinach, and beet greens, a whole enormous pile of leafy chard can be reduced to a little pile of barely anything by a few quick turns in a hot skillet. And with one lunch, plus me stealthily hiding the leftovers so only I could benefit from them, that delicious $2 bunch of red chard was gone in a matter of moments. But it left such a nice taste and experience in my mouth that I eagerly anticipated a return to said farmer, and maybe TWO bunches of it this time. Alas, by the time I got back to that market, his slot remained unhappily empty. Given that it was the day after July 4th, I’ll grant him his absence. But by golly, if next week rolls around and he isn’t in his usual place, his hat pushed back and a truck full of truly wonderful produce behind him, don’t be surprised if you hear that I’ve broken down crying.
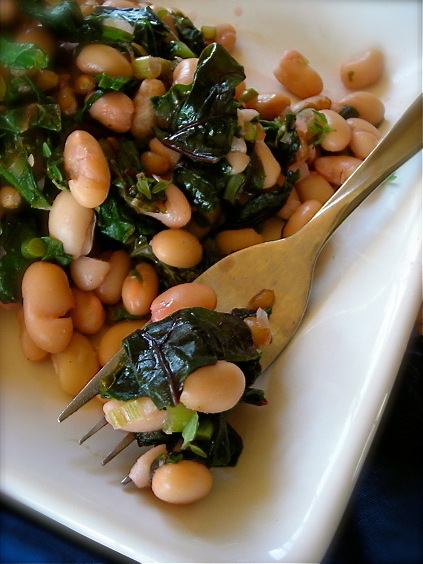
Because that’s how quickly, and deeply I’ve fallen for this rich and lush green. It’s dark and brooding, silky, tender and tastes like I’m in the middle of a deep forest drawing in the air, and the green. Can a vegetable taste like a color? Does color even have a taste? To me it does, and this chard tastes like it looks. Deep green, and rich with flavor and I’m sold, 100%.
Have you tried Chard? What do you like to do with it?
Chard and White Beans with Fresh Herbs
2 small shallots, finely minced
2-3 garlic cloves, minced (use minced garlic scapes if you have them, about 2 T. worth)
2 big bunches red chard, stems removed and rough chopped
1 15-oz can Great Northern Beans, drained and rinsed
1-2 T. each finely minced parsley and thyme
1/2 c. cooked wheatberries (optional- I had these on hand and they were delightful in this dish)
In a large skillet, saute shallot and garlic until tender. Add the chard in handfuls, stirring to saute. Cook chard for about 5 minutes, or until tender. Stir in white beans and herbs. Season with salt and pepper and cook for a few minutes to blend flavors. Add a few tablespoons of water if dry.
Recipe from Whole Foods, with heavy modifications
May 13th, 2011
| 2 Comments »
Summer tomato season is heading our way. I don’t have a huge garden plot to grow produce in, but I always grow tomatoes as there is nothing finer on this earth than a homegrown organic tomato. Come August, we’re usually over-run with them, and are eating them in everything. And really, there’s nothing better than a fruit so delicious that you can slice it, grate a bit of fresh black pepper on it and eat it with a fork.
This year, we’ll be utilizing a lot more tomatoes in this delicious and simple Shrimp Panzanella Salad I’ve discovered
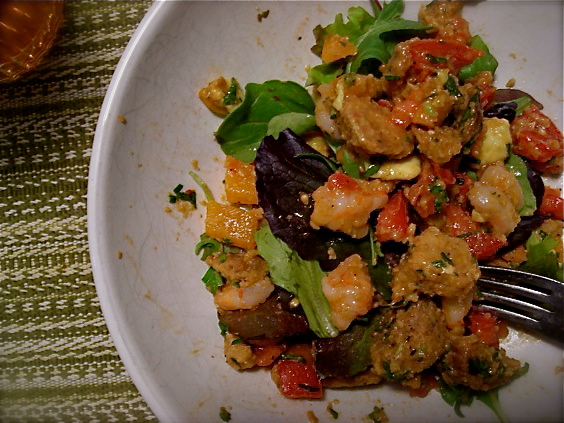
As luck would have it the night I made this, a gorgeous sunny day had turned dark and cloudy, with storms brewing, so this photo is nowhere near as bright and summery as this salad’s true appeal. Fresh chopped tomato and peppers, doused with a liberal amount of oil, a splash of good vinegar and a veritable shower of fresh parsley, basil and thyme and the taste that springs from your fork is all about Summer! Summer! Summer! Even when Spring! struggles to fully arrive here in Minnesota.
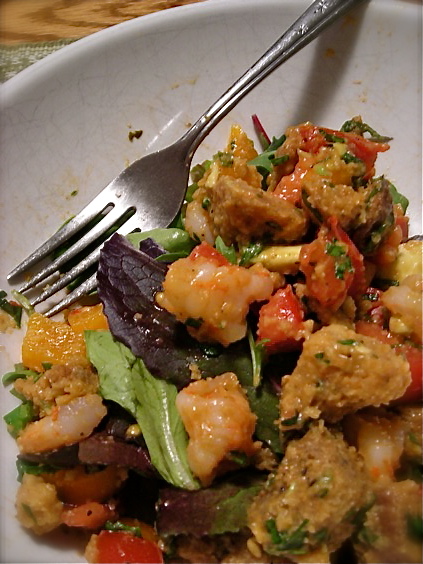
So imagine it yourself; the taste of a ripe juicy tomato, the crunch of seasoned and browned cubes of hearty bread, toasted to a firm crunch, the snap of bell pepper and the heady flavor of fresh herbs. Mix in pieces of perfectly cooked shrimp, doused with a bit of chili garlic sauce for spice, served over fresh spring greens and you’ve got a dinner salad with substance, not to mention a wild ride of textures, flavors and colors. I could have admired it in my bowl if I wasn’t so hungry.
And simple? This here’s an easy, quick dinner to have ready. With a few shortcuts like artisan croutons and cooked shrimp, you can get this together in about 15 minutes, yet it’s hearty enough to fill you up, but not leave you sluggish. It may even give you an extra burst of energy to head out after dinner for a gorgeous sunset walk.
Shrimp Panzanella Salad
4 c. multi-grain bread cubes, preferably day old. Or equivalent of pre-made croutons.
1# coarsely chopped cooked shrimp
4 large ripe but firm tomatoes
2 bell peppers, any color, chopped
3/4 c. fresh chopped parsley
1/4 c. fresh chopped basil
3 T. fresh thyme
1/4 c. pitted kalamata olives, plus 2-3 T. brine
3 T. red wine vinegar
1-1/2 t. fresh chopped chives
Spring greens of choice
Fresh ground black pepper and sea salt
If using fresh bread cubes, preheat oven to 350°. Place bread cubes in a large bowl and drizzle with 2-4 T. olive oil. Toss to coat and spread on a baking sheet. Bake the cubes, stirring every 5 minutes or so until they’re very crisp and dried, about 15-20 minutes. Watch them carefully. Allow them to cool completely before assembling the salad.
Combine the shrimp, tomato, bell pepper, fresh herbs, olives, brine and vinegar in a large bowl. Drizzle with 3-4 T. olive oil and toss to coat. Add cooled bread cubes, toss to combine. Season to taste with salt and pepper. Allow to sit for 15 minutes to mix flavors.
Serve over spring greens.
Adapted from Eating Well magazine.
|


