September 20th, 2011
| 6 Comments »
Summer ends when the season ends, some time in the midst of every September. The 22nd? 21st? The sun crosses a time line and the word ‘summer’ is an afterthought, yet for most people, Labor Day signals the official end of the best season Minnesota has to offer. I’m more optimistic. I like to step outside the box, and while others are saying ‘Fall’ when school buses roll down the streets again, I’m still crowing ‘Summer’. I will gracefully extend my white flag of surrender to that mentality, that a season can be marked by milestones instead of days on a calendar, while I straddle the seasons, try to push summer to extend just a bit farther.
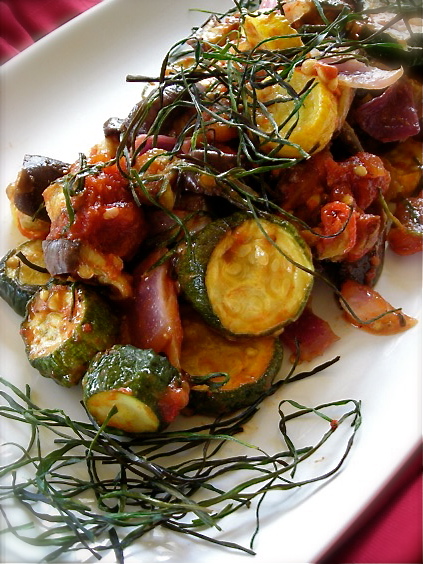 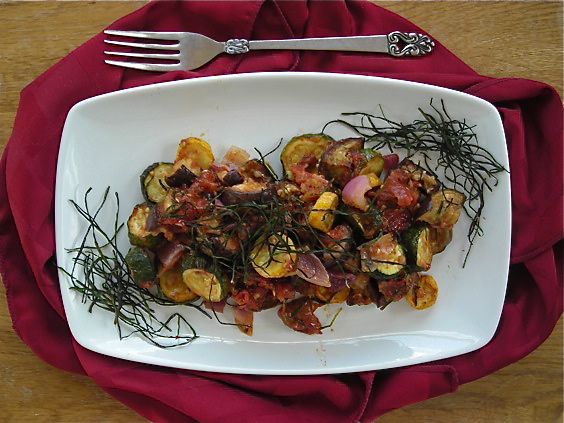
It’s not hard to do when a plate of this Roasted Ratatouille is staring back at you, loaded with late summer tomatoes softened to a deeply flavorful mass, chunks of hearty zucchini and eggplants so perfectly round and unblemished that they look false and plastic, yet yield to a tender flesh so delicious it makes your eyes roll back. I can have my face in Summer, my cheeks enjoying the warmth of the days, while my head and heart charge towards Fall, cool air, a warm humming oven and a comforting meal when the air chills and sweatshirts come out.
This dish, once again as is the case with so many in my adult years, was not something I’ve loved forever, and maybe that’s part of it’s appeal. My Mom used to make Ratatouille when I was young, and my sisters ate it but it always turned me off completely. That which held ruby red tomato and a vegetable with the word ‘egg’ in it just sounded like it would be horrible. I was a picky child mostly due to texture issues, as I have learned; foods like mushrooms, tomato, squashes of all kinds and especially eggplant (an egg? a plant?) are now foods that sweep themselves across my plate on a regular basis, bursting with flavor when once they would make me shudder. I’m so glad to have grown up to learn of their wonder.
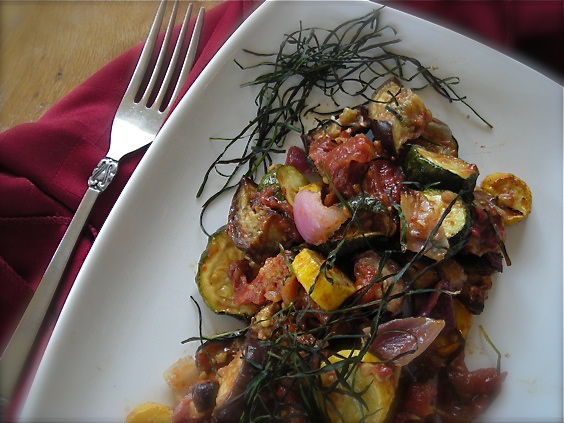
Roasting vegetables is quite possibly my most favorite way to eat them, except for right off the vine. With an enormous bounty of fresh from the Farmers Market zucchini and onions, and the aforementioned eggplants, along with the fattest and juiciest Black Krim heirloom tomatoes to come out of my tiny postage stamp garden, this dish was so loaded with flavor that it made my eyes water in joy. Tomato flavor intensified from the heat of the oven, while the eggplant and zucchini became tender-crisp and then just to make it more interesting, I mix everything together and let it sit overnight in the fridge, just to tease a bit more flavor out, a deeper marriage of September’s taste of the vine. The bowl needed nothing else; no salt or pepper, no added oil or seasoning. Topped with the amazing find of crisp strips of chive thrown on top of the vegetables on a whim, it was a dish that slowly spread a Cheshire grin over my face with each bite.
What a personality too. There’s no stodginess involved here, no set way to consume such a meal; we ate this mixed with pearl couscous (because I am, truly, having a love affair with those tiny grains of pasta) and we ate it atop heady and aromatic polenta studded with corn kernels and flecks of fresh herbs. It would be just at home too, stuffed inside a crisp and warm baguette, layered with provolone cheese for an incredible, messy delicious sandwich. Serve it on rice, or with a simple risotto. Warm it slightly and place it on garlicky crostini for a hearty appetizer or light meal. Or toss it, chilled, with greens and a shower of fresh grated asiago cheese for a salad unlike any other. Mix it with pasta, please; make sure you add a good turn of hard cheese. And if you find yourself late at night, in the kitchen with a fork in hand, a few dips in to the bowl while no one is watching is ok too.
And are you like every other gardener in the state- a pile of chives growing in your garden that you don’t know what to do with? I foolishly planted chives many years ago, which went to seed without me doing anything about it (big, BIG mistake) and now, well now I am fighting off chives with a blowtorch practically, and did you know that if you pluck them they just grow faster? Neither did I, but I’m learning that the hard way. Another thing I learned about chives is that you can blast them to kingdom come with Round-Up, but the little buggers just come back, shiny green and taunting. I’ve learned to hate chives, but a handful of them tossed atop these roasting vegetables made for a crispy and delicious garnish that just might make me a bit softer towards this evil relentless herb. Surprise awaits in the strangest places, doesn’t it?
Roasted Ratatouille with Crispy Chives
2-3 medium tomatoes
1 large eggplant
3-4 small zucchini or yellow squash (2 if they’re larger)
1 large red onion
3 garlic cloves
A generous handful of fresh chives
Olive oil, sea salt and fresh ground pepper
Preheat your oven to 400°. Slice the tomatoes into quarters and place on a baking sheet. Drizzle with about a tablespoon of good olive oil, sprinkle with a bit of salt and a few grinds of fresh pepper. Place pan in hot oven and roast, watching carefully, until the tomatoes begin to soften and the skins wrinkle. You want them to retain much of their shape, but release some of their luscious juices. I don’t roast them for more than 10-15 minutes at that temp. Remove the pan and allow them to cool, then slip the skins off.
Dice the zucchini and eggplant, slice the onion and crush the garlic, placing all of these on two baking sheets. Drizzle with a bit of olive oil, add salt and pepper and roast until the vegetables begin to soften, about 15 minutes. Stir carefully, then return pan to oven for about 10 more minutes. Scatter chives over the top of the vegetables, then roast about 10 minutes more, or until the chives are crisp and toasty, but not black and charred. Remove pans and allow vegetables to cool.
In a large bowl, combine tomato (with any juice from the roasting pan), eggplant, zucchini, onion, garlic and about a third of the crispy chives, reserving the rest for garnish. Gently mix together (I like to use my hands to avoid breaking everything down), taste and season with more salt and pepper if desired. The ratatouille can be eaten as is, warm or at room temp. For deeper flavor, chill the mixture overnight, and allow to warm to room temp the next day before serving.
August 26th, 2011
| 2 Comments »
August is almost over.
And even writing that out doesn’t feel like it’s real. But it is; the month is over next week, then September comes and summer fades into the rear view mirror, leaving it’s fingerprints in our memory, waning like a summer tan. It has truly been an amazing and beautiful summer.
But it’s been a glorious August in Minnesota, a perfect end to this fleeting season. Despite June’s cool weeks, July roared in with it’s searing heat and choking humidity, and storm after storm after storm charged across the sky, darkening the hours, drowning us in rain. And what a delight too. I didn’t water my grass once this summer and it’s stayed lush and green through all the record-breaking heat. That’s pretty rare here. And the abundant rain has turned our surroundings in to a thick rainforest of growth, with a fresh earthy smell that’s nearly intoxicating. August ushered out the heat, and brought us gorgeous sun, endless blue sky and cool nights with fresh breezes. I’ve just fallen in love with August this year. If summer in Minnesota was like this month has been, no one would ever see the need to complain.
Then there’s the bounty, the amazing bounty sagging the tables at the Farmers Markets every week. It’s staggering how much produce is weighing down those tables, with over-loaded trucks parked behind, waiting to dispel their goods. I can take a $20 dollar bill and bring home two big sacks stuffed with food each week. My last trip was so fruitful that I could hardly stagger to the car with my load. And for only $28 dollars, I could have collapsed our kitchen island with the weight.
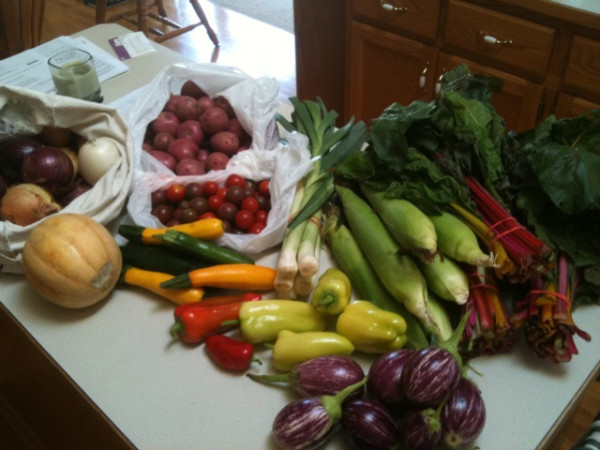
The one item I’ve been a bit disappointed with this season has been the sweet corn. I’ve had more misses with my ears than I’ve had wondrously sweet experiences, and one farmer I spoke to said that the intense heat and heavy rain can cause such quick ripening of the corn that it’s difficult to get it at that sweet tender state that so many people like.
A recent batch of corn that I purchased was a bit too starchy and dry for my liking, but mixed with red pepper, dark green kale and a few handfuls of good cheese, it turned in to a delightful dish that took the focus off the chewy over-ripe corn.
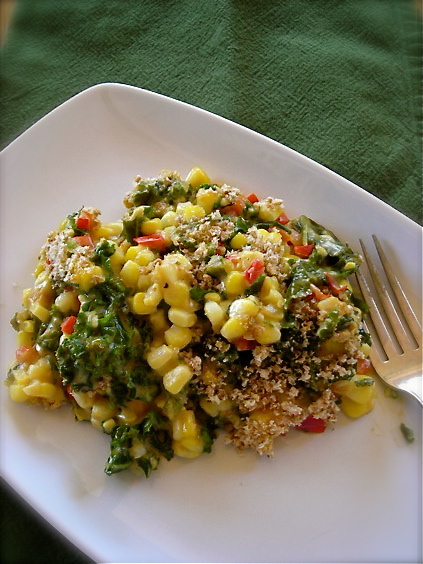
This cheesy baked dish was so yummy, rich with fresh summer flavor. I’d love to try it again, adding more vegetables to it, maybe change the cheese to something stronger, or try it with chard since I seem to have glided up and over the moon for this particular dark leafy green. Did you see in that photo that I bought THREE bunches of it? I am crazy.
But that’s what I need to do; dive head first into these seasonal delights and enjoy them while I can. Like summer, and August, they’ll be fading all too quickly, and I’ll be back in the produce aisle of the grocer, surveying my options, rubbing my arms from the cold, wishing I was dodging sunlight, an overstuffed sack slung on my bare shoulder.
Cheesy Corn and Kale Bake
1 red bell pepper, diced
1 medium leek, sliced thin (or an onion, if you wish)
2 garlic cloves, minced
1 large bunch of curly leaf kale, washed and spun dry then chopped
4 c. fresh corn kernels
2 T. unsalted butter
2 T. AP flour
1 c. milk (i used soy)
1 c. freshly grated cheddar cheese (or mix it up a bit with pepper jack)
1 T. cream cheese (I used sour cream)
Pinch of cayenne pepper
Salt and black pepper to taste
Preheat oven to 375°
In a deep cast iron skillet, or other oven proof skillet, sauté the leek and pepper in a bit of olive oil until soft. Add the garlic and cook, stirring, for about a minute or two. Add in the kale and stir until it’s coated with the oil, then cover the pan and cook for about 5 minutes, stirring once or twice. Scrape veggies in to a bowl and set aside.
In same pan, melt the butter, then add the flour and stir to make a roux. Cook, stirring, for about two minutes to cook out the raw flour taste. Slowly whisk in the milk until smooth, then cook, stirring constantly until the mixture is very thick. It may look a bit reddish brown from the pepper, but that’s just fine. Mix the cheese in a little at a time until you have a nice cheese sauce, stir in the cream cheese and cooked pepper mix, and then the corn kernels. It will be very thick. Season with salt, pepper and the cayenne and spread it evenly in the pan. Place the pan, uncovered, in to the oven and bake until hot and bubbly, about 30 minutes.
Original recipe is from The Kitchn website; I made heavy modifications.
You can use frozen corn in this if you wish, just be sure to run it under cold water to thaw it out, and shake all the extra moisture out before adding it to the cheese sauce mixture.
August 20th, 2011
| 2 Comments »
What’s that saying? ‘Necessity is the mother of invention?’
Many amazing recipes occur when the frantic need for something to add to dinner comes up and I wildly glance in the pantry to see what I’ve got. What odds and ends are laying about in the fridge? What needs to get used up? What tastes good together?
I fling a lot of ingredients in a pan, or a bowl and I cross my fingers a lot when I cook. Whether it’s out of ‘necessity’ like the quote, or just curiosity, it’s not often that I follow a recipe. More likely, I am making something up as I go. Thankfully, more often than not the results are pretty tasty.
The worst part of it all is that if I don’t write down what I did, I rarely remember it to be able to recreate the dish.
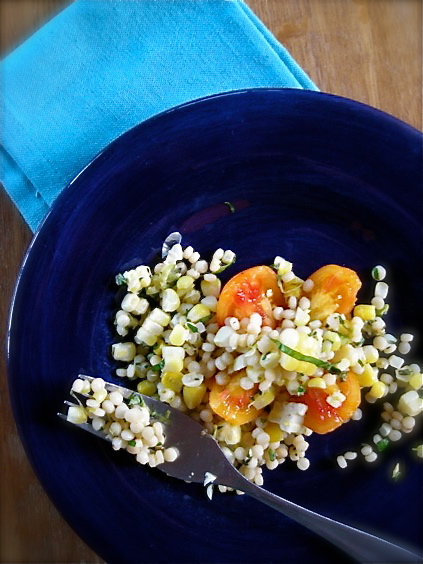
This one, however, did not get away from me.
Side dishes have always been a favorite of mine, and lately I’ve been on this kick of filling my plate with nothing but ‘side’ dishes. The nice thing about removing the focus of meat from our meals is that just about everything we do now can either be termed a ‘main’ dish, or a ‘side’ dish. And sometimes, all of what is being served at our table, technically, are sides.
Griffin was making fish for dinner recently (yes, we eat fish) and we both really wanted something unique on the side. I keep a lot of rice and grains handy, but we were short on time and didn’t want to wait for brown rice, or wild rice to cook. He was digging through our pantry and pulled out a jar of pearl couscous, asking me ‘What’s this?’ And as with necessity, and invention was born.
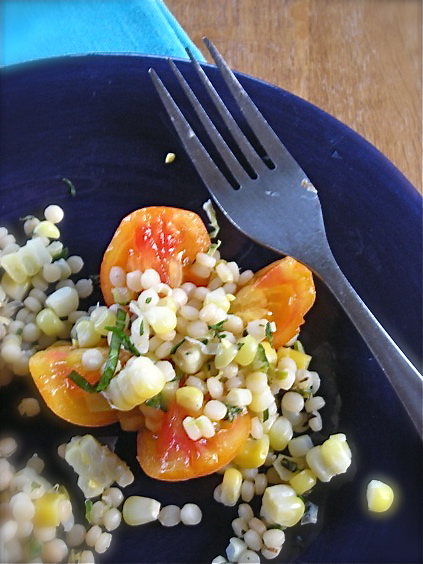
Pearl couscous, mostly recognized as Israeli couscous, is the thicker version of the tiny semolina grains that most people know best. Couscous isn’t really a ‘grain’ like farro, or quinoa; it’s pasta in minutiae form. The instant version of couscous cooks in a flash by adding the tiny beads to boiling broth. The larger form takes a bit longer, but still is quick enough to make for an easy dinner. We used chicken broth, some frozen corn and a generous handful of fresh herbs from the garden and the result was surprising to all of us. It’s light and flavorful and wondrously versatile, but not heavy like larger pasta shapes. I think some form of this will be making regular appearances on our dinner table. With enough fresh vegetables added to it, the dish becomes a meal in itself, or you can serve it over a garden fresh tomato for a perfect salad option. It actually tastes wonderful cold too.
Did you notice the new print button feature??? Pretty cool, huh??
Pearl Couscous Pilaf
1 c. pearl couscous
1-1/4 c. well seasoned broth (can use vegetable, mushroom, chicken….)
1 medium leek, or 2 small ones, sliced and washed well (can sub a finely diced onion)
2 cloves garlic, crushed
1/2 c. vegetable of choice (we used corn; try diced zucchini or other fresh seasonal vegetables)
1/4 c. fresh herbs, finely chopped (we used thyme, oregano and basil, then parsley to finish)
In a deep skillet with a cover, heat a few tablespoons of oil. Add the leek and cook, stirring regularly, until softened and beginning to brown in some places. Add in the garlic and cook, stirring for about a minute. Add the corn (or whatever vegetable you are using) and stir to coat with the oil mixture, then add the couscous and cook, stirring, for about 5 minutes. Pour in the broth, stir to combine and bring to a boil. Then reduce the heat so it simmers, cover the pan and allow to cook, undisturbed, until the couscous absorbs all the broth. It should take about 10 minutes. Allow it to sit for about 5 more minutes, off heat. Before serving, toss the fresh herbs in and stir to combine, seasoning with salt and fresh pepper. Top with parsley as a garnish.
July 27th, 2011
| 5 Comments »
Eventually, we all know it’s going to happen; the bounty of summer vegetables is going to begin to overwhelm home cooks. This rapid increase of summer heat has brought my tomato plants into full force growth, skyrocketing up in the garden and bursting out buds like crazy. If this keeps up, August is going to be both delicious and ridiculous. And zucchini? We all know that one plant per home garden is enough to keep a happy cook in oblong green delight, but the overly enthusiastic gardeners who tend several plants will one day walk out to their garden and be confronted with tons of zucchini. Mark my words. Then they’ll do whatever they can to pawn the excess off on anyone who’ll look their way. Then there’s eggplant. The purple orbs are everywhere once they’re ripe. My word. It’s craaaaa- zee. But in a good, good way.
Because I found The. Best. summer vegetable option once your countertop is over-flowing with fresh zucchini, tomato and eggplant.
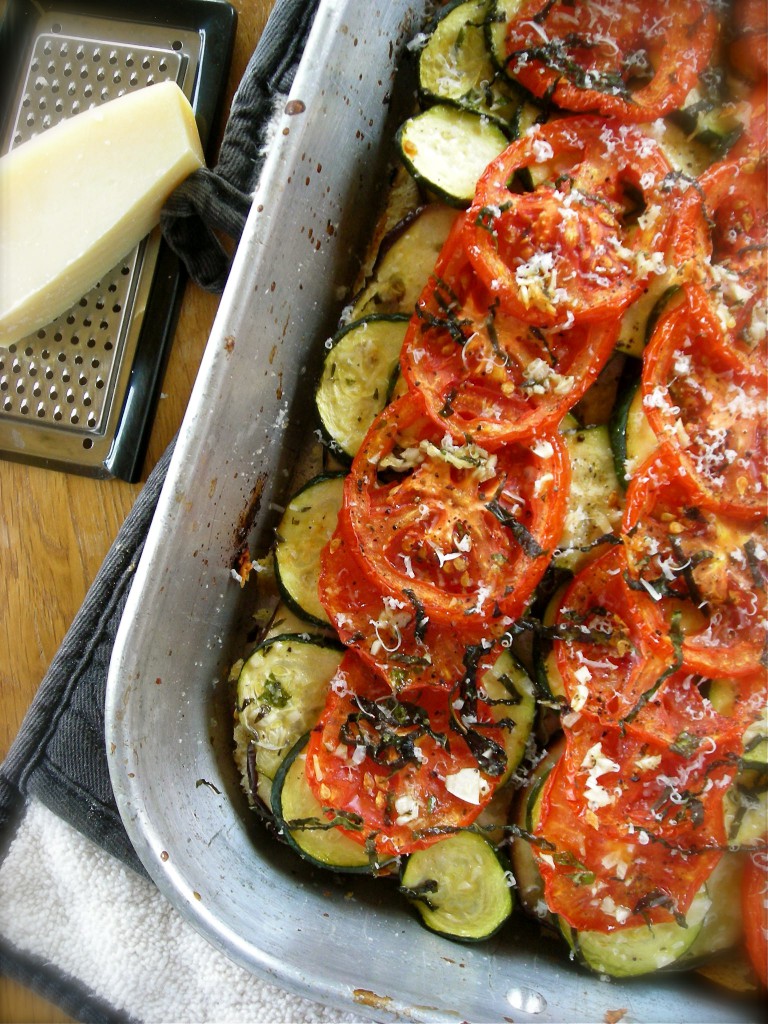 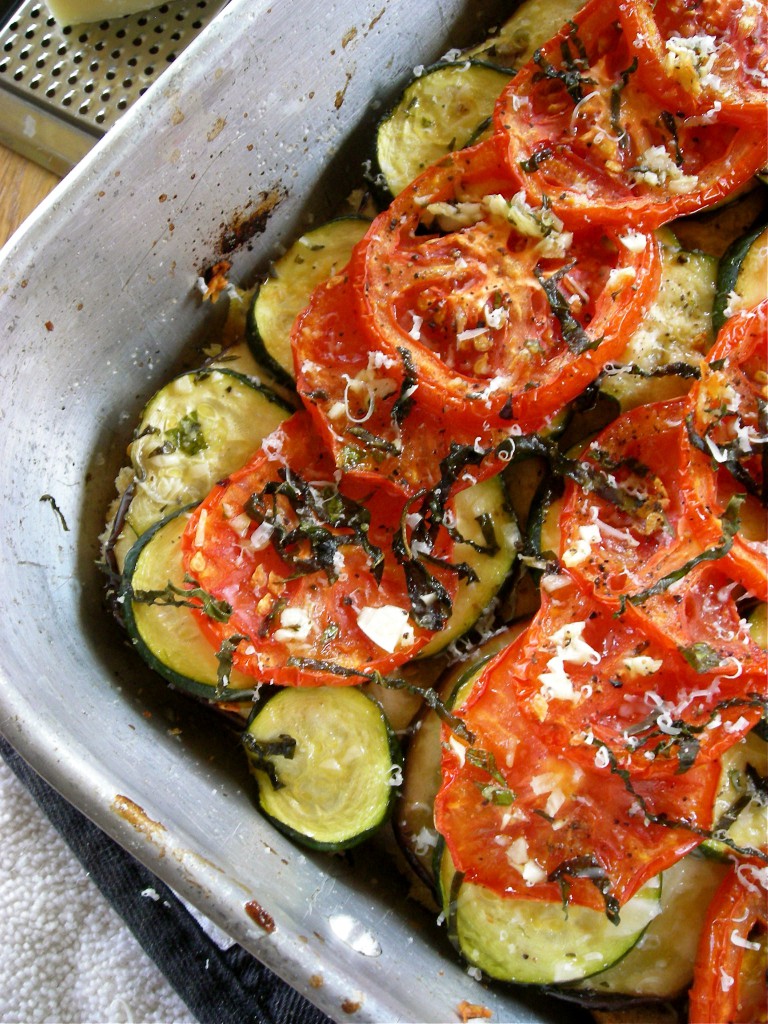
Provided your willingness to turn on your oven, here’s a dish that screams out “SUMMERTIME!!” in every bite, from the heady garlic and fresh herb infused olive oil that you drizzle over everything to the fresh vegetables that make up the bulk of this gratin. Get a really, really good loaf of bread for the base, a fine bottle of white wine for you, and enjoy a meal worthy of any fancy summer dinner party, or simply a way to ease yourself out of a hectic day.
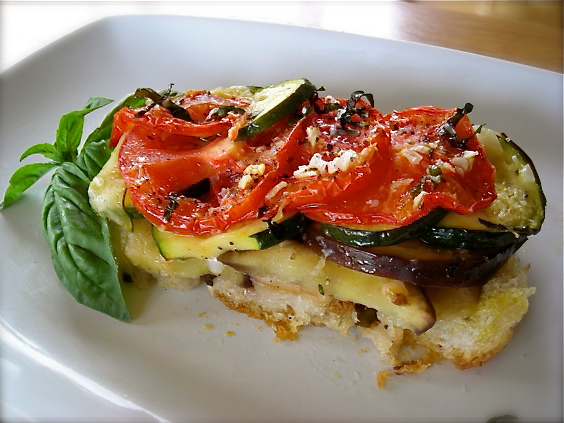
I spied this recipe on the Food & Wine website, searching for some new plant-friendly recipes to add to our eating repertoire. I knew we’d love it and I wasn’t disappointed. Once out of the oven, the smell was killing me. I could barely wait for it to cool enough to cut a slice and dig in. Mike came home from meeting with some of his clients, and despite having already eaten lunch, I pretty much shoved a slice at him and demanded that he try it. Which he did. He’s got the right attitude, hmm?
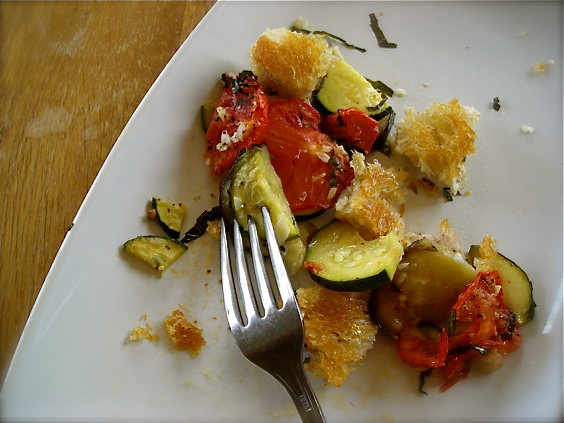
The base of this gratin is made from good rustic bread, torn in to pieces and drizzled with a heady blend of garlicky oil inundated with fresh herbs. It bakes up nice and crunchy, aromatic and flavorful, adding a nice contrast to the soft baked tomato, zucchini and eggplant slices gracing the top. A smattering of fresh basil, a spray of good parmesan cheese and a fork. Oh, and don’t forget the wine. It’s a dish that tastes of summertime, reeking of warm days, the scent of cut grass and the way the night air sulks around at dusk with the lingering scent of the day before finally giving way to the cool of night. If anything else smacks of good seasonal eating, show me, because I really want to know.
You know that day will come when you glance, overwhelmed, at the summer bounty before you and you think ‘Oh dear, what do I do NOW???’ Well I have the answer, my friends. You will make this dish. And with one bite, you will determine when you can make it again. And maybe, again.
Do you have any favorite ways to use zucchini and eggplant??
Ratatouille Gratin
1 medium eggplant, sliced 1/4″ thick
2 medium zucchini, sliced 1/4″ thick
3-4 medium tomato, sliced 1/4″ thick.
1/2 c. good olive oil
4 cloves garlic, minced extra fine
1 heaping tablespoon each fresh thyme, parsley and basil, minced fine, plus extra for finishing
1 1-lb loaf good quality artisan bread, torn in to 1-2″ pieces (i used a good sourdough, left in a paper bag overnight)
Stir olive oil, garlic and the heaping tablespoons of fresh herbs together in a small bowl. Whisk well to combine.
Toss eggplant and zucchini with 1-2 teaspoons of kosher salt and let stand for about 20-30 minutes. Drain any liquid and gently squeeze dry, if possible. Sprinkle tomato slices with salt and pepper.
Spray a 9×13 baking dish with cooking spray and arrange torn bread in bottom. Pack the bread in as tight as possible in one layer, using the entire loaf. Drizzle the bread with about 2 T. of the garlic/herb oil. Arrange the eggplant slices on top, then the zucchini, then the tomato. Drizzle the top of the vegetables with another tablespoon or two of the oil and sprinkle some thyme leaves over that.
Bake the gratin for 30-40 minutes, or until the vegetables are aromatic and slightly browned and the bread crust is crispy. Remove from oven and allow to stand for 10-15 minutes. Sprinkle with minced basil and parsley and fresh grated parmesan before serving, if desired. The gratin can be served warm, or at room temperature. To reheat, place gratin on a baking sheet and rewarm in a low oven.
From Food & Wine, with heavy modifications
July 20th, 2011
| 6 Comments »
I do realize that’s a pretty strong statement, given the evolution of pizza from your basic tomato pie with sausage or pepperoni to the amazing creations available at any number of fancy wood and coal-fired joints around town. Pizza is one of those food items that’s tireless in it’s ability to transform itself, often gravitating out to an entire new plain before charging back to it’s humble beginnings once more. What’s old is new again, right? Pizza. Hand held food, and a very personal statement if ever one existed. Everyone has their own ideas about what makes good pizza; what kind of sauce tastes best, what toppings make for the most flavor, the amount of cheese, thin crust or thick, crunchy or soft.
My personal favorite was always sausage, green pepper and black olive. Something about that combination made perfect sense to my mouth. I could handle pepperoni, plain with no additions but given a choice, sausage ruled. The cheese had to be ample, enough to stretch happily out from the crust as I bit in to it, and it always, always needed several shakes of grated parmesan cheese on top. I can still put away a few slices of this perennial favorite, but my tummy wouldn’t be too happy with me. These days, I’m far more content to cover my pizza crust (thin, but not crispy) with a number of vegetables and a much less substantial amount of cheese. I’ve been known to eschew pizza sauce in favor or pesto, or no sauce at all. I’ve rubbed crushed roasted garlic over the crust before placing the toppings on it and I’ve tried lots of variations on the pizza theme, including dessert pizza. I may grow and evolve with my tastes, but I still love pizza. And often I think that I’ve tried most ways possible to eat the ultimate hand-held meal.
Then I made this pizza:
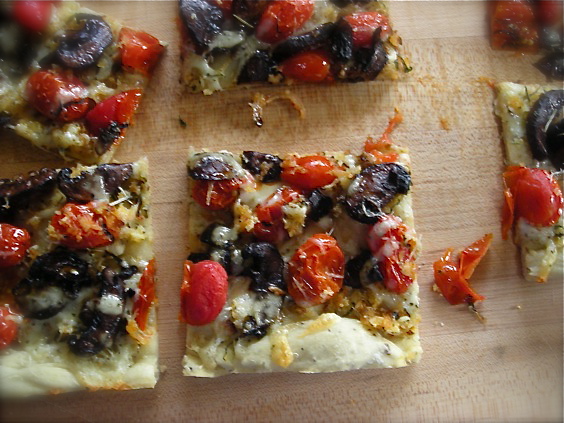
And wow, did I realize how wrong I was.
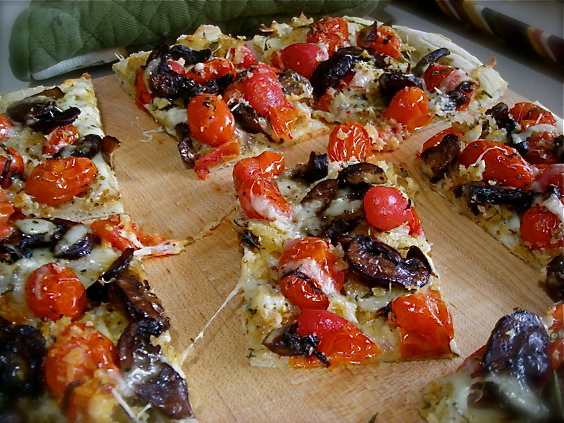
Because all the pizza I’d made involved creating a pie with toppings that baked in the oven. A scatter of diced red peppers, chunks of portabella mushrooms, spinach leaves etc etc…. you place them on the crust and let the oven do it’s work.
This pizza, however, required a bit of foresight. The tomatoes must be roasted ahead of time, and the mushrooms need a nice dousing of good balsamic vinegar and a turn on a superbly hot grill before they can be placed on your pizza crust, covered with a bit of cheese and given a quick dash in to a scorching 500° oven. But the prep is worth it; this pizza has more incredible flavor than what might normally be rendered from placing regular cherry tomatoes and portabella mushrooms on pizza crust.
Recently, I attended a dinner at Levain in Minneapolis, and one of the courses was served with roasted balsamic oyster and shiitake mushrooms. I’m learning to enjoy mushrooms in many forms, having been one of those foods that I simply could not eat for a very long time. But given that I grew up with canned mushrooms in my meals, really, can you blame me? I am a recent convert to balsamic grilled portabella mushrooms at home, loving how flavorful they are, and these mushrooms at Levain delighted me to no end. In fact, many of the other attendees to this dinner stated that these deliciously flavored mushrooms turned them around from their dislike of the fungi and made them happy fanatics. I was in heaven, savoring each tender, savory bite and in the days since, dreamed of those mushrooms gracing my dinner plate.
Then along came this pizza. With tomatoes slowly roasted in the oven until they sizzled and popped. But it needed something else, a rich deep something to balance that tender sweet flavor and these mushrooms, liberally doused in balsamic and olive oil, then cooked lickety-split on a searing hot grill made for a heavenly companion.
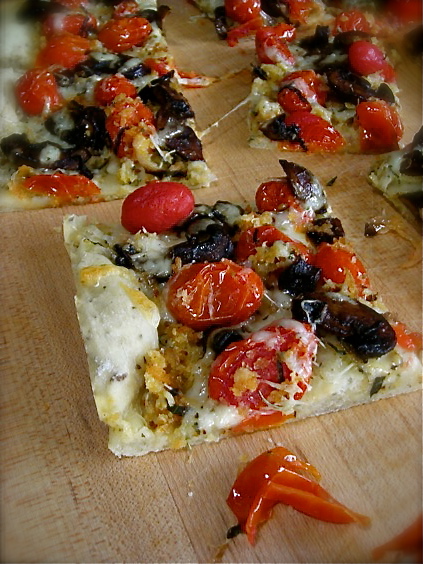
The cherry tomatoes themselves are created with enough flavor to please all on their own; a quick toss with crushed garlic, thinly sliced shallot and a generous handful of panko breadcrumbs, they are then dressed in a bit of olive oil and some fresh thyme and set under the broiler. The heat renders the cherry tomatoes sweeter than you could imagine, with a nice crumb mixture, bits of crunchy shallot and garlic, and here’s where I think the pizza reaches new heights because that browned, seasoned bread crumb on top of your pizza crust makes for a flavor you just can’t get from bread alone.
It all just requires a bit more thought. And every bite is worth it too. Even a few days later as I pulled the last slice from the fridge and ate it cold. It was all worth it.
What’s your absolute favorite way to eat pizza?
Pizza with Charred Cherry Tomato & Balsamic Mushrooms
2 pints cherry tomatoes, washed.
1/2 c. panko bread crumbs
4 cloves garlic, smashed and crushed
2 shallots, thinly sliced
1-2 t. fresh thyme
1 pkg Portabella mushrooms slices
1/4 c. olive oil
2 T. good quality balsamic vinegar
Pizza dough and cheese topping of choice
Preheat your broiler. In a bowl, combine the cherry tomato, panko, garlic, shallot and thyme. Season to taste with salt and pepper and drizzle the mixture with about 2-3 tablespoon of olive oil. Toss gently to coat. Spread mixture on a large cookie sheet and place under the broiler, watching carefully, until the tomatoes begin to sizzle, and brown in spots. It should take maybe 10 minutes or so, being careful not to allow the panko to burn. Remove from the oven and set aside.
Whisk 1/4 c. oil and the balsamic together until emulsified. Pour over the mushrooms in a bowl, and gently toss with a rubber spatula until all the emulsion is absorbed. Do not add more oil or vinegar. The mushrooms can be grilled, or they can also be broiled until they are richly browned and tender.
Heat your oven to 500° and if you have a pizza stone, heat it in the oven for up to 30 minutes. Roll out your pizza dough to desired size and thickness on parchment paper. Scoop some of the cherry tomato mixture on to the crust, then scatter the mushrooms. Add your cheese and place parchment on heated pizza stone. Bake the pizza until crust is golden and topping sizzle. It shouldn’t take long at all.
Original recipe from Food & Wine, with heavy modifications.
Kate says: I used a pizza dough recipe from Cooks Illustrated. Wish I could give it to you but they don’t like it when bloggers share their recipes, the meanies. Any scratch pizza dough you like will work.
July 16th, 2011
| 7 Comments »
People, I’ve madly fallen in love with radishes.
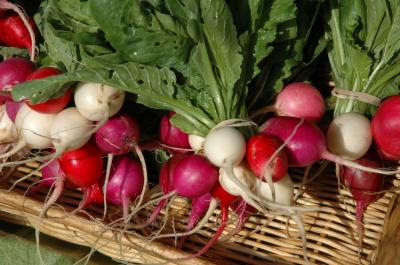 (photo courtesy of Really Natural) (photo courtesy of Really Natural)
I do remember not particularly liking them as a kid. But then again, I didn’t care for much then anyway, being raised on a typically 1970’s diet, I was your typically picky little thing. Fresh foods weren’t that present in our home so my exposure was lacking and my palate not particularly advanced; it’s no shock I wasn’t at all enamored with the radish’s peppery bite, a sting to the tongue that I found unpleasant. My sister Karen loved them, dragging them through a plate of table salt before popping them in her mouth. Even that typical dressing did nothing to take the edge off the flavor. So for the most part, I’d ignored them.
Then something happened a few years back. On a trip to the Farmers Market, I spied a large bunch of red, white and pink radishes- it was an enormous amount- and was only a dollar. I picked them up, passed a buck to the farmer and placed them in my bag. Once home, I stared at them and thought ‘Great. Now what?’ I ate one, and it was divine. Fresh, snappy, crisp and tart, but not harsh and sour like I recalled. Still, I didn’t leap headfirst into devouring them. I remained rather skeptical. And they languished in my fridge until I was forced to do something, anything, with them.
So I pickled them. On a whim. And went tuckus over teakettle for the crisp little discs, eating them on sandwiches, with my fingers and finally with a fork to grab the last little slices from the dredges of their vinegary brine. And it was soon after that when I first dragged a cold fresh radish through a slab of creamy butter to discover one of the best, and most surprising treats I’ve ever tasted. My eyes were now opened to the radish. Once again. Adulthood is a wonder around every corner, especially when discovering the foods from your childhood that once caused you to turn up your nose are now part of your regular gustatory delight.
So they’ve happily made a comeback; the inexpensive little things can be had sometimes on a 2-fer deal with any farmer willing to move their bounty. I scrub them down and place them in a baggie where they happily keep for days on end, willing that they last that long in my fridge. I eat them for breakfast a lot, sliced thick on good toasted bread with slices of butter, or most recently, this delicious sandwich creation that I’m thoroughly ga-ga over.
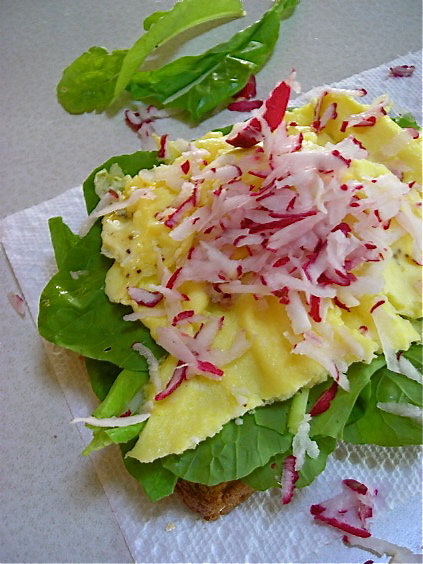
A cooked egg, nice and firm is placed a top a bed of greens on nicely toasted bread, and covered with several shredded radishes. The key is to shred the radish directly over the egg. Something about the fresh spray of liquid released makes for a much better flavor. I like spinach with this, but I’ve used spring greens, garden lettuce and romaine as well. This is a summery breakfast, if I’ve ever dreamed of one.
I took my radish love one step further too, recently, when I roasted an entire batch of them.
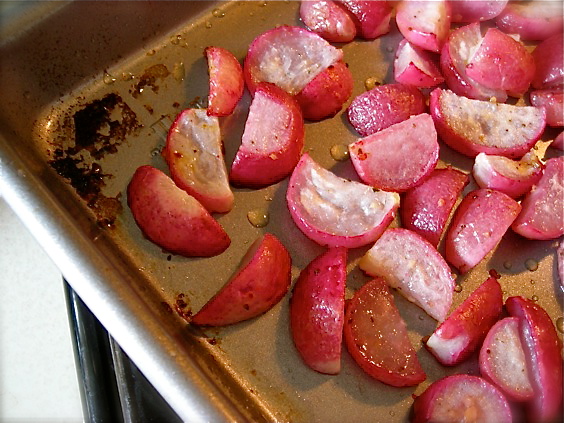
Roasting radishes takes the sharp flavor away, and replaces it with a mellow soft rendition that is palatable to anyone, even the most avowed radish hater. One would hope, anyway. I could have eaten these like candy, but instead, I caramelized a big pan of vidalia onions and made the two of them into a delicious tart atop a flaky puff pastry crust.
 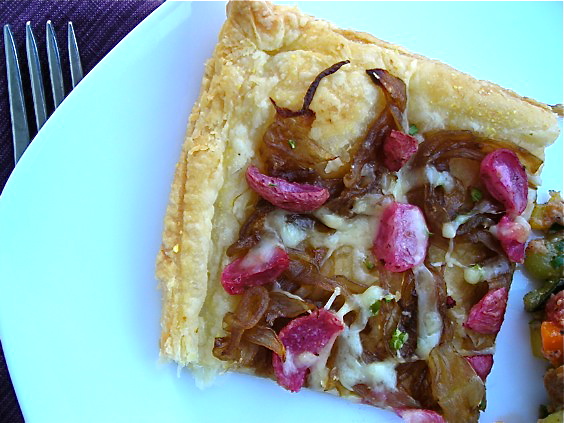
This was a sweet, tender and amazing hand held meal, soft like summer nights, fresh as the season and when topped with just a little Gouda cheese, a bit of savory tang that balanced the vegetables perfectly. Eating a slice of it, on my patio, with a lovely glass of Rosé wine and a perfect summer night surrounding me, I felt a million miles away from my life, but in the simplest way possible. I love how a good meal, with gentle ease can transform an ordinary day into something surreal and dreamy. That’s the magic in a plate of really, really good food.
So…. do you like radishes? What do you like to do with them?
Roasted Radish & Caramelize Onion Tart
Scrub one bunch of radishes well, removing tops and roots. Cut into halves or quarters and toss with a bit of seasoned oil of choice. Roast at 400° until tender. It won’t take too long, maybe 10 minutes.
Slice two Vidalia onions and place in a hot skillet. Cook onions over medium heat, turning frequently, until browned and tender, about 15 minutes. Reduce heat to low, add a few tablespoons of brown sugar (or a drizzle of good honey) a tablespoon of kosher salt and a dash or two of balsamic vinegar. This is my favorite way to caramelize onions, but you may have your own method. Continue cooking the onions for about 20-30 more minutes, or until they are very soft and richly browned. Stir them on occasion, and be careful not to let them burn.
Thaw one sheet of puff pastry. Roll out sheet to desired thickness on parchment paper, then transfer to baking sheet. Poke holes in pastry with a fork and place in 400° oven, baking until lightly browned, about 10-15 minutes. Remove from oven, spread caramelized onion over the crust then top with roasted radish and a small amount of a good sharp aged cheese of your choice. I used Gouda because I had a some on hand. Fontina and Gruyere would be good options too. Place back in oven and bake for about 15 more minutes, until edges of pastry are crisp and brown and toppings are hot. Allow to cool slightly, then serve. Can also be served at room temperature.
June 5th, 2011
| 5 Comments »
I’m always on the look-out for quick and easy meal options, ideas for those nights that the guys take over dinner prep and want some good food to appear without a great amount of fuss. Long winded recipes don’t cut it with them, but these really easy Black Bean Tostadas make for a perfect summer dinner.
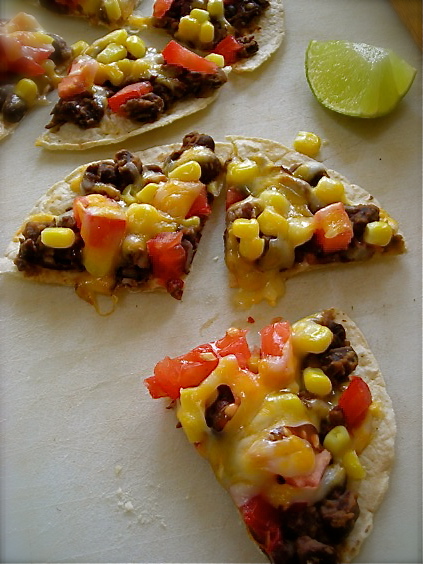
Based on this idea for a Black Bean and Corn Pizza, I took it one step more towards simple and used corn tortillas for the base, making a crispy shell that went from our toaster oven to my plate in about 10 minutes. The most time I spent was opening a can of black beans and shaking them under running water.
If you’ve got a toaster oven you’ve got the means to make this in a snap but are limited to only two at a time. Using a regular oven makes for more crowd appeal. Increase the amount of all ingredients as needed for the number of people you’re serving. I would imagine that adults could easily eat two or three of these. I myself managed to shotgun four without a blink of remorse.
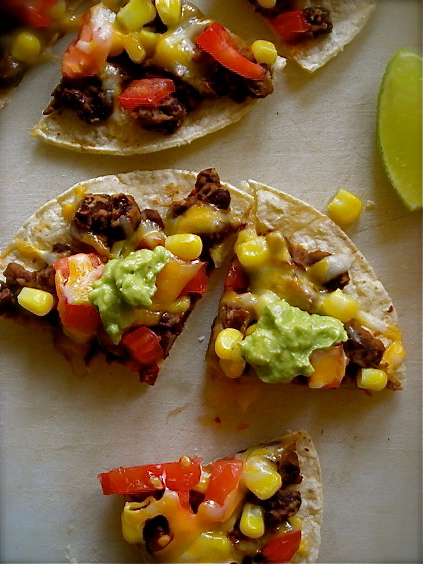
But I was stuffed. Happy. But stuffed. Delicious as a main meal, this would also be perfect for a nice appetizer, and could easily be done on a grill with tantalizingly smoky results. The black beans make for a hearty and filling addition and no one will miss any meat in this. Fresh tomato gave it a summery flavor, and a crumble of queso fresco would be a nice addition just prior to eating them.
Black Bean Tostadas
1 15-oz can black beans, drained and rinsed
2-3 t. chipotle en adobo
1-2 t. each ground cumin and chili powder
1 medium tomato, diced
1 c. frozen corn (no need to thaw)
1 avocado, diced
Corn tortillas
Pepper Jack, or Co-Jack cheese for topping
Lime wedges
Heat oven to 400°.
Place drained black beans in a small saucepan and add 1/3 cup of water, the chipotle en adobo, cumin and chili powder. Stir to combine and heat until simmering. Remove pan and mash beans coarsely with a sturdy wooden spoon. Add more water if needed to make beans spreadable, but not runny. You want them to be thick.
On a baking sheet, arrange corn tortillas and place in oven, turning once until tortillas are slightly firm. Remove pan from oven and carefully spread a few tablespoons of black bean mixture on them, then top with tomato, corn and diced avocado. Sprinkle a little cheese over them and return the pan to the oven. Bake until cheese is melted and tortillas are crispy around the edges, maybe 5 minutes. Squirt fresh lime juice over the tortillas before serving.
NOTE: Instead of using avocado chunks on the tostadas, mash the avocado with a little lime juice, salt and pepper and use either as a topping for the tostada when it comes out of the oven, or spread a thin layer atop the black beans before adding the other toppings and baking them. Either way you use it, it’s delicious.
May 1st, 2011
| 7 Comments »
We’re trying so hard to go full steam ahead in to Spring. But around here, it seems like Mother Nature just wants to tease us, here with a lovely day then a blast of cold and rain, then yet another lovely day, then once again cold, and more rain. Lakes, streams, ponds, rivers and especially the people are overflowing their limits. We’ve had enough. Bring us the sunshine please, and for more than just one day.
So here we are, the first day of May. Our expected high likely won’t even reach 50 degrees. It feels weird to offer you a delicious crispy flatbread recipe, topped with a rich verdant pesto and some sassy caramelized onions because instinct is telling me to braise something hearty and warm. But it’s May and I refuse to get out my cast iron dutch oven anymore. In fact, I sure hope it got cleaned well the last time I used it because I’m desperately trying not to get reacquainted with it until October.
So, let’s move on to this, shall we?
 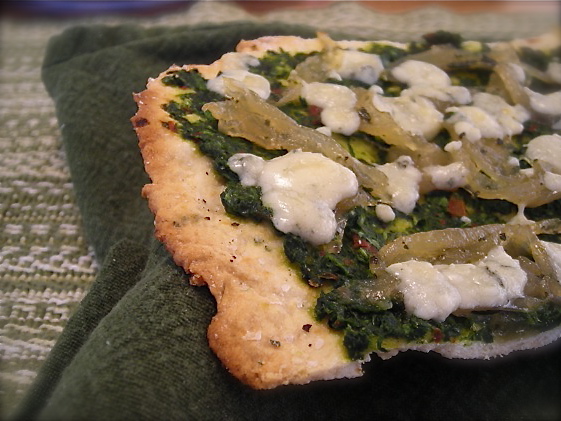
This was actually a recipe covered on this site back in November of 2009. For most of the year previous to that, I’d made this simple and delicious herb flatbread about a half dozen times for various meals, or really, even to just snap a piece off here and there to snack on. It’s ridiculously easy, it tastes amazing and it works for so many meal options, especially something very simple like being topped with fresh pesto, a smattering of caramelized Vidalia onions and several dollops of goat cheese. Run that under a broiler for a few minutes and the simplest meal is yours, delicious and light, packing a flavorful Spring-like medley for your mouth.
Every day I’m at work I pass a display of enormous Vidalia onions. It’s set up right by the entrance for easy access, and every day I see them I think about this flatbread, those golden burnished onions and the deep dark green of this pesto. I’ve experimented with lots of greens for pesto, and two of my most favorite ones are beet greens or spinach. Beet greens make the most earthy, dark and appealing pesto, and spinach offers a lighter, fresher touch. When fresh spinach is available at the Farmers Markets by the bucketful, I will buy several loads of it and make pesto, freezing it for future use.
I’ve done large batches of caramelized onions, slicing up to four of them at a time and slowly cooking them down to a glittering golden mass. They’ll keep in the fridge for up to a week, and you can freeze them too. The pesto freezes beautifully as well, or simply use your favorite commercial brand to make it even easier. A batch of this flatbread comes together in no time, so you can get out to find the sunshine.
Well, whenever it comes back, that is.
Herb Flatbread
1 3/4 c. unbleached flour
1 t. baking powder
1/2 t. salt
1-2 T. fresh herb of choice
1/2 c. water
1/3 c. oil
Heat oven to 450° with a pizza stone on middle rack. Combine dry ingredients and herbs. Make well in center and pour in oil and water. Stir with spoon until a soft dough forms. Turn out onto parchment paper and knead about 5-6 times to bring dough together. Can be divided into 2-3 small balls and rolled flat, or rolled out as one large circle. Drizzle olive oil over top, sprinkle with sea salt and more herb and transfer, parchment and all to heated stone. Bake until browned in spots and fragrant- time will depend on how thin dough is rolled. Remove from oven and cool (don’t cool on stone- it will continue to bake). Slice with pizza cutter and enjoy.
Recipe from Gourmet magazine
Spinach Pesto
4 c. washed spinach leaves, stemmed
1/3 c. olive oil
3 T. toasted pine nuts
1 clove fresh garlic, chopped
Place all ingredients in a food processor and process until smooth, scraping down sides as needed. This pesto can be frozen for quite some time with only minimal loss of flavor. Do not add cheese to pesto if planning to freeze, otherwise, add to taste your preferred hard cheese.
KATE’S NOTES:
Pine nuts are ungodly expensive right now. I love subbing cashews in pesto for the meaty flavor, and have dabbled with the idea of using almonds too, as they’re my favorite nut. And instead of using traditional parmesan in my pesto, I love the addition of Manchego or Trugole, which is really similar to Asiago, only creamier and with a milder taste.
February 20th, 2011
| 6 Comments »
There’s still enough wintertime for this dish…….. especially with yet another major storm bearing down on Minnesota.
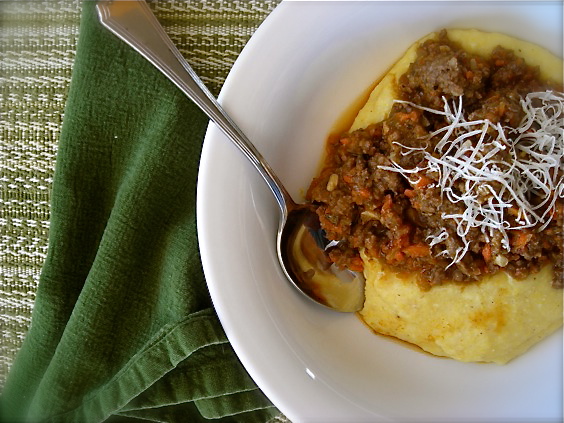
There’s still enough of winter for a slow stove-top meal, one that fills your kitchen with a heady fragrance, a simmer that beckons one and all from the cold and wind to a wide shallow bowl of tender meat and vegetables, rich with rosemary and basil. Winter still has us in it’s grasp despite the longer hours of the day, our luck changing as we see traces of the sun through our dinner hour, a few more precious hours of light in the afternoon when school is done. Pick a slow weekend day if you can, to enjoy the hours with a bubbling pot on the stove, as sun moves to twilight. Or place it all in a crock pot before you head out the door for work, then come home to a sensational smell, and a hearty rustic dinner. This is the quintessential Winter meal; it’s warm and rich and soothing and amazingly good. It’s rustic and simple and easy to prepare. And it makes good on the promise of chasing the cold away.
Recently I attended a dinner that featured organic Muir Glen tomatoes, and as we gathered our coats to leave, smiling from content tummies, chatting heartily with each other, the sponsor of the meal handed everyone a gift bag that held a small cookbook of tomato recipes, plus a sampling of some of Muir Glen’s finest canned tomatoes. The dinner, highlighting Muir Glen’s specialty selection of canned tomatoes, the Meridian Ruby variety, was held at five locations with their resident chefs around the country, the local establishment being Corner Table in Minneapolis. The small booklet that came with the gift bag had recipes that made my eyes dance with delight, and the very first one listed was the traditional Ragù recipe from Cascina Spinasse in Seattle. The restaurant serves traditional Northern Italian fare, which includes this hearty meat-based sauce; slowly simmered pork and beef, with minced carrot, celery, onion and garlic to round out the flavors. Add wine, Muir Glen’s fresh and flavorful Meridian Ruby tomatoes and let it bubble contentedly on the stove for a few hours. Who needs a plane ticket?
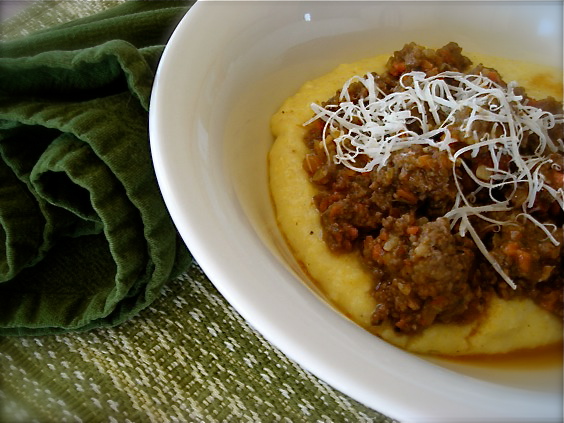
Ok, I agree…. a plane ticket to Italy would be fine, yes. BUT…. this dish is far cheaper.
As it cooked, simmered and blended on the stove, filling my kitchen with it’s rich scent, I felt like I’d be selling such a beauty short by serving it over boring old pasta. I know it would taste fine, sure…. but its decadence and hearty flavor made me wish for a creamy soft polenta to top it with. After all, if this Ragù was traditional Northern Italian fare, then a bowl of creamy polenta would be a natural base. And there I kind of balked. It’s a good thing the pot went in the refrigerator overnight so I could mull on how best to tackle this need.
Because you see, several years ago I went through a phase where I repeatedly tried polenta, in as many forms as I could manage. I tried it with white corn meal, in true Southern Grits fashion; I tried it in solid form, broiling or searing small cakes of it to golden perfection before topping it with whatever I was experimenting with at the time. I tried recipe after recipe of soft polenta and every single time I ended up disappointed, or worse, really turned off. I decided that maybe I just didn’t like polenta, but then I’d try it in a restaurant and be bowled over with how delicious it was. And I loved cornbread, corn muffins, hush puppies and corn fritters, so what was it about polenta that I couldn’t manage? I’m pretty sure it was the cooking method, but by the time I figured it out, I was so over making it at home. And I haven’t attempted it since.
This time, I was determined, and after consulting with my friend Shaina, I armed myself with some of her knowledge and feedback and headed into the kitchen. Thirty minutes later, a pot of superbly creamy and flavorful polenta was waiting for the rich and hearty Ragù. The first bite made me swoon, eyes rolling in delight. It was, through my hands and a little attention, the most delicious food I’ve ever made at home, and it was happily making it’s way to my mouth. I cook a lot. And I cook really well, but this was the first time I think anything I’d made could stand up to the food served in a good restaurant.
But then, I suppose when you have with a recipe that comes from one of Food and Wine’s Best New Chefs of 2010, that’s probably a good start.
Spinasse Ragù
1# each ground beef and ground pork (i used 93/7 ground beef)
1/2 t. salt
1/4 t. fresh ground black pepper
2 small onions, peeled and cut to large pieces
2 carrots, peeled and cut to large pieces
2 stalks celery, with leaves, cut to large pieces
4 cloves garlic, peeled
2 T. olive oil
1 t. crushed dried rosemary leaves
1 14.5-oz can Muir Glen Organic Meridian Ruby tomatoes (or use equivalent of other kind)
1 c. dry red wine
1 quart good chicken stock
1/2 t. ground nutmeg
In a 4-qt dutch oven, brown the meat with salt and pepper over medium heat until no longer pink. Drain fat using a colander over a large bowl. Discard fat, set meat aside.
In large food processor, place onions, carrots, celery and garlic and process until finely chopped. In same dutch oven, add olive oil, vegetables and rosemary, cooking for about 15 minutes or until vegetables start to brown.
Add tomatoes and meat to pan, stir to combine. Cook approximately 15 minutes, until tomatoes darken slightly. Add red wine, increase heat to medium-high and cook until liquid reduces by about half. Add chicken stock, reduce heat to low and simmer, stirring occasionally, for 3-4 hours. Stir in nutmeg in final minutes of cook time.
KATE’S NOTES: For extra richness in this dish, I added about a half cup of heavy cream with the chicken stock. I think it made an exceptional addition. When you add the stock, the mixture will be very loose, like a soup. It will reduce as it simmers though. I did not cover the pan as it cooked, but I doubt it will make much difference, although it may take longer for the liquid to reduce if it’s covered.
From Cascina Spinasse, Seattle Washington, and Chef Jason Stratton
from the Muir Glen Tomato Vine Dining Tour recipe booklet
Creamy Soft Polenta
1/2 c. stone ground corn meal
1 c. fat free milk
1 c. water
1 t. butter
Salt and pepper as needed
In a heavy medium saucepan, bring milk, water and butter to a boil then add cornmeal in a thin stream, whisking constantly. Once cornmeal is added, whisk for several minutes to insure smooth consistency. Bring to a simmer, reduce heat to low and cover the pan, leaving lid ajar to release steam. Simmer polenta for about 10 minutes, stirring often to keep it from scorching, then add 2-3 tablespoons of water. Stir to combine, replace cover (leaving it ajar) and simmer for 10-15 minutes more, stirring regularly, scraping the bottom to prevent scorching. Add about 2-3 more tablespoons of water at this point, stir to combine and cook for about 5 more minutes, stirring regularly. Taste for texture; it should be smooth, and not at all grainy. If any graininess remains, add a few more tablespoons of water and cook until smooth. Serve immediately. Makes about 2 servings
KATE’S NOTES: Be aware that Polenta, as it cooks, bubbles like molten lava, and it can be dangerous if not kept partially covered. Keep the heat low to prevent the bubbles from exploding violently. And when you stir the polenta as it cooks, make sure you are scraping the pan bottom thoroughly. I used a flat edge wooden spatula for this. A heat resistant rubber spatula would also be a good option.
DISCLAIMER:
I attended the dinner at Corner Table as a guest of Muir Glen and did not pay for my meal. The promotional products were
free of charge as well. I was not paid to endorse or even mention Muir Glen Meridian Ruby tomatoes, Chef Stratton’s restaurant, his recipe or any other information found here. The opinions in this post are strictly my own.
January 9th, 2011
| 6 Comments »
I know, I know…. there you all are, patiently waiting for me to get my caboose in gear and start posting the food posts again. Enough of the extraneous stuff! Bring on the food! Get cooking again, would you? I can hear you all, I promise. And it’s good too, because it’s tossing me head-long back into the kitchen to start these next 12 months off in style.
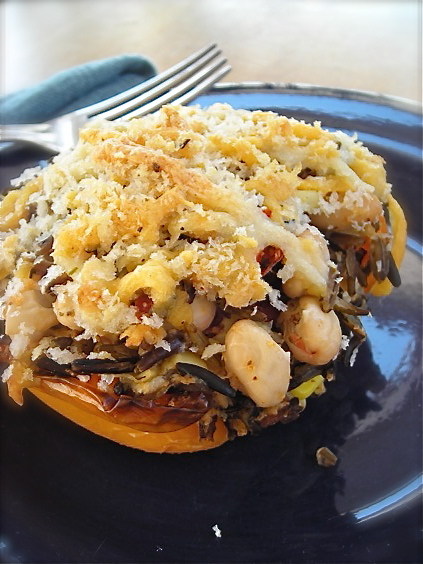
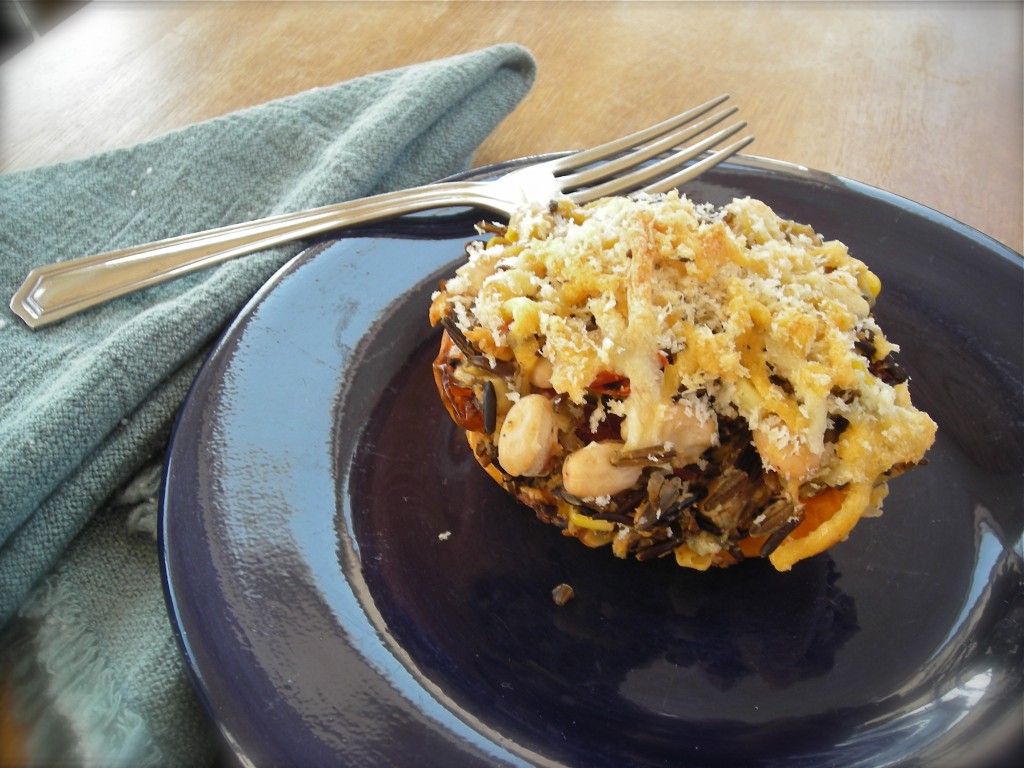
With Amazing Wild Rice Stuffed Peppers
Honestly, I have no clue what happened to me between Christmas and New Years but I had ZERO desire to cook a thing. Nothing. Who was that girl? I get an extreme amount of pleasure in the kitchen; I love the act and the art of cooking, pulling something from the stovetop or oven that fills the room with incredible smells, moving tastes about on my tongue and delighting in the flavors within. This is who I am, it’s what I love. But there was that week, that flux week between holidays that always just feels odd, like the end of something when we’re not quite ready for the new thing to begin and everything in me just went swirling down the proverbial toilet. Good thing for a loving spouse who made a few meals and for copious amounts of leftovers.
But then, I came roaring back with an idea, a brainstorm that drove me to a creative new height. I wanted something light, healthy and easy to put together. I wanted to add a new line to my ever burgeoning arsenal of recipes, the list I go to time and again, options that fall into place in our dining repertoire with ease. What jumped out from under my hands was this Wild Rice Stuffed Pepper, that despite being completely meat-free, the Teen did eat part of his without one iota of complaint. There was no suspicious poking at it, no scowling or contempt.
Yeah, who was that kid, you say? Mine. The young man who seems to be changing every day that I look at him, the one approaching his 17th birthday. He’s become a bit more acceptable to new things, less rigid about what he won’t eat. I’m liking the results.
Really, the adjectives necessary to describe this dish are extravagant. Mind-boggling. Flavorful and light, but hearty and comforting as well. Mike and I loved these too, but then, I knew we would. We’d be meat-free more often if it weren’t for the Carnivore. This dish, once the lovely colored peppers were home from the market, came together entirely from my pantry and freezer. I love those types of meals. Opt in the fresh produce, fill the edges with staples and sit down to a lovely meal. This is the cooking I like.
Wild Rice Stuffed Peppers
3 colored peppers of choice, sliced in half and cored
1 cup wild rice, washed and picked over
1 small shallot, minced
2 cloves garlic, minced
1 15-oz can great northern beans, rinsed
1 c. frozen corn kernels
1/2 c. canned tomatoes, or 2 chopped fresh Roma tomatoes
1 c. panko breadcrumbs
1 c. shredded cheese of choice, plus more for topping (I used cheddar and pepper jack together)
1/3 c. shredded parmesan, with more for topping
Salt and pepper to taste
In a medium saucepan, bring 4 cups of water to a boil. Add the wild rice, return to a simmer and cook, covered until the rice is tender 30-40 minutes. I used long grain, or regular wild rice so it took longer than if you use the cracked version. Adjust simmering time accordingly. Once rice is tender, drain excess water in a wire strainer and set aside.
Meanwhile, set your oven to Broil. Line a baking sheet with foil. Place prepared peppers on sheet, cut side up and broil for about 5-7 minutes, until edges are slightly browned and peppers are softened just a little. Remove from oven, set aside and set oven temperature to 400°.
In a deep skillet, saute shallot in oil for about 5 minutes, then add garlic and cook about a minute longer. Add the beans and corn, and heat through. Stir in the tomato and wild rice until just combined and remove from heat. Add the cheese and panko. Season to taste with salt and pepper.
When mixture is cool enough to handle, pick up a generous handful and press it together slightly, then mound it into a pepper half. Repeat with remaining peppers and filling, mounding the peppers full. You may not use all the filling but be generous. In a small bowl, place about a half cup of the shredded cheese and several tablespoons of shredded parmesan. Add two tablespoon of panko bread crumbs and toss to coat. Top the peppers with this and place in the oven for about 15 minutes, or until the filling is hot and the cheese on top has melted. Serve immediately.
KATE’S NOTES:
Look for good sturdy peppers that are heavy and full for this dish. They’ll hold the filling better. I like to find ones that have four ‘knobs’ on the bottom if I can. It makes for a more even cut. If you like to make stuffed peppers the regular way, by coring the entire pepper instead of cutting it in half, by all means do so. I like this method for the ease of eating them.
There is endless versatility in this recipe: use brown rice and black beans, or regular rice and red beans. Add frozen peas or even cooked cubes of squash. Add in a host of fresh herbs. Skip the panko to make them gluten-free. It helps to bind the ingredients but I will say that it’s not necessary at all. Change up your cheese, or add chopped leftover meat if you have it.
|


