December 13th, 2010
| 7 Comments »
Risotto is one of those dishes that scares people. Somehow it’s considered a demonic culinary principle, a dish that’s reserved for restaurants and someone willing to stand over a steaming pot and stir, stir, stir, stir until their arm falls off. Who has that kind of discipline?
While there is some truth that risotto is time consuming, and does need attention, I’ve managed to make beautiful creamy pots of it by simply standing by, keeping the flame tempered and making sure the rice doesn’t stick. And I don’t focus on it diligently, spoon in hand, because I’ll tell you something that may force some die-hard, principled professionals to throw rotten tomatoes at me in dispute-
risotto does not need to be stirred constantly.
So there, I said it, and I will uphold this truth until the day I die. I’ve done it both ways. I’ve stood by that pot stirring until I am completely zoned out by the motion, and I’ve dumped in the broth, given it a couple of whirls with the spatula and walked away. Yes. I’ve walked away from risotto and lived to tell the tale. While this is no meal to get on the table quickly, with some time and a bit of care, you can make it without making yourself crazy.
And one comforting thing you ought to know about me, for as many pots of creamy perfect risotto that I have managed to get out of my kitchen, there have been plenty that have failed miserably. They’ve gotten over-cooked and mushy and just downright wrong. Both from being constantly stirred and not, just so you can’t point out a fault to my procedure. Make it perfect one time and you feel like a genius. You do it again, bursting with confidence of your skill and the next pot is like sloppy porridge. Ugh. My only suggestion to mastering risotto is to just make it. And make it again, and again and again because you will learn to watch the rice kernels and see how they change (whether you are stirring constantly or not) and you will see how it transforms with the broth and added ingredients from singular grains to a homogenous dish.
And please take comfort in the fact that this particular risotto that I’m going to talk about came out a bit overcooked.
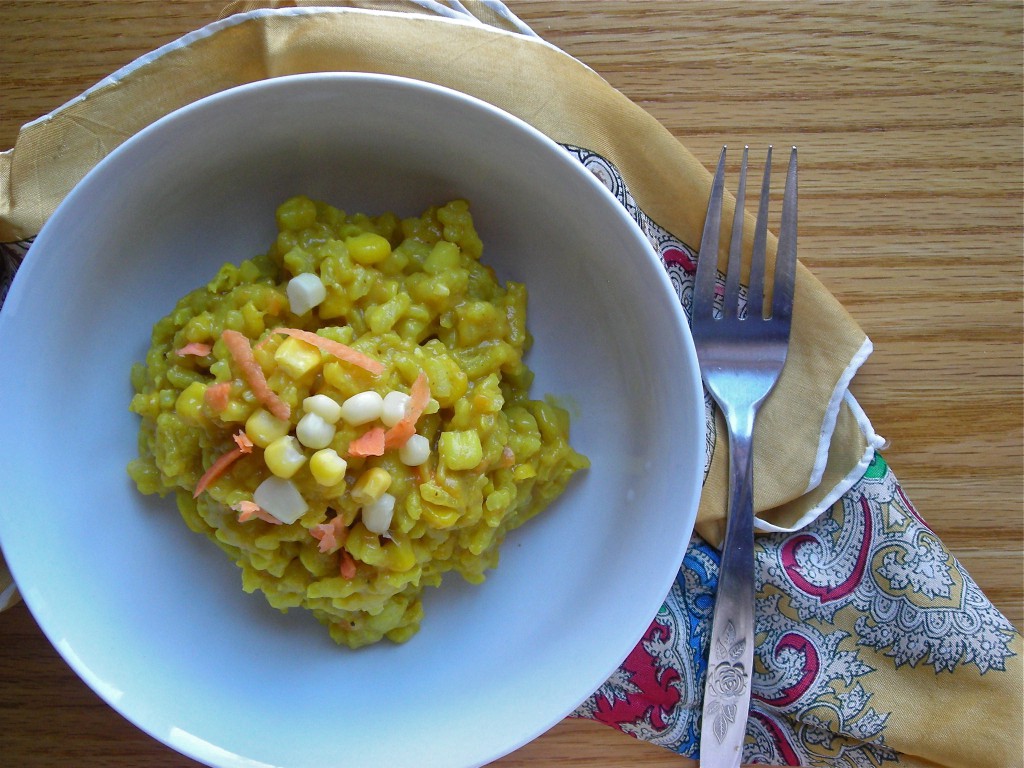
But it tasted amazing, and that’s the focus of whatever risotto you make, whether the texture is perfect or not, think more of the taste and the flavors in your mouth and less that it needs to be some level of award-winning achievement. There is no such thing as perfection, especially in cooking. Risotto is one to never give up on, too.
This Curried Sweet Potato & Corn Risotto was another Iron Chef moment for me; I needed a dinner plan, yet again at 3:30 and scanned the cupboards and fridge for options. There was arborio rice and there was a stack of sweet potatoes on the counter. And there was corn in the freezer. My brain suddenly jumbled this all together, along with the bright sunny curry colors and I sat down to determine the best way to make it work. I settled on shredding the sweet potato in order to incorporate it more evenly in the cooking process, and adding the frozen corn in the last 5 minutes to cook it just enough but to preserve some of the crispness of the kernels. The end result, despite being, like I said, slightly overdone, was a superb flavor, and so cheerful in our bowls.
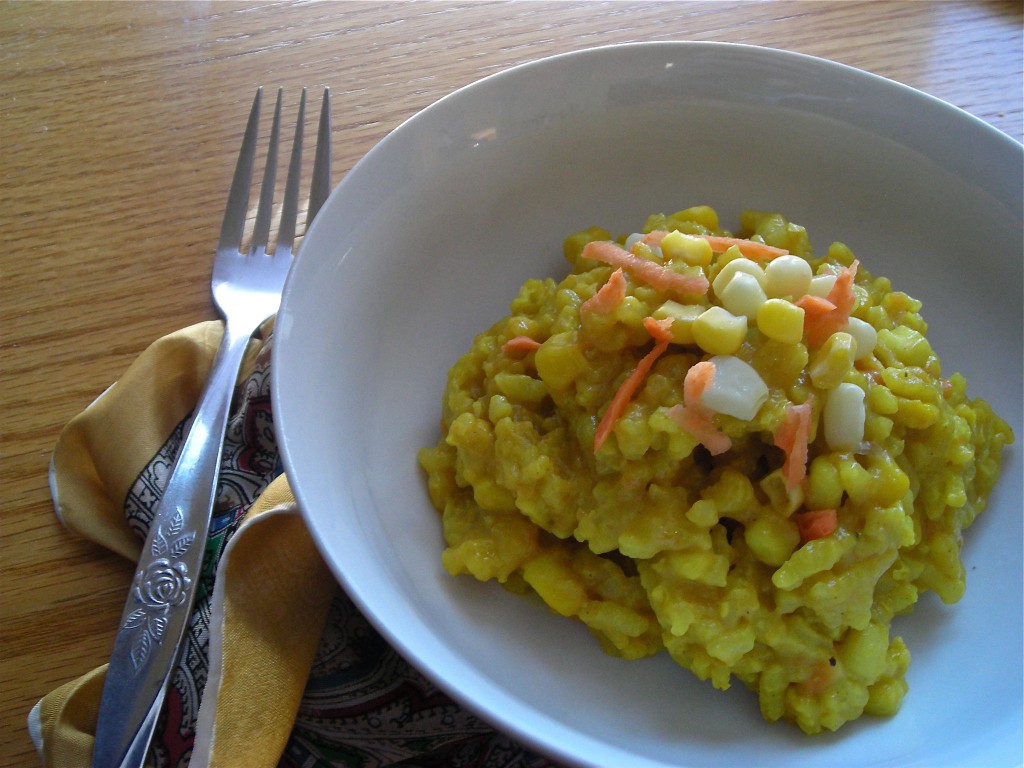
Curried Sweet Potato & Corn Risotto
The entire process for making risotto will take 35-45 minutes. For the last 15 minutes or so, you probably will need to stick close to the stove and stir more, but the first part of it can be somewhat unattended.
Many risottos use wine, and are finished with parmesan cheese. For this curry version, I did not use wine or cheese as I didn’t think it would match with the flavors of the curry.
1 c. arborio rice (or carnaroli works too)
2 qts chicken stock
2 sprigs fresh thyme
4 cloves fresh garlic, divided
1 medium sweet potato, peeled and grated on a box grater
1 c. frozen corn kernels
1-2 T. curry powder
In a medium saucepan, heat the stock to a bare simmer with the fresh thyme sprigs, and two cloves of the garlic that have been roughly chopped. Stir and keep warm over low heat.
For the remaining two cloves of garlic, mince very fine. In a large, deep skillet, heat 2 tablespoons of olive oil (or use butter, or both- that’s what I prefer) add the garlic and saute over medium heat until fragrant, stirring to prevent scorching. Add in 1 tablespoon of curry powder and stir to blend, then add in the rice. Stir to coat the rice with the garlic and curry powder, and cook, stirring regularly, until grains are somewhat translucent, about 5 minutes.
Ladle about two cups worth of the warm stock into the skillet with the rice and stir to blend. Maintain a gentle simmer, stirring on occasion, until the stock is absorbed. Be sure that the rice does not stick to the bottom of the pan. The mixture should simmer gently, but never boil vigorously. When the grains have absorbed the stock, ladle in about 2 more cups worth. Repeat, allowing this to absorb and keeping the grains from sticking. You won’t need to watch it constantly, but stay close and just check it occasionally.
After the second round of stock is absorbed, add about a cups worth of shredded sweet potato to the rice, and a ladle or two of stock. You want to give it enough liquid to loosen it and allow it to simmer, but not so much as before. Stir and allow to absorb. Add another ladle, and repeat. Now test a grain or two. They should begin to yield to your bite, with some firmness remaining. Add in the corn, a few more ladles of stock and simmer until the liquid is absorbed. Test the grains again. At this point, the mixture should look smoother and beginning to come together with a creamy sauce. Keep testing the grains and adding just a little stock if needed. If you like the idea of more curry flavor, go ahead and stir more curry powder in to the grains. By now, you will probably be stirring a bit more to prevent sticking. Stir, test the grains and add a little more stock until the mixture has a wonderful creamy texture.
Season it with salt and pepper and serve as soon as possible. Risotto doesn’t always hold well.
December 8th, 2010
| 7 Comments »
The primary reason for the type of cooking I do is my health. Our health. This has been at the front of my mind since Griffin began eating solid foods as a baby. Before he was even born I knew I wanted to be able to feed him in a healthy manner, with fresh scratch-made foods and a lot of variety. It felt at times like a monumental task, being entrusted to feeding. teaching and educating this blank palate he had, and giving him the tools to grow strong and vital from the inside out.
I made the majority of his baby foods from scratch, from the foods I was eating. Granted, this was only 15 years ago, but I came across an incredible amount of ignorance over it, people who told me he would suffer from malnutrition because of the foods I fed him. I was appalled at the ignorance. Here I was, cooking carrots, beans and squash, pureeing them smooth and using them for his meals and I was accused of not feeding him properly. What about that was wrong?
Now flash forward to the presence; this type of cooking for your baby is the gold standard. Scratch foods are the goal, and one’s health through the foods they eat is the #1 topic on most anyone’s mind. Obesity and diet related diseases are out of control. If ever there was a time to take control of one’s health by what we put in our mouths, now would be it. And so what moves through my kitchen has to pass a certain level of scrutiny; is it a whole food? without trans fats? no MSG? low in sodium? what are the health properties? and probably most importantly, how can I do all of this and maintain our food budget?
One aspect of cooking that I try to utilize as much as possible is to fill each meal with multiple items that all contribute to healthier eating. I use a lot of legumes when I can, fresh vegetables wherever possible and load up a pot of soup with everything imaginable.
This Hearty Minestrone is a perfect example of the type of soup we love in this house; rich and delicious, chock full of good things.

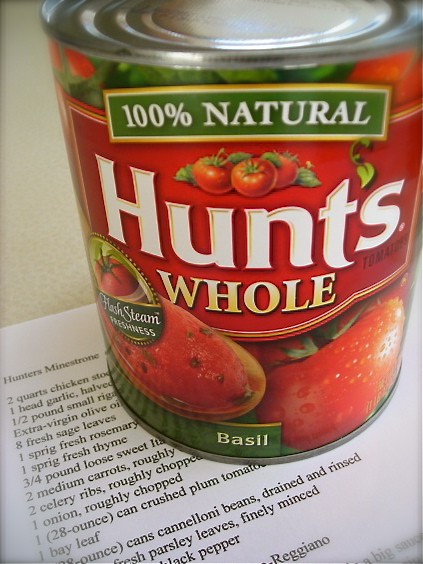
Canned tomato products make a regular appearance in my winter repertoire, my bubbling pots of chili, soups of all kinds, warming roasts and numerous pasta dishes. The presence of heart-healthy lycopene is very high in tomatoes, and has found to be much more readily absorbed from canned products than in fresh ones, and you know, finding a good tomato in Minnesota during the winter months is a laughable matter. Being able to pull out a can of tomato product to add the all-important element of health to our diet makes dinnertime a bit easier. On the plus side, using Hunts tomato products insures top quality standards, as the tomatoes are Flash steamed, preserving the full flavor of tomatoes for home use year round.
ConAgra Foods recently presented effective evidence for the benefits of lycopene in the American diet, stating that the health advantages of tomato products, in addition to the lycopene, include significant levels of Vitamin C, fiber and potassium, more than twice the potassium of notable sources such as bananas, potatoes or orange juice. In conjunction with research done at the University of California-Davis, participants in a six-week study who experience high blood pressure found a marked decrease in numbers when they consumed twice daily amounts of canned tomatoes. (Source: Tomatoes: The Everyday Superfood for Heart Health)
But back to that Minestrone, shall we?
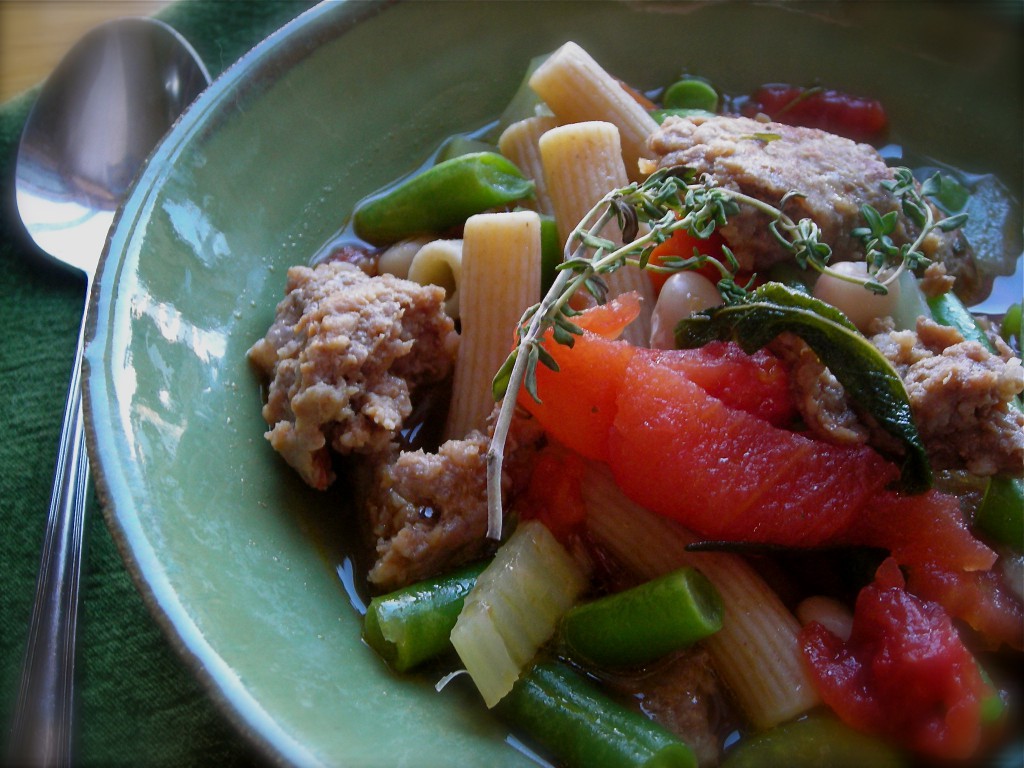
Hearty Minestrone
Adapted from Tyler Florence, Real Kitchen cookbook
2 quarts chicken stock
4 garlic cloves, crushed
1/2 # small rigatoni, or other hearty shape of pasta
Extra-virgin olive oil
8 fresh sage leaves
1 sprig fresh rosemary
2-3 sprigs fresh thyme
3/4 pound loose Italian pork sausage (sweet, or hot- both work well)
3 medium carrots, roughly chopped
2 celery ribs, roughly chopped
1 onion, roughly chopped
1 (28-ounce) can whole tomatoes (I like to use the Hunts brand with basil added.)
1 bay leaf
1-2 15-oz cans cannelloni or Great Northern beans, drained and rinsed
1 10-oz package frozen green beans, preferable the steam-in-the-packet kind
1/2 bunch fresh parsley leaves, finely minced
-Combine the stock, crushed garlic, rosemary, sage and thyme in a big saucepan and simmer for about 15 minutes to give the stock a nice, garlicky herbed taste. Keep warm.
-Bring a pot of salted water to boil for the rigatoni.
-Pour 1/4 cup olive oil in a large stockpot. Add the sausage and cook, breaking up the sausage with the side of a big spoon until well browned.
-Add the carrot, onion and celery to the saucepan and cook for about 5 minutes, until the vegetables are softened but not browned.
-Stir in the crushed tomatoes, bay leaf, cannelloni beans, green beans and chicken stock. Bring to a simmer and cook, stirring occasionally. The soup will develop more flavor the longer it simmers. Cook over a very low flame for up to two hours, or for as little as 30 minutes, depending on how much time you have. Remove the herb stems before serving.
-Cook the rigatoni according to package directions. Drain and rinse with cold water to stop the cooking.
-To serve soup, place a small amount of cooked pasta in the bottom of a soup bowl and ladle the hot soup over the top. Sprinkle with the parsley, and shredded parmesan cheese, if desired.
KATE’S NOTES:
I like to keep the pasta separate from the actual soup when I make Minestrone due to the pasta’s amazing ability to absorb a phenomenal amount of liquid. It is, however, entirely up to you and I certainly can’t deny the added flavor of cooking the pasta in the incredibly flavorful broth that this recipe makes. For an extra delicious added flavor, top slices of good crusty bread with shredded parmesan cheese and broil until browned and toasty, then float them on the soup.
Disclaimer:
I was compensated financially for this post in cooperation with The Motherhood.com We Heart Tomatoes campaign, ConAgra Foods and Hunts Tomatoes. Sources included information supplied by ConAgra Foods. All other information in this post was my own opinion.
December 1st, 2010
| 30 Comments »
It’s time, everyone. Time to roll back my sleeves, part the curtain and say ‘Ta-Da!!’ to the recipe created for the Marx Foods and Foodie Blogroll Iron Foodie Competition.
It’s something wholly appropriate for winter, for soothing the soul and senses and for nourishing the body and boosting one’s resolve to face the chill of the day, the brisk wind at your back and whipping through your hair.
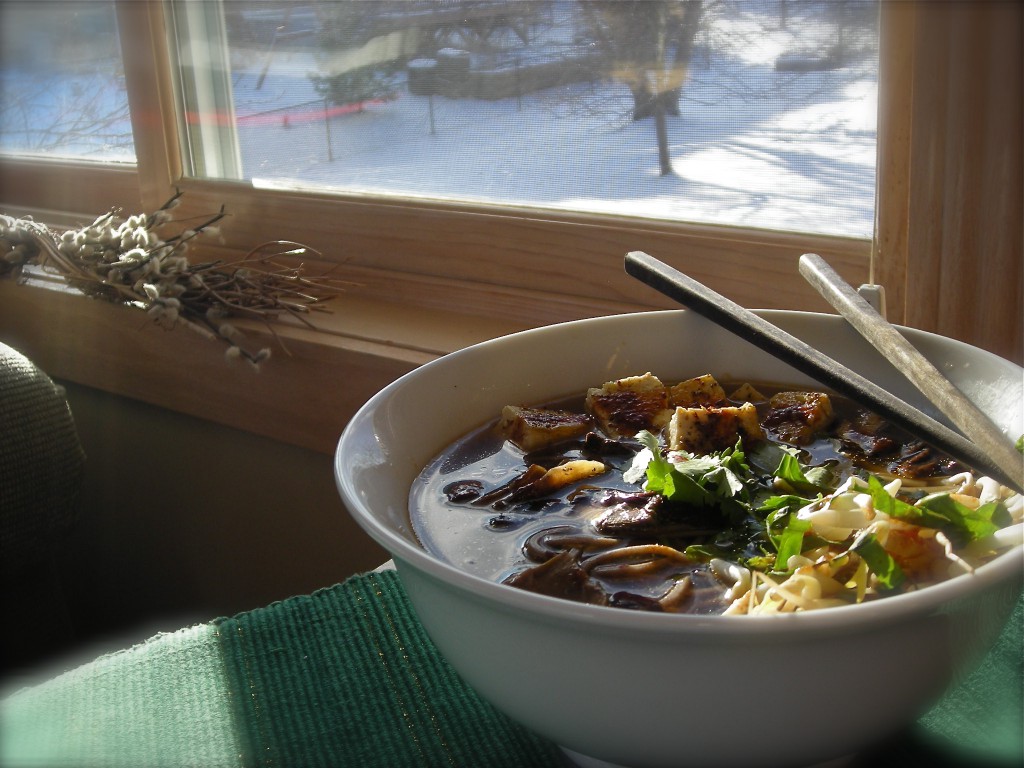
Within the bowl of steaming soup, of soothing soft noodles to slurp and crunchy sprouts, there’s a sense of calm that begins to spread over you with the very first mouthful. Outside lays the endless expanse of snow, as far as you can see and the memory of dragging a cartful of groceries through the parking lot, turning your back to the wind that cut through you with the precision of a laser…. it sticks in you like a bad dream almost. My coat gets stiff in the cold, and even though I may be warm inside, the crackle I hear when I move my arm sounds like the material could shatter at the slightest touch.
Winter just means soup, and this soup was a perfect tonic for that trip to the grocers, and really, for any nagging sense of imbalance that might cross your day.
 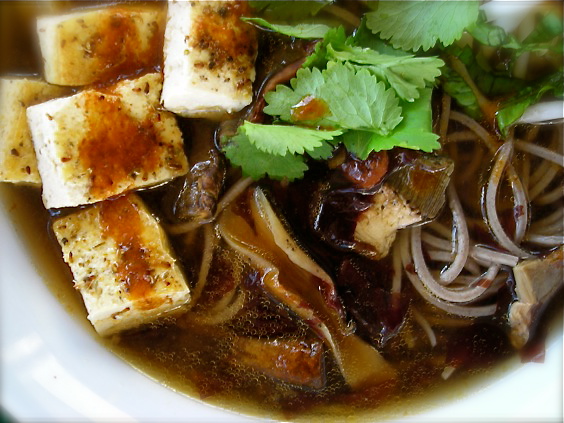 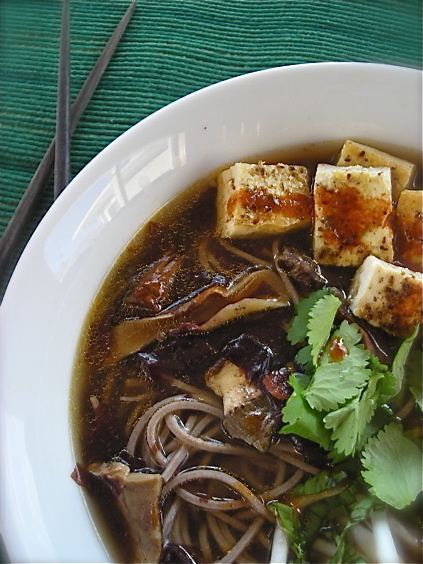
The Iron Foodie Challenge was to utilize at least three ingredients from the Mystery Box sent to the contestants from Marx Foods. Everyone’s box contained Fennel Pollen, Smoked Sea Salt, Tellicherry Black Peppercorns, Bourbon Vanilla Beans, Maple Sugar, Dried Aji Panca Peppers, Dulse Seaweed, and Dried Wild Porcini Mushrooms. Our products were sample sizes only, so basically we had a pretty small window to work with. I knew I had to really think over my recipe before taking it to the kitchen because I couldn’t screw up. I had no back-ups.
Right away, I knew it would be a noodle soup. With the seaweed and porcini mushrooms, a big steaming bowl of noodle soup was a given. I love having one set down in front of me in a restaurant, the scent of rich broth reaching my nose, golden noodles, green herbs and lots of wonderful vegetables. I contemplated adding chicken to mine, but settled on tofu to use up a container in my refrigerator. The result was wonderful, and Mike and I sat down next to each other, forks in hand and happily slurped from the bowl, exclaiming over the subtle bursts of flavor.
Warming Winter Soup
From my kitchen:
One block extra firm tofu
4-oz soba noodles
1/2 c. fresh bean sprouts
2 tablespoons chopped fresh basil
2 tablespoons chopped fresh cilantro
From Marx Foods:
Fennel Pollen
Dried Porcini Mushrooms
Dried Aji Panca Chilies
Dulse Seaweed
Smoked Sea Salt
Take the block of extra-firm tofu and slice through it the wide way into three equal portions. Place on several layers of paper towel and cover with several more paper towels. Place something heavy over the three portions and weigh it down to press the liquid out.
In a small bowl, measure 2 tablespoons of olive oil, 1 tablespoon of fennel pollen and 1/2 teaspoon of smoked sea salt. Whisk to incorporate and set aside to blend the flavors. Whisk occasionally to combine.
Bring a kettle of water to a rolling boil. Place dried porcini mushrooms in a small bowl and pour boiling water over to cover. Place dried peppers in a small bowl and cover with boiling water. Set both aside to soften.
In a medium saucepan, bring 1-1/2 quarts of good chicken stock to a boil. Add in 4 oz. of soba noodles and cook according to package directions. Drain, reserving the broth, and rinse noodles to stop cooking. Set aside. Place broth back in pan over a low flame. Place a length of paper towel or cheesecloth in a wire strainer and place over a measuring cup. Drain the porcini mushrooms through the paper lined strainer to remove and dirt or grit, reserving the mushroom broth in the cup. Add the mushrooms to the simmering broth. Check the mushroom stock for clarity, and add to pan with mushrooms.
When the chilies are soft and pliable, snip them with a scissors into the bowl of a food processor, and add several tablespoons of their soaking liquid. Process the peppers until they are well chopped, adding more soaking liquid if necessary. Strain the pepper mixture through a wire strainer, pressing on the solids to extract as much chili puree as you can. Whisk 1-2 tablespoons of olive or sesame oil into the pepper puree.
Remove the tofu from the paper towels and brush with the fennel pollen/oil mixture, then heat a saute pan to nearly smoking. Carefully place tofu steaks in pan and sear for about 5-7 minutes or until nicely browned, then carefully turn over steaks and sear the other side for about 5 minutes. Place on fresh paper towel to drain and cool enough to cut into bite size pieces.
Place dulse seaweed in bottom of a deep soup bowl. Ladle the hot broth with mushrooms over the seaweed. Add the cooked soba noodles, cubed tofu, bean sprouts, cilantro and basil. Drizzle the soup with the chili puree and serve immediately. Season with more smoked sea salt, and pepper if desired.
November 30th, 2010
| 3 Comments »
The last gasp, Day 30 of NaBloPoMo 2010. Like I said a week or so ago, it was a lot easier than I expected, what with going back and recycling previous posts and recipes. I like bringing back some old favorites, plenty of which none of you have seen before unless you’ve been hanging around here for almost 5 years.
I am looking forward to a few days off, but right around the corner is the Iron Foodie contest entry that I will be preparing, and another big blog milestone is coming up on the heels of that, one I am looking forward to sharing with everyone. I’m kind of excited about it; maybe it won’t be that huge to some, but to me, it’s BIG.
And with that, I leave the 2010 version of National Blog Posting Month with this delicious recipe for Arroz Amarillo, or Yellow Rice, a delicious side dish that goes with just about anything.
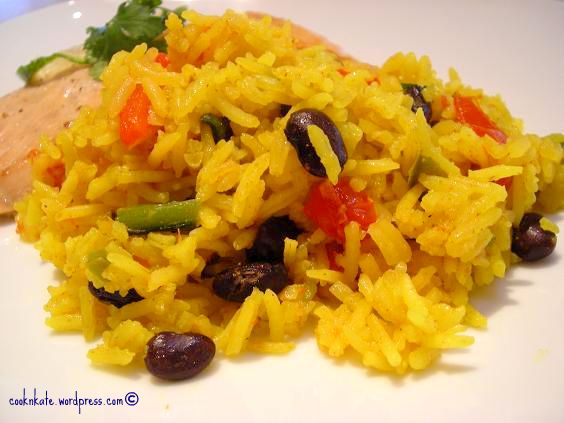
Yeah, yeah. Photo… not so great. Recipe? Awesome!!! Color? Gorgeous! Taste? Spectacular.
Arroz Amarillo or Yellow Rice
original recipe- A Cooks Tour of Mexico by Nancy Zaslavsky
This is Kate’s version:
2 T. vegetable oil
1 c. white rice, rinsed and shaken dry
One medium onion, sliced
One Jalapeno pepper, seeded and sliced thin
One poblano pepper, seeded and cut in half
One red pepper, seeded and cut in half
2 cloves garlic, minced
One medium tomato coarsely chopped
Half of a 14-oz can of black beans, drained and rinsed
2 c. chicken stock
1 t. turmeric
2 t. ground cumin
Cilantro leaves
Place poblano and red peppers on foil covered cookie sheet and spray lightly with cooking spray. Broil until skins are charred, watching carefully. Place in bowl and cover with plastic wrap to sweat. Remove skins when cooled and coarsely chop.
Heat oil in deep skillet; add in onion and saute over medium heat until soft and slightly browned, about 5-8 minutes. Add in garlic and jalapeno and cook for about a minute, until fragrant. Remove vegetables from heat and add a tablespoon of oil to pan. Stir in rice and coat with oil. Cook, stirring continually until rice is nutty, browned and fragrant, about 8-10 minutes. Do not allow to scorch. Stir turmeric and cumin into hot stock until dissolved. Add vegetables back to pan, stir to combine, then add stock. Bring to a boil and reduce heat. Add tomatoes to pan, cover and allow to simmer until nearly all the liquid is absorbed. Stir in beans, roasted peppers and a handful of cilantro leaves. Cover and cook for about 5 more minutes. Serve with lime wedges and pimento stuffed green olives if desired.

Yay!! I finished!! 30 posts in 30 days!!
November 28th, 2010
| 8 Comments »
This is the best kind of morning. It’s so quiet as I’m the only one awake. We decided last night to attend the late church service this morning, so instead of rolling everyone out of bed to get out of the house by 8:30, we’re not needing to be coherent until a few hours later. And when the cats started their pre-dawn routine of scratching at the bed to get someone up, I arose to greet the sunrise with them, affording my hard-working spouse yet another day of extended sleep. Five days a week he rises before the sun to delve into his work, to think and sip his coffee and deal with these cats that somehow think going outside on these dark, cold mornings is a really good idea. And apparently, it is for like 2 minutes, then they race back in for the nearest blanket and cozy fleece bed. The little turds.
But today is my day. And I’ve found an amazing sense of calm in these quiet hours. I can write, and think and plot and dream. I can surf, lurk and sip dark, rich coffee. I can hear myself think and often find some wonders brewing in my own head.
And I can nibble on these incredible Sweet Potato biscuits.
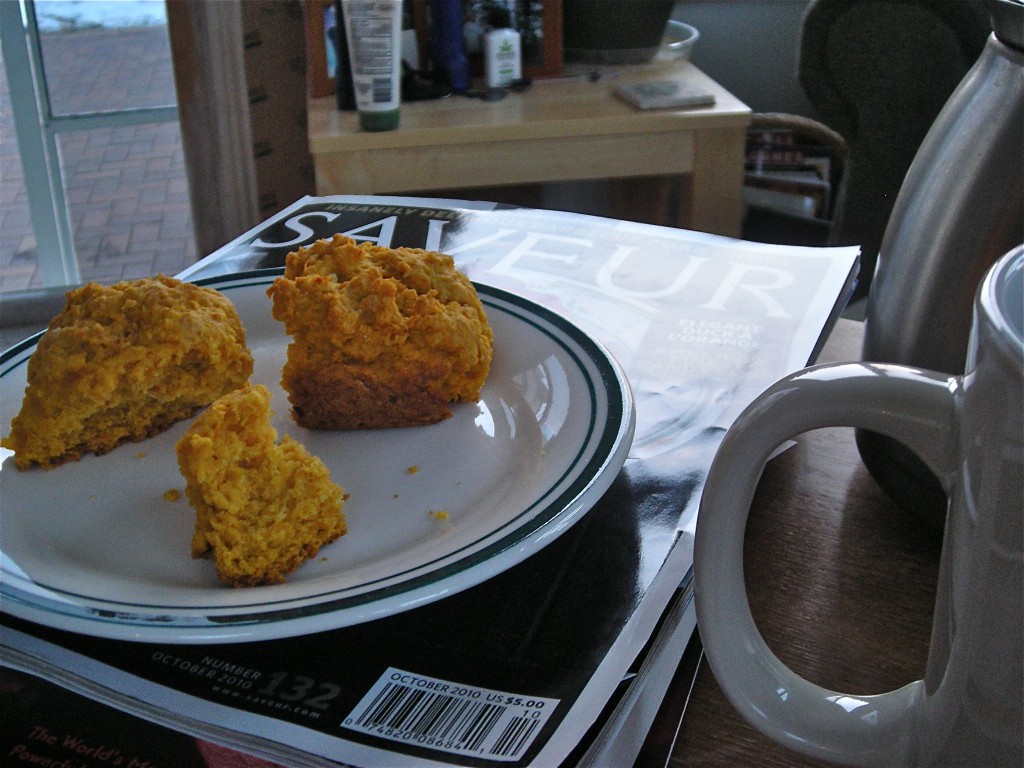
This is my morning; it’s me, the coffee pot, my big mug and a stack of inspiration. It’s the sunrise outside the windows, a fleece blanket on my lap and sometimes a cat. It’s peaceful. It’s contemplative. The birds flit around the feeders outside, gathering in the hawthorn tree while I watch and observe. The cardinal flashes his bright red feathers against the white of the snow. The bluejay squawks. The goldfinch chatter. The crows call from the rooftops and the sun turns the sky from winter’s deep blue to hints of azure and bronze. The sunrises lately have been lovely, even when so fleeting. I’m happy to be sitting here to appreciate them.
It’s my morning time. It’s perfect. And these biscuits? Well, you would do yourself a favor to have a pan of them at any meal, and then steal away one quiet morning with a mug of dark coffee and a few of them on a plate to fill your belly. The lovely hue of orange is one of their many appealing features, but the fluffy, moist and tender crumb that spills out when you crack one open is the best part about them. With a cat, or not; with a sunrise or a bowl of steaming soup, served with any meal they will compliment it highly. They will inspire. Like the sunrise and a quiet morning.
Sweet Potato Biscuits
from The Kitchen Sink Recipes (and from Bon Appetit)
Yield: 12 to 15 biscuits
One 3/4-pound red-skinned sweet potato (yam), peeled, cut into 1/2-inch cubes
1 3/4 cups all purpose flour
1 tablespoon (packed) dark brown sugar
2 1/2 teaspoons baking powder
1 teaspoon salt
1/2 teaspoon baking soda
Pinch of cayenne pepper
8 tablespoons (1 stick) chilled unsalted butter, cut into 1/2-inch cubes, plus 2 tablespoons butter, melted
1/3 cup chilled buttermilk
Cook sweet potato in medium saucepan of boiling salted water until tender, 8 to 10 minutes. Drain, cool, and mash.
Position rack in lower third of oven; preheat to 425°F. Butter bottom and sides of 8- or 9-inch cast iron skillet (or 8- or 9-inch cake pan).
Whisk flour and next 5 ingredients in large bowl. Add cubed butter to flour mixture; toss to coat and rub in with fingertips until mixture resembles coarse meal. Whisk 3/4 cup mashed sweet potatoes and buttermilk in medium bowl. Add to flour mixture; toss with fork. Gather mixture in bowl, kneading until dough comes together. Turn dough out onto floured work surface and pat into 1-inch-thick round. Using 2-inch round biscuit cutter, cut out biscuits, flouring cutter after each cut. Gather scraps; pat into 1-inch-thick round. Cut out additional biscuits, until the dough has been used.
Arrange biscuits side by side in prepared skillet or pan. Brush with melted butter. Bake until puffed and golden on top and tester inserted into center biscuit comes out clean, about 22 minutes. Cool 10 minutes in pan. Turn biscuits out and gently pull them apart.

Just a few days left of National Blog Posting Month!!!
November 23rd, 2010
| 2 Comments »
Thanksgiving is just a few days away. Like you need to be reminded of that? We’ll be experiencing a pre-Thanksgiving snowstorm this year but I’m thinking it won’t hamper any of our plans. My family is all local, and hardy winter souls with dependable cars and a lifetime of snow experience. Plus it’s a homemade meal. They don’t miss that for anything.
My menu is planned and it’s always pretty simple. The family is not much for experimenting with rambunctious flair; they like their mashed potatoes, a good smoked turkey on the grill and plenty of gravy. We’ll drink wine, snack on cheese and crackers and enjoy each other’s company and really, that’s all that matters at all on a holiday, isn’t it?
Snacks are an important part of any gathering, and since I’m doing the cooking, someone else is bringing the pre-meal offerings. But if it’s me making something for nibbling, I like a bit of variety and spice.
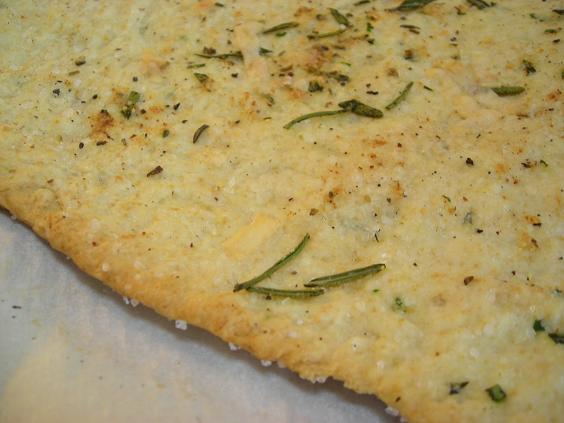
For something delicate and different, this Herb Flatbread from a long ago Gourmet magazine is a simple and delicious option. It’s good enough to eat alone, or topped with a thin slice of sharp cheese. It’s a bit too delicate to spread much on, but nice to have in a cracker basket.
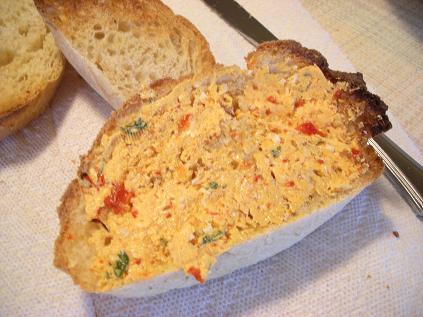
For something really different to spread on your dinner rolls, or a good hearty cracker, this Roasted Red Pepper butter is an awesome option. It’s rich, with the sharp tang of roasted peppers, and could even turn a pan of mashed potatoes into a unique delight.
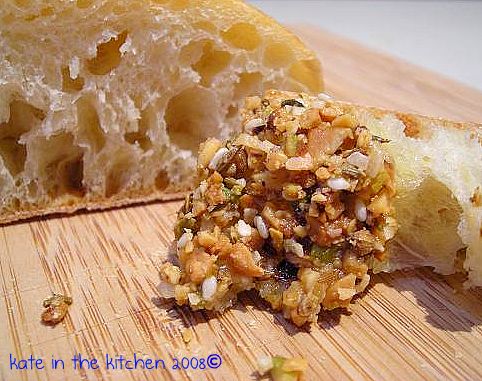
And if you want to really stretch your wings and offer something bold, spicy and off the beaten track, this fragrant nut and spice mix called Dukka is a wonderful option for an appetizer. A fragrant crush of nuts, cumin and coriander seeds and a little coconut, it makes for a good crunchy texture against soft bread that’s been dipped in olive oil.
The most important aspect of any holiday gathering, though, is to relax, enjoy the day and the company and don’t sweat out every detail. Here’s hoping your Thanksgiving is full of warm smiles, plenty of laughter and lots of delicious food.
Dukka- middle eastern spice mix
From July 2008 Food and Wine magazine
1/4 c. each raw pistachios, almonds, hazelnuts and cashews
1/4 c. coriander seeds
1/4 c. unsweetened coconut
1 1/2 T. cumin seeds
1/4 c. sesame seeds
In a 350 degree oven, roast the nuts until golden brown and fragrant, stirring occasionally, about 10-15 minutes. Empty into bowl to cool slightly. In a skillet over medium heat, toast coriander seeds until fragrant and browned, about 6-8 minutes. Remove from pan to bowl for cooling. Toast cumin and coconut until coconut is golden, 4-8 minutes. Cool with coriander. Toast sesame seeds until golden, 4-6 minutes. Cool separately.
In work bowl of food processor, combine nuts, coriander, cumin and coconut; pulse until coarsely chopped, or preferred consistency. Empty into large bowl and add sesame seeds, stirring to combine. Season with a little kosher salt and black pepper if desired. Keep in airtight container, either refrigerated or frozen.
Roasted Red Pepper Butter
1 c. room temp butter
7-oz jar roasted red pepper, drained and finely minced
2 t. milk
1 T. fresh chives, minced
1 T. fresh parsley, minced
1/4. c. fresh grated parmesan or asiago cheese
Salt and Pepper
Combine all ingredients in a small bowl and beat with a hand mixer until smooth and fluffy. Can be shaped into a log and chilled, or stored in a plastic container.
Hint: with the peppers, the finer you mince, the prettier and more spreadable the butter will be. I used a knife on mine but next time will use a food processor or chopper to get them even finer.
Herb Flatbread (from Gourmet magazine)
1 3/4 c. unbleached flour
1 t. baking powder
1/2 t. salt
1-2 T. fresh herb of choice
1/2 c. water
1/3 c. oil
Heat oven to 450 with a pizza stone on middle rack. Combine dry ingredients and herbs. Make well in center and pour in oil and water. Stir with spoon until a soft dough forms. Turn out onto parchment paper and knead about 5-6 times to bring dough together. Can be divided into 2-3 small balls and rolled flat, or rolled out as one large circle. Drizzle olive oil over top, sprinkle with sea salt and more herb and transfer, parchment and all to heated stone. Bake until browned in spots and fragrant- time will depend on how thin dough is rolled. Remove from oven and cool (don’t cool on stone- it will continue to bake). Slice with pizza cutter and enjoy.

November 20th, 2010
| 2 Comments »
It’s the weekend before Thanksgiving. I’ve done my shopping and planning and am ready to cook, and eat and enjoy. I love Thanksgiving, especially the turkey and stuffing. I always buy a huge bird to insure plenty of leftovers, and there’s always a soup in the days after, or a few morning of making crunchy little cakes from leftover stuffing, or a frittata maybe, with some cranberries and bits of turkey mixed in.
Looking for a nice treat to start your holiday off right? How about a Dried Cherry Poppyseed Scone?

If you’ve got house guests coming, these delicious dried cherry scones are a perfect offering for a simple, but elegant start to your day. Heck, even without house guests, you should find a reason to put these on your weekend menu. They’re light and fluffy, with chewy cherries and the crunch and snap of poppy seeds. No cherries? Use cranberries, or even raisins. A wintery morning, chilly and bright can be made much nicer with the humming oven and the warmth of a fresh scone. Next to a fragrant cup of coffee or tea, I can’t think of a nicer way to wake up.
Dried Cherry Poppyseed Scones
from Tyler Florence, Real Kitchen
2 c. AP flour
1 T. baking powder
1/2 t. salt
2 T. sugar
3 T. poppyseeds
5 T. butter, cold
1 c. milk or cream
1 c. dried cherries
Heat oven to 400 degrees. Place parchment on a cookie sheet. Place cherries in a heat proof bowl. Boil water to vigorous bubbles and pour just enough in the bowl to cover the cherries. Stir to combine and allow to sit, stirring occasionally until the water is tepid and the fruit soft. Drain the fruit, reserving the juice.
Sift together flour, baking powder, salt, sugar and poppyseeds. Using a pastry blender, cut in the butter until the mixture looks like coarse crumbs. You want to leave larger pieces of butter. Make a well in the center and add the milk, stir to just combine everything, making sure you scrape across the bottom of the bowl. Toss the drained fruit with just enough flour to coat them lightly, then add to the dough, stirring carefully until just incorporated.
Lightly flour your countertop and turn the dough out. With your hands, shape into a square, roughly about 10″x12″ or so. With a sharp knife, bench scraper or spatula, cut the square into four equal portions, then cut each portion in half, corner to corner, to form triangles. Carefully lift the triangles with a spatula onto your prepared sheet. Alternately, you can scoop the dough straight from the bowl to the cookie sheet. Bake for 15-18 minutes until lightly browned and fragrant. Allow to cool.
For a glaze, combine reserved juice with about 1 1/3 cups powdered sugar and a little melted butter. Drizzle over scones before serving.
November 19th, 2010
| 4 Comments »

(photo from “That’s Yummy”)
We’re woefully into November’s gray and flat winter light. The cloud cover expanse across the sky is leaden and heavy and daylight begins to fade around 4:00pm, yet even in the best of midday light, the ability to take a good photo often is a crapshoot. I don’t really mind the changes that come around this time of year, this first adventure into winter, the shorter days and descent into wool sweaters, layers, warm socks and extra blankets on the bed. The coziness of it is good, it’s necessary, and there’s a lot of it that can be so soothing- like the leaping blue flame under the daily tea-kettle, the ritual of a warm steaming cup to carry me through the late afternoon; there’s the presence of the strands of tiny twinkling lights we’ve used to adorn certain areas of our home- the stairwell for those dark, dark mornings, the top of the cupboard in the kitchen, and the fancy festooned bakers rack in the corner of our kitchen.

The tiny lights are nice in those early mornings before the dawn when Mike is awake; it provides enough light to get the coffee pot going and the cat dishes filled without having that eye-burning glare that we encounter when first out of bed. The stairwell lights guide him safely down in the darkness. We put these lights up many years ago at Christmas time, and they’ve proven to be so useful that we never removed them. In those gloomy November afternoons they add a warm touch to our home, along with the singing tea kettle, and those steaming cups. Add a candle or two and you can chase those dark hours away a lot easier.
A good warm oven and simmering pot on the stove does that too. I recently came across a recipe for Butternut Squash Pasta, in Gourmet magazine’s Best of 65 Years cookbook. It was a simple process of cooking cubed squash then tossing it with garlic and pasta, but I thought to take it one step further and create an awesome squash puree to mix in with pasta, creating a saucy topping that clung to every single bite.
Problem was, as delicious as it tasted, it looked just ghastly. Imagine, brightly colored orange squash mixed with cooked whole wheat pasta. Oh gads…. it was homely as all get out, but tasted glorious and superbly like comfort in my bowl. I do recommend it, even if I can’t show you the result. Roast your halved butternut squash until it’s good and soft. Scrape the flesh into a bowl, add a little broth or milk to help thin it, then mash it smooth. You can whiz it in the food processor too. The resulting puree should be thick, close to the texture of canned pumpkin, and can be used like canned pumpkin, which, after all, is squash right?
Having the use of pureed squash on hand made it a cinch to whip up a batch of muffins too, and after finding a recipe for Whole Wheat Muffins with Pumpkin and Quinoa on Fork, Knife and Spoon, I knew those had to somehow come out of my oven in the near future. With a little trip towards the healthy side of muffins, these little beauties came out bouncy soft, only the slightest bite of sweet and full of chewy nibs of quinoa blended with the sweet taste of roasted squash.
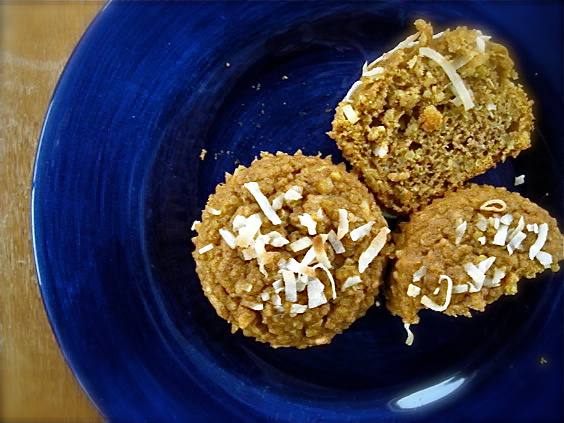
Touched inside and out with toasted coconut, they had a lot going for them. A bite for breakfast, a quick pick me up snack or a nice late night treat before climbing under piles of blankets, they fill in all parts of your day with a compliment for your tummy. Follow the link to Kate’s blog ( I know! Another Kate! ) for the original recipe. I doctored mine up to utilize what I had on hand for my version.
Whole Wheat Muffins with Quinoa and Squash
2 c. whole wheat flour
1-1/2 c. cooked quinoa
1/2 c. pure maple syrup
2 t. baking powder
1 t. baking soda
1 t. ground cinnamon
1/2 t. ground nutmeg
1/4 t. ground allspice
1/2 t. sea salt
1 c. cooked butternut squash
1 egg
3/4 c. buttermilk
3 T. oil
1 t. vanilla extract
1/2 c. shredded coconut, toasted
Preheat oven to 375 and spray muffin pans, or line with paper. You will get approximately 18 muffins.
To cook quinoa- measure one cup of water in a saucepan and place over medium burner. Rinse 1/2 cup of quinoa in a wire strainer under cold running water, shaking to rinse thoroughly. Place quinoa in saucepan and bring to a boil. Reduce heat, cover and simmer about 10-15 minutes until all the water is absorbed. Remove pan from heat and let stand for 10 minutes, then scrape cooked quinoa onto a plate and spread out to cool.
When cooled, measure flour and quinoa into a large bowl. With your hands, gently toss together until blended, and quinoa appears the size of tapioca pearls. Add in baking powder, soda, spices and salt and mix thoroughly.
In another bowl, measure buttermilk, then whisk in syrup, egg, squash, oil and vanilla. Whisk together, then add to dry ingredients with coconut. Using a rubber spatula, gently fold ingredients together until incorporated. Do not overmix. Scoop into muffin tins, about 2/3 full and bake for 15-18 minutes, or until tops are browned and spring back when touched. Allow to cool in muffin pans for 15 minutes or so, then turn out onto wire racks to cool completely.

And without even realizing it, I’m more than halfway through NaBloPoMo, or National Blog Posting Month. It’s proven to be way easier than I anticipated, but with 4-1/2 years of archives to wander through and re-introduce, I’m never at a loss for material.
November 18th, 2010
| 5 Comments »
There’s a lot of cowboy in me. Not the horse-ridin’ spur-wearin’ giddy-up-ing cowboy, but the kind that understands ‘Cowboy Cooking’ as a necessary culinary term.
Most people these days better understand the term ‘Iron Chef’ though, thanks to the ubiquitous presence of the Food Network. Cowboy cooking, or Iron Chef-ing is where you take a whole bunch of ingredients and come up with a dish that is nothing short of fantastic. It’s a skill that has served me well in my kitchen.
This roasted vegetable pasta dish was a stellar example of that. It’s from last winter and was a repeated entree in our kitchen for the remainder of the season. All you do is roast up a pan of your favorite vegetables until they are fragrant and soft, then process them in a food processor to a chunky sauce. Mix them with a hefty pasta shape, add some grated parmesan and grab your fork. It works equally well to just toss them with pasta as is after roasting.
The sauce is versatile enough to also be used as an appetizer, topping crostini or another sturdy base.
And uh yeah….. ew; this photo is NOT my favorite, yet it’s what I get trying to photograph food in Minnesota during the month of February. Ugh. Sorry.
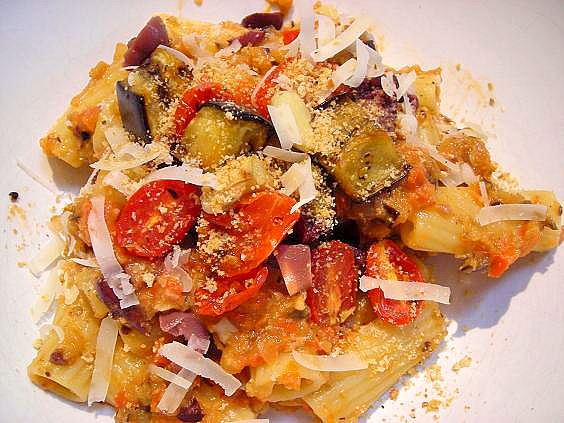
It really tastes FAR better than this looks. I promise! Yee haw!! Let’s get cookin’!
Roasted Vegetable Pasta
1 medium eggplant, cubed
1 medium yellow onion, cut into eighths
1 red pepper, seeded cored and cut into large chunks
1 pint grape tomatoes, halved
4-6 cloves garlic, rough chopped into large pieces
Olive oil
Salt and pepper
1 # rigatoni
Fresh parmesan cheese
Chopped kalamata olives
Place vegetables into a large bowl. Pour about 1/8 c. of olive oil over them, salt and pepper and maybe some dried seasoning of your choice. Toss to coat. Place on cookie sheets and roast in a 400-degree oven for 25-35 minutes, or until vegetables are soft and fragrant. Gently stir once during the cooking.
Cook pasta to al dente. Drain, reserving about 2 cups of pasta water and keep pasta warm. Place roasted vegetables in food processor and add a cup of reserved pasta water and 1/8 c. olive oil. Process until mixture is chunky, scrape down sides and process to desired consistency. If mix is too thick, add some more pasta water. You want it to be spreadable but not drippy, thick but not gloppy.
Toss vegetable mix with warm pasta. You may not need it all so scoop accordingly. Toss to coat pasta, add in kalamata olives (if desired) and parmesan cheese. Season with salt and pepper. Serve hot.
And remember when I recently talked about that yummy Panko Crumb topping? Hello, and giddyup …..it works perfect here.
November 17th, 2010
| 1 Comment »
Brownies are awesome, let me just get this out of the way. I can’t think of anything I like more than a good chewy brownie. Especially one from the edge of the pan where there might be a bit of dense crust that gets a little hard, more intensely chewy. Those are the best ones. And a corner piece? Rapture.
I’ve always loved brownies, and all forms of them too. I like them with chocolate chips and without. I like them with toffee bits in them, I like them swirled with cheesecake, studded with some nuts or topped with a thick layer of ganache. I like brownies. And they have a special place in my heart in regards to my child too, because I have the fondest memory of my boy at the tender age of five, with a very loose tooth on the bottom- his first to be exact- and he had taken a brownie that was a little harder than normal since it was a few days old. He was sitting at our tiny little kitchen table happily chewing away when he suddenly got this look on his face that was a combination of panic and elation.
“My tooth came out!” He exclaimed loudly. Then he opened his brownie filled mouth, reached in and withdrew his tooth, holding it out to me in the palm of his hand, thoroughly covered in chocolate. He was thrilled and smiled widely, while chocolate-y drool seeped over his lips. Then he did what any kid in his place does; out of sheer excitement, he opened his mouth to show me the empty gap. Yep. His mushed up brownie filled mouth. He was five. What else do you do but smile and praise him?
And then tell that story over and over again for the next 11 years. I couldn’t help it. What a memory!
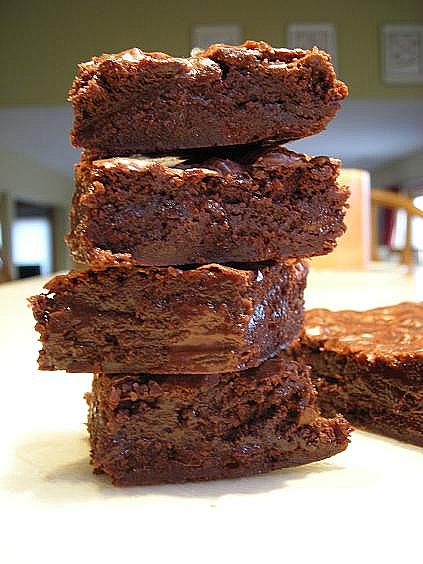
These Brownies likely won’t ever cause a tooth to come out; they’re fudgey, moist and perfectly dense with a delectable chocolate taste. What they are, also, is really low in fat. I like that in a brownie, and I like even more when you get a product that’s low in fat that doesn’t taste that way at all. These are a quintessential brownie experience, a blast of rich chocolate, a sure-fire solution to that sullen mood, crappy day or the loudly demanding desire for something deliciously chocolate.
Indulge at your own risk, and don’t say I didn’t warn you.
Dark Fudgy Brownies
from Eating Well magazine, Jan/Feb 2007
3/4 cup all-purpose flour
2/3 cup confectioners’ sugar
3 tablespoons unsweetened cocoa powder, American-style or Dutch-process
3 ounces dark or bittersweet chocolate (50-72% cacao), coarsely chopped, plus 2 1/2 ounces chopped into mini chip-size pieces, divided
1 1/2 tablespoons canola oil
1/4 cup granulated sugar
1 1/2 tablespoons light corn syrup blended with 3 tablespoons lukewarm water
2 teaspoons vanilla extract
1/8 teaspoon salt
1 large egg
1/3 cup chopped toasted walnuts, optional
Position rack in center of oven; preheat to 350°F. Line an 8-inch-square baking pan with foil, letting it overhang on two opposing sides. Coat with cooking spray.
Sift flour, confectioners’ sugar and cocoa together into a small bowl. Combine the 3 ounces coarsely chopped chocolate and oil in a heavy medium saucepan; place over the lowest heat, stirring, until just melted and smooth, being very careful the chocolate does not overheat. Remove from the heat and stir in granulated sugar, corn syrup mixture, vanilla and salt until the sugar dissolves. Vigorously stir in egg until smoothly incorporated. Gently stir in the dry ingredients. Fold in the walnuts (if using) and the remaining 2 1/2 ounces chopped chocolate just until well blended. It will be VERY thick. Turn out the batter into the pan, spreading evenly.
Bake the brownies until almost firm in the center and a toothpick inserted comes out with some moist batter clinging to it, 20 to 24 minutes. Let cool completely on a wire rack, about 2 1/2 hours.
Using the overhanging foil as handles, carefully lift the brownie slab from the pan. Peel the foil from the bottom; set the slab right-side up on a cutting board. Cut into desired size. Can be frozen. In fact, they are amazing from the freezer. Like killer good fudge.
NUTRITION INFORMATION: Per brownie: 86 calories; 3 g fat (1 g sat, 1 g mono); 11 mg cholesterol; 15 g carbohydrate; 2 g protein; 0 g fiber; 19 mg sodium; 25 mg potassium.
1 Carbohydrate Serving Exchanges: 1 other carbohydrate

|


