July 15th, 2009
| 6 Comments »
So you want to hear something that sounds a little weird to me? I like beets, and not only do I like beets, but I absolutely LOVE beet greens. I think I can officially be called a grown-up now. I think….
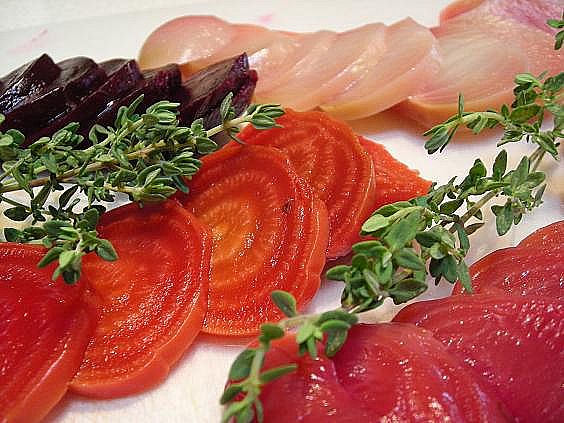
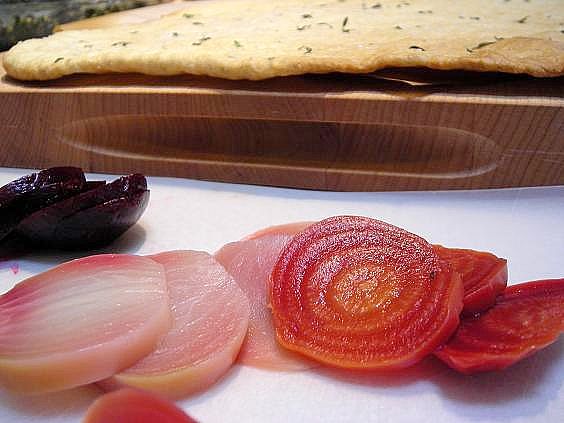
Anyway, why is this such a revelation? Due to the fact that just a few short years ago, I couldn’t be persuaded to even consider the beet, it stands to reason that for me to kindly elbow my way to the front of my favorite Farmers Market organic vendor and snatch the last bunch of his bi-colored beets off the table is little short of miraculous. What’s more miraculous is that he is but one of only a few vendors that I see at my local weekly stops that A) actually has beets other than red ones, B) has beets with stunningly gorgeous greens and C) has beets with the green still attached, period.
Why farmers hack off those nutrient rich leaves I’ll never know. Beet greens are nutritional powerhouses, chock full of Vitamins A, B-6 and C, antioxidants like beta carotene and lutein and they are full of fiber, zinc, calcium, magnesium, phosphorus, potassium and iron. There’s no saturated fat and no cholesterol in beet greens, and with a quick saute and a few seasonings, you get a delicious option for your plate. A cup of greens will set you back a measly 10 calories or so.
I recently experimented with Spinach Pesto, much to our delight (and Griffin’s chagrin) and so it wasn’t without much thought that I considered another go-round of Pesto with the slowly growing pile of beet greens that I was accumulating. A quick search for recipes or methods turned up little on actually making a Pesto with the greens, and not like it’s much to consider what with a food processor, some good olive oil, a little garlic and a few seasonings, that I would be well on my way to a glistening dish of green goodness without much of a recipe to follow. Pesto is pesto…. the method is still the same. I knew the greens couldn’t be used raw like spinach can, so I decided a quick sauté was in order.
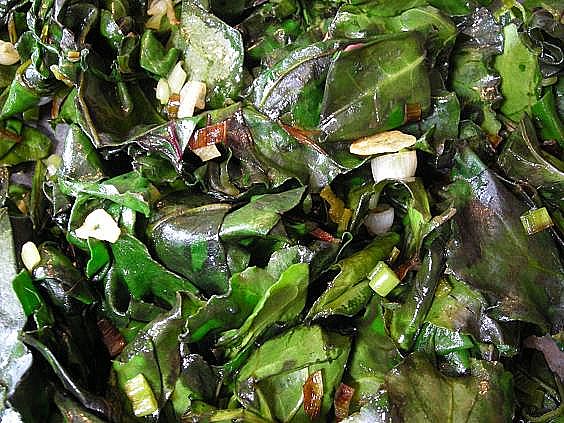
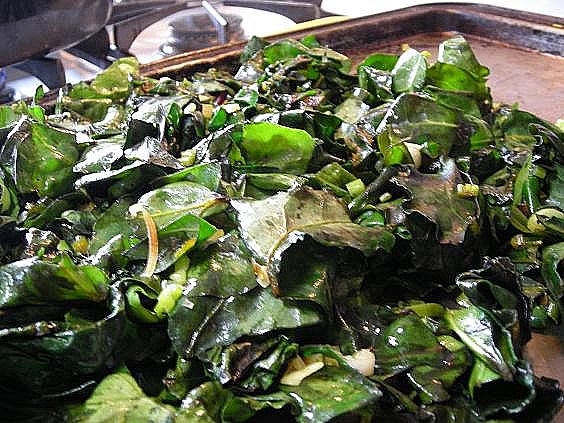
I decided to use caramelized leek and garlic as a good base for this pesto, something that would have a lot of flavor to stand up to the commanding taste of the beet green. After a slow saute to a deep golden brown, I dropped the beet greens into the same pan, stirring and tossing them with the hot leeks, and watched carefully to get them to a point of losing their crunchy texture, but not so far as to make them fully cooked. I left them dark green with some toothsome bite, then scraped them onto a baking sheet to cool. The whole thing was placed in the food processor, with olive oil, kosher salt and fresh ground pepper, then whizzed to the perfect consistency.
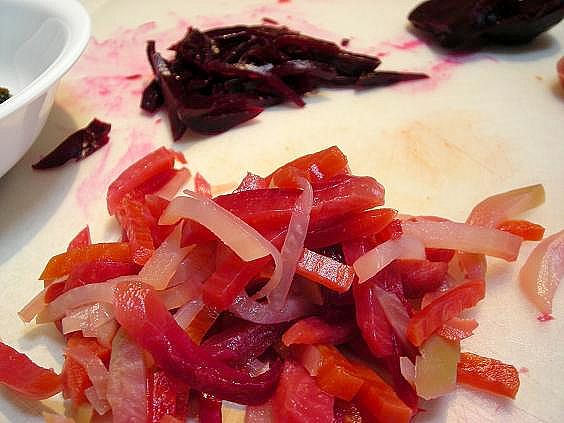
Wow. This is one amazing flavor, let me tell you. Perfect for pasta, as would be expected, but also good for spreading on my favorite herb flatbread and topping with an array of roasted and julienned beets, a drizzle of good herb vinaigrette and a sprinkle of nuts.
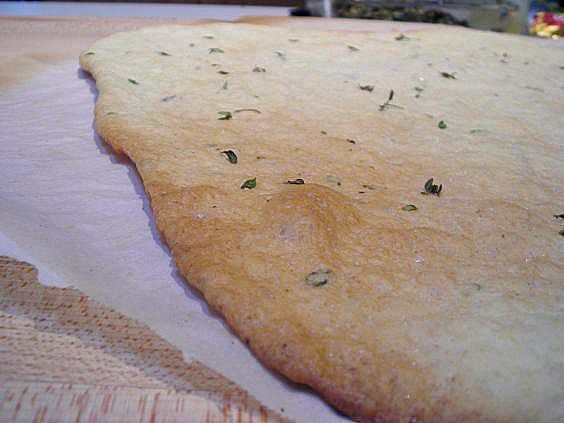  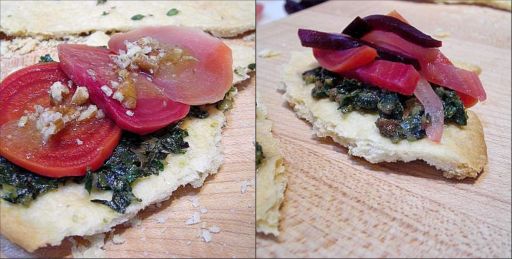 
Perfect Herb Flatbread
1- 3/4 c. AP flour
1 t. baking powder
1/2 t. salt
2-3 T. fresh herb of choice
1/2 c. water
1/3 c. good quality olive oil
Heat oven to 450° and place a round baking stone in oven.
Blend dry ingredients, including herbs together in a bowl. Slowly add water and oil and blend until a somewhat stiff dough forms. Turn out onto parchment paper and knead gently about 4 or 5 times to pull the dough together. Roll into a large 10-12″ circle with a rolling pin, sprinkle with sea salt and a drizzle of oil and place, with parchment, on heated stone. Bake for about 8-10 minutes or until browned in some spots. Remove from oven and cool. Do not leave on baking stone or it will continue to bake!
Dough can be divided into smaller portions and rolled out separately to smaller circles.
If you don’t have a baking stone, place the dough (on the parchment) right onto the rack of your oven. It may come out a little rippled.
I roasted these beets, wrapped in foil and in a 400° oven until they were nice and tender. The skins slip right off once cooled and they keep for several days in the fridge.
July 10th, 2009
| 4 Comments »
Anyone remember this?

Ok, so I’m not trying to compare myself with some crazy looking statue….one that’s squatting, for goodness sakes, but yesterday was a day to make me one utterly happy and excited home chef.
I got a brand new grill!

Our old grill hung around for nearly seven years, but should have been replaced at least two years ago. The shield over the burners was corroded and crumbling, it didn’t heat or cook evenly and the ignition was busted, requiring a torchiere to light it every time. The burners were not very well protected, and a strong wind would blow out the flames if you weren’t paying attention. I don’t have to tell you how dangerous a running propane tank can be now, do I?
This grill is the same that resides at our lake home. We loved it so much that as soon as we spotted it on sale this year we snatched one for home. It has a huge cooking area.
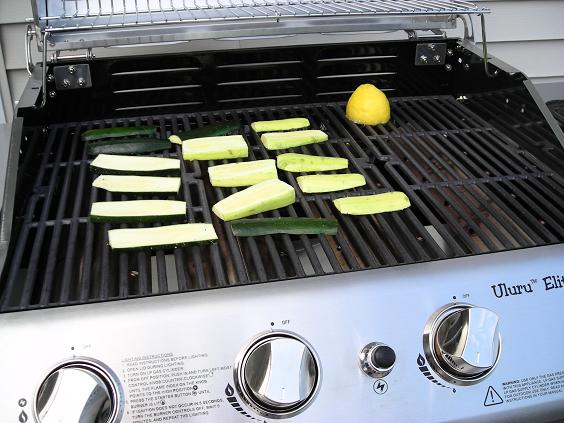
The four burners are highly conductive, providing even heat all around. The grates are super sturdy cast iron, and it provides terrific conditions for indirect cooking or smoking methods. It’s also fully protected, and despite strong breezes off the lake it has never been snuffed out by the wind.
There’s also a lip at the edge of the grates so that nothing can roll or slip off.
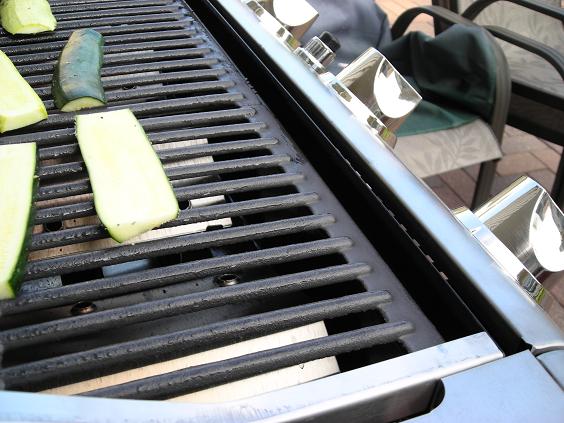
This is perfect if you, like we do, regularly grill hot dogs or bratwurst. Nothing like a little crunchy grit on the ol’ dogs, huh?
So, with a bounty of produce from the Farmer’s Market and a kid-free evening, I made this amazing Grilled Vegetable and Quinoa Salad for Mike and I. The summer night wasn’t all that warm, but the salad was perfect; light, flavorful and simple, not to mention just chock full of nutrition. Our tummies were so very happy!
It started with some perfectly roasted gold beets.

Some delightful grilled zucchini…
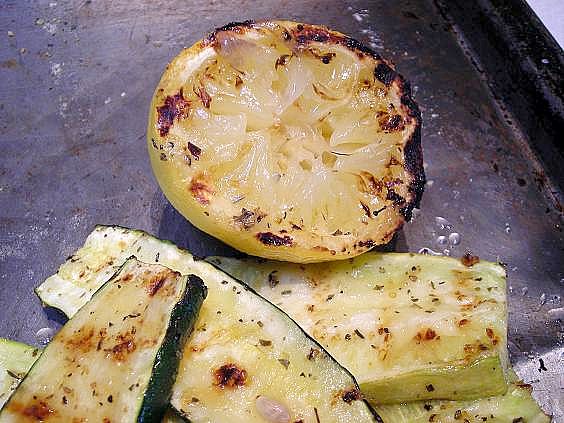 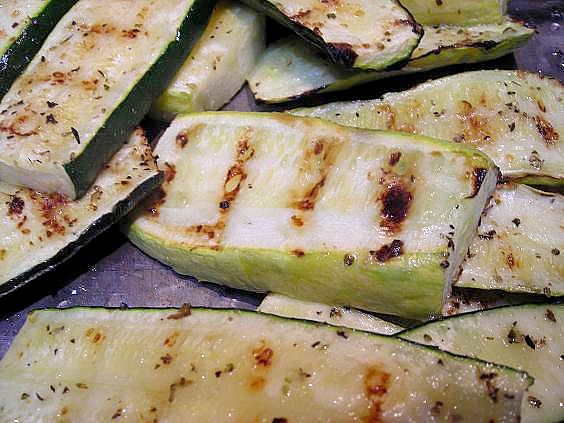
I added in roasted red pepper, cubed fresh mozzarella and half of an avocado.
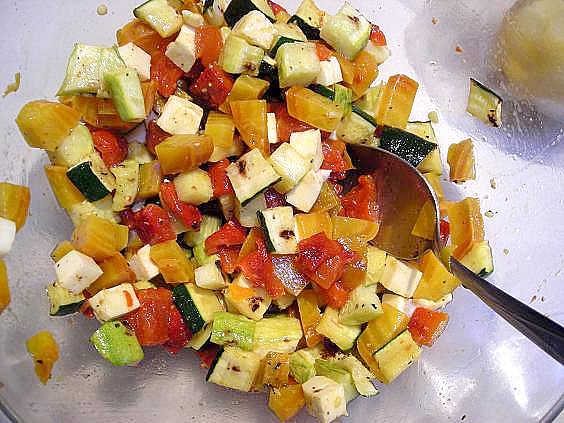
Drizzled it with lemon juice and some good olive oil, seasoning with fresh ground pepper and a bit of Penzeys Shallot salt.
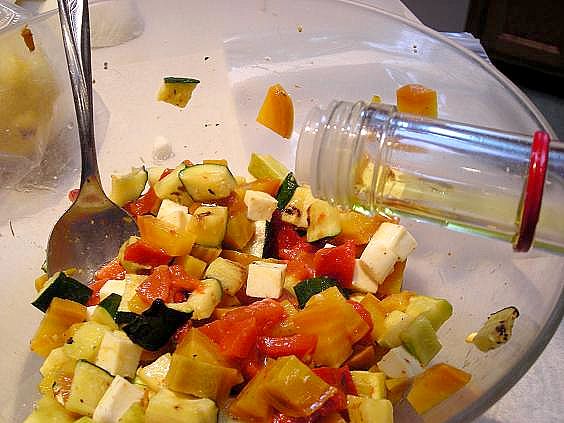
And served it with quinoa, topped with unsalted roasted almonds.
 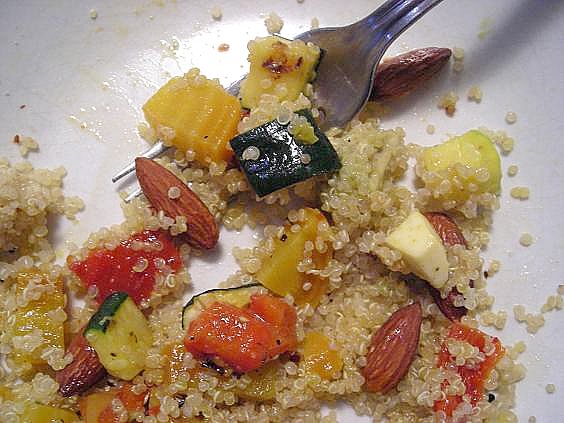
Variations are endless with this fresh and wonderful salad. I thought some chickpeas might make a nice touch. You could try a more southwestern touch with the seasonings, like cumin, chili powder or chipotle powder, use roasted poblanos or jalapenos, stir in some black beans and use lime juice instead of lemon. Eggplant would be a nice addition too, as it grills up some beautifully. If you like raw onion, use some minced red. Add some goat cheese or feta instead of the fresh mozzarella. Grilled tomato or sweet onions would also be delightful. Millet, wheatberries or possibly even barley would make a good substitute for the quinoa.
Regardless, it’s a terrific, light and easy summer option for the abundance of summer produce, and those warm and muggy nights.
July 8th, 2009
| 7 Comments »
If you had asked me a week ago if I liked potato salad, I probably would have done some type of combination eye roll with a detestable smirk to show you in no uncertain terms how much I really can’t be bothered with all that cold potato with mayo and god knows what else kind of food that is everywhere this time of year.
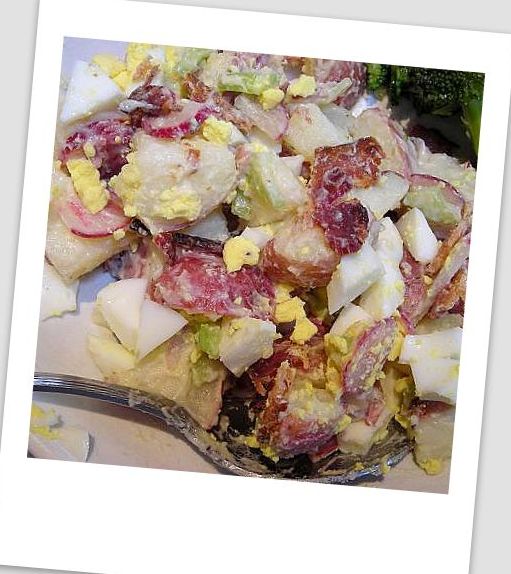
And oh, I would have been so wrong but really, give me a moment to get you up to speed on the saga of Potato Salad In My Life. I’m sure when I’m done you’ll understand the reason behind that particular face I was prone to making.
You see, Potato Salad was everywhere when I was a kid. Everywhere. My mom made it all the time -always the same way– for every picnic or family gathering we had, and in our extended family of grandparents, uncles, aunts and the 10 cousins, we gathered often. There was always potato salad. We always had a big hunk dumped on our plates and were expected to eat it. This was the 70’s. We were supposed to sup without question and usually when Mom was out of earshot, someone inevitably would make gagging noises and shove the mess aside, or maybe if it was a certain bespectacled scrawny little dark blonde girl, she would eat the hard-boiled eggs off her portion, maybe one piece of potato, but never a radish and then muck up the rest in an effort to look like she at least tried. Who me? Well, yeah, probably.
Potato salad. Just the words conjure up images of gloppy yellowed blobs of indistinguishable potato, maybe a piece of celery or egg, certainly nothing that anyone ever leaps on in ecstasy, eyes sparkling for joy kind of way. Yet if there is one thing that makes for the most impassioned arguments or a hotly tested debate it’s the humble potato salad. People are nothing if not vocal about how it MUST be done; vinegar based or mayo, mustard or not, eggs- some say yuck, to others it’s a must- and celery, of course. Wax spuds or russets? Colored or not? Boiled, baked, roasted, grilled…..just doing an Internet search for ‘potato salad’ not only gets you forty-trillion recipes, but several lengthy and impassioned debates, some with plenty of CAPS!!! to indicate their point.
Gah. It’s a potato. And a salad.
But back to Mom’s, the salad that wouldn’t die. And can my sibs help me out here? Did Mom actually like the potato salad or did she just make it because everyone expected her to bring it? I seem to recall a lot of grumbling when it was being made (oh wait… that might have been me) and not a lot of excitement.
Then comes last week, the day that a not so unusual dish of potato salad landed on the counter at a pool party I attended, whereas I scooped up a small amount and raised the first bite to my mouth, utterly without any expectation, delight or joy at all and it positively bowled me over in how it brought back such a rush of memory that I could almost hear my Mom’s laughter again. Me, who got so sick of potato salad that I just about cringe when I even hear the words; me, who to this day, despite loving cold cooked potato with a simple sprinkle of salt never ever wants them mixed with mayo, I had to quick email my sister and ask her to help me remember how to make Mom’s Potato Salad because suddenly I had to have some or I might have had a little meltdown.
Me and meltdowns…..so not pretty. I do what I can to avoid them at all costs.
And talk about recipe karma…..Kris named the simple ingredients that she remembered- potato, radish, celery, cooked egg, mayo and Durkee’s Famous Sauce. Season with salt and pepper, please. That was it, and it was all available in my kitchen. Before the day was out I was staring at a bowl of perfect cooked potato dressed in a simple mix, with colorful radish and ca-runchy celery. I took a bite.
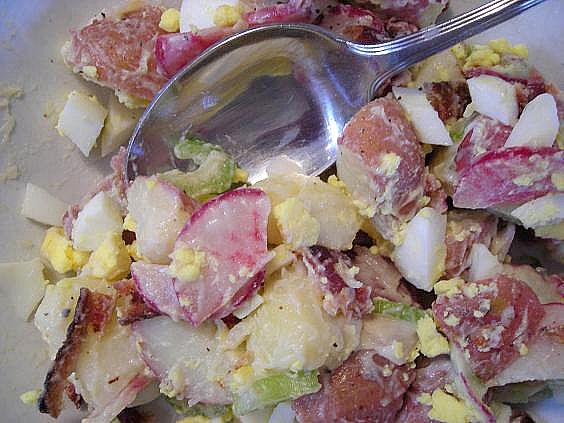
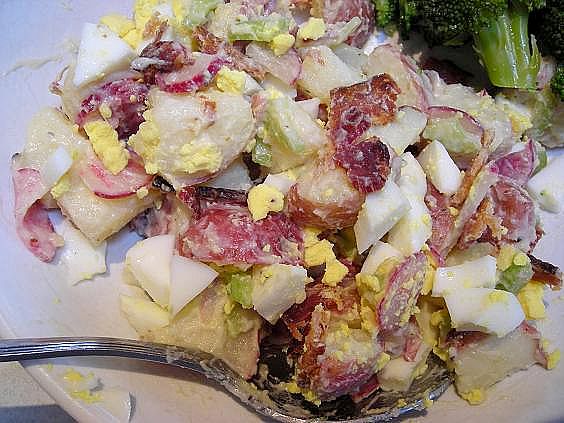
It was all I could do not to break down in tears right then. The wave of nostalgia that came over me was overwhelming; sweet and lovely but almost paralyzing in it’s sadness. I scorned this dish growing up, and crossed my blue eyes at my Mom so many times that I’m sure she never looked straight at me when she announced her intention to make this dish in order to NOT see me do that AGAIN, her precious #5 of 5, making faces at her. I mocked it, mushed it, stuck my tongue out at it and gagged at the very idea of it. Then I shunned it for decades, somehow convinced my life would be just fine, thank you very much, because I don’t want Potato Salad. I don’t like Potato Salad. Oh how very wrong I was. And how so very sorry I am that I was like that to her.
Now I’m sure that this won’t be my BFF for long. God knows I probably don’t have enough tears in me to continue making this all summer but it was so perfect and easy to pull from the fridge to serve alongside our BLT’S, or BLATZ as I likened to refer to the mile- high creation on my plate…. what’s that you ask? Why, it’s bacon, lettuce, avocado, tomato and grilled zucchini. Delicious in it’s own right, but amazing next to this potato salad.
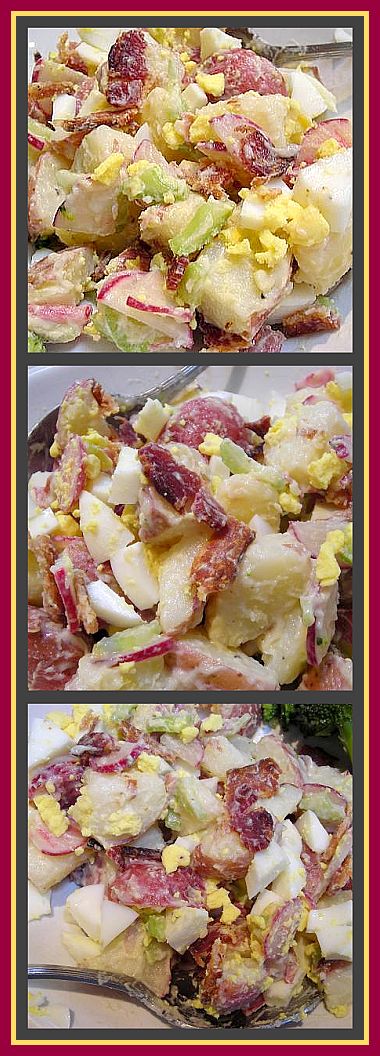
Kate’s Mom’s Potato Salad
(weights and amounts are approximate- you will know best how much to use)
2# potato of choice, scrubbed with skin on
1-2 stalks of celery, sliced fine (amount depends on your love of the ca-RONCH factor)
4-6 radishes, scrubbed and sliced thin (again with the ca-RONCH deal)
2-3 hard boiled eggs, sliced
1/2 c. real mayo
1/4 c. Durkee’s Famous Sauce
Salt and Pepper to taste
Boil potatoes until a fork slips in easily. Time will be dependent on size and type. Drain, reserving some of the potato water and sprinkle with sea salt while still hot. Toss slightly and sprinkle on more salt. Allow to cool and dice or slice to your liking. Leave the skins on.
Mix potato, celery and radish in a large bowl. Combine the mayo and Durkees and drizzle about 1/8 c. (or 3 T.) of the potato water into it, then whisk to emulsify. The starch in the potato water will help the dressing stick better. Pour half over the potato mix and stir gently to combine. Season with salt and pepper. Taste it. Add more dressing if you like it creamier, or more salt and pepper. Add the eggs and fold in gently. Serve at room temp or cover and chill thoroughly.
KATE’S NOTES:
Why yes, you do spot bacon in the photos above. While the original recipe does not call for bacon, I had some on hand and added a crumbled piece to see how it would be. What can’t be improved with bacon? Wait, don’t answer that!
The bacon was OK, but not perfect. And I am aghast to say it, but it’s true. The salad just doesn’t need it, and it isn’t Mom’s Potato Salad any other way.
June 26th, 2009
| 17 Comments »
Today marks the 3rd anniversary of this blog. Am I happy about it? That depends on the day, but usually yes. And sometimes, more often than not these days, I would say no.
I admit that I’ve toyed a lot lately – a lot!– with quitting this past time of mine. Part of me feels if I hit the ‘Delete’ button that there wouldn’t be many people who would notice. You see, the thing is, everyone is writing a blog these days; it’s the thing to do- it’s cool, trendy etc etc. And the sheer number of food blogs out there is astonishing beyond imagination. It seems like anyone who’s ever been told ‘Hey, this is GOOD!’ has decided to write a food blog. Some of them are amazing, and they humble me greatly. Others? Feh. A can of soup poured over a microwaved potato somehow doesn’t strike me as being fodder for a blog, but hey, who am I to ask what other people want? After three years it has become apparent to me that I still haven’t got a clue, and that maybe I never will. This has become OK with me, in a hard-fought and harsh sort of way.

I’ve had some recent face-palm moments of anxiety though, there’s been ranting and grousing; Facebook conversations with treasured blog buddies and true friends have been able to talk me me down off the ledge which is why I am here to write this anniversary post. These moments of extreme instability have thankfully had a purpose. I have at least come to understand the most important reason why I continue to do this even when it often makes me crazy; I would rather have half a dozen genuine and honest comments about what I post that come right from a readers heart lush with praise than a hundred fickle and shallow ones that only say ‘Yum!’. Because it’s important for me to touch someone through this giant web we live in, to touch a part of them that matters. Our lives are too informal and detached. We type messages to one another instead of speaking face to face, fall into television shows and disappear, plug in our earbuds and tune out the rest of the world. If this is how life has turned, I can jump aboard with the rest and I certainly have. You all know, if you’ve been here long enough, how much I love Facebook and how it keeps me connected with so many, over thousands of miles, the past and the present colliding all in one crazy spot, and this blog is yet another way that I can reach out across the spaces in between and give everyone a part of who I am. That is what’s important to me. I want it to feel like coming home to an old and trusted friend. My reward is in your words, and I want you to know I appreciate them immensely.

The rest of it is certainly still evolving and no one is more surprised than I am about how this blog has pushed me to stretch and re-define my food tastes and more thoroughly examine both what I do and how I eat, and in keeping with the way I choose to nourish myself and my family, the food will remain real and honest. My hope each time I post a recipe is that you find something in it that lights a spark. That you read the recipe and say not only “I can do that!” but “I WANT to do that!” Because I don’t find it at all coincidental that as we strive towards that always elusive brass ring, surrounding ourselves with technology and silencing the voices of those around us in favor of an array of electronics, that the urge and need to feed our stomachs AND our souls grows ever louder and more persistent. We congregate where there is nourishment for every aspect of our lives and our hunger isn’t always for food; it’s for something to touch us, to touch our lives and give us a reason to smile, a means for being connected – really connected and not just with a power cord- and I hope that you’ll find a small part of that here.
This blog- this three years in the making blog of mine, it’s not about mass appeal and I hope someone smacks me a good one if I even think to post an ad on it. It isn’t about my stats, or readership. I don’t feel I need to roam the USA going to blog conferences and schmoozing (I hate schmoozing for schmooze sake….I just like to hang out and talk to people). I’m not big on posting recipes that have worn out a welcome, I don’t jump on food trends, I’m not a locavore and I dislike labels. I love to cook and I’m really darn good at it. That’s all I want to share.

And I did promise you something food related as you put up with me in my last post going on about learning life lessons in the garden and talking about my darling shaved cat, so I won’t disappoint but this is something pretty simple. Almost too simple. That’s what makes it so good though.
It’s a wrap.
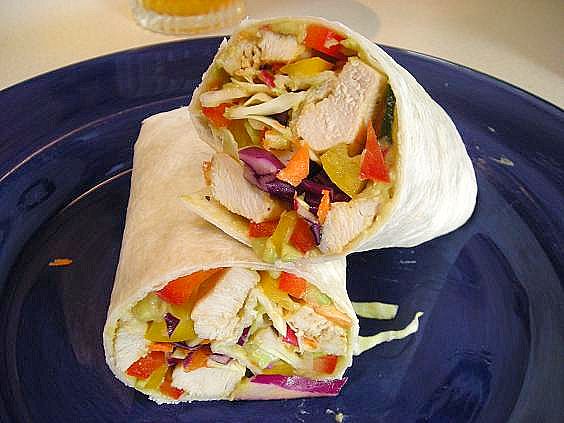 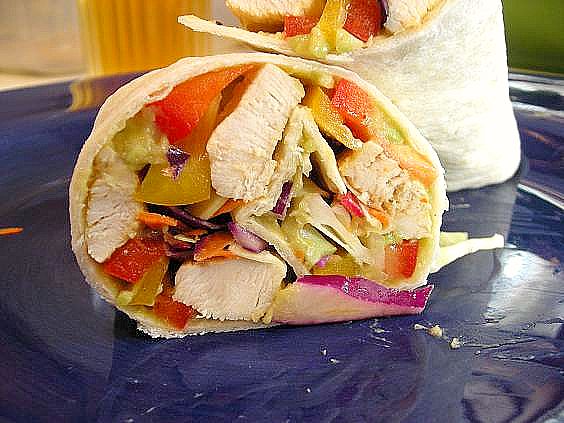
Nothing superbly special, right?
But I’ll tell you, start with this creamy Avocado White Bean Spread and any wrap you make will be just a titch better. Grill some chicken, beef strips or shrimp, get some good crab meat or top quality tuna and add whatever vegetables you prefer. Grate some good cheese into it. Wrap it in a nice flavorful tortilla and pour some ice tea. The weather has been HOT here, and this cool and quick dinner was just the ticket. We were picking at the crumbs and sighing in contentment at each other. A few fresh cherries rounded out a perfect summer meal.
Creamy Avocado and White Bean Spread
From Eating Well magazine (and adapted slightly by Kate)
1 15-oz can Great Northern beans, drained and rinsed
1 ripe avocado
1/2 c. grape tomatoes (my addition)
1-2 T. finely minced red onion (or use some good onion powder like Penzeys)
Fresh ground black pepper and coarse salt to taste
In the bowl of a food processor, combine all ingredients and process until slightly chunky. Scrape sides. Pulse once or twice more to fully combine and scrape into a clean bowl. Season to taste.
Spread about nice layer of this on a tortilla and top with your choice of fillings. Roll up tightly and enjoy. It’s also delicious as a chip and raw vegetable dip (but it does NOT photograph well! Sorry!)
Would you like something equally delicious and appealing with little fuss? How about a nice Mexican Rice?
Kate’s Mexican Rice
1 15-oz can diced or whole tomato
1 medium onion
1 jalapeno (seeded if you wish)
1 4-oz can green chilies
1 1/2 c. white rice
Fresh lime wedges and oil for cooking.
In the bowl of a food processor, place tomato, onion (cut into fourths) jalapeno and green chilies. Blend until mixture is finely chopped, almost to the point of being like a thin salsa. Pour into a measuring cup. It should be about 3-4 cups.
In a deep skillet over medium high flame, heat about 2 T. of cooking oil until very hot. Pour in the rice and stir to coat with oil. Turn heat down to medium and continue to cook, stirring regularly until the rice is turning browned and becoming very fragrant, about 5-8 minutes. The pan should be smoking hot by now. Carefully pour in the tomato mixture- careful of the steam!- and quickly stir to combine it with the toasted rice. Allow to come to a simmer and then cover, reduce heat and cook until liquid is absorbed. Turn off heat and allow pan to stand, covered, for about 10-15 minutes. Fluff with a fork and serve, squirting some fresh lime juice over the top.
NOTES FOR THE RICE:
You can stir in another chopped jalapeno before serving the cooked rice. It adds another level of heat to the dish. Other good additions are canned black beans (rinsed), frozen corn, sauteed zucchini or roasted peppers. Or all of it. For varied flavors, try using fire roasted tomatoes. If you wish to use fresh tomato, the equivalent would be about three medium sized ones and it’s a good idea if you peel them before using. This is excellent as a rice to use with burritos and tastes fabulous topped with cold chunks of avocado.
June 15th, 2009
| 9 Comments »
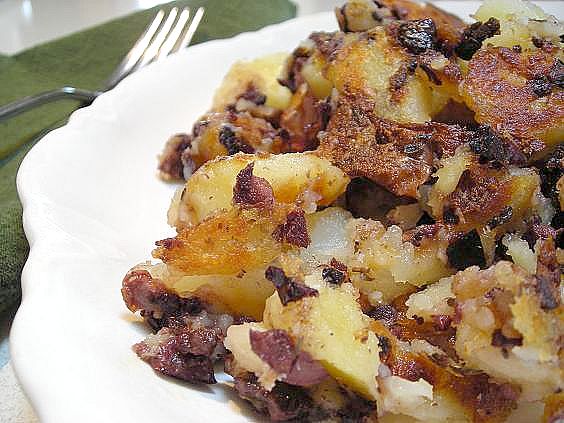
From my lips to yours, I never would have thought to put these two flavors together in all the world of combination’s; one so briny, the other so mellow- who would have thought that they’d be any good together?
Thankfully someone did, and they had the fortitude to put it in a cookbook for all of us to see. And for me to find. I love a good potato, especially charred in a hot pan, a nice crust on the outside. And tapenade? I have no reticence, and no restraint for all things constructed of chopped olives. I’ve been known to use a pastry brush to glean the remains from any given jar that crosses my doorway. I love the stuff that much.
The ironic thing was, several days before I happily discovered this recipe in the New York Times Dining Section, I was browsing through the cookbook ‘Seven Fires: Grilling the Argentine Way’, from where this recipe came, by Francis Mallman and Peter Kaminsky. I was enraptured, and getting hungry. I even saw this recipe and thought to myself, once again, about whether or not it was wise to purchase a cookbook based on one divine recipe in it, decided that yet again I couldn’t justify it, and placed it back on the shelf. Then my normal Wednesday browsing on the NYT site nearly made me shout out loud.
What was unexpected was that I had all the ingredients right in the pantry to make it .
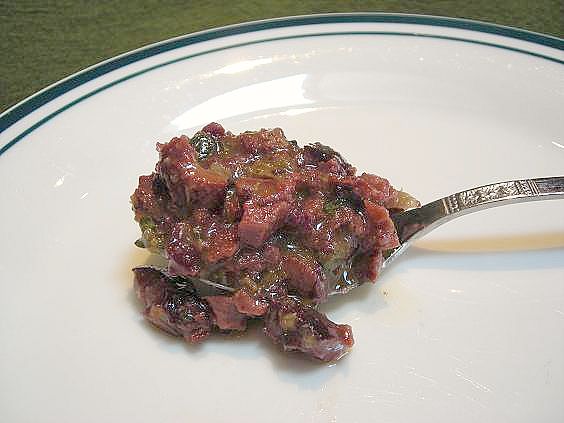
What wasn’t so expected? I waited, for more than a week, to actually do it. Had I known, or better yet believed fully that I would love this to the extent that I did, I would not have hesitated one instant to put it together, and I encourage you to do the same. For breakfast. For brunch. For a nice supper, a late night snack.
But hesitate I did, and the tapenade, thrown together in about 10 minutes, languished in the fridge in it’s oil and vinegar bath, most likely improving in flavor immensely prior to me unearthing it. And the finished product was so outstanding and perfect that I awoke the next day craving more.
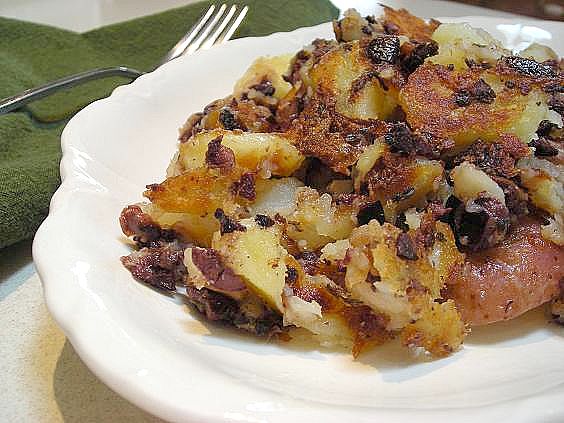
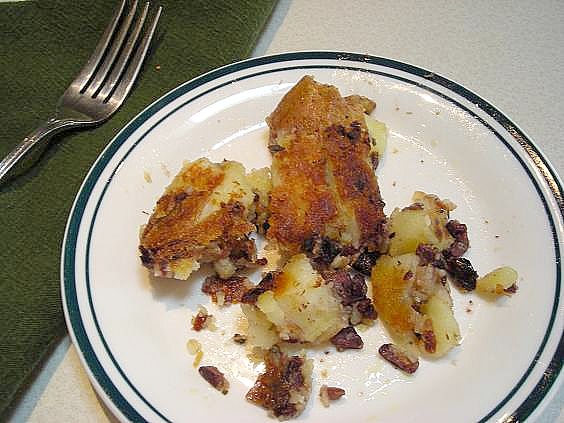
When I think of Smashed Potatoes, I think of a fluffy mash of skin-ons. This is more like Home Fries, Fried Potatoes or anything of the same sort, and the crusty-ness of the potato chunks is one of the biggest pulls of this dish. The pairing of the briny and sharp tapenade with the mellow, mild potato seems unlikely; too much of one and not enough of the other, but the mix is divine, the flavors perfect in their execution.
Smashed Potatoes with Tapenade
Adapted from ‘Seven Fires: Grilling the Argentine Way’ by Francis Mallman and Peter Kaminsky (via the New York Times Dining Section, 5/20/09)
For the Tapenade:
1 c. kalamata olives, minced
2 T. capers, minced
1 t. grated lemon zest
1 T. fresh lemon juice
1 1/2 t. fresh thyme, chopped
1/2 c. extra virgin olive oil
Fresh ground black pepper
Mix everything in a bowl. I stirred in about a tablespoon of red wine vinegar and it sat in my fridge for at least a week.
For the Potatoes:
About 1-1/2 pounds of waxy small red or white potatoes,
2 T. red wine vinegar
1 bay leaf
6 black peppercorns
Salt
Wash potatoes. If not uniform in size, cut to size and boil, with all added seasonings, until tender. Drain and discard seasonings. Gently break the potatoes into smaller chunks. I did this on a paper towel.
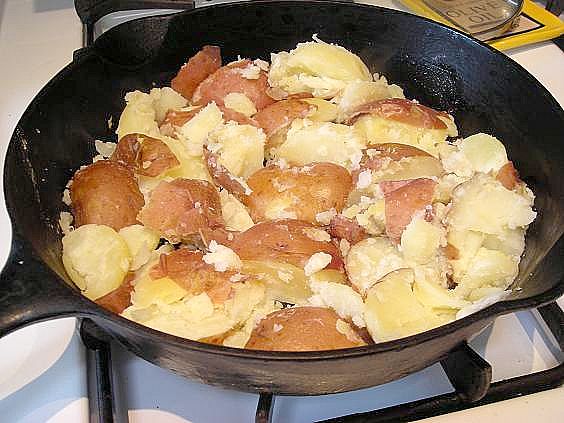
Heat a heavy seasoned skillet until very hot (a drop of water immediately sizzles and evaporates). Place potatoes in skillet and cook without stirring for about 10 minutes. Dot top with tapenade and gently turn potatoes over. Cook on other side for about 10 minutes more, or until crisp and browned. Serve immediately.
An excellent option:
Cook the potatoes and tapenade until hot and crispy. Push aside from the center of the pan, making a circle and drop two eggs onto the hot pan. Cook to desired soft or hard stage and serve with potatoes.
A warning:
Although these flavors are wonderful together, it could easily be overpowering by adding too much tapenade. The recipe given makes a nice amount, but I caution against using all of it with the potatoes, as the original recipe seems to suggest. Add in less than you might think, and taste when it’s hot. There should be a nice balance between the two flavor components. If you wish for a sharper taste, add more of the tapenade.
And a great suggestion:
Use some of the oil from the tapenade to flavor the potatoes as they cook. The recipe calls for a half cup olive oil for the tapenade and it seems like a lot until you realize how flavorful it gets, and how it can really amp up the end result of this dish. Use it, and love it.
June 10th, 2009
| 10 Comments »
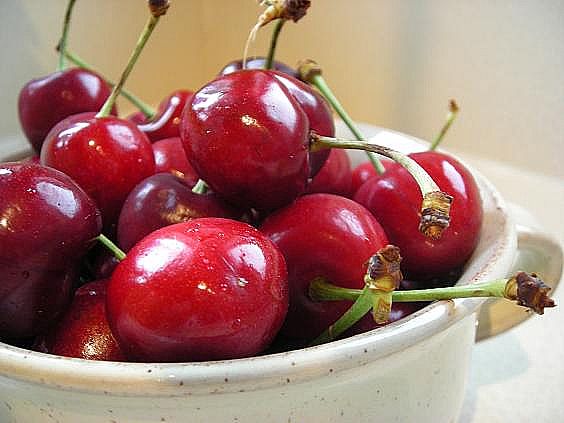
I almost thought to do this as a Wordless Wednesday post, but I simply can’t be quiet about fresh cherries and when I get passionate and excited about a food, my hyper-articulate and descriptive nature fully reveals itself and well, I just can’t stop. Either talking about them or eating them.
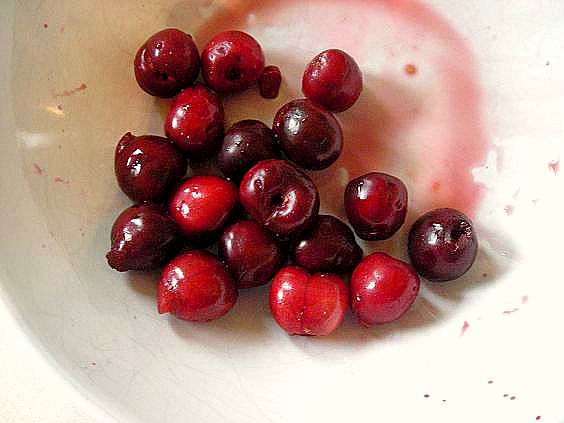
This time of year, I’m not even that picky about how much a bag of cherries will set me back. This is one fruit that I will splurge on when in season without even a blink of an eye. And it’s the easiest to consume too; just a wash under water, a bowl for the pits and stems and no white clothing. I’ve eaten them until I feel like one big round fat cherry myself, lips and fingertips stained purple. I rarely make anything with cherries; they just don’t last long enough for me to search for the perfect recipe, I have little patience for the mess and hassle of pitting them by hand and really, I struggle with feeling like I am wasting this precious summer treat by putting it in anything, making it into something other than what it is- a perfect, simple, nutritious and fabulous treat. You do a great deal of good for yourself to snack on fresh cherries- they are low in fat, cholesterol and sodium and contain high levels of antioxidants such as anthocyanins, quercetin and ellagic acid. They have high levels of vitamin C, fiber and anti-inflammatory properties. One cup has about 90 calories.
On or about the third bag of the dark and sweet red drupes that came into my kitchen, I started thinking about making something like cherry spoonfruit, or a cherry syrup to have on hand, then I began thinking about chocolate and cherries. Pretty soon, it was Chocolate Cherry Pancakes for dinner, with fresh and warm cherry syrup on the side.
 
It was like having dessert for dinner. The key to a good pancake– besides a good heft and height- is that they taste good all on their own. I’m no spartan when it comes to my cakes; they’ve got to be chock full of something good, something flavorful and tasty enough so that I can eat it all on it’s own. These certainly fit that need. Chunks of sweet cherries, a sprinkling of Guittard semi-sweets and a hot pan was all I needed. That and an appetite.
Cherry Syrup
by Kate
(weights are approximate; this was totally thrown together)
1-1/2# fresh pitted cherries
1 c. water
1/2 c. brown sugar
2 T. lemon juice
Cornstarch for thickening (the amount you use will vary with the juiciness of your fruit)
Combine all ingredients in a heavy pan and cook at a simmer until fruit breaks down and releases it’s juice. Mix about 2 T. of cornstarch with 1/4 c. cold water to make a pourable liquid. Slowly pour into hot fruit, whisking constantly until thickened to your liking. Cook, stirring occasionally for about 5 minutes more, or until liquid has darkened and becomes syrupy. Remove from heat and allow to cool.
This should keep in the fridge for a week or so, if it lasts that long. Enjoy on pancakes or waffles, ice cream, yogurt, cereal…..the possibilities are endless.
June 8th, 2009
| 4 Comments »
Maybe I was a rabbit in another life. Or maybe it’s just my normal summertime affliction, but greens have dominated my meals as of late.
What fuels this obsession, and it can certainly be called one, is the availability of the ‘live’ lettuce heads my grocer has started carrying. I found these last summer and the love affair was ignited like an inferno; a big bunch of varied lettuces are packaged with the root ball intact. They can be planted and grown at home, or like I do, simply chopped off at the root, washed and held in the fridge. The amount of lettuce one gets in these offerings is grand, the quality is terrific and the price is exceptional, a bargain if there ever was one. I’ve bought two at a time and happily dug into their depths for countless meals, relishing the ease, the taste and the light fare. The bonus is that it’s a locally grown product by Minnesota’s own Bushel Boy.
Still, I’m chomping at the bit to get into Market season, where farmers by the score sell buckets of fresh lettuces for insanely cheap prices. A dollar gets me a five-quart buckets worth of fresh lettuces, almost more than I can manage, but that never seems to stop me. Once June is ever-present and the weather beckons me to other options, ones that don’t include standing over a stove, having fresh greens in the fridge gives me endless options for meals. I’m satisfied to have a plate of leafy goodness that hides all sorts of other crunchy vegetable options, a grain and legume for protein with a simple squeeze of a fresh lime and a dash of balsamic, and maybe a piece of chicken for Griffin to help his carnivorous cravings. With these offerings, and a few decent salad dressings, my young man surprised us all recently, including himself, when he ate a grilled chicken salad with amazing gusto and exclaimed “That was the best salad I’ve ever had. And I never expected to use the words ‘best’ and ‘salad’ together ever!!”
Well, neither did we, and it was an awfully nice thing to hear.
So it was with great anticipation that I awaited the start of one of my favorite local satellite Farmers Markets and drove towards it with excitement. Imagine my disappointment when the normally over-crowded parking lot where it is held instead was home to just about half a dozen vendors, with only one selling any type of green stuff. I felt like a slowly deflating balloon, but shouldered on, purchasing a sackful of organic spring greens, spinach and radishes. At least it was a good start, and while I was heading back home with my goodies, the sack of spinach, crammed full of dark green curly leaves, gave me the idea of making Spinach Pesto and then dinner was born.
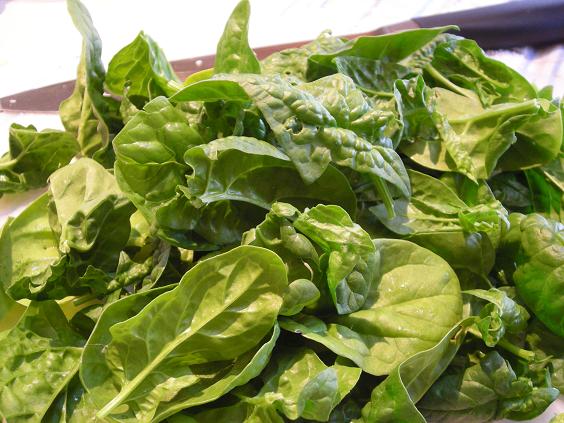
Pesto is a favorite around here, well- of the adults anyway. A few summers in the past, I had a garden bounty of basil that I turned into approximately 20 cups of pesto that I coveted in the freezer for months to come. I’ve been slow to experiment with other forms of pureed greens, but no more; this spinach pesto, combined with some remaining roasted red peppers that I found in the fridge, was so light, delicious and flavorful that now the craving for pesto, in any form, can be squelched with nary an effort outside of cleaning a bounty of my favorite leafy green.
 
And it turned a plain box of pasta into a superb weeknight meal.
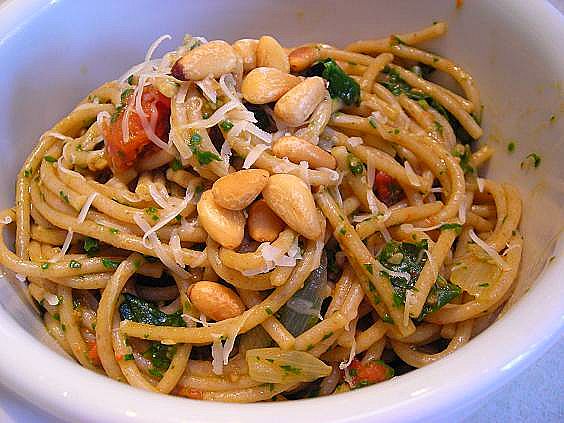
Spinach Pesto
by Kate
4 c. washed spinach leaves, stemmed
1/3 c. olive oil
3 T. toasted pine nuts
1 clove fresh garlic, chopped
Place all ingredients in a food processor and process until smooth, scraping down sides as needed. This pesto can be frozen for quite some time with only minimal loss of flavor. Do not add cheese to pesto if planning to freeze, otherwise, add to taste your preferred hard cheese.
For the Pasta-
Heat water to cook pasta.
I diced two ripe tomatoes and sliced a medium shallot. Sautè the shallot in olive oil, in a deep sided pan, until soft and starting to turn slightly golden. Reduce heat and add tomato, cooking over low heat until it begins to break down only slightly. Stir minimally.
When the pasta is ready, lift all the pasta with tongs straight from the cooking water and into the saute pan. Stir to coat with the tomato mixture, then spoon in about a half cup of the prepared pesto. Using a little of the pasta water, thin the pesto slightly and toss to coat. Add more pesto if so desired. Top with grated cheese and toasted pine nuts and season to taste.
I stirred about a cup of chopped spinach leaves into this as well for a little more color and texture.
Simple Tip of the Day:
When you use spaghetti for a pasta dish, do you break apart the strands before placing them in the boiling water? Does tiny shards of broken spaghetti fly all over the kitchen?
Try this instead:

Leave the pasta in the box and bend the box over the edge of your counter. All the broken pieces stay in the box, eliminating the annoyance of finding them scattered around your kitchen for days to come. Also, if you salt your pasta water, pour the salt directly into the box with the pasta while you wait for the water to boil. That way, you’ll never forget to add it.
Pesto Magic!
Pesto is so endlessly versatile. Have you ever stirred pesto into burger meat? It’s one of my favorite ways to use it. The oil helps to keep the meat moist and it gives the finished product huge flavor. Griffin won’t eat pesto on pasta, but when I turn the remains into a grilled and fragrant burger, he spares no restraint in consuming it without question.
Pesto is also wonderful in a grilled cheese. We didn’t get around to utilizing this method with the spinach pesto this time, even with wonderful Jalapeno Cheddar bread available as a base, but in the foreseeable future, I’m pretty certain this will be dinner.
Spread some pesto on slices of french bread, a pocketed ciabatta or crusty semolina sesame and sprinkle a little grated hard cheese over the top. Try something different than parmesan or asiago- maybe manchego?- and then place the slices under the broiler for a few quick minutes. Watch carefully! This is an excellent appetizer. Thick slices of fresh tomato can also be spread with pesto and cheese and broiled to a sizzling snack.
Roasted vegetables get a nice enhancement from being served with pesto, especially potatoes.
Pesto salad dressing is wonderful. A tablespoon or two can be added to your standard oil/vinegar mix, or thinned slightly and simply tossed with your greens.
June 4th, 2009
| 3 Comments »
Let me tell you about my nephew Matt, or as he likes to refer to himself ‘my second son’.

Matt is nine, with light red hair and an adorable grin that’s going through its ‘Jack-O-Lantern’ phase, losing his baby teeth and replacing them with Chiklet chompers. He has a personality that just lights up a room. Last summer, he spent so much time at my house hanging out with Griffin, sleeping over and basically insinuating himself into our lives that it stopped surprising me to find him sprawled on the sofa with my own child, coming out of the bathroom in the early morning hours or pulling up a chair at mealtime. He became a permanent fixture, and when September rolled around, I missed him like crazy.
When Matt was about three, we were at our lake home for a perfect summer weekend and all the kids were outside playing Flashlight Tag as the sky darkened. On our screen porch, Matt’s mom Aimee pulled out a bundt cake, a stack of plates, forks and a big knife, and as she began cutting into the cake, the kids came racing inside to gather round the giant wooden picnic table that dominates the room. Matt climbed onto one of the benches, saw what his Mom was doing and loudly exclaimed “CAKE!?? What’s happening??”

See, he always associated cake with celebration, and this was just another typical summer weekend for our extended family. But the sight of that cake was enough to send him into shivers, with the wonder of his age bringing forth a now most cherished family quote. Rarely does a real celebratory event pass where someone doesn’t exclaim “Cake! What’s happening!?” when dessert is being served.
I’m not one to make a lot of cake. Special occasions aside, cake is just too tempting in this house, and should there be a plate of delicious moist cake hiding out under the domed cake holder, it slowly gets whittled away through furtive slips of a knife, while telltale crumbs are disposed of as sweet tooth cravings are duly satisfied. My family has no willpower. And neither do I. It’s best that we just leave cake to those special occasions where it can be appreciated in a quick burst of sugar joy and then forgotten. I think it leads to a better cake appreciation factor.

On a whole other level, cakes that fall outside the ordinary of the flour, butter and sugar world have quite a different effect on me, hence the siren pull of this Nectarine Ginger Cake. With an unusual (at least for cake) recipe, lots of ripe fruit and a one-bowl and pan deal, this was a cake that I knew wouldn’t languish under the cake dome once we got our cake-ness fill, especially given the fact that the recipe mentions this being a perfect breakfast, snack AND dessert option. Cake with multiple personalities should be on everyone’s To-Do list.
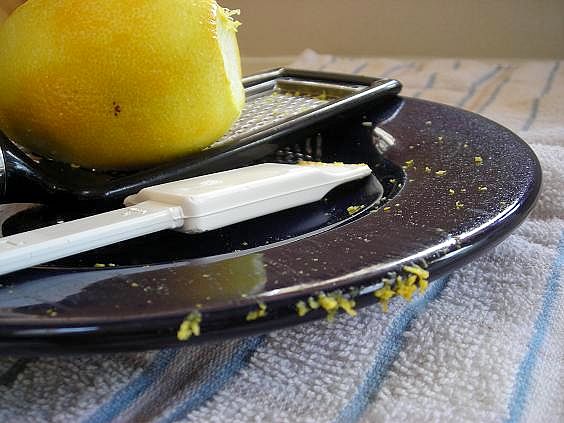
Who am I to argue with lemon zest, olive oil, crystallized ginger- this is cake?- not to mention using one bowl, getting to cut into fragrant nectarines and all that finished off with an aroma of baking cake that rose from my oven like a treasure trove slowly displaying its riches. I’m so there. Even with a few fundamental flaws in the recipe (which are totally correctable and well worth a repeat- I’ll spare you the same issues) this cake was a hit.
 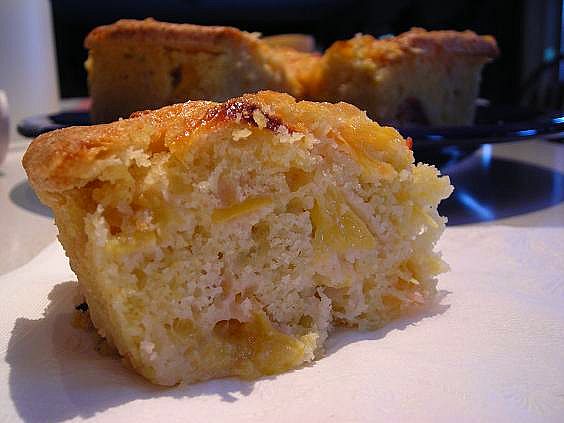
Now, admittedly, I’ve never made a cake with olive oil and whoa, tell me why I waited so long? That won’t be happening again. The subtle flavor of this moist and tender cake was only a part of it’s beauty; this cake sang like the Spring days outside my window. It was fresh and incredibly light with a nice browned crunchy top full of chewy nectarine slices and tiny dots of candied ginger. And about that breakfast option? I might just have to pour another cup of coffee and check that out. I mean, you need all the exquisite details, don’t you? I would be a bad blogger to leave them out.
So what did go wrong with this, as I hinted to? For one thing, again I didn’t trust my culinary instinct and when I read some things in the directions that just didn’t sound right, I went with them anyway and had some issues. The temperature called for was 375°, which to me seemed a bit hot for a cake. Most cake recipes I’ve used require 350°. The cake pan called for was way too small, and I knew it but didn’t scrape out the batter into a bigger one. At least I put the pan on a foil lined cookie sheet. First instinct ignored, and I fumed as I watched it bubble over. Secondly, it called for 5 large nectarines, four of them diced. Folks, that’s a lot of fruit, and this cake needed a 9″ pan. I used barely four and got a super fruit-filled result which is fine; the snack of the leftover fruit held off my cake-hunger, but if you’re making cake- that fluffy concoction of flour and sugar- it’s good to actually have something cake-like in the finished results.
Other than that, the recipe is indeed very simple. While it calls for ground ginger in the batter, I think that fresh grated would taste better. I detected little ginger taste in the end result. The lemon zest is amazing, people, and do yourself a favor; slip a few tablespoons of juice into the batter. Your taste buds will high-five you in joy.
Nectarine Ginger Cake
(with modifications already made)
Preheat oven to 350°. For your cake pan options, the original recipe called for a 9-inch round cake pan with a removable bottom. This is entirely too small so don’t do it, unless your pan is higher than normal. I started to use an angel food cake pan and decided against it. Then I kicked myself as the cake poured out while baking. A 9 x 13 would work well too, with a slightly shorter end result. Whatever pan you use, spray it and sprinkle a little sugar in to coat.
Cake:
2 eggs
1/3 c. milk
1/3 c. good quality olive oil
1 lemon, zested completely and half of it squeezed
2/3 c. sugar
1 T. fresh ginger, grated
1 1/2 c. AP or cake flour
2 t. baking powder
1/2 t. salt
4 large nectarines, three diced small and one for slicing
1/4 c. crystallized ginger, minced or sliced
In a large bowl, whisk eggs, milk and oil until emulsified. Add in all the lemon zest and juice and blend well. Stir in the sugar and fresh ginger. Seperately, blend flour, baking powder and salt then stir into wet ingredients until just barely incorporated. Fold in diced fruit gently.
Pour batter into prepared pan. Arrange nectarine slices on top and scatter crystallized ginger over that. Sprinkle with about two tablespoons of sugar, either white or something fancier. I think raw sugar would be awesome. I’ve been gifted with a divine pistachio sugar, and I’m almost inventing excuses to use it.
Bake until cake top is nicely golden brown and cake springs back when touched- about 45-60 minutes (See Notes). Be careful if you touch the cake top- the candied ginger gets really hot! The toothpick method will work as well. Allow to cool, or serve warm.
CAKE NOTES:
Depending on the freshness and juice level of your nectarines, this cake’s cooking time could vary. Be sure to check starting around the 45 minute mark. If the top is browning too much, place some foil over it.
May 26th, 2009
| 11 Comments »
I’ve always considered myself a pretty flexible, go with the flow kind of person, and nowhere is that more evident than in the food that I will eat. I’m no gourmet and I don’t require an exotic or complicated meal ever; I’m just as happy to chomp through a grilled brat as I would be to sit in front of half a dozen fancy courses at dinner. No one has to worry about cooking me something amazing if I am invited to dinner. Even though I prefer eating healthier options, I’m OK with eating a wide range of foods, and flexibility is key to happy indulgence and peaceful co-existence. I never want to be considered a diva about food.
At one point in my life I was dating a very nice guy and it seemed like it might be getting serious. Then one evening for a meal, I suggested that we have salmon.
“Oooh, I don’t really like salmon.” Was what he said, or something like that.
This statement gave me pause.
“You don’t like salmon?” I said, gazing at him quizzically, mentally tossing out all those ‘permanent’ thoughts I was starting to entertain. How could I be serious about a man who didn’t eat salmon?
“Why?”
“It’s just too dry and flavorless.” (or something like that. It’s possible I may have blocked out some of this conversation to save my sanity)
“Hmmm.” I was scratching my chin and trying to think of something witty. But I couldn’t.
“Well, would you try it if I make it?” And thankfully he agreed.
It was a delectable Maple Glazed Salmon that the guy actually liked. A lot.
And apparently he liked a whole lot more too.
  
You see, there was a lot at stake in the appreciation of that piece of fish.
 
I can’t say that it was just that piece of perfectly cooked salmon that set in motion three lives to be intertwined forever, nor was it the multitudes of perfectly cooked fish that have crossed our plates since then. I just know that slightly more than 8 years ago, I met a man who didn’t much care for fish and with one plate of plump pink salmon, the future seemed pretty rosy.
And we sealed it all with a kiss.

I’m sure you could be wondering…. did he fall in love with me, or with my cooking?
I’m certain it was me, because at that point in my life, while I was a pretty good cook, it paled in comparison to what happens in my kitchen these days and it was that salmon that seemed to be the start of my epic culinary journey. I had concocted a delicious recipe for Maple Glazed Salmon and submitted it to a magazine, which somehow got them all excited and itching to talk to me, which led to a two-page spread about ‘Cooking Healthy for Your Family’ that included my Salmon recipe, photos of all of us and lots of nice words. This was in the Spring issue of Reiman’s Light and Tasty magazine way back in 2003. The following year, after submitting my most favorite veggie pizza recipe to a ‘Meatless Marvels’ contest and winning a Runner-Up prize, I looked at what I wanted in my life and felt like food was the key. Healthy food. Better for you food. Not your Mama’s food.
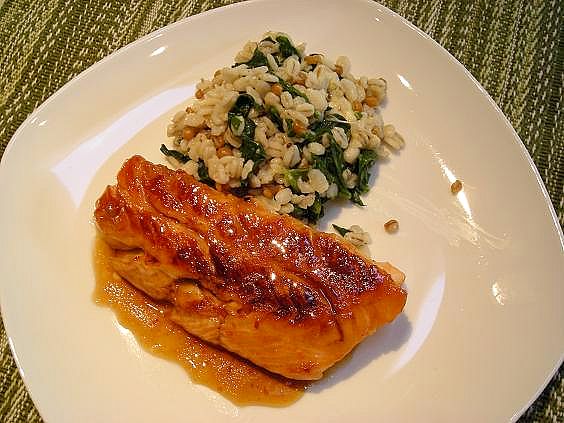 And to think that all that love, that nurturing and contentedness, and 8 years with a great guy (nearly 7 of them married), all that started somewhere back around a piece of fish, with a willingness to be open to potential and the flexibility needed to understand that life isn’t always the way you might imagine. Or remember. And to think that all that love, that nurturing and contentedness, and 8 years with a great guy (nearly 7 of them married), all that started somewhere back around a piece of fish, with a willingness to be open to potential and the flexibility needed to understand that life isn’t always the way you might imagine. Or remember.
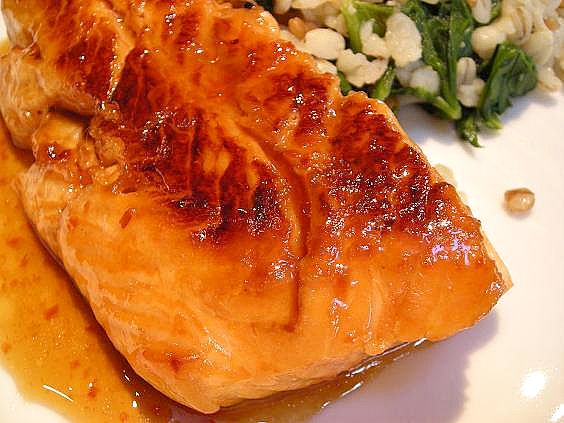 This recipe is quite simple, and stands up well to the assertiveness in salmon. I don’t recommend it for lighter and mild fish such as tilapia, halibut or mahi mahi, but it would be equally welcome on pork or chicken if that suits you. Use top quality maple syrup too. This recipe is quite simple, and stands up well to the assertiveness in salmon. I don’t recommend it for lighter and mild fish such as tilapia, halibut or mahi mahi, but it would be equally welcome on pork or chicken if that suits you. Use top quality maple syrup too.
Kate’s Maple Glazed Salmon
2/3 c. pure maple syrup
1 T. worchestershire sauce
1 T. brown sugar
1 T. ketchup
1 T. cider vinegar
1/2 t. ground mustard
1 salmon fillet, or two steaks
In a small saucepan, blend all ingredients together and bring to a gentle simmer. Allow to simmer, stirring occasionally, until slightly thickened and darker in color. Pour into a heat-proof container, such as a pyrex measuring cup, to cool, whisking regularly. You can speed up the cooling process by placing the container in a bowl of cold water and whisking briskly.
Brush about half the glaze onto the salmon and allow to sit for up to 30 minutes. Heat a skillet to hot and place the coated salmon, glaze down in the pan. Allow to cook until nicely browned and the glaze is bubbling. Carefully turn over, brush on more glaze and cook over lowered heat until cooked through, but still tender. Salmon can be served drizzled with remaining glaze.
The side dish in the photo is a blend of cooked barley, wheatberries and spinach, with plenty of shaved parmesan cheese.
May 14th, 2009
| 1 Comment »
I’ve been holding out on you, but not on purpose.
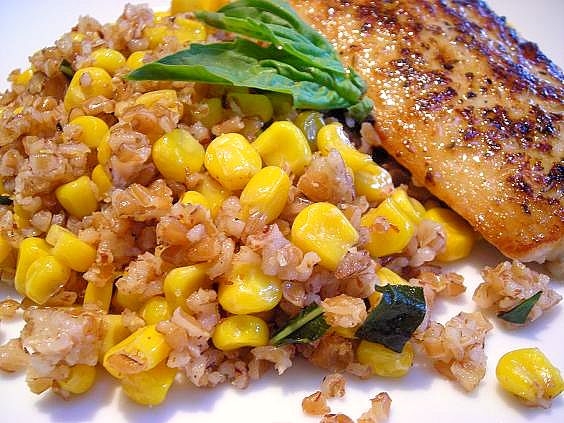
I’m guilty of thinking that somehow giving you a simple recipe as a means to serve frozen corn might just bore you to death. Really, it isn’t anything superbly fancy, but right about now, as we are staring down the summertime bounty of vegetables and with fresh corn season coming quicker than a May thunderstorm, I think it’s time to share the love. Especially since I enhanced the dish with my current love- bulgur- and made it a couple thousand times better.
I don’t even know when it was that I came across this method on Kim’s blog, but I was immediately transfixed and had to try it. Which I did, and which I almost regretted because I could barely think of anything else. Now I need to share it with you.
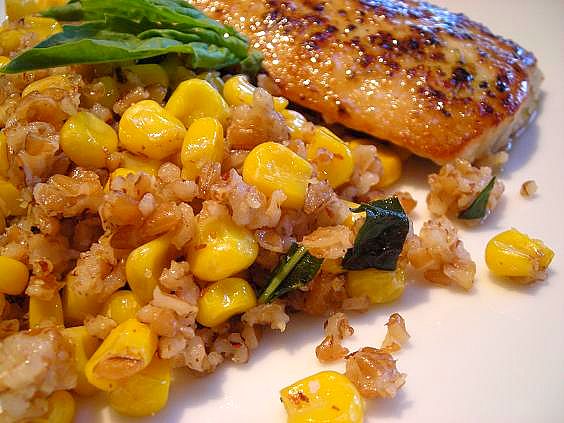
I simply call it Brown Butter Corn. How easy is that? You take some good butter and heat it in your pan until it’s toasty and brown, add in frozen corn and cook it until it’s tender and delicious, maybe tossing in a handful of fresh basil, or rosemary, or thyme and a seasoning of sea salt and fresh ground pepper. Pile it on your plate next to your main course and you’ve elevated your meal slightly from the humdrum to the hubba-hubba. (wow, did I just say that?)
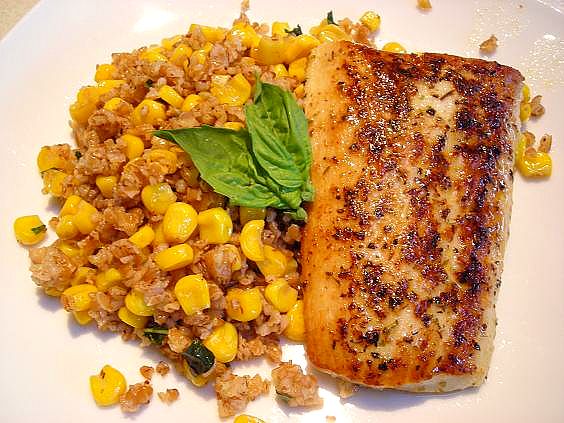
Only this time, with a container of my current whole grain love all cooked and ready in the fridge, this side wasn’t just about the nutty and toasty, it was far better. Copious amounts of fresh basil really sent the flavor sky-ward. And with a perfectly cooked piece of Mahi-Mahi as an accompaniment, alongside an effusive smiling husband (and a kid-free evening), it quickly became one of those meals that sends shivers through you, making you slow down, smile more, sigh often and think “When can we have this again??”
Brown Butter Corn with Bulgur
by Kate
4 T. good quality butter
1 pkg frozen corn, shaken in a wire sieve to remove any ice or frost- NOT rinsed!
1-2 cups cooked bulgur
Fresh herb of choice- basil, rosemary and thyme all work well
Salt and fresh ground pepper
Heat butter gently in a large skillet over medium heat. When it’s darkened and smelling toasty, add corn (it will sizzle!!!) and quickly stir to combine. Allow to cook for about 10 minutes, stirring often. Add in bulgur and fresh herb, stir to combine and heat through. Season with salt and pepper.
KATE’S NOTES:
The simplicity of this dish is ridiculous. Even without the bulgur it’s delicious, and the variation of vegetables that you could use is astounding. I think of fresh summer squash, a julienne of root vegetables, diced eggplant or even a mix of greens. Sub in another grain for the bulgur- like farro, another of my current loves- or add in wild rice, red rice or a mix. I’ve loved corn and rice mixed together since I was a little girl, but there is something about the browning of the butter that makes it so much more elegant. Watch out though! The butter slips easily from ‘browned’ to ‘burned’ and once that happens, you need to throw it out and start over. ‘Burned’ butter corn, I’m thinking, isn’t all that appetizing. Heat it gently and stay close by. And by all means, DO NOT rinse the corn! The butter is scalding hot when you add the vegetable, and if there is water on it, the likelihood of bad splattering is quite high.
|


 And to think that all that love, that nurturing and contentedness, and 8 years with a great guy (nearly 7 of them married), all that started somewhere back around a piece of fish, with a willingness to be open to potential and the flexibility needed to understand that life isn’t always the way you might imagine. Or remember.
 This recipe is quite simple, and stands up well to the assertiveness in salmon. I don’t recommend it for lighter and mild fish such as tilapia, halibut or mahi mahi, but it would be equally welcome on pork or chicken if that suits you. Use top quality maple syrup too.

