June 15th, 2012
| Comments Off on instagram friday
Another week done and over, and we’re sliding all over the place on the weather scale in Minnesota. Ultra hot and windy days are followed by chilly rain and clouds, and now the heat is ramping back up again, along with increasing humidity.
My week started out on a very high note.

And after a whirlwind weekend of family, friends and celebration, we all crashed. Hard.


In the midst of the chaos, with family, happy children and a lot of amazing food, stood a bouquet of sunshine for all to see.

In a moment of frivolity and boredom, there were shadow puppets.

I spent a lovely afternoon at Dehn Herb Gardens on Wednesday, walking through greenhouse after greenhouse of fresh herbs and lettuces, rich with oxygen and plant life. My head felt clearer when I left there than it has felt in a long time. I took home a huge box of fresh lettuce and another of basil. Guess what was for dinner that night?
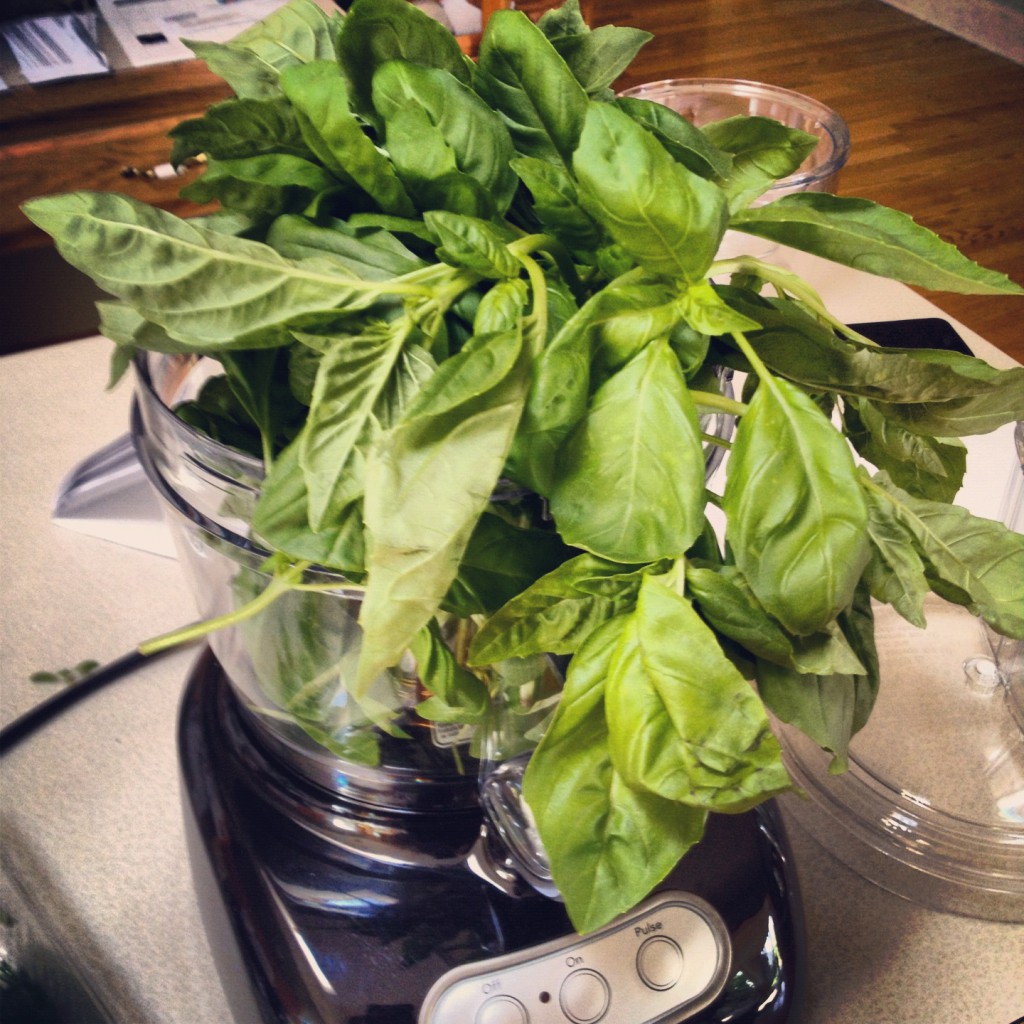
{{the best pesto I have ever had in my life}}
There were other delicious things happening in my kitchen this week too. With cool weather, I always get the urge to bake.
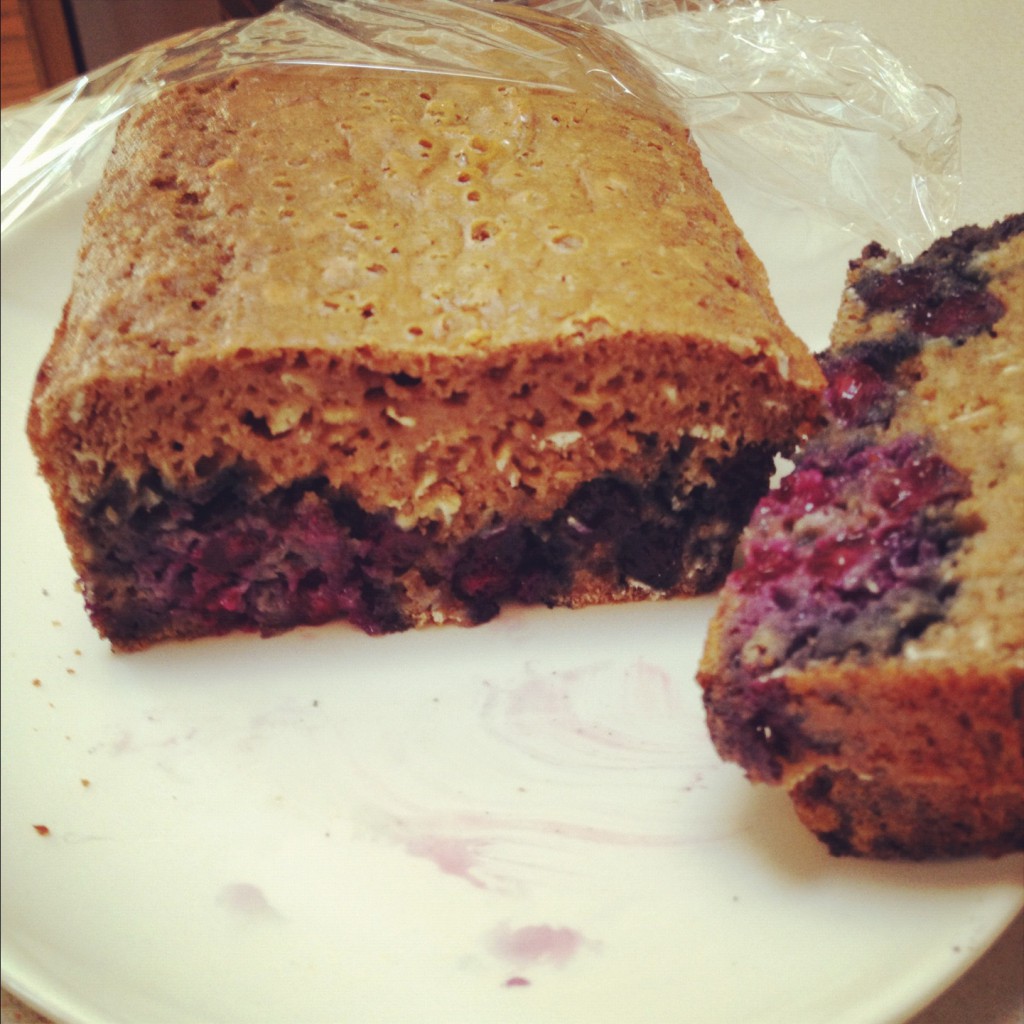
{{Blueberry Oat Quick Bread with sunken blueberries- that trick of coating them in flour does not work}}
Grilled vegetables, anyone?

I spy a swath of light from the setting sun, still visible at 10:15pm.

And of course, there were all the delicious finds…….
My obsession with vegetarian burgers knows no limits
Or the endless ways to combine pasta and vegetables
See what I mean?
I mean, really? I am obsessed.
Super summery light eating with these easy Summer Rolls
Happiness is always a choice
A perfect book for the introverts of the world
My current cookbook love.
HAVE A WONDERFUL WEEKEND EVERYONE!
HAPPY FATHERS DAY TO ALL THE DADS !
June 13th, 2012
| 4 Comments »
Summer is all about the simple, right? There’s such an abundance that planning a meal becomes moot, and your food comes together easily with a few ingredients, a nice olive oil to drizzle, maybe even served on a paper plate so that we can get back outside. Back to summer and enjoyment.
I’ve been on a creative kick with fruit, as evidenced by that gorgeous and frightfully easy Strawberry Balsamic Vinaigrette, and when blueberries went on sale at a local grocer, I stockpiled them, dropping them on yogurt, in cereal, atop pancakes and just about any other vehicle to my mouth that one can imagine. Nothing like fresh blueberries.
And there is nothing quite like this Blueberry Compote, resplendent with Lemon Thyme and fresh lemon juice.
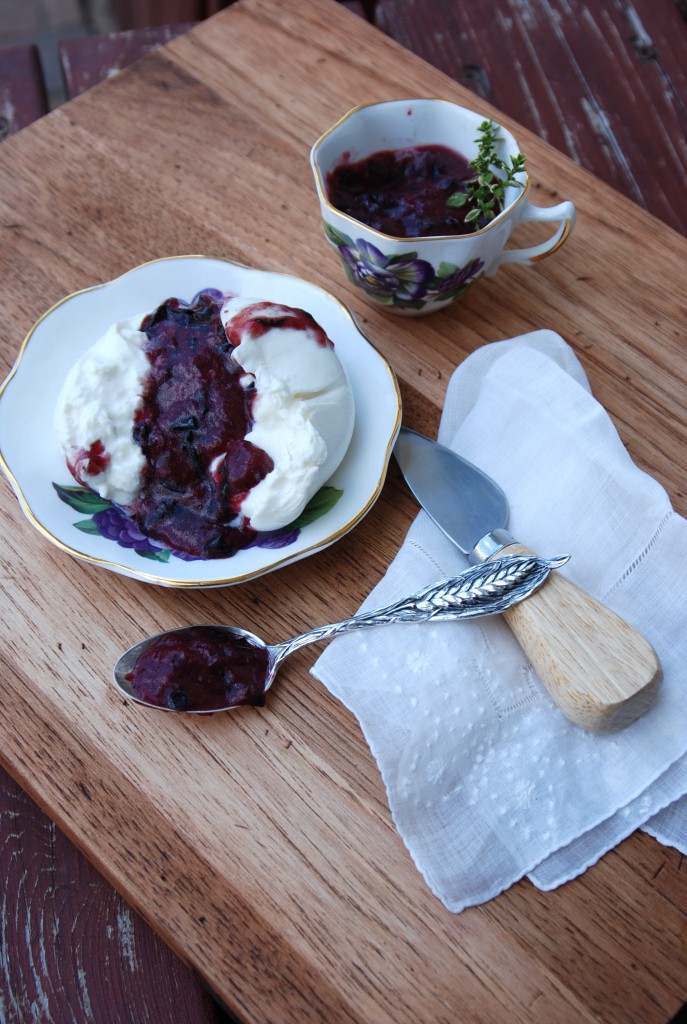
Coupled with a fast and furious love for the cheese within a cheese known as Burrata, and an ongoing affair with the tender and tiny striped leaves of the Lemon Thyme plant, I took a leap of faith on the perfect marriage of lemon and blueberry and created this quick topping that complimented the creamy cheese to utter perfection.
On a hot day, breaking open a ball of fresh mozzarella, watching the dreamy interior slip in to the bowl, mixing with the dark, deep blue of the berries, this was a quintessential summer treat. It’s made to cool down the sultriest of days. It doesn’t require much else than a spoon, really. Or good toasted bread, because really, anything tastes good on toast, doesn’t it?? And toast is a much easier means to achieving a good meal than any other base as it goes well with just about anything placed on top of it. I think a good loaf of cinnamon bread would be ideal for this creamy, berry-filled treat.
Aren’t familiar with Burrata? It’s a ball of fresh mozzarella that’s filled with shreds of MORE fresh mozzarella that’s soaked in rich cream. It’s cheese, and then some and every bit of it is rich and satisfying. It’s a nice appetizer, a perfect salad option (think good grilled veggies awash in that phenomenal cheese bath) or a delightful dessert. At upscale grocers, you should be able to find it with the other fresh mozzarella products in the deli.
All that’s left to desire is a warm, lazy day and the need to fill the belly.
Blueberry Compote with Lemon Thyme
1/2 c. fresh blueberries, washed.
2 T. fresh lemon thyme, minced
1 t. fresh lemon zest
1-2 t. fresh squeezed lemon juice
Pinch of good sea salt and fresh ground black pepper
2-3 T. good quality olive oil (use the best you’ve got here)
Mash berries in a glass measuring cup and stir in the lemon thyme, lemon zest and juice. Allow to stand for a while in order to blend the flavors. Whisk in the oil, add salt and pepper to taste, and more lemon if you wish. Chill thoroughly. The mixture will thicken as it cools, due to the oil. Whisk it again before serving to loosen.
In a bowl, carefully place one Burrata and using a spoon, break it open down the center, allowing the creamy middle to spread out. Spoon the chilled compote over the Burrata, drizzle a little oil over it and a thin pinch of good sea salt. Grab a spoon.
June 4th, 2012
| 7 Comments »
It’s almost ridiculous how simple and delicious this vinaigrette is, how a few smashed berries and a drop or two of balsamic vinegar can transform into a delightful, light and spring-like marinade for the freshest of fresh greens, but this is the very reason why we blog, share and shout our discoveries. These delicious surprises need to be more widely known.
Do you ever feel like the very fiber of your body fills up sometimes with the grimy bits of your life? Sucking you down and drawing all the energy out of you? I’m very blessed with an easy job that’s only {barely} part-time, but it’s a whacky schedule that leaves only a few days a week completely free and I often cram them with activity with friends, or cooking, household needs, market trips, etc… so much that there comes a time when my body just wants to scream “WAIT! Will you SLOW down a minute???” My sweet husband sees this on my face much clearer than I ever feel it in my bones, and gently urges me to listen. I love that man. So Memorial Weekend came, I had a whopping FIVE DAYS OFF and our lake home called, and finally, I listened. Complete with said husband’s urging me to “Just go.” And within the walls of a beloved summer home, rich with memory and the ability to lull me to a state of relaxation that releases all those icky, grimy bits, the creative mind floods with possibility.
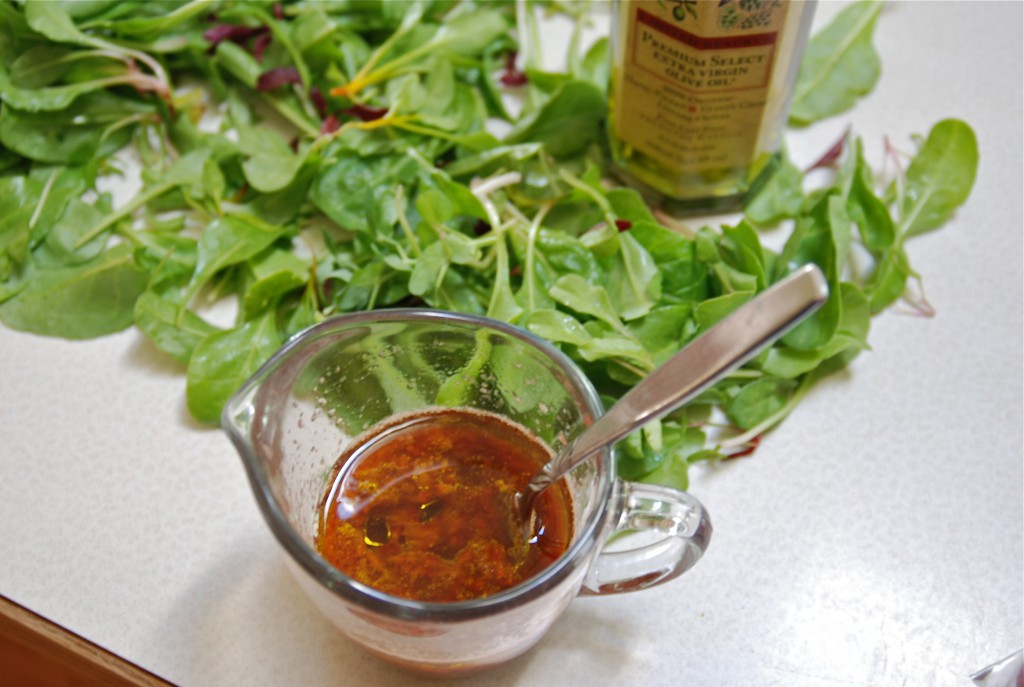
Prior to my escape, and ahead of a pending thunderstorm, I browsed the insanely crowded St. Paul Farmers Market and packed a large sack of fresh greens to take along with me. Thunderous clouds chased me home, and by the time I pulled the greens out to clean them, the sky had opened, lightning flashed and thunder rolled and the cat climbed in a cupboard to hide, poor thing.

{{mr. big eyes}}
I certainly don’t blame him. Thunder does that to a soul, sometimes.
And away from the city, with the sparkling lake outside and lush humid air circulating, I opened the bag of freshly washed pea shoots I’d purchased, a bunch so enormously large that my two hands could not span the circumference and they thoughtfully conveyed “We need something more than what comes in a bottle.” and with the pack of strawberries saying ‘Hey! What about me?’ I spurred a breakthrough. What? Your food doesn’t speak to you? Shame. There’s is a lot to hear from our food these days.
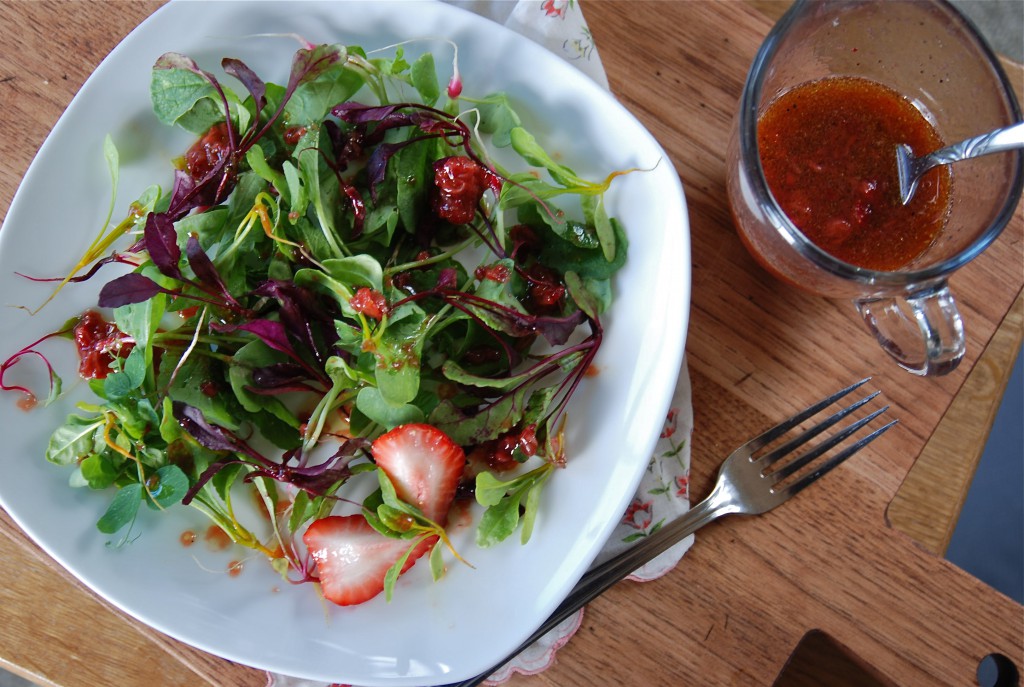
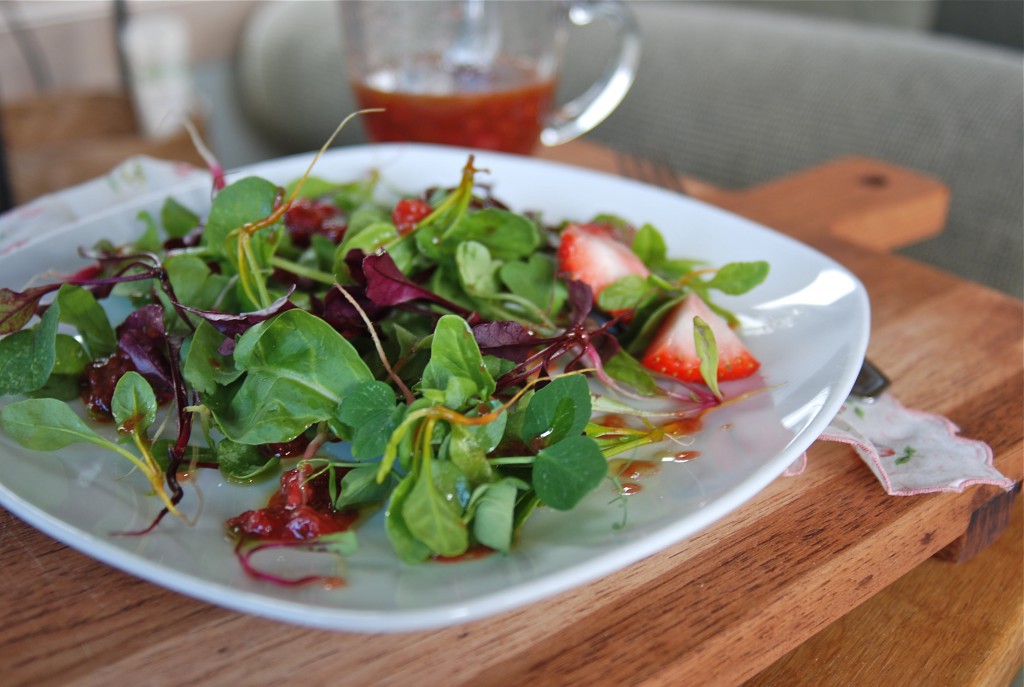
And if pea shoots haven’t yet been discovered in your eating repertoire – and mercy, do you like peas? try the pea shoots, you will not regret it!- microgreens of any kind are a perfect option, as well as the freshest of spring lettuces, spinach, chard, kale….. the possibilities choke with potential, all dancing about, trying to show us the best they can offer. And if you’re privy to a garden with teeny root vegetable greens that require thinning, like radish or beets, those little shoots that you pull from the ground are delicious too. We thinned baby lettuce and radish from the lake garden, then the beets at home were thinned and the bag of greens that resulted nearly made me weep with joy. Silly, I know. But that abundance is sweet manna, no greater thing to a hungry soul drawn tight from the grimy bits of life.
This kind of salad, where freshness is bursting from every corner of the plate is where you would happily pull out your very best bottle of olive oil to use in this vinaigrette. You can’t imagine the taste of that plate up there; I was so enamored of it myself and I’m the impetus behind it, but when the first bite slipped between my lips, coating them with sweet-tart strawberry, dressed in perfect olive oil, I wondered if this truly was heaven on earth, bound in a plate of über-local garden greens and a super simple vinaigrette. I ate it for breakfast, it was that good.
Strawberry Balsamic Vinaigrette
This “recipe”, so to speak, isn’t precise with measurements. And I apologize to those who require those parameters. Do your best with these suggestions.
1 pint of strawberries, washed and hulled
Balsamic vinegar
Good quality olive oil
Brown sugar
Sea salt and fresh ground pepper
Salad greens of the proper quantity for the number of people you’re serving.
As you wash your berries, keep an eye out for the inevitably softer, slightly mushy berries. Set these aside, as their sharper, wine-y taste make them perfect for your vinaigrette.
Wash and spin dry your greens.
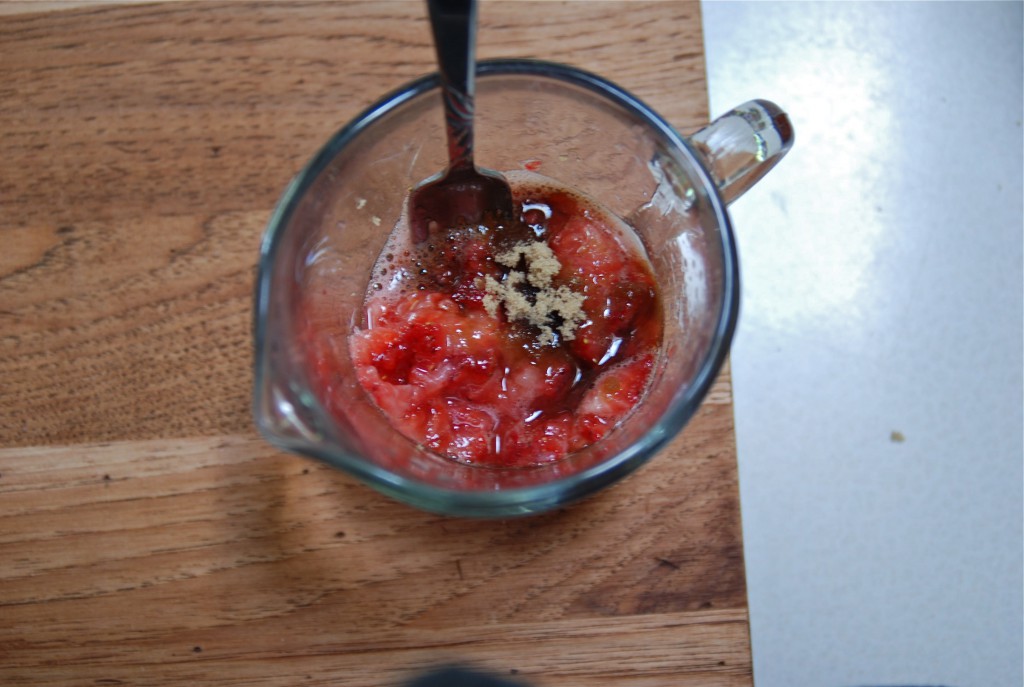
In a small measuring cup, place 3-6 chopped berries (dependent on how much vinaigrette you wish to make) and mash them with a fork to release their juice. Add a few drops of balsamic vinegar and a generous pinch of brown sugar. Stir it together and leave it on the counter. How long? My first batch sat for nearly three hours. The second, only about 15 minutes. Mash the berries on occasion, and stir to keep it emulsified.
Just before serving your salad, add the olive oil. How much you add depends on how many berries make up the base. More berries? More oil. Add less than you think at first, as you can always pour in a bit more. You want a nice balance of sweet berry, tart balsamic and smooth oil. Shake a few more drops of balsamic as needed, add a dash of salt and pepper and taste everything along the way. You’ll know when it’s perfect.
Plate the greens, add a few sliced berries and drizzle the vinaigrette over the top. I like to keep the chunks of mashed fruit in there, but if you’re a purist, strain it before using. But those chunks are delicious.
May 29th, 2012
| 1 Comment »
There are those days that beg for nothing at all; you know which ones I mean- vacation days of sand between your toes, gazing over azure water under a floppy hat, or ones spent in crazy fun activity with family, day trips of time on the road, the ribbon of concrete slipping away under your tires while you watch the landscape woosh by you. We’ve had them. We need them.
One recent Sunday was like that. The house emptied out early, before my mind was even fully awake and I sipped coffee, feet tucked under me in a big cozy chair, book in lap and content kitties napping near by. After a few days of record May heat and intense sunshine, the weather gave way to a thick continual mist and wind-whipped trees. I stepped outside briefly to see if it was worthy of even trying to take a walk, and my hair flew around my head, smacking me in the eye like a mischievous pony. Turning back to the patio door, I saw one cat lift it’s head and stare at me, as if to say ‘What ARE you doing out there??’ I really had no answer.
Back inside, another coffee in hand, I was hungry, and craving something with rhubarb but wanting more than a coffee cake, better than a muffin. Serendipitously, I sleepily browsed my blog reader, and suddenly, a gorgeous Rhubarb Spoonbread jumped out at me, thanks to Autumn, of Autumn Makes and Does. I’ve been reading Autumn’s blog for a few months now, and whoa…. you should too. I’m pretty sure it will make you sigh in happiness at least once or twice. We all could use those moments, right? Where we sigh with joy over something delicious?? Yes. Yes, we do.
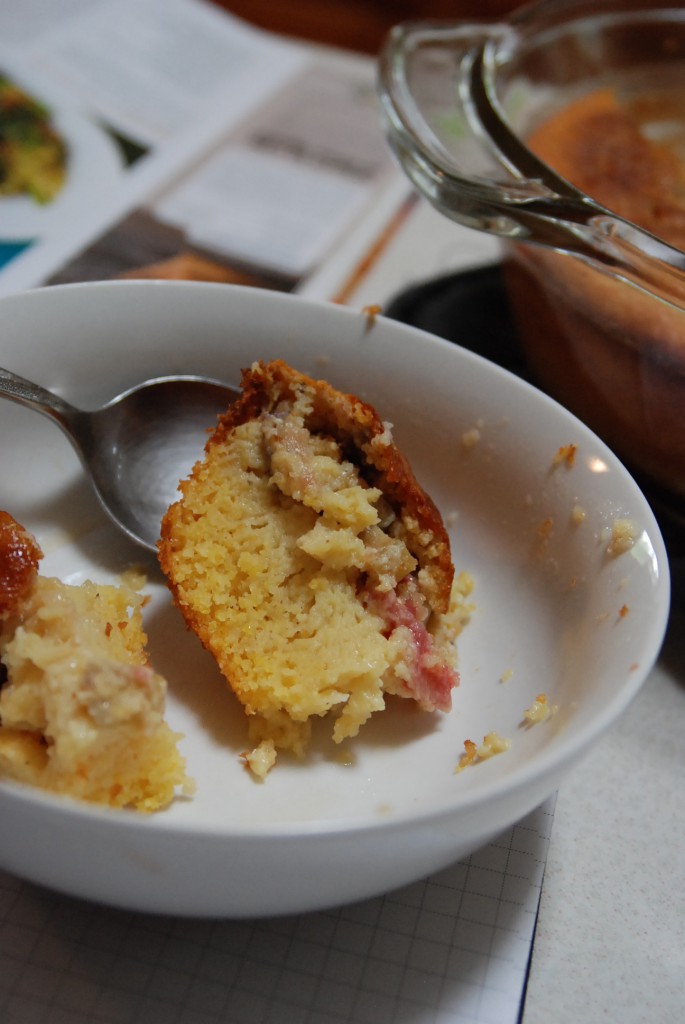
I managed to haul myself off the chair long enough to pull together the ingredients for this delight, savoring the fact that I’d stocked away baggies full of fresh rhubarb in the freezer, JUST for a moment like this one. {{high five, self!}} And with a few minutes under cold running water, those luscious red cubes were good to go. The oven sparked to life in that affirming way that chases gray, rainy days away; as the pan cooked, the kitchen filled with it’s inviting scent, tickling my already empty belly, teasing in it’s delicious way. That sound, the woosh of flame igniting seems to bring a grounding for me. I waited patiently for the spoon bread, browsing magazines, and the piles of recipes culled from a thousand sources and soon, all I wanted to do was cook.
That may not sound simple at all, but it is, to me. It’s what pulls together all the fibers of who I am that get scattered in my days away from the kitchen. When our food storage containers are stuffed in the drawer and not in the fridge, I feel like something is missing, and with all this inspiration around me, in blogs and websites and magazines, it doesn’t take much to make it all come together. Maybe all I needed was a spoon bread, an empty house with quiet jazz from the speakers and a misty morning of oven humming and hot coffee.
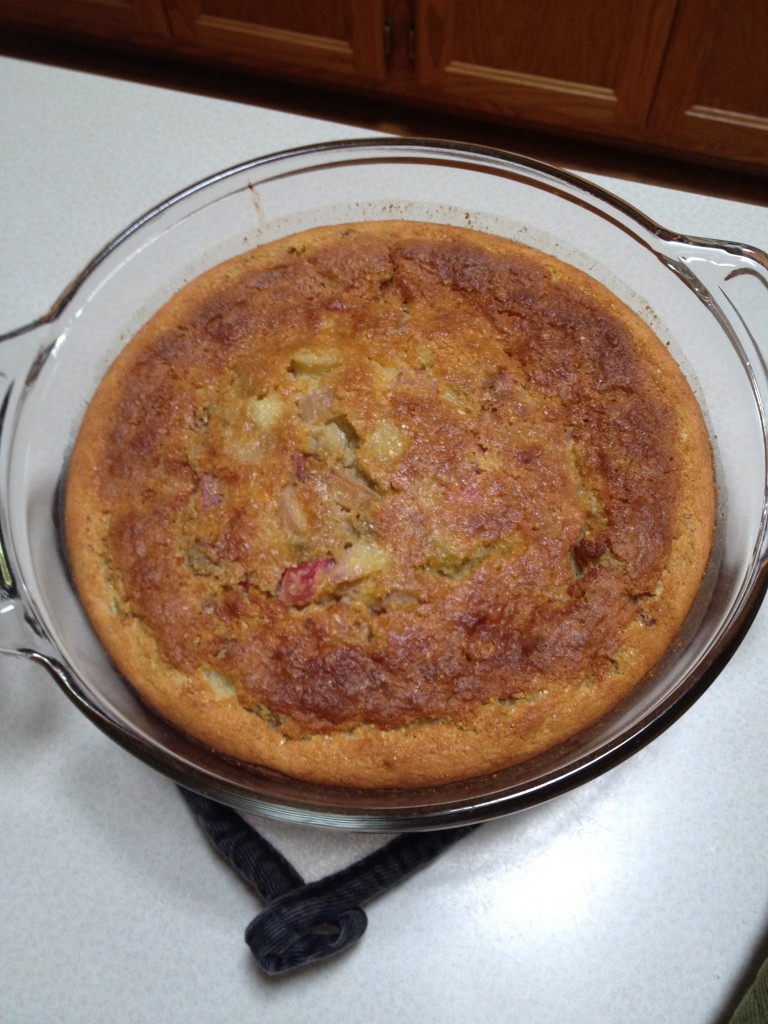
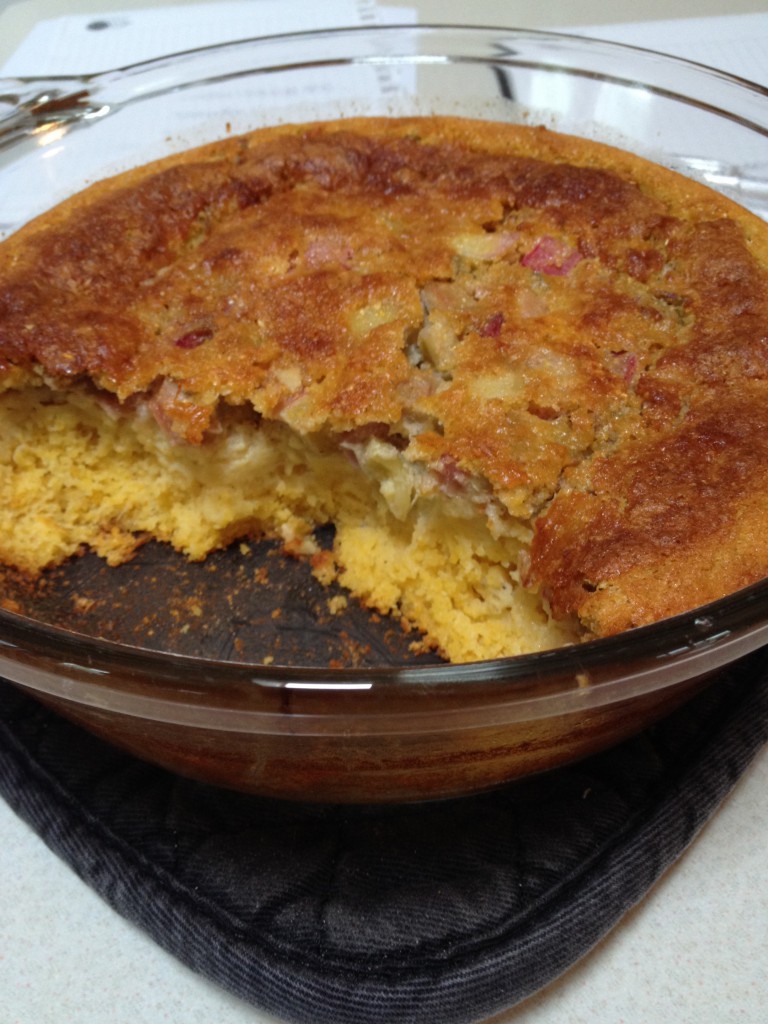
Like Autumn, I’m not sure why I haven’t explored spoon breads more often. Oh, right; Mike doesn’t eat eggs. Ah well, too bad for him. This was a perfect custard-y bread, sweet and tangy at the same time and dug out warm from the pan, drizzled with good maple syrup and eaten, tucked back in to that cozy chair, and more coffee steaming from the table next to me. It was much, much more than I had imagined for my day when I opened my eyes that morning, or as I stood briefly in the mist outside, thinking maybe it hadn’t been so worth getting up in the first place. But a spoonbread, warm from the oven, set me upright even with the dull low clouds outside.
And this spoon bread, well, it’s perfect for a savory snack, with maple syrup {although a good dousing of heavy cream isn’t bad at all} and of course, it makes an easy dessert, warm, again, and topped with vanilla ice cream, a scoop of yogurt or possibly maple-sweetended mascarpone cheese. Oh sigh, and sigh again {{see? again with the sighing, and so soon!!}} Something simple, on a blustery, misty day never tasted so good, in so many ways.
Rhubarb Spoonbread
Ingredients
- 6.5 oz (about 2 cups) rhubarb, sliced about 1/4 thick
- 2.5 oz (1/3 cup) sugar (I used organic cane sugar)
- 2 T maple syrup (preferably grade B), plus more for drizzling
- 4.5 oz (1 cup) yellow cornmeal
- 2 t baking powder
- 1/4 t baking soda
- 1 pinch salt
- 2 cups buttermilk
- 3 T butter, preferrably unsalted
- 3 eggs
Cooking Directions
- Place chopped rhubarb, maple syrup, and sugar in a small bowl. Stir together and set aside while you gather the remaining ingredients and complete the following steps.
- Preheat the oven to 400.
- Place the butter in an 8 x 8 inch square pan and put the pan in the pre-heating oven.
- Whisk together the cornmeal, baking soda, baking powder, and salt. Make a well in the center. Add the eggs, but do not stir, set aside.
- Check on the butter. Take it out of the oven when it’s completely melted. Allow the oven to continue preheating.
- Now, stir the eggs into the cornmeal mixture and add the buttermilk. Stir briskly until completely combined.
- Swirl the butter around the hot pan and pour any excess into the batter. Stir to combine.
- Stir the rhubarb sugar mixture into the batter and pour into the buttered 8 x 8 pan. Bake for 35-40 minutes, or until the center no longer jiggles.
- Serve warm drizzled with more maple syrup.
Recipe printed in it’s entirety from Autumn, of Autumn Makes and Does. The only thing I did different was bake it in a 4-qt pyrex baking dish.
May 23rd, 2012
| 1 Comment »
I’ve been phenomenally absorbed by Tamar Adler’s An Everlasting Meal. I’ve barely even gotten through half of it because I read, re-read, underline, contemplate, read AGAIN and then think about it like my very life depends on those words filling every pore in my body. Have you read it? If you love food, and you love simple, easy, good food, I strongly encourage you to pick it up, but be warned….. this book could change the way you cook and I urge you to own it so you can really enjoy the prose, the story, the thoughtful way that Tamar looks at the very things that sustain us.
I’m grateful to this book too, as it came to me through a renewed relationship with an old friend from high school. Connecting on Facebook, even though she lives in Brussels, Belgium, we’ve exchanged many emails about food, and her quest for some information on what constitutes ‘good’ olive oil led to a long discussion about this book. A few days later, the book itself arrived on my doorstep, courtesy of this friendship, and now I know why Barbara was so moved by it.
Tamar’s philosophy about food is utterly simple. It doesn’t have to be complex in the least, and she states this over and over again, through every chapter, rich with descriptives of meals so ridiculously simple that it honestly could inspire even the most timid home cook to become brazen in their own kitchen. The chapter on beans gave me more to think about regarding the humble legume than I’d ever imagined, and was the inspiration when along came a day where a simmering pot of beans just seemed like the thing to do.
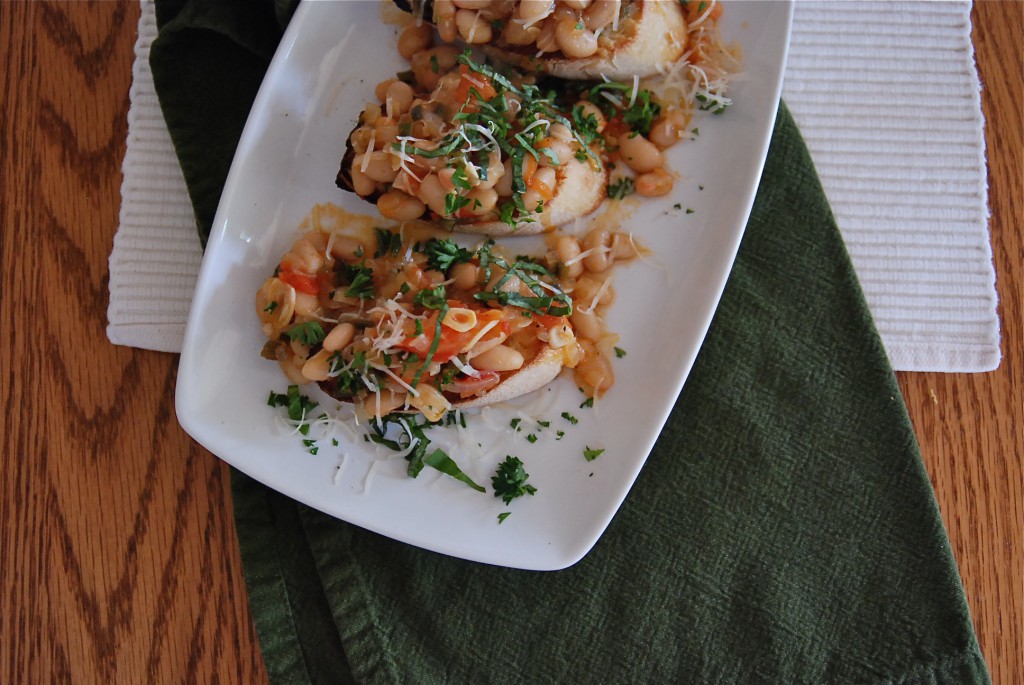
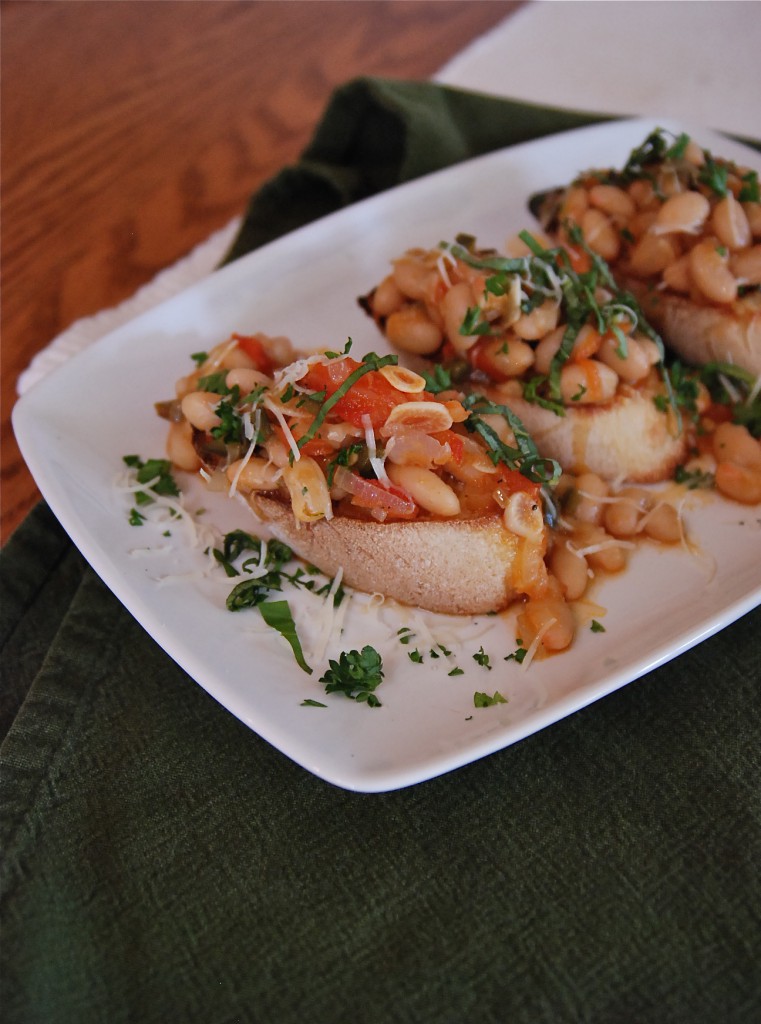
Simple and fulfilling meals have always been my most favorite. I don’t mind fancy eating, once in a great while, but my start on food was a humble beginning, and I’ve lived through some seasons where there just wasn’t enough on the table. I’m not particular about my food, either. I’ll eat most anything I’m served and I’m grateful for it, as the memories of hunger will always remain within me. To me, a pot of beans is a thing of beauty; savory without a lot of work, filling without heft, satisfying like an old friend. It’s soul {filling} food, that which makes you just feel good. Although I do enjoy the long process, on occasion, that a dried bean requires for preparation, I keep on hand a wide variety of canned beans, and in a pinch, these have saved dinner, lunch and even breakfast from mediocrity. A good time simmering and they become so creamy soft and perfect. With a loaf of chewy bread, it’s royalty on a plate, by way of a peasant’s wage.
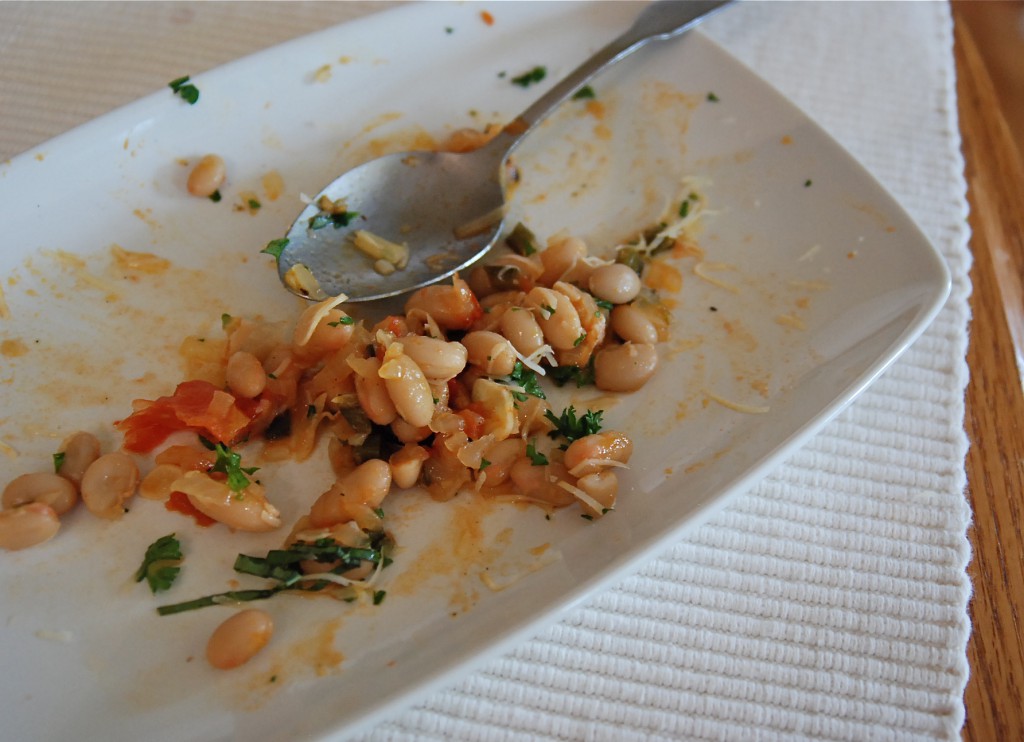
White Bean Ragout
2 large onions, minced fine
1 bell pepper, minced fine
3-4 cloves garlic, thinly sliced
2 medium tomatoes
2 15-oz cans Great Northern white beans, or Cannellini
2 c. vegetable broth
1/2 c. chopped fresh parsley and basil (I don’t recommend subbing in dried)
1/2 c. shredded fresh parmesan cheese
Baguette slices
First, we’ll roast those tomatoes. Slice each one in to quarters, remove the tough core and place on a baking sheet. Heat the oven to 400°. Drizzle the tomato wedges generously with good olive oil, and sprinkle with a bit of sea salt and fresh cracked pepper. Place in the oven and roast until the skins blacken slightly and get all puffy, but not to the point of collapse. You want some heft left in them. Allow them to cool slightly, discard the skins and gently lift them in to a small bowl. Any oil remaining on the pan can be scraped in to the bowl as well.
As the tomatoes roast, heat a large, deep skillet and add oil of choice. Saute the onions and bell pepper, stirring occasionally, for about 25-30 minutes, or until they are very, very soft. Add in the sliced garlic and continue to cook for about 15 more minutes. Don’t allow the vegetables to brown too much. A little is good. Sprinkle them with sea salt and some cracked pepper.
Take the tomatoes and add them to the pan, breaking them up with a spoon. Make sure you add all the juice and oil that’s accumulated too. That’s delicious. Stir in the beans and add the broth. Allow the mixture to simmer, gently, stirring it on occasion, until the broth is thickened and the beans are nice and creamy. If it seems to get too dry and/or sticks to the pan, add more liquid, like broth, or even water. Taste for salt and pepper, adding more if you wish. Add a few tablespoons of shredded parm to the vegetables.
Sprinkle the baguette slices with more parmesan and either broil or toast in a toaster oven until browned and crispy. Alternately, you can grill the bread too, adding the parm when the bread is slightly charred and hot. Place your toasted bread on a plate and scoop the beans over them, making sure to drizzle the liquid on as well. Top with more parm and the fresh herbs. Serve warm, or at room temperature.
Recipe origin: Bon Appetit magazine, May 2012; here with adaptations
May 21st, 2012
| 2 Comments »
A really good bowl of perfect fried rice is one of my most favorite things to consume. Any restaurant with it on the menu sets it’s yardstick by how good their fried rice tastes, and with one bite I’m either over the moon or sadly disappointed. A matchless bowl will have the ultimate combination of firm grains of rice, a deep rich flavor from the wok and enough extras to make good flavor without sacrificing the overall taste of the dish.
I’ve made fried rice at home on occasion, and always with the caveat that my wok will never replicate that of a good restaurant. I enjoy it for what it is from my own kitchen and don’t expect perfection. Especially if I stray from a standard method and go off on my own path.
I’m like that as a cook, anyway. I’m not one to follow a crowd and stick to something tried and true. I like to push myself with my food and try many different means to fill my belly. My unconventional means to a steaming bowl of fried rice started with roasting a few pans of vegetables and ended up with a decent rendition for dinner that everyone enjoyed.
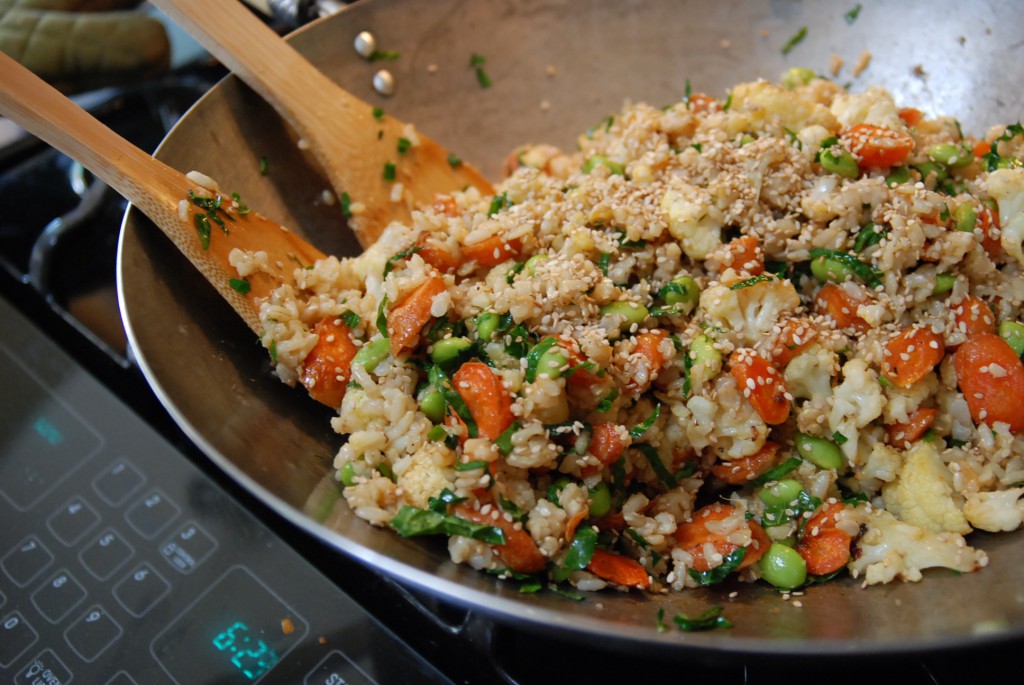
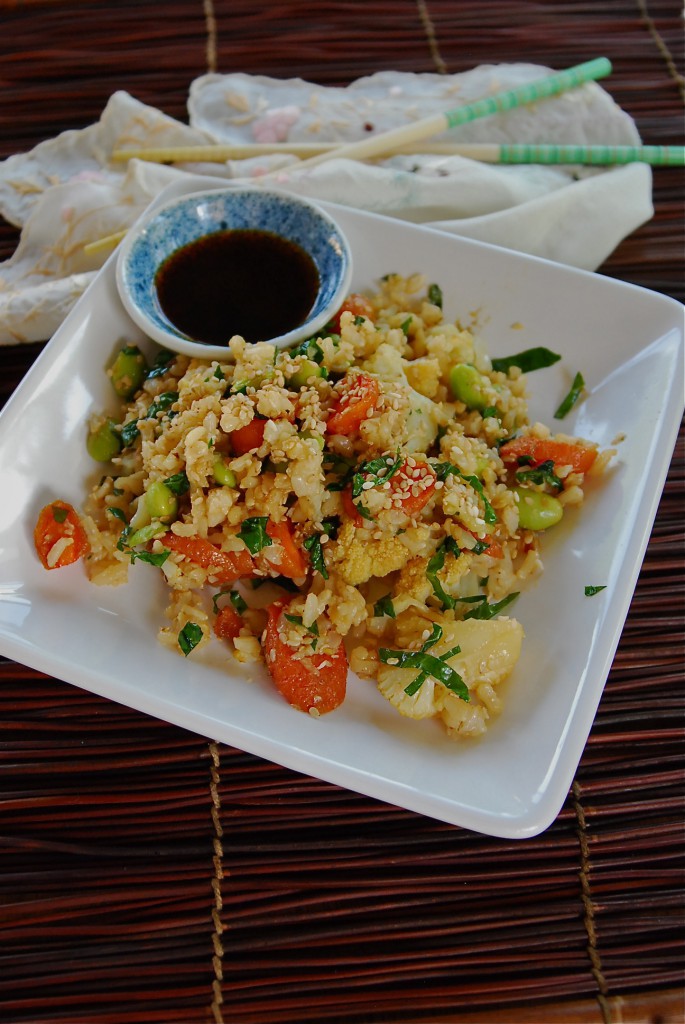
The best beginning to any fried rice is always cold, cooked rice. A few cups of that, along with any variety of vegetables and a hot pan and you’ve got what you need. My version had edamame, roasted cauliflower and carrots in it, plus the remains of some shredded lacinato kale that I had on hand. True proponents of fried rice likely would shake their heads at this combination, but that’s me, in a nutshell. Improvising is my strongest tool when it comes to cooking. There are many days that I stand, pantry doors open, fridge ajar, my mind churning with possibilities, and learning to utilize what’s on hand is a skill worthy of any home cook.
Plus? This was utterly delicious.
Roasted Vegetable Fried Rice
1 pkg frozen Edamame pods
1 head cauliflower, washed and cut to bite sized pieces
1/2# carrots, washed and sliced on a bias
1 c. shredded lacinato kale (or other greens, like spinach or chard)
2-3 cloves of garlic, finely minced
1 T. minced fresh ginger
4 c. cold cooked rice
2-3 T. sesame oil
Soy sauce to taste
Fresh squeezed lime juice (optional, but delicious!)
Sesame seeds for garnish (also optional, also delicious)
Peanut or coconut oil for frying. (You want an oil that will withstand the high heat needed in this dish. I don’t recommend using olive oil for fried rice as it breaks down at high heat.)
Cook Edamame according to package directions, cool and remove from the pods. Heat oven to 400°.
Roast cauliflower and carrots on separate baking sheets, as they will need different times to cook completely. Toss them in a bit of oil, salt and pepper prior to placing in the oven, and roast them to desired tenderness.
In a wok, or large skillet, heat a small amount of oil. When hot and shimmering, add the ginger and garlic and quickly stir for about 30 seconds. Add the rice and stir to combine, breaking up the clumps. Stir and toss the rice until it’s nice and hot, the drizzle about a tablespoon of sesame oil around the edge of the pan and stir the rice with the oil. Add in the vegetables and stir to heat through. Drizzle with soy sauce and a good squeeze of fresh lime juice. (the zest is really nice too!) Add a bit more sesame oil and a few tablespoons of sesame seeds, if you have them. Stir together to combine until it’s all nice and hot. Serve topped with more sesame seeds.
May 10th, 2012
| 16 Comments »
There are plenty of food items, when given a second chance (ok, and sometimes a third or fourth) will reveal much more to your palate than they did on the initial try. Every time I hear of someone disliking a specific food, I ask them how many times they’ve eaten it, how it was prepared or where they had it or any number of questions to determine what they don’t like about it. I always want to know the whys and hows and whats of someone’s intense aversion to a certain food.
When I first met Mike, he told me he did not like salmon. Not one bit. When pressed for more information, he revealed that when he’d eaten it, it was tough in texture (definitely overcooked) and tasted fishy (definitely not very fresh) and so I made him a salmon dinner one night of a terrific piece of fresh salmon that was perfectly cooked. I hooked him for life, pun intended. A poorly prepared food item can be a real turn off. For the longest time as a kid, I absolutely hated pork due to it being overcooked and tough as nails. Once I tasted the beauty of perfectly cooked pork, tender and succulent, I was reformed.
A lot of times, if it isn’t the way it’s cooked then it’s the texture. This was true of my tastes for a very long time. And almost all of the foods that I once disliked as a child, and even in to adulthood have now made themselves a permanent space in my life. Foods such as tomato, onion, squash of all kinds, eggplant, mushrooms…. this list is all about texture. And my initial introduction to Buckwheat groats, also known as Kasha, turned me off due to the texture as well. But the second glance, with a better cooking method in hand and some quick innovation in the kitchen, I turned this healthy grain into a mind-blowing salad that I can’t wait to make again.
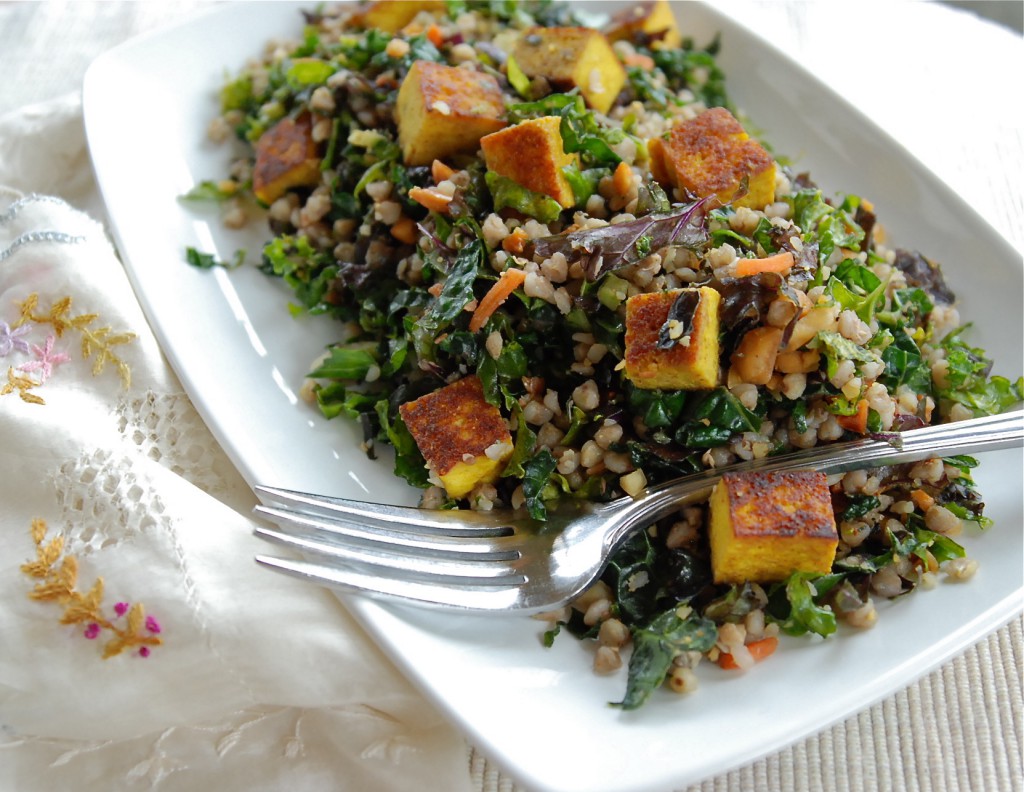
As a singular food item, I’m still not enthralled with kasha, but I think that alone, this grain is pretty uninspiring. That all changes when mixed together with others, kind of like that quiet and unassuming person who comes alive in the right crowd. Kasha grains are tiny, heart-shaped and solid, similar to barley grains, with a sweet, nutty flavor and a nice chewy texture. Buckwheat groats are a potent nutritional item, with no cholesterol, sodium or saturated fat. It’s high in fiber and magnesium, with a low glycemic index. Mixed with shredded kale, dressed lightly in a simple oil & vinegar dressing and dusted with sea salt and cracked pepper, the grains added a perfect complement to kale’s crunchy personality. Chunks of tofu, seared crisp after a curry bath marinade, made for eye-catching color and a protein boost.
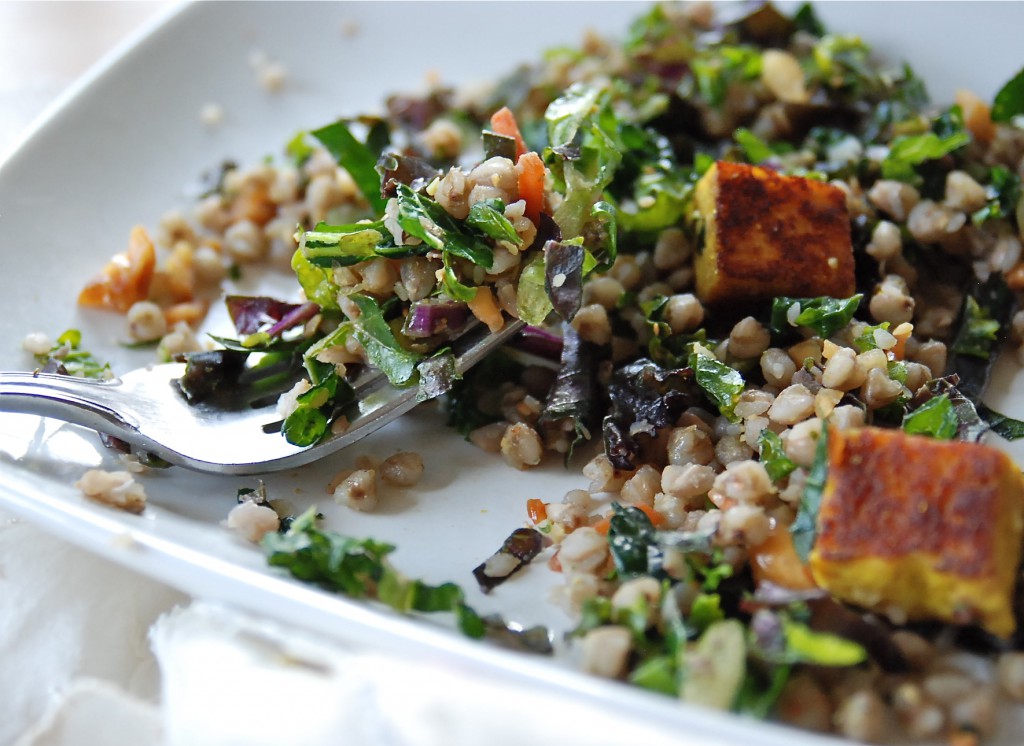
I was a little concerned that this salad would be a bit light, lacking the substance needed to fuel a body’s needs through the day, or evening, but after consuming a small plate of it, I was surprisingly full, and that satiation lasted until bedtime, and beyond. A small portion for lunch the next day easily carried me through the remainder of work too.
And speaking of second chances……
 This delightful 4-cup Bodum Assam Teapot needs a new home. Do you love tea? I drink a lot of tea, and have a somewhat shocking collection of it in a cupboard. I also have a smaller Bodum Teapot that doesn’t get used as much as I would like. So this one could be yours, all for the sake of a comment. Tell me what kind of tea you like to drink, hot or cold or whatever, and you’ll have a chance. I will pick one name on Sunday May 13th. This delightful 4-cup Bodum Assam Teapot needs a new home. Do you love tea? I drink a lot of tea, and have a somewhat shocking collection of it in a cupboard. I also have a smaller Bodum Teapot that doesn’t get used as much as I would like. So this one could be yours, all for the sake of a comment. Tell me what kind of tea you like to drink, hot or cold or whatever, and you’ll have a chance. I will pick one name on Sunday May 13th.
And now, how about that recipe??
Kasha with Kale and Curried Tofu
1 pkg extra firm tofu, drained and cut in to cubes
2 T. curry powder
1/4 c. olive oil
1 c. raw buckwheat groats (available at co-ops)
2 c. water
Sea salt and fresh cracked pepper
1 pkg Cut N Clean Greens Rainbow Kale Salad (with or without the dressing- which can be used in lieu of a vinaigrette)
About a half cup of your favorite vinaigrette recipe, or similar bottled version
Crushed peanuts, optional (but a delicious and crunchy addition)
In a small skillet, begin toasting the buckwheat groats over medium-low heat. Have the water ready in a separate lidded pan. As the buckwheat begins to heat up and you start to smell a nice nutty scent, start the water heating. Continue toasting the buckwheat, shaking the pan to avoid scorching, while the water heats up. When the water begins boiling, carefully start shaking the toasted groats in to the water. They will sizzle and the water will steam up as you add the groats, so don’t dump them all at once, just a small amount at a time. Once they are all in the boiling water, reduce the heat to a bare simmer, cover the pan and cook the groats for about 15 minutes. The water should be completely absorbed and the top of the groats will look dry. Shut off the heat and allow the pan to sit for 10 minutes, then fluff the grain carefully.
In a small measuring cup, whisk the curry powder and olive oil together. Pour over cubed tofu and toss to coat. The tofu will soak up all the marinade. Allow to soak for about a half hour. (this is a good time to cook those groats) Heat a large skillet over medium heat and add a drizzle of olive oil. Sear the tofu to your desired browning. Place on paper towels to absorb any excess oil, and set aside.
Place rainbow kale in a large bowl and drizzle some of the vinaigrette over it. How much depends on your taste. I like a lightly dressed salad, but you may like a bit more. Add in the groats, about a cup at a time as you may not want all of it in the salad. Toss, taste, season and add more groats until you have a nice balance of kale and grain. Taste, add more vinaigrette or salt and pepper if needed, then gently add in the tofu and crushed peanuts, if using.
The salad can be eaten at room temperature, and the flavor deepens overnight in the fridge. Taste the next day to see if it needs more vinaigrette, salt or pepper. The kale and grains will absorb that overnight.
May 5th, 2012
| 2 Comments »
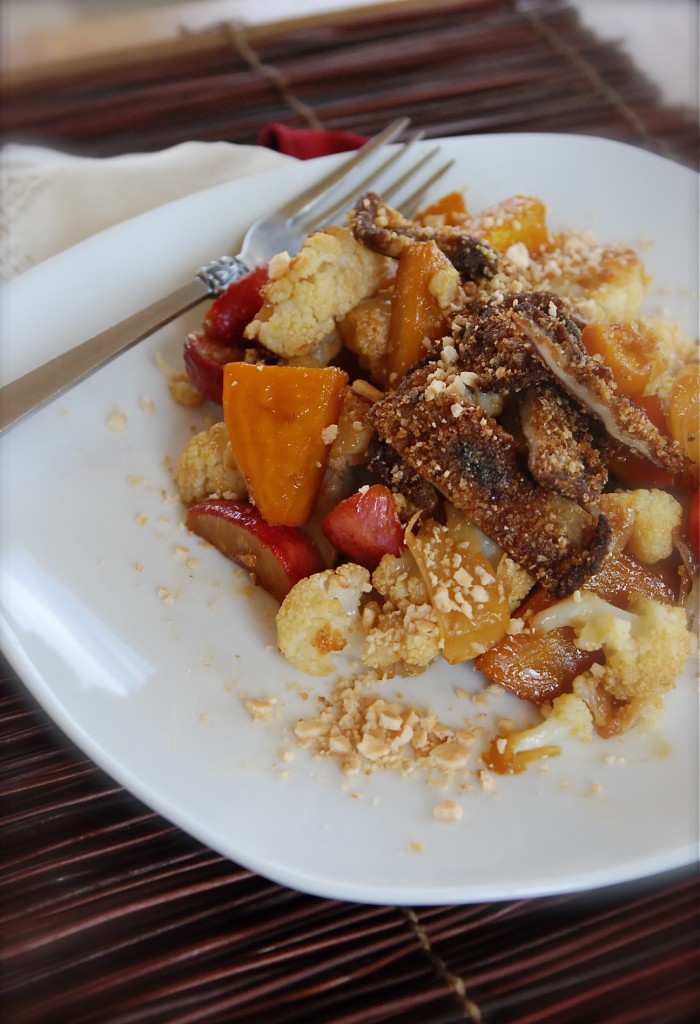
Saturday mornings are my sacred time. I rise early, with eager cats who think that the moment the birds start singing is ripe for raising their own voices, stirring the humans awake. I try to ignore Eli’s little ‘meeps’ while he negotiates the bed as light barely filters through the blind, but I can’t ignore his 16-lb frame when he steps on my head. It’s fine when all this happens around 7am in January. In May, at the prime hour of 5am, it’s a different story. But it’s his job and we respect that. Thank goodness for coffee.
And Saturday is my time. Mike rises six days a week with those critters (God bless that man) but on Saturday, he sleeps like a teenager, often until the unlikely hour of 9 or 10. It’s good for him, and those quiet moments of early sunrise, with coffee and a purring cat, are moments that are good for me. The patio door is open (though not in January) the birds sing-song chorus is cheerful, the coffee is super strong just as I like it and I have oceans of time to scan my blog reader, catch up on email or even a show on Hulu if I want. I’m often selfish with time; I like some that’s all mine, that I don’t need to share with anyone. I like being introspective, quiet and alone sometimes and these Saturday mornings are perfect for that.
I almost didn’t want to post this recipe. It was an utter ‘Hail Mary’ moment, a substitution of this for that, swapping one method for another and done in a haste that I’m almost embarrassed about. I had a small bag of fresh shiitake mushrooms, a plan and a time frame and every bit of it slipped away in the chaotic way that life takes charge and suddenly I was faced with a ‘Now or never’ option before the mushrooms became a slippery mass in their bag, and I punted blind.
The first bite to my mouth was almost interrupted by my heart pounding so badly that it nearly cut off my ability to swallow. I set some pretty high standards for myself, and no one is really holding that yardstick up to me, but me. I think I know what I’m doing; I think I can look at a recipe and recreate it in my head to be more about what I like to eat. And almost all of the time, when I head blind in to a dish, swapped out of someone else’s work, I do really well with it. It’s when I don’t trust my gut instincts and follow a recipe step by step, with all the ingredients in line like regimented soldiers that I trip up over my own indecision and end up tossing the whole thing on the compost heap.
Why do we sell ourselves short? We all do it, for one area of our lives or another. We can talk ourselves out of anything, refute the praise sent our way, shake our heads and frown at a compliment, and in our heads we make it seem so completely right, as in ‘Everyone does it and I’m not that great’. But here’s the thing: we ARE that great. We deserve those compliments and when they come, when praise rains down we shouldn’t turn from it, we should bask in it. It doesn’t mean we’re egotistical. It means something much more than that.
At my age I should think I know who I am, what I am capable of, what I enjoy eating and what I really don’t like any longer, and I SHOULD be able to rearrange a recipe without hand-wringing and self-doubt. I’m good at my craft; God gave me a gift and a skill set, and every time I stop my forward momentum and start scratching at my chin, all wrapped up in anxiety as I second guess myself, I’m portraying to Him that I don’t trust Him one bit.
Ephesians 2:10
“For we are God’s workmanship, created in Christ Jesus to do good works, which God prepared in advance for us to do”
{{I’m not here to ask, or even expect that you share my beliefs, and if you don’t,
please respect our differences as I kindly ask that you keep that to yourself}}
This very act of disavowing God’s gifts to us was discussed in a sermon in my church several months back and it sank in to my heart like a stone and settled there, and now, with conviction, every time I raise my own voice against myself, I hear His coming back to me. This is my gift, and this is HIS gift to me and I trust in Him with all my heart. It goes without saying that He is not one to retract a gift due to some misaligned belief. “Oh whoops, sorry. Those skills were meant for someone ELSE. NOT you!” He just doesn’t work in that manner. I can trust in my gifts as I trust in Him. And whether you believe or not, your specific type of faith is irrelevant. We all have amazing gifts that we can be proud of, that we can own 100% regardless of where we feel they come from. Acknowledging them is a truth that we should never deny ourselves. We don’t need belief in God for that to happen; just faith in ourselves.
And with this recipe, in my rushed state to prepare this, without a whole great plan of exactly HOW it was going to be done, like I said, I punted blind and should have just told that quickened heartbeat to ‘Shush!’ as I raised my fork. I know that I’m good enough at my craft to make this dish amazing.
Because the end result was delicious, and it was exactly like I expected it to be. And those crispy Shiitake mushrooms? What an amazing taste and crunch. I should prepare them that way just as a snack, drenched and dredged and seared to a golden crackle. I had to shoot the photos, taste the finished product and just as quickly as all that was completed, pack it away and race out the door to one of those life moments that you simply can’t miss. So I need to make this again, with time to savor and enjoy the process, the gift and the fruits of the Earth and rejoice in what I’ve been given.
Do you ever find that you second guess yourself, or you dismiss praise, or shake off a compliment??
What do you feel are your own unique gifts??
Honey-Soy Glazed Vegetables
with Crispy Mushrooms
1/2 lb Shiitake mushrooms, stems removed
1 bunch Gold Beets, with greens; trimmed, peeled and cut to bite size pieces. Greens rinsed and set aside
1 small head Cauliflower, washed and cut to bite size pieces
1 bunch Radishes, trimmed and halved
1/4 c. honey
2 T. soy sauce
1 T. fresh squeezed lemon juice
2 T. molasses
2 T. water
1 package Asian Rice Crackers, pulverized (I placed these in a large plastic bag and whacked at them with a rolling pin)
Heat your oven to 400°. Whisk the honey, soy sauce and lemon juice together and set aside. In a separate small bowl, whisk the molasses and water together and set that aside as well.
Toss beets with oil of choice, salt and pepper to taste and place on a large baking sheet. Separately, prepare cauliflower and radishes in the same manner but place on a separate sheet as they will cook at a different rate than the beets. Place both sheet pans in the oven and roast until beginning to become tender when pierced with a fork. Remove the pans from the oven and drizzle the honey-soy mixture evenly between the two pans. Stir the vegetables to coat, place back in the oven and continue to roast, stirring often, until the sauce caramelizes and the vegetables become very tender. This timing will depend on your oven and the size to which you cut the vegetables. Be sure to watch them rather carefully, as the honey in the sauce can scorch.
When veggies are done to your liking, place them in a large bowl and sprinkle about 1/4 cup of the pulverized rice crackers over them, tossing lightly to coat.
Heat a heavy skillet (cast iron if you’ve got it) with about 1/4″ of an oil that will withstand a high dose of heat, like coconut or grapeseed. Toss the shiitake mushroom caps in the molasses mixture, then coat them with the crushed rice crackers. Carefully place them, cap down in the heated oil and fry until crisp, about 5 minutes. Drain them on paper towels until cool enough to handle, then slice them in to strips.
Spoon the glazed vegetables on to plates, then top with the sliced mushrooms. Sprinkle the dish with any remaining crushed rice crackers and serve. This tasted divine served just slightly above room temperature.
KATE’S NOTES:
In my haste and scattered-ness over this recipe, I completely forgot to add the greens to the dish. They can be sauteed until tender in the skillet, just before you sear the shiitake mushrooms. I will definitely make that addition next time this dish comes through my kitchen.
April 21st, 2012
| 4 Comments »
If you hang around me and the blog long enough, you’ll realize that I really love quick breads. Scan my Recipe Index and you’ll see the spoils of a bowl of dry, a bowl of wet, a loaf pan or paper lined muffin tins and a hot oven. Some gals get their bake on through cookies, or lofty cakes slathered with buttercream; they perfect treats of sugar and spice, with fondant or piping, bars and brownies worth gloating over. I do love cake, and grew up with a Mom who never bought cookies from a store, rising in the summer before daybreak to bake prior to the sun releasing it’s intense heat on the day. But there’s something magical about a muffin, or tempting tea breads with a perfect moist crumb. I can’t get enough of them.
I’m always paying attention to quick bread recipes, but am often driven to dismay over ones that are choked with sugar and oil. I’ve managed to make a few of these into something a bit more healthy, but these days, I want recipes that offer abundant flavor without the tooth-aching sweetness.
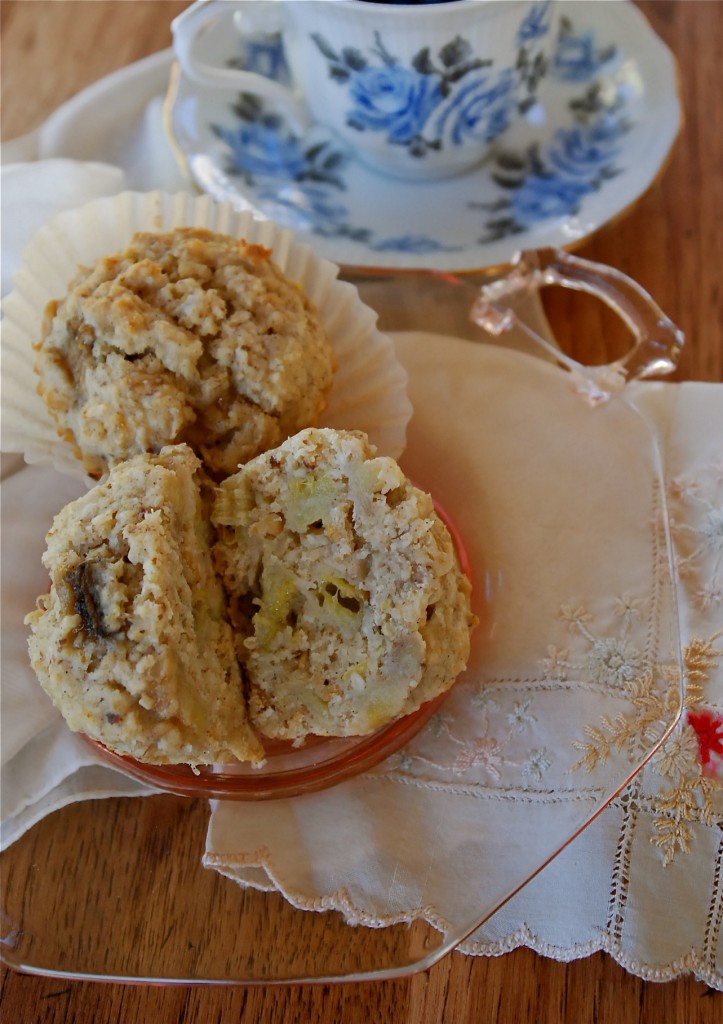
I came across this muffin recipe on The Kitchn and immediately wanted to make it as I’ve sufficiently restocked on Coconut Oil for a while now, and in glancing over the ingredients I was impressed with the amount of flavor these muffins would have, without dumping a ton of sugar in them. They’ve got coconut oil! And flaked coconut!! A vanilla bean! Whole oats! Fruit! What’s not to love?? The original recipe called for mango, so I selected one from the store and a few days later when it was ripe, I began tossing flour and oats together, melting coconut oil and tenuously scraping down the ONE vanilla bean that I had remaining in my kitchen. Then I cut open the mango, and nearly started crying. It was stringy and bone dry inside. I angrily tossed in in the trash, envisioning a few dollars being dumped there, then glanced around my kitchen, studded with lined muffin pans, full bowls and an oven blinking its readiness. What now??
Thank goodness there lay several bananas in the utmost condition for baking in to a tropical themed muffin.
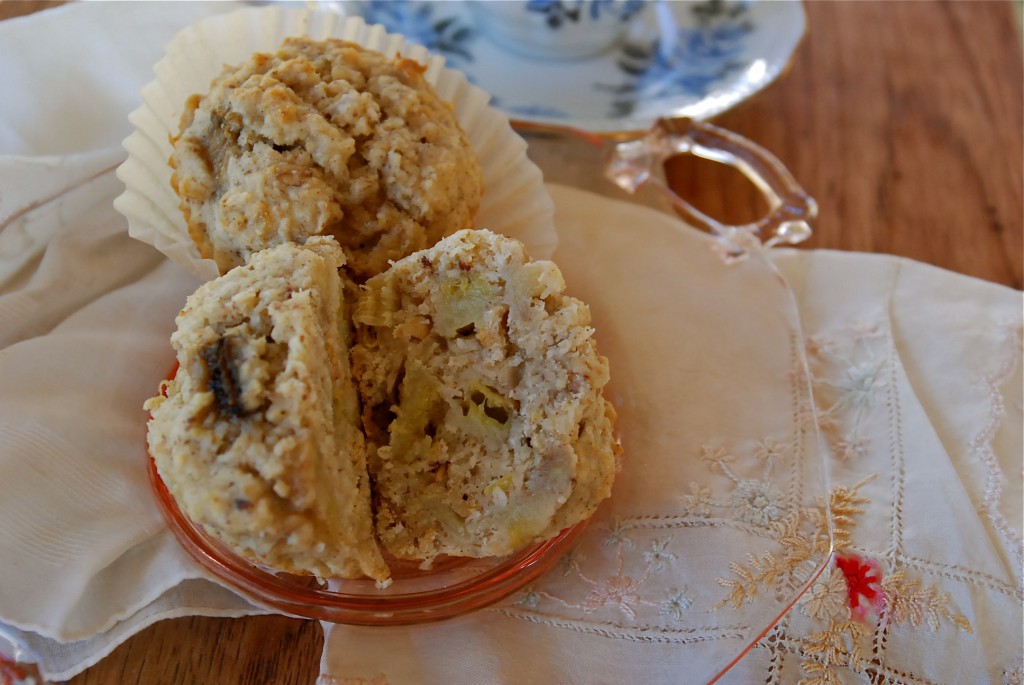
A few deft turns of a sharp knife, and swipes of a rubber spatula to pull it all together and soon I was being treated to the most amazing scent coming from my oven. I know that I should never think that I’ve ever found the most perfect muffin recipe because there is always something out there to top it. Guaranteed.
These moist and perfect muffins are one of the finest I’ve eaten. And I’ve consumed a great deal of muffins. The tender banana chunks in them get sweeter and more intense after a day or two, and the coconut, subtle taste of vanilla and the crunchy oats add oh so much goodness. Although I’m certain that a perfectly ripe and juicy mango would be utterly divine in them, having only a banana to work with was not a step down, by any means. I’d do these again, without one change. They’re that good.
Coconut Oat Banana Muffins
1/2 c. virgin coconut oil
3/4 c. wheat flour
3/4 c. oat flour (you can make this by grinding whole oats in a food processor or coffee grinder)
1/2 c. old fashioned whole oats
2 T. ground flaxseed
1-1/2 t. baking powder
1/4 t. kosher salt
1/2 c. unsweetened flake coconut (if you have the wide flakes, the original recipe called for those; I only had fine)
1 c. full fat sour cream, room temperature (I used Noosa Honey flavored yogurt and would do that again, hands down)
1/3 c. granulated sugar
1 large egg, room temperature
1 t. lemon zest
1 T. fresh squeezed lemon juice
1/4 c. milk of choice (I used vanilla almond milk)
1 split vanilla bean
1 c. diced banana (I used two bananas, which came out to be more than 1 cup)
1/4 c. shredded coconut to sprinkle on top of muffins, if desired
NOTE: You DO want the sour cream (or yogurt) and egg at room temp because if you mix those cold with the melted coconut oil, the oil will just seize back up again. Measure the sour cream and egg in a large 4-cup measuring cup, or small bowl and let it sit on the counter for a few hours.
Preheat the oven to 375°. Line two six-cup muffin tins with paper liners.
Split the vanilla bean and scrape the insides, adding it to the sour cream/egg mixture. Heat the coconut oil gently in a microwave safe container (I did about 40-50 seconds on 60% power) and add the vanilla bean shell to it. Allow the oil to cool, but not to the point of being solid again.
In a medium bowl, whisk both flours, the oats, flaxseed, baking powder and salt together. Stir in the half cup of unsweetened flake coconut.
To the sour cream/egg and vanilla bean mixture, add the sugar, milk, lemon zest and juice. Strain the coconut oil through a wire strainer right into the bowl and whisk to combine everything. Mix this with the dry ingredients until about halfway incorporated, then add the banana and fold gently until everything is uniform. Be sure to scrape across the bottom of the bowl with the spatula to get all the dried ingredients.
Scoop into the muffin tins. You can fill them pretty full, but if you don’t care to, you may need another tin. I filled 12 cups completely full and still had a bit of batter left in the bowl. Next time, I will make them smaller and use another six-cup tin.
Bake for 20-25 minutes until tops spring back when you touch them, or a toothpick inserted in the center comes out clean. Dare to wait until cool enough to eat; they will smell so enticing that you’ll find that to be a challenge.
Original recipe from The Kitchn, here with heavy modifications.
April 11th, 2012
| 1 Comment »
There’s nothing, really, to making a pan of enchiladas. Tortillas, filling, sauce and cheese, a bit of time in a hot oven and you’ve got a dinner that should please just about anyone. I probably don’t even need to give you a recipe, do I? (but I will…..)
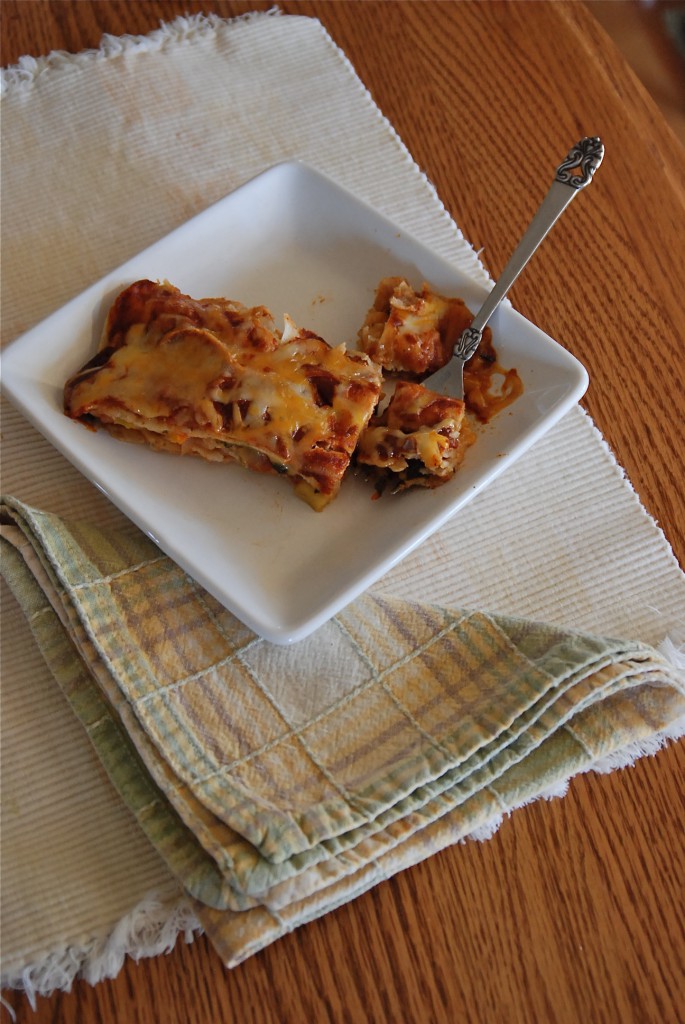
What enchiladas are though, is reliable. At least in my home they are. I know they’re something that all of us will eat without a shred of complaining. And we all need those types of meals in our homes, on our tables and in our back pockets, don’t we? The ones that no one whines over, or rolls their eyes. A meal that everyone will gobble down with reckless abandon. I know with a few peppers, canned beans, frozen corn, a pack of tortillas and a bit of time, that a meal will land in our midst and pull us together, drawing the day to a close. And long before we stopped eating meat, I could make Vegetable Enchiladas and Griffin wouldn’t care one whit about them. Thankfully, that’s still true.
We’ve slipped back to somewhat more normal weather these days, now that April has come and set her softly budding Spring on us. March’s heat wave gave us all a taste of warmth and summer and we all want it back, but these days, the nights come cold and brisk and for me, this past week of frost warnings and cold sunshine was enough to want the oven humming and a warming dish in our bellies. I know soon enough that it won’t feel like these comforting dishes will be necessary, so along with our old reliable Enchiladas, I wanted to have one last send off of a favorite meal before the heat comes and dinner plates are full of fresh and lighter meals.
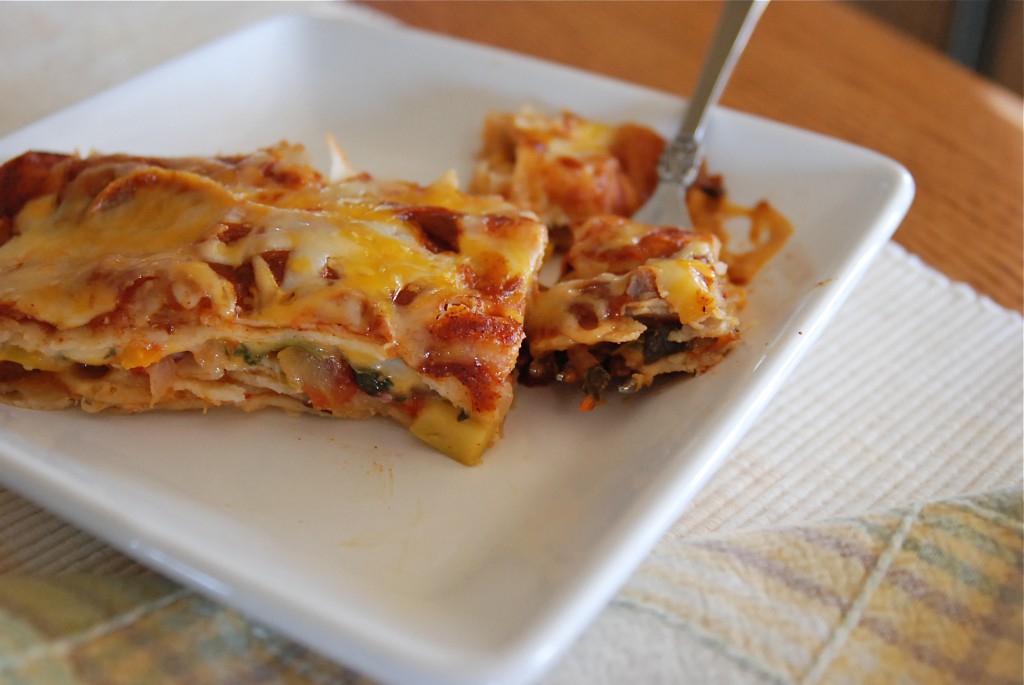
There’s really two ways you can make Enchiladas, outside of choosing between corn and flour tortillas; you can roll up the filling inside the tortillas, or you can layer the filling between the tortillas, creating a more ‘lasagna’ style dish that’s equally as good, and sometimes a bit easier to negotiate out of the pan. I like them both ways, and the ‘lasagna’ method is a bit less work, but if you’ve got willing hands to help, the rolling part happens pretty fast. The best part of this meal is having LOTS of good leftovers, and I think the flavor gets much better overnight.
And as for sauces….. I’ve never made an enchilada sauce from scratch that even came close to tasting like a few canned varieties I’ve found. My go-to brand of enchilada sauce is Carlita; it’s a deep, rich red sauce that’s got just the right amount of seasoning and spice. Las Palmas is another good option; they’ve got both red and green enchilada sauce, and have a Mild, Medium or Hot option. The Medium is plenty for us, and their green enchilada sauce is really amazing.
(disclaimer: nobody paid me to say that, or gave me free products to say that. Just so you know)
Vegetable Enchiladas
2 bell peppers, cored, seeded and diced (any color you choose)
1 large yellow onion, diced
2 cloves garlic, minced
1 jalapeno pepper, cored, seeded and diced (like it spicier? make it a serrano)
2 small zucchini, peeled and diced
1 c. frozen corn kernels
1 15-oz can black beans, drained and rinsed (can sub any kind, really)
1 15-oz can fire roasted tomatoes
1 T. chili powder (can sub in canned chipotle in adobo if you have it on hand- it’s a wonderful flavor)
1 T. ground cumin
2 c. washed and finely chopped spinach, chard or beet greens (optional, but it adds a good amount of flavor and nutrition)
8-oz shred cheese of choice
1 15-oz can enchilada sauce of choice (you can use two if you like a lot of sauce)
Tortillas of choice (use the small 6″ corn, or the 8″ flour; you’ll need 12-15 corn, 10-12 flour)
Oil of choice for cooking
Spray a 9×13 baking pan with cooking spray. You may have enough filling to make more enchiladas, so have a smaller pan at the ready, like an 8×8. Heat the oven to 400°. Have your tortillas on the counter to warm slightly as they’ll roll better, but if you’re using corn tortillas, don’t leave them uncovered or they will dry out.
In a deep skillet with a cover, heat a bit of oil and add the onion. Cook about 10 minutes, or until softened and then add the bell pepper and jalapeno. Cook, stirring occasionally until the peppers begin to soften. Add in the garlic, zucchini, frozen corn and canned beans. Stir it all together and get it simmering. Cover the pan and cook for about 10 minutes. Stir in the greens, cover and turn off the heat. Let stand for about five minutes.
Place a tortilla in the pan and drop a few tablespoons of shred cheese down the middle. Spoon some of the filling in (the amount depends on the size of your tortilla) and spread it to the edge. Gently roll the tortillas up, making sure the seam side is down. Repeat until the pan is full. The tortillas can be moved closer to one another as your roll. You want them pretty snug, but not crammed in the pan or it will be impossible to get them out.
Spoon the sauce down each tortilla, spreading it out as you go. They should be well covered. Sprinkle the top with cheese and cover with foil. Bake for about 20 minutes, then take the foil off and allow the cheese to brown just a bit more. Thirty minutes should be plenty of time. If you allow the Enchiladas to sit for 10-15 minutes, they are A LOT easier to get out of the pan.
These are delicious served with avocado, sour cream, or both.
KATE’S NOTES: To make Enchiladas ‘Lasagna’ style, lay the tortillas on the bottom of the baking pan. Spread some filling over them, then top with a bit of cheese and a drizzle of sauce. Layer more tortillas and repeat. You should be able to get at least three layers, finishing with sauce over the top, and cheese before baking. Allow this to also sit for a spell before cutting in to squares.
If you wish to add meat to the filling, please do so. I used to make these all the time with chicken, and once in a while with pork or beef. One pack of boneless skinless chicken breasts is perfect; dice them, and sear the meat in with the onions, then proceed with the remaining steps.
Any leftover filling is wonderful for breakfast. I had about 1-1/2 cups left from this meal, and for breakfast I heated it in a pan then cracked two eggs in it, covered the pan and cooked it for about five minutes. I scooped it on to a plate that had a handful of tortilla chips on it. It was the finest breakfast I’ve had in a long time.
|


