August 29th, 2012
| 2 Comments »
In case you’ve been living underground, or in a state of firm denial, September begins on Saturday.
And to that I say “WHAAAAAAT??”
Summer just seems to whiz by us in a blur. There at the start it seems like it could be endless, days and days of nothing ahead of us and hours of daylight that stretch long in to the night. All of a sudden we turn the page to August, the air changes a bit and the light leaves earlier and the slide to Fall comes fast and quick. The ‘back to school’ photos are showing up everywhere this week, and next Tuesday, after Labor Day there will be tons more. For the first time in 13 years, I won’t have a child in school. It’s both bittersweet and wonderful. There’s a lot of change happening in our household as my boy finds his way in this world.
There is one constant with us now, as the tables turn from Summer to Fall and schedules become more prevalent, and that’s the staggering, loaded tables of the Farmers Market in it’s most bountiful season. Even though I know this to be true, it still boggles the mind when I gaze around me at the wonders that came from the soil, the simple act of placing seed in dirt, with faith, water and sunshine, and a plant that we can consume grows before our eyes. Water washes the dirt away and we take knife to vegetable flesh, some raw, some cooked and all delicious and perfect. I love when people share photos of their CSA bounty, the excitement clear in their words. What a blessing we have in the bounty of such a plentiful season.
But the question remains; how much eggplant and zucchini and tomato and corn and EVERYTHING can we consume, in all honesty? What’s next for the buckets of peppers? The endless greens? Oceans of onions? If you time your visit to the Farmers Market just right, the vendors tend to give away and handful of extras when you buy something, just to move it along. I’ve often staggered home under the weight of such visits, dumping out my bags on to the kitchen island to survey and ogle and dream and scheme. And I’m happy to share my findings.
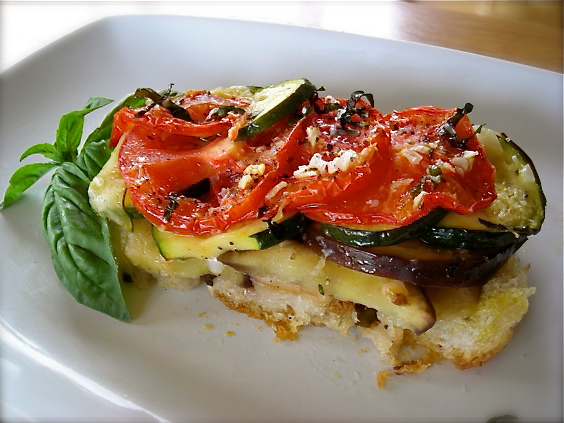
The bread base alone in this dish is incredible, but the meltingly good, thinly sliced veggies on top of it become so soft and tender from the oven that your fork slips through it without a second thought. Get out the good olive oil, round up your fresh herbs; this dish should be in your meal plan now.
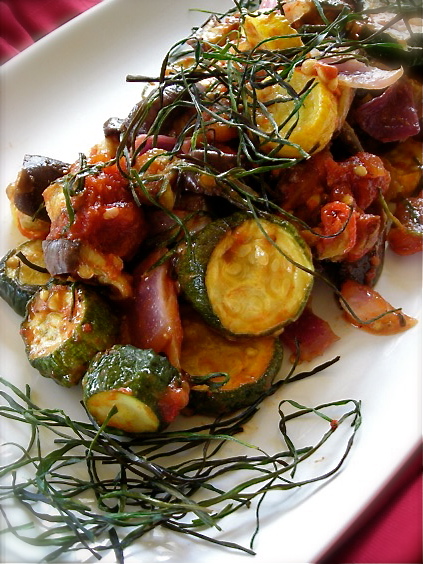
There is surely no shortage of recipes for Ratatouille, and countless ways to pull together this classic and rustic dish. This roasting method was a favorite way to use up zucchini and eggplant last year, bringing out the sweet flavors and the topping of crisp chives added such a perfect extra touch.
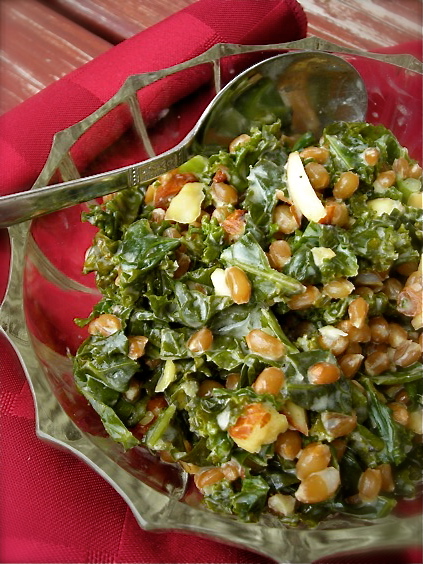
Simple and quick, although not the prettiest, any hearty green can be used, along with any grain. The versatility of this dish is one of it’s best appeals. Plus side? It’s good, fast and hearty without being heavy.
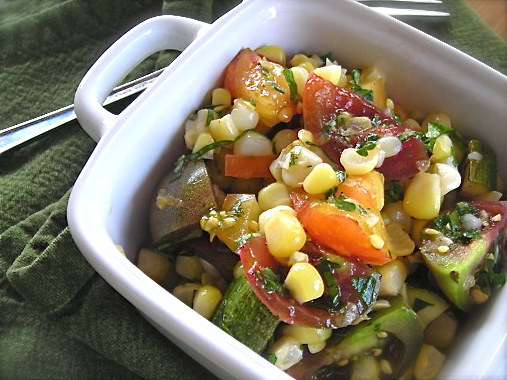
As fresh as you can get, and beautiful to behold, this salad spotlights all the gorgeous tomato varieties available, resplendent with fresh herbs and crunchy sweet corn. It’s perfect for any remaining hot Summer days.
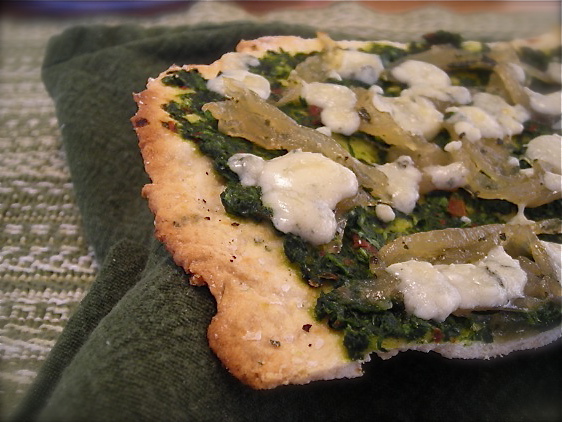
A bit futzy, as you make both a pesto and this delicate herbed flatbread, PLUS caramelizing a pan of onions, but put them all together and it packs amazing flavor. Use a good cheese and say Hello to an elegantly done meal or appetizer.
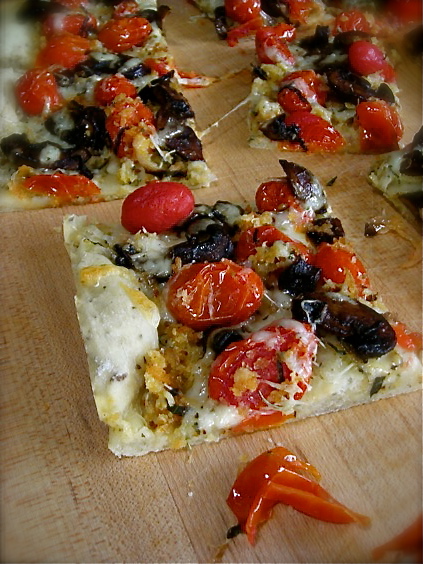
This was, hands down, one of the best pizzas I’ve ever made at home. I could not get enough of it and ate far more than would be considered reasonable, but that’s how good it was. And once again, it requires a few steps ahead of putting together the final result, but every moment spent creating this pizza is well worth it.
There are SO many more recipes and simple dishes to put together that I could share with you but I think I will save those for another post in order to not overwhelm you. This bountiful season will continue, and of one thing I’m certain, we’ll all need lots more inspiration before the end is in sight.
August 15th, 2012
| 2 Comments »
Happy birthday Julia Child!!
The culinary icon and towering personality would have been 100 years old today. And if she was alive, she no doubt would stick to her mantra in the kitchen, regardless of whom she was talking to:

And the thing is, this being fearless aspect of cooking, this devil-may-care mindset and learning from every mistake I make is how I approach each day in my kitchen. I’m not perfect by any means; I make a ton of mistakes still, even with the advanced skills I have. I still am full of anxiety when I try something new, but I keep trying, I keep figuring it out as I go and I keep entering that kitchen, day after day with fresh eyes and an eagerness that propels me forward. I’ll never tire of trying.
Never in the history of our culture has there been a time that is so saturated with every aspect of food. Our culture is obsessed with it’s food, some in a good, good way and others, not so much. There is more awareness now about food, from the way it’s grown and raised to the means of acquisition to the method it’s prepared; it’s on the minds and tongues of everyone and never before has there been such a desire for making and sharing good food.
Julia Child was one of the pioneer who started Americans out on this food adventure. The warbling, funny and iconic host of PBS’ The French Chef gave us permission to explore and expand our palates, to try out new foods and recipes. Her seminal work, Mastering the Art of French Cooking was first published in 1961 to critical acclaim, and is still in print today. She was a prolific cookbook author, as well as host of several other television shows. Her entire kitchen is on display at the Smithsonian National Museum of American History. Julia paved the way for so many other chefs through her inspiration, her urging people to just get in the kitchen and start somewhere, anywhere. Nobody could have imagined in the 1970’s, an era of bland, boring and uninspired eating that if we could consider ourselves fast-forward three decades that we’d be deeply embedded in a cultural revolution that embraces fresh, seasonal and sustainably sourced food. Julia herself likely could never have anticipated that, but here we are, and there she was, unknowingly a forerunner in a movement that’s spanned decades and shows no sign of slowing down.
So let’s pour an Angosoda, Julia’s favorite drink.


A shot of Perrier sparkling water and a few dashes of Angostura Bitters make up Julia’s favorite pick-me-up; Angosoda. The spritely bubbles give a sense of celebration. And the Bitters are well known for helping soothe a full belly.
And how about cake?? There can’t be a celebration without cake, can there?
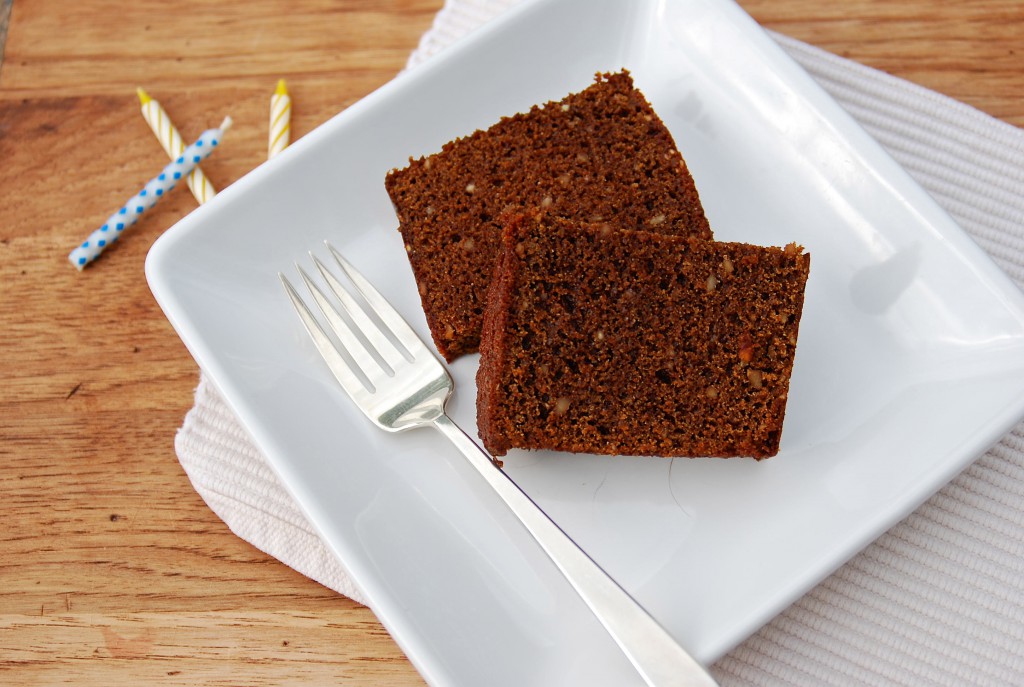
This Honey Spice Cake, or Pain d’Épices is a lovely cross between cake and bread. Rich and moist from the honey, lush with spice and flavor, it’s perfect for a celebration with decadent whipped cream or rich gelato, wonderful with a cup of coffee in the morning or tea in the afternoon. And it ages beautifully, wrapped in plastic and forgotten in the freezer for a month, or even left on the countertop for a few days if you can muster up the courage to leave it alone. I can’t. We can’t. Quick breads such as this are my most favorite item to bake. This dense cake was fragrant and dark, bidding me ‘Good morning!!’ when I rose the day after baking it. A thick slice, a steaming rich cup of coffee and a rainy morning were a fine trifecta of celebration for a most beloved woman.
Thanks Julia, for paving our path on this delicious road, for urging us to be fearless, for teaching us to laugh off our mistakes, for continually inspiring us to try something new. For everything you’ve done, and continue to do with your lilting spirit, we raise a glass on your birthday in thanks and celebration.
BON APPETIT!!!
Honey Spice Cake (Pain d’Épices)
- 1¼ cups honey
- 1 cup light brown sugar
- ¾ cup boiling water
- 1 Tbsp baking soda
- ½ tsp fine sea salt
- 3½ cups whole wheat pastry flour (or unbleached all-purpose flour)
- ¾ cup almonds, ground fine
- 1 tsp almond extract
- ¼ cup dark rum
- ½ tsp each: ground cinnamon, cloves, ginger and nutmeg
- ¼ tsp ground white pepper
- 2 tsp grated fresh orange or lemon peel
- ½ cup each: dried apricots, chopped and golden raisins
Method:
- Preheat oven to 325 degrees.
- Generously butter bottom and sides of the springform or loaf pan. Set aside.
- In the bowl of a heavy-duty mixer with the paddle attachment, beat together the honey, sugar and water until the sugar is dissolved. Then beat in the baking soda and salt. Add half the flour and beat about a minute.
- Gradually add the remaining flour and continue to beat 2 minutes more on medium speed. The batter should be stiff and sticky.
- Reduce the speed on the mixer to slow and add the remaining ingredients. Mix until everything is well incorporated. Scrape the batter into the pan; smooth the top with a damp or spatula.
- Bake on the middle rack of the oven for 1 hour. The cake is done when it begins to pull away from the side of the pan and a toothpick inserted in center emerges clean.
- Cool the cake on a wire rack for 15 minutes. If using a springform, release the pan sides; otherwise unmold the cake and place on a rack, top-side up. Cool for about 2 hours or until completely cool, then wrap well in plastic.
Julia recommends waiting at least a day or more before serving. For the best flavor and texture, age the cake for 2 weeks in the refrigerator or 1 month in the freezer.
DISCLAIMER:
I was provided the Perrier and Angostura Bitters for free in exchange for exposure on the blog.
All opinions and words are my own.
August 10th, 2012
| 2 Comments »
Something glorious happened in Minnesota in the last week; that stifling, oppressive heat and humidity finally was swept away and in it’s place is cool, breezy sunshine, temperate nights and audible sighs of relief. A pair of jeans even made an appearance lately.
Now I do realize that August can still be hot and sticky, but I am really crossing my fingers that the worst of it is over. I enjoy my outdoor time, my biking and fresh air and I would really love to get back in to this without taking a bath in my own sweat.
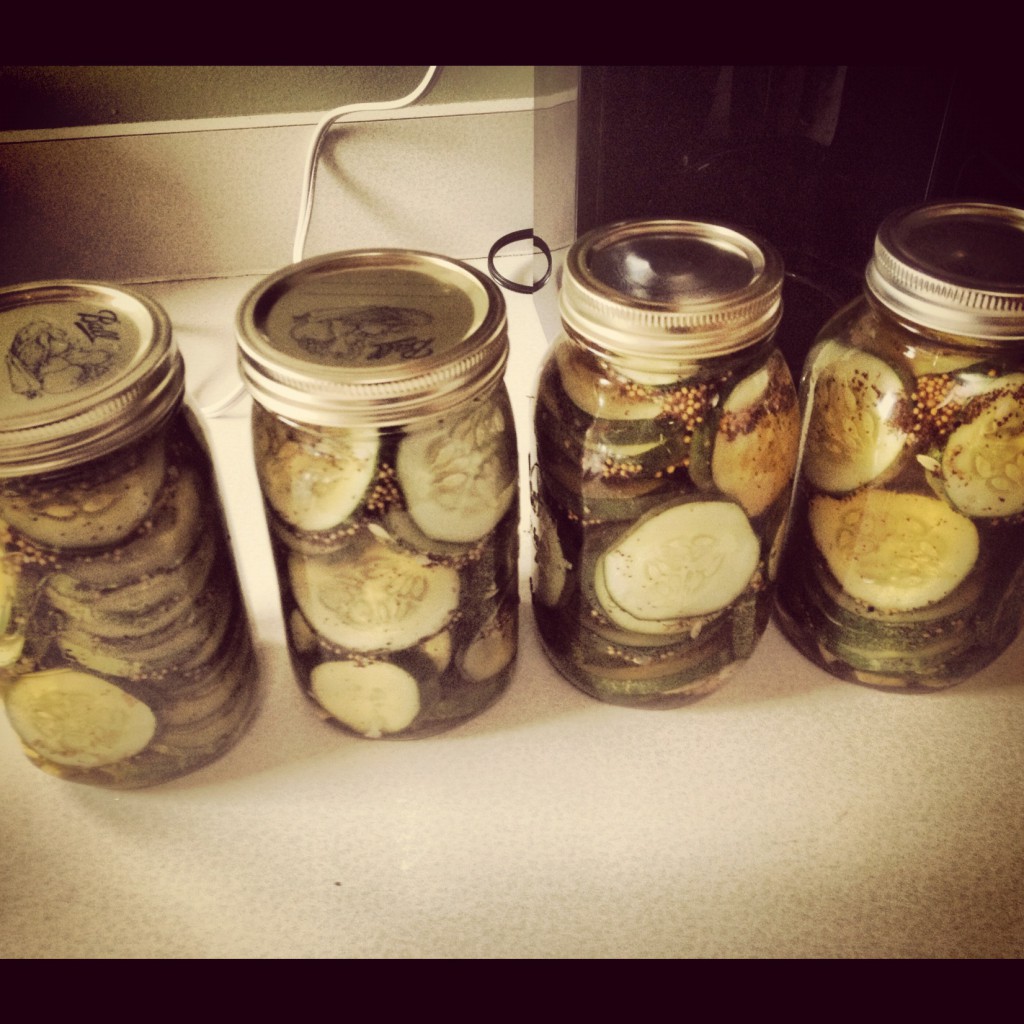
And it is that time of year too, for pickling, for canning, for preserving. I haven’t leapt headfirst in to the preserving craze that a lot of home cooks are on these days, but this year, faced with an abundance of cucumbers from our garden at the lake, I did tackle making refrigerator pickles and I’m so glad that I did. These pickles pack a punch of memory that I love with each crunchy, sweet-sour bite.
When I was very little and before my parents split, we spent a few summers enjoying a vacation at a resort near Detroit Lakes. It was a perfectly idyllic week for both parents and children, as this resort had all sorts of activities planned out, guaranteed to keep kids happy and occupied, while parents had their own time to sit and relax. Every morning, the staff would gather the kids right after breakfast, and some days, keep us busy until we arrived, breathless, grimy and sunburned back at the dining hall for dinner. Three squares a day were served, and at dinnertime, a relish plate was on every table that held carrot and celery sticks and tiny, sweet-sour pickles that I loved. The vegetables, inevitably, would absorb some of the pickle brine, so everything sort of tasted the same, but I loved nibbling off that plate and had no idea how much I missed that flavor until last Fall when my sister-in-law brought a jar of refrigerator pickles to a family gathering and I lifted one to my mouth for that first, long forgotten crunch.
It was like rapidly falling backwards in time to being 5 years old, reaching across the huge rectangle table in that massive dining hall, with floor to ceiling windows open to the summer breeze and surrounded by the last memories of my family completely intact. That sweet, salt, celery and mustard seed flavor had eluded me for a lifetime and I didn’t even know it until I tasted those pickles. I was flooded with memories, scents and nostalgia. I could smell the lake, our cabin, the cotton sheets we slept on, suntan lotion, the hot dry grass underfoot. I could see that resort in it’s entirety. I could recall the fun and laughter and the sheer exhaustion of falling asleep after a long, busy and exciting day. It was the last memories of perfection in life, before fracture, before pain and shouting and the upheaval of divorce. It was the end of one life and the beginning of another. But now, where life is happy and easy, where the love abounds, the flavor comes full circle. And I’ve made six quarts of these lovely little pickles, and we’re all enjoying them greatly.
There’s very little work involved in making these pickles, outside of stuffing the jars with cucumber slices. Our garden cucumbers from the lake were quite round and large by the time I got hold of them; with smaller cukes, the stuffing becomes much easier. Add in slices of onion and peppers, crushed cloves of garlic, slices of jalapeño for kick. I made my quarts with garlic and love the flavor. One 12-hour period in the refrigerator and you’re done.
Refrigerator Pickles
For the Brine:
1 c. white vinegar
1-1/2 cups granulated sugar
1 T. kosher salt
1 t. celery seed
1 t. mustard seed
In a non-reactive pot, bring ingredients for brine to a boil, stirring well to help dissolve the sugar and salt. Place sliced cucumbers and any extra flavor additions in quart jar. Pour brine over, screw down the top and shake gently to distribute. Allow to cool slightly, then place in refrigerator for a minimum of 12 hours. Make sure you’re putting the jars in the refrigerator while they are still fairly warm. You should be able to hold them, but still feel the heat.
Give the jars a good shake the next day to redistribute the brine and slices. This recipe should make enough brine for 1-2 quarts.
RECIPE NOTES: I doubled this recipe for my first batch, which made three quarts, easily. The next batch, in which I had 12 huge cucumbers to use, I packed 4 quart jars, made a 5X batch and ended up with quite a bit of brine left.
Be sure you are really packing the jars well. These will shrink considerably while pickling.
For both batches I made, I used a small amount of brown sugar in place of the white. It gives the pickles a bit more deep flavor. It’s not necessary at all, just an option.
August 1st, 2012
| 4 Comments »
It isn’t much, I admit. This spread, or dip or whatever you wish to call it was a lightning bolt of inspiration one night when I was craving something different to put on our favorite grilled dinner item- a loaf of pillowy ciabatta bread stuffed with an assortment of grilled vegetables.
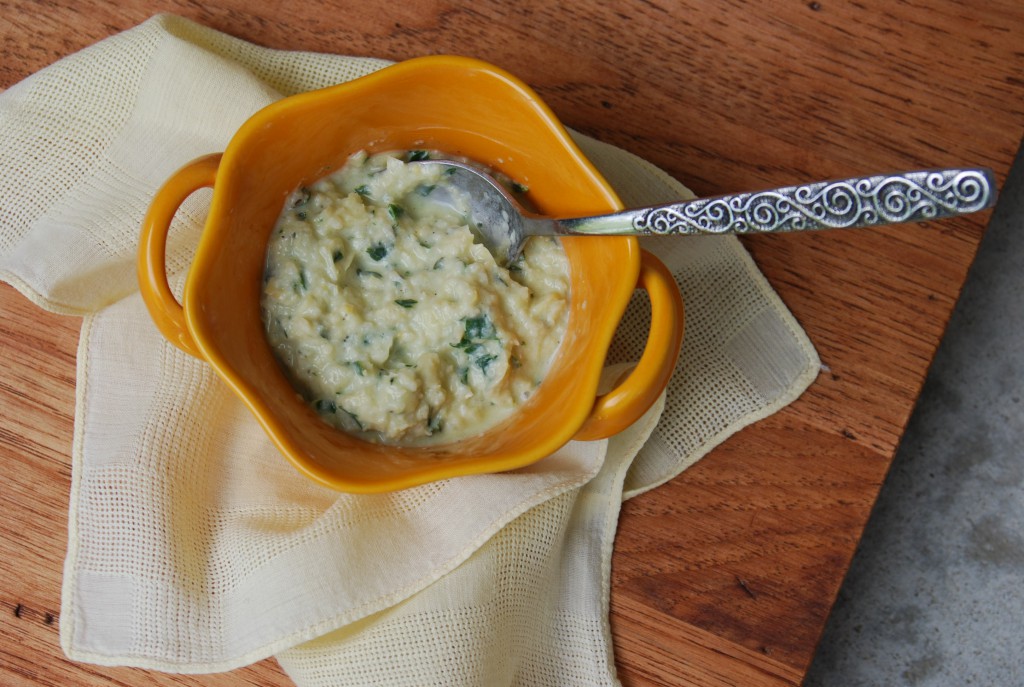
Sweet corn is in that stage of ripeness and availability right now that finds it everywhere you turn, and we’re consuming it several times a week, as well it should be. We’re so blessed in Minnesota to have an abundant crop of the good stuff, ready on road side stands, in the Farmers Market and a few select amazing Minnesota grown varieties in the local grocers as well. Sweet corn that bursts when you bite it, needing little besides a drizzle of butter and salt to make it wonderful. Have you tried mashed avocado on sweet corn? You must. It’s simply divine. And this creamy, slightly tart-sweet spread also lends itself highly to corn, hot from the grill or bubbling stock pot of water.
Beyond the goat cheese and sweet corn kernels, stripped from the cob, you could do any additions to this, with endless possibility. Fresh herbs are a must; I used lemon thyme, oregano and parsley (my basil is overgrown and bitter from the heat- big sad eyes here) but if you have good basil, by all means, use it in this spread. Add a pinch of sugar to balance the tart; combine some Southwestern flavors like cumin, lime juice and zest and chili powder for a big ol’ kick. Add curry powder and lime juice for an altogether different interpretation. Since the sweet corn supply is endless, your variations on this could be as well.
Sweet Corn & Goat Cheese Spread with Fresh Herbs
1 ear sweet corn, cooked and kernels stripped
2 oz soft plain goat cheese
1 T. fresh squeezed lemon juice
1 t. fresh lemon zest
3 T. mixed fresh herbs
Pinch of brown sugar
Salt and pepper to taste
Place all ingredients in the work bowl of a food processor and process until fully combined, scraping bowl occasionally. Taste for seasoning, and add more salt and pepper if it’s too sweet, or a bit more sugar if too tart.
Just a note on this: I have a tiny little food processor, like a quart sized one and it was perfect for making this spread. In a larger bowl type of processor, you may not have a confined enough space to get it to mix properly. Try it in a regular blender, or in a deep pyrex measuring cup with an immersion blender if you have either of those options. This made about a cup’s worth of spread, but if you want to make more, increase the ingredients accordingly.
July 11th, 2012
| 3 Comments »
I went a bit crazy over cherries recently. After discovering them at a local market for $2.98 a pound one week, I splurged and bought nearly 18 pounds worth of them. Then barely two weeks after that, the same market had them for $1.97 a pound and I bought about 8 more pounds.
I know. Whoa, girl. And it begs the question….. just what did I DO with all those cherries??? Besides gleefully stuff them in my mouth. Which I did a lot of, mind you. They are so crisp and perfect and juicy. I could hardly help myself and I’m pretty sure my veins ran thick with deep, dark cherry juice for a few days. I know our kitchen looked like a battle zone following some of our marathon pitting sessions. Griffin was really helpful in that regard, gleefully pitting fruit shirtless so he could comment on how he looked like a mass murderer. Ha. Kids.
For the past several years, we’ve managed to just about eat our weight in cherries when they come in season; it’s one of our all-time favorite fruits and each year as we slurp through a sack of them, our fingers turning purple in our consumption, we’ve always talked about trying to dry them for future use. We have a huge Harvest Maid dehydrator, and dried cherries are one of Mike’s favorite items to put in his daily yogurt, but at almost $10 a pound for them, we don’t keep them on hand much at all. So faced with this year’s bounty, the first goal was to dehydrate as much as possible. Thankfully, a trio of helpful hands made the job of pitting and slicing them a bit easier, and our first batch came through successfully. So successful that I turned around and dried a whole dehydrator full of them again. We were left with about 3 quarts of dried fruit, and Mike’s eyes shone with anticipation.
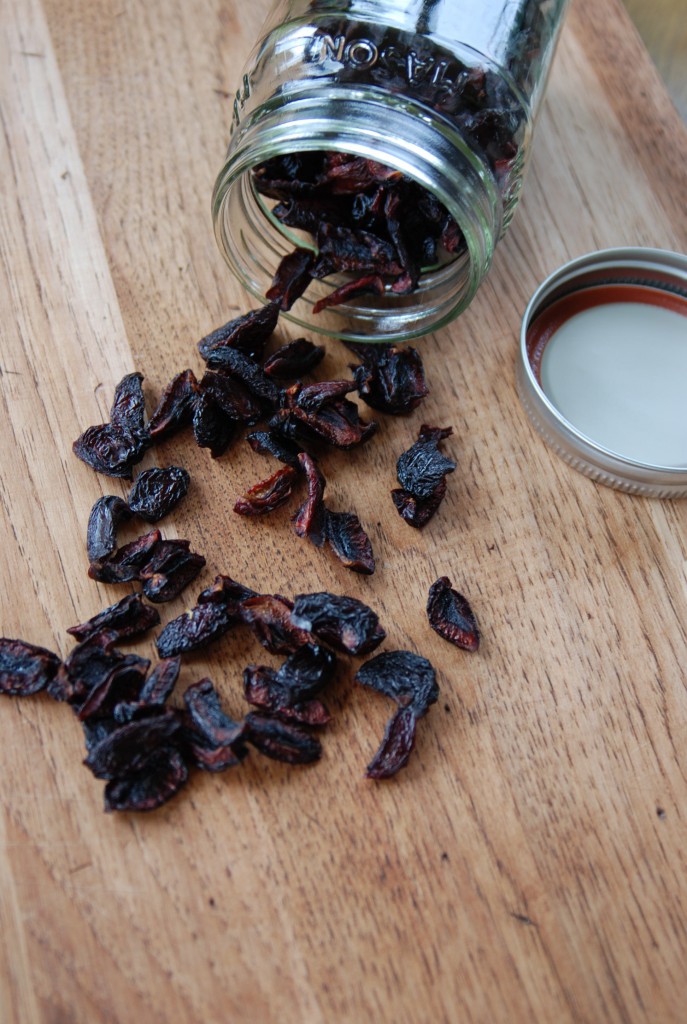
The process to dry them takes up to 12 hours; we pitted the fruit and sliced them in half, then started the dehydrator at 145° for two hours right around dinnertime. At that point, we turned it down to 125°, placed it in our mudroom (that thing is loud, y’all) and forgot about it until the next morning.
For more inspiration, I scoured the internets, implored friends and sought out anything cherry related for several days. My eyes popped in excitement upon finding a Chocolate Cherries recipe, soaking ripe cherries in chocolate simple syrup and a few quarts of those went in the fridge.
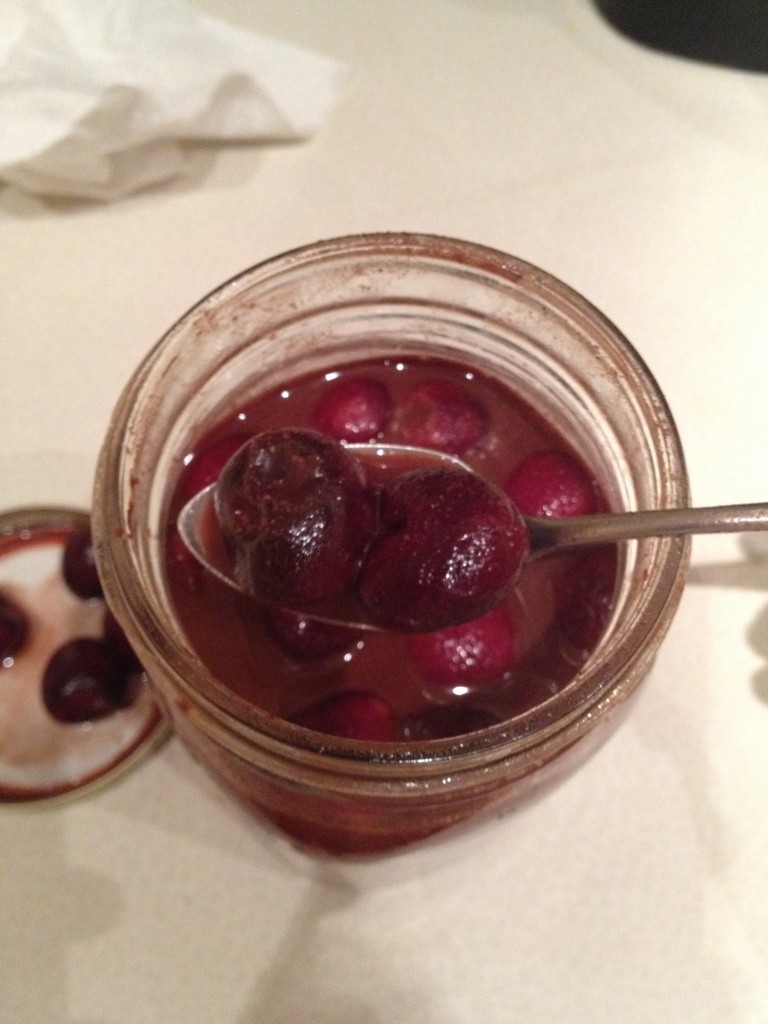
Here’s the link to that procedure; it ridiculously simple: Dark Chocolate Cherries. The worst part of doing these was to keep them in the fridge for two weeks. I’m sure I could have consumed them earlier, but part of me loved the idea of anticipating such a treat. And what a treat they were; lush and plump with a rich taste of chocolate amidst the sweet fruit. Dropping them over a bowl of vanilla bean ice cream, drizzled with the chocolate-y liquid was a sensory adventure of taste and delight.
I roasted a batch of fruit too, sprinkled with dark brown muscavado sugar and drizzled with a little balsamic vinegar. Sprinkled with chopped mint, they were mind-blowing; warm and soft, sweet and slightly tangy all at once. They will make a wonderful addition to yogurt, or on top of ice cream, or better yet, turned in to my favorite brownies for a sweet treat. Another wonderful treat for these roasted beauties was to spread some ricotta cheese on good sourdough bread and top it with the fruit. Make it even better by gently broiling the ricotta first.
Here’s my method for roasting the fruit:
Roasted Cherries
Pit and de-stem one sack of fresh cherries, removing any that are bruised or moldy. Heat oven to 450°. Place cherries on a rimmed baking sheet and sprinkle with sugar of choice- it can be brown sugar, cane sugar or any type of specialty sugar. Use about 2-3 tablespoons and just dust the tops of the cherries. Place in the oven for about 10 minutes, until the cherries swell and release some of their juices. Mix about a tablespoon of balsamic vinegar in with a cup of water. Drizzle over cherries, shake to distribute and place back in oven for a few more minutes, allowing the juices to bubble and thicken slightly. Remove pan from oven and allow to cool. Sprinkle with finely chopped mint and place in a jar with a few mint sprigs overnight. Remove mint the following day.
For another batch of fruit I made a Cherry Ginger Butter from my friend Amanda. It comprised my very first water-bath canning experiment and went off without a hitch. I was impatient though, and didn’t allow the fruit to completely cook down so the end result was more of a fruit sauce but it’s still an incredible flavor. And it gave me the canning bug so hopefully I can do some more with that as the bountiful summer season winds down.
And you know what?? Another local market is having a Cherry Blow-Out starting on Thursday!! Cherries at $2.99/lb AGAIN. Yikes!! Good thing there are other inspirational ideas that I found:
Cherry Balsamic Vinegar
Martha Washington’s Preserved Cherries
Cherry Cornmeal Cake
Cherry Crumble
July 5th, 2012
| 4 Comments »
Cauliflower is so endlessly versatile, and to think up until a few years ago, I’d only eaten it raw or boiled. Boiled? Ugh. Steamed is a much better, albeit bland, option, but if you allow it to go too far in the steamer, it’s lack of inspiration becomes legendary. The epiphany, thankfully, was the pan of deeply roasted cauliflower that changed my mind about the stark white florets forever. I’ve tried it mashed like potatoes, and also pureed smooth with parmesan for a creamless alfredo sauce. But time and again, I placed a pan loaded with it in to a hot oven and devoured the results.
That was about it for that vegetable, and I was fine with it. I could eat cauliflower year-round, and I do, but now with a few new methods in my arsenal, I can enjoy this vegetable a whole lot more.
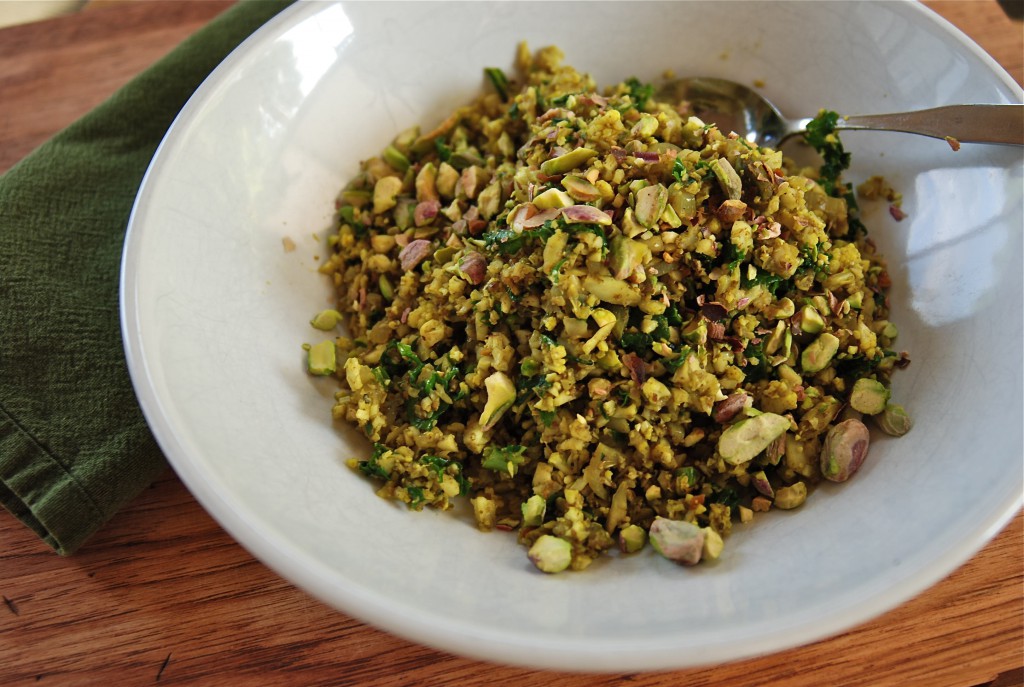
I came across this fried ‘rice’ recipe for Cauliflower on Shanna’s blog and knew that I had to get that going in my own kitchen. While I do love fried rice to the depths of my heart, it’s best when you have cold, cooked rice on hand and that’s not just something that materializes in this kitchen every day. But a head of cauliflower, ground in a few pulses in your food processor and mixed with the same type of seasonings in a hot wok can be a dynamite substitute, with a lot less calories and carbs.
And simple doesn’t even do this justice. It’s ridiculous how easy and quick this is. I spent more time prying the leaves from the core of cauliflower than any other aspect of putting this together, including chopping an onion. Given that you’re basically pulverizing the vegetable, you can use the core of it as well and no one would ever know the difference. In less than 10 minutes after heating up my wok, we sat down to steaming bowls of this fragrant meal.
Shanna has two options for this recipe on her blog, which is a wealth of beautiful writing (with a love story that’s almost as good as ours…..) and this base of ground cauliflower could really withstand just about any treatment to create your own version. I made a rich curry flavored dish, enhanced with ground pistachios for flavor and as I tossed and cooked it, inhaling the fragrance from the wok, I started thinking of all sorts of vegetables I could add to this to make it better and deeper in flavor, and in a second round of this simple meal, I added in some leftover vegetables from a coconut curry stir fry that Griffin had made, as well as a few handfuls of cold rice and the results were equally spectacular. This will be a new favorite in our house, you can bet on that.
Another mind-blowing option for Cauliflower that I’d been thinking about lately is to prepare it on the grill. I’ve seen methods of doing this by slicing through the head, creating a ‘steak’ and laying that on the grill. In my attempt to cut my Cauliflower though, my ‘steaks’ broke apart, leaving me with no other choice but to toss them on my grill plate to cook. Probably one of my best purchases for outdoor cooking, my cast iron grill plate lays directly on top of the grate and is perfect for cooking all manner of small foods; I can grill peppers and onions for fajitas, asparagus without losing any stalks, mushrooms, small fruit and a wide range of other foods, and it was perfect to create this smoky, sensational grilled cauliflower. I could barely contain myself from eating the entire bowl of it.
My most favorite marinade to use on grilled vegetables is a spicy mustard vinaigrette, brushed or tossed with the vegetable prior to being placed on the grate. It imparts terrific flavor, with just a bit of punch from the mustard. I’ve found that it works well on almost every vegetable I’ve ever grilled. Which, admittedly, has been A LOT. I love to grill just about anything.
Cauliflower Fried Rice
1 small head cauliflower, leaves removed and broken in to large chunks
1 small onion, diced
2 garlic cloves, minced
1 T. fresh ginger, minced
1 t. crushed red pepper flakes
Coconut oil for cooking
Soy sauce and sesame oil to finish
Place the cauliflower in the work bowl of your food processor and pulse to break it down. You want small pieces but not too deeply ground up. It happens fast too, and I need about 3-4 good pulses before it’s perfect.
Heat a small amount of coconut oil in your wok, or other large deep skillet. Add the onion and cook, stirring continually, until it’s softened, maybe 5 minutes tops. Add the garlic and ginger and cook, stirring, for several more minutes. Add the cauliflower and stir to mix everything up. At this point, once the cauliflower is warmed, you can be done. I cooked it through a bit so it wasn’t completely crunchy, retaining just enough bite to be toothsome. It’s entirely up to you.
Drizzle the cauliflower with a bit of soy sauce and sesame oil, if desired, before serving.
RECIPE NOTES: This can be treated like any fried rice recipe, using vegetables to bulk up the finished product. The variations you can make are positively endless.
June 28th, 2012
| 21 Comments »
In moving past the continual consumption of meat with our meals, it brings to light an entirely new way of going out to eat, as I’m left wondering how up to date any restaurant will be with their meatless options. There are those places that soar, offering a wealth of meat-free entrees that dazzle, while others places rely on pasta dishes as their sole vegetarian fare.
Pasta isn’t bad, mind you. I do enjoy it. But these days, having just a pasta dish or two with vegetables as your meatless menu offering is pretty unimaginative for a restaurant.
But that being said, pasta has it’s virtues.
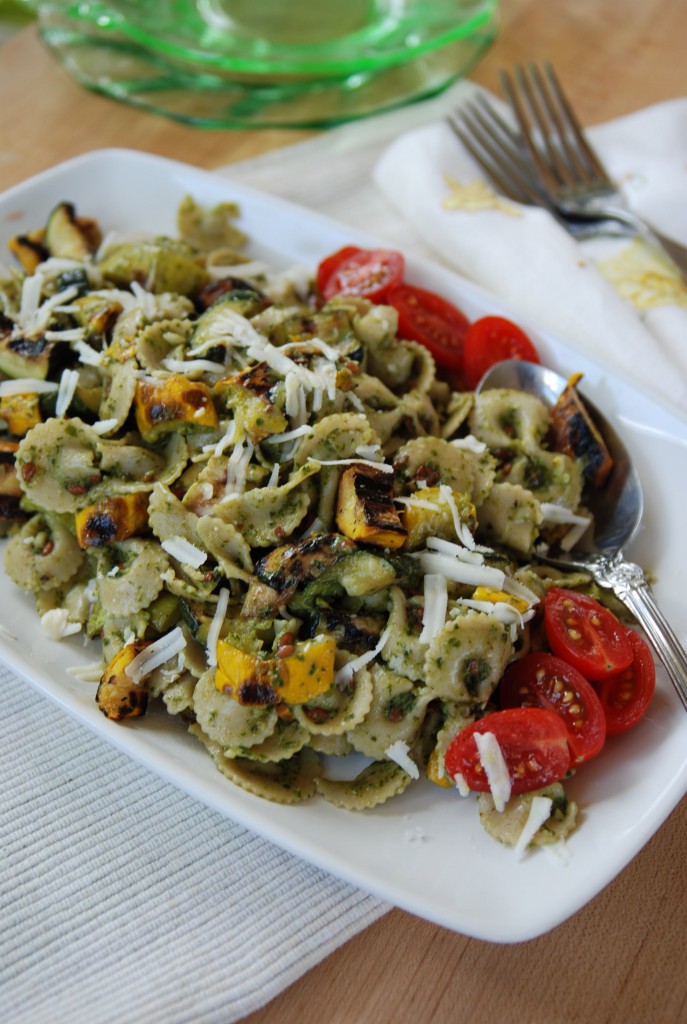
Hodgson Mills Pasta is running a recipe contest on Pinterest and I’m participating with this recipe. Are you on Pinterest? There’s a special page for Hodgson Mills that has all the recipe entries on it.
I’d appreciate a vote if you’re so inclined. There are some pretty nice prizes. You must go to the page linked above to vote. Pinning this recipe from my blog won’t count.
And Hodgson Mills was nice enough to offer $25 dollars of assorted pasta to one lucky winner from my blog. That’s a lot of pasta! All you need to do to enter is leave a comment on my blog stating your favorite way to prepare pasta (US residents only, with a valid mailing address, please) You have until Thursday July 5th to leave a comment and be entered for the giveaway. I will choose one commenter through Random.Org and contact you via email, so be sure to leave that information. Hodgson Mills will ship directly to you.
Do you love your pasta rich and cheesy? How about chock full of rich tomato sauce and italian sausage? Plain with simple garlic and olive oil? I’ve been enjoying Hodgson Mills whole wheat pasta with summer fresh pesto and grilled vegetables, and creating this recipe was a deliciously fun way to use up a huge box of basil that I’d been given. Food gifts are the best, aren’t they?
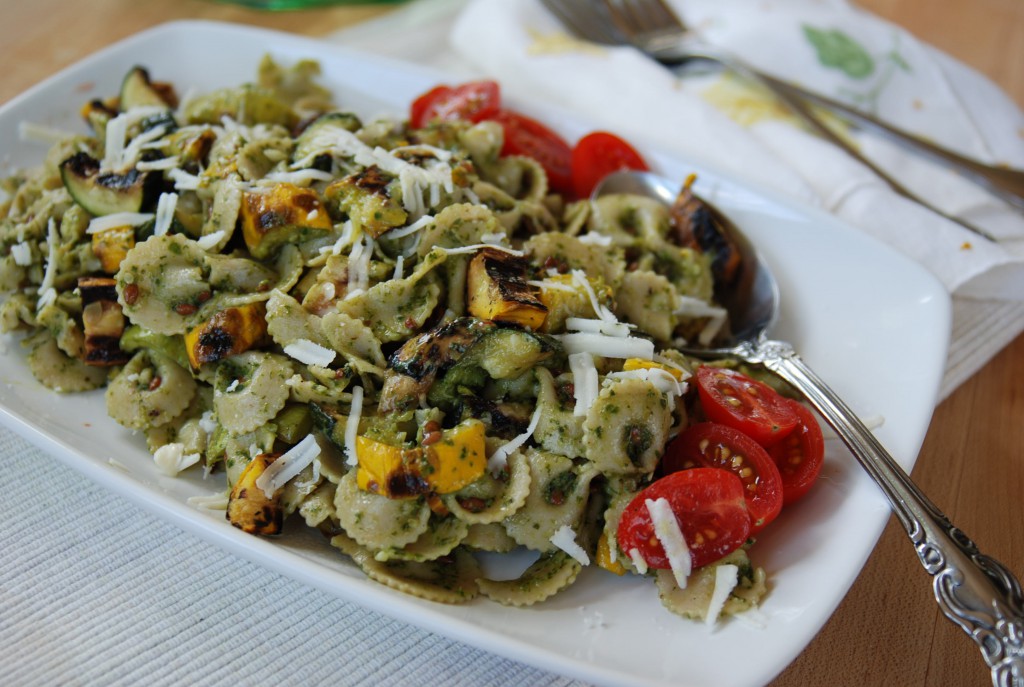
Summer Pesto Pasta with Grilled Zucchini
1-lb Hodgson Mills Bow Tie Pasta
2 medium zucchini
1/4 c. olive oil
2 T. fresh squeezed lemon juice
1 t. prepared spicy mustard
1 c. prepared pesto (or make your own from scratch, method included)
Fresh Cherry tomatoes, optional
Prepare zucchini:
Heat gas grill on high for 10 minutes. Just prior to cooking, reduce heat to medium-low and brush grill grates with canola or other neutral oil. Whisk together the olive oil, lemon juice and prepared mustard; set aside. Wash zucchini thoroughly and trim off root end. Slice zucchini the long way into three strips about 1/4″ thick. Brush with the mustard oil and place, oiled side down on prepared grill grates. Cook without moving for 5 minutes. Using tongs, carefully turn zucchini over and continue to cook until tender, about 7-10 minutes more. Remove from grill and set aside to cool. Cut zucchini in to bite sized pieces.
For the Pesto:
4 cups loosely packed basil leaves
1/3 c. olive oil
2 T. shredded parmesan cheese, plus more for finished pasta.
2 T. pine nuts (optional)
1 T. kosher salt
1 t. fresh cracked black pepper
Place all ingredients in the work bowl of a 2-quart food processor. Process in pulses until thoroughly combined, adding more olive oil if needed and scraping down sides as necessary. Scrape prepared pesto in to a bowl and press plastic wrap over the surface to prevent discoloration.
In a 6-quart stockpot, bring water to a boil. Add pasta and salt, if desired. Cook pasta until just al dente. Reserve one cup of the cooking water, drain pasta and place back in the stock pot. Add half the pesto to the hot pasta. Drizzle in a little of the cooking water and stir to combine, adding in a bit more cooking water if needed. Add more pesto if needed, along with the cooking water until it’s to your preferred consistency. Stir in the grilled and chopped zucchini and more parmesan cheese, if desired. Taste and season with salt and pepper. Chill pasta for up to an hour before serving, or overnight if desired. Taste prior to serving to adjust for seasoning, and add sliced cherry tomatoes for garnish and color.
June 27th, 2012
| Comments Off on raw pea salad with jicama, cucumber & mint
I’ve never liked peas. Never. But again, as always, I’d been exposed only to frozen cooked peas, often overdone and alarming in their color and consistency. Even the smell made me want to gag.
But then again, up until just last year, I’d never had peas fresh, raw and straight from the shell. I popped this raw pea in to my mouth in a moment of bravery and bit down. It was, obviously, a revelation, and the continuation of these eye-opening food experiences as an adult has been nothing short of wondrous, proving that it is never, ever to late to learn about new foods.
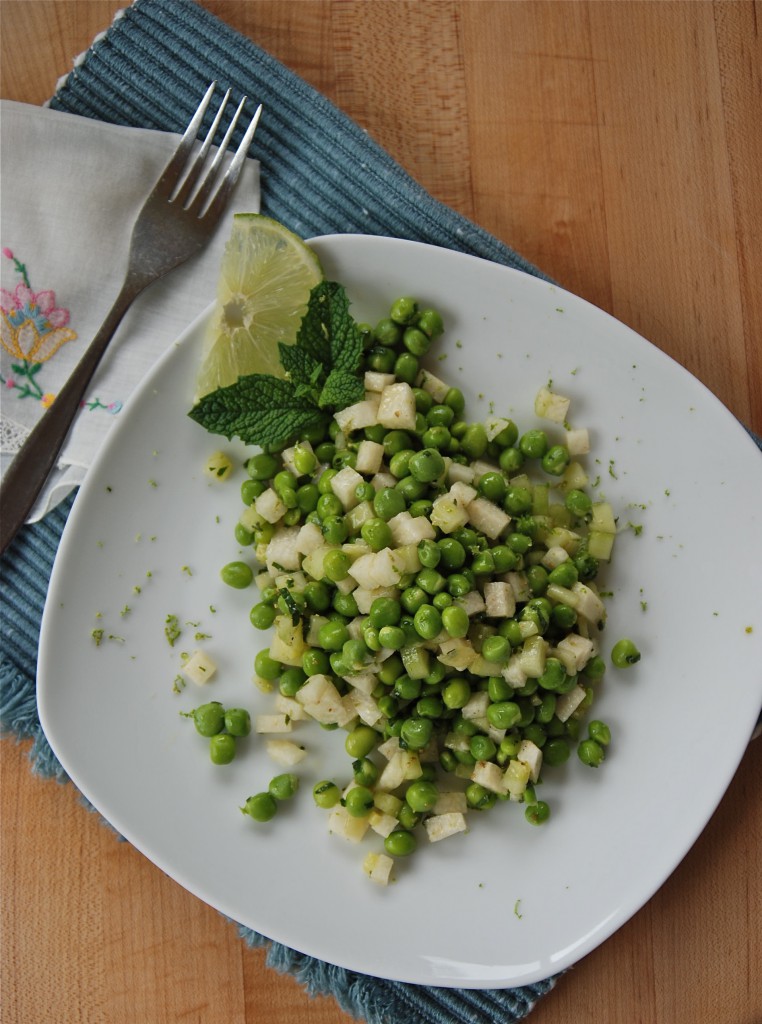
Still, I’d never decided to push myself in to making something with raw peas until this summer when the idea began forming in my head for this salad. Coupled with the opening day of the Shoreview Farmers Market near us (and a day off of work for me) I picked up two baskets of sugar snap peas and spent an ungodly amount of time shelling them. As I stood there, thumbs slipping through the shells, watching the peas tumble in to the water, I thought back over time to how many women had done this task before me, sitting on a breezy porch or back steps in the warmth of late Spring, a basket of peas in their lap listening to the ‘plup plup’ of tiny peas hitting the bowl. I love the nostalgia of food, how the simple means of connecting with our sustenance has been practiced for generations, going back in time when eating local wasn’t considered trendy because it was all anyone could ever do. Sometimes I long for that ability to connect, to be caught deeply in a season of plenty sitting right outside my kitchen door.
Maybe I was born in the wrong era.
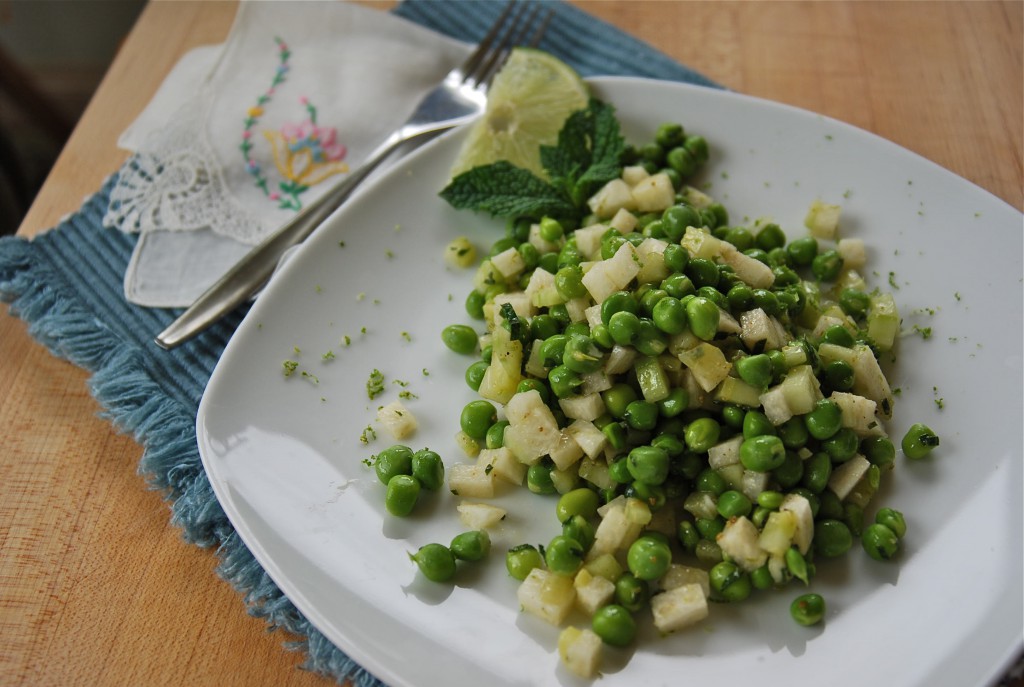
I couldn’t begin to tell you where the urge for this salad came from; it arrived with the heat blasting Minnesota, wringing us out in humidity and a continual dance of thunderstorms bringing severe damage, flooding and devastation. I’ve been shocked and saddened every day as photos flit across my screen showing the aftermath of these storms. Amidst all the chaos and rain-soaked days, the idea shimmered like the waves of sunlight, boiling up in me and urging itself along. Peas. Jicama. Cucumber and especially the mint. For some reason in my head, it all worked so I shelled, chopped, mixed and crossed my fingers. A squeeze of fresh lime juice, a few shakes of cumin and salt and a spoon lifted to my mouth assured me that my mind was right, as right as heat in the summertime and peas that will always need shelling. Right in the ways of that only simple can be.
I’d be completely at home in the wide open country, on an open back porch under the sunshine and immensely fresh air. I know I would. But in my lifetime that’s unlikely to happen. I won’t be picking sugar snap peas in my garden, warm in the heat, listening to them fall in a bowl but rest assured, I will be making this salad again. From the first bite, to the next and finally a stolen spoonful the following day to remind myself of how good it was, how fresh and summery it tasted in my mouth, it was so perfect, so crunchy sweet and all mixed up with flavor and snap. Here’s to the joy of Summer time.
Raw Pea Salad with Jicama, Cucumber & Mint
3# shelled sugar snap peas
1 c. english cucumber, peeled and diced fine
1 c. jicama, peeled and diced fine
1/4 c. chopped mint
1/3 c. good quality olive oil
3 T. fresh squeezed lime juice
1 T. fresh lime zest
1/2 t. ground cumin
Sea salt and fresh ground black pepper to taste
In a large bowl, combine the peas, cucumber, jicama and mint. Whisk together the oil, lime juice and zest, cumin, salt and pepper. Adjust to taste and pour over salad. Stir to combine, adjust salt and pepper. Chill for an hour before serving; taste for seasoning.
This salad was excellent served atop a bed of fresh salad greens, too. The vinaigrette dresses the greens beautifully.
Once chilled, the olive oil will solidify slightly;
you can let the salad sit at room temperature for a few minutes if that doesn’t appeal to you.
June 24th, 2012
| 4 Comments »
I’ve been blogging at this site for six years now. I KNOW! What the heck?!!! I’m either crazy, stubborn or irritatingly persistent, or maybe a combination of all three. At any rate, it’s like a child I’ve raised; I vacillate back and forth between utter frustration with it, and phenomenal pride. SIX YEARS!
And this here blog has seen some pretty major input of amazing recipes, many of which most of my readers have never, ever seen because, really, who looks through the Recipe Index? Does anyone? And in being a part of the blog world for six years, it’s been amazing to watch foods change and swell with time, going from something obscure and strange to being mainstream and freaking everywhere. Are whole grains all that new? It seems so, if you pay attention to the blog posts out there, but four years ago I was playing with grains, having to trek all over the city in search of quinoa, red rice, millet and farro. Now every supermarket has them, thankfully. And I love that people have embraced them.
Three years ago I made a cake with olive oil in it and was all over myself at how odd that felt, and also jumping up and down a little bit with each bite because, whoa….. it was GOOD. Nowadays, there are olive oil cakes popping up in every season, with every fruit imagineable. No one bats an eye at olive oil in a cake. But three years ago? It seemed new, fresh and different. And I clearly recall feeling rather odd pouring all that oil in to the batter. But the result was stunning.
That was three years ago, and I haven’t revisited that recipe once. Shame. It was pretty amazing, and now with nectarines in season, I picked up a sack of them and pulled up the recipe in my Index. And I’ll tell you; nothing makes me groan in agony, feeling like banging my head on a wall as I do when I see the way I used to photograph my food. {{Go on, take a look. I don’t mind.}}
Thankfully, we’ve come a long way in that area.
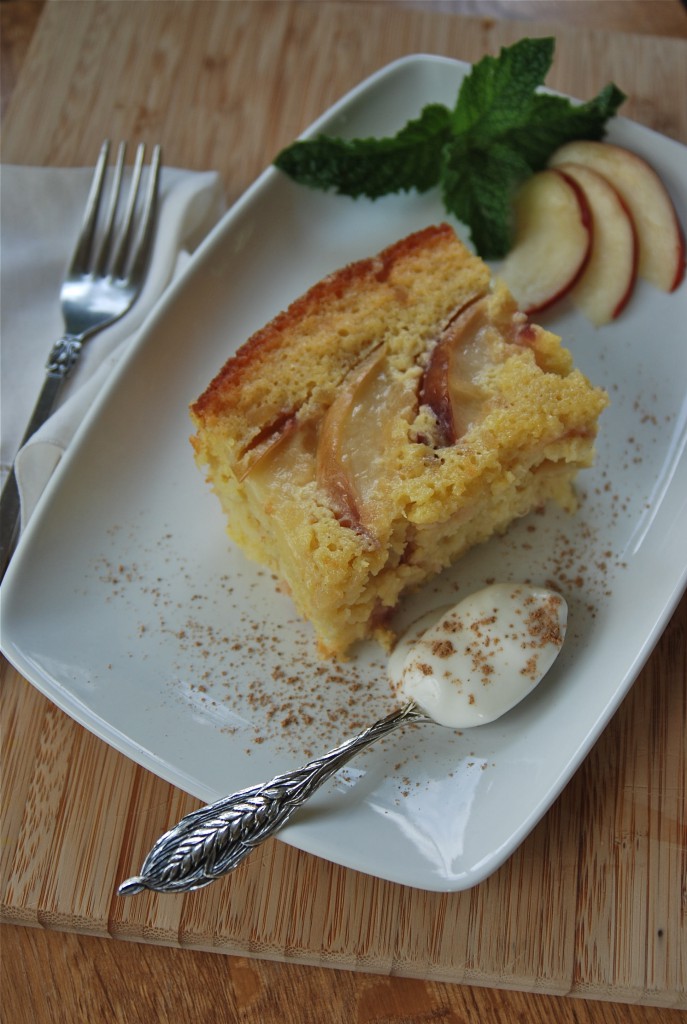
In re-working this recipe, the one substitution I made was to use fresh grated ginger in place of dried and ground. I recalled that the ginger taste was just not that noticeable in the previous attempt, but with the addition of it fresh, it just popped out of the cake, dancing up front and center in my face. Balanced with the tang of lemon, and the subtle fruity nectarine pieces that literally melt inside the cake, it was a combination of tastes that are at once bold and forthright, yet clean and crisp. And that olive oil? It’s darn near perfect.
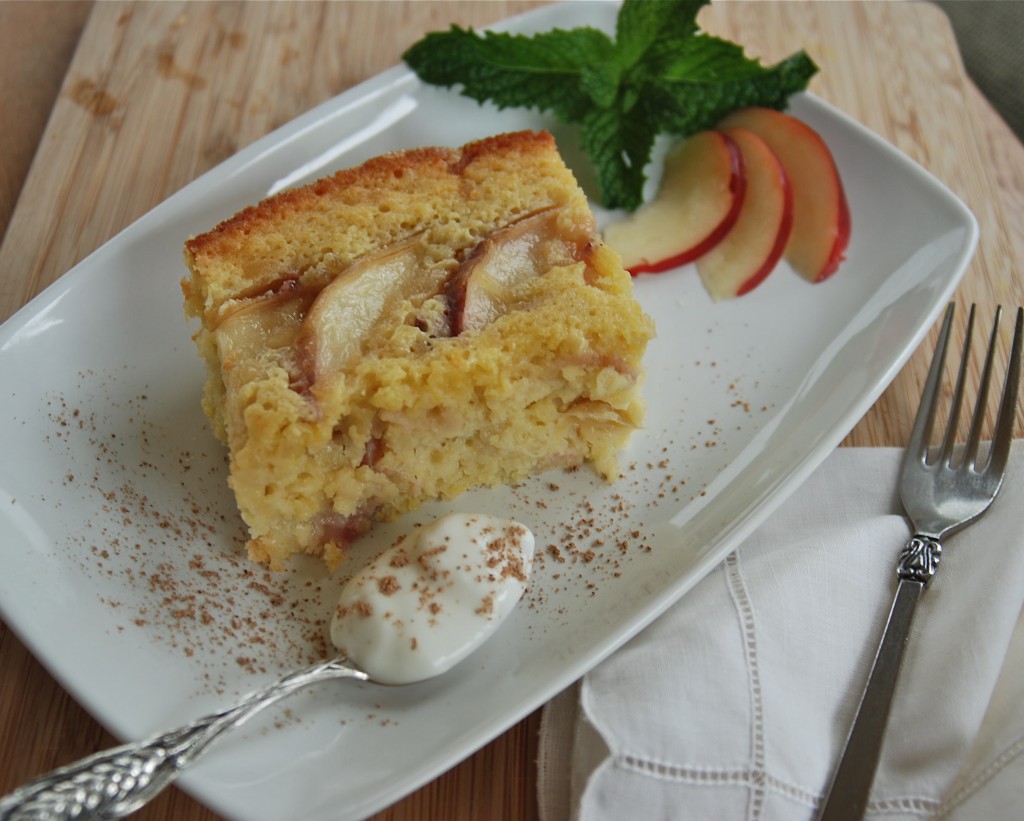
Ginger Nectarine Cake
2 eggs
1/3 c. milk
1/3 c. good quality olive oil (use the best you’ve got; you will taste it in this cake)
1 lemon, zested. Squeeze out juice from half.
1 T. finely grated fresh ginger
1/3 c. sugar (original recipe calls for 2/3- I found the smaller amount to be perfect. Adjust accordingly to your taste)
1-1/2 c. AP flour
2 t. baking powder
1/2 t. sea salt
3 large nectarines, two diced small, one sliced for garnish
2 T. crystallized ginger, chopped fine.
Preheat oven to 350°. This cake can be made in any number of pans, like a 9×13 for a thin cake, or an 8×8 for a thicker cake. You can also use a 10-inch springform pan with removable bottom. I used a 2-qt oval baking dish. Spray any pan you use with non-stick baking spray.
In a large bowl, whisk eggs, milk and oil until emulsified. Add lemon zest and juice and whisk again. Mixture will look slightly curdled and will be very thick. Stir in fresh ginger and sugar, whisk the mixture vigorously.
Separately, whisk flour, baking powder and salt together. Stir in to wet ingredients until just barely blended. Add in diced fruit and fold to incorporate. Scrape batter into prepared pan and smooth top. Arrange sliced nectarines on top, and sprinkle with the crystallized ginger and a tablespoon or two of sugar, if desired.
Bake cake until the top is nicely golden brown and the cake springs back when touched, about 40-60 minutes, depending on the pan you use. The toothpick test will help determine when it’s done. (A 9×13 will get done quicker, so be aware of that)
This cake recipe originated in a copy of Real Food magazine, available quarterly at Lunds/Byerly’s
June 19th, 2012
| 5 Comments »
I’ve been on a mostly plant-based eating plan for just over a year now and have no intention of ever going back to eating meat on a regular basis. I’m not against having a bit of it here and there if the mood suits me, but with a heightened awareness of how it deeply affected my health, I’m off of the stuff for the long term.
Trouble is, I’ve been searching for cooking inspiration and while I can find a great deal online in the blogs that I follow, I hadn’t come across a really good source until I serendipitously found Michael Natkin’s blog, Herbivoracious, and within a day’s time was invited to a local book signing with the author. Everyone who attended the event received a complimentary cookbook and several tantalizing bites from the simple and gorgeous recipes in the book.
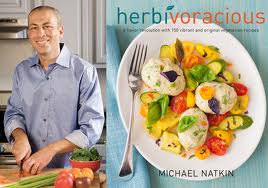
I haven’t devoured a cookbook like this in a very long time. I’ve purchased a few promising vegetarian cookbooks through used book stores, but have come away from them feeling uninspired, or worse, dismayed at the boring recipes. In our current state of food, with a wealth of ingredients available to us, fresh produce everywhere and home cooks hitting up the internet with abandon to share their stories and recipes, we shouldn’t feel like pasta and vegetables make up the bulk of a vegetarians meals, but that was the message a lot of vegetarian cookbooks still seem to send. I wanted something that reflected the modern cuisine, full of a wide selection of fresh ingredients, unique spices, terrific grains and a grown-up mentality towards consumption of plant-based foods. Just a few pages in to Michael’s book and I knew I’d found what I was looking for, breathing an excited sigh of relief. I immediately started marking pages, rich with inspiration, my mouth already watering over what was to come.
One aspect of this book that I love is that it mirrors my own cooking philosophy, in that a recipe should be a guide, and not a cut and dried interpretation of the finished dish. Michael clearly discusses ways to change up his recipes, suggesting additional ingredients or substitutions and encouraging the reader to utilize what’s on hand. Every dish is simple, yet elegant, running the whole range of time needed for completing the recipes from about 10 minutes to pull together an easy salad to longer, in-depth recipes for those special occasions. The book is full of advice on sourcing ingredients, caring for your knives, planning your meals and making your prep easier to manage; he covers so many little details that it makes the book more than just a cookbook, but something akin to treasured kitchen advice. The cover page is gorgeous, but if it gets torn, stained or otherwise in your exploration, the actual cover itself still has it’s beautiful logo. I like that in a book.
Even while still at the book signing event, chatting excitedly with a few friends and paging through the book, I came across the Golden Beet Tartare recipe and knew that would be tops on my list. I adore gold beets and it sounded like a delicious summery salad for a hot, sticky day.
I wasn’t wrong at all about that. The heat is on, Minnesota. It’s time to stay cool, right?
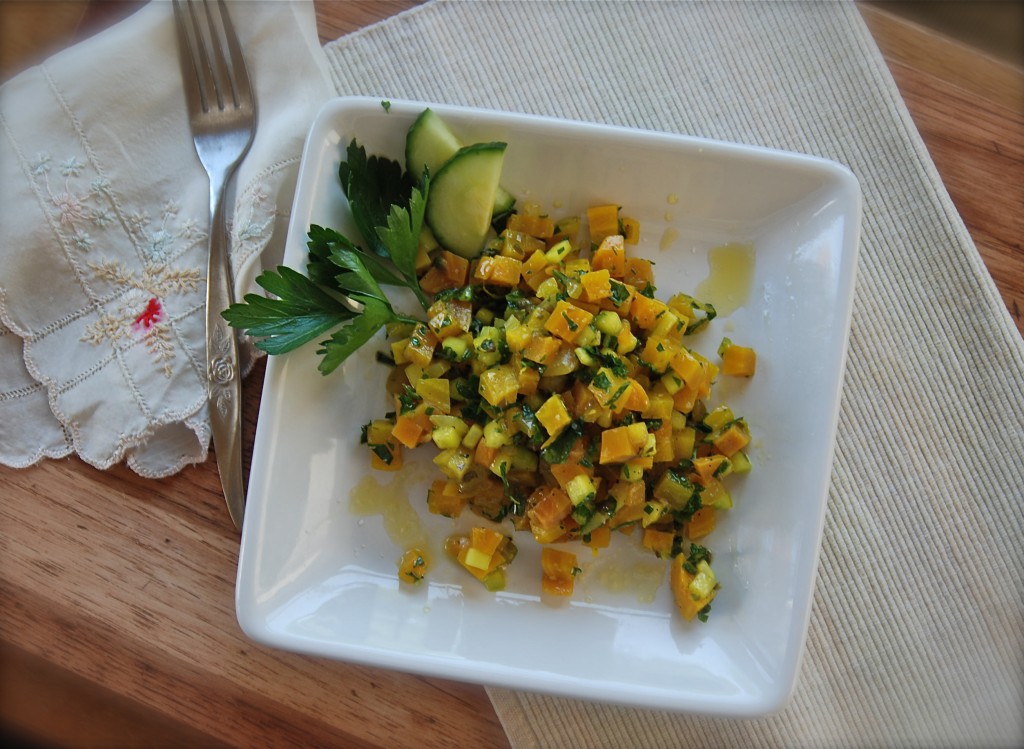
Fresh and bright, this simple salad has crunch and texture galore, the rich earthy taste of beets and mellow cucumber and onion. The original recipe called for raw red onion which I don’t ever use as I dislike raw allium in anything, so I substituted grilled vidalia onions with just enough snap remaining. Once it was all pulled together I thought it still needed a bit more color to jazz up the visual aspect, so I finely chopped some kale leaves that gave it the perfect balance.
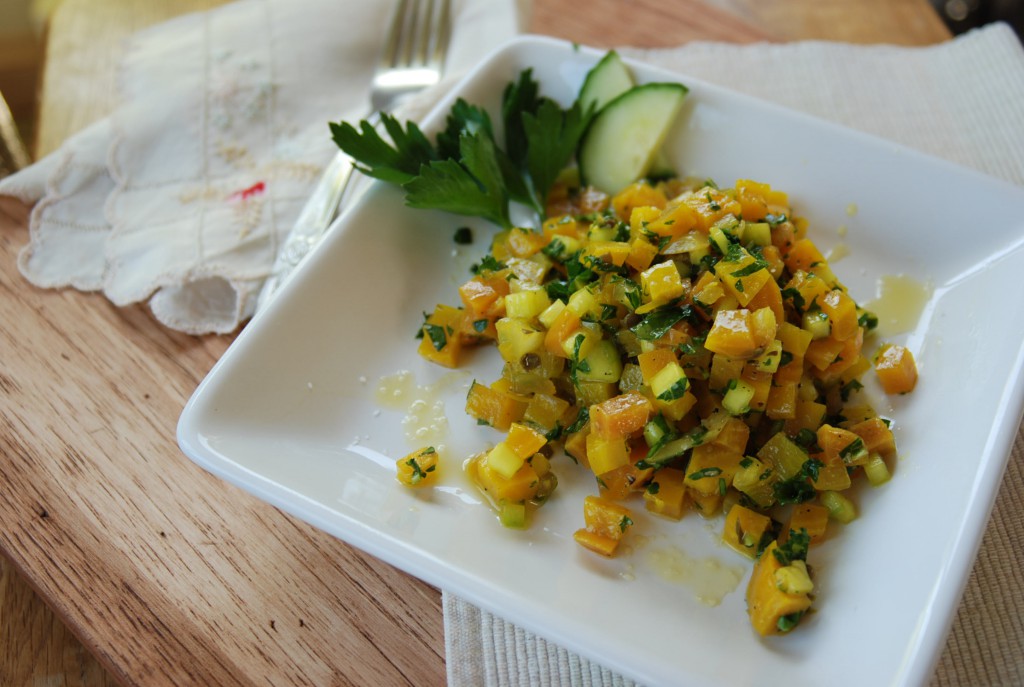
I can foresee this recipe becoming a regular in my kitchen, giving it repeated appearances and endangering my endless love of beets. With the upcoming beet season looming, and such pretty colors and patterns in this nutritious and healthy root vegetable, I vow to practice enough restraint to keep it fresh and desirable so we can continue to enjoy it’s benefits. Right now, I’m fighting off the urge to consume the entire container of this salad. A definite winner.
Please visit Michael’s site, for his complete recipe for Golden Beet Tartare. I’m going to give you my method, which, as Michael encourages, is my own take on the recipe.
Golden Beet Salad
3 medium beets, tops trimmed (save them and eat them if it’s your thing)
1/2 an English Cucumber, peeled and finely diced
1/2 medium Vidalia onion, grilled but still somewhat crunchy, finely diced
1 T. capers, drained and minced
1/2 c. kale leaves, finely minced
3 T. olive oil
1 t. fresh lemon zest
1 T. fresh squeezed lemon juice
1 T. fresh chives, minced
2 T. fresh parsley, minced (I used flat leaf; curly would work just as well)
Sea salt and fresh ground black pepper
Heat oven to 400°. Place a square of foil in an 8×8 baking pan and put beets in the foil. Drizzle with a bit of olive oil and fold the foil over the beets. Roast the beets until a knife inserted in them slips out easily. The time will depend on the size of your beets, but plan for at least 45 minutes to an hour. Allow the beets to cool, then peel and dice them.
In a bowl, add the beets, cucumber, onion, capers, kale, lemon zest and juice, chives and parsley. Drizzle in the oil, add a few shakes of sea salt and grinds of pepper. Stir to combine and taste for seasoning. Allowing the salad to sit for a few hours, or overnight before serving will deepen the flavors. Adjust seasonings before serving.
DISCLAIMER:
I received a complimentary copy of Herbivoracious from attending the book signing event.
All opinions and feedback about the book are strictly my own.
|


