October 9th, 2013
| 1 Comment »
I love October. I love everything about it, from it’s blazing maples and fiery Sumac to the clear, crisp nights of abundant stars, the scent of woodsmoke floating on the chilled air. I love that switch to snugglier clothes and another blanket on the bed. I love a simmering soup pot, a pan of fragrant cornbread, baking with apples and fresh-pressed, rich apple cider
I just LOVE October!




I haven’t always loved Ratatouille, though. And I’ve made it multiple ways that have been OK, to an extent, but haven’t been so wonderful that I jumped at a chance to repeat the recipe. Yet every year, when the abundance of zucchini and eggplant and tomato is all there, ready and waiting to be slowly cooked together in this classic peasant dish, I always want to try something again.
There are so many ways to make a simple dish like this.
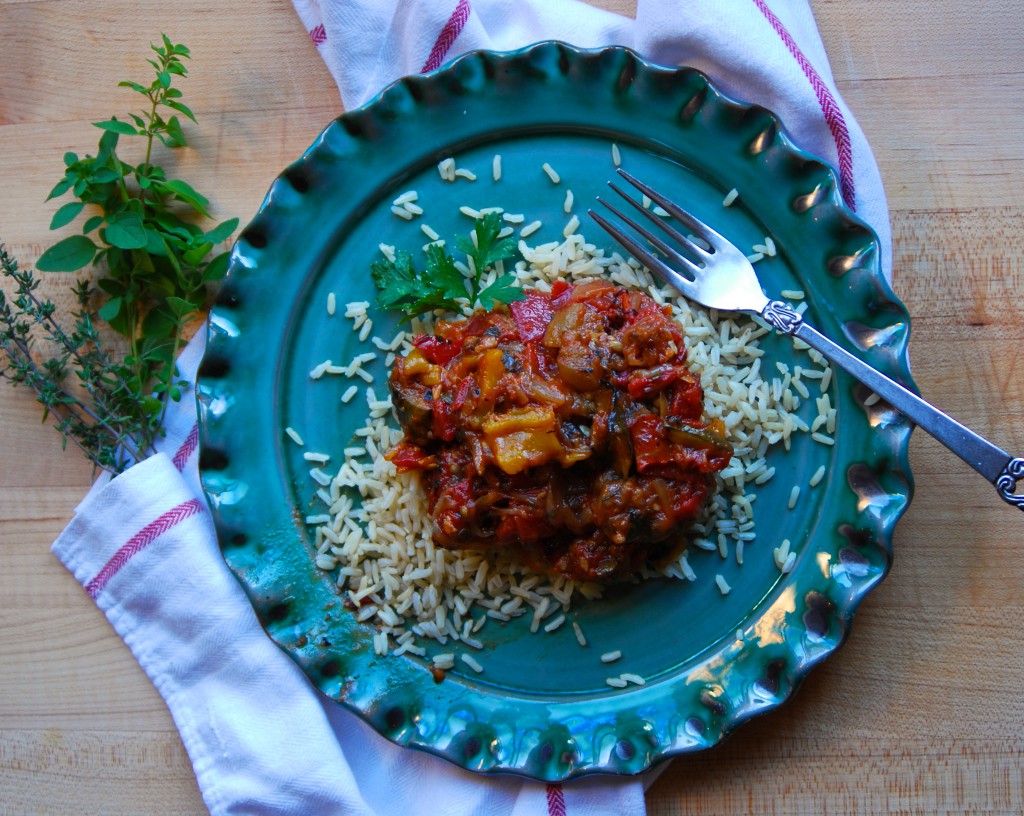
This recipe I would repeat. Over and over again. While it is a bit extensive, with the grilling and the simmering, the end result is well worth the extra effort. This Ratatouille was silky smooth and simply melted in my mouth, with hints of smokiness from the grill. And as all good dishes go, it was even better the next day.
This recipe does not use fresh tomatoes, and I love the rich flavor that fire-roasted canned tomatoes gives it. Feel free to use fresh if you wish, knowing you will lose some of that smoky taste if you do.
Ratatouille, Grilled and Simmered
3 small zucchini, sliced horizontally
1 medium eggplant, peeled and sliced into 1/2″ slices
2 medium onions, sliced thin
3 cloves garlic, finely minced
1 each red, yellow and orange bell pepper, gutted and halved
1 28-oz can fire roasted tomatoes (strongly suggested for the amazing flavor they will add- sub in fresh if you wish)
1/2 c. good quality olive oil
1/4 c. balsamic vinegar
1/4 c. mixed fresh herbs, like oregano, thyme, parsley, basil, all finely minced
2 t. smoked paprika (smoked is preferred; use regular if it’s all you have)
Salt and pepper
Whisk the olive oil and balsamic vinegar together in a measuring cup. Brush a small amount on one side of the eggplant slices, being careful not to spread on too much. Brush some on the zucchini and reserve the remaining oil/vinegar mix for later.
In a 6-qt stockpot, heat a small drizzle of olive oil and add the sliced onions. Cook over medium heat, stirring occasionally, until the onions are opaque. Add the garlic, reduce the heat and cook, stirring often, until the onions and garlic are very soft.
While the onions cook, heat your grill, and when hot, place the peppers, skin side down on the hottest part. Add the sliced zucchini and eggplant, and cook until tender and slightly charred for all vegetables. Place peppers in a bowl and cover with plastic wrap to steam so you can remove the skin. Rough chop the zucchini and eggplant and add to the pan with the onions, stirring to combine. Drizzle in a small amount of the oil/vinegar mix to moisten and add the smoked paprika. When cool enough to handle, skin the peppers and rough chop those, adding to the pan, along with the can of tomatoes. Stir everything, get it simmering, then reduce the heat and cover the pan. Allow it to cook, slowly, for 30 minutes. Stir it once or twice to insure it isn’t sticking. Reduce heat if it is, and drizzle a bit more of the oil/vinegar mix in, if needed.
Season to taste with salt and pepper, and add in half the fresh herbs. Allow to simmer about 5 more minutes. Stir, taste and season more, if needed. Serve warm or room temperature, over brown rice or pasta, or with a thick, hearty bread to soak up the juices.
KATE’S NOTES: I am nuts for fire-roasted tomatoes and have tried multiple brands, always coming back to Muir Glen Organic. The taste is bar none for a canned product- it tastes like tomato right off the vine! You can use fresh tomato in this dish if that’s your thing, but the extra fire-roasted taste will lend well to the final result, along with the grilled and charred vegetables.
The smoked paprika also adds a nice deep, smoky flavor, and has been one of my most favorite spices to add to just about everything lately. You will get a much different taste if you use regular paprika.
October 3rd, 2013
| 2 Comments »
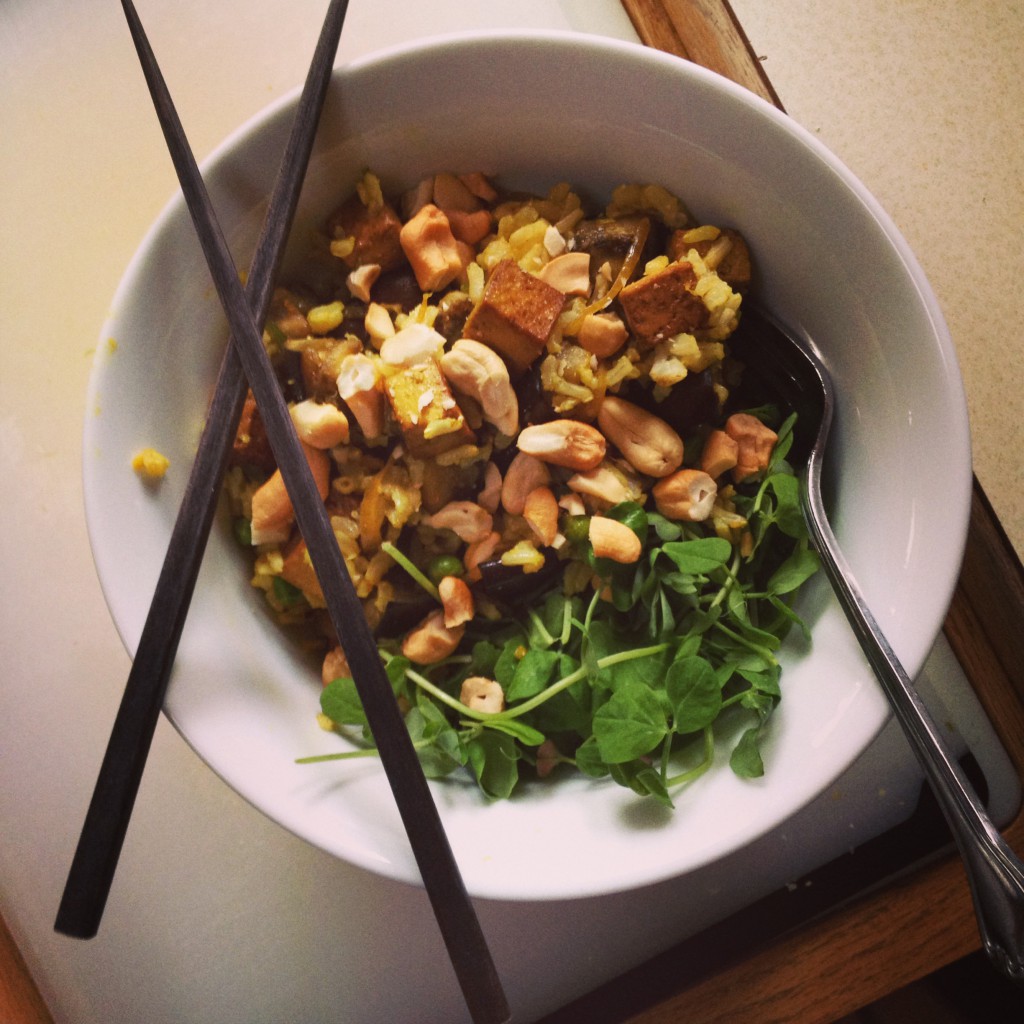
Rice bowls sound so 1970. Especially brown rice bowls. With tofu. I’m old enough to remember the 1970’s, the retro colors, long flowing skirts and hair and the food culture of healthier options. I look around now and see so much of the same, in people far too young to even know what it was all about.
Come in to my kitchen…
October 17th, 2011
| 6 Comments »
I spent a significant amount of time this past summer wandering up and down the aisles of our local farmers markets, as many, many people do. But I don’t venture in to the larger markets in Minneapolis or St Paul, instead preferring to go to the small satellite ones in the suburbs. I can always find what I needed, and as was the case this past year, I found a whole lot more than I ever anticipated.
Each summer for the last 5 years it seems some type of theme arises from a particular food I discover and experiment with; it might be a food type, such as the summer of 2007 when I learned a great deal about cooking with whole grains like quinoa, millet, bulgur and a multitude of colorful rice varieties. Or it might be a particular food, like in 2008 when I took the humble burger in different directions, and 2009 found me falling in love with beets and getting my fill of learning about those. In 2010, what I experimented with was a killer job. Cooking went by the wayside last year, but this summer, with a better schedule and actual time off during the week, trips to the Farmers Market were a must, and in those weekly visits, I came across a multitude of vegetables that I’d never tried or even considered prior to this past June.
And what was different about this year was the increase in the need for vegetable based meals, since we walked away from meat consumption in May and never looked back. So stretching the imagination and reaching for foods that were unfamiliar was going to have to stick. I needed to expand my palate, and this was the perfect spot to do so.
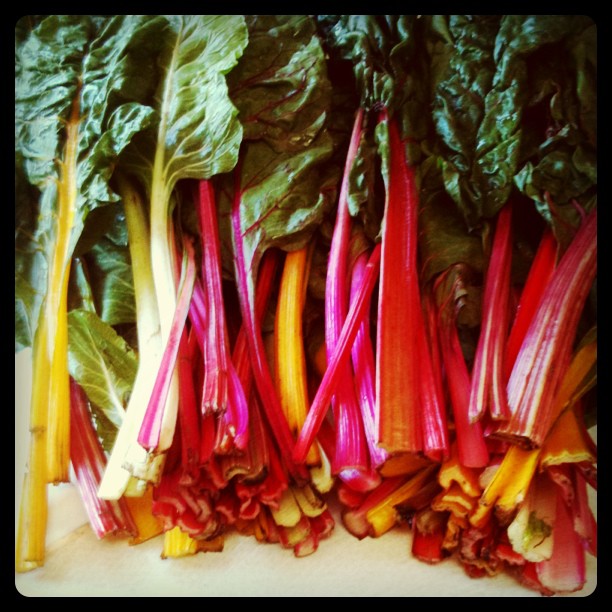
If I could pinpoint one item that I really learned a great deal about this year it would be Greens. Kale and chard crossed our plates and made appearances in our kitchen nearly every week. Enormous bunches of chard could be purchased from the market for a dollar a piece and easily could feed us for 2 meals or more, depending on what I did with it. I discovered the joys of making Chard Chips, and fell in love with a simple chard side dish, sauteed with a few cloves of garlic and simmered gently to bring out it’s deeply rich and slightly sweet flavor. I love Rainbow Chard for it’s colorful stems.
Then, in one visit to the market in Maplewood, I came across a giant bunch of greens on a farmers table and asked curiously “What is this?”
“That’s Sweet Potato Leaves.” She said, smiling widely. “They’re like spinach, only a little sweeter.”
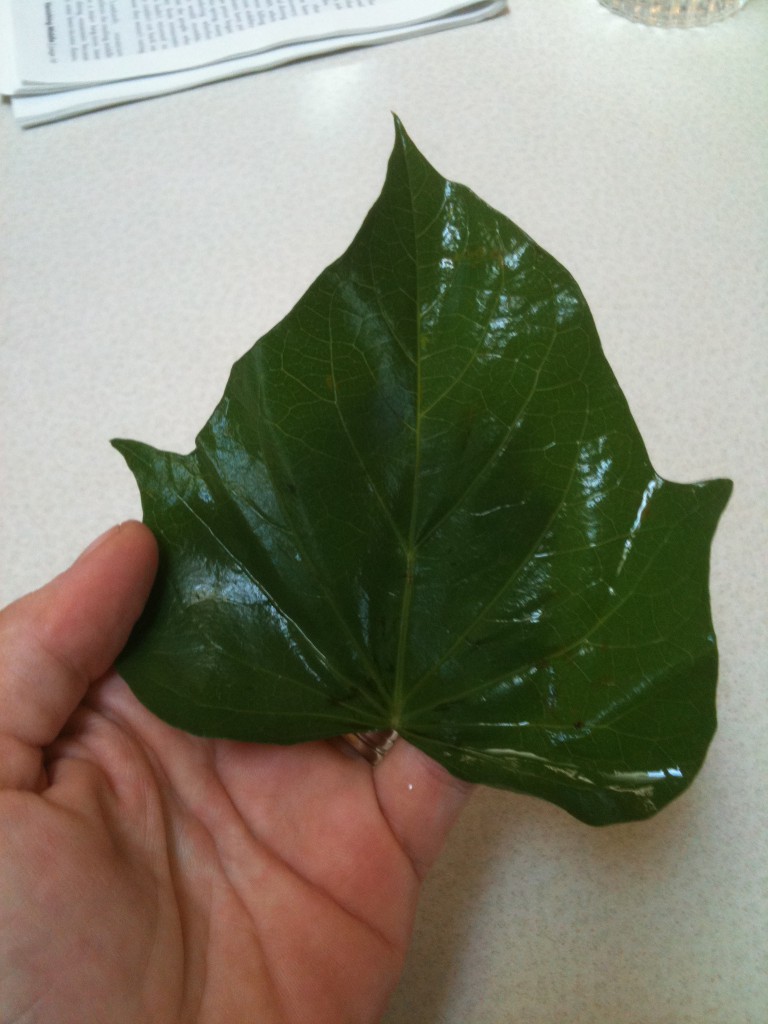
Here was yet another enormous bunch of greens, and for a dollar as well. What did I have to lose? I handed over a buck and placed the bunch in my sack and as I turned away, the farmer said with a smile “Those are going to become your favorite green!!” To which I simply smiled and said ‘Thank you!’
She was 100% correct. I stripped the leaves that evening and sauteed them for dinner and with the first bite, I was raving over how tender and amazing they tasted and couldn’t wait to return the following week for more. Also known as Kamote, or Camote leaves, and as other dark leafy greens they are loaded with vitamins and minerals like iron, magnesium and calcium, making them a good choice for healthy eating. Each week I could, I returned to that market, and that farmer and scooped up large bunches of Sweet Potato leaves. While many cultures also eat the stems, I consumed only the leaves, tossing the stems in the garden to compost. Imagine my surprise when I noticed after a few weeks that those stems had taken root and were growing new leaves. I managed to get a small crop of my own Sweet Potato leaves from my garden before the first frost in September. Now that’s a nice bonus.
I’ve been on the fence with Eggplant for a while now, fighting back and forth with it, hoping to fall in love even when I fall on my face, but for some reason I keep trying and I’m really glad as I have discovered more ways this summer to enjoy Eggplant. I came across Rosa Bianca eggplants too, and was immediately drawn to their unique colors.
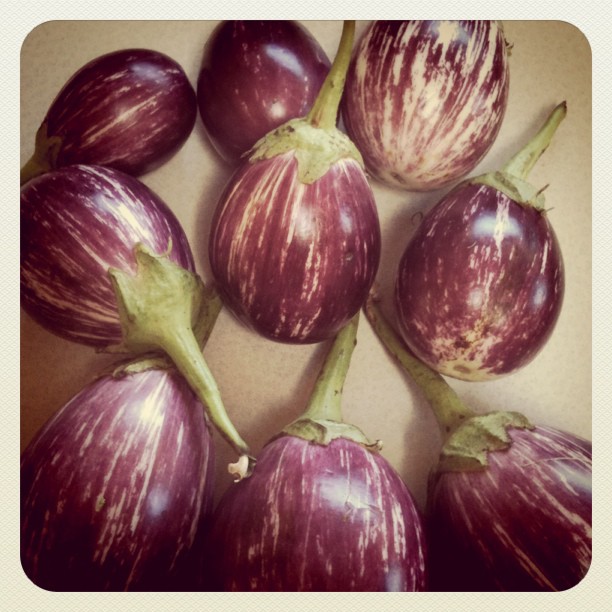
But I also came across a completely new (to me) eggplant; a tiny orange one with grooved sides that looked a lot like a mini pumpkin.
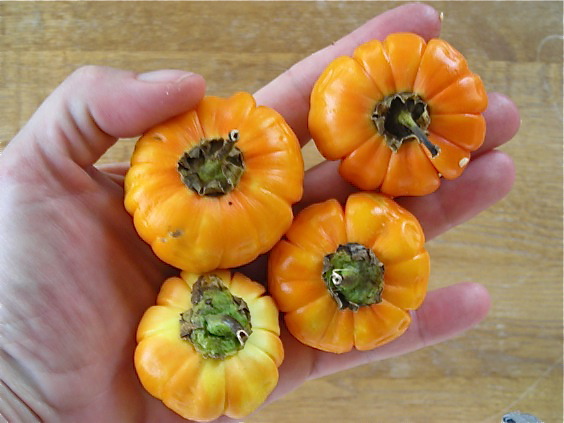
The farmer told me that they could be roasted like regular eggplant. What she didn’t tell me, and what I discovered a bit too late was that this little orange variety is very bitter and is considered a delicacy in SE Asian cuisine. One bite and I had to admit that I’d found a vegetable I couldn’t eat.
A few more unique vegetables crossed my doorstep this summer, due to a relationship with Ocean Mist Farms. I was contacted by a representative of Ocean Mist back in July and asked if I was interested in some fresh Fennel to try. While Fennel isn’t really anything new, it was not a vegetable I’d done much with and while I did like it, the cost had always been prohibitive. I agreed to the Fennel they would send, and soon a case of it arrived at my house, holding six large, aromatic and superbly fresh bulbs. We had a wonderful time enjoying the light anise flavor, roasting them with potatoes and carrots. Fennel becomes so nicely sweet when roasted. I also added fennel to a slaw salad I made, loving it’s crisp texture and added taste to a favorite summery dish.
Recently, Ocean Mist contacted me again, offering to send me a vegetable I’d never even heard of: Cardones. Curiosity won me over, and I accepted. I had no idea what I was going to receive.
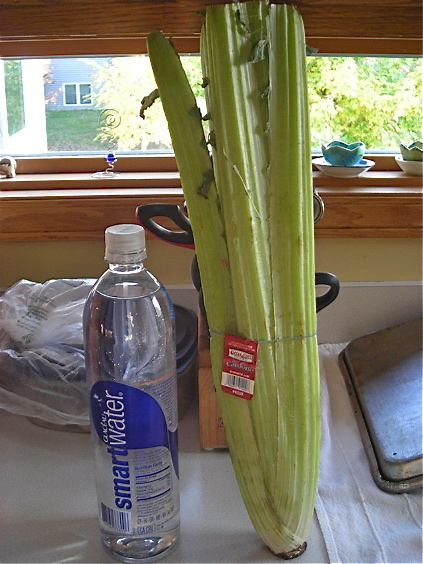
Cardones, or Cardoons, are very popular in Italy, come from the Thistle family and are considered a distant cousin of the Artichoke. They look like mutant celery, but they cannot be eaten raw. The internal part of the plant has slim silvery gray leaves that look like sage. And they are HUGE. Check out those stalks!!!
This was nothing like I’d known before; and I was initially at a loss as to what to do. After some research online, I decided to make a creamy cardone soup out of one of the bunches. They require a long simmering time, and mixed with onion and leek, it offered a warm and fragrant scent to a chilly evening. The finished soup was smooth, mild and creamy, and as we discovered, tasted amazing with some leftover wild rice pilaf stirred in to it.
The next two stalks I roasted, and this method was the best tasting. I tossed the slices with a bit of olive oil and a splash of an asiago caesar salad dressing I had on hand and after a nice long turn in a 425° oven, they were tender and flavorful enough to toss with pasta. The experience with Cardones was really interesting; I kept expecting celery flavor, but instead got something so unusual. It was like artichokes but richer. Cardones are similar to Artichokes in that they will discolor when cut apart, and should be soaked in acidulated water to prevent brown spots from forming. I did discover too, that they will change color even after cooking, and the roasted pieces I had in the refrigerator turned a strange shade of greenish gray after a day. The taste does not change though, even when they look just a bit unappetizing. I’m sure they have a lot more use in the kitchen, and maybe I’ll come across them again so I can experiment more.
WHAT NEW VEGETABLES ARE YOU LEARNING ABOUT?
ARE THERE VEGETABLES YOU EAT NOW THAT YOU NEVER THOUGHT YOU WOULD LIKE?
DISCLAIMER:
Ocean Mist Farms provided me with both the case of Fennel and the Cardones free of charge.
I have no obligation to post any feedback or information on them, and all opinions are my own.
October 1st, 2011
| 4 Comments »
Truth:
I could be accused of purchasing eggplant simply to make this dish. Not that this is a bad thing.
Truth:
I have a wooden spoon permanently stained from turmeric.
Truth:
I may have, just a wee bit, tried to hide the remains of this dish in the back of the fridge where my husband can’t find it.
Admission:
I love curry.
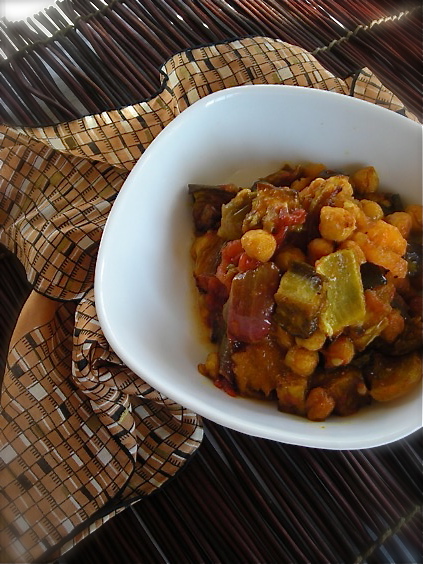
The first time I ever tried any kind of curry flavored dish was in college when a roommate and I shared an amazing meal at an Ethiopian restaurant. She warned me that I would sweat curry the next day and she wasn’t kidding; the warmth that exuded from my skin was unreal. It was heady, and deep with the memory of the fragrant meal we’d consumed the night before and I would lift my arm to my nose repeatedly over the course of my morning to remind myself of the flavors. It’s no surprise that any type of curry dish, whether red or green or yellow, is at the top of my list in terms of my favorite taste. With or without coconut milk, whether searing hot with a heat that makes my heart beat just a bit faster and sweat bead at my eyebrows, or a mild gentle tease that touches my tongue, curry flavored dishes are tops.
Eggplant. Chickpeas. Red onions. Fresh curry powder whisked with a splash of oil and just a bit of dark brown sugar to aid in caramelization. A hot oven. And 30 minutes. That’s it. From that point, all you need is a fork.
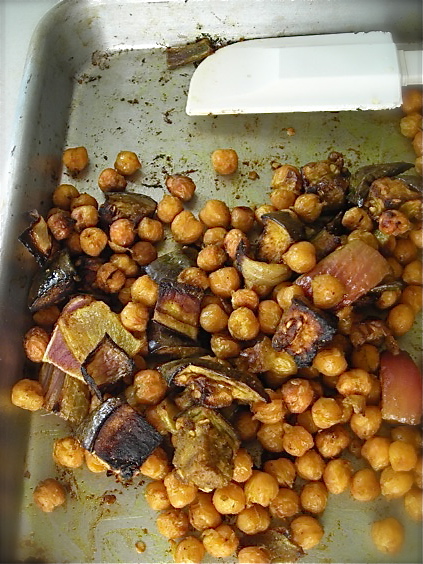
Your house will smell truly amazing, and I’m telling you, it will be darn right difficult to resist eating the roasted curried chickpeas right off the baking sheet when it’s all done. They become dense and crispy, especially if you take a few moments after you’ve drained them to spread them out and pat them dry with a paper towel, and I’m sure you’ve heard by now that roasted chickpeas make a perfectly addicting snack? I’ve experimented with them already, and have, more than once, gazed at the enormous #10 foodservice size cans of them in consideration of purchasing. Crazy? Maybe. But once you try this, you may understand why that’s not so dumb a thought.
But this dish? It’s a ‘Wow’ factor of 10. And an ‘Easy’ on the preparation scale. You’ll spend 10 minutes cutting and prepping, then you’ll pace for the 30 minutes it sits in your oven. Give the baking sheet a shake halfway through and that’s about it. The eggplant cooks to a creamy dream, onions settle in soft and caramelized and those chickpeas…… oh those chickpeas. Hold me back.
Good thing I’ve got that permanent turmeric-stained spoon. I’m going to need it.
Eggplant and Chickpea Curry
1 medium eggplant, diced
1 large red onion, chopped
1 medium red pepper, cored and seeded, chopped
1 15-oz can chickpeas, drained and rinsed (spread them and pat dry for extra crispness)
1/4 c. olive oil
2 t. good quality curry powder
1 t. dark brown sugar (sub molasses, muscavado or honey too, can use light brown sugar as well)
Preheat your oven to 400°
Whisk together the curry powder, sugar and oil in a small bowl. Combine the eggplant, onion, pepper and chickpeas, then pour the curry oil over and carefully toss together to combine. The eggplant will soak up the oil but don’t add anymore. Eggplant is a sponge; too much oil and it will be too soggy.
Spread the mixture on a baking sheet and bake, shaking the pan once or twice about halfway through, for 30 minutes. This dish can be consumed immediately, but takes on deeper flavor if allowed to sit overnight in the refrigerator.
Serve with naan or pita bread, over brown rice or on crisply toasted baguette slices.
KATE’S NOTES: For additional amazing flavor, add two large tomatoes that have been roasted as well, but don’t place them with the eggplant. They take far less time. For a good method, check this recipe.
Original recipe from Food & Wine, here with modifications
September 20th, 2011
| 6 Comments »
Summer ends when the season ends, some time in the midst of every September. The 22nd? 21st? The sun crosses a time line and the word ‘summer’ is an afterthought, yet for most people, Labor Day signals the official end of the best season Minnesota has to offer. I’m more optimistic. I like to step outside the box, and while others are saying ‘Fall’ when school buses roll down the streets again, I’m still crowing ‘Summer’. I will gracefully extend my white flag of surrender to that mentality, that a season can be marked by milestones instead of days on a calendar, while I straddle the seasons, try to push summer to extend just a bit farther.
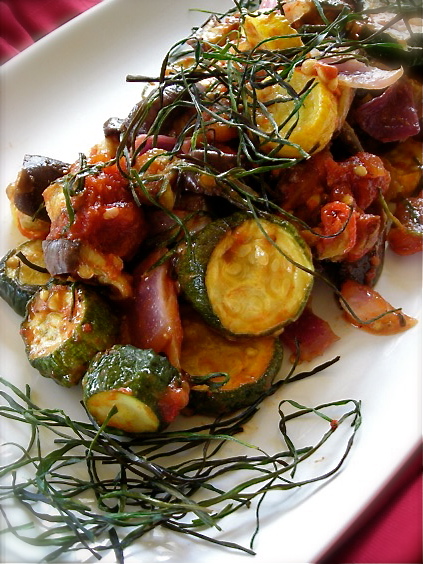 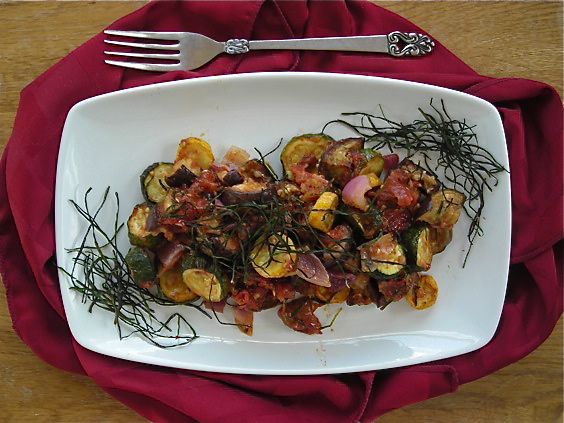
It’s not hard to do when a plate of this Roasted Ratatouille is staring back at you, loaded with late summer tomatoes softened to a deeply flavorful mass, chunks of hearty zucchini and eggplants so perfectly round and unblemished that they look false and plastic, yet yield to a tender flesh so delicious it makes your eyes roll back. I can have my face in Summer, my cheeks enjoying the warmth of the days, while my head and heart charge towards Fall, cool air, a warm humming oven and a comforting meal when the air chills and sweatshirts come out.
This dish, once again as is the case with so many in my adult years, was not something I’ve loved forever, and maybe that’s part of it’s appeal. My Mom used to make Ratatouille when I was young, and my sisters ate it but it always turned me off completely. That which held ruby red tomato and a vegetable with the word ‘egg’ in it just sounded like it would be horrible. I was a picky child mostly due to texture issues, as I have learned; foods like mushrooms, tomato, squashes of all kinds and especially eggplant (an egg? a plant?) are now foods that sweep themselves across my plate on a regular basis, bursting with flavor when once they would make me shudder. I’m so glad to have grown up to learn of their wonder.
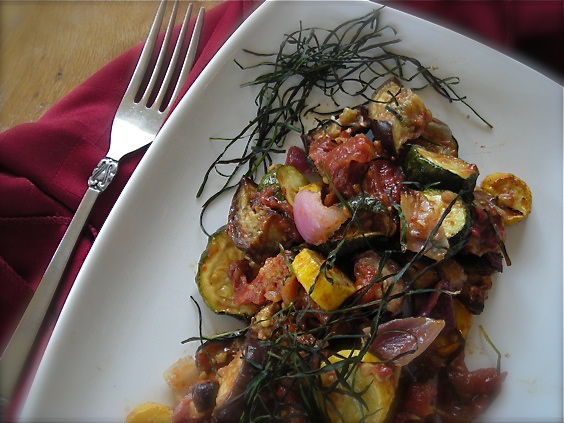
Roasting vegetables is quite possibly my most favorite way to eat them, except for right off the vine. With an enormous bounty of fresh from the Farmers Market zucchini and onions, and the aforementioned eggplants, along with the fattest and juiciest Black Krim heirloom tomatoes to come out of my tiny postage stamp garden, this dish was so loaded with flavor that it made my eyes water in joy. Tomato flavor intensified from the heat of the oven, while the eggplant and zucchini became tender-crisp and then just to make it more interesting, I mix everything together and let it sit overnight in the fridge, just to tease a bit more flavor out, a deeper marriage of September’s taste of the vine. The bowl needed nothing else; no salt or pepper, no added oil or seasoning. Topped with the amazing find of crisp strips of chive thrown on top of the vegetables on a whim, it was a dish that slowly spread a Cheshire grin over my face with each bite.
What a personality too. There’s no stodginess involved here, no set way to consume such a meal; we ate this mixed with pearl couscous (because I am, truly, having a love affair with those tiny grains of pasta) and we ate it atop heady and aromatic polenta studded with corn kernels and flecks of fresh herbs. It would be just at home too, stuffed inside a crisp and warm baguette, layered with provolone cheese for an incredible, messy delicious sandwich. Serve it on rice, or with a simple risotto. Warm it slightly and place it on garlicky crostini for a hearty appetizer or light meal. Or toss it, chilled, with greens and a shower of fresh grated asiago cheese for a salad unlike any other. Mix it with pasta, please; make sure you add a good turn of hard cheese. And if you find yourself late at night, in the kitchen with a fork in hand, a few dips in to the bowl while no one is watching is ok too.
And are you like every other gardener in the state- a pile of chives growing in your garden that you don’t know what to do with? I foolishly planted chives many years ago, which went to seed without me doing anything about it (big, BIG mistake) and now, well now I am fighting off chives with a blowtorch practically, and did you know that if you pluck them they just grow faster? Neither did I, but I’m learning that the hard way. Another thing I learned about chives is that you can blast them to kingdom come with Round-Up, but the little buggers just come back, shiny green and taunting. I’ve learned to hate chives, but a handful of them tossed atop these roasting vegetables made for a crispy and delicious garnish that just might make me a bit softer towards this evil relentless herb. Surprise awaits in the strangest places, doesn’t it?
Roasted Ratatouille with Crispy Chives
2-3 medium tomatoes
1 large eggplant
3-4 small zucchini or yellow squash (2 if they’re larger)
1 large red onion
3 garlic cloves
A generous handful of fresh chives
Olive oil, sea salt and fresh ground pepper
Preheat your oven to 400°. Slice the tomatoes into quarters and place on a baking sheet. Drizzle with about a tablespoon of good olive oil, sprinkle with a bit of salt and a few grinds of fresh pepper. Place pan in hot oven and roast, watching carefully, until the tomatoes begin to soften and the skins wrinkle. You want them to retain much of their shape, but release some of their luscious juices. I don’t roast them for more than 10-15 minutes at that temp. Remove the pan and allow them to cool, then slip the skins off.
Dice the zucchini and eggplant, slice the onion and crush the garlic, placing all of these on two baking sheets. Drizzle with a bit of olive oil, add salt and pepper and roast until the vegetables begin to soften, about 15 minutes. Stir carefully, then return pan to oven for about 10 more minutes. Scatter chives over the top of the vegetables, then roast about 10 minutes more, or until the chives are crisp and toasty, but not black and charred. Remove pans and allow vegetables to cool.
In a large bowl, combine tomato (with any juice from the roasting pan), eggplant, zucchini, onion, garlic and about a third of the crispy chives, reserving the rest for garnish. Gently mix together (I like to use my hands to avoid breaking everything down), taste and season with more salt and pepper if desired. The ratatouille can be eaten as is, warm or at room temp. For deeper flavor, chill the mixture overnight, and allow to warm to room temp the next day before serving.
July 27th, 2011
| 5 Comments »
Eventually, we all know it’s going to happen; the bounty of summer vegetables is going to begin to overwhelm home cooks. This rapid increase of summer heat has brought my tomato plants into full force growth, skyrocketing up in the garden and bursting out buds like crazy. If this keeps up, August is going to be both delicious and ridiculous. And zucchini? We all know that one plant per home garden is enough to keep a happy cook in oblong green delight, but the overly enthusiastic gardeners who tend several plants will one day walk out to their garden and be confronted with tons of zucchini. Mark my words. Then they’ll do whatever they can to pawn the excess off on anyone who’ll look their way. Then there’s eggplant. The purple orbs are everywhere once they’re ripe. My word. It’s craaaaa- zee. But in a good, good way.
Because I found The. Best. summer vegetable option once your countertop is over-flowing with fresh zucchini, tomato and eggplant.
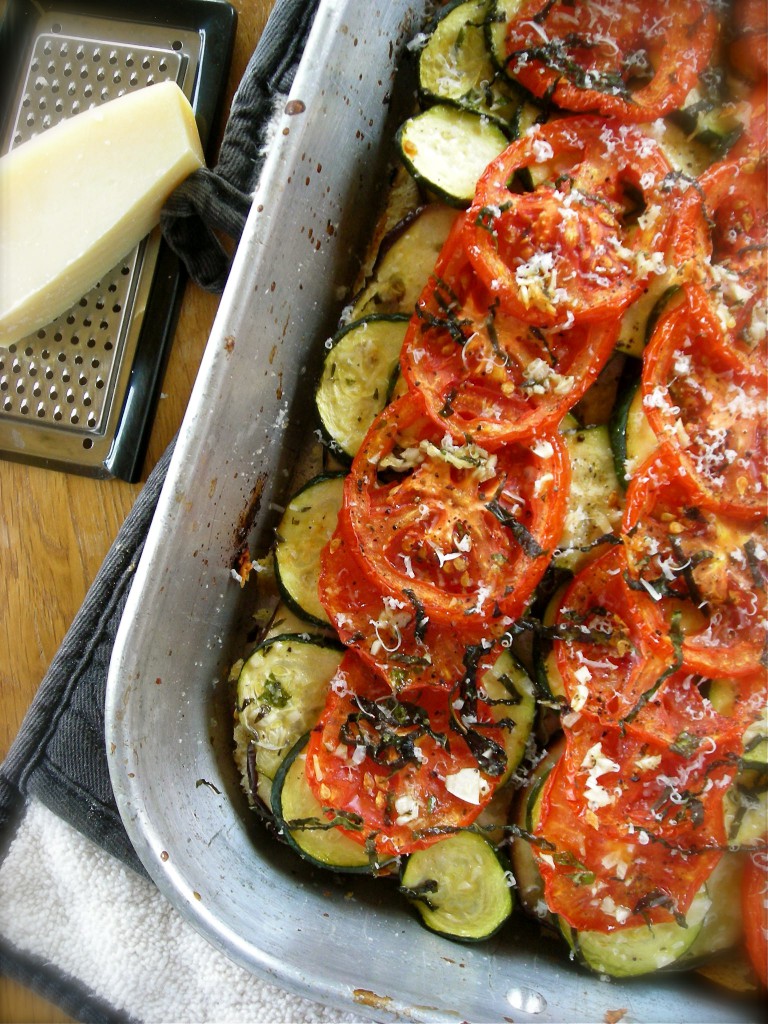 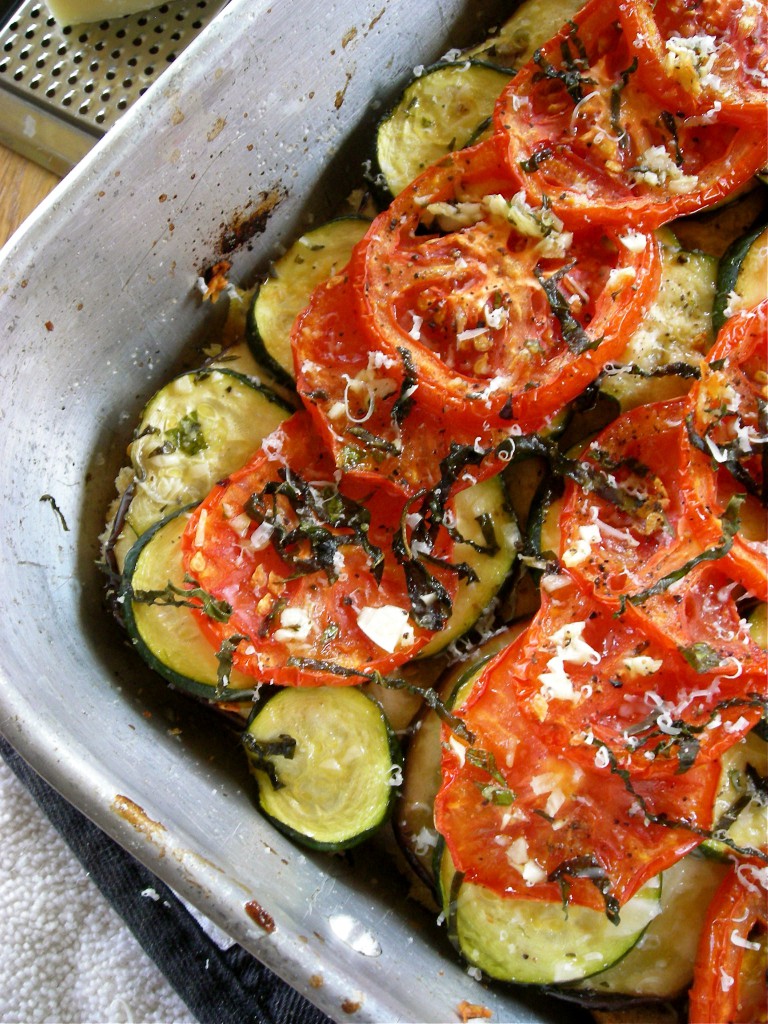
Provided your willingness to turn on your oven, here’s a dish that screams out “SUMMERTIME!!” in every bite, from the heady garlic and fresh herb infused olive oil that you drizzle over everything to the fresh vegetables that make up the bulk of this gratin. Get a really, really good loaf of bread for the base, a fine bottle of white wine for you, and enjoy a meal worthy of any fancy summer dinner party, or simply a way to ease yourself out of a hectic day.
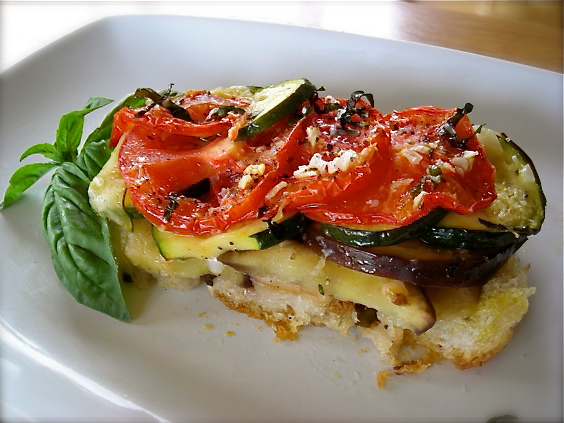
I spied this recipe on the Food & Wine website, searching for some new plant-friendly recipes to add to our eating repertoire. I knew we’d love it and I wasn’t disappointed. Once out of the oven, the smell was killing me. I could barely wait for it to cool enough to cut a slice and dig in. Mike came home from meeting with some of his clients, and despite having already eaten lunch, I pretty much shoved a slice at him and demanded that he try it. Which he did. He’s got the right attitude, hmm?
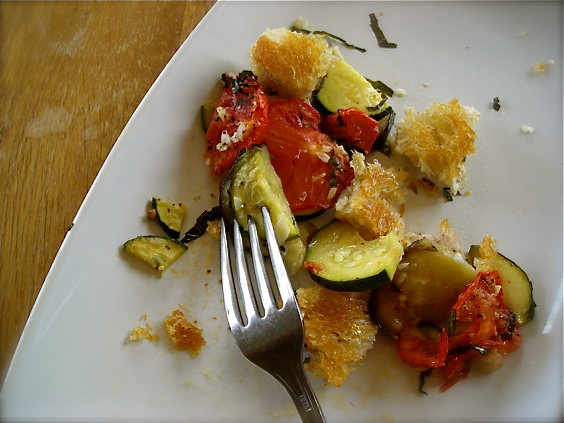
The base of this gratin is made from good rustic bread, torn in to pieces and drizzled with a heady blend of garlicky oil inundated with fresh herbs. It bakes up nice and crunchy, aromatic and flavorful, adding a nice contrast to the soft baked tomato, zucchini and eggplant slices gracing the top. A smattering of fresh basil, a spray of good parmesan cheese and a fork. Oh, and don’t forget the wine. It’s a dish that tastes of summertime, reeking of warm days, the scent of cut grass and the way the night air sulks around at dusk with the lingering scent of the day before finally giving way to the cool of night. If anything else smacks of good seasonal eating, show me, because I really want to know.
You know that day will come when you glance, overwhelmed, at the summer bounty before you and you think ‘Oh dear, what do I do NOW???’ Well I have the answer, my friends. You will make this dish. And with one bite, you will determine when you can make it again. And maybe, again.
Do you have any favorite ways to use zucchini and eggplant??
Ratatouille Gratin
1 medium eggplant, sliced 1/4″ thick
2 medium zucchini, sliced 1/4″ thick
3-4 medium tomato, sliced 1/4″ thick.
1/2 c. good olive oil
4 cloves garlic, minced extra fine
1 heaping tablespoon each fresh thyme, parsley and basil, minced fine, plus extra for finishing
1 1-lb loaf good quality artisan bread, torn in to 1-2″ pieces (i used a good sourdough, left in a paper bag overnight)
Stir olive oil, garlic and the heaping tablespoons of fresh herbs together in a small bowl. Whisk well to combine.
Toss eggplant and zucchini with 1-2 teaspoons of kosher salt and let stand for about 20-30 minutes. Drain any liquid and gently squeeze dry, if possible. Sprinkle tomato slices with salt and pepper.
Spray a 9×13 baking dish with cooking spray and arrange torn bread in bottom. Pack the bread in as tight as possible in one layer, using the entire loaf. Drizzle the bread with about 2 T. of the garlic/herb oil. Arrange the eggplant slices on top, then the zucchini, then the tomato. Drizzle the top of the vegetables with another tablespoon or two of the oil and sprinkle some thyme leaves over that.
Bake the gratin for 30-40 minutes, or until the vegetables are aromatic and slightly browned and the bread crust is crispy. Remove from oven and allow to stand for 10-15 minutes. Sprinkle with minced basil and parsley and fresh grated parmesan before serving, if desired. The gratin can be served warm, or at room temperature. To reheat, place gratin on a baking sheet and rewarm in a low oven.
From Food & Wine, with heavy modifications
March 3rd, 2010
| 13 Comments »
What’s that, you say? Ajvar? Is it AHJ-VAR? AGG-VAR? How do you say it?? And what the heck is it?!?
It’s delicious, delightful, piquant, sweet and when spread on a toasted pita, a tiny slice of food heaven. The origin is Balkan in nature, and it shares it’s etymology with caviar, although there is no fish roe involved.
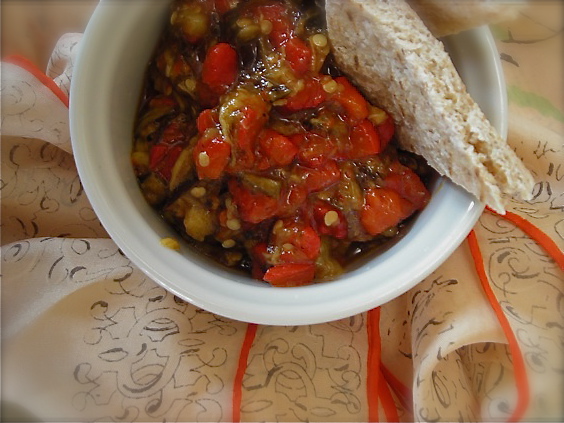
And it’s pronounced EYE-VAR. As with most foods that pass through this little blog of mine, it has a story. A pricey one. And it goes like this.
I love ethnic foods, and the more eclectic and unique the ethnicity is, the better I like it. I’m happy to browse any manner of unusual food market I come across, my eyes trailing the shelves, fingering the ingredients found there and trying to determine if I know what is is, first and foremost, and if I can take it home and use it. I am so blessed to live in a very culturally diverse city, and within many channels and pockets of the population one can find amazing stores full of ingredients that will elevate simple home dining. In the middle eastern market that I frequent in Columbia Heights, where the pita bread is often so fresh that the bags are still warm, I came across a jar of a bright red condiment that caught my eye. Roasted red peppers, roasted eggplant, garlic, oil. Oh my, what’s not to love? Despite the hefty price tag, I took one home. Big mistake.
I toasted some of that wonderful pita bread and slipped it through the bowl of bright red Ajvar in front of me, lifting it to my mouth. I was lost. I fell hard and fast for this sweet, somewhat spicy and cool relish. Mixed with a bit of plain yogurt, I could eat it night or day. And I did. I made pilgrimages back to that market for more bread, for more Ajvar. The price always got me, but I forged on. I loved the stuff. But like all good things, bested as they can be by economic downturn, I had to suspend my tastebuds desire for it and stop driving back to that store to buy another jar.
But I didn’t forget. There would be a day to enjoy it again. I was certain of it.
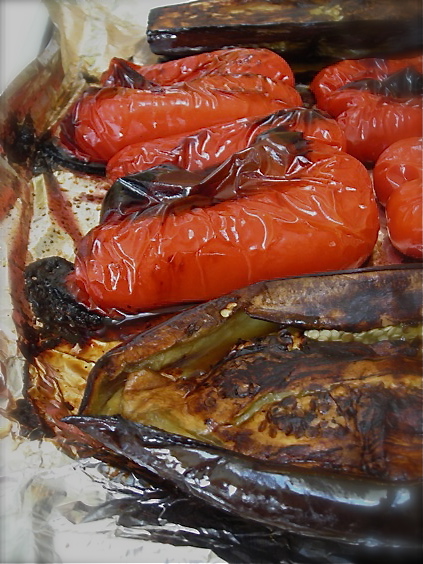
Like for many, that economic downturn hasn’t really let up it’s grip on us, and being the case, I’ve yanked up the bootstraps and found ways to further stretch the dollars and yet not go without some of the foods I really love. But it took coming across a superbly simple recipe for Ajvar to prompt me into actually making this at home.
What could be simpler than roasting vegetables to a nice rich blackened state and running my big knife over them? Because, you know, when looking at this, I yet again get that feeling that I wish I hadn’t waited so long.
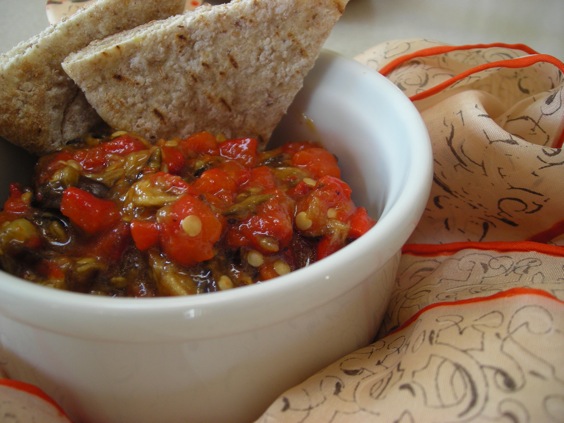 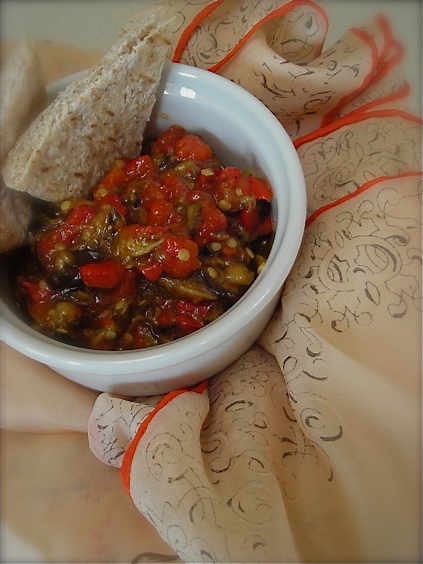
Ajvar
recipe source unknown (somewhere in Internet land)
1 large eggplant, sliced in half the long way
2 red bell peppers, split in half and de-seeded
2-4 garlic cloves (optional)
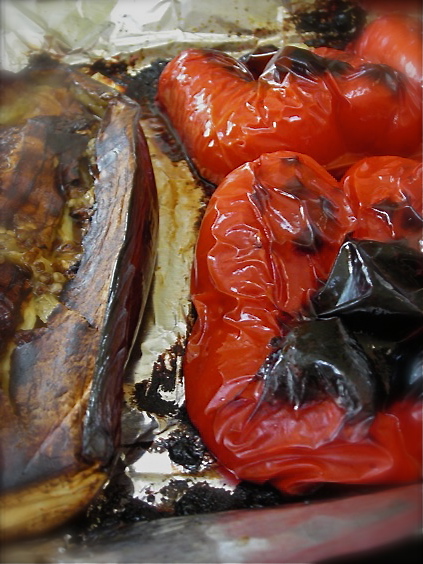
Preheat oven to 450° and adjust one rack to the lowest level in your oven. Cover a baking sheet with foil and spray the foil with cooking spray. Place the vegetables cut side down on the sheet and lightly mist the tops with cooking spray. This is optional, but I find it helps with the charring.
Roast the vegetables on the lowest rack until the tops of the peppers are black and wrinkly, and the eggplant has softened. Depending on your oven, this could take anywhere from 15-30 minutes, or maybe more. Check regularly to monitor. If your house is like mine, you may need to de-activate your smoke detector. This is a fragrant and hot process.
Remove the sheet when the veggies are ready and allow to cool completely. At this point, you can either place them in a food processor to blend, or simply mince them on a cutting board. I used the cutting board and my big chef’s knife. It took me about 2 minutes. Place minced veggies in a bowl, add about 1/4 cup of good quality olive oil, and then season to taste with salt and pepper. If you want it spicy, feel free to add crushed red pepper, or if you can find it, ground szechuan peppercorns would be amazing in this. I prefer mine on the mild side. It can be served room temperature, but the flavor will develop after a day or two in the fridge.
Eat it with toasted pita, carrots, or spread on hearty crackers. It tastes wonderful when mixed with a little plain yogurt too. I also think it would be delicious served over pasta.
August 17th, 2009
| 4 Comments »
First, there was a teeny little fun project.
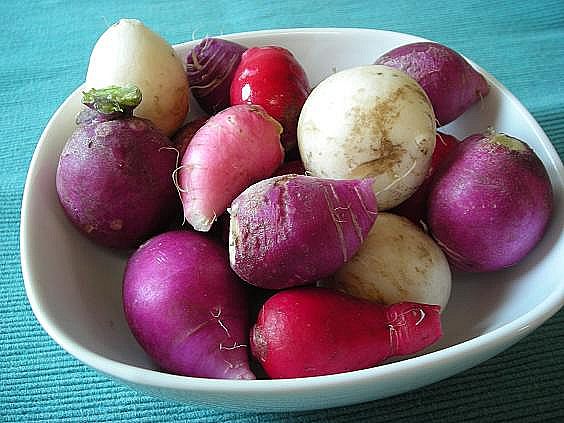 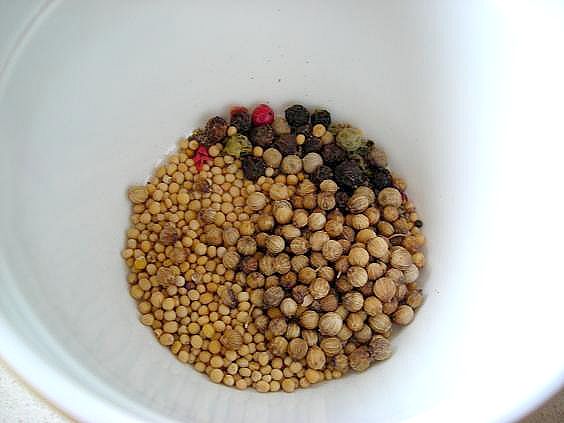
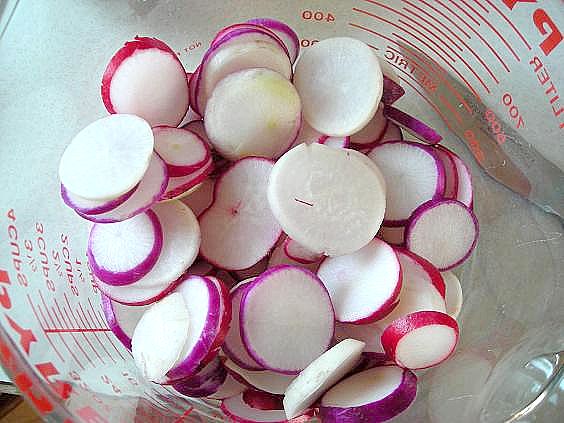

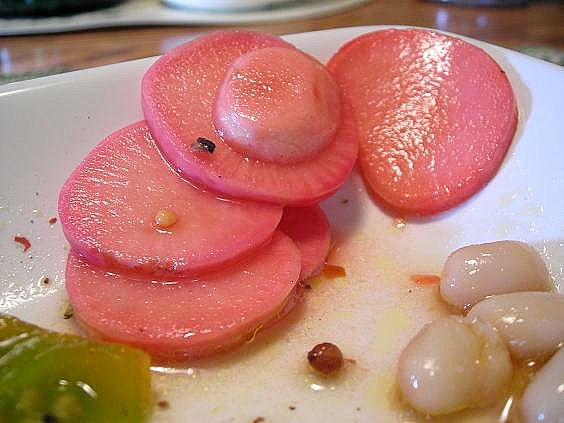
Then there was dinner.
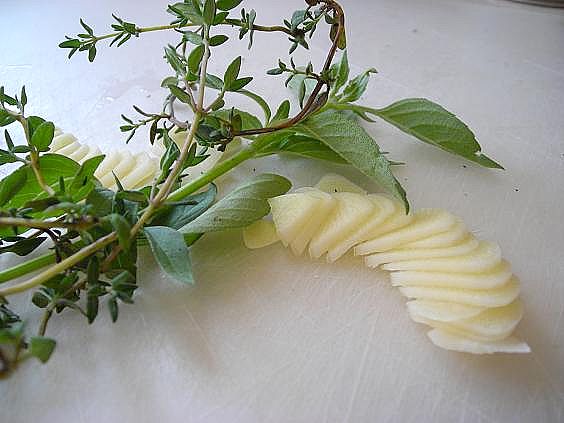  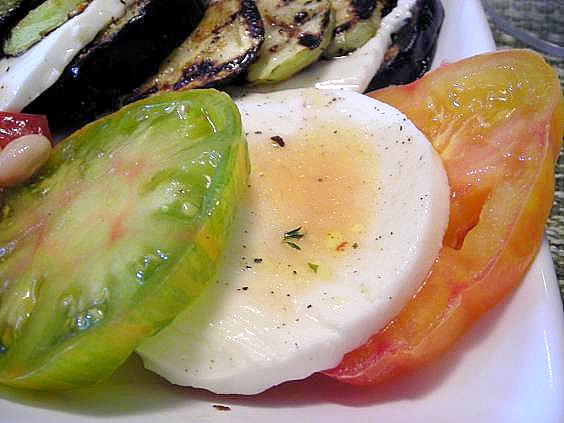 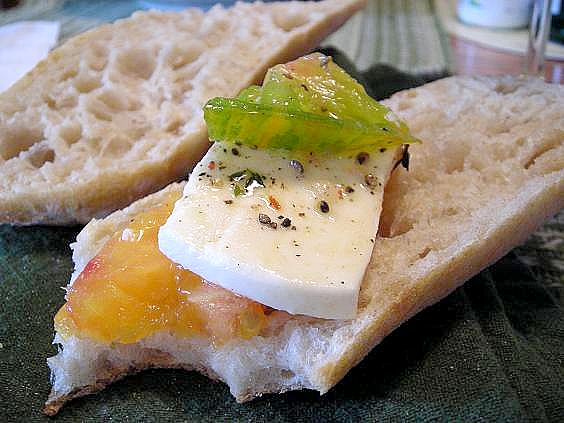 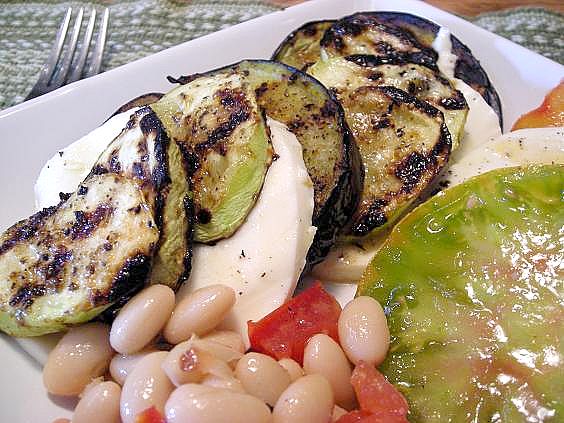 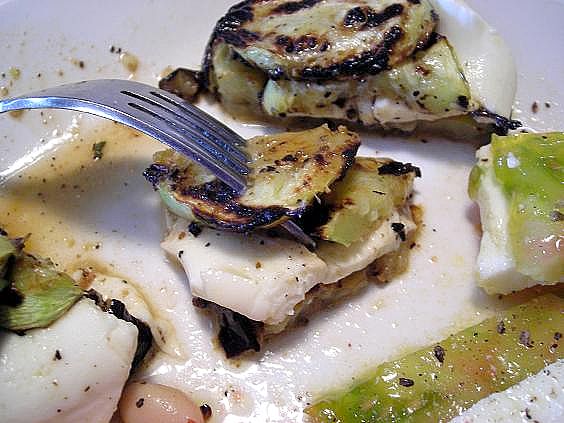  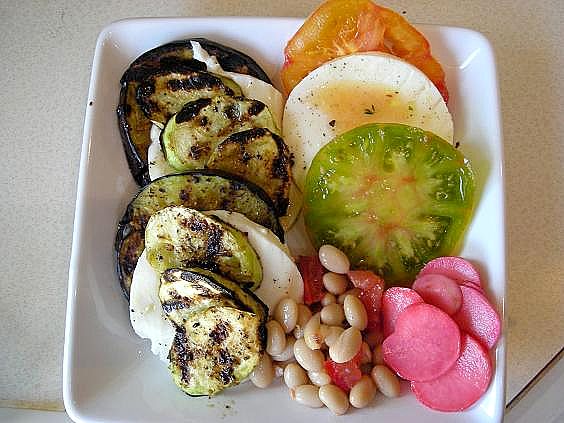
There was some good wine…..

and a good book……

It was almost a shame that the evening had to end. Sometimes you get such a perfect balance of simple, well- cooked and seasoned food, with plenty of color and a varied amount of flavor that you wish it could last for hours. It was that good. The night was breezy and warm, a beautiful rendition of mid-August, and the guys were each off on their own pursuits. It was just me and the cats. And it was heaven.
Pickled Radishes
From Epicurious
1/2 c. red wine vinegar
1/4 c. water
1/4 c. white sugar
2 t. kosher salt
1 t. mustard seed
1 t. coriander seed
1/2 t. peppercorns
2 bay leaf
1 bunch radishes, sliced thin
Scrub radishes well with a stiff brush and slice thin, discarding the stem end. Place in a pyrex or other heatproof bowl. Combine ingredients for the brine in a small saucepan and bring to a slow simmer, stirring to dissolve sugar. Simmer for about two minutes. Remove from heat and allow to cool slightly, then pour over radish slices, stirring to combine. Allow radishes and brine to cool for about 20-30 minutes, then spoon the entire mixture into a glass jar with a lid. Be sure to have sterilized the jar, lid and ring well in hot soapy water or by boiling. Screw on the lid, shake well to combine everything once again, and place jar in refrigerator. These are ready to eat within 3-4 hours. They will get more tang and bite the longer they sit. If you don’t wish to have the pink slices, substitute white wine vinegar for the red. This recipe offers a perfect balance of sweet and tart.
The idea for the dinner came from ————> HERE
The recipe for the Garlicky White Beans is —————> HERE
My method for grilling zucchini and eggplant can be found ———> HERE
|


