November 15th, 2009
| 7 Comments »
If you saw a recipe for Nutella Swirl Pound Cake, you’d probably think like I did….
“That has to be amazing…..”
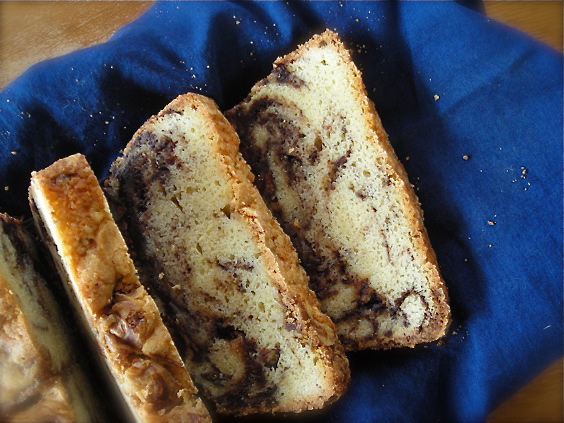 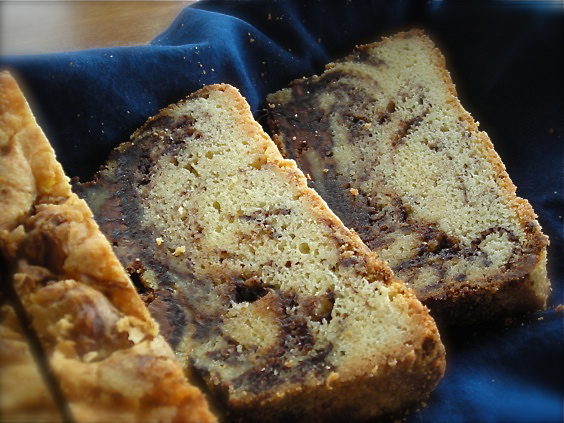
It was amazing. In fact, amazing or fantastic or decadent or incredible might just begin to scratch the surface of expectation for something with Pound Cake and Nutella in the title. If you’ve got a better description, please share it with me, preferably over a slice of this cake and some dark coffee. I could use some help in making this disappear.
I don’t make pound cakes much at all. I mean, a cake in all it’s sponge-y glory is bad enough, the butter laden, sugar sweetened lofty treat. But a POUND cake? Equal gobs of butter, eggs and sugar that all come together to create a glorious dense concoction not only tastes amazing, but can do incredible things to your thighs. And not many of them good. And with Nutella on top of all that sugar. And butter. To have that temptation around, or get my guys used to such decadence would be evil for all of us. We have no resistance, no self control. I think I’ll stick to cookies. My feet can’t possibly handle all the cardio I would need to do to work off the calories in a cake such as this. I like my waistline.
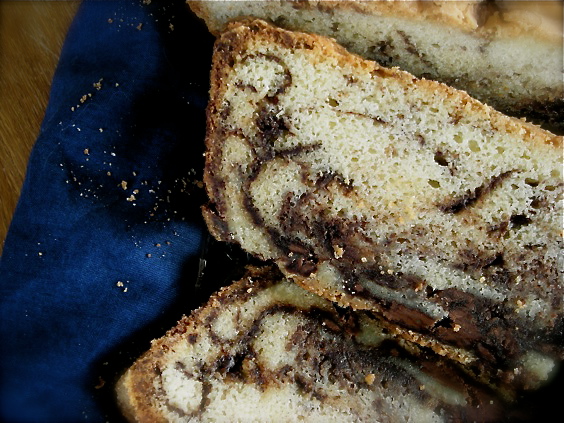
This cake came out of the oven, however, looking anything but fabulous. The top sunk, the crust was really crumbly and it seemed quite fragile. The bottom of the cake fell off as I tipped it out of the pan. But, it was utterly delicious, superbly rich and proof that even when it looks sad and forlorn, what it’s really all about anyway is how it dances across your tongue. It was so tantalizing in fact, once I was done photographing it’s sturdy swirled slices, I promptly wrapped the remainder of it tight and placed it in the freezer. If the threat of tooth-breakage looms, I won’t be so quick to indulge in a stolen bite or two. And my thighs will be pretty grateful for that. I’ll pull it out for Thanksgiving, maybe, or when there’s a need to share something that the comfort of chocolate and sugar, a close friend and a cup of tea can provide is the only requirement necessary.
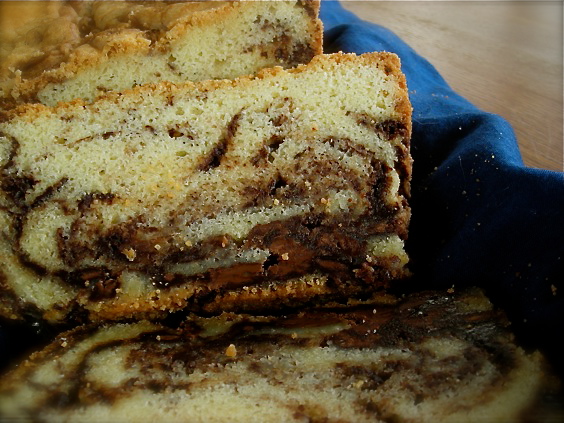 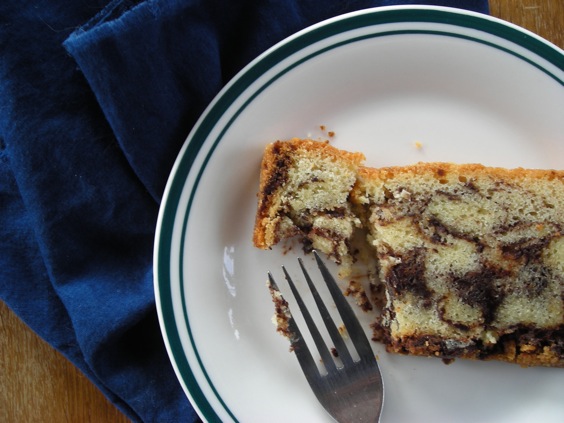
Nutella Swirl Pound Cake
From Food and Wine magazine, originally by Lauren Chattman, Cake Keeper Cakes
4 large eggs, at room temperature
2 t. pure vanilla extract
1-1/2 c. unbleached AP flour
3/4 t. baking powder
1/4 t. salt
1 c. butter, softened
1-1/4 c. sugar
1 13-oz jar Nutella spread
Heat oven to 325°. Spray a 9×5 cake pan with cooking spray. Dust with flour. Fill a bowl with hot tap water and place entire jar of Nutella in it to soften. Place the eggs and vanilla in a small bowl and whisk lightly to combine. Blend dry ingredients together in another small bowl.
In a stand mixer, blend the butter and sugar on medium speed until light and fluffy, about 3 minutes, scraping down the sides at least twice. Turn the mixer to medium-low and add the egg mixture in a steady stream, stopping to scrape down the bowl once or twice. Reduce mixer speed to low and add the flour mixture, about a half cup at a time, scraping the bowl after each addition. After the last addition, blend the full mixture together for 30 seconds on medium speed.
Scrape 1/3 of the batter into the prepared pan. Smooth with a spatula. With a clean spatula, spread half the Nutella on the batter and smooth. Add in another 1/3 of the cake batter, then the remaining Nutella. Spread the last of the cake batter on the top. With a clean butter knife, swirl the batter and Nutella together to create a marbling effect. Don’t overmix the two!
Bake the cake until it’s golden on top and a toothpick inserted in the center comes out clean. Cool for 15 minutes in the pan, then turn cake out onto a wire rack to cool completely. This cake tastes excellent after spending a night in the refrigerator, wrapped tight in plastic. I don’t know why. But trust me on that.
KATE’S NOTES:
I may be labeled insane, but using the entire jar of Nutella is kind of overkill. The first issue is something I saw in all the photos of this cake across the internet, and is evident in mine. The Nutella sinks. It caused the bottom of my cake to scorch slightly, and the bottom fell off when I took the cake out of the pan. I think the same marbling affect could be achieved with less Nutella, and without the end result of it sinking. I think that the Nutella would be utilized better if drizzled over the layers of cake batter, and not swirled with a knife. This is just an opinion. I probably won’t make the cake again to see if it actually would make a difference. Although I might. If I’m desperate.
However, should the bottom of your cake fall off too, do what I did: I used a large spatula to gently scrape the stuck parts out of the pan and then I replaced them on the bottom of the cake. Once wrapped up and chilled, which I can’t recommend enough, it sort of glued itself back together. And despite how high and lofty your cake will look when it comes out of the oven, for whatever reason, it will sink. All the cakes I saw on the internet had the same sunken tops. Don’t despair. It isn’t your fault. It still tastes delicious.
November 13th, 2009
| 4 Comments »
November has come, and we’ve been treated to a few simply glorious days. The sunshine is most welcome here, since October winds and rain stripped the trees barren before we had our customary chance to oooh and ahhh over the coloful glory. The tone of the land is now that of bleached straw and flat brown; the deer that roam our neighborhood melt into the backdrop like a thief, vanishing in a blink.
 
This little guy was quite languid and uninterested in my trespassing on his sun-bathing path. He even let me stroke his leathery skin before he casually twisted his way into the leaves to continue sunning himself.

Yet even with these brilliant sunshine-y days, Daylight Savings Time and the calendar both make the late afternoons chilly, and those warm cozy meals are even more appealing.
I’m not one to think that feeling under the weather is all that productive -who does?- but on a recent day, I found myself feeling uncharacteristically blah and lacking energy to do much, which resulted in a long period of time under a blanket on the couch, a cat curled up contentedly on me while I precariously balanced my computer to occupy myself with recipe searches. An hour and a half later, I did manage, with some appropriate groaning and sighing along with the displacement of one unenthusiastic feline, to pull myself to a sitting position, and there was a stack of papers almost an inch thick on the printer that made all that time worthwhile. That’s the kind of down-time productive one can appreciate. And one of those highly anticipated papers, the best kind that float around my kitchen, papers lush with promise and anticipated flavors and not a payment of some type being sought by the outer world, this thick and comforting stew filled that early afternoon darkness with warm and intoxicating smells, a bubbling pot of seductive chunks of squash and flavorful stewed beans that managed to make me feel a lot better, at least in returning some of my energy.
Mike always knows that something wonderful is happening in the kitchen when I haul out this old and beautifully seasoned cast iron stockpot. Just dragging it out of the cupboard is quite the workout. I think if it wasn’t on a upper shelf I might not be so fearful of it.
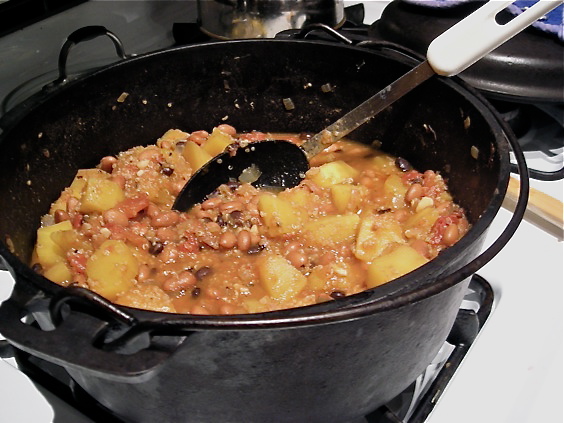
This recipe calls for using dried beans, but rarely do I have enough foresight into my dinner preparations to put a bag of beans to soak the night before, so I used canned pinto beans instead. And although I did have to put myself through that most tedious kitchen task of peeling the acorn squash, I approached it calmly and without the usual hair-pulling hysteria that surround the words “Peel and chop one medium hard squash” Can somebody out there give me an amen? Thanks. I know I’m not the only one who despises certain culinary obligations. That probably includes soaking dried beans, since I hardly ever do it.
This recipe, with it’s canned bean option, comes together really fast if you don’t count tackling the squash. A quick saute of onion and garlic, then you stir in the rest and let it simmer until the squash is tender. When the quinoa shows you it’s adorable little curlicue thread, call out the diners to gather and spoon up a thick and fragrant bowl.
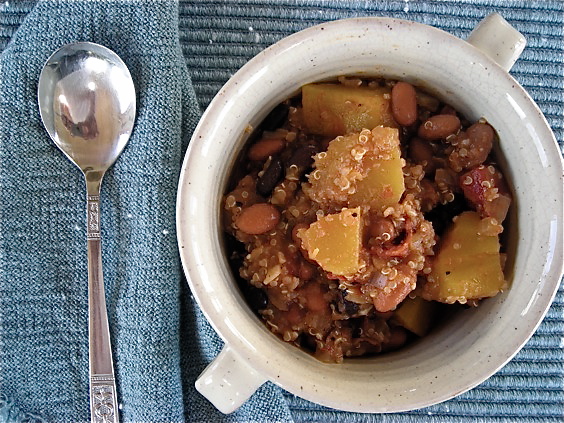 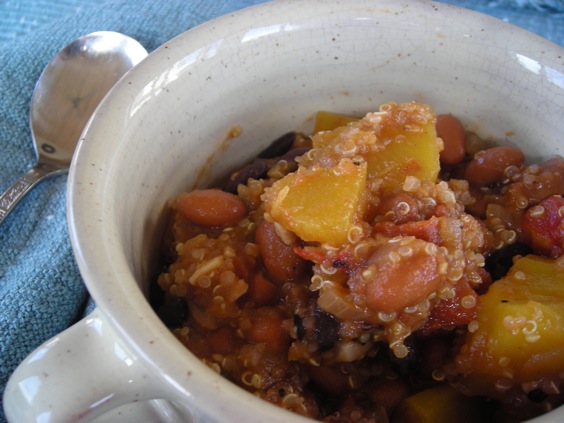
Andean Bean Stew with Winter Squash and Quinoa
from The New York Times, Recipes for Health and Nutrition, Nov. 2008
1 winter squash of choice, peeled and cut into 1/2″ chunks
2 cans pinto beans, drained and rinsed
1 medium onion, chopped
1 T. sweet paprika
4 garlic cloves, minced
1 can fire-roasted tomatoes, with liquid (use regular if you don’t have these available)
1/2 c. quinoa, rinsed well
1 bay leaf
3 T. chopped basil or parsley
In a sturdy stockpot, brown the onion in oil of choice, about 10 minutes or so. Add the paprika and stir to coat, cooking for a minute. Add in garlic and stir, cook for 30 seconds or until very fragrant. Add in tomatoes and their juice and cook for a few minutes to combine flavors. Stir in the beans and squash. Fill the tomato can with water and empty into the pot. The solids should be only just covered with liquid. This is a thick stew. Add more if necessary and put the bay leaf in the pot. Bring to a boil and then allow to simmer, covered, until the squash is tender, but not thoroughly cooked- 30 minutes or so. Stir in the quinoa and simmer until the grain is translucent and the tiny thread appears- about 10-15 minutes more. Season to taste with salt and pepper. Serve topped with basil or parsley.
This stew, like many, becomes more flavorful as it sits. It also thickens substantially. Add a little water when reheating.
November 11th, 2009
| 9 Comments »
{{{I’m doing my first guest post over at The LoveFeast Table today! Yeah!}}}
Apple Crisp is so Fall, so perfectly suited for the October-November loop, and so willing to apply anyone’s simple signature to it’s luscious ingredients that it has sort of gone beyond being a favorite dessert, becoming more like that old dear friend that never fails to bring sunshine to a dreary day.
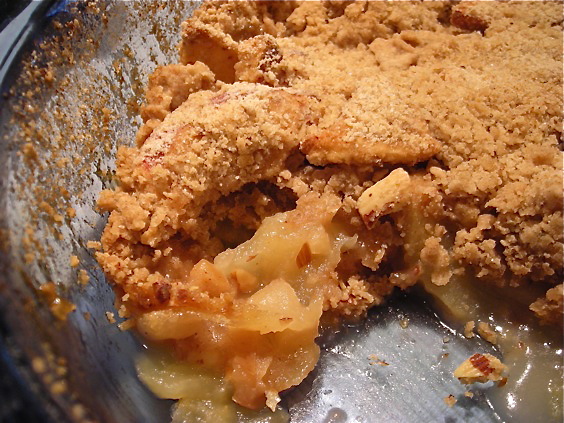
The smell of apples and cinnamon baking is a comfort that threads itself under your skin. It’s no surprise that the most popular of pies and scented candles are usually ‘Apple Pie’, long celebrated as All American and breathing remnants of home and Mom. Apple Crisp is simpler than pie, ready with a few turns of the peeler and knife, chunks of cold butter cut into crumbly flour and brown sugar to bake into a delicately scented crunch atop soft and juicy warm apples.
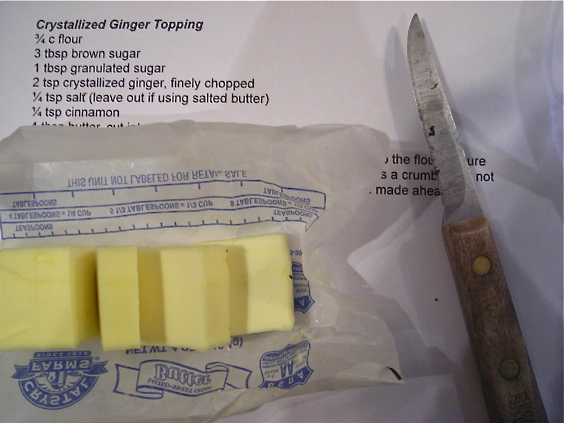 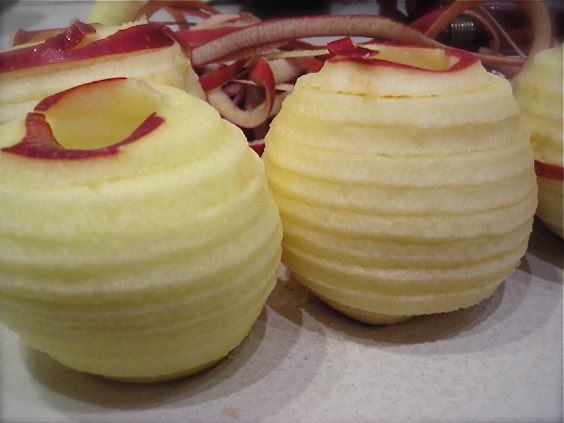
The addition of crystallized ginger in this recipe is wonderful; a gentle hint of warmth and a touch of it’s sweetness made the crunchy topping extra flavorful. I’ve been making Apple Crisp since I was barely old enough to see over the top of our stove, and had to stand on a chair to be able to work the peeler, my Mom by my side watching to make sure I didn’t hack off a snippet of skin here and there. She showed me how to peel an apple whole, with a long dangling strip, and how to carefully carve out apple cores and slice them uniformly so they would bake evenly. Now I have a device that peels and cuts your apples all in the turn of a crank, making any kind of apple dish quick and easy. So when I was faced lately with a chilly night and an unidentifiable need in me to seek a little comfort, a good book and a warm plate of this crisp seemed to be in order. Just taking in the first thin whiffs of the aroma seeping from the oven took the edge off whatever empty spot had formed inside. Apple Crisp was always a prominent item in our Fall kitchen, topped with cold ice cream releasing a thin river of creamy white over the still warm fruit. It’s a memory that tastes like home, if memories come with flavor which almost all of us know that they do. And maybe that night, I needed a memory to soothe me, the feeling of someone by my side watching over me. I know Mom would have loved this version as well.
I’m a nut for almonds – ha! pun intended- but there is little in terms of dessert items that I don’t think can be helped and favored by the addition of chopped almonds. For this recipe, I scattered chopped almonds over the apples in the pan before sprinkling on the topping, and also sifted the fine almond flour from the chopped pieces into the topping mixture to add even more flavor. To do so, just pour the chopped almonds into a wire sieve and shake it over whatever you wish.
Fabulous apple and almond flavor pours through every bite, whether topped with ice cream, whipped cream or yogurt……
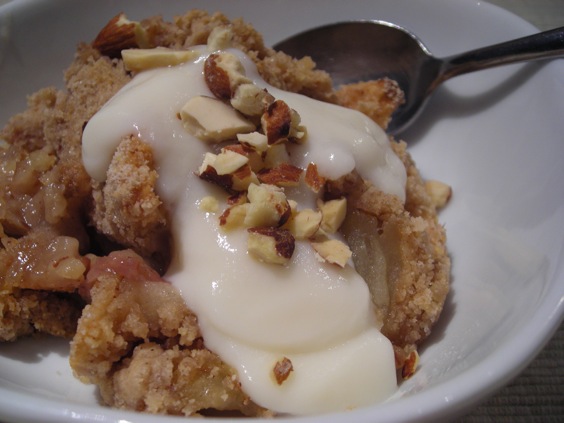
Or not……
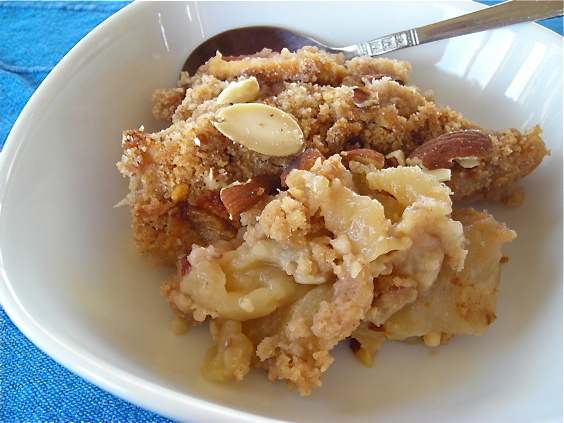
And yes, I did eat it for breakfast. Wouldn’t you?
Apple Crisp with Crystallized Ginger Topping
adapted from The Art of Simple Food by Alice Waters, via The Heavy Table
Kate’s Advice- Make the topping first. Your apples won’t turn brown that way.
Heat oven to 375°. Butter a 8″square baking dish, or equivalent and set aside.
For the topping:
3/4 c. AP flour
3 T. brown sugar
1 T. white sugar
2 T. crystallized ginger (I chopped mine fine- it would have been WAY chunky otherwise)
1/4 t. salt (omit if you use salted butter)
1/2 t. cinnamon
4 T. butter, cut into chunks
Mix all ingredients except butter in a bowl. Work the butter into the flour mixture with your fingers until it’s relatively chunky. Don’t mix it down to a fine sand. Chill until ready to use.
5 medium apples, peeled, cored and sliced
1 T. white sugar
1 T. AP flour
Toss apples with flour and sugar and place in baking dish. Sprinkle topping over the apples and bake for 30-40 minutes or until filling is bubbly and top is browned.
November 8th, 2009
| 4 Comments »
The FDA is pretty darn good at sounding the alarm over foods that one shouldn’t eat, or maybe not in excess. They’re just as good at recanting that advice after a year or so, more research and maybe some hand deep in their back pocket, but do they ever go the opposite direction? Can a food item be so stuffed with good ingredients, a high health quotient and incredible good taste that it’s possibly too good for you? Would the mighty FDA ever come at us like a pack of angry Chihuahuas for bypassing the french fry in favor of whole grains and fruit?
Eh, I think not. But this muffin might come a wee bit close to inducing a good health coma, if that is indeed possible.
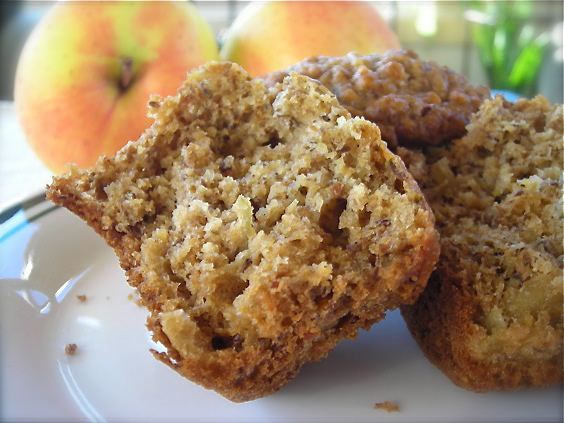 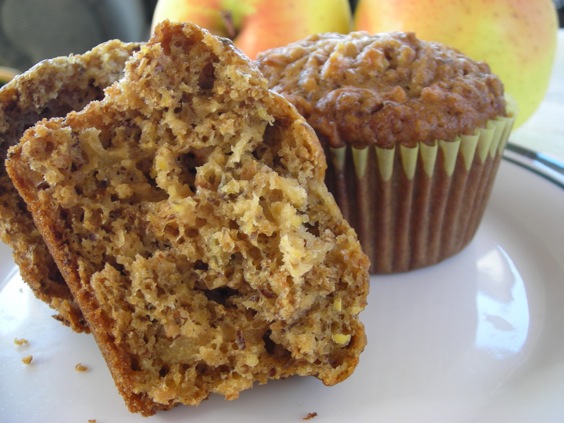
Muffins are one of my favorite snack items to make. There is so much that can be done to your basic muffin that I could spend from now until next November making a different variety each week and likely never run out of options. They tend to have a split personality though; as much as everyone wants to believe that eating a muffin is healthier, most of them sold in stores or coffee shops aren’t any better for you than eating a cookie or a croissant. And they’re HUGE, usually. Much too huge, and come on….who eats only half of those monsters? Uh, huh. That’s what I thought.
These basic whole grain muffins are one of my favorite recipes to play with, and they’re loaded with healthy ingredients. With their good hearty texture, they’re wonderful for any eating need from morning coffee to a late night indulgence and they adapt to any kind of extra I can dream up to mix into the batter. I’ve made them with zucchini, chopped pears and pecans, banana, blueberries and here in this version with apples. They freeze beautifully too, as any good muffin should.
Whole Grain Muffins
by Kate
1 ½ c. buttermilk
2 large eggs
2 T. butter, melted
¼ c. oil
¼ c. real maple syrup
1-1/2 c. All-Bran cereal
½ c. packaged 7-Grain cereal (like Bob’s Red Mill; 5-Grain or 10-Grain is fine too)
3 T. whole rolled oats
1-1/2 c. AP flour (can sub Whole wheat flour for half, if desired)
2 T. ground flaxseed
¼ c. brown sugar
1 t. EACH baking powder and baking soda
¼ t. salt.
Heat oven to 375°. Line muffin tins with paper liners, or spray with cooking spray.
In a medium bowl, whisk together buttermilk, eggs, butter, oil and maple syrup. Stir in All Bran cereal, oats and the 7-Grain cereal. Let stand for about 10 minutes, stirring occasionally.
In another bowl, whisk together the flour, brown sugar, flaxseed, baking powder, baking soda and salt. Blend in the wet ingredients and fold together until just combined. Scoop into muffins tins to 2/3 full and bake for 18-20 minutes, or until tops spring back when touched. Cool on wire rack for about 10-15 minutes, then remove muffins from pan to cool completely.
Added ingredients– 1 c. blueberries, frozen (do not thaw) or fresh; 1 c. chopped pear like a D’Anjou or Bosc; 1-2 mashed ripe bananas, 1/2 c. of any nut you prefer; 1 c. shredded zucchini; 1 medium apple, cored and chopped or shredded (or about a half cup of chunky applesauce), 1/2 c. coconut (delicious with banana and pecans) The possibilities are endless for what you put in these!!
And yes! Pumpkin, sweet potato or even squash is an option too, but check out this recipe for a delicious muffin idea with those ingredients.
November 4th, 2009
| 8 Comments »
Caramelized onions have become pretty common and ubiquitous. They’re everywhere, gleaming from tart crusts and mixed with all sorts of extras and I should be really tired of them, shouldn’t I?
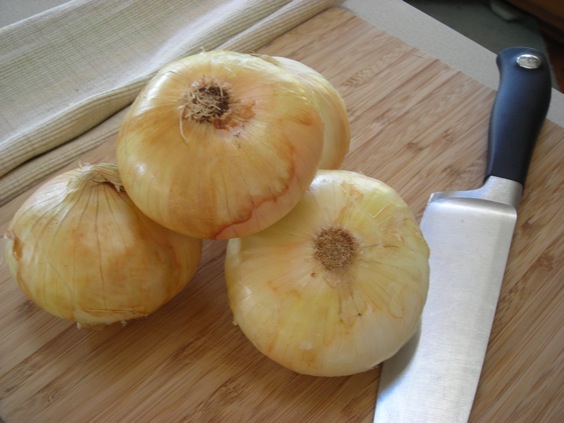
But I still find myself slicing an enormous pile of onions, ridiculous in it’s volume and placing them in my 25-year old skillet with the high sides to contain the mass. There’s a nice shimmery pool of olive oil and butter awaiting those translucent slices, and even though my mind is telling me that it’s way too much- did I really need to slice all five of those huge things?- I have to calmly tell myself that with patience and time, some brown sugar, a little kosher salt and a hundred or so turns of the spoon, it will reduce itself appropriately to fit into a two-cup container. And it does. I must feel I have precious little else to do with my time but keep watch over a pan on the stove for an hour or so.
As the mass cooks and pops, and I stir, stir, stir and stir some more to cook them as evenly as possible, I find myself poking through the fridge to see what I can do to kick my inner Iron Chef into action. Sure, I may think that making a big pan of these burnished beauties is a fine idea, in reality, I often jump into a process of cooking with nary a hint of what my final outcome of that ingredient will be. But I am creative. Something always happens. I pull out the half decimated container of fresh sage leaves and wonder ‘Hey! Haven’t I heard something about frying sage leaves?’ and then I think that fried sage leaves would be amazing with those onions so pretty soon my house is even more fragrant and I find myself glad that I am home by myself at this point. It’s unfair to subject anyone to amazing cooking smells when you have no idea how you plan to utilize it all.
So let’s back up, shall we? There’s the onions, the fried sage leaves crumbled to crispy bits and a container of gorgonzola. All this combination really needs is some sort of vehicle to get it to my mouth. Crostini? A spoon? Fingers?
Flatbread? With spinach pesto??
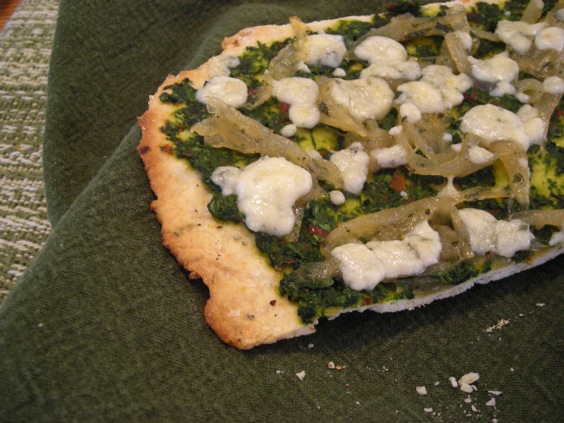 
Somebody pinch me. I’ve created heaven. If I disappear for a bit in a daze of an herb and onion induced food coma, honed to razor sharp perfection by gooey gorgonzola, this might be why.
For the flatbread recipe, go HERE.
For the spinach pesto recipe, go HERE.
And if you’re looking for something really simple but with incredible flavor, make these garlic and lemon infused white beans, and then stir some of the onions into them. Hmmm…..this could be heaven too. It’s a toss-up.
Oh and then as if that wasn’t enough, I added them to roasted garlic and sauteed shrimp and lots of fresh herbs that went over delightfully toothsome whole grain pasta, and it turns out that something celestial happened right there in that dish as well.
Sorry….have I just made you hungry???
November 2nd, 2009
| 6 Comments »
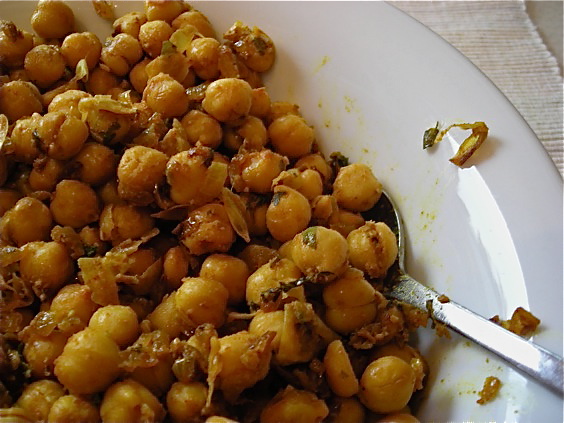
The flavors of a good curry will always be an experience that I seek fervently. I’ve learned as I’ve gotten older that more complex flavors in my mouth are highly desirable, and even a basic curry recipe can be so loaded with ample taste that it’s like fireworks on the tongue. A really good curry, as I have gathered from reading through some of my Indian cookbooks, is a process; it takes time to develop and gets better as it sits. In fact, Julie Sahni’s ‘Classic Indian Cookbook’ is full of recipes that simmer and bubble slowly over hours, and then goes on to say something to the extent of “Cover your pot and allow to sit for two hours or more, preferably overnight to create a deeper flavor.”Whoa now.
My love for a good curry dish is too high, too frenetic and too enthusiastic to consider making something such as Julie’s amazing dishes, then forcing myself, with a household of warming spices permeating every surface, to put aside the final product and WAIT to eat it. I may have patience for many things in life, such as a good loaf of bread, Spring to follow Winter and the ending of a long and complicated novel, but curry indulgence is not something I can set in the fridge, ignore and go about my business. When that baby is done and ready, I want to dig in. I want to indulge, feel the play in my mouth and the warmth filling every corner of my stomach and soul. Maybe in another life I was born to a land of coriander and ginger, soothed with the brightness of turmeric and weaned on cumin. How else would I have such a cuisine so infused in my blood? I’m a white girl with blue eyes, but place the aromatic Indian spices in front of me and I turn golden like a cheetah, speeding to pounce in delight on my meal.
A quick fix is always a good thing among the tried and true, slow creations hidden in the pages of any Indian cookbook. This recipe for highly pungent -and fast cooked- Curried Chickpeas has the warm spices of those stalwarts without the long waiting period. Now I could have used dried chickpeas for a slight flavor edge but in a pinch, for this eager mouth to devour, the canned are a perfect choice. It was barely 15 minutes from start to finish, and a steaming aromatic bowl of tiny, golden infused orbs sat on my counter. One bite and they ‘POW’d and ‘ZING’d their way to every one of my taste buds, delighting me and easing the need for some kind of spicy fury on my fork. Not overwhelming, and certainly not one to make my eyebrows sweat -a sure sign of potent heat- but again with the subtle means of infusing curry to the deepest layer of my skin. And fast. With a deep breath of relief, I was soothed once again.
Curried Chickpeas
From The Los Angeles Times, 10/21/09
1 medium onion, diced
1 t. turmeric
1 t. coriander seed
1 t. cumin seed
1/2 t. cayenne pepper
2 15-oz cans chickpeas, drained and rinsed
2 T. chopped cilantro (more to taste)
1 T. each fresh squeezed lemon juice and zest (lime would work fine, in fact I think it might be better)
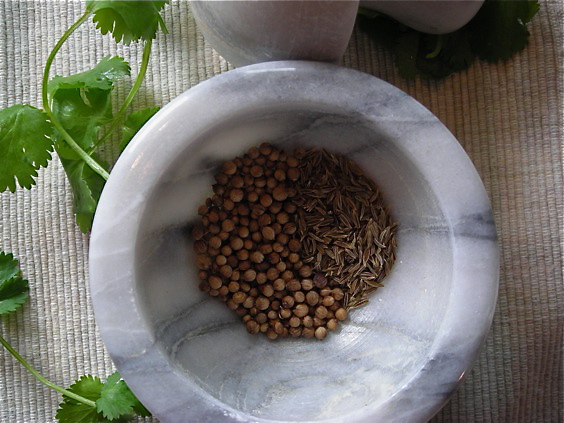
With a mortar and pestle, or a spice grinder, crush the coriander and cumin seed into coarse powder.
In a saute pan, heat oil of choice and add onions over medium-high heat. Saute onion until deep golden brown and crispy, about 8-10 minutes, stirring frequently. Add the turmeric, coriander, cumin and cayenne. Cook, stirring frequently until aromatic and toasted, about 2-3 minutes. Stir in the chickpeas, cilantro and lemon juice. Cook, stirring occasionally for about 10 minutes to allow the flavors to develop. Remove from heat and taste. Season with salt if desired. Allow to cool, transfer to a container and chill prior to serving. Adjust lemon juice and seasoning if you wish.
KATE’S NOTES:
I like the fresh flavors of using whole coriander and cumin seed in recipes. If you don’t keep a mortar and pestle, or spice grinder on hand, use pre-ground spices in the same quantity.
October 28th, 2009
| 6 Comments »
I should have known. Us Minnesotans wrote the book on the phrase ‘If you don’t like the weather, wait a minute.’
Right on time, at the heels of my dreary October report, came a smashingly beautiful Fall day; just in time to lift spirits across the city, to pour sunshine down on the deprived and saddened. It was blinding. It felt hot. Car interiors warmed up and jackets were shed. Lots of skin came out to say ‘Hello’, to welcome the sun.
And while most of the city wandered around in a daze, strangers smiling at each other with lots of contented sighs, I escaped.


Just a few short months ago, that deck was covered in soggy footprints, soaked towels, half empty sunscreen bottles, juice boxes, a few toys, often a stray lifejacket and maybe a wet child or two. It held chairs that held bodies that held hair off their warms necks and cold drinks in hand. The deck groaned under the weight of languid summer days, resplendent in the hot sun. And the lake laughed up at the blue sky, at the boats skipping across it’s surface and popped up a turtle or two to take stock, or a loon that just as quickly dove for cooler waters beneath. At night, the waters slept, still as glass, covered occasionally in a gentle fog, as the rubber band snap of bullfrogs sang harmonious shoreline lullabies. Idyllic barely does it justice. And it always ends far too soon.
But now, it’s just empty, save for the few hardy anglers, a lazy boat or two that holds tight to the remaining light and good weather and maybe the eagle, if he’s fishing today. Still, in it’s emptiness, and the solitude that tends to follow Labor Day like a reluctant puppy, Loveless Lake retains it’s beauty in entirely different ways, and offers a means to escape just once more before it settles down for a long winter’s nap.
 
And I settle in, pulling a bag of two of food with me and some warm clothing. The furnace kicks out it’s cozy heat and a few candles lead the daylight hours into night. I settle into the profound silence with a good book or two, some music and the need to just be me for a day or two. To hike and sit on a stone overlooking the St.Croix River, or to just stare at the water outside. Maybe I’ll do nothing at all. Stay in my pajamas all day and drink coffee, invite the muse to visit and tap away until it’s satisfied. I might rake leaves and lay among the crunch. There certainly should be a nap on the sofa, a good snack. And a bonfire as the sun disappears over the tree line. The bed is piled with blankets and I turn off the furnace at night, hunkering down under the weight that lulls me to sleep. I think about nothing at all. And everything, but really, it’s nothing. Winter is coming and this will end for several months. I won’t be able to walk down the hill, with the water winking an invitation at me beyond the corner of the cabin. There won’t be the giddy anticipation of a weekend with my nieces and nephews, racing around the water in the boat, dragging an inner-tube with a shrieking child holding on for dear life. It will end, with the last drop of water drained from the water heater, and the final look around before the car door slams on yet another season.
It’s always bittersweet.
October 19th, 2009
| 3 Comments »
I really need to make more of it. Time that is, especially when I can get this……
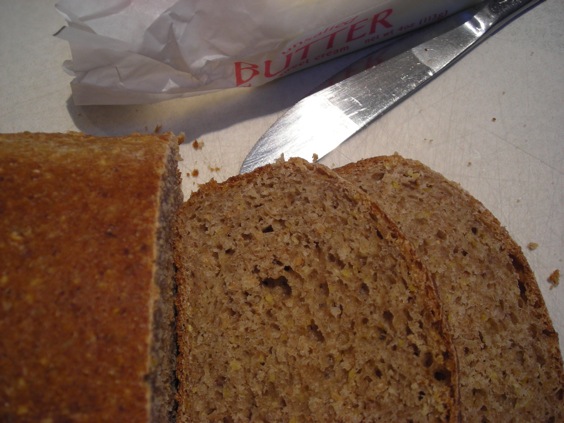
for something like 15 minutes of actual work; like getting my hands messy, watching the mixer spin and covering a bowl with plastic kind of work. Whoa. I’m exhausted just thinking about it.
But really, I should do this more often.
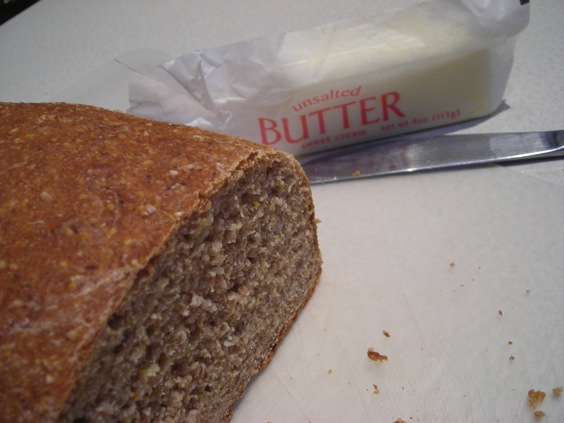
Maybe it’s because I don’t think bread photographs all that well. Like soup. I can make soup once a week but you rarely read about it here because it isn’t all that glamorous and hates to pose when the camera comes out. Some foods you can’t keep down if you tried. The camera turns on and they pose the heck out of themselves, flashing their merits for the lens to find, almost shouting ‘Look at me!!’ in their desire to be seen. And loved. Bread is just sort of there. The color isn’t superb and eye-catching; you can’t really show off the crumb in any photo and there’s no flashy edges, roasted and burnished, that tell it’s tale. And it’s bread. It’s a vehicle for your cheese, peanut butter, jam or fruit butter. It gets smothered in mayonnaise. No wonder it just sits there when the camera comes out. Rarely is bread honored on it’s own, although some of the best breads I have ever eaten can offer up their finest attributes with nary a spread in sight. But let’s face it. When you go for bread, you almost always have the thought of placing something on it, covering it up and hiding it from view, mashing it down in a press, or cooking it over a flame. Maybe over time, bread has developed somewhat of a complex, and when the camera points its way, it probably sighs and thinks ‘Oh great, next it will be the peanut butter jar. Or that god-awful mayo crap. Or that fabulous sharp cheddar in the fridge, maybe with chutney.’ It’s time to behold the bread. To claim it for the amazing food that it is, to place it forefront in the kitchen, to give it it’s due. To make time for it. To take 21 pictures of it like I did in an exhaustive effort to bring out the best of it, to try to make it shine. As I tapped ‘Command + Delete’ over and over again, sighing in frustration, the coarse and hearty crumb of this bread still playing on my tongue, I decided that the bread just needed to tell it’s own story in the only way it could. It needs to be made to be appreciated.
For five years of my life, I worked in the office of an artisan bakery and was subjected daily to fresh baked bread of all shapes, sizes and flavors. Some days all I could manage for lunch was to grab a ciabatta roll and maybe a little ham. Sometimes it was a Sesame Semolina loaf, a snappy and crisp Baguette or the mouth-puckering Sourdough Boule. My desk usually would be covered in crumbs, and when I cleaned out my keyboard, yep- you guessed it- crumbs. My daily log book was filled with crumbs. They crunched under my shoes, and almost every day as I exited the building and passed the rack of breads that were left, I would grab one to take home for Griffin. But I was surrounded by the wonder of all things yeast and it cemented a love for bread in me that lives strong still, nearly eight years after I left the job. I never really thought about how fortunate I was then, but now, when I want something yeasty, that snaps with a shower of golden snowy crumbs all over my lap, that’s what I think about.
And I need to give it the time and attention it should have, time it deserves and way more than I do, which is a rarity. Even if most of that time is spent gazing at a plastic covered bowl, faint drafts of yeast and flour emitting from within, while I sigh heavily, dreaming of warm bread covered with melted butter, a drizzle of honey or a gooey slice of melted Brie. The warmth of a 400° oven easily chases the chill of an October Sunday away, while I doze through the NFL game, one synapsis just awake enough to keep track of the time passing and bringing me ever closer to those dark brown loaves. And the smell. God really knew what He was doing when He created bread, didn’t He? Somebody say ‘Amen’.
Whole Wheat Multi Grain Bread
From The Essential Eating Well Cookbook
1-3/4 c. whole wheat flour
3/4 c. bread flour
3/4 c. 7-Grain cereal (Bob’s Red Mill makes a delicious one)
2 T. milk powder
1 pkg. active dry yeast (2-1/4 tsp.)
1-1/4 t. salt
1-1/3 c. water
2 T. molasses (I did not have any, subbed in unsw.applesauce and loved the result)
1- 1/2 T. canola oil
Fit your Kitchenaid mixer with the dough hook. Spray a medium bowl with cooking spray and set aside.
Combine flours, cereal, milk powder, yeast and salt in the mixer bowl and blend on low speed for about a minute. Whisk together the water, molasses and oil until combined, and then with the mixer running on low, slowly pour the liquids into the flour mixture. When fully combined, stop the mixer and allow the dough to rest in the bowl for 30 minutes.
Turn the mixer on to low again, and mix the dough for about a minute stirring in about 2 more tablespoons of wheat flour. The dough will not form a ball and will be slightly sticky. Scrape the dough into the prepared bowl and cover the top with plastic. Allow to rise until doubled in size- 1 to 1-1/2 hours.
Coat a standard loaf pan with cooking spray. Turn the dough out onto a lightly floured surface, and sprinkle a little more flour over the top. Carefully collect the dough together to form a loaf and place in pan. Cover with plastic and let rise until doubled in size, 50 minutes to an hour.
Bake at 400° for 35-40 minutes, until top of loaf is golden brown and there is a hollow sound when you tap on the top. Allow to cool in pan, then turn out onto a wire rack to cool completely before slicing.
KATE’S NOTES:
Bob’s Red Mill makes a 5-Grain, 7-Grain and 10-Grain cereal mix. Although the recipe calls for the 7-Grain, I used the 10-Grain as it was what I had on hand. Either of the three varieties would work just fine in the proper quantity. I was a little skeptical about the amount of time the dough mixed after the rest period. It seems pretty short and does not seem to develop the gluten much like other methods. However, the result of the loaf tasted really good, with a dense and coarse multi-grain crumb and a nice texture. I might experiment with the amount of mixing time to see what the end result might be. I doubled the recipe and both loaves were a bit short but I might have baked them sooner than they should have though.
October 14th, 2009
| 10 Comments »
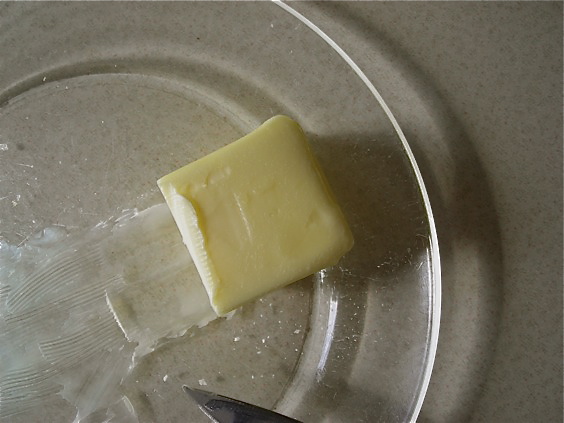 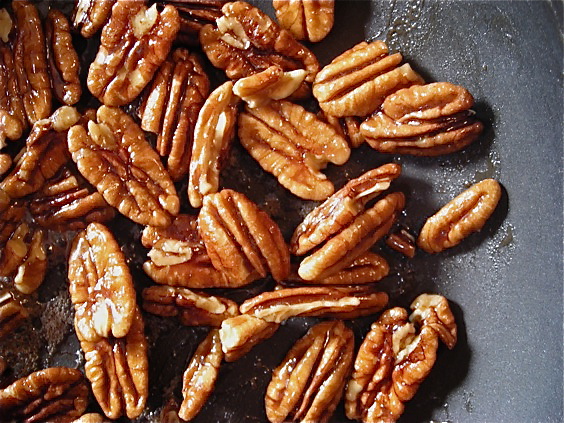 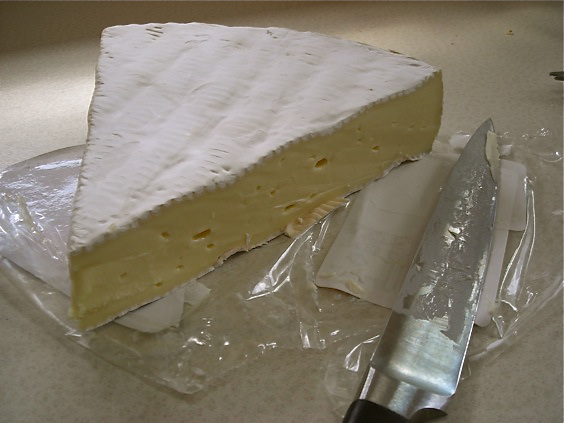 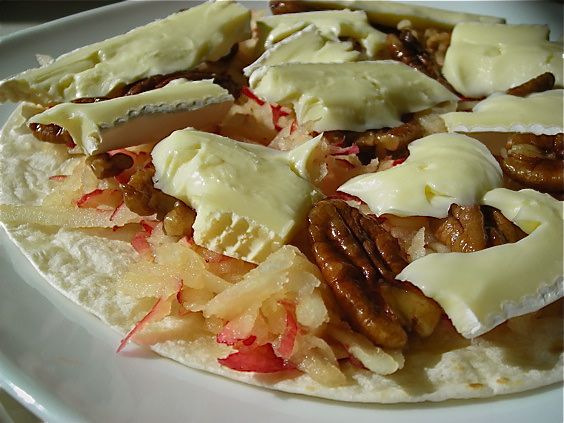  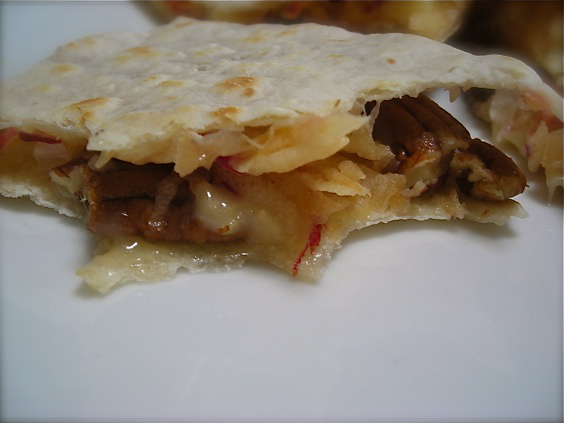
Apple, Brie and Sweet Salty Praline Quesadillas
By Kate
One medium sized apple of choice, shredded and squeezed to remove excess moisture (I used Honeycrisp)
Two sliced Brie cheese
Sweet Salty Pralines (method follows)
Two Flour tortillas
In 8″ skillet, heat one tortilla until starting to crisp and brown. Remove to plate and add second tortilla to pan. While second tortilla heats, spread shredded apple over warmed tortilla on plate and top with pieces of Brie. Scatter pralines over the top. Cover with second tortilla and place back in pan. Reduce heat to low and cover, allowing to heat slowly. Carefully flip tortilla once during heating. When cheese is melted, place on plate and cut into wedges. Serve hot.
To make Pralines:
In a medium sized skillet, melt a tablespoon of unsalted butter over medium heat until foamy. Add in a cup of pecans and stir to coat. Cook, stirring regularly for about 2-3 minutes, then sprinkle in two tablespoons of brown sugar and one teaspoon of sea salt. Stir to coat pecans, breaking up any chunks that form. After a minute or two, carefully pour two tablespoons of water into the skillet and stir to combine. Bring to a simmer and cook, stirring regularly, until syrup thickens and pecans are fully coated. Pour onto a plate and spread to cool, being careful not to touch the caramel.
October 11th, 2009
| 4 Comments »
The words ‘chili’ and ‘simple’ often aren’t used in the same sentence, and I’m sure chili purists would snort at a pot of smoky rich chili that’s ready in less than an hour, but while there can be a steadfast debate over what constitutes true chili- beans, no beans, the type of meat or none at all- chili is one of those subjective words that has as many meanings as there are cooks to pull it together.
I love a pot of chili that develops over time on my stove. The extra deep flavors, the rich tender chunks of beef and the warm smoky aroma that fills my house are one of the things I begin to crave as the daylight grows shorter each Fall. Be that as it may, I also love having something hearty, healthy and quick to pull together and offer to a gnawing stomach. Or a broken soul.
I found this quick chili recipe last year from an Eating Well magazine and it was an instant hit. It comes together so quickly that you might barely have time to bake a pan of cornbread before you are ready to indulge. You need canned beans and enough know-how to chop an onion; most anyone can manage that and yet it just begs for improvisation, for peppers or perhaps corn and some late season zucchini to add heft and health to an already stellar pot.
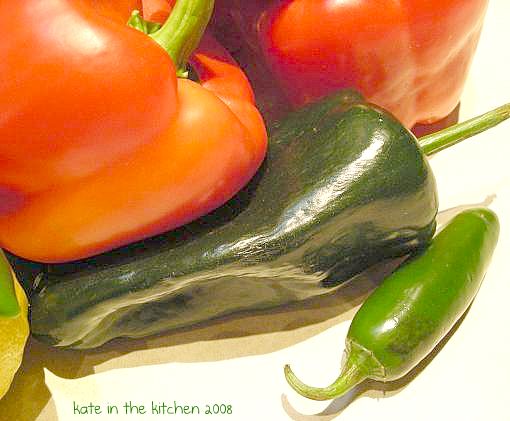
Soup. Chili. Stew. Chowder. These words have been ringing in my head this past month as we’ve waved off summer and started our reacquaintance with Autumn. Last year I was happily enmeshed in soup-making and found all sorts of good ideas for a steaming pot. This one is a good -and quick- option for soup season.
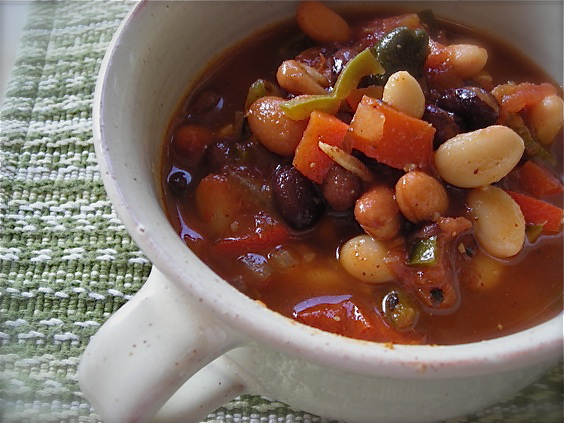 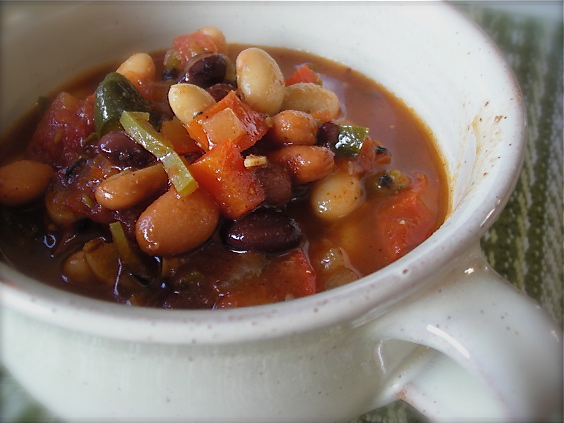
Quick and Easy Three Bean Chili
Adapted by Kate
1 medium red pepper, cored and diced
1 medium poblano pepper, cored and diced
1 jalapeno pepper, cored and diced (for more heat, use serrano)
1 medium onion, diced
3 cloves garlic, minced
1 15-oz can great northern beans
1 15-oz can black beans
1 15-oz can pinto beans
2 15-oz or 1 28-oz can fire roasted tomatoes
3 T. chili powder
1 T. ground cumin
1-2 T. chipotle chili in adobo, if desired
Drain and rinse all canned beans, set aside. In a medium stockpot, cook onion and all the peppers in oil until soft, about 8-10 minutes. Add in chili powder, cumin and garlic and cook about a minute, stirring continually. Add in tomato and all beans, and two quarts of water. Stir to combine and bring to a boil. Simmer to develop flavors, about 15 minutes. Add in chipotle for more flavor and heat if you wish. Season to taste with salt and pepper, if needed.
Can be topped with diced avocado, cilantro leaves and a wedge of lime. Additional ingredients to add if desired: diced zucchini or frozen corn.
|


