November 23rd, 2012
| 1 Comment »
Magic October is gone, the artist’s palette splashed vibrant and rich, in every direction we looked. The season of brown replaced it, and the darkness falls predictably, knocking us backwards in to quieter evenings, thicker clothes, retrospection. Thanksgiving came as early this year as it possibly could; beginning on a mild note in the morning with temperatures near 60 degrees. By afternoon, the wind had stripped the mild weather away, and as dusk fell across countless laden tables of bounty, snowflakes began dropping from the sky, making photos like this nothing but a memory.

I’ve been cooking quite a bit, but not jotting down recipes, or taking much beyond a quick iPhone photo for my Instagram page. Then, I’m not sharing those on Instagram Friday anymore, either. In struggling with the whys of this blog, and trying to figure out a method to jump-start my creativity again, I came across this post from Jacqui that sent my heart scurrying. If there could be truer words spoken about what is in my mind in the moment -although there’s far less about tacos than in Jacqui’s- I don’t know where I’d find it. In brief bullets, she knocked one out of the park, and has left me questioning even more which direction my little corner here is going.
And it’s now way deep in November. I’ve watched in previous years of my life how this 11th month has silently bound me to suffocation in a dark melancholy, but in recent years have seen a more forgiving approach to the slow decline of natural light. Have you ever read this essay from Jeanette Winterson? It’s all about embracing winter darkness and appreciating what happens after the sun goes down.
“We have all experienced negative darkness – those long stretches of the night when we can’t sleep, and worry about everything, and so we know that “dark time” can seem interminably long, compared with daytime. Yet this slowing of time can be the most relaxing and beautiful experience. Spending the evening in candlelight, and maybe by the fire – with no TV – talking, telling stories, letting the lit-up world go by without us, expands the hours, and alters the thoughts and conversations we have.”
Since finding it many years ago, there has been much more to discover about darkness; and I realize that fighting the cold, the brown and the ennui that November brings only tends to make those aspects of it more pronounced. This November has been very kind; it’s been mild, warm even, and there have been days of ample sunshine that the cats love to bask in. Really, there wasn’t much to complain about with this 11th month.


But I was pleased to see the snowflakes yesterday. Crazy as it sounds, I’ve been impatient for real cold. For my cross country skis and sweaters and candlelight twinkling against windows reflecting pale apparitions of white. I’m a girl of seasons, born deep in my blood and others may find Winter contentious and difficult, but it will arrive with it’s own fury and grace regardless, and welcoming the season without fight is far less tiresome.
And this blog? Well, I’ve got some ideas planned for the next six weeks or so, a fun giveaway for my readers and some good old fashioned Christmas treats to share. And then…. poof! The blog, as we know it, will be gone and once again a Phoenix will rise from the ashes, hopefully by the time the first month of 2013 ends. I’m churning with ideas and plans and am quite excited to see how it all comes out on the other end.
So…. how about a recipe? A perfect one for this time of year, these Sweet Potato Biscuits are wonderful to nibble on with morning coffee, or as an amazing addition to any holiday table (I can only imagine how delicious these would be with turkey and stuffing….) They’re a cinch to make too. Who doesn’t love that?
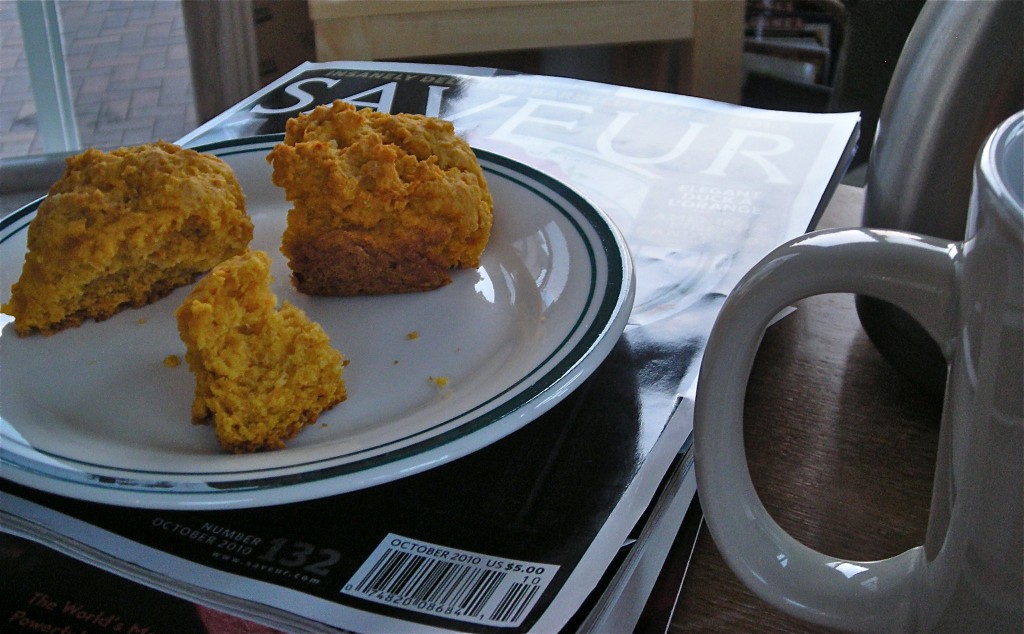
Sweet Potato Biscuits
Yield: 12 to 15 biscuits
One 3/4-pound red-skinned sweet potato (yam), peeled, cut into 1/2-inch cubes
1 3/4 cups all purpose flour
1 tablespoon (packed) dark brown sugar
2 1/2 teaspoons baking powder
1 teaspoon salt
1/2 teaspoon baking soda
Pinch of cayenne pepper
8 tablespoons (1 stick) chilled unsalted butter, cut into 1/2-inch cubes, plus 2 tablespoons butter, melted
1/3 cup chilled buttermilk
Cook sweet potato in medium saucepan of boiling salted water until tender, 8 to 10 minutes. Drain, cool, and mash.
Position rack in lower third of oven; preheat to 425°F. Butter bottom and sides of 8- or 9-inch cast iron skillet (or 8- or 9-inch round cake pan).
Whisk flour and next 5 ingredients in large bowl. Add cubed butter to flour mixture; toss to coat and rub in with fingertips until mixture resembles coarse meal. Whisk 3/4 cup mashed sweet potatoes and buttermilk in medium bowl. Add to flour mixture; toss with fork. Gather mixture in bowl, stirring gently until dough comes together. Using your fingers, press any remaining flour in to the dough, and gently turn it out in to the prepared pan, pressing it to fit. Score the biscuit dough in a pie wedge shape.
Brush tops with melted butter. Bake until puffed and golden on top and tester inserted into center biscuit comes out clean, about 22 minutes. Cool 10 minutes in pan. Turn biscuits out and gently pull them apart.
from The Kitchen Sink Recipes (and from Bon Appetit)
October 10th, 2012
| 1 Comment »
I adore muffins.
But I should clarify something; I like real muffins, not cupcakes masquerading as muffins. While there are those in the camps of muffin lovers that think sweet muffins are perfect, I’m generally not one of them. I like a hearty muffin. Small in stature but huge in flavor. I like them to be full of grains, nuts, fruits and the good stuff that makes me feel all right about eating them. And apparently, given that there are more than half a dozen recipes in this blog (and wayyyy more that never made it long enough to be photographed and talked about), one could stand to reason that if given a choice of what to bake on a very chilly, rainy October morning, it would be muffins.
And even though I likely would LOVE to re-make all these muffin recipes, frankly, it wouldn’t be so hot for my waistline. So I’ll just re-visit some of my favorites instead. You’re ok with that, aren’t you?
{{Before moving in to Muffin Mania, have you checked out this week’s Cookbook giveaway yet??}}
Songs and soundtracks make up the background for this indulgent Fig Muffin with Honey Lemon Cream Cheese filling.
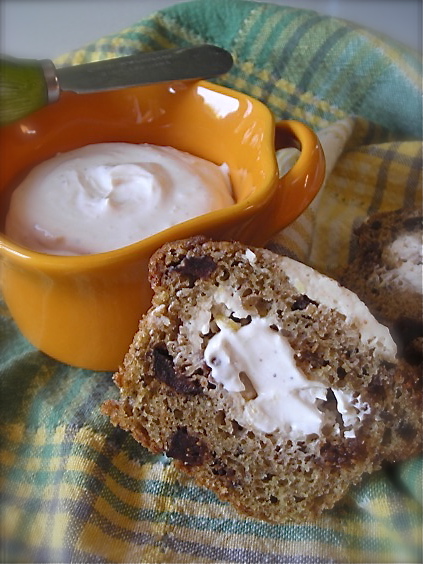
Just right for the season, Pumpkin Maple Muffins. Sorry the photo is missing……
Butternut squash, November light and Whole Wheat Muffins with Quinoa & Squash.
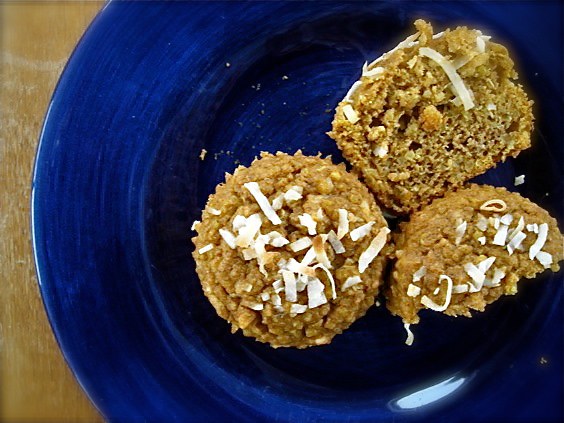
Whole Wheat Muffins, a blank palette for so much imagination and flair.
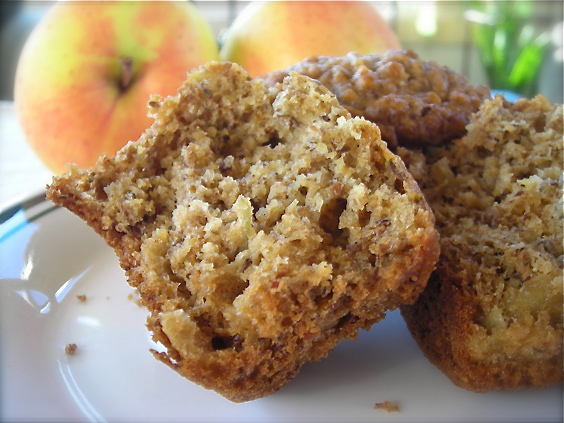
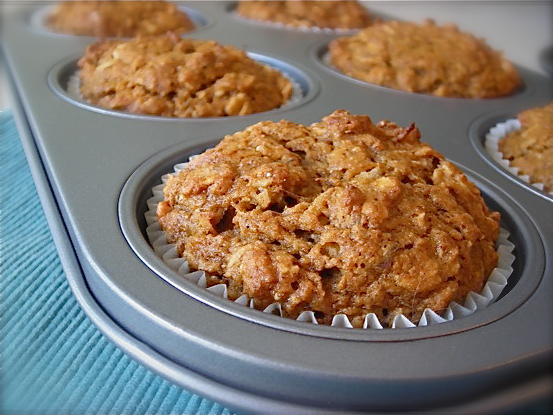
Another good choice for Fall; Oatmeal Sweet Potato Muffins. *sigh*
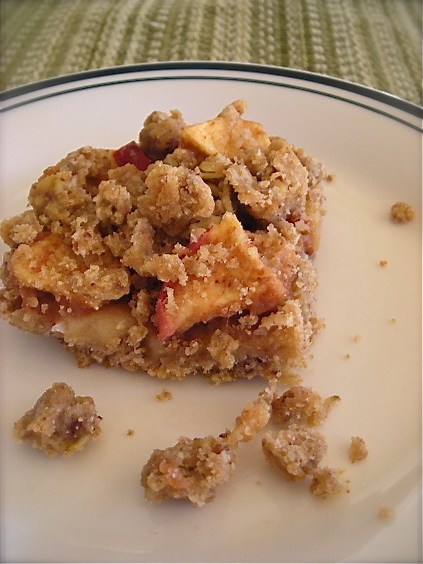
And of course, there has to be something with Apples. The Apple Cheddar Muffin recipe is tops, but quite frankly, these Apple Streusel Bars just had to be snuck in because they are SO darn good.
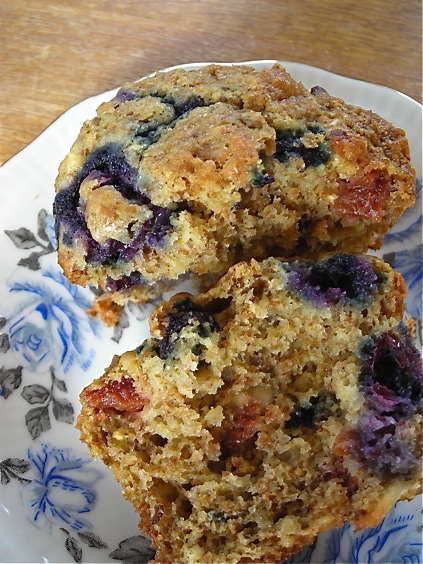
How about a Blueberry Bran Muffin? This particular creation had a handful of fresh cherries tossed in as well.
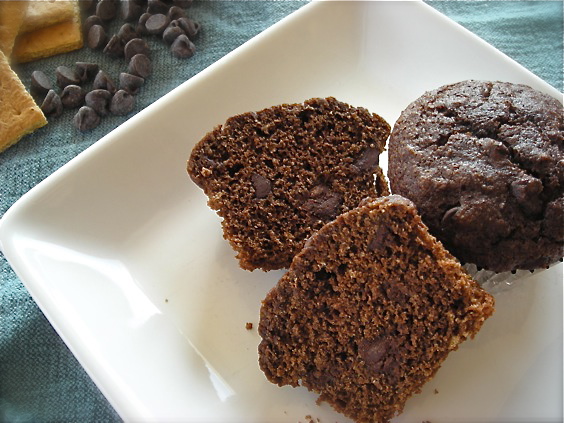
And finally, a Chocolate Graham Muffin that thinks it should be a cupcake. Add marshmallows and it might be S’Mores.
Next time, I’ll tell you all about my love for Tea Breads. And of course, share that bounty of recipes as well. 🙂
August 1st, 2012
| 4 Comments »
It isn’t much, I admit. This spread, or dip or whatever you wish to call it was a lightning bolt of inspiration one night when I was craving something different to put on our favorite grilled dinner item- a loaf of pillowy ciabatta bread stuffed with an assortment of grilled vegetables.
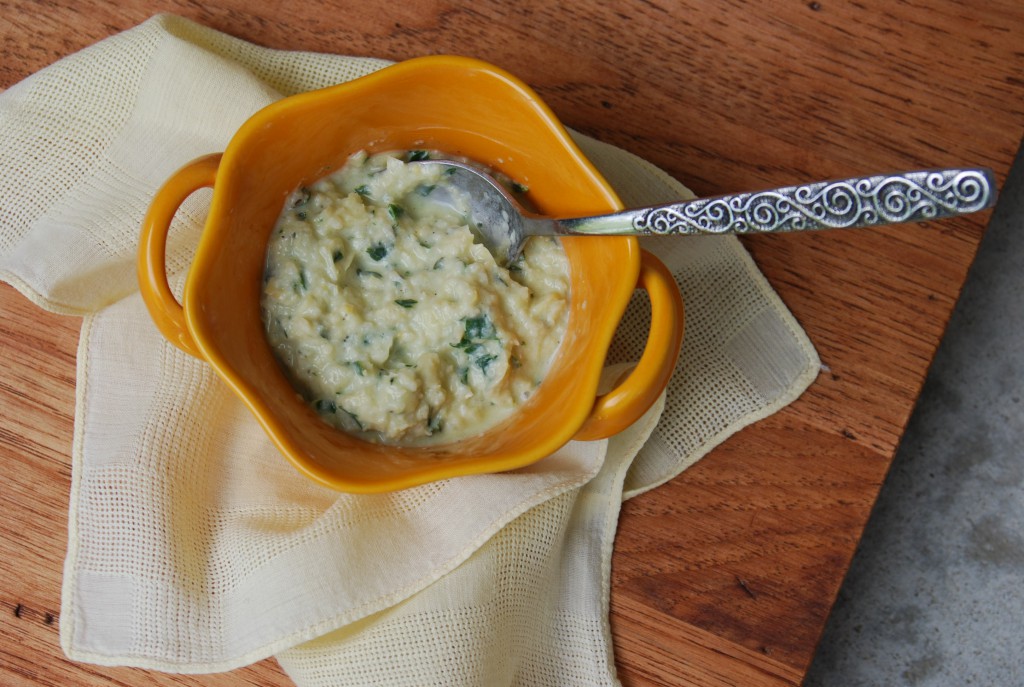
Sweet corn is in that stage of ripeness and availability right now that finds it everywhere you turn, and we’re consuming it several times a week, as well it should be. We’re so blessed in Minnesota to have an abundant crop of the good stuff, ready on road side stands, in the Farmers Market and a few select amazing Minnesota grown varieties in the local grocers as well. Sweet corn that bursts when you bite it, needing little besides a drizzle of butter and salt to make it wonderful. Have you tried mashed avocado on sweet corn? You must. It’s simply divine. And this creamy, slightly tart-sweet spread also lends itself highly to corn, hot from the grill or bubbling stock pot of water.
Beyond the goat cheese and sweet corn kernels, stripped from the cob, you could do any additions to this, with endless possibility. Fresh herbs are a must; I used lemon thyme, oregano and parsley (my basil is overgrown and bitter from the heat- big sad eyes here) but if you have good basil, by all means, use it in this spread. Add a pinch of sugar to balance the tart; combine some Southwestern flavors like cumin, lime juice and zest and chili powder for a big ol’ kick. Add curry powder and lime juice for an altogether different interpretation. Since the sweet corn supply is endless, your variations on this could be as well.
Sweet Corn & Goat Cheese Spread with Fresh Herbs
1 ear sweet corn, cooked and kernels stripped
2 oz soft plain goat cheese
1 T. fresh squeezed lemon juice
1 t. fresh lemon zest
3 T. mixed fresh herbs
Pinch of brown sugar
Salt and pepper to taste
Place all ingredients in the work bowl of a food processor and process until fully combined, scraping bowl occasionally. Taste for seasoning, and add more salt and pepper if it’s too sweet, or a bit more sugar if too tart.
Just a note on this: I have a tiny little food processor, like a quart sized one and it was perfect for making this spread. In a larger bowl type of processor, you may not have a confined enough space to get it to mix properly. Try it in a regular blender, or in a deep pyrex measuring cup with an immersion blender if you have either of those options. This made about a cup’s worth of spread, but if you want to make more, increase the ingredients accordingly.
July 16th, 2012
| 5 Comments »
I’ve never really been a fan of ketchup, and can’t recall the last time I really ate it. Maybe in college, dragging a thick and steaming hot onion ring through a plate of ketchup and mustard swirled together, or possibly on a bratwurst, back in some far away and hazy memory but it’s been a really long time. Griffin likes it, Mike won’t touch it.
Then I discovered tomato jam.
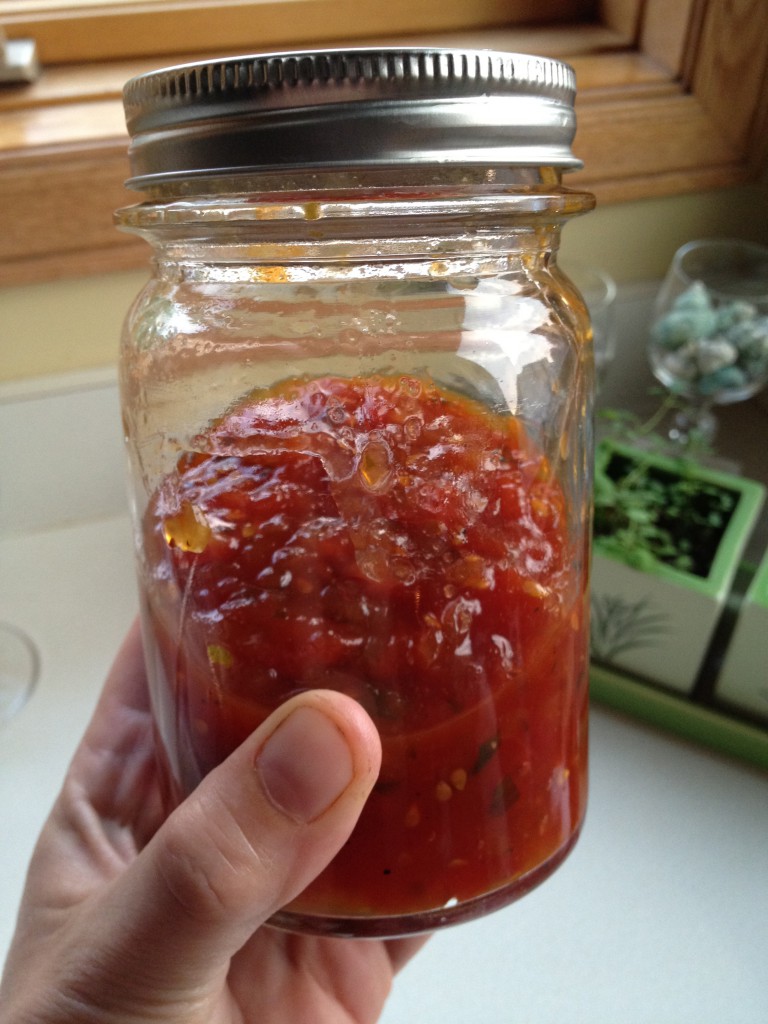
From Herbivoracious, my current cookbook love by Michael Natkin, I saw this condiment in the last pages of the book and was intrigued by it, then read a really positive and glowing review of the same recipe on another food blog, sealing the deal. With a few imperfect tomatoes and a bit of time to simmer the jam, the first time I scooped it on to my plate and tried it was a revelation. I frankly didn’t know what to expect, but what landed on my tongue was unlike anything I’d tasted before. It was thick and bursting with tomato flavor, a bit sweet but not at all syrupy or tinny like ketchup. And as soon as the last bit was scraped from the jar, I knew I needed to have more.
And the thing is, this is a perfect recipe for this time of year. You don’t need lovely tomatoes to make it because you cook them down to a thick jam, so all those ones on the vine that don’t make it to the plate, the ones that maybe split in the heat, or have one side that won’t ripen; think of the bushels of tomatoes at the Farmers Markets that are there for canning too, how perfect they’d be to make this extraordinary condiment. It goes so well on burgers, sausages, hot dogs, veggie patties, on top of grilled vegetables or spread on bread for your sandwich. You might think you need to hide it in the fridge so your spouse won’t eat the last of it. (ahem…. not that I did that or anything…. just sayin’) It’s a quintessential summer treat, making your cook-out more refined and grown up. Save the syrupy sweet ketchup for the kids in your life. This tomato jam?? It’s ketchup with a Ph.D. And that’s for us.
Tomato Jam
1-1/2 lbs of fresh tomatoes, peeled
1/2 a small onion, diced
3/4 c. sugar
2 T. lemon juice
1 T. kosher salt
2 T. chopped fresh rosemary
Pinch of saffron threads
Pinch of crushed red pepper
Fresh ground black pepper
In a medium saucepan, combine all the ingredients except the black pepper. Bring to a boil, reduce the heat and allow to simmer until the jam has thickened, about an hour or more. Stir often while it simmers.
From Herbivoracious.
KATE’S RECIPE NOTES:
This cooks for a looooooonnnggg time. A very long time. The first batch I made took well over an hour to cook down, and the second round I made was a double recipe and that one cooked for over two hours. Most of that time is pretty hands off though; you stir every once in a while but you are not tied to the stove by any means.
I’m not a huge fan of rosemary. WHAT?? I know. But I’m not. So I subbed in lemon thyme, oregano and parsley and who would even know that this wasn’t exactly how it should be made?? It’s glorious this way. Experiment with your own fanciful herb combinations. For both batches I reduced the sugar, adding only 1/3 of a cup for a single batch, 1/2 cup for the double batch. I also added lemon zest to the mix because when you’ve got lemon juice, you need lemon zest, as far as I’m concerned. But that’s just me. The book says to use up the jam in three days, and although I’m certain I could have done that if I tried, it lasted for more than a week in my fridge just fine.
I’m debating an attempt to water bath process some of this so I can have it all winter long. It’s probably going to happen. Probably.
July 8th, 2012
| 1 Comment »
Summer kind of smacked us around this past week in Minnesota. We’re a state that lives for Summer, for beach time and hours spent outdoors engaging in just about any activity that means we escape our houses and enjoy the weather, but then there are those Summer days that are so hot, so thickly humid and uncomfortable that we have no choice but to stay home, avoid the triple digits outdoors and attempt to entertain ourselves while the sun tries to burn holes in our roof.
I’ve experienced some hot Summers in my lifetime; 1988 was a blistering hot Summer that saw temperature records fall by the score, knocking out ones that had stood the test of time since the 1930’s. I was living in a third floor walk-up apartment with no A/C and I’ve never been so miserable in my life. One evening in July, as I sat out on the stoop with other exhausted and over-heated residents of our building, the night air at 10:30 was still hovering around 105°. Trying to sleep was impossible. At 3:30 that morning, I finally gave up and turned on the radio, only to hear that the current temperature was 88°. During that particular Summer, we saw a stretch of weather where the temperature did not fall below 85° for more than a week. At that point in time, central air-conditioning was still a novelty.
I don’t recall much about what I ate during that sweltering Summer, and having this cool, crunchy and fresh salad around might have made those awful days a bit more tolerable, but at that point in my life, my culinary exploits were just about non-existent. Thankfully, for our current heat wave, and after a quick and sweaty trip through the Farmers Market, we were stocked to the hilt with fresh greens and lettuces and crisp vegetables, making this dish a mainstay of those sticky days blessedly spent inside our comfortable, fully air-conditioned house.
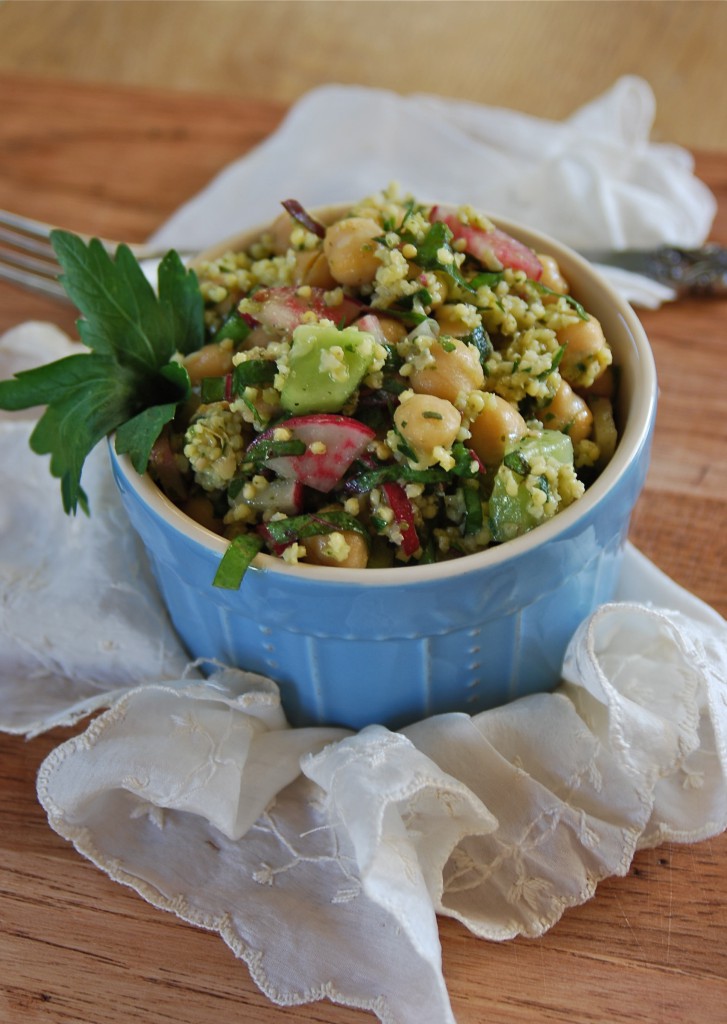
Not familiar with millet? Most of us in the USA see it only in birdseed, and that’s a sad fate for us humans, but terrific for the birds. Millet is widely cultivated in the form of pearl millet in India and parts of Africa, and is popular there due to it’s high productivity and and short growing season. In the USA, the most widely cultivated form of millet is proso millet, grown and used as birdseed. Millet is an ancient grain, known for being the least allergenic and most digestible of the gluten-free ancient grains that are becoming more popular. Millet is high in fiber and all the B vitamins, iron, calcium and zinc. It cooks in less time than quinoa and has a pleasantly sweet and nutty flavor.
This salad, born of desperation and some choice nightmares over stressful memories of past sticky summers, made our stretch of housebound days feel a bit easier. Even in the cool comfort of home, with the heat and humidity kept at bay by closed shades, eating becomes almost an afterthought. There’s no comfort in foods that are heavy or rich; no desire for flame or heat, and when the mood strikes to eat something, it’s good to just reach in the refrigerator and pull out a bowl of summertime goodness. The crunch and snap of fresh vegetables, the headiness of herbs cut straight from the garden outside your door and a blind eye turned from the weather forecast was welcome relief as the calendar page turned to July.
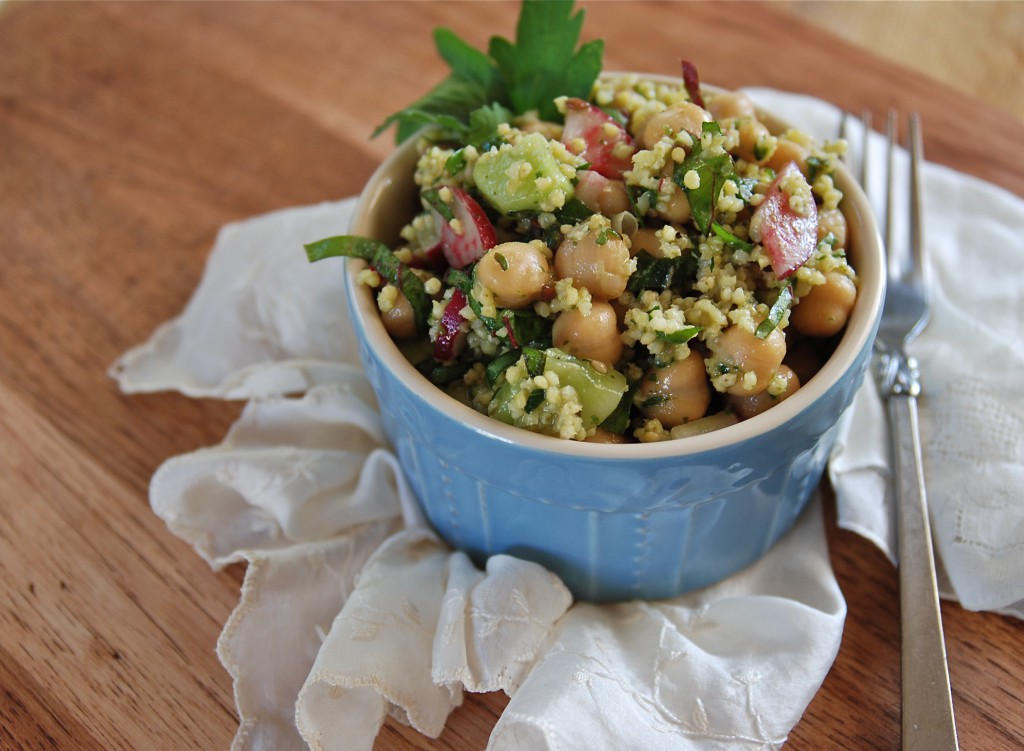
This salad is endlessly versatile, and if Millet isn’t available, you can use just about any small grain you wish. With the wide variety of fresh vegetables in season, as well as delicious greens, putting your own personal thumbprint on this salad is a cinch. I loved the addition of the radish greens to the salad, offering their unique peppery bite, but if you use them, seek out organic radishes to insure that the greens aren’t laden with pesticide residue. And as always, with time in the refrigerator, this salad takes on a lot more flavor.
Now we’re all set for the next heat wave. Let’s just hope it’s not too soon.
Millet & Chickpea Salad
1/2 c. raw millet
1 15-oz can chickpeas, drained and rinsed
1 small cucumber, peeled and diced (remove the seeds if desired)
1 small bunch radishes and their greens, washed and sliced
1 c. fresh chopped herbs such as basil, oregano, thyme and parsley
1/4 c. good quality olive oil
2 T. white or red wine vinegar
Sea salt and fresh cracked pepper to taste
In a small saucepan, bring 1-1/2 cups of water to a boil. Rinse millet in a wire mesh strainer until the water runs clear. Add millet to boiling water with a generous pinch of salt. Bring to a boil, reduce the heat and simmer for about 10 minutes. Test the grains. They should still be firm, with a bit of softness, like rice. All the water might not be absorbed either. If tender, remove from heat and drain remaining water. Spread cooked millet on a parchment lined baking sheet to cool.
In a large bowl, combine the cooled millet, chickpeas, cucumber, and radish, greens included. Whisk the oil and vinegar together in a small measuring cup, season with salt and pepper. Pour over vegetables and toss to coat. Taste and season with more salt and pepper, if you wish. Add half the herbs, toss together. Chill for about an hour. Taste before serving, adding more seasoning and herbs to boost flavor.
July 5th, 2012
| 4 Comments »
Cauliflower is so endlessly versatile, and to think up until a few years ago, I’d only eaten it raw or boiled. Boiled? Ugh. Steamed is a much better, albeit bland, option, but if you allow it to go too far in the steamer, it’s lack of inspiration becomes legendary. The epiphany, thankfully, was the pan of deeply roasted cauliflower that changed my mind about the stark white florets forever. I’ve tried it mashed like potatoes, and also pureed smooth with parmesan for a creamless alfredo sauce. But time and again, I placed a pan loaded with it in to a hot oven and devoured the results.
That was about it for that vegetable, and I was fine with it. I could eat cauliflower year-round, and I do, but now with a few new methods in my arsenal, I can enjoy this vegetable a whole lot more.
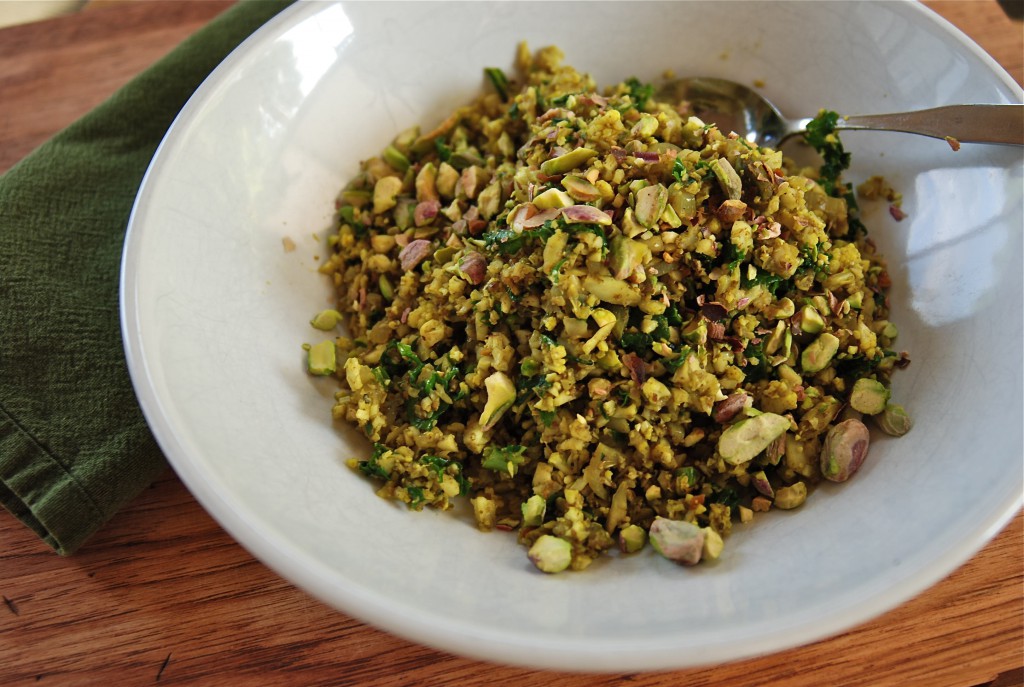
I came across this fried ‘rice’ recipe for Cauliflower on Shanna’s blog and knew that I had to get that going in my own kitchen. While I do love fried rice to the depths of my heart, it’s best when you have cold, cooked rice on hand and that’s not just something that materializes in this kitchen every day. But a head of cauliflower, ground in a few pulses in your food processor and mixed with the same type of seasonings in a hot wok can be a dynamite substitute, with a lot less calories and carbs.
And simple doesn’t even do this justice. It’s ridiculous how easy and quick this is. I spent more time prying the leaves from the core of cauliflower than any other aspect of putting this together, including chopping an onion. Given that you’re basically pulverizing the vegetable, you can use the core of it as well and no one would ever know the difference. In less than 10 minutes after heating up my wok, we sat down to steaming bowls of this fragrant meal.
Shanna has two options for this recipe on her blog, which is a wealth of beautiful writing (with a love story that’s almost as good as ours…..) and this base of ground cauliflower could really withstand just about any treatment to create your own version. I made a rich curry flavored dish, enhanced with ground pistachios for flavor and as I tossed and cooked it, inhaling the fragrance from the wok, I started thinking of all sorts of vegetables I could add to this to make it better and deeper in flavor, and in a second round of this simple meal, I added in some leftover vegetables from a coconut curry stir fry that Griffin had made, as well as a few handfuls of cold rice and the results were equally spectacular. This will be a new favorite in our house, you can bet on that.
Another mind-blowing option for Cauliflower that I’d been thinking about lately is to prepare it on the grill. I’ve seen methods of doing this by slicing through the head, creating a ‘steak’ and laying that on the grill. In my attempt to cut my Cauliflower though, my ‘steaks’ broke apart, leaving me with no other choice but to toss them on my grill plate to cook. Probably one of my best purchases for outdoor cooking, my cast iron grill plate lays directly on top of the grate and is perfect for cooking all manner of small foods; I can grill peppers and onions for fajitas, asparagus without losing any stalks, mushrooms, small fruit and a wide range of other foods, and it was perfect to create this smoky, sensational grilled cauliflower. I could barely contain myself from eating the entire bowl of it.
My most favorite marinade to use on grilled vegetables is a spicy mustard vinaigrette, brushed or tossed with the vegetable prior to being placed on the grate. It imparts terrific flavor, with just a bit of punch from the mustard. I’ve found that it works well on almost every vegetable I’ve ever grilled. Which, admittedly, has been A LOT. I love to grill just about anything.
Cauliflower Fried Rice
1 small head cauliflower, leaves removed and broken in to large chunks
1 small onion, diced
2 garlic cloves, minced
1 T. fresh ginger, minced
1 t. crushed red pepper flakes
Coconut oil for cooking
Soy sauce and sesame oil to finish
Place the cauliflower in the work bowl of your food processor and pulse to break it down. You want small pieces but not too deeply ground up. It happens fast too, and I need about 3-4 good pulses before it’s perfect.
Heat a small amount of coconut oil in your wok, or other large deep skillet. Add the onion and cook, stirring continually, until it’s softened, maybe 5 minutes tops. Add the garlic and ginger and cook, stirring, for several more minutes. Add the cauliflower and stir to mix everything up. At this point, once the cauliflower is warmed, you can be done. I cooked it through a bit so it wasn’t completely crunchy, retaining just enough bite to be toothsome. It’s entirely up to you.
Drizzle the cauliflower with a bit of soy sauce and sesame oil, if desired, before serving.
RECIPE NOTES: This can be treated like any fried rice recipe, using vegetables to bulk up the finished product. The variations you can make are positively endless.
June 13th, 2012
| 4 Comments »
Summer is all about the simple, right? There’s such an abundance that planning a meal becomes moot, and your food comes together easily with a few ingredients, a nice olive oil to drizzle, maybe even served on a paper plate so that we can get back outside. Back to summer and enjoyment.
I’ve been on a creative kick with fruit, as evidenced by that gorgeous and frightfully easy Strawberry Balsamic Vinaigrette, and when blueberries went on sale at a local grocer, I stockpiled them, dropping them on yogurt, in cereal, atop pancakes and just about any other vehicle to my mouth that one can imagine. Nothing like fresh blueberries.
And there is nothing quite like this Blueberry Compote, resplendent with Lemon Thyme and fresh lemon juice.
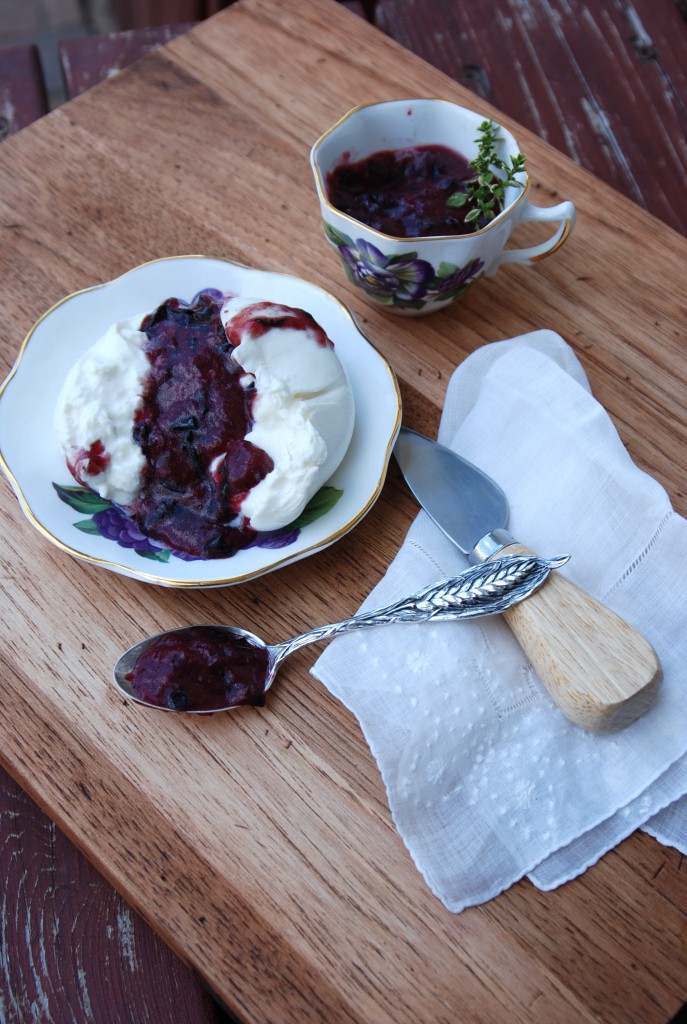
Coupled with a fast and furious love for the cheese within a cheese known as Burrata, and an ongoing affair with the tender and tiny striped leaves of the Lemon Thyme plant, I took a leap of faith on the perfect marriage of lemon and blueberry and created this quick topping that complimented the creamy cheese to utter perfection.
On a hot day, breaking open a ball of fresh mozzarella, watching the dreamy interior slip in to the bowl, mixing with the dark, deep blue of the berries, this was a quintessential summer treat. It’s made to cool down the sultriest of days. It doesn’t require much else than a spoon, really. Or good toasted bread, because really, anything tastes good on toast, doesn’t it?? And toast is a much easier means to achieving a good meal than any other base as it goes well with just about anything placed on top of it. I think a good loaf of cinnamon bread would be ideal for this creamy, berry-filled treat.
Aren’t familiar with Burrata? It’s a ball of fresh mozzarella that’s filled with shreds of MORE fresh mozzarella that’s soaked in rich cream. It’s cheese, and then some and every bit of it is rich and satisfying. It’s a nice appetizer, a perfect salad option (think good grilled veggies awash in that phenomenal cheese bath) or a delightful dessert. At upscale grocers, you should be able to find it with the other fresh mozzarella products in the deli.
All that’s left to desire is a warm, lazy day and the need to fill the belly.
Blueberry Compote with Lemon Thyme
1/2 c. fresh blueberries, washed.
2 T. fresh lemon thyme, minced
1 t. fresh lemon zest
1-2 t. fresh squeezed lemon juice
Pinch of good sea salt and fresh ground black pepper
2-3 T. good quality olive oil (use the best you’ve got here)
Mash berries in a glass measuring cup and stir in the lemon thyme, lemon zest and juice. Allow to stand for a while in order to blend the flavors. Whisk in the oil, add salt and pepper to taste, and more lemon if you wish. Chill thoroughly. The mixture will thicken as it cools, due to the oil. Whisk it again before serving to loosen.
In a bowl, carefully place one Burrata and using a spoon, break it open down the center, allowing the creamy middle to spread out. Spoon the chilled compote over the Burrata, drizzle a little oil over it and a thin pinch of good sea salt. Grab a spoon.
June 4th, 2012
| 7 Comments »
It’s almost ridiculous how simple and delicious this vinaigrette is, how a few smashed berries and a drop or two of balsamic vinegar can transform into a delightful, light and spring-like marinade for the freshest of fresh greens, but this is the very reason why we blog, share and shout our discoveries. These delicious surprises need to be more widely known.
Do you ever feel like the very fiber of your body fills up sometimes with the grimy bits of your life? Sucking you down and drawing all the energy out of you? I’m very blessed with an easy job that’s only {barely} part-time, but it’s a whacky schedule that leaves only a few days a week completely free and I often cram them with activity with friends, or cooking, household needs, market trips, etc… so much that there comes a time when my body just wants to scream “WAIT! Will you SLOW down a minute???” My sweet husband sees this on my face much clearer than I ever feel it in my bones, and gently urges me to listen. I love that man. So Memorial Weekend came, I had a whopping FIVE DAYS OFF and our lake home called, and finally, I listened. Complete with said husband’s urging me to “Just go.” And within the walls of a beloved summer home, rich with memory and the ability to lull me to a state of relaxation that releases all those icky, grimy bits, the creative mind floods with possibility.
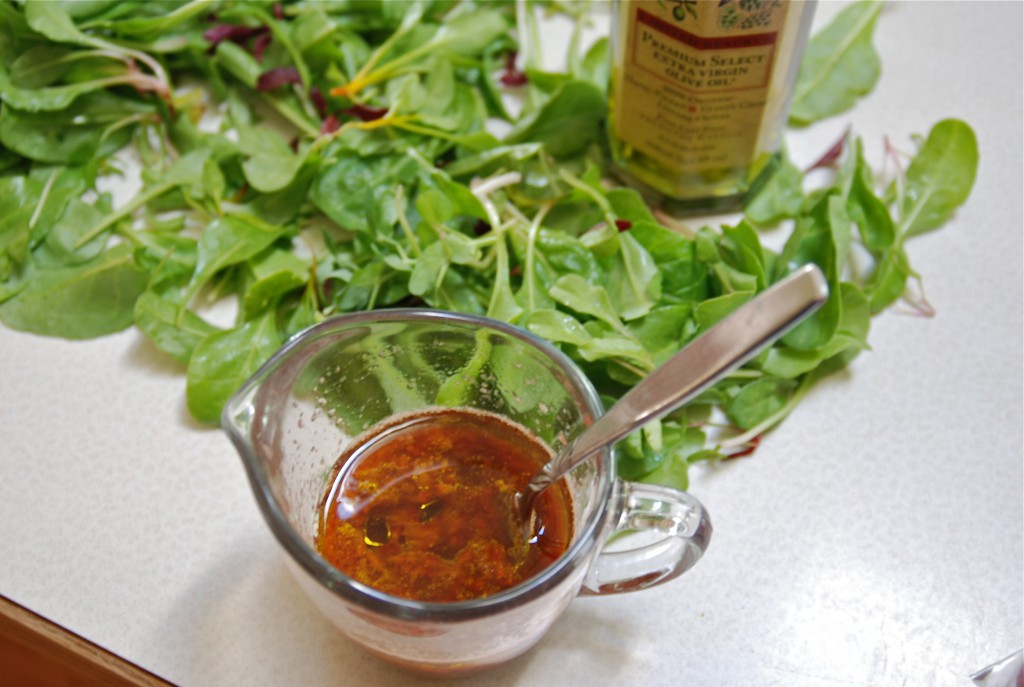
Prior to my escape, and ahead of a pending thunderstorm, I browsed the insanely crowded St. Paul Farmers Market and packed a large sack of fresh greens to take along with me. Thunderous clouds chased me home, and by the time I pulled the greens out to clean them, the sky had opened, lightning flashed and thunder rolled and the cat climbed in a cupboard to hide, poor thing.

{{mr. big eyes}}
I certainly don’t blame him. Thunder does that to a soul, sometimes.
And away from the city, with the sparkling lake outside and lush humid air circulating, I opened the bag of freshly washed pea shoots I’d purchased, a bunch so enormously large that my two hands could not span the circumference and they thoughtfully conveyed “We need something more than what comes in a bottle.” and with the pack of strawberries saying ‘Hey! What about me?’ I spurred a breakthrough. What? Your food doesn’t speak to you? Shame. There’s is a lot to hear from our food these days.
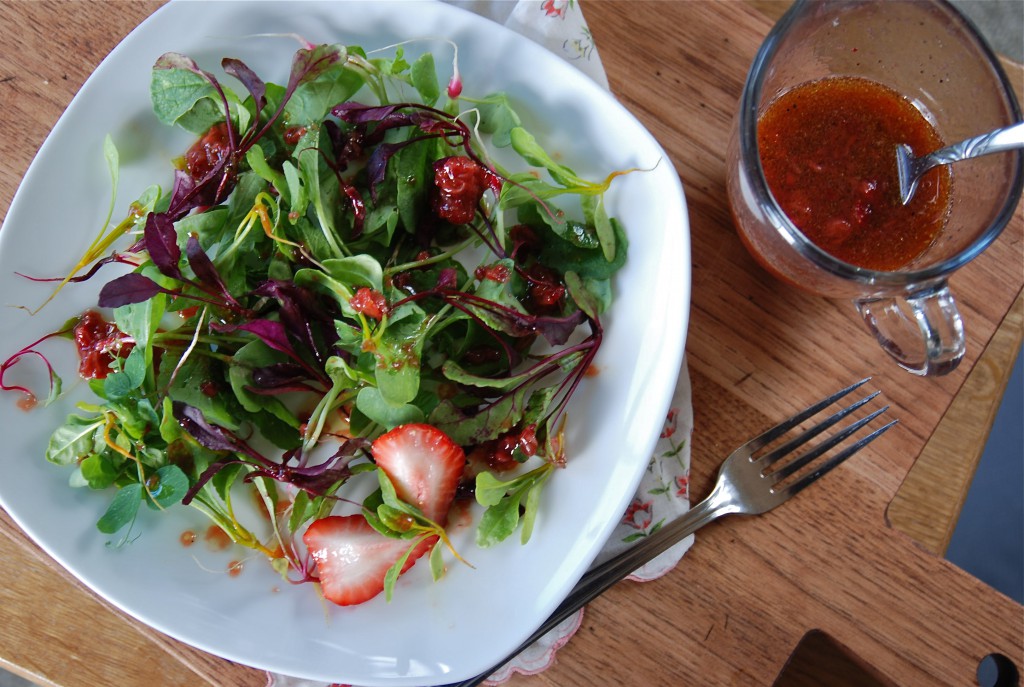
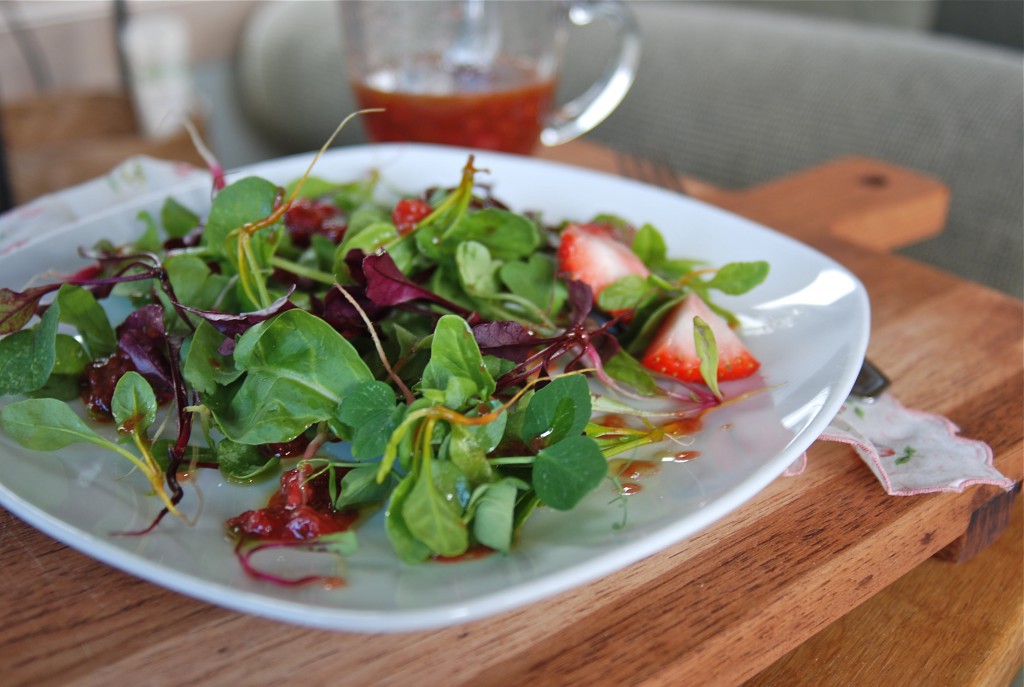
And if pea shoots haven’t yet been discovered in your eating repertoire – and mercy, do you like peas? try the pea shoots, you will not regret it!- microgreens of any kind are a perfect option, as well as the freshest of spring lettuces, spinach, chard, kale….. the possibilities choke with potential, all dancing about, trying to show us the best they can offer. And if you’re privy to a garden with teeny root vegetable greens that require thinning, like radish or beets, those little shoots that you pull from the ground are delicious too. We thinned baby lettuce and radish from the lake garden, then the beets at home were thinned and the bag of greens that resulted nearly made me weep with joy. Silly, I know. But that abundance is sweet manna, no greater thing to a hungry soul drawn tight from the grimy bits of life.
This kind of salad, where freshness is bursting from every corner of the plate is where you would happily pull out your very best bottle of olive oil to use in this vinaigrette. You can’t imagine the taste of that plate up there; I was so enamored of it myself and I’m the impetus behind it, but when the first bite slipped between my lips, coating them with sweet-tart strawberry, dressed in perfect olive oil, I wondered if this truly was heaven on earth, bound in a plate of über-local garden greens and a super simple vinaigrette. I ate it for breakfast, it was that good.
Strawberry Balsamic Vinaigrette
This “recipe”, so to speak, isn’t precise with measurements. And I apologize to those who require those parameters. Do your best with these suggestions.
1 pint of strawberries, washed and hulled
Balsamic vinegar
Good quality olive oil
Brown sugar
Sea salt and fresh ground pepper
Salad greens of the proper quantity for the number of people you’re serving.
As you wash your berries, keep an eye out for the inevitably softer, slightly mushy berries. Set these aside, as their sharper, wine-y taste make them perfect for your vinaigrette.
Wash and spin dry your greens.
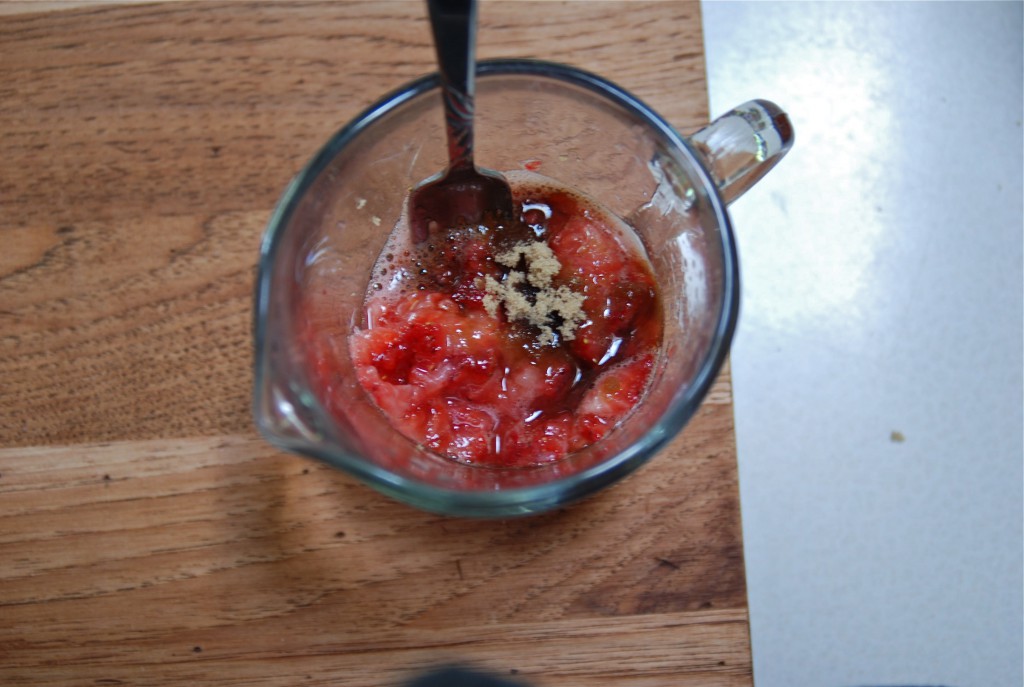
In a small measuring cup, place 3-6 chopped berries (dependent on how much vinaigrette you wish to make) and mash them with a fork to release their juice. Add a few drops of balsamic vinegar and a generous pinch of brown sugar. Stir it together and leave it on the counter. How long? My first batch sat for nearly three hours. The second, only about 15 minutes. Mash the berries on occasion, and stir to keep it emulsified.
Just before serving your salad, add the olive oil. How much you add depends on how many berries make up the base. More berries? More oil. Add less than you think at first, as you can always pour in a bit more. You want a nice balance of sweet berry, tart balsamic and smooth oil. Shake a few more drops of balsamic as needed, add a dash of salt and pepper and taste everything along the way. You’ll know when it’s perfect.
Plate the greens, add a few sliced berries and drizzle the vinaigrette over the top. I like to keep the chunks of mashed fruit in there, but if you’re a purist, strain it before using. But those chunks are delicious.
May 29th, 2012
| 1 Comment »
There are those days that beg for nothing at all; you know which ones I mean- vacation days of sand between your toes, gazing over azure water under a floppy hat, or ones spent in crazy fun activity with family, day trips of time on the road, the ribbon of concrete slipping away under your tires while you watch the landscape woosh by you. We’ve had them. We need them.
One recent Sunday was like that. The house emptied out early, before my mind was even fully awake and I sipped coffee, feet tucked under me in a big cozy chair, book in lap and content kitties napping near by. After a few days of record May heat and intense sunshine, the weather gave way to a thick continual mist and wind-whipped trees. I stepped outside briefly to see if it was worthy of even trying to take a walk, and my hair flew around my head, smacking me in the eye like a mischievous pony. Turning back to the patio door, I saw one cat lift it’s head and stare at me, as if to say ‘What ARE you doing out there??’ I really had no answer.
Back inside, another coffee in hand, I was hungry, and craving something with rhubarb but wanting more than a coffee cake, better than a muffin. Serendipitously, I sleepily browsed my blog reader, and suddenly, a gorgeous Rhubarb Spoonbread jumped out at me, thanks to Autumn, of Autumn Makes and Does. I’ve been reading Autumn’s blog for a few months now, and whoa…. you should too. I’m pretty sure it will make you sigh in happiness at least once or twice. We all could use those moments, right? Where we sigh with joy over something delicious?? Yes. Yes, we do.
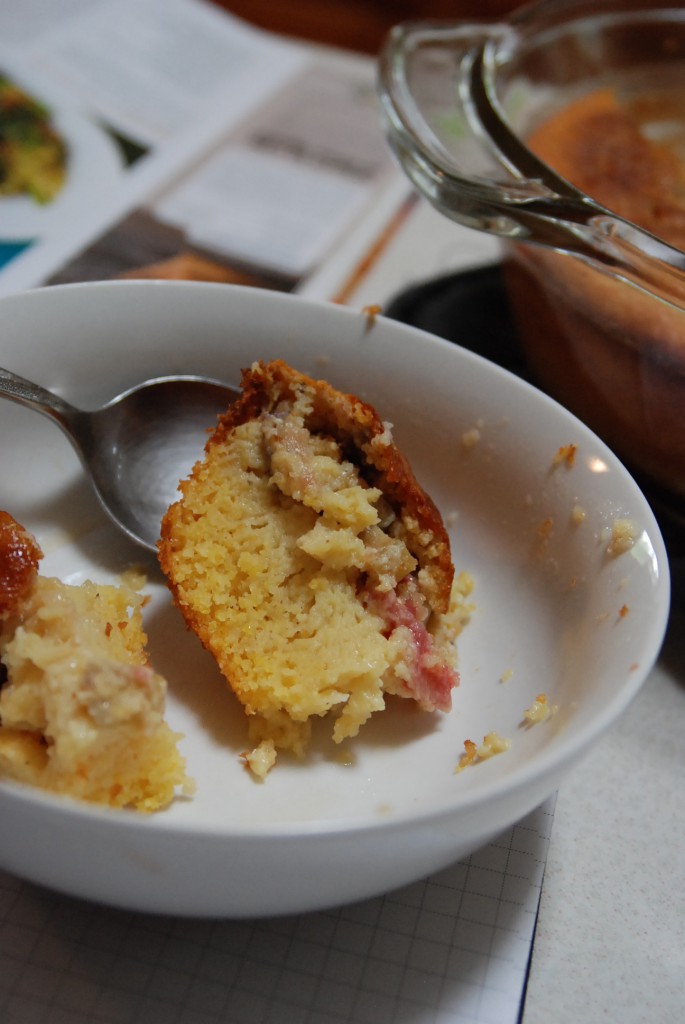
I managed to haul myself off the chair long enough to pull together the ingredients for this delight, savoring the fact that I’d stocked away baggies full of fresh rhubarb in the freezer, JUST for a moment like this one. {{high five, self!}} And with a few minutes under cold running water, those luscious red cubes were good to go. The oven sparked to life in that affirming way that chases gray, rainy days away; as the pan cooked, the kitchen filled with it’s inviting scent, tickling my already empty belly, teasing in it’s delicious way. That sound, the woosh of flame igniting seems to bring a grounding for me. I waited patiently for the spoon bread, browsing magazines, and the piles of recipes culled from a thousand sources and soon, all I wanted to do was cook.
That may not sound simple at all, but it is, to me. It’s what pulls together all the fibers of who I am that get scattered in my days away from the kitchen. When our food storage containers are stuffed in the drawer and not in the fridge, I feel like something is missing, and with all this inspiration around me, in blogs and websites and magazines, it doesn’t take much to make it all come together. Maybe all I needed was a spoon bread, an empty house with quiet jazz from the speakers and a misty morning of oven humming and hot coffee.

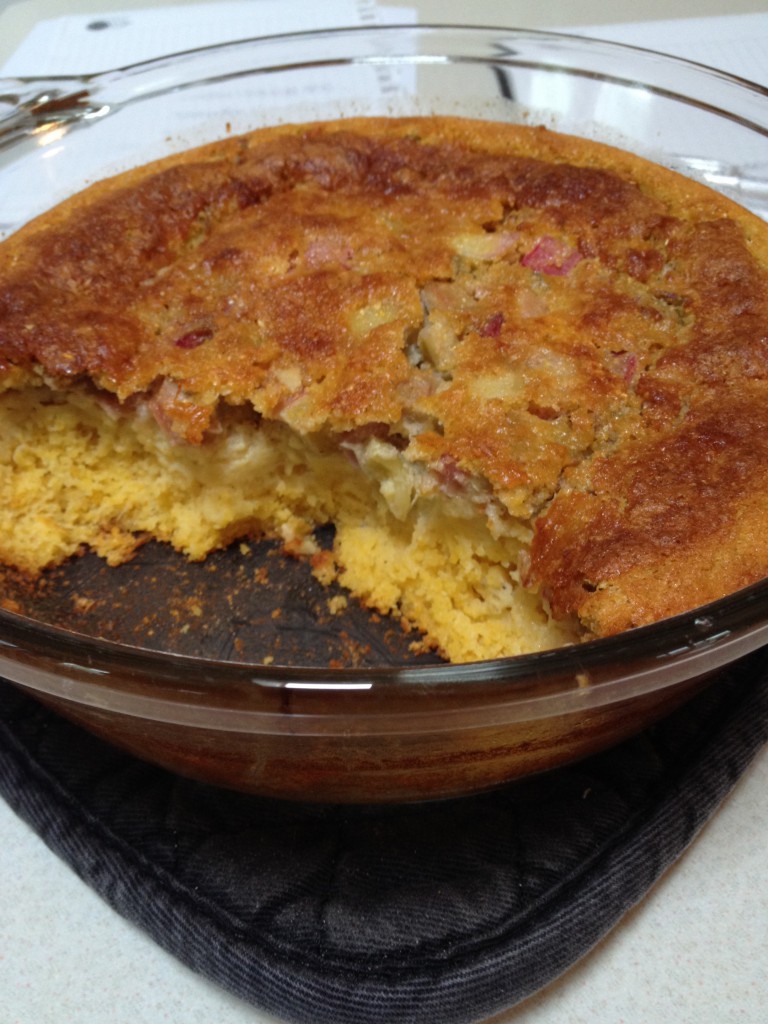
Like Autumn, I’m not sure why I haven’t explored spoon breads more often. Oh, right; Mike doesn’t eat eggs. Ah well, too bad for him. This was a perfect custard-y bread, sweet and tangy at the same time and dug out warm from the pan, drizzled with good maple syrup and eaten, tucked back in to that cozy chair, and more coffee steaming from the table next to me. It was much, much more than I had imagined for my day when I opened my eyes that morning, or as I stood briefly in the mist outside, thinking maybe it hadn’t been so worth getting up in the first place. But a spoonbread, warm from the oven, set me upright even with the dull low clouds outside.
And this spoon bread, well, it’s perfect for a savory snack, with maple syrup {although a good dousing of heavy cream isn’t bad at all} and of course, it makes an easy dessert, warm, again, and topped with vanilla ice cream, a scoop of yogurt or possibly maple-sweetended mascarpone cheese. Oh sigh, and sigh again {{see? again with the sighing, and so soon!!}} Something simple, on a blustery, misty day never tasted so good, in so many ways.
Rhubarb Spoonbread
Ingredients
- 6.5 oz (about 2 cups) rhubarb, sliced about 1/4 thick
- 2.5 oz (1/3 cup) sugar (I used organic cane sugar)
- 2 T maple syrup (preferably grade B), plus more for drizzling
- 4.5 oz (1 cup) yellow cornmeal
- 2 t baking powder
- 1/4 t baking soda
- 1 pinch salt
- 2 cups buttermilk
- 3 T butter, preferrably unsalted
- 3 eggs
Cooking Directions
- Place chopped rhubarb, maple syrup, and sugar in a small bowl. Stir together and set aside while you gather the remaining ingredients and complete the following steps.
- Preheat the oven to 400.
- Place the butter in an 8 x 8 inch square pan and put the pan in the pre-heating oven.
- Whisk together the cornmeal, baking soda, baking powder, and salt. Make a well in the center. Add the eggs, but do not stir, set aside.
- Check on the butter. Take it out of the oven when it’s completely melted. Allow the oven to continue preheating.
- Now, stir the eggs into the cornmeal mixture and add the buttermilk. Stir briskly until completely combined.
- Swirl the butter around the hot pan and pour any excess into the batter. Stir to combine.
- Stir the rhubarb sugar mixture into the batter and pour into the buttered 8 x 8 pan. Bake for 35-40 minutes, or until the center no longer jiggles.
- Serve warm drizzled with more maple syrup.
Recipe printed in it’s entirety from Autumn, of Autumn Makes and Does. The only thing I did different was bake it in a 4-qt pyrex baking dish.
May 23rd, 2012
| 1 Comment »
I’ve been phenomenally absorbed by Tamar Adler’s An Everlasting Meal. I’ve barely even gotten through half of it because I read, re-read, underline, contemplate, read AGAIN and then think about it like my very life depends on those words filling every pore in my body. Have you read it? If you love food, and you love simple, easy, good food, I strongly encourage you to pick it up, but be warned….. this book could change the way you cook and I urge you to own it so you can really enjoy the prose, the story, the thoughtful way that Tamar looks at the very things that sustain us.
I’m grateful to this book too, as it came to me through a renewed relationship with an old friend from high school. Connecting on Facebook, even though she lives in Brussels, Belgium, we’ve exchanged many emails about food, and her quest for some information on what constitutes ‘good’ olive oil led to a long discussion about this book. A few days later, the book itself arrived on my doorstep, courtesy of this friendship, and now I know why Barbara was so moved by it.
Tamar’s philosophy about food is utterly simple. It doesn’t have to be complex in the least, and she states this over and over again, through every chapter, rich with descriptives of meals so ridiculously simple that it honestly could inspire even the most timid home cook to become brazen in their own kitchen. The chapter on beans gave me more to think about regarding the humble legume than I’d ever imagined, and was the inspiration when along came a day where a simmering pot of beans just seemed like the thing to do.
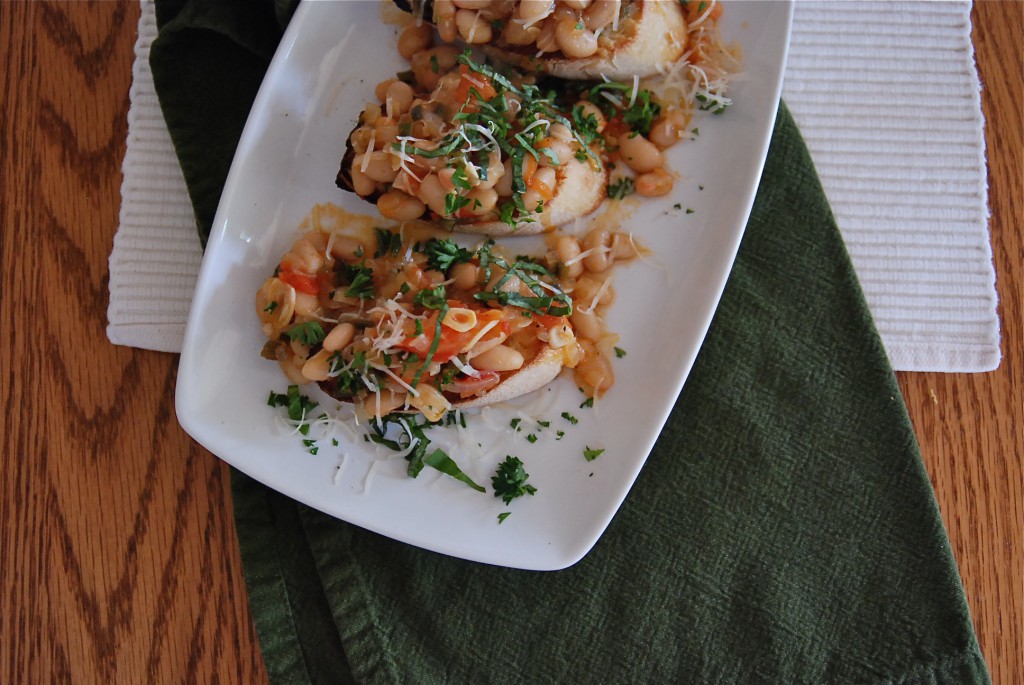
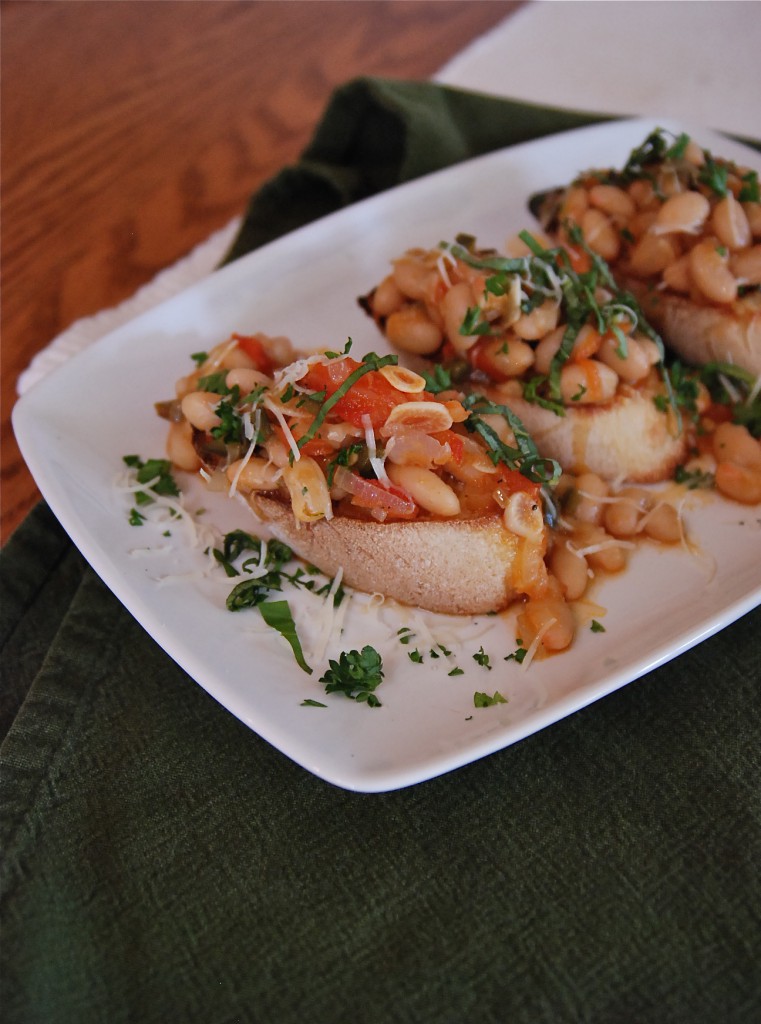
Simple and fulfilling meals have always been my most favorite. I don’t mind fancy eating, once in a great while, but my start on food was a humble beginning, and I’ve lived through some seasons where there just wasn’t enough on the table. I’m not particular about my food, either. I’ll eat most anything I’m served and I’m grateful for it, as the memories of hunger will always remain within me. To me, a pot of beans is a thing of beauty; savory without a lot of work, filling without heft, satisfying like an old friend. It’s soul {filling} food, that which makes you just feel good. Although I do enjoy the long process, on occasion, that a dried bean requires for preparation, I keep on hand a wide variety of canned beans, and in a pinch, these have saved dinner, lunch and even breakfast from mediocrity. A good time simmering and they become so creamy soft and perfect. With a loaf of chewy bread, it’s royalty on a plate, by way of a peasant’s wage.
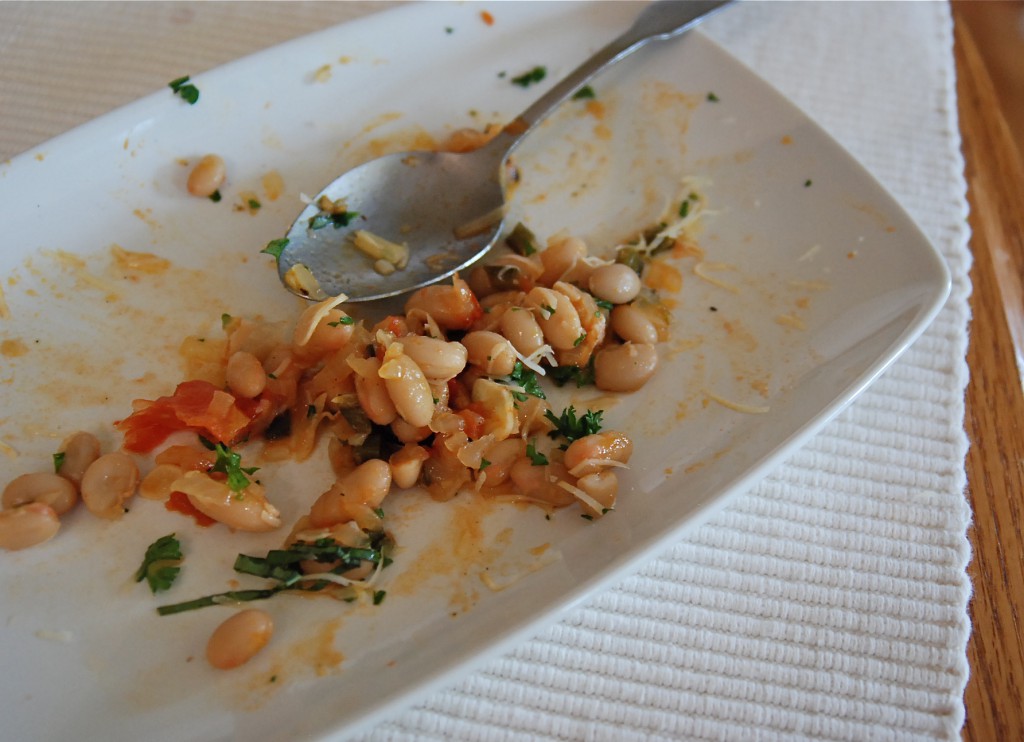
White Bean Ragout
2 large onions, minced fine
1 bell pepper, minced fine
3-4 cloves garlic, thinly sliced
2 medium tomatoes
2 15-oz cans Great Northern white beans, or Cannellini
2 c. vegetable broth
1/2 c. chopped fresh parsley and basil (I don’t recommend subbing in dried)
1/2 c. shredded fresh parmesan cheese
Baguette slices
First, we’ll roast those tomatoes. Slice each one in to quarters, remove the tough core and place on a baking sheet. Heat the oven to 400°. Drizzle the tomato wedges generously with good olive oil, and sprinkle with a bit of sea salt and fresh cracked pepper. Place in the oven and roast until the skins blacken slightly and get all puffy, but not to the point of collapse. You want some heft left in them. Allow them to cool slightly, discard the skins and gently lift them in to a small bowl. Any oil remaining on the pan can be scraped in to the bowl as well.
As the tomatoes roast, heat a large, deep skillet and add oil of choice. Saute the onions and bell pepper, stirring occasionally, for about 25-30 minutes, or until they are very, very soft. Add in the sliced garlic and continue to cook for about 15 more minutes. Don’t allow the vegetables to brown too much. A little is good. Sprinkle them with sea salt and some cracked pepper.
Take the tomatoes and add them to the pan, breaking them up with a spoon. Make sure you add all the juice and oil that’s accumulated too. That’s delicious. Stir in the beans and add the broth. Allow the mixture to simmer, gently, stirring it on occasion, until the broth is thickened and the beans are nice and creamy. If it seems to get too dry and/or sticks to the pan, add more liquid, like broth, or even water. Taste for salt and pepper, adding more if you wish. Add a few tablespoons of shredded parm to the vegetables.
Sprinkle the baguette slices with more parmesan and either broil or toast in a toaster oven until browned and crispy. Alternately, you can grill the bread too, adding the parm when the bread is slightly charred and hot. Place your toasted bread on a plate and scoop the beans over them, making sure to drizzle the liquid on as well. Top with more parm and the fresh herbs. Serve warm, or at room temperature.
Recipe origin: Bon Appetit magazine, May 2012; here with adaptations
|


