June 27th, 2011
| 6 Comments »
I stopped eating meat with every meal on May 2. And I love how I feel nowadays, but I didn’t expect that I’d enter in to a time of total culinary paralysis when faced with re-working a lifelong habit of making meat the center of my meals.
We haven’t wasted away, thank goodness, and we never will. We’ve made some delicious foods but I haven’t stretched myself a whole lot. I’m grilling a lot of veggies, sticking them on amazing breads or tying them up in delicious pilafs. I made this fragrant and savory Red Lentil Dhal that we’ve loved since the first time it crossed our stove and landed in our bowls. We’ve enjoyed plenty of legumes, super fresh salads topped with a wide array of ingredients and terrific grilled cheese sandwiches. But I’m not content to play it safe, to stick with what I know will be wonderful. I want to expand, to grow and to embrace fully this new method of eating and not just end up a Junk Food Vegetarian.
So I’m scouring the ‘net for inspiration, grabbing books with gusto from library shelves, from Half Price Books and from friends hands (not really, but I would if the opportunity came up) just to get my mind rolling into this new territory. And it is new territory. It’s a new and totally different way of life and even being as good a cook as I am, I’ve had moments of sheer panic in thinking ‘What the hell do I make now?’, hence the aforementioned grilled cheese.
The worst part was finding the time. I had to stop over-scheduling all my time away from work into activities that were taking me away from home, away from time to experiment and work up some of these new options. I think, subconsciously, I was avoiding it. No more. It’s time to start applying tabs to the cookbook pages, plot out a few weeks worth of meals and get back on track. The nicest part of being meat-free is how much it frees up in our budget. I knew we spent a lot on meat, but folks, it’s outrageous what we have to work with now that this aspect of our eating is gone.
So I started with chickpeas. But not just any chickpeas. This is a kick in the mouth, heady and WOW recipe that will just plain knock you on your tush.

And they look so innocent, don’t they?!
We do love our chickpeas around here, and Mike has taken to making some pretty tasty hummus for us to snack on. Then I discovered Roasted Chickpeas and my life suddenly seemed more complete. But really, that was just the tip of the iceberg because I found a recipe for this Indian Spiced Chickpea salad and now I’ve got something going with this handy and nutritious little legume. It’s called love. Luuuuurrrrrve, people. Straight up legume love.
With no cholesterol, no sodium, no saturated fat; an excellent source of protein and fiber, as well as minerals like folate, calcium, magnesium and potassium, it’s a super-duper powerhouse for the meatless maniac such as myself. And when paired with toasted mustard, fennel and cumin seeds with a nice shake of crushed red pepper, plus smooth creamy greek yogurt to soften the flavorful blow to your tongue, it a cool little force to be reckoned with. Like my resolve. This is just a few steps for me, this quick jaunt out of the starting gate. The gun has sounded. And there’s a lot of road to cover up ahead so hang on, all right? Here we go.
Note: This recipe is ridiculously simple to make, but the flavor improves over time as it sits. Make it up and allow an hour, or even more if you can, for sitting, stirring regularly. If you like less of a crunchy seed factor, grind the fennel and cumin seed before adding it to the oil. You’ll still get a load of flavor without the crunch. Don’t grind the mustard seeds. Those soften really well.
Indian Spiced Chickpeas
Two 15-ounce cans chickpeas—rinsed, drained and patted dry
2 tablespoons peanut oil
1 teaspoon mustard seeds
3/4 teaspoon cumin seeds
3/4 teaspoon fennel seeds
1/4 teaspoon crushed red pepper
3/4 cup plain whole-milk yogurt
1 1/2 tablespoons fresh lemon juice
2 scallions, thinly sliced
1/4 cup chopped cilantro
1/4 cup chopped mint
1 teaspoon kosher salt
Pour the chickpeas into a large bowl. In a small skillet, heat the peanut oil until shimmering. Add the mustard seeds, partially cover the skillet and cook over moderately high heat until the mustard seeds stop popping, about 1 minute. Add the cumin and fennel seeds and the crushed red pepper and cook until the mixture is fragrant, about 30 seconds. Pour the hot oil and spices over the chickpeas. Stir in the yogurt, lemon juice, sliced scallions, chopped cilantro and mint and salt. Serve the chickpea salad at room temperature.
Recipe Credit: Food and Wine magazine
December 13th, 2010
| 7 Comments »
Risotto is one of those dishes that scares people. Somehow it’s considered a demonic culinary principle, a dish that’s reserved for restaurants and someone willing to stand over a steaming pot and stir, stir, stir, stir until their arm falls off. Who has that kind of discipline?
While there is some truth that risotto is time consuming, and does need attention, I’ve managed to make beautiful creamy pots of it by simply standing by, keeping the flame tempered and making sure the rice doesn’t stick. And I don’t focus on it diligently, spoon in hand, because I’ll tell you something that may force some die-hard, principled professionals to throw rotten tomatoes at me in dispute-
risotto does not need to be stirred constantly.
So there, I said it, and I will uphold this truth until the day I die. I’ve done it both ways. I’ve stood by that pot stirring until I am completely zoned out by the motion, and I’ve dumped in the broth, given it a couple of whirls with the spatula and walked away. Yes. I’ve walked away from risotto and lived to tell the tale. While this is no meal to get on the table quickly, with some time and a bit of care, you can make it without making yourself crazy.
And one comforting thing you ought to know about me, for as many pots of creamy perfect risotto that I have managed to get out of my kitchen, there have been plenty that have failed miserably. They’ve gotten over-cooked and mushy and just downright wrong. Both from being constantly stirred and not, just so you can’t point out a fault to my procedure. Make it perfect one time and you feel like a genius. You do it again, bursting with confidence of your skill and the next pot is like sloppy porridge. Ugh. My only suggestion to mastering risotto is to just make it. And make it again, and again and again because you will learn to watch the rice kernels and see how they change (whether you are stirring constantly or not) and you will see how it transforms with the broth and added ingredients from singular grains to a homogenous dish.
And please take comfort in the fact that this particular risotto that I’m going to talk about came out a bit overcooked.
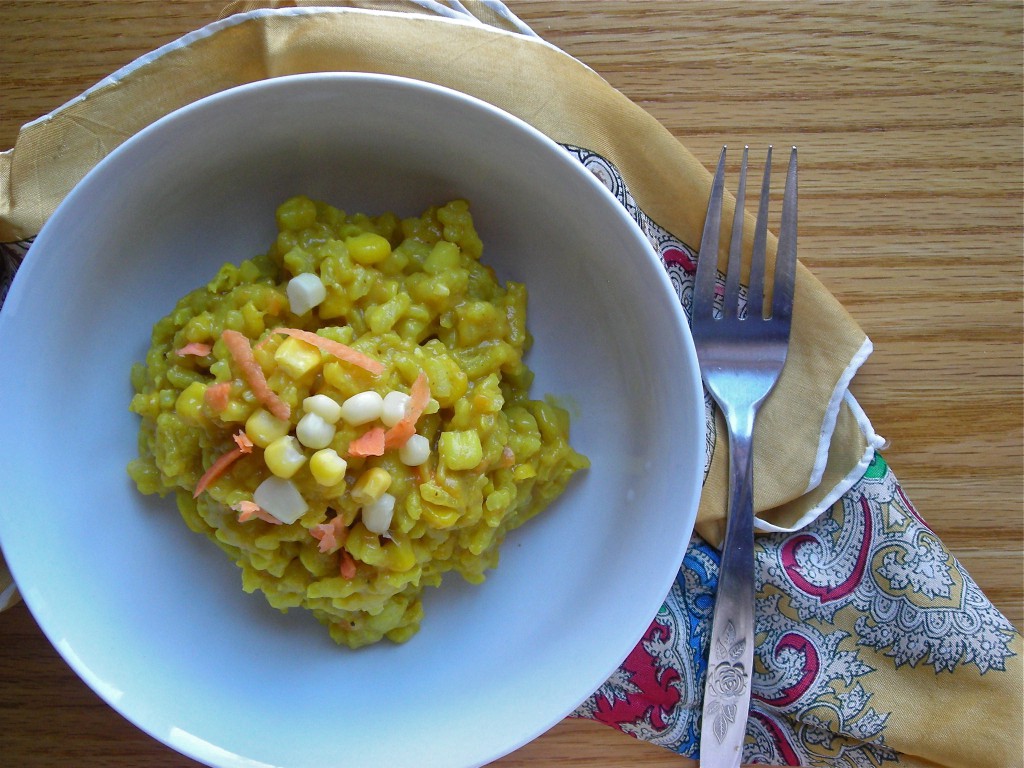
But it tasted amazing, and that’s the focus of whatever risotto you make, whether the texture is perfect or not, think more of the taste and the flavors in your mouth and less that it needs to be some level of award-winning achievement. There is no such thing as perfection, especially in cooking. Risotto is one to never give up on, too.
This Curried Sweet Potato & Corn Risotto was another Iron Chef moment for me; I needed a dinner plan, yet again at 3:30 and scanned the cupboards and fridge for options. There was arborio rice and there was a stack of sweet potatoes on the counter. And there was corn in the freezer. My brain suddenly jumbled this all together, along with the bright sunny curry colors and I sat down to determine the best way to make it work. I settled on shredding the sweet potato in order to incorporate it more evenly in the cooking process, and adding the frozen corn in the last 5 minutes to cook it just enough but to preserve some of the crispness of the kernels. The end result, despite being, like I said, slightly overdone, was a superb flavor, and so cheerful in our bowls.
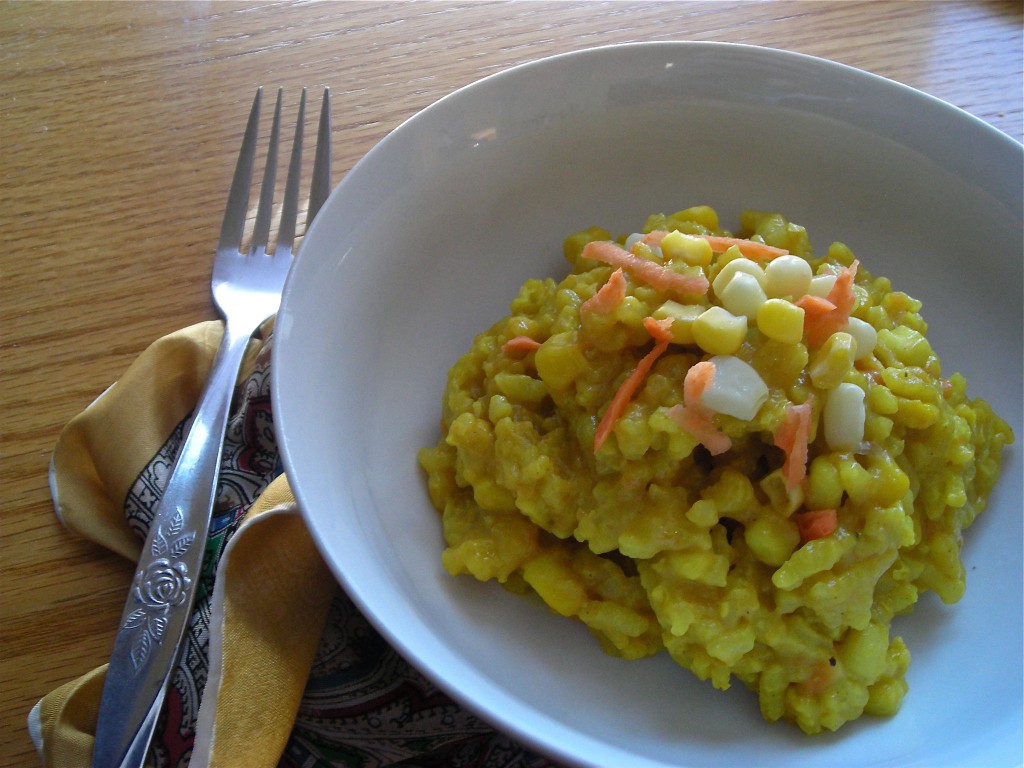
Curried Sweet Potato & Corn Risotto
The entire process for making risotto will take 35-45 minutes. For the last 15 minutes or so, you probably will need to stick close to the stove and stir more, but the first part of it can be somewhat unattended.
Many risottos use wine, and are finished with parmesan cheese. For this curry version, I did not use wine or cheese as I didn’t think it would match with the flavors of the curry.
1 c. arborio rice (or carnaroli works too)
2 qts chicken stock
2 sprigs fresh thyme
4 cloves fresh garlic, divided
1 medium sweet potato, peeled and grated on a box grater
1 c. frozen corn kernels
1-2 T. curry powder
In a medium saucepan, heat the stock to a bare simmer with the fresh thyme sprigs, and two cloves of the garlic that have been roughly chopped. Stir and keep warm over low heat.
For the remaining two cloves of garlic, mince very fine. In a large, deep skillet, heat 2 tablespoons of olive oil (or use butter, or both- that’s what I prefer) add the garlic and saute over medium heat until fragrant, stirring to prevent scorching. Add in 1 tablespoon of curry powder and stir to blend, then add in the rice. Stir to coat the rice with the garlic and curry powder, and cook, stirring regularly, until grains are somewhat translucent, about 5 minutes.
Ladle about two cups worth of the warm stock into the skillet with the rice and stir to blend. Maintain a gentle simmer, stirring on occasion, until the stock is absorbed. Be sure that the rice does not stick to the bottom of the pan. The mixture should simmer gently, but never boil vigorously. When the grains have absorbed the stock, ladle in about 2 more cups worth. Repeat, allowing this to absorb and keeping the grains from sticking. You won’t need to watch it constantly, but stay close and just check it occasionally.
After the second round of stock is absorbed, add about a cups worth of shredded sweet potato to the rice, and a ladle or two of stock. You want to give it enough liquid to loosen it and allow it to simmer, but not so much as before. Stir and allow to absorb. Add another ladle, and repeat. Now test a grain or two. They should begin to yield to your bite, with some firmness remaining. Add in the corn, a few more ladles of stock and simmer until the liquid is absorbed. Test the grains again. At this point, the mixture should look smoother and beginning to come together with a creamy sauce. Keep testing the grains and adding just a little stock if needed. If you like the idea of more curry flavor, go ahead and stir more curry powder in to the grains. By now, you will probably be stirring a bit more to prevent sticking. Stir, test the grains and add a little more stock until the mixture has a wonderful creamy texture.
Season it with salt and pepper and serve as soon as possible. Risotto doesn’t always hold well.
November 30th, 2010
| 3 Comments »
The last gasp, Day 30 of NaBloPoMo 2010. Like I said a week or so ago, it was a lot easier than I expected, what with going back and recycling previous posts and recipes. I like bringing back some old favorites, plenty of which none of you have seen before unless you’ve been hanging around here for almost 5 years.
I am looking forward to a few days off, but right around the corner is the Iron Foodie contest entry that I will be preparing, and another big blog milestone is coming up on the heels of that, one I am looking forward to sharing with everyone. I’m kind of excited about it; maybe it won’t be that huge to some, but to me, it’s BIG.
And with that, I leave the 2010 version of National Blog Posting Month with this delicious recipe for Arroz Amarillo, or Yellow Rice, a delicious side dish that goes with just about anything.
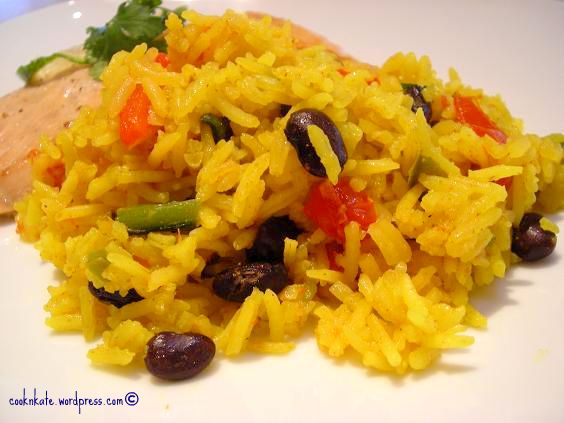
Yeah, yeah. Photo… not so great. Recipe? Awesome!!! Color? Gorgeous! Taste? Spectacular.
Arroz Amarillo or Yellow Rice
original recipe- A Cooks Tour of Mexico by Nancy Zaslavsky
This is Kate’s version:
2 T. vegetable oil
1 c. white rice, rinsed and shaken dry
One medium onion, sliced
One Jalapeno pepper, seeded and sliced thin
One poblano pepper, seeded and cut in half
One red pepper, seeded and cut in half
2 cloves garlic, minced
One medium tomato coarsely chopped
Half of a 14-oz can of black beans, drained and rinsed
2 c. chicken stock
1 t. turmeric
2 t. ground cumin
Cilantro leaves
Place poblano and red peppers on foil covered cookie sheet and spray lightly with cooking spray. Broil until skins are charred, watching carefully. Place in bowl and cover with plastic wrap to sweat. Remove skins when cooled and coarsely chop.
Heat oil in deep skillet; add in onion and saute over medium heat until soft and slightly browned, about 5-8 minutes. Add in garlic and jalapeno and cook for about a minute, until fragrant. Remove vegetables from heat and add a tablespoon of oil to pan. Stir in rice and coat with oil. Cook, stirring continually until rice is nutty, browned and fragrant, about 8-10 minutes. Do not allow to scorch. Stir turmeric and cumin into hot stock until dissolved. Add vegetables back to pan, stir to combine, then add stock. Bring to a boil and reduce heat. Add tomatoes to pan, cover and allow to simmer until nearly all the liquid is absorbed. Stir in beans, roasted peppers and a handful of cilantro leaves. Cover and cook for about 5 more minutes. Serve with lime wedges and pimento stuffed green olives if desired.

Yay!! I finished!! 30 posts in 30 days!!
November 28th, 2010
| 8 Comments »
This is the best kind of morning. It’s so quiet as I’m the only one awake. We decided last night to attend the late church service this morning, so instead of rolling everyone out of bed to get out of the house by 8:30, we’re not needing to be coherent until a few hours later. And when the cats started their pre-dawn routine of scratching at the bed to get someone up, I arose to greet the sunrise with them, affording my hard-working spouse yet another day of extended sleep. Five days a week he rises before the sun to delve into his work, to think and sip his coffee and deal with these cats that somehow think going outside on these dark, cold mornings is a really good idea. And apparently, it is for like 2 minutes, then they race back in for the nearest blanket and cozy fleece bed. The little turds.
But today is my day. And I’ve found an amazing sense of calm in these quiet hours. I can write, and think and plot and dream. I can surf, lurk and sip dark, rich coffee. I can hear myself think and often find some wonders brewing in my own head.
And I can nibble on these incredible Sweet Potato biscuits.

This is my morning; it’s me, the coffee pot, my big mug and a stack of inspiration. It’s the sunrise outside the windows, a fleece blanket on my lap and sometimes a cat. It’s peaceful. It’s contemplative. The birds flit around the feeders outside, gathering in the hawthorn tree while I watch and observe. The cardinal flashes his bright red feathers against the white of the snow. The bluejay squawks. The goldfinch chatter. The crows call from the rooftops and the sun turns the sky from winter’s deep blue to hints of azure and bronze. The sunrises lately have been lovely, even when so fleeting. I’m happy to be sitting here to appreciate them.
It’s my morning time. It’s perfect. And these biscuits? Well, you would do yourself a favor to have a pan of them at any meal, and then steal away one quiet morning with a mug of dark coffee and a few of them on a plate to fill your belly. The lovely hue of orange is one of their many appealing features, but the fluffy, moist and tender crumb that spills out when you crack one open is the best part about them. With a cat, or not; with a sunrise or a bowl of steaming soup, served with any meal they will compliment it highly. They will inspire. Like the sunrise and a quiet morning.
Sweet Potato Biscuits
from The Kitchen Sink Recipes (and from Bon Appetit)
Yield: 12 to 15 biscuits
One 3/4-pound red-skinned sweet potato (yam), peeled, cut into 1/2-inch cubes
1 3/4 cups all purpose flour
1 tablespoon (packed) dark brown sugar
2 1/2 teaspoons baking powder
1 teaspoon salt
1/2 teaspoon baking soda
Pinch of cayenne pepper
8 tablespoons (1 stick) chilled unsalted butter, cut into 1/2-inch cubes, plus 2 tablespoons butter, melted
1/3 cup chilled buttermilk
Cook sweet potato in medium saucepan of boiling salted water until tender, 8 to 10 minutes. Drain, cool, and mash.
Position rack in lower third of oven; preheat to 425°F. Butter bottom and sides of 8- or 9-inch cast iron skillet (or 8- or 9-inch cake pan).
Whisk flour and next 5 ingredients in large bowl. Add cubed butter to flour mixture; toss to coat and rub in with fingertips until mixture resembles coarse meal. Whisk 3/4 cup mashed sweet potatoes and buttermilk in medium bowl. Add to flour mixture; toss with fork. Gather mixture in bowl, kneading until dough comes together. Turn dough out onto floured work surface and pat into 1-inch-thick round. Using 2-inch round biscuit cutter, cut out biscuits, flouring cutter after each cut. Gather scraps; pat into 1-inch-thick round. Cut out additional biscuits, until the dough has been used.
Arrange biscuits side by side in prepared skillet or pan. Brush with melted butter. Bake until puffed and golden on top and tester inserted into center biscuit comes out clean, about 22 minutes. Cool 10 minutes in pan. Turn biscuits out and gently pull them apart.

Just a few days left of National Blog Posting Month!!!
February 22nd, 2010
| 8 Comments »
There are certain foods that are superstars of nutritional value, simple to prepare and easy on the pocketbook yet are really kind of ugly ducklings in terms of aesthetics. If we eat with our eyes first and foremost, and if we didn’t know that these foods were not only powerhouses in being good for us AND very tasty as well, we would take one look at them and likely turn away in scorn. Take lentils for example. These tiny legumes are so rich in the good things we need for our bodies. But I imagine there’s a huge population of people simply turned off by their unfortunate lot in the food world beauty contest. Cooked to perfection and placed in a bowl, they resemble more a pile of mud than something amazing you want to eat.
Now doesn’t that sound delicious?! Can’t wait to dig in!
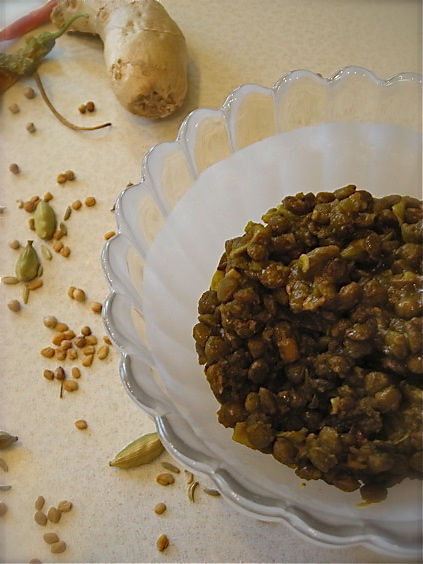
I do get it. Really, I do. If it wasn’t for the copious amounts of fragrant dhals and mounds of aromatic Indian food that I’ve come to adore in my life, I might not exactly be in the Lentil Fan Club. But I am. And I think that everyone should. As legumes go, the lentil is one that you can take from dried form to beautifully cooked with hardly a second thought. Even the largest brown lentils will cook up nicely in about 20-30 minutes, the smaller pink and red ones turn delightfully smooth even faster, making the lentil a smart choice to keep on hand for a hearty meal. With added vegetables, it turns into a perfect soup. Served over rice, maybe with a salad and you’ve got a complete meal. Add in one of the heady fragrant spices of Indian cuisine, such as fenugreek or cumin -or in this case, both- and you’ve got a delicious creamy, slightly spicy and overall compelling meal with little more than boiling some water and a measuring spoon or two.
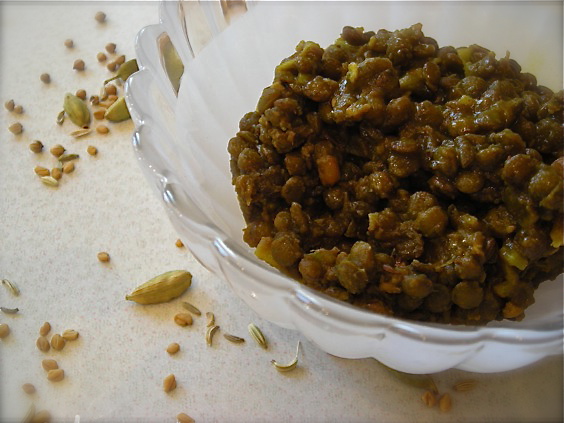
By far and away my favorite lentil is the French Puy, also known as the French Green lentil. It’s smaller than the brown, larger than the more colorful red and pink and will also cook up easily, all the while retaining it’s shape more without turning mushy. While the mushy lentil does have it’s place, I really prefer some texture to them. The Puy has a somewhat higher price tag than the brown, but I think it’s worth it. The flavor too, is deep and earthy, a bit more intense over the somewhat gritty taste I’ve come across in the brown.
My first exposure to lentils was as a wee lass in elementary school. Our schooling, up until I was in 5th grade, centered mostly around a loosely defined cooperative that rented space in an old Catholic school building. We had some pretty progressive education, I guess these days it ties in best with home schooling, and one year we did volunteer work at the Renaissance Festival in a soup booth, making both Beet Borscht and Lentil Soup. I did not like the lentil soup much, but I was a kid. Forgive me for thinking it was odd among my usual repertoire of fish sticks and Rice-a-Roni.
Then in college, I had a roommate for a time who was a vegetarian and loved to cook. On occasion I would tag along with her on her trips to The Wedge Co-Op, back in the long ago days when it was so tiny that barely two people could stand in any aisle. I often had no clue about the foods she would buy but I asked her endless questions and when she cooked she would share some of her meals with me. One meal was lentils, and although I didn’t fall down in love with them, I had a better idea of them than what my childhood memories had given me. Still, it took cementing my love of Indian food for me to begin actually making them at home. Once I did discover how good they could be, really there’s no stopping me now. If only I could convince The Teen to try them.
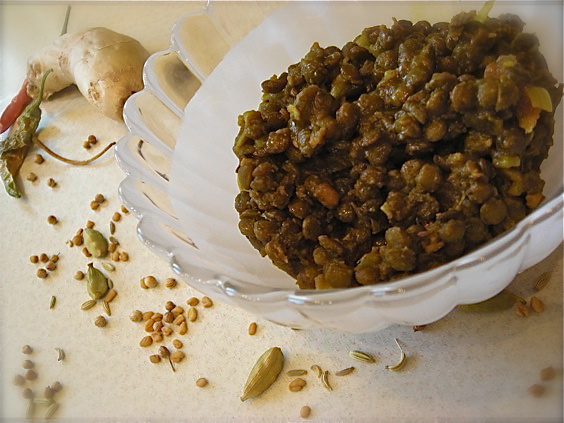
One of these days, maybe.
Dhal with Green Lentils
adapted slightly from The Curry Book by Nancy McDermott
1 c. french puy green lentils, rinsed and sorted
4-5 c. water
1 t. ground turmeric
1 t. fenugreek seeds, crushed
1/2 t. ground cayenne
2 t. cumin seeds
3 cloves finely minced garlic
2 T. finely minced fresh ginger
1 medium onion, finely minced
1 medium tomato, chopped
In a large saucepan, bring 4 cups of the water and lentils to a boil. Skim off any foam that may form. Reduce heat to medium-low and add the turmeric, fenugreek and cayenne. Allow to simmer, uncovered, until lentils are tender- approximately 25-35 minutes. You may need to add more water as the lentils cook to prevent them from sticking.
When lentils are tender, heat a small skillet over medium heat with oil of choice. Add the cumin seeds and cook until they become dark and fragrant, and begin to pop. Add in the onion, garlic and ginger and reduce the heat, sauteing gently and stirring occasionally until the vegetables are soft, about 5-7 minutes. Stir the mixture into the lentils and blend well. If the lentils are soupy, you can raise the heat and simmer the mixture to reduce the liquid. Keep an eye on it so it doesn’t burn and stir it to keep blended. When cooked to your desired consistency, stir in the tomato. It will thicken slightly as it stands. Season with salt if desired.
NOTE: It’s unlikely you can find fenugreek in anything other than seed form. To crush them, use a dedicated spice grinder if you have one, or place them in a sealed plastic bag and crush them with a rolling pin, a meat tenderizer or other hard implement. The seeds are pretty solid. Don’t be surprised if doing it by hand requires slight effort. It’s totally worth it for the flavor.
This dish definitely gets better with some time to sit in the fridge. It can be made with the smaller colored lentils but keep in mind that the cooking time will be much quicker, and it will have a different texture. One cup of red lentils will need less water, about 3-4 cups.
|


