November 11th, 2011
| 4 Comments »
I’m not sure if everyone with a blog is receiving an undue amount of spam comments lately, but every day I open my Dashboard, I see upwards of 100 or more spam waiting for me to delete. I rarely look them over to see if anyone real has been caught up in the filter; i’m trusting they haven’t, but my apologies if you’ve left a comment that hasn’t appeared. I am too impatient to sift through the drivel.
But today when I opened the spam, and readied myself to hit ‘Delete’, one comment caught my eye, and I had to wonder if it was actual, or not. It said “I’m not sure how you can survive on this dreck. For pete’s sake would it kill you to eat a little meat now and then?’ The sender’s name seemed authentic, the email was normal, and the website looked legit. Still, after a moment of shock, I deleted it with the others. Even if it was real, harsh criticism of my blog, my words and my life have no place here. This is my home, and I’m not interested in anyone bringing their scorn in to it.
My friends and I have had a discussion about this type of intolerance a lot. I am blessed with a bevy of amazing women in my life that share a desire for good health and well-being through our food and lifestyle. Through changes in our diets, my friends and I have found incredible health benefits that we never expected to be possible. We don’t avoid certain foods because it’s trendy and everyone is doing it; we avoid them because our bodies have clearly shown us that this is what they want. And we don’t get it, this bashing of choice. Not at all. Our choices, regardless of how anyone else views them, whether they understand or not why we do them, or really, any opinion about them, these are OUR decisions, and should never be vilified for being different than someone else’s. And since giving up meat, I get this a lot. The worst part is when it comes from family. I don’t expect anyone outside of myself to agree 100% with what I choose to do, and I consider it to be great fortune that Mike is completely on board with our healthy eating habits. I find it odd, and also disheartening though, that others feel they can impart their beliefs on me, or dump a whole lot of disrespect on my choices. They’re MY choices. Choices made for reasons of health and well-being. Choices that took time to develop, and that my body has made very clear, are correct for me. I don’t ask anyone else to believe it, accept it, or even participate in it. I just ask that it be respected.
Is that really so difficult?
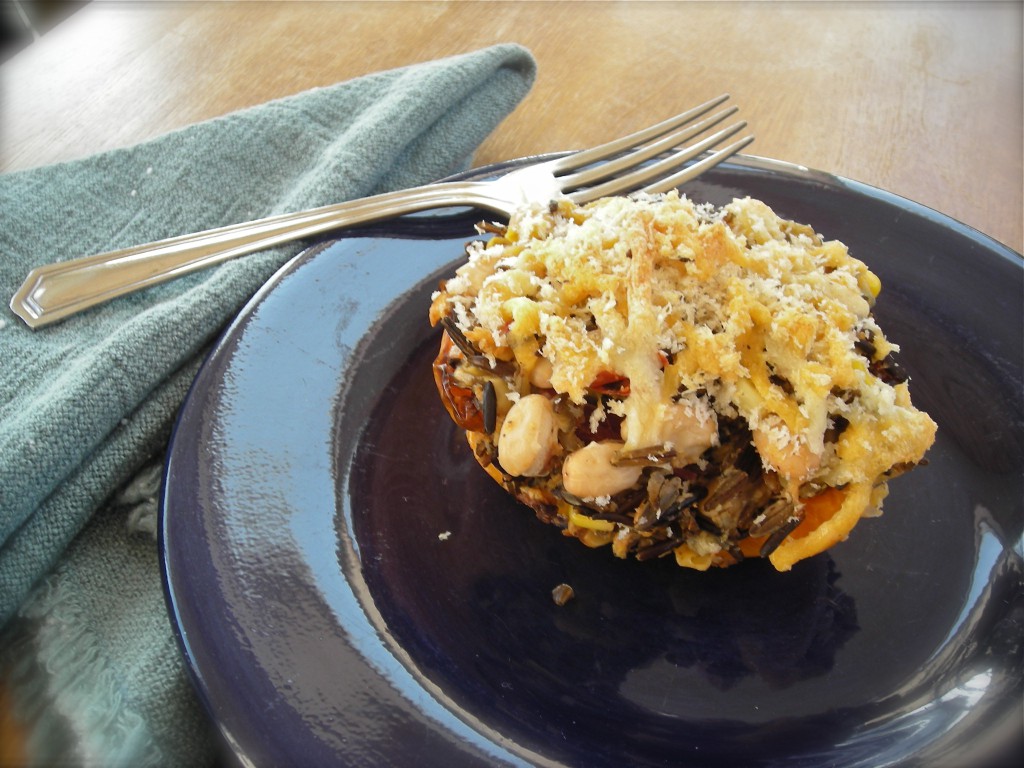
I mean, really, does that pepper there LOOK so terrible? Stuffed with whole grain wild rice, legumes, vegetables and cheese, this has “Delicious!!” written all over it. You can eat it and still feel light inside, yet fully satisfied too. And it will stick with you, despite it’s feathery appearance. This is comfort food through and through.
I realize that everyone has the sense that their choices are the right ones, and that sense, as deeply ingrained as it is, seems implausible that others don’t share the same vision. What they do, what anyone does, is the right one however, for those making the decision. And this bashing about of others, a dressing down of someone who chooses differently for their life and health, can we all just agree to stop so much judging? What does it really say about someone who thinks that muscling their beliefs on others is acceptable? Does it make them seem secure in what they preach? Or does the very act of questioning someone else, of scorn and laughter over another person’s choice speak to an insecurity they have about themselves?
I don’t have the answers. I doubt this conversation will end, ever, and that makes me sad. The consumption of food has become such a hot-button issue, and everyone thinks they have the right way of doing it. We make very powerful statements by what we put in our mouths, and it seems that instead of it polarizing us, it’s turning us against each other.
What food choices do YOU make for your health? Do you ever feel like those choices are questioned by others?
How do you respond to those questions?
Wild Rice Stuffed Peppers
3 colored peppers of choice, sliced in half and cored
1 cup wild rice, washed and picked over
1 small shallot, minced
2 cloves garlic, minced
1 15-oz can great northern beans, rinsed
1 c. frozen corn kernels
1/2 c. canned tomatoes, or 2 chopped fresh Roma tomatoes
1 c. panko breadcrumbs
1 c. shredded cheese of choice, plus more for topping (I used cheddar and pepper jack together)
1/3 c. shredded parmesan, with more for topping
Salt and pepper to taste
In a medium saucepan, bring 4 cups of water to a boil. Add the wild rice, return to a simmer and cook, covered until the rice is tender 30-40 minutes. I used long grain, or regular wild rice so it took longer than if you use the cracked version. Adjust simmering time accordingly. Once rice is tender, drain excess water in a wire strainer and set aside.
Meanwhile, set your oven to Broil. Line a baking sheet with foil. Place prepared peppers on sheet, cut side up and broil for about 5-7 minutes, until edges are slightly browned and peppers are softened just a little. Remove from oven, set aside and set oven temperature to 400°.
In a deep skillet, saute shallot in oil for about 5 minutes, then add garlic and cook about a minute longer. Add the beans and corn, and heat through. Stir in the tomato and wild rice until just combined and remove from heat. Add the cheese and panko. Season to taste with salt and pepper.
When mixture is cool enough to handle, pick up a generous handful and press it together slightly, then mound it into a pepper half. Repeat with remaining peppers and filling, mounding the peppers full. You may not use all the filling but be generous. In a small bowl, place about a half cup of the shredded cheese and several tablespoons of shredded parmesan. Add two tablespoon of panko bread crumbs and toss to coat. Top the peppers with this and place in the oven for about 15 minutes, or until the filling is hot and the cheese on top has melted. Serve immediately.
What’s on YOUR plate this month??

November 10th, 2011
| 2 Comments »
The last two years for NaBloPoMo I’ve gone back in to my Recipe Index and re-introduced items that are worthy of a second look. Most people following my blog now weren’t doing so a year ago, and if readers are anything like I am, finding a new blog usually means going forward with what they post, not going back in the archives to find the hidden gems.
And it’s also a way for me to remember what I’ve posted to these pages over the past 5-1/2 years. There is a great deal of content in my Recipe Index; way more than one could ever browse through, and a lot of it from way back when contains poorly photographed foods that I would be a bit embarrassed to even show you. Part of me often thinks about re-doing some of these recipes, with updated photos of better quality, and that’s still in the back of my mind.
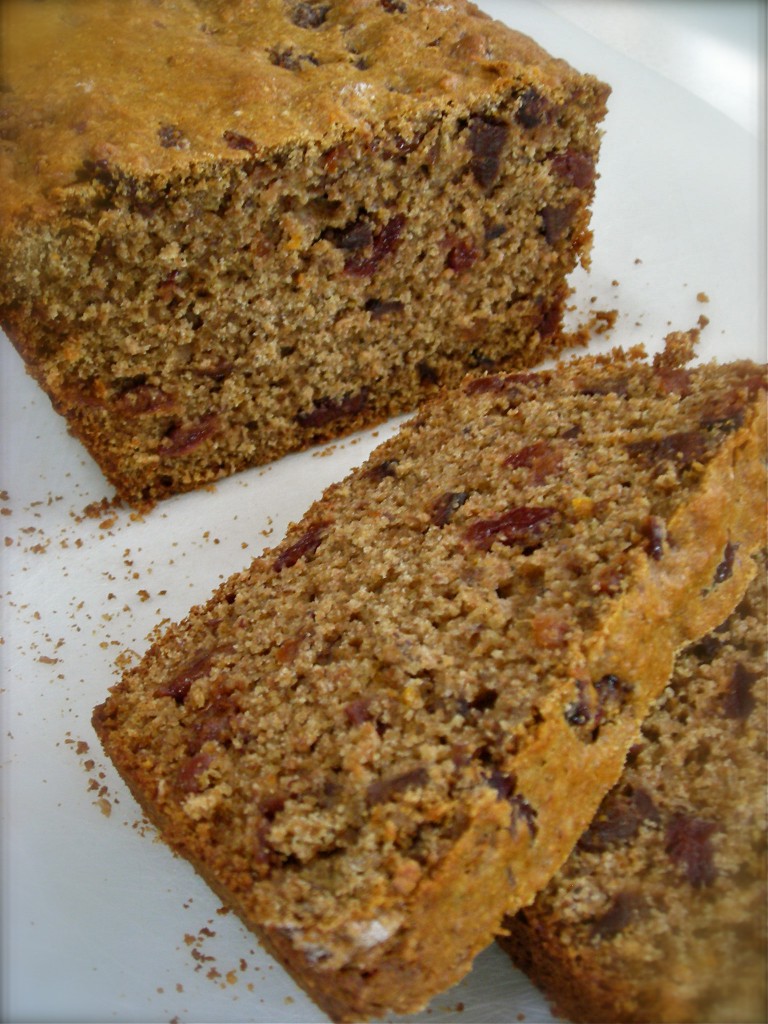
This bread made an appearance in my kitchen last Spring, and I loved it immensely, forgetting it until today, while scrolling through to find something interesting to share. Dried figs and cherries gave it a wide appeal of flavor, and tea breads are one of my favorite items to make because they are so simple to put together. Mix a bowl of wet ingredients, then a bowl of dried and blend them just so. A greased pan, a hot oven and an hour later, a steaming and fragrant loaf awaits you and a cup of tea or coffee. I could probably do a month alone on tea breads in all their various forms and still not exhaust this easy item.
What I love about this recipe is that it has a lot of healthier options for baking. I’ve tried to get away from using refined sugar in my baking for much of the past year or so, experimenting with honey or maple syrup, and actively seeking recipes that offer delicious flavor without a ton of food items that our bodies can do without. This recipe relies on the cooked dried fruit to provide sweetness, along with a small amount of honey. Whole wheat flour and wheat bran make for a healthier base too. I’m not fooling myself that this is good enough to eat all the time; the bread still has a lot of calories, but overall, if I’m going to make myself a treat, I want it to be better for me in any way I can manage.
Because deprivation just isn’t an option.
Do you have a favorite baked good that YOU like to make??
Cherry Fig Tea Bread
1 c. dried tart cherries
1 c. chopped dried figs
1 c. orange juice
2 c. whole wheat flour
1/2 c. honey
1/4 c. wheat bran
2 t. freshly grated orange zest
2 t. baking powder
1 t. baking soda
1/2 t. salt
2 large eggs
2/3 c. plain soy milk
3 T canola oil
1 t. pure vanilla extract
Preheat oven to 350°F. Coat a 9 1/2-by-5 1/2-inch loaf pan with cooking spray.
Combine cherries, figs and orange juice in a medium saucepan. Bring to a simmer over low heat. Simmer, covered, for 5 minutes. Strain, reserving 1/3 cup of the fruit-cooking liquid. Set the fruit and liquid aside in separate bowls.
Stir together flour, sugar, wheat bran, orange zest, baking powder, baking soda and salt in a large bowl. Whisk together eggs, buttermilk, oil, vanilla and the reserved 1/3 cup fruit-cooking liquid in another large bowl. Add to the flour mixture and stir with a rubber spatula until just combined. Fold in the reserved fruit. Turn the batter into the prepared pan.
Bake until the top is golden and a cake tester inserted in the center of the loaf comes out clean, 35 to 45 minutes. Let cool in the pan on a rack for 10 minutes. Loosen edges and invert the loaf onto a rack to cool. Serve warm or at room temperature.
Original recipe from Eating Well magazine.
What’s on YOUR plate this month??

November 6th, 2011
| Comments Off on farro pilaf with gold beets
There’s no other choice now. The clocks are switched, falling back; the light in the morning is better but soon the winter darkness will settle on our afternoons. Temps will drop and all sorts of things happen that we’ve been very fortunate, up until now, to have avoided.
But still, we’ve had some beautiful weather. And right now I’m sitting in the wan light of dawn watching the clouds scuttle across the sky at a fast, furious clip. The patio door is open and it’s mild for a November morning. The clouds are fascinating, wind-whipped deep blue patches racing along as if they’ve got somewhere important they need to be. I sip my coffee, watching, taking it all in.
In a few weeks we’ll have Thanksgiving, and I’m trying to take that in as well. I’m also trying to plan a menu that doesn’t focus around meat, even debating whether to just do what I want and make a completely meat-free meal, or bow to convention, and what the rest of my family expects and make a turkey. The jury is still out on that one.
I do know one of the sides I plan to make.
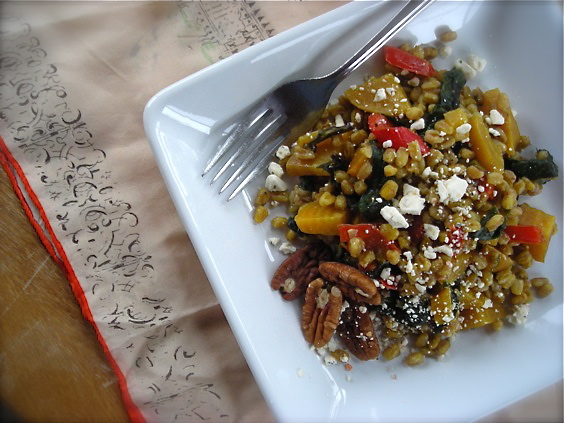 
Just about two years ago I came across this recipe, intrigued by Farro and the gold beets that I’d fallen in love with, and the first bite was a revelation. Somewhere in this dish, I began to see that a meal could be enjoyed without meat, and one that would leave me satiated without the bloat of something heavy. It was a good revelation, and something to start me on the road to better health.
Every component of this dish is not only perfect alone, but when mingled with each other makes for so much amazing texture and flavor. The Farro is chewy, with a deep nutty flavor; then you’ve got the beets and their greens to offer up a dark, earthy taste, a crisp pepper, robust cheese and a scatter of chopped pecans to add a bit more crunch. Every element of it is lovely, and on it’s own it could easily be a meal. Next to your turkey, it’s a terrific side dish.
I can’t complain about the seasonal change, the coming cold, or even the snow that’s rumored to fly soon. I’m ready, and with recipes like this, I’ll be warm from the inside too.
Got a favorite recipe or dish that keeps you warm and toasty in cold weather?
Farro Pilaf with Gold Beets
3 large gold beets, roasted and diced, with greens washed, de-ribbed and rough chopped
2-3 c. cooked farro (can sub brown rice)
1 red pepper, seeded, cored and diced
2 garlic cloves, minced
1 small shallot, diced
1/2 c. crumbled feta or goat cheese
1/3 c. pecan pieces
salt and pepper to taste
{{Farro can be cooked like any other grain, with a 2:1 ratio of water to grain; 1 cup uncooked will yield the amount needed for this recipe. It should be tender to the bite, not too firm with a texture similar to barley. Be sure to rinse it thoroughly in a wire sieve prior to cooking. It can be very dusty.}}
In a deep skillet with a tight fitting lid, heat oil of choice and add red pepper, cooking for about 5 minutes. Add shallot, cooking until soft and slightly browned, maybe 5-8 more minutes. Add garlic and cook until fragrant, 30 seconds or so. Add the chopped greens and cook, stirring continually until just barely wilted. Stir in the cooked farro and diced beets. Add about 1/3 cup of water and combine. Cover the pot, turn heat to low and cook, stirring occasionally until heated fully through. Season to taste with salt and pepper. Serve topped with cheese and nuts.
KATE’S NOTES:
The mellow flavors of the beets and farro simply beg for a good salty and robust cheese. Feta is perfect, goat cheese would be great but blue cheese and gorgonzola also would work nicely. If you can’t find Farro, use Wheat Berries, or long grain brown rice.
~~originally from The New York Times recipes for Health and Nutrition, March 27, 2009; adapted by Kate
What’s on YOUR plate this month??

November 5th, 2011
| 2 Comments »
It’s November again. And this morning when I arose, in the dark still silence, to the hum of the furnace and an noisy, eager cat face, the air smelled definitively of the impending winter. Never mind that it might reach near 60 today, or that the sun burns bright in that kind of blue sky that hurts your eyes, the wind that touched my face when I let out our early riser told me ‘You know, I could snow at any minute.’
We’re pretty fortunate that our Fall has been both spectacular and snowless. The only month without recorded snowfall in Minnesota is July, and with the frost that came so early in September, I felt certain that a drifting white mass would come sooner or later. I’ve been happy to be so, so wrong.
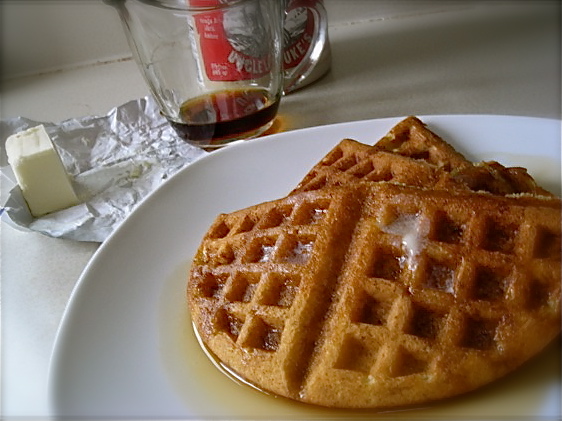
These Cornmeal Waffles are a favorite cold weather breakfast. First crafted and enjoyed on a crackling, numbingly cold day in January of 2010, they’ve gained a permanent foothold in my breakfast rotation, the waffle recipe I turn to time and again. With their crisp edges, and the sharp tang of buttermilk contrasting with the deep, rich maple syrup, it’s a dance of flavors to awaken you and set you upright, not to mention bolstering you against cold and wind.
The inevitable Winter is just around the corner. Shore up your weekends with foods that bring warmth to your home and fuel for the internal furnace. These waffles freeze beautifully. I always make a double, or even a triple batch so that we have lots of extras on hand.
Do you have a preference for Waffles or Pancakes??
Buttermilk Cornmeal Waffles
1 cup sifted all-purpose flour (sift before measuring)
1 cup yellow cornmeal, preferably stoneground
2 teaspoons baking powder
1 teaspoon baking soda
1/4 teaspoon salt
3 large eggs
2 cups well-shaken buttermilk
6 tablespoons vegetable oil plus additional oil for brushing waffle iron
Into a large bowl sift together flour, cornmeal, baking powder, baking soda, and salt. Repeat sifting 2 more times.
In another large bowl whisk together eggs, buttermilk, and oil. Add flour mixture all at once and whisk just until combined.
Preheat a waffle iron and preheat oven to 200 °F.
Brush waffle iron lightly with additional oil. Spoon batter into waffle iron, using 1/4 cup batter for each 4-inch-square standard waffle and spreading batter evenly, and cook according to manufacturer’s instructions. Transfer waffle to a baking sheet and keep warm, uncovered, in middle of oven. Make more waffles with remaining batter in same manner, brushing waffle iron with more oil before adding each batch.
Serve waffles with syrup.
(from Kristin at The Kitchen Sink Recipes, slightly adapted from Gourmet magazine)
What’s on YOUR plate this month??

November 4th, 2011
| 2 Comments »
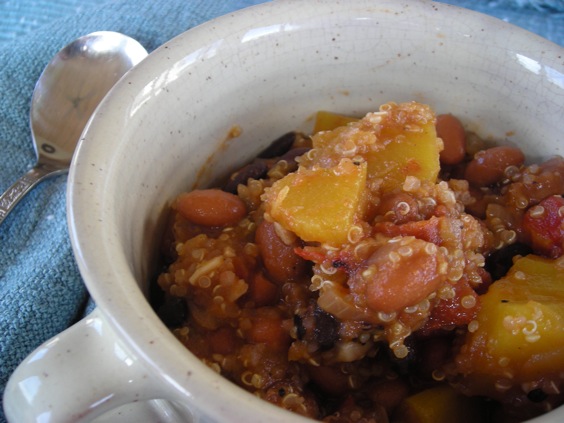
This is a perfect stew for right now, for November, for cool nights and for filling your house with warmth. I made this two years ago and we loved it; this being long before we passed on meat in favor of hearty vegetable dishes and grains. So bringing it up again serves more than a purposeful means to introduce you to something I loved, but to reintroduce myself to a great idea, once more.
I’m giving you the Weeknight Version of this hearty and delicious stew, ready in about as much time as it takes for your squash to cook in the pan. If you are so inclined, use dried beans instead, with the proper soaking. As with many soups or stews, this dish tastes better with a day in the fridge, but it also thickens substantially so you’ll want to add more broth or liquid the next day.
Delicious and hearty, with a good healthy twist and terrific for a cool weather meal, what’s NOT to love about this??
Andean Bean Stew with Winter Squash and Quinoa
1 winter squash of choice, peeled and cut into 1/2″ chunks
2 cans pinto beans, drained and rinsed
1 medium onion, chopped
1 T. sweet paprika
4 garlic cloves, minced
1 can fire-roasted tomatoes, with liquid (use regular if you don’t have these available)
1/2 c. quinoa, rinsed well
1 bay leaf
3 T. chopped basil or parsley
In a sturdy stockpot, brown the onion in oil of choice, about 10 minutes or so. Add the paprika and stir to coat, cooking for a minute. Add in garlic and stir, cook for 30 seconds or until very fragrant. Add in tomatoes and their juice and cook for a few minutes to combine flavors. Stir in the beans and squash. Fill the tomato can with water and empty into the pot. The solids should be only just covered with liquid. This is a thick stew. Add more if necessary and put the bay leaf in the pot. Bring to a boil and then allow to simmer, covered, until the squash is tender, but not thoroughly cooked- 30 minutes or so. Stir in the quinoa and simmer until the grain is translucent and the tiny thread appears- about 10-15 minutes more. Season to taste with salt and pepper. Serve topped with basil or parsley.
from The New York Times, Recipes for Health and Nutrition, Nov. 2008
What’s on YOUR plate this month??

November 3rd, 2011
| 2 Comments »
Fall weather and a steaming bowl of soup seamlessly slip in to one another every year. Once the weather turns from the sultry summer sun to that burnished hazy look of Fall, where the leaves outside burn crimson against the blue sky and the air chills down the moment the sun slips to the tree line, a steaming bowl of soup seems as natural as taking a breath.
I used to be afraid of soups, in a life so far past that I can’t recall even the precise reason why. I think I didn’t understand how to properly build the flavor of soups, from the slow caramelization of the vegetables, to the added broth and simmer, the final seasoning; a pot of soup intimidated me, and I would marvel over those consumed at cozy cafe lunches, wondering what I could do to achieve such a grand blend of flavor and texture. The truth, once discovered, astounded me in it’s simplicity: a good pot of soup is built like a good house is built, from the ground up. Once this simple procedure is set, the possibilities are endless.
 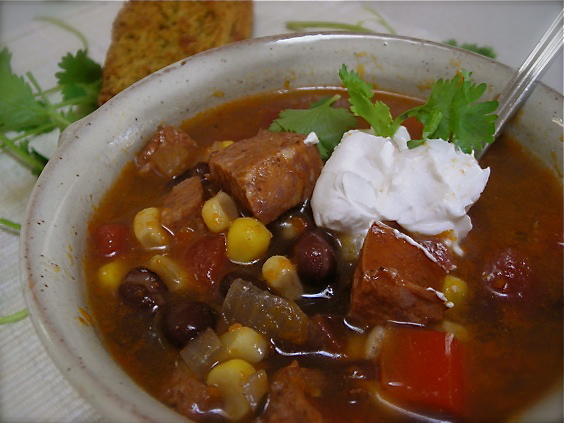 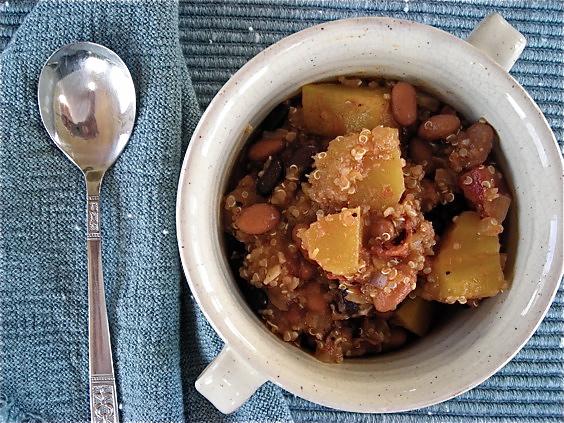
The Soup and Stew category in my Recipe Index is loaded with content. No truer testimony to that perfect soup achievement can be found anywhere else; we’ve enjoyed some amazing, delicious and hearty soups over the years. I may not be the best at photographing them, but I certainly can make them now. I’m so glad too. There is so much love in a pot of soup, simmering on the stove, chasing the wild winds of Fall or Winter away, while keeping time with the hum of the furnace. They fill the house with warmth, with scent and with promise. And the versatility of soup, at least in my head, makes it a perfect meal to eat most every night, no special occasion, or long stretch of time needed. And then there is the health aspect of it, because you know I need to mention how perfect a bowl of thick vegetable soup can be, once you ignore the call of butter and cream. Some of my most perfect bowls of soup have been made from a handful of sadly forgotten vegetables from the refrigerator, past their prime for anything but to be chopped, sauteed and simmered to a delightful, steaming finish.
And bread. Let’s not forget the perfect match to a perfect meal. A loaf of good sturdy bread. Soup and bread, like Fall and sweaters, just fits; it rolls of the tongue seamlessly, and makes perfect sense. A spoon in one hand, chunk of bread in the other, eagerly soaking up the broth and bits of herbs still clinging to the bowl. In my previous life working in an artisan bakery, a loaf of bread and a bowl of soup from the lunch counter was a regular meal, something I craved daily. And I still do. I can dip a saltine cracker in my soup, or nibble on corn muffins too, but nothing tastes better with soup than bread.

These days, without meat to bulk up my soups, I’m consuming them simply loaded with vegetables, and often, legumes. Thick bunches of chard, or spinach or kale make for stellar soups, along with sharply flavored carrots and a host of other possibilities. I’ve made several pots of green soup, throwing in baby bok choy along with the other hearty leafy greens, then pureeing it smooth, sipping it from a mug, feeling the bright green goodness flowing through me.
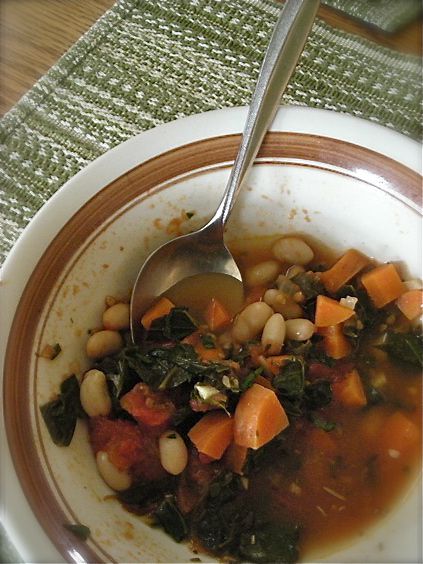
This hearty bowl of Ribollita, or Tuscan Bread and Tomato Soup, used up the very last tomatoes from the garden at the lake. Mike came home from a few days there with a sack of sadly misshapen and bruised fruit, the last of a summer bounty and I quartered them and roasted a large pan worth, reserving the tomato liquid and oil to help flavor this pot of soup. The tomato flavor was out of this world; sweet, deep and lush, and a large bag of chopped dinosaur kale added green goodness. This isn’t a brothy soup, and you don’t need to roast your own tomatoes to achieve it, given the availability of excellent canned products. Place the pot on your stove on a gray afternoon, and simmer it slowly. This one doesn’t take much time at all, but the flavor will fool anyone in to thinking it simmered forever.
What is YOUR favorite soup? Do you like to make it at home?
Ribollita Soup
2 tablespoons olive oil
4 large garlic cloves, chopped
1 medium onion, chopped
2 carrots, peeled and chopped
2 celery ribs, chopped
1 dried bay leaf
10-ounce bag frozen spinach
2 cans cannellini beans with liquid
6 cups chicken stock (or vegetable stock, for a vegan adaptation)
One 15-ounce can (1 3/4 cups) tomato pureé
9 ounces day old bread, torn in pieces, about 3 cups
1/4 cup fresh basil, chopped
Parmesan, grated (optional)
Heat a heavy-bottomed pot over medium-high heat. Add oil. When the oil is hot, add the garlic, onion, carrots, celery, and bay leaf and season with salt and pepper. Sauté until softened, 5 to 7 minutes. Add the frozen spinach and sauté for a moment to break up any large clumps.
Add beans, stock, and tomato pureé. Bring soup to a boil. Stir in bread and reduce heat to a simmer. Cook until soup thickens slightly. Remove from heat and stir in chopped basil. Remove bay leaf and serve topped with grated Parmesan.
Recipe from Apartment Therapy: the kitchen Written complete, with no modifications
Those soups above? You’ll find them on my site if you follow these links:
Quick Three Bean Chili
Chorizo Black Bean Soup
Andean Quinoa Stew
There’s a few other good recipes on my site you might like:
Zuppa Arcidossana– one of my most favorite soups from my meat eating days
Hearty Minestrone – Forgive the horrid winter photo and just make that soup. Wow.
Chili Blanco – from 2007, so far back in the archives, and an amazing recipe.
And for some more delicious soup recipes out there, my friends have been Souper crazy as well:
Amy gives you an amazing array of Fall soup options.
Laurie shares an African Peanut Soup that I can’t wait to make.
Angharad gives us even more soup recipes to enjoy
What’s on YOUR plate this month??

November 2nd, 2011
| 3 Comments »
It’s November, so that means one thing in the blogging world.

What’s on YOUR plate for November??
{{And you thought I meant Thanksgiving, didn’t you?}}
That’s my cute little badge for NaBloPoMo 2011, which is blog lingo for National Blog Posting Month. You post every day for a month. That’s all it is. It’s also National Novel Writing Month, or NaNoWriMo, an epic adventure in which you write a 50,000 word novel in 30 days. If I had the month free with zero obligations, I might give that one a shot. That’s a lot of words, isn’t it?
I’ve done NaBloPoMo twice; in 2008, when I highlighted a different food holiday each day for the month of November, and again last year, in 2010 when I culled through the 4-1/2 years of archived posts on my site and re-introduced some favorites. That’s my plan this year as well. There is A LOT of good content in my archives, recipes that are perfect for this time of year that no one finds anymore, plus with Just Write Tuesdays, I’ve got more than enough content to fill 30 days in a row. Piece o’ cake.
{{by the way, my sweet husband Mike made that sweet badge for me. He’s awesome that way.
And he accepts food for payment!! Hi honey!!}}
Today is about cookies, though. Sugar Cookies to be exact. It is, hands down, my all time favorite cookie and I don’t say that lightly. There are a lot of amazing cookies out there; chewy Oatmeal Raisin, decadent Chocolate Cookies, Pumpkin cookies with thick cream cheese frosting. There are no limits to what can be scooped up and baked on a sheet pan. But a good sugar cookie is one of life’s simplest pleasures; buttery, chewy and rich with vanilla, I can tell a sugar cookie made with love over a mass-produced butter-flavored fake any day of the week. My Sugar Cookies evoke sighs of joy, and eye rolls and ‘Mmmmmm’ responses from everyone who tries them. And it’s a well honed taste too, going back to my childhood, and a beloved bakery from the golden days of neighborhood bakeries, where a sugar cookie always waited for me. If you want to read the whole story, please go <HERE>
And if you just want the recipe, here it is.
Sugar Cookies
1 c. softened butter, no substitutes (reserve one of the wrappers)
1-1/2 c. white sugar (plus more for rolling)
2 t. pure vanilla extract
1 egg
2-3/4 c. AP flour
1 t. baking soda
1/2 t. baking powder
Heat the oven to 375° and line two cookie sheets with parchment paper. Place about 1/3 of a cup of white sugar on a small plate and set aside.
Cream butter and the 1-1/2 cups of sugar together until very light and fluffy. Add in egg and vanilla extract and blend thoroughly until smooth and creamy. You really can’t overmix at this point. You want a base that is smooth and creamy as it makes the end result stupendous. Stir together flour, baking soda and powder, and with mixer on low, gradually add to butter until fully incorporated and mixture is in large, somewhat dry chunks. It will not be a smooth batter, but granular, like pie crust. The dough should hold together when pressed between your fingertips. If it doesn’t, take the bowl off the mixing stand and turn the dough gently with your hands, pressing any loose flour in to the dough to incorporate. Chill the dough for 20-30 minutes before scooping. It’s a lot easier to work with that way.
Using a small scoop (I used a #60 sized) press dough tight into a ball and drop onto cookie sheet. With your butter wrapper, wipe the bottom of a smooth glass, then dip the glass onto the sugar you’ve set aside. Gently press down on the cookie dough, dipping the glass before each one. If any dough falls loose, lightly push the pieces into the sides of the cookie.
The cookies will bake up just fine if you don’t wish to flatten them; that’s just my preferred method. Bake for 8-10 minutes, reversing trays from front to back, and swapping top to bottom about halfway through. I’ve tried this with the convection feature on my oven and they browned too quickly so I don’t recommend that method.
I like to remove the cookies right way, on the parchment to a cooling rack. These are pretty sturdy once baked, and will slip off the parchment easily with a gentle nudge. You simply must eat at least a few of them warm. Of course, a glass of cold milk, or a nice cup of coffee or tea is an excellent accompaniment. The cookies will become firmer as they sit for a day or two.
KATE’S NOTES: I began using the super-fine baking sugar for all my baking needs and find that it makes for better creaming and a nicer crumb on the finished product. Most grocers carry it in the baking aisle, in a sturdy carton. It’s called ‘Bakers Sugar’ and it’s very, very fine grain. I used it in these cookies and they were even better than I recall.
The addition of a bit of nutmeg (about 1/2 a teaspoon) in the batter makes for wonderful flavor, or you can add ground nutmeg to the sugar used for rolling the cookies in.
October 13th, 2011
| 2 Comments »
There’s something quite elegant about a dark, almost black molasses cake.
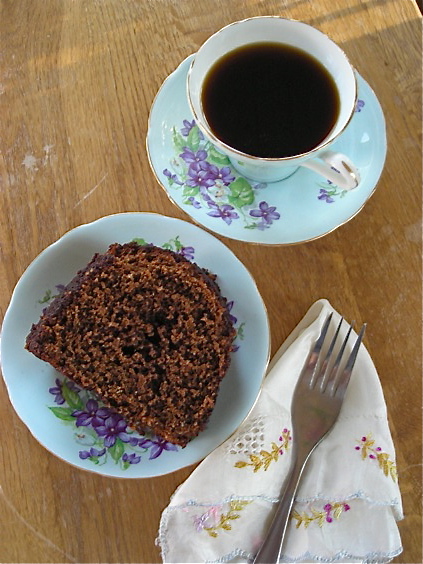
It’s a hallmark of Fall too, even though really, it’s good any time of year. But the cinnamon and ginger have the warm and tranquil feel of a blazing fire, or a maple tree in full color. They speak their spice words and the ones we hear the loudest is ‘Autumn’. Cooler weather means baking. A warm oven is the right means to chase the chill away, and a dark rich molasses cake sits on the counter, awaiting the moment when the dishes are done, the light is gone and the dessert plates come out, forks clinking in anticipation.
Call it gingerbread, call it molasses cake. It’s all the same in my head. And it’s a taste I’ve loved for an eternity, it seems. There is something about that flavor the moment that it lands in your mouth. It’s soothing, again; another impression that tells me of a passing season. A cake to usher in sweatshirt weather, and extra blankets on the bed. We all love these dark and inviting cakes, whether with a scoop of ice cream on top, or yogurt.
I’m not a recipe loyal cook. Ok, I recant; I can be a recipe loyal cook until I see something that I think would be even more amazing and then I try the new option and the old standby gets tossed aside. I’m easy like that. I like to experiment. I like to travel new gustatory paths and explore new tastes. This particular molasses cake has LOADS of molasses- a full 1-1/2 cups. And it strongly suggests you use blackstrap molasses to make it the richest, darkest most lush molasses cake of all time. I didn’t have blackstrap on hand. In fact, I’ve never bought blackstrap molasses. I might. Just to try this cake again in it’s original form, because, to this molasses cake crazy girl, this recipe was one that might never get replaced. It’s that good.
Coming from the kitchn, one can expect a recipe of extraordinary taste. I’ve been a bit hooked on what Faith Durand and Sara Kate Gillingham put forth, finding a great deal of recipes that stretch the limits of normal food items, a wide range of delicious and healthy vegetarian dishes that don’t read like a 1990’s restaurant menu and plenty of kitchen design upgrades that make even the most even-keeled, happy in her place person swoon in delight. And there’s never been a crashing dud in any of the recipes I’ve been bold enough to try. You need to really like your food to love what these ladies do with it, and I appreciate a place that wears like an old friend, a comfortable trustworthy feeling that brings a smile, a lightness to your heart. With so many slap-dash recipe sites out there, finding a trustworthy one that works is a gem.
So…. back to this cake. Did you think I’d forgotten?
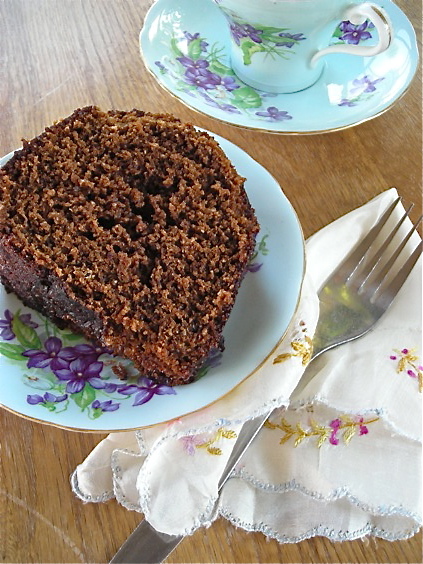
I would never forget to share such a treat with you. Are you a cake and ice cream fanatic? Because this works beautifully with vanilla, or mix it up a bit and go for pumpkin ice cream, cinnamon or when it’s available, try eggnog ice cream for a big decadent kick. It also works to eat it with yogurt, the richer and more dense, the better. A few brandied cherries on top wouldn’t be bad, nor would a turn in a microwave to warm it slightly, after which you drizzle a thin stream of pure maple syrup over the top. And whipped cream! If that’s your thing, you’re in luck. This cake does it all. All the parameters of a good dessert.
And if dessert isn’t your thing exactly, try a piece of this with your morning coffee. You’re welcome.
Dark and Damp Molasses Cake
12 T. unsalted butter, cut into chunks
1 1/2 c. unsulphured dark or unsulphured blackstrap molasses
3/4 c. brown sugar
1/3 c. white sugar
3 1/4 c. all-purpose flour
1/2 t. fine salt
2 1/2 t. baking soda
2 t. ground ginger
1/2 t. cinnamon
2 t. espresso powder (optional)
1 t. vanilla
2 large eggs, beaten
1 1/2 c. whole milk
Heat the oven to 350°F. Lightly butter or grease a standard bundt cake pan.
Place the chunks of butter in a 2-quart saucepan set over medium heat. Pour in the molasses and whisk in the brown sugar and white sugar. Whisk as the butter melts. When the butter has melted and is completely liquid, and the sugar has dissolved and is no longer grainy, give it a final stir and turn off the heat. Set the pan aside to cool. (The molasses will look slightly separated from the melted fat; they won’t be smoothly combined.)
Use a clean dry whisk to combine the flour, salt, baking soda, ginger, cinnamon and espresso powder in a large bowl. (The espresso powder is optional; it will lend one more dimension of flavor to your cake.)
Whisk the vanilla, eggs, and milk into the saucepan with the molasses and melted butter. When it is completely combined, pour this liquid slowly into the bowl of dry ingredients. Whisk thoroughly to combine, making sure there are no lumps.
Pour the thick batter into the prepared springform pan. Bake at 350°F for 45 to 50 minutes or until a tester inserted in the center of the cake comes out clean. Let cool for 20 or 30 minutes, then run a thin, flexible knife around the inside of the pan to help the cakes edges release. Remove the cake from the pan and let it cool completely on cooling rack.
recipe from the kitchn; for a delicious frosting to spread on top of this cake, follow the link here.
October 1st, 2011
| 4 Comments »
Truth:
I could be accused of purchasing eggplant simply to make this dish. Not that this is a bad thing.
Truth:
I have a wooden spoon permanently stained from turmeric.
Truth:
I may have, just a wee bit, tried to hide the remains of this dish in the back of the fridge where my husband can’t find it.
Admission:
I love curry.
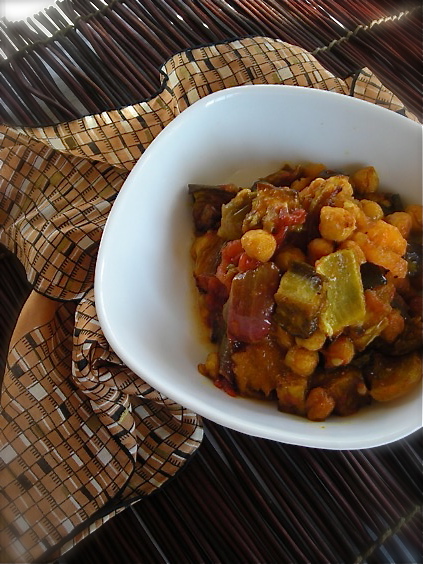
The first time I ever tried any kind of curry flavored dish was in college when a roommate and I shared an amazing meal at an Ethiopian restaurant. She warned me that I would sweat curry the next day and she wasn’t kidding; the warmth that exuded from my skin was unreal. It was heady, and deep with the memory of the fragrant meal we’d consumed the night before and I would lift my arm to my nose repeatedly over the course of my morning to remind myself of the flavors. It’s no surprise that any type of curry dish, whether red or green or yellow, is at the top of my list in terms of my favorite taste. With or without coconut milk, whether searing hot with a heat that makes my heart beat just a bit faster and sweat bead at my eyebrows, or a mild gentle tease that touches my tongue, curry flavored dishes are tops.
Eggplant. Chickpeas. Red onions. Fresh curry powder whisked with a splash of oil and just a bit of dark brown sugar to aid in caramelization. A hot oven. And 30 minutes. That’s it. From that point, all you need is a fork.
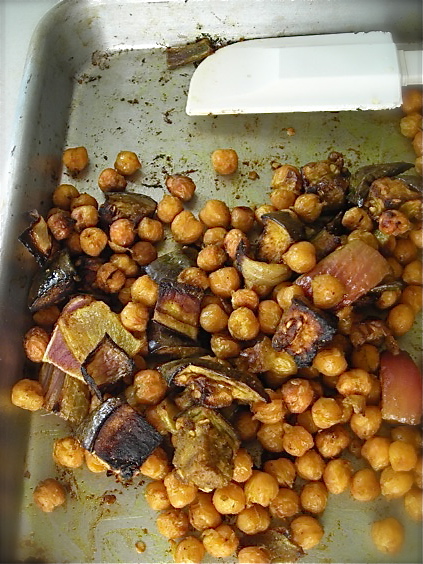
Your house will smell truly amazing, and I’m telling you, it will be darn right difficult to resist eating the roasted curried chickpeas right off the baking sheet when it’s all done. They become dense and crispy, especially if you take a few moments after you’ve drained them to spread them out and pat them dry with a paper towel, and I’m sure you’ve heard by now that roasted chickpeas make a perfectly addicting snack? I’ve experimented with them already, and have, more than once, gazed at the enormous #10 foodservice size cans of them in consideration of purchasing. Crazy? Maybe. But once you try this, you may understand why that’s not so dumb a thought.
But this dish? It’s a ‘Wow’ factor of 10. And an ‘Easy’ on the preparation scale. You’ll spend 10 minutes cutting and prepping, then you’ll pace for the 30 minutes it sits in your oven. Give the baking sheet a shake halfway through and that’s about it. The eggplant cooks to a creamy dream, onions settle in soft and caramelized and those chickpeas…… oh those chickpeas. Hold me back.
Good thing I’ve got that permanent turmeric-stained spoon. I’m going to need it.
Eggplant and Chickpea Curry
1 medium eggplant, diced
1 large red onion, chopped
1 medium red pepper, cored and seeded, chopped
1 15-oz can chickpeas, drained and rinsed (spread them and pat dry for extra crispness)
1/4 c. olive oil
2 t. good quality curry powder
1 t. dark brown sugar (sub molasses, muscavado or honey too, can use light brown sugar as well)
Preheat your oven to 400°
Whisk together the curry powder, sugar and oil in a small bowl. Combine the eggplant, onion, pepper and chickpeas, then pour the curry oil over and carefully toss together to combine. The eggplant will soak up the oil but don’t add anymore. Eggplant is a sponge; too much oil and it will be too soggy.
Spread the mixture on a baking sheet and bake, shaking the pan once or twice about halfway through, for 30 minutes. This dish can be consumed immediately, but takes on deeper flavor if allowed to sit overnight in the refrigerator.
Serve with naan or pita bread, over brown rice or on crisply toasted baguette slices.
KATE’S NOTES: For additional amazing flavor, add two large tomatoes that have been roasted as well, but don’t place them with the eggplant. They take far less time. For a good method, check this recipe.
Original recipe from Food & Wine, here with modifications
September 20th, 2011
| 6 Comments »
Summer ends when the season ends, some time in the midst of every September. The 22nd? 21st? The sun crosses a time line and the word ‘summer’ is an afterthought, yet for most people, Labor Day signals the official end of the best season Minnesota has to offer. I’m more optimistic. I like to step outside the box, and while others are saying ‘Fall’ when school buses roll down the streets again, I’m still crowing ‘Summer’. I will gracefully extend my white flag of surrender to that mentality, that a season can be marked by milestones instead of days on a calendar, while I straddle the seasons, try to push summer to extend just a bit farther.
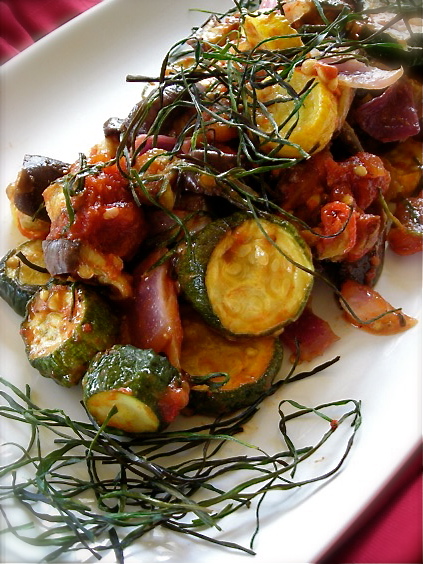 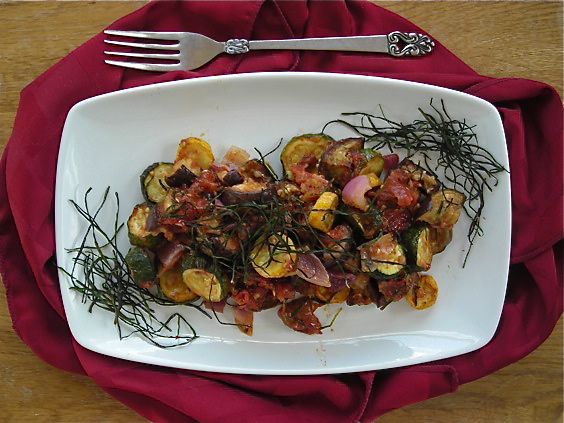
It’s not hard to do when a plate of this Roasted Ratatouille is staring back at you, loaded with late summer tomatoes softened to a deeply flavorful mass, chunks of hearty zucchini and eggplants so perfectly round and unblemished that they look false and plastic, yet yield to a tender flesh so delicious it makes your eyes roll back. I can have my face in Summer, my cheeks enjoying the warmth of the days, while my head and heart charge towards Fall, cool air, a warm humming oven and a comforting meal when the air chills and sweatshirts come out.
This dish, once again as is the case with so many in my adult years, was not something I’ve loved forever, and maybe that’s part of it’s appeal. My Mom used to make Ratatouille when I was young, and my sisters ate it but it always turned me off completely. That which held ruby red tomato and a vegetable with the word ‘egg’ in it just sounded like it would be horrible. I was a picky child mostly due to texture issues, as I have learned; foods like mushrooms, tomato, squashes of all kinds and especially eggplant (an egg? a plant?) are now foods that sweep themselves across my plate on a regular basis, bursting with flavor when once they would make me shudder. I’m so glad to have grown up to learn of their wonder.
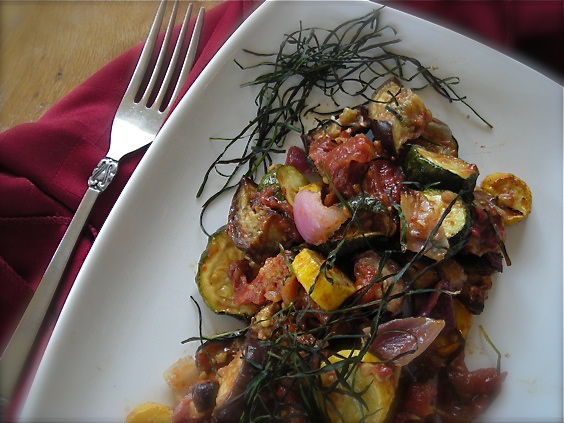
Roasting vegetables is quite possibly my most favorite way to eat them, except for right off the vine. With an enormous bounty of fresh from the Farmers Market zucchini and onions, and the aforementioned eggplants, along with the fattest and juiciest Black Krim heirloom tomatoes to come out of my tiny postage stamp garden, this dish was so loaded with flavor that it made my eyes water in joy. Tomato flavor intensified from the heat of the oven, while the eggplant and zucchini became tender-crisp and then just to make it more interesting, I mix everything together and let it sit overnight in the fridge, just to tease a bit more flavor out, a deeper marriage of September’s taste of the vine. The bowl needed nothing else; no salt or pepper, no added oil or seasoning. Topped with the amazing find of crisp strips of chive thrown on top of the vegetables on a whim, it was a dish that slowly spread a Cheshire grin over my face with each bite.
What a personality too. There’s no stodginess involved here, no set way to consume such a meal; we ate this mixed with pearl couscous (because I am, truly, having a love affair with those tiny grains of pasta) and we ate it atop heady and aromatic polenta studded with corn kernels and flecks of fresh herbs. It would be just at home too, stuffed inside a crisp and warm baguette, layered with provolone cheese for an incredible, messy delicious sandwich. Serve it on rice, or with a simple risotto. Warm it slightly and place it on garlicky crostini for a hearty appetizer or light meal. Or toss it, chilled, with greens and a shower of fresh grated asiago cheese for a salad unlike any other. Mix it with pasta, please; make sure you add a good turn of hard cheese. And if you find yourself late at night, in the kitchen with a fork in hand, a few dips in to the bowl while no one is watching is ok too.
And are you like every other gardener in the state- a pile of chives growing in your garden that you don’t know what to do with? I foolishly planted chives many years ago, which went to seed without me doing anything about it (big, BIG mistake) and now, well now I am fighting off chives with a blowtorch practically, and did you know that if you pluck them they just grow faster? Neither did I, but I’m learning that the hard way. Another thing I learned about chives is that you can blast them to kingdom come with Round-Up, but the little buggers just come back, shiny green and taunting. I’ve learned to hate chives, but a handful of them tossed atop these roasting vegetables made for a crispy and delicious garnish that just might make me a bit softer towards this evil relentless herb. Surprise awaits in the strangest places, doesn’t it?
Roasted Ratatouille with Crispy Chives
2-3 medium tomatoes
1 large eggplant
3-4 small zucchini or yellow squash (2 if they’re larger)
1 large red onion
3 garlic cloves
A generous handful of fresh chives
Olive oil, sea salt and fresh ground pepper
Preheat your oven to 400°. Slice the tomatoes into quarters and place on a baking sheet. Drizzle with about a tablespoon of good olive oil, sprinkle with a bit of salt and a few grinds of fresh pepper. Place pan in hot oven and roast, watching carefully, until the tomatoes begin to soften and the skins wrinkle. You want them to retain much of their shape, but release some of their luscious juices. I don’t roast them for more than 10-15 minutes at that temp. Remove the pan and allow them to cool, then slip the skins off.
Dice the zucchini and eggplant, slice the onion and crush the garlic, placing all of these on two baking sheets. Drizzle with a bit of olive oil, add salt and pepper and roast until the vegetables begin to soften, about 15 minutes. Stir carefully, then return pan to oven for about 10 more minutes. Scatter chives over the top of the vegetables, then roast about 10 minutes more, or until the chives are crisp and toasty, but not black and charred. Remove pans and allow vegetables to cool.
In a large bowl, combine tomato (with any juice from the roasting pan), eggplant, zucchini, onion, garlic and about a third of the crispy chives, reserving the rest for garnish. Gently mix together (I like to use my hands to avoid breaking everything down), taste and season with more salt and pepper if desired. The ratatouille can be eaten as is, warm or at room temp. For deeper flavor, chill the mixture overnight, and allow to warm to room temp the next day before serving.
|


