April 27th, 2014
| 1 Comment »
{{In the midst of radio silence on the blog, I’m re-posting this terrific Crackerbread recipe from last Spring,
along with a bittersweet story of my beloved rolling pin}}
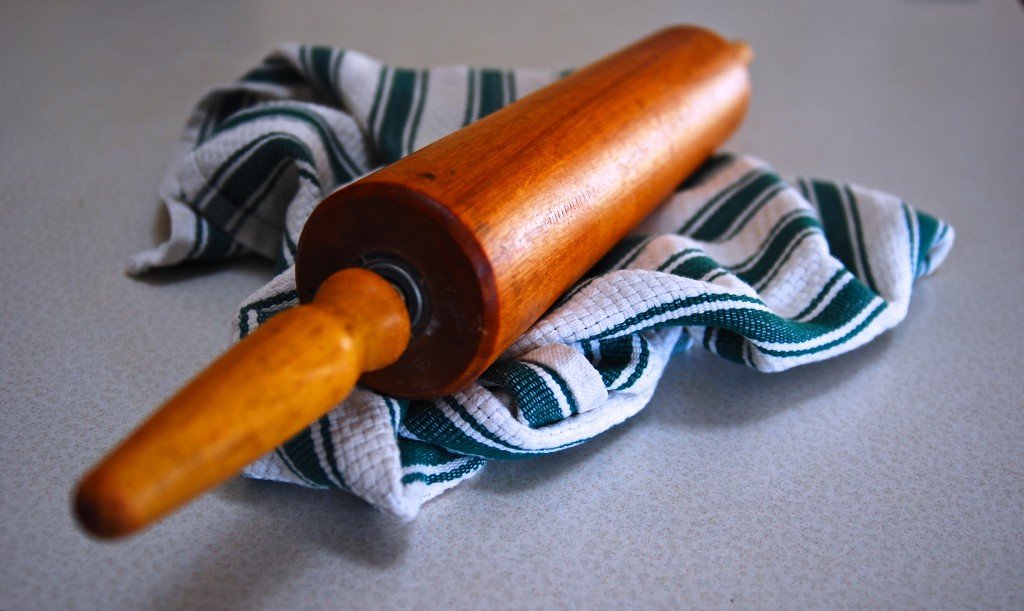
I have a rolling pin in my kitchen that I suspect is older than I am. It belonged to my Mom, and when she passed, I wordlessly picked it up, a flood of childhood memories racing through me; winter afternoons in our kitchen, the laminate tabletop covered in flour and pie tins at the ready. My sisters and I, our eyes eager, would watch our Mom as she pressed, turned, rolled and spun that rolling pin over a disc of fragrant pie dough. The pin whizzed as she pushed, a thwack on the counter as it dropped back on the dough, amidst the crackle of wax paper and the gentle song of a heating oven.
Come in to my kitchen…
September 11th, 2013
| 1 Comment »
It doesn’t take much to get my hands dirty, foraging in the garden for the tomato harvest, cutting herbs for the kitchen or pulling up the few weeds that mock the dwindling layer of mulch over the soil. And those tomato plants love to leave their thick, green coloring on my hands and arms as I pick, the fuzzy leaves and stalks brushing against me. When I wash off afterwards, the water runs green in the sink, soap turning an odd greenish-yellow, the color of life from the soil.

(photo courtesy of Bossy Acres)
Come in to my kitchen…
September 4th, 2013
| 2 Comments »
It’s pretty rare that I won’t try something new. For food, that’s a given; and I’m willing to try most everything once. You can never say that you don’t like something if you never try it, and more often than not, you should try a food a minimum of five times before declaring it off limits. Certain foods, however, I have taken one bite, just to say “I’ve tried this.” but there was never any chance of a repeat performance.
Like beef tongue. And for the record, I realize that it’s ‘beef’. But when you walk in to your culinary class at 6:45am, bleary eyed and in search of coffee and a massive, pale, gross looking slug of WHAT-THE-HELL-IS-THAT??? is laying on the counter, to which your instructor glibly tells you ‘That’s beef tongue.’, it truly turns your stomach. You cannot even imagine how enormous the tongue of a cow is unless it’s laying on the counter in front of you. Think of what you see, then add about 18 inches. Plus, cooking that thing is…. pungent. Then you have to peel it, and that’s as horrible as it sounds, because it’s truly wretched when you hear, and see it happening. I asked my instructor if my grade would be based on eating the beef tongue and he shook his head, thankfully. I took one taste, though, fresh with the memory of that pale slug looking thing, and the ripping of skin in my head and that was the end of that.
These days, the list of foods that I eat is extensive, no more surprising that 90% of them, I’m betting, were foods I didn’t touch even 10 years ago; beets, fennel, tomato, chard, spinach, mushrooms, eggplant (jury is still out on that one), salmon, onions, squash (both varieties), fresh herbs, olive oil, coconut oil, nuts…. it just goes on and on. The expansion of your palate will never be a quick and perfect thing, and that’s ok. As long as you never stop trying new foods, new methods of cooking foods and keeping an open mind to it all, there may come a day when mushrooms are on your plate because YOU put them there. This is no more surprising to me than being jabbed with a pin, as mushrooms were so revolting to me for so long that I nearly gagged just being in the same room with them.
My work allows me a constant window to people’s eating quirks. And even after 2-1/2 years at this job, I still am surprised to come across food aversions. I’m not talking about avoidance for health reasons, such as lactose or gluten issues, I’m talking about people who visibly shudder when I serve salmon. “It’s fishy.” is the standard response. And they don’t want to hear that it’s only fishy when it isn’t fresh. That the cooking method goes miles towards making it taste good. That even if they haven’t eaten it in 20 years, they really should try it again. Once someone makes up their mind that they don’t like a food, it’s pointless to even open their minds again.
And that’s sad. If that had been me 10 years ago, my life, my meals and my mind would be terribly stagnant. And what’s the worse that can happen? You make a dish and end up not liking it? Maybe it was the method. The seasonings. It was overcooked, or undercooked. Did anyone really love kale the first time they ate it? I sure didn’t. But I kept on trying, because if nothing is ventured, nothing is gained. Which brings me to Grilled Cabbage.
My only exposure to warm cabbage in a meal was when I was young and the corned beef with cabbage dinner was prepared in our house. The smell was nauseating, and I couldn’t eat the pale, limp cabbage that was the result. With this memory, I’m not sure how I decided that grilling it might be better, but I’m always willing to take a shot and see what I hit. Something about that additional smoky grilled taste caught in my head, and I drizzled olive oil over sliced cabbage in an oven safe skillet and sprinkled it with a bit of sea salt.
Then I set the entire pan in the middle of a very full grill.
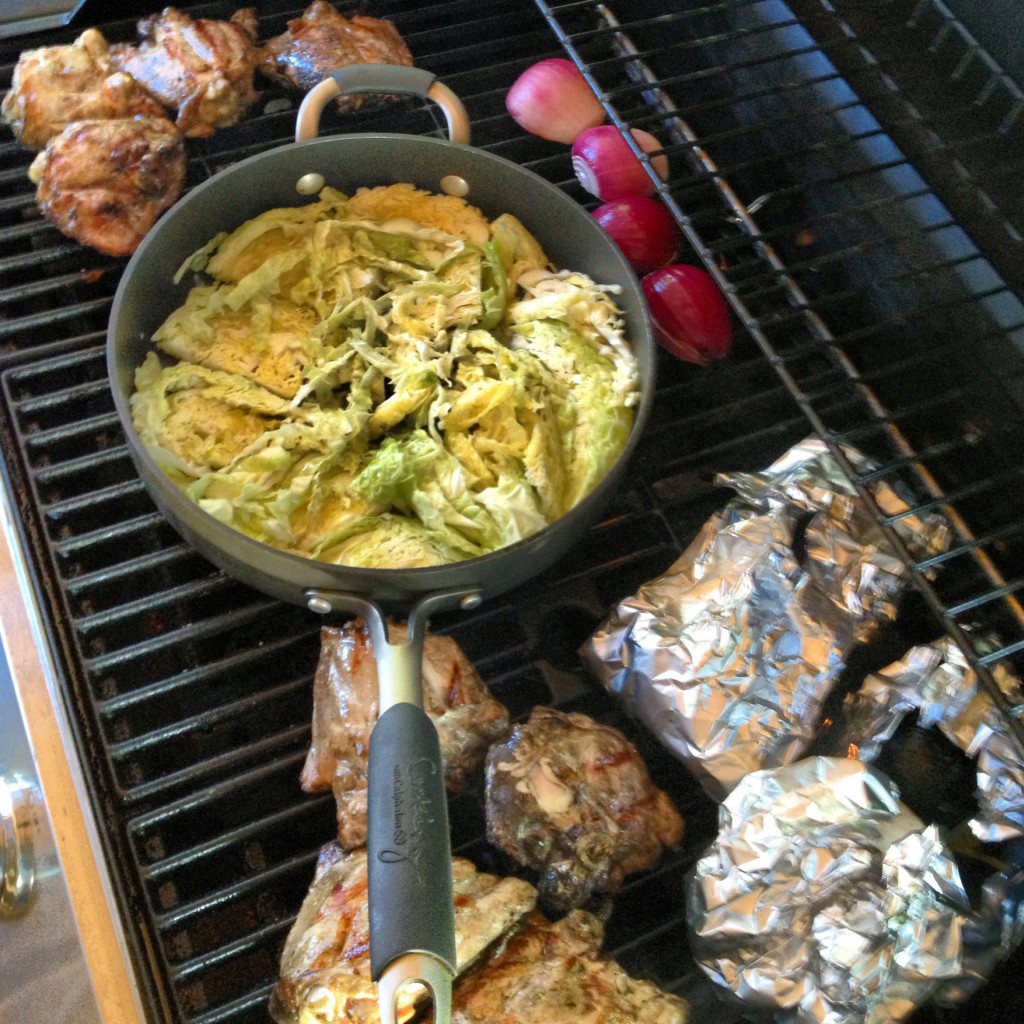
This was totally new for me, and I wasn’t even sure I would like it, but I let it brown all over, tossing it occasionally with tongs as it cooked. When it seemed tender, but still a bit crisp, I took it off the heat and scattered a handful of crumbled blue cheese on it.
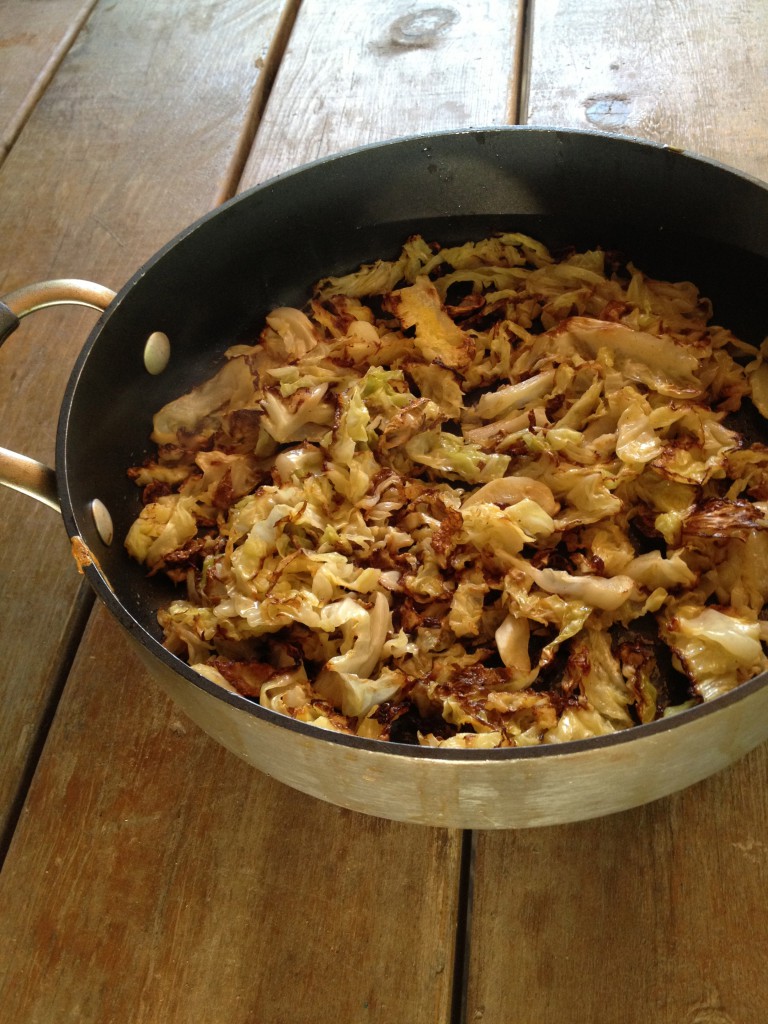
A tentative first bite, and contemplative chew revealed the smoky taste I was looking for, and a surprisingly crisp yield. A pop of blue cheese sealed the result; it was really good. Unbelievably, outrageously good; so good that I ate the entire pan, a half head of Napa cabbage, along with the rest of my dinner.
You know when you’ve had something extraordinary happen, and it seems to fill you with a sense of wonder? Like the air around you has shifted and you can almost feel a change taking hold of you? This, coupled with the start of September, a new month, and all around me seeing my friends children go off to school in new clothes, to new schools, from new homes and new states and begin brand new experiences and somewhere inside you, this time of year says ‘What was will never be the same again.’

And I don’t think I’ll look at a plain head of cabbage again, now that I know what heat and smoke can do to it. So try something new, and keep your mind open to possibilities and just TRY those foods that you maybe once hated, that maybe made you gag or roll your eyes. You just never know, do you?
What are some foods that you eat now that you once couldn’t stand??
Grilled Cabbage
Napa cabbage, shredded, but not too fine
Olive Oil
Sea Salt
Blue cheese crumbles (or feta, if you are so inclined)
Heat grill to high, or prepare coals to make a good hot base.
In an oven safe skillet, or a cast iron pan, lay cabbage in one layer as best as possible. It will shrink a bit, so you can wedge it together at the beginning. Drizzle with about 1/4 cup of olive oil and sprinkle with a teaspoon of sea salt, or to taste. Place pan on grill grate and shut the lid. (Remember…. the handle will be HOT. Keep an oven mitt or towel close by, with a set of tongs)
Allow to sit, undisturbed, for about 15 minutes, then toss lightly, pressing it back to one layer. This helps with the browning, which provides tons of flavor. Cook, tossing occasionally, until cabbage is wilted and browned all over. How long you cook it depends on how crisp or soft you wish it to be. My pan was probably on the grill for (maybe) a half hour, possibly less, and the end result was crisp, but still tender.
Remove from heat and toss blue cheese on top. Allow to cool slightly, and consume warm. Season with pepper, if need be.
August 28th, 2013
| 2 Comments »
Earlier this Spring, we took the leap and purchased a CSA share in the Bossy Acres farm. Bossy Acres, run by the team of Karla Pankow and Elizabeth Millard, grow organically on a farm in Northfield, and specialize in unique, heirloom varieties. Being a family of three, we decided to get the Mini share that would deliver every other week, plus an add-on share for fresh farm eggs and fresh roasted coffee.
Hands down, it was the best decision we made this year. In previous years, I would visit the Farmers Markets up to three times a week to keep a good stock of fresh vegetables on hand. In deciding on our CSA delivery, I figured that I would still be able to browse the markets on our off week from deliveries, but the wealth of vegetables showing up in our boxes keeps us chugging along in between delivery weeks, and only on a few occasions have I needed a quick visit to our local market to fill in around the edges. Our garden has also been producing well, and we’ve enjoyed broccoli, chard and a bounty of tomatoes from our own backyard, and the garden at our lake home.
In one delivery from Bossy Acres, complete with a copious harvest from the lake, I faced a counter full of cherry tomatoes that I desperately needed to do something with before they all started collapsing.
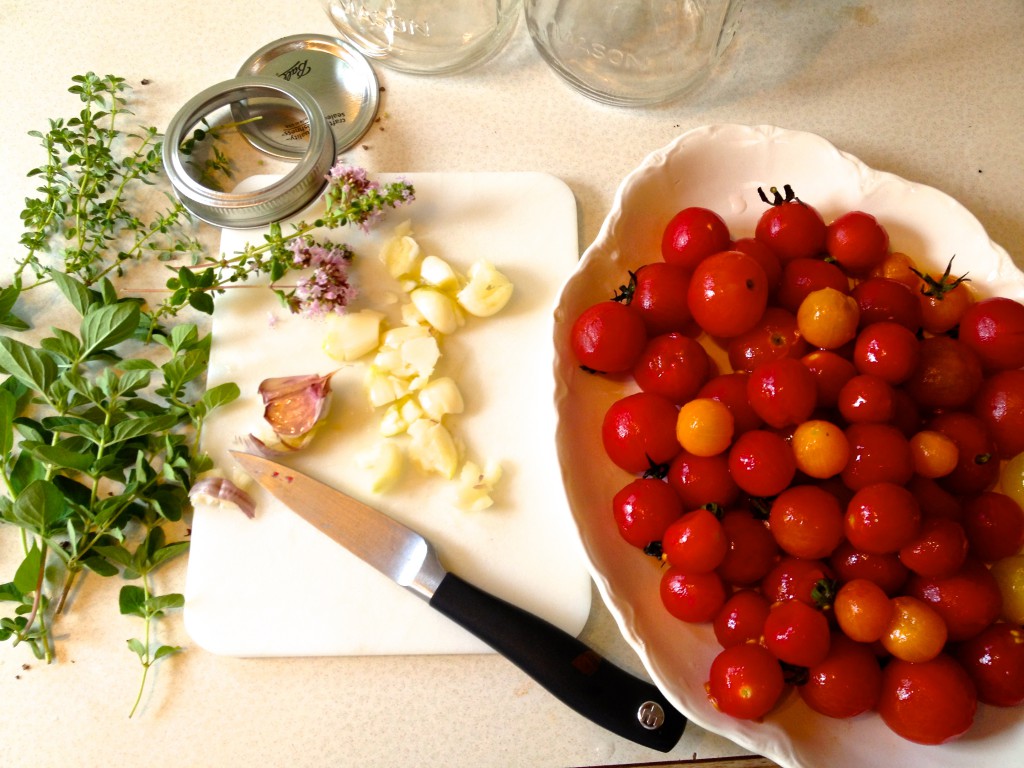
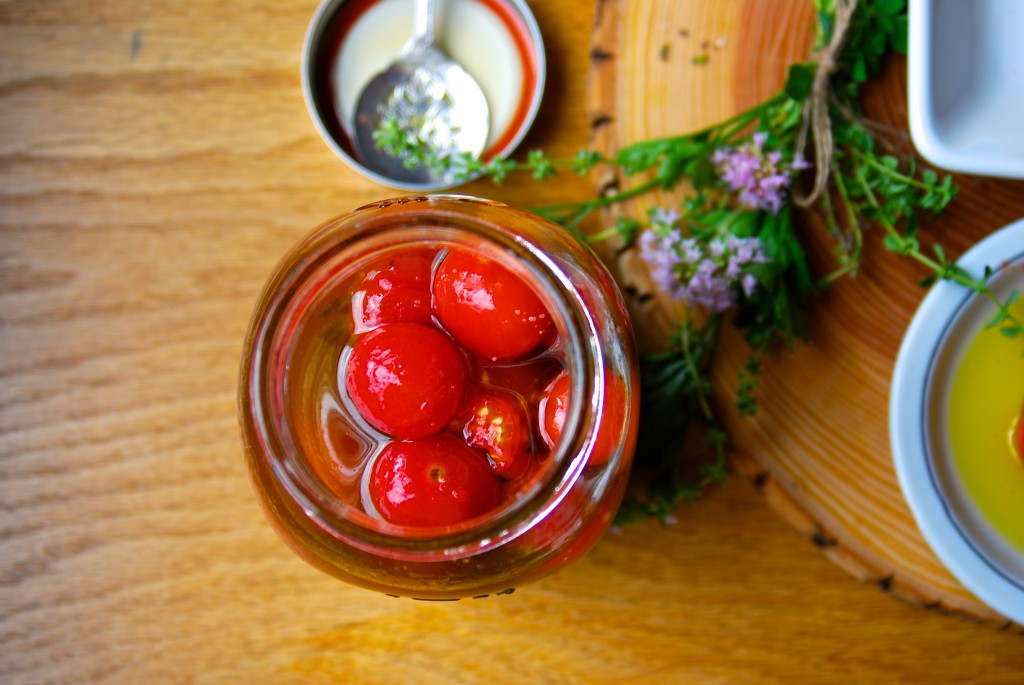
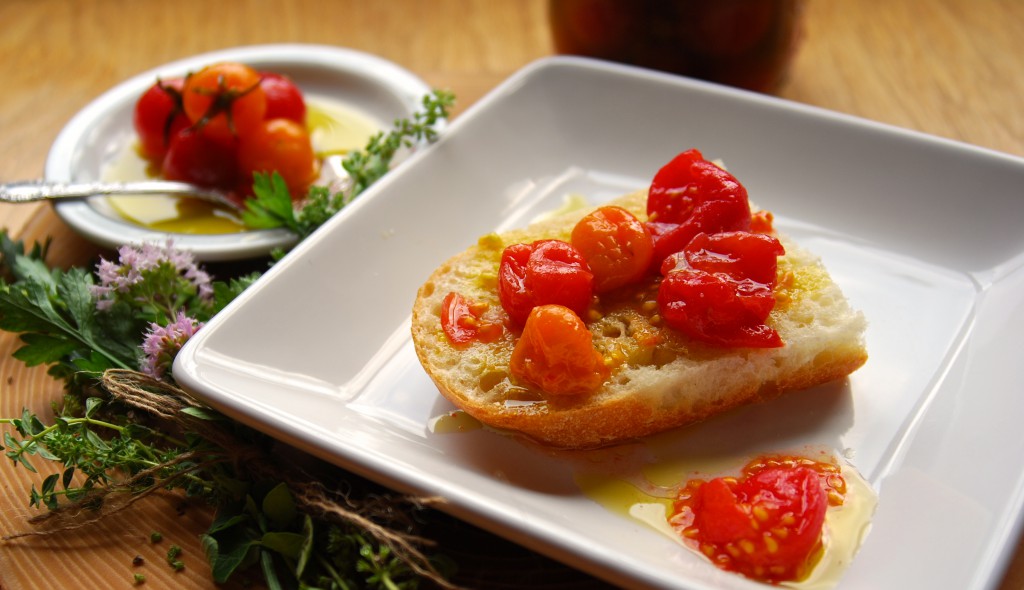
These simple marinated cherry tomatoes were a perfect option to take care of the bounty. One quart jar later, they were ready for a few days soaking in the refrigerator, redolent with fresh thyme, oregano and crushed cloves of aromatic garlic. The hardest part of the entire procedure was peeling the little things. The olive oil marinade even made enough to have some left over to fill an extra bottle for use on salads or drizzled over good bread.
A good marinated tomato has endless uses. I love using them on pizza, or you can toss them on your greens, too. Mashed and blended with vinegar, they make a simple vinaigrette, or like pictured here, scooped out and placed on bread, with some of the oil scattered over the top. Once the jar has had time to meld all the flavors together, what happens after that is only limited by your imagination and appetite.
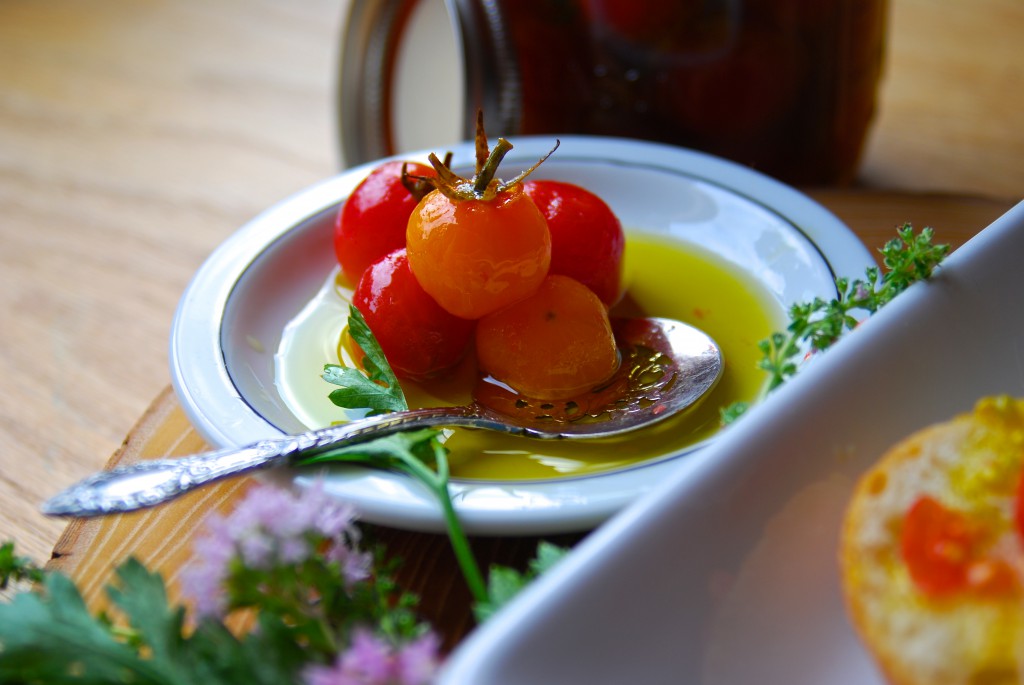
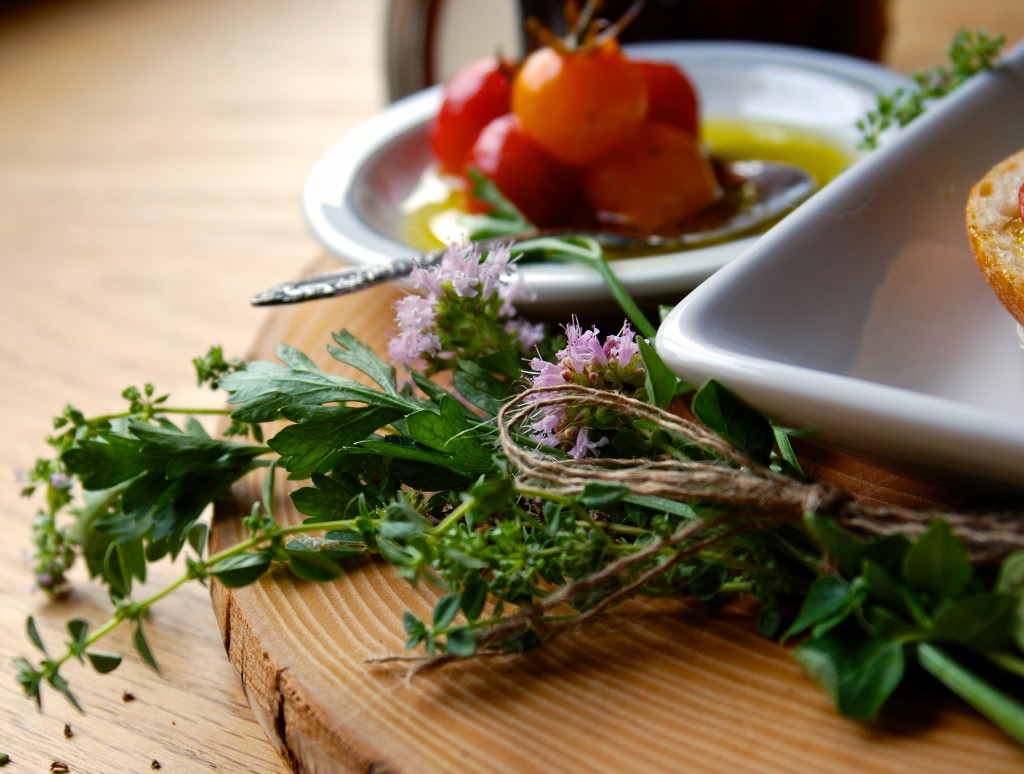
For your bounty of garden tomatoes, pack up a jar or two of these beauties. You will love them.
Herb Marinated Cherry Tomatoes
2 c. high quality olive oil
5 cloves garlic, crushed
1 t. crushed red pepper
2 sprigs each fresh thyme and oregano
1 t. mixed peppercorns
1 t. flaked sea salt (I used Maldon smoked)
2 pints Cherry Tomatoes
The Cherry tomatoes need to be peeled, and this was the most tedious part of the whole procedure. Score an X on the bottom of the fruit with a sharp knife and bring a pot of water to a boil. Place a large bowl of ice water nearby. Working in batches, drop the scored tomatoes in the boiling water for 15 seconds. With a slotted spoon, remove from the pot and immediately drop in the ice water. Once cooled, simply peel off the skins. Place the tomatoes in a quart canning jar with a few sprigs of fresh herbs. I liked using the flowering tops of the herbs in the jar.
In a small saucepan, warm the oil, garlic, red pepper, peppercorns and salt gently, stirring to dissolve the salt. Do not bring to a boil. Add the fresh herbs and remove from the heat. Allow to cool completely, then strain out the solids, pouring the oil over the tomatoes in the jar. Any remaining oil can be poured in to a carafe for other uses in the kitchen. Cover the jar and give a gentle shake, then allow to sit at room temperature for 2 hours. Refrigerate for up to two weeks. I doubt they’ll last that long.
You will see the oil solidify in the refrigerator. This is normal. Allow the jar to sit at room temperature for a short time before serving to bring the oil back to liquid.
November 23rd, 2012
| 1 Comment »
Magic October is gone, the artist’s palette splashed vibrant and rich, in every direction we looked. The season of brown replaced it, and the darkness falls predictably, knocking us backwards in to quieter evenings, thicker clothes, retrospection. Thanksgiving came as early this year as it possibly could; beginning on a mild note in the morning with temperatures near 60 degrees. By afternoon, the wind had stripped the mild weather away, and as dusk fell across countless laden tables of bounty, snowflakes began dropping from the sky, making photos like this nothing but a memory.

I’ve been cooking quite a bit, but not jotting down recipes, or taking much beyond a quick iPhone photo for my Instagram page. Then, I’m not sharing those on Instagram Friday anymore, either. In struggling with the whys of this blog, and trying to figure out a method to jump-start my creativity again, I came across this post from Jacqui that sent my heart scurrying. If there could be truer words spoken about what is in my mind in the moment -although there’s far less about tacos than in Jacqui’s- I don’t know where I’d find it. In brief bullets, she knocked one out of the park, and has left me questioning even more which direction my little corner here is going.
And it’s now way deep in November. I’ve watched in previous years of my life how this 11th month has silently bound me to suffocation in a dark melancholy, but in recent years have seen a more forgiving approach to the slow decline of natural light. Have you ever read this essay from Jeanette Winterson? It’s all about embracing winter darkness and appreciating what happens after the sun goes down.
“We have all experienced negative darkness – those long stretches of the night when we can’t sleep, and worry about everything, and so we know that “dark time” can seem interminably long, compared with daytime. Yet this slowing of time can be the most relaxing and beautiful experience. Spending the evening in candlelight, and maybe by the fire – with no TV – talking, telling stories, letting the lit-up world go by without us, expands the hours, and alters the thoughts and conversations we have.”
Since finding it many years ago, there has been much more to discover about darkness; and I realize that fighting the cold, the brown and the ennui that November brings only tends to make those aspects of it more pronounced. This November has been very kind; it’s been mild, warm even, and there have been days of ample sunshine that the cats love to bask in. Really, there wasn’t much to complain about with this 11th month.


But I was pleased to see the snowflakes yesterday. Crazy as it sounds, I’ve been impatient for real cold. For my cross country skis and sweaters and candlelight twinkling against windows reflecting pale apparitions of white. I’m a girl of seasons, born deep in my blood and others may find Winter contentious and difficult, but it will arrive with it’s own fury and grace regardless, and welcoming the season without fight is far less tiresome.
And this blog? Well, I’ve got some ideas planned for the next six weeks or so, a fun giveaway for my readers and some good old fashioned Christmas treats to share. And then…. poof! The blog, as we know it, will be gone and once again a Phoenix will rise from the ashes, hopefully by the time the first month of 2013 ends. I’m churning with ideas and plans and am quite excited to see how it all comes out on the other end.
So…. how about a recipe? A perfect one for this time of year, these Sweet Potato Biscuits are wonderful to nibble on with morning coffee, or as an amazing addition to any holiday table (I can only imagine how delicious these would be with turkey and stuffing….) They’re a cinch to make too. Who doesn’t love that?
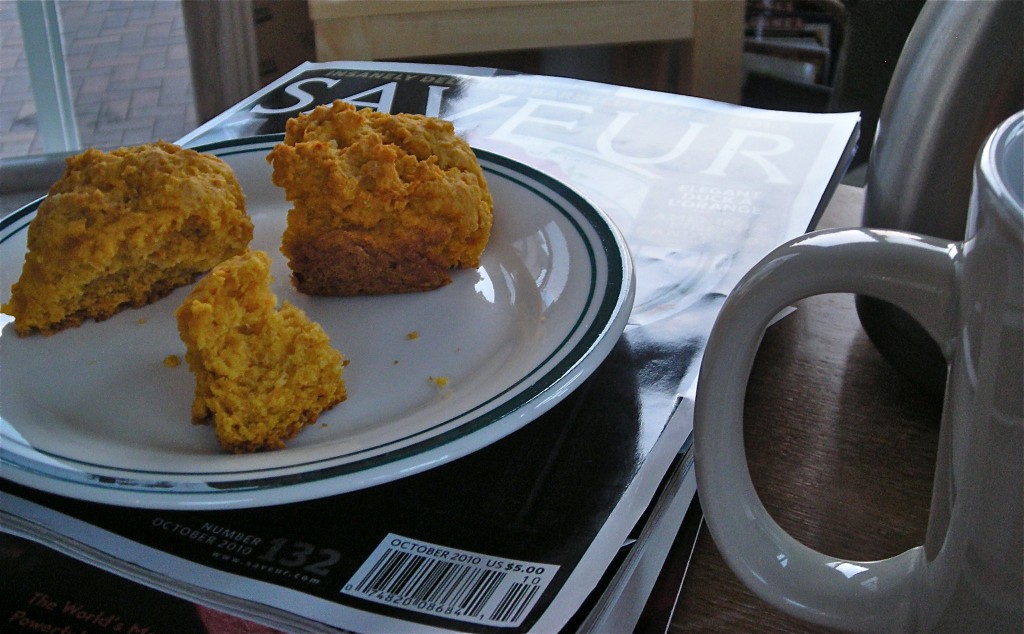
Sweet Potato Biscuits
Yield: 12 to 15 biscuits
One 3/4-pound red-skinned sweet potato (yam), peeled, cut into 1/2-inch cubes
1 3/4 cups all purpose flour
1 tablespoon (packed) dark brown sugar
2 1/2 teaspoons baking powder
1 teaspoon salt
1/2 teaspoon baking soda
Pinch of cayenne pepper
8 tablespoons (1 stick) chilled unsalted butter, cut into 1/2-inch cubes, plus 2 tablespoons butter, melted
1/3 cup chilled buttermilk
Cook sweet potato in medium saucepan of boiling salted water until tender, 8 to 10 minutes. Drain, cool, and mash.
Position rack in lower third of oven; preheat to 425°F. Butter bottom and sides of 8- or 9-inch cast iron skillet (or 8- or 9-inch round cake pan).
Whisk flour and next 5 ingredients in large bowl. Add cubed butter to flour mixture; toss to coat and rub in with fingertips until mixture resembles coarse meal. Whisk 3/4 cup mashed sweet potatoes and buttermilk in medium bowl. Add to flour mixture; toss with fork. Gather mixture in bowl, stirring gently until dough comes together. Using your fingers, press any remaining flour in to the dough, and gently turn it out in to the prepared pan, pressing it to fit. Score the biscuit dough in a pie wedge shape.
Brush tops with melted butter. Bake until puffed and golden on top and tester inserted into center biscuit comes out clean, about 22 minutes. Cool 10 minutes in pan. Turn biscuits out and gently pull them apart.
from The Kitchen Sink Recipes (and from Bon Appetit)
July 8th, 2012
| 1 Comment »
Summer kind of smacked us around this past week in Minnesota. We’re a state that lives for Summer, for beach time and hours spent outdoors engaging in just about any activity that means we escape our houses and enjoy the weather, but then there are those Summer days that are so hot, so thickly humid and uncomfortable that we have no choice but to stay home, avoid the triple digits outdoors and attempt to entertain ourselves while the sun tries to burn holes in our roof.
I’ve experienced some hot Summers in my lifetime; 1988 was a blistering hot Summer that saw temperature records fall by the score, knocking out ones that had stood the test of time since the 1930’s. I was living in a third floor walk-up apartment with no A/C and I’ve never been so miserable in my life. One evening in July, as I sat out on the stoop with other exhausted and over-heated residents of our building, the night air at 10:30 was still hovering around 105°. Trying to sleep was impossible. At 3:30 that morning, I finally gave up and turned on the radio, only to hear that the current temperature was 88°. During that particular Summer, we saw a stretch of weather where the temperature did not fall below 85° for more than a week. At that point in time, central air-conditioning was still a novelty.
I don’t recall much about what I ate during that sweltering Summer, and having this cool, crunchy and fresh salad around might have made those awful days a bit more tolerable, but at that point in my life, my culinary exploits were just about non-existent. Thankfully, for our current heat wave, and after a quick and sweaty trip through the Farmers Market, we were stocked to the hilt with fresh greens and lettuces and crisp vegetables, making this dish a mainstay of those sticky days blessedly spent inside our comfortable, fully air-conditioned house.
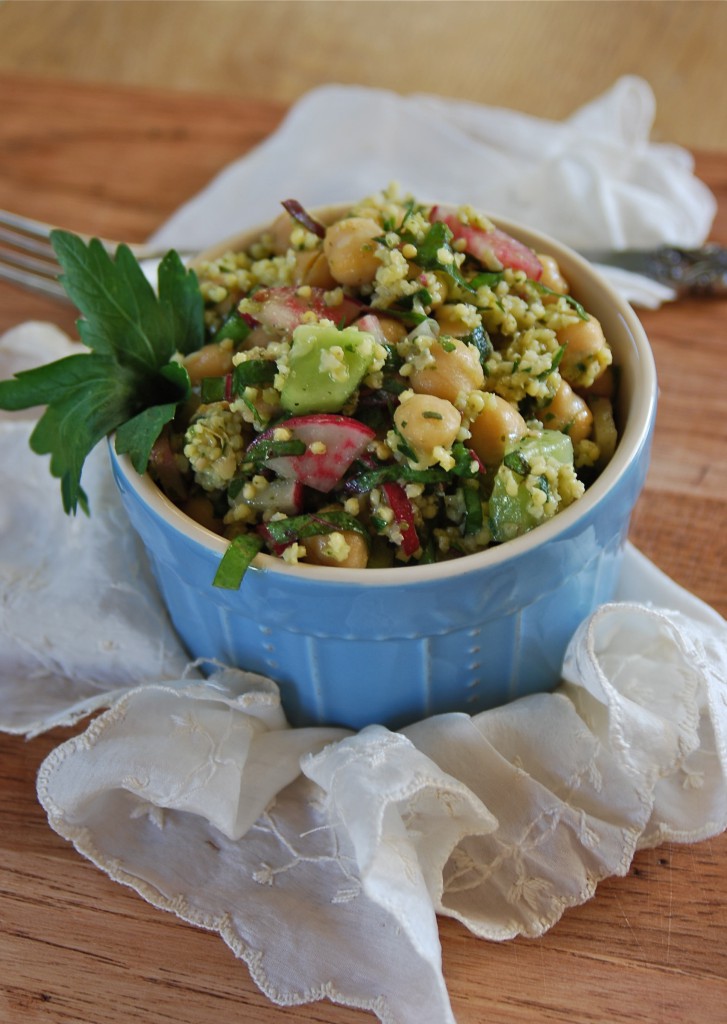
Not familiar with millet? Most of us in the USA see it only in birdseed, and that’s a sad fate for us humans, but terrific for the birds. Millet is widely cultivated in the form of pearl millet in India and parts of Africa, and is popular there due to it’s high productivity and and short growing season. In the USA, the most widely cultivated form of millet is proso millet, grown and used as birdseed. Millet is an ancient grain, known for being the least allergenic and most digestible of the gluten-free ancient grains that are becoming more popular. Millet is high in fiber and all the B vitamins, iron, calcium and zinc. It cooks in less time than quinoa and has a pleasantly sweet and nutty flavor.
This salad, born of desperation and some choice nightmares over stressful memories of past sticky summers, made our stretch of housebound days feel a bit easier. Even in the cool comfort of home, with the heat and humidity kept at bay by closed shades, eating becomes almost an afterthought. There’s no comfort in foods that are heavy or rich; no desire for flame or heat, and when the mood strikes to eat something, it’s good to just reach in the refrigerator and pull out a bowl of summertime goodness. The crunch and snap of fresh vegetables, the headiness of herbs cut straight from the garden outside your door and a blind eye turned from the weather forecast was welcome relief as the calendar page turned to July.
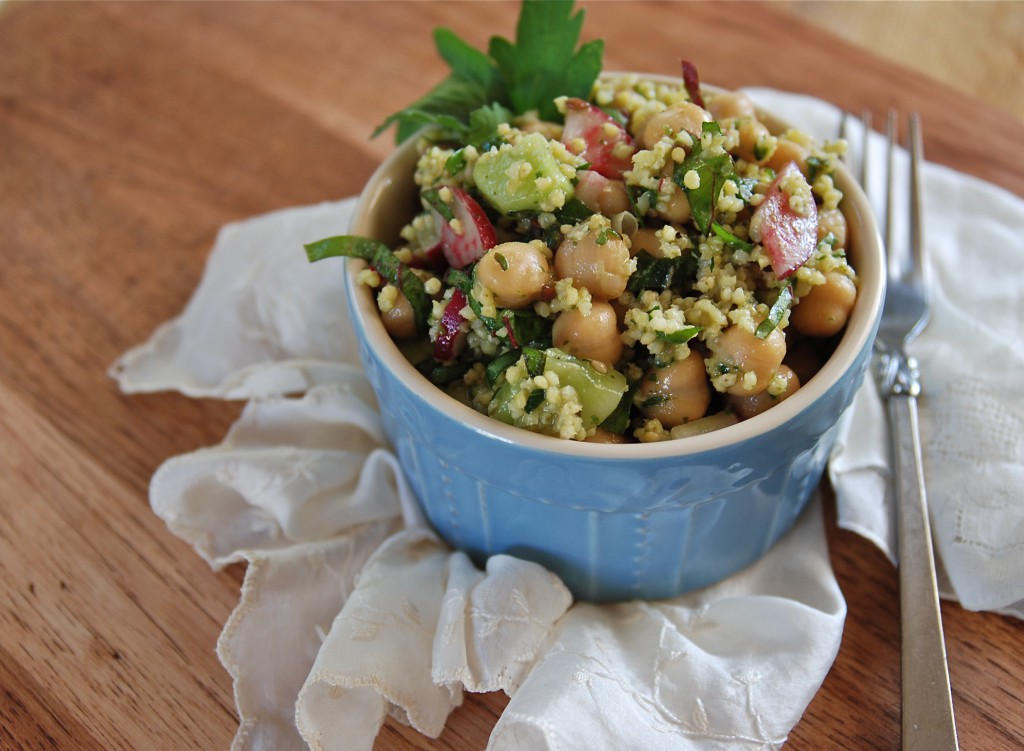
This salad is endlessly versatile, and if Millet isn’t available, you can use just about any small grain you wish. With the wide variety of fresh vegetables in season, as well as delicious greens, putting your own personal thumbprint on this salad is a cinch. I loved the addition of the radish greens to the salad, offering their unique peppery bite, but if you use them, seek out organic radishes to insure that the greens aren’t laden with pesticide residue. And as always, with time in the refrigerator, this salad takes on a lot more flavor.
Now we’re all set for the next heat wave. Let’s just hope it’s not too soon.
Millet & Chickpea Salad
1/2 c. raw millet
1 15-oz can chickpeas, drained and rinsed
1 small cucumber, peeled and diced (remove the seeds if desired)
1 small bunch radishes and their greens, washed and sliced
1 c. fresh chopped herbs such as basil, oregano, thyme and parsley
1/4 c. good quality olive oil
2 T. white or red wine vinegar
Sea salt and fresh cracked pepper to taste
In a small saucepan, bring 1-1/2 cups of water to a boil. Rinse millet in a wire mesh strainer until the water runs clear. Add millet to boiling water with a generous pinch of salt. Bring to a boil, reduce the heat and simmer for about 10 minutes. Test the grains. They should still be firm, with a bit of softness, like rice. All the water might not be absorbed either. If tender, remove from heat and drain remaining water. Spread cooked millet on a parchment lined baking sheet to cool.
In a large bowl, combine the cooled millet, chickpeas, cucumber, and radish, greens included. Whisk the oil and vinegar together in a small measuring cup, season with salt and pepper. Pour over vegetables and toss to coat. Taste and season with more salt and pepper, if you wish. Add half the herbs, toss together. Chill for about an hour. Taste before serving, adding more seasoning and herbs to boost flavor.
July 5th, 2012
| 4 Comments »
Cauliflower is so endlessly versatile, and to think up until a few years ago, I’d only eaten it raw or boiled. Boiled? Ugh. Steamed is a much better, albeit bland, option, but if you allow it to go too far in the steamer, it’s lack of inspiration becomes legendary. The epiphany, thankfully, was the pan of deeply roasted cauliflower that changed my mind about the stark white florets forever. I’ve tried it mashed like potatoes, and also pureed smooth with parmesan for a creamless alfredo sauce. But time and again, I placed a pan loaded with it in to a hot oven and devoured the results.
That was about it for that vegetable, and I was fine with it. I could eat cauliflower year-round, and I do, but now with a few new methods in my arsenal, I can enjoy this vegetable a whole lot more.
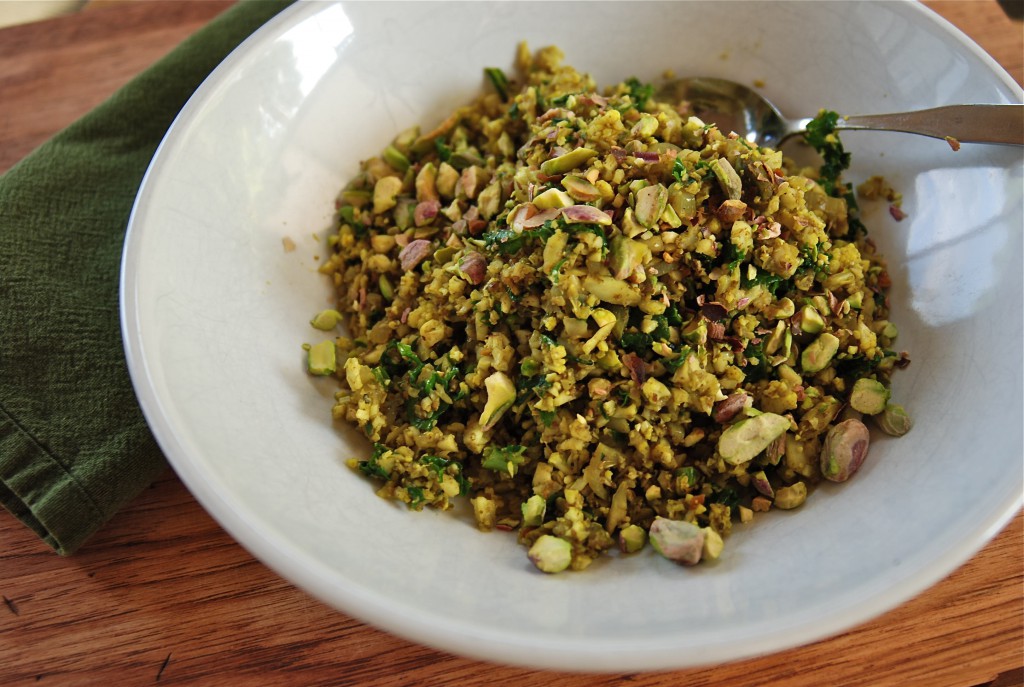
I came across this fried ‘rice’ recipe for Cauliflower on Shanna’s blog and knew that I had to get that going in my own kitchen. While I do love fried rice to the depths of my heart, it’s best when you have cold, cooked rice on hand and that’s not just something that materializes in this kitchen every day. But a head of cauliflower, ground in a few pulses in your food processor and mixed with the same type of seasonings in a hot wok can be a dynamite substitute, with a lot less calories and carbs.
And simple doesn’t even do this justice. It’s ridiculous how easy and quick this is. I spent more time prying the leaves from the core of cauliflower than any other aspect of putting this together, including chopping an onion. Given that you’re basically pulverizing the vegetable, you can use the core of it as well and no one would ever know the difference. In less than 10 minutes after heating up my wok, we sat down to steaming bowls of this fragrant meal.
Shanna has two options for this recipe on her blog, which is a wealth of beautiful writing (with a love story that’s almost as good as ours…..) and this base of ground cauliflower could really withstand just about any treatment to create your own version. I made a rich curry flavored dish, enhanced with ground pistachios for flavor and as I tossed and cooked it, inhaling the fragrance from the wok, I started thinking of all sorts of vegetables I could add to this to make it better and deeper in flavor, and in a second round of this simple meal, I added in some leftover vegetables from a coconut curry stir fry that Griffin had made, as well as a few handfuls of cold rice and the results were equally spectacular. This will be a new favorite in our house, you can bet on that.
Another mind-blowing option for Cauliflower that I’d been thinking about lately is to prepare it on the grill. I’ve seen methods of doing this by slicing through the head, creating a ‘steak’ and laying that on the grill. In my attempt to cut my Cauliflower though, my ‘steaks’ broke apart, leaving me with no other choice but to toss them on my grill plate to cook. Probably one of my best purchases for outdoor cooking, my cast iron grill plate lays directly on top of the grate and is perfect for cooking all manner of small foods; I can grill peppers and onions for fajitas, asparagus without losing any stalks, mushrooms, small fruit and a wide range of other foods, and it was perfect to create this smoky, sensational grilled cauliflower. I could barely contain myself from eating the entire bowl of it.
My most favorite marinade to use on grilled vegetables is a spicy mustard vinaigrette, brushed or tossed with the vegetable prior to being placed on the grate. It imparts terrific flavor, with just a bit of punch from the mustard. I’ve found that it works well on almost every vegetable I’ve ever grilled. Which, admittedly, has been A LOT. I love to grill just about anything.
Cauliflower Fried Rice
1 small head cauliflower, leaves removed and broken in to large chunks
1 small onion, diced
2 garlic cloves, minced
1 T. fresh ginger, minced
1 t. crushed red pepper flakes
Coconut oil for cooking
Soy sauce and sesame oil to finish
Place the cauliflower in the work bowl of your food processor and pulse to break it down. You want small pieces but not too deeply ground up. It happens fast too, and I need about 3-4 good pulses before it’s perfect.
Heat a small amount of coconut oil in your wok, or other large deep skillet. Add the onion and cook, stirring continually, until it’s softened, maybe 5 minutes tops. Add the garlic and ginger and cook, stirring, for several more minutes. Add the cauliflower and stir to mix everything up. At this point, once the cauliflower is warmed, you can be done. I cooked it through a bit so it wasn’t completely crunchy, retaining just enough bite to be toothsome. It’s entirely up to you.
Drizzle the cauliflower with a bit of soy sauce and sesame oil, if desired, before serving.
RECIPE NOTES: This can be treated like any fried rice recipe, using vegetables to bulk up the finished product. The variations you can make are positively endless.
June 28th, 2012
| 21 Comments »
In moving past the continual consumption of meat with our meals, it brings to light an entirely new way of going out to eat, as I’m left wondering how up to date any restaurant will be with their meatless options. There are those places that soar, offering a wealth of meat-free entrees that dazzle, while others places rely on pasta dishes as their sole vegetarian fare.
Pasta isn’t bad, mind you. I do enjoy it. But these days, having just a pasta dish or two with vegetables as your meatless menu offering is pretty unimaginative for a restaurant.
But that being said, pasta has it’s virtues.
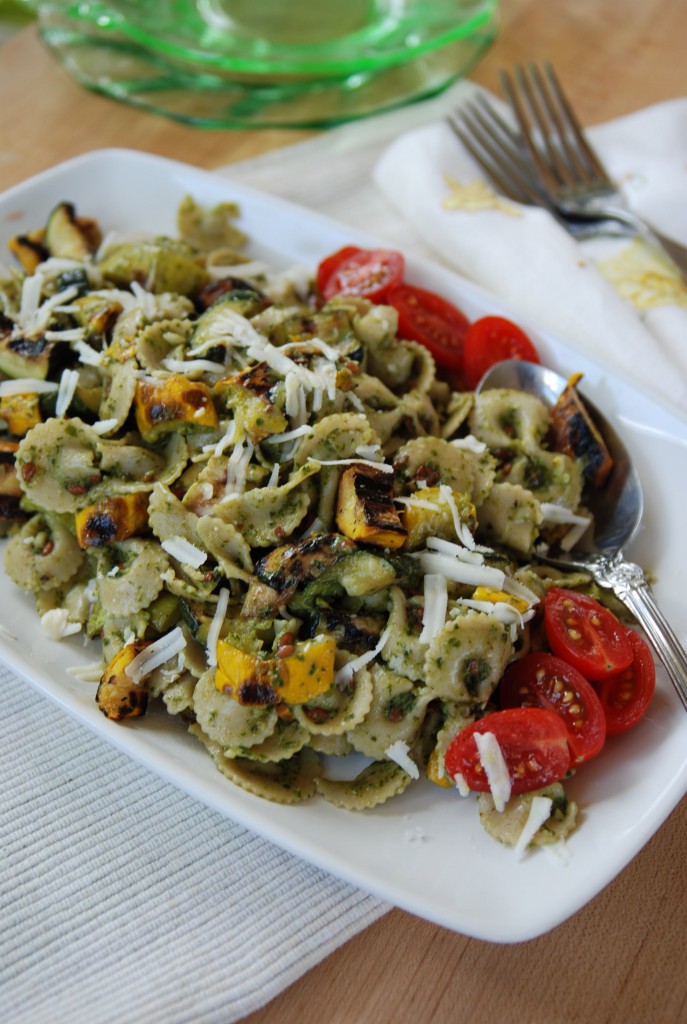
Hodgson Mills Pasta is running a recipe contest on Pinterest and I’m participating with this recipe. Are you on Pinterest? There’s a special page for Hodgson Mills that has all the recipe entries on it.
I’d appreciate a vote if you’re so inclined. There are some pretty nice prizes. You must go to the page linked above to vote. Pinning this recipe from my blog won’t count.
And Hodgson Mills was nice enough to offer $25 dollars of assorted pasta to one lucky winner from my blog. That’s a lot of pasta! All you need to do to enter is leave a comment on my blog stating your favorite way to prepare pasta (US residents only, with a valid mailing address, please) You have until Thursday July 5th to leave a comment and be entered for the giveaway. I will choose one commenter through Random.Org and contact you via email, so be sure to leave that information. Hodgson Mills will ship directly to you.
Do you love your pasta rich and cheesy? How about chock full of rich tomato sauce and italian sausage? Plain with simple garlic and olive oil? I’ve been enjoying Hodgson Mills whole wheat pasta with summer fresh pesto and grilled vegetables, and creating this recipe was a deliciously fun way to use up a huge box of basil that I’d been given. Food gifts are the best, aren’t they?
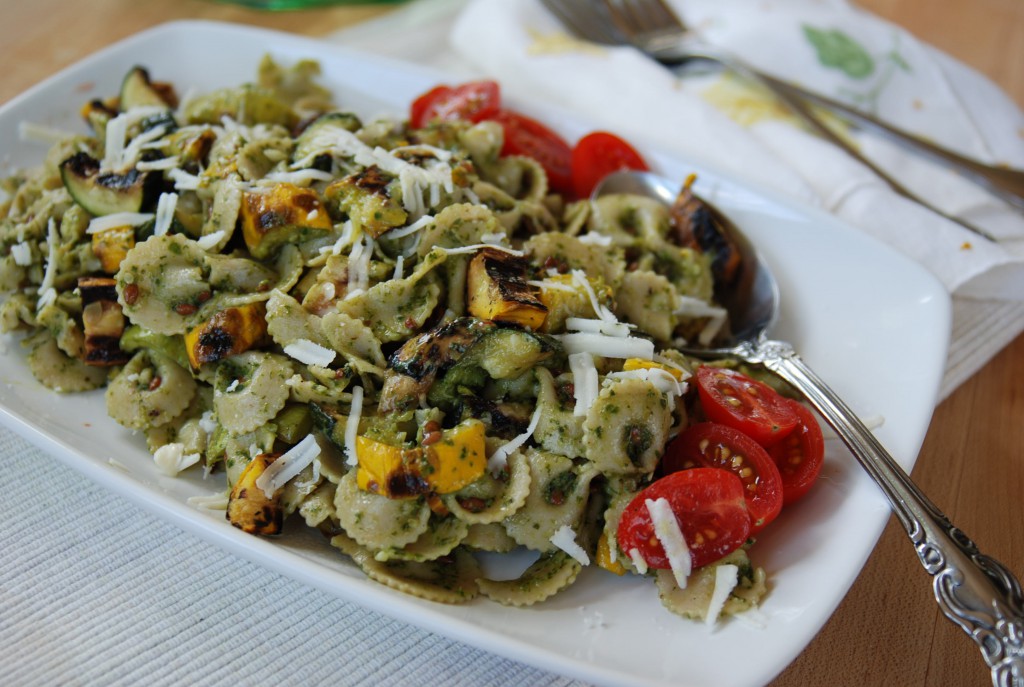
Summer Pesto Pasta with Grilled Zucchini
1-lb Hodgson Mills Bow Tie Pasta
2 medium zucchini
1/4 c. olive oil
2 T. fresh squeezed lemon juice
1 t. prepared spicy mustard
1 c. prepared pesto (or make your own from scratch, method included)
Fresh Cherry tomatoes, optional
Prepare zucchini:
Heat gas grill on high for 10 minutes. Just prior to cooking, reduce heat to medium-low and brush grill grates with canola or other neutral oil. Whisk together the olive oil, lemon juice and prepared mustard; set aside. Wash zucchini thoroughly and trim off root end. Slice zucchini the long way into three strips about 1/4″ thick. Brush with the mustard oil and place, oiled side down on prepared grill grates. Cook without moving for 5 minutes. Using tongs, carefully turn zucchini over and continue to cook until tender, about 7-10 minutes more. Remove from grill and set aside to cool. Cut zucchini in to bite sized pieces.
For the Pesto:
4 cups loosely packed basil leaves
1/3 c. olive oil
2 T. shredded parmesan cheese, plus more for finished pasta.
2 T. pine nuts (optional)
1 T. kosher salt
1 t. fresh cracked black pepper
Place all ingredients in the work bowl of a 2-quart food processor. Process in pulses until thoroughly combined, adding more olive oil if needed and scraping down sides as necessary. Scrape prepared pesto in to a bowl and press plastic wrap over the surface to prevent discoloration.
In a 6-quart stockpot, bring water to a boil. Add pasta and salt, if desired. Cook pasta until just al dente. Reserve one cup of the cooking water, drain pasta and place back in the stock pot. Add half the pesto to the hot pasta. Drizzle in a little of the cooking water and stir to combine, adding in a bit more cooking water if needed. Add more pesto if needed, along with the cooking water until it’s to your preferred consistency. Stir in the grilled and chopped zucchini and more parmesan cheese, if desired. Taste and season with salt and pepper. Chill pasta for up to an hour before serving, or overnight if desired. Taste prior to serving to adjust for seasoning, and add sliced cherry tomatoes for garnish and color.
June 27th, 2012
| Comments Off on raw pea salad with jicama, cucumber & mint
I’ve never liked peas. Never. But again, as always, I’d been exposed only to frozen cooked peas, often overdone and alarming in their color and consistency. Even the smell made me want to gag.
But then again, up until just last year, I’d never had peas fresh, raw and straight from the shell. I popped this raw pea in to my mouth in a moment of bravery and bit down. It was, obviously, a revelation, and the continuation of these eye-opening food experiences as an adult has been nothing short of wondrous, proving that it is never, ever to late to learn about new foods.
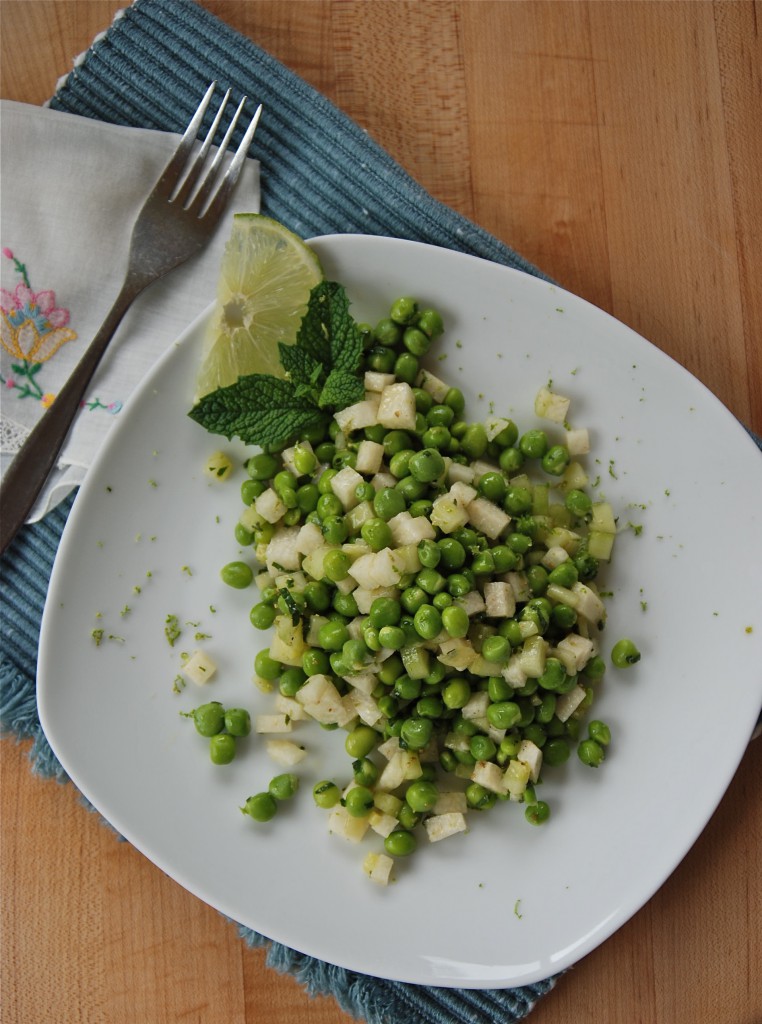
Still, I’d never decided to push myself in to making something with raw peas until this summer when the idea began forming in my head for this salad. Coupled with the opening day of the Shoreview Farmers Market near us (and a day off of work for me) I picked up two baskets of sugar snap peas and spent an ungodly amount of time shelling them. As I stood there, thumbs slipping through the shells, watching the peas tumble in to the water, I thought back over time to how many women had done this task before me, sitting on a breezy porch or back steps in the warmth of late Spring, a basket of peas in their lap listening to the ‘plup plup’ of tiny peas hitting the bowl. I love the nostalgia of food, how the simple means of connecting with our sustenance has been practiced for generations, going back in time when eating local wasn’t considered trendy because it was all anyone could ever do. Sometimes I long for that ability to connect, to be caught deeply in a season of plenty sitting right outside my kitchen door.
Maybe I was born in the wrong era.
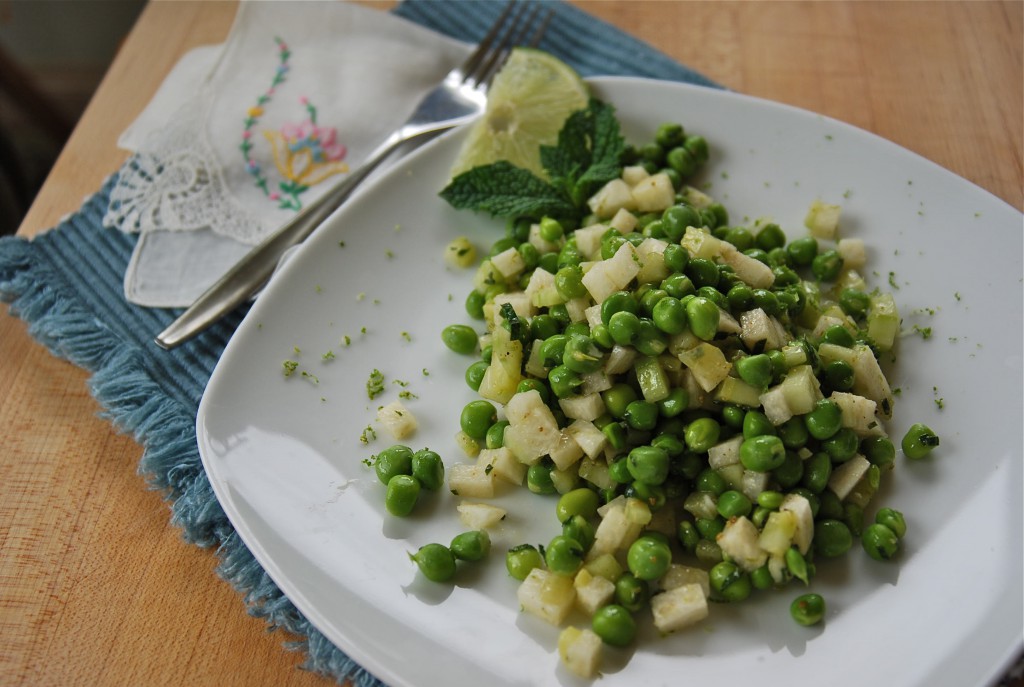
I couldn’t begin to tell you where the urge for this salad came from; it arrived with the heat blasting Minnesota, wringing us out in humidity and a continual dance of thunderstorms bringing severe damage, flooding and devastation. I’ve been shocked and saddened every day as photos flit across my screen showing the aftermath of these storms. Amidst all the chaos and rain-soaked days, the idea shimmered like the waves of sunlight, boiling up in me and urging itself along. Peas. Jicama. Cucumber and especially the mint. For some reason in my head, it all worked so I shelled, chopped, mixed and crossed my fingers. A squeeze of fresh lime juice, a few shakes of cumin and salt and a spoon lifted to my mouth assured me that my mind was right, as right as heat in the summertime and peas that will always need shelling. Right in the ways of that only simple can be.
I’d be completely at home in the wide open country, on an open back porch under the sunshine and immensely fresh air. I know I would. But in my lifetime that’s unlikely to happen. I won’t be picking sugar snap peas in my garden, warm in the heat, listening to them fall in a bowl but rest assured, I will be making this salad again. From the first bite, to the next and finally a stolen spoonful the following day to remind myself of how good it was, how fresh and summery it tasted in my mouth, it was so perfect, so crunchy sweet and all mixed up with flavor and snap. Here’s to the joy of Summer time.
Raw Pea Salad with Jicama, Cucumber & Mint
3# shelled sugar snap peas
1 c. english cucumber, peeled and diced fine
1 c. jicama, peeled and diced fine
1/4 c. chopped mint
1/3 c. good quality olive oil
3 T. fresh squeezed lime juice
1 T. fresh lime zest
1/2 t. ground cumin
Sea salt and fresh ground black pepper to taste
In a large bowl, combine the peas, cucumber, jicama and mint. Whisk together the oil, lime juice and zest, cumin, salt and pepper. Adjust to taste and pour over salad. Stir to combine, adjust salt and pepper. Chill for an hour before serving; taste for seasoning.
This salad was excellent served atop a bed of fresh salad greens, too. The vinaigrette dresses the greens beautifully.
Once chilled, the olive oil will solidify slightly;
you can let the salad sit at room temperature for a few minutes if that doesn’t appeal to you.
June 19th, 2012
| 5 Comments »
I’ve been on a mostly plant-based eating plan for just over a year now and have no intention of ever going back to eating meat on a regular basis. I’m not against having a bit of it here and there if the mood suits me, but with a heightened awareness of how it deeply affected my health, I’m off of the stuff for the long term.
Trouble is, I’ve been searching for cooking inspiration and while I can find a great deal online in the blogs that I follow, I hadn’t come across a really good source until I serendipitously found Michael Natkin’s blog, Herbivoracious, and within a day’s time was invited to a local book signing with the author. Everyone who attended the event received a complimentary cookbook and several tantalizing bites from the simple and gorgeous recipes in the book.
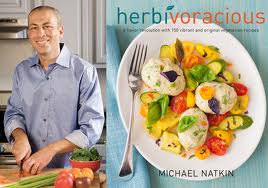
I haven’t devoured a cookbook like this in a very long time. I’ve purchased a few promising vegetarian cookbooks through used book stores, but have come away from them feeling uninspired, or worse, dismayed at the boring recipes. In our current state of food, with a wealth of ingredients available to us, fresh produce everywhere and home cooks hitting up the internet with abandon to share their stories and recipes, we shouldn’t feel like pasta and vegetables make up the bulk of a vegetarians meals, but that was the message a lot of vegetarian cookbooks still seem to send. I wanted something that reflected the modern cuisine, full of a wide selection of fresh ingredients, unique spices, terrific grains and a grown-up mentality towards consumption of plant-based foods. Just a few pages in to Michael’s book and I knew I’d found what I was looking for, breathing an excited sigh of relief. I immediately started marking pages, rich with inspiration, my mouth already watering over what was to come.
One aspect of this book that I love is that it mirrors my own cooking philosophy, in that a recipe should be a guide, and not a cut and dried interpretation of the finished dish. Michael clearly discusses ways to change up his recipes, suggesting additional ingredients or substitutions and encouraging the reader to utilize what’s on hand. Every dish is simple, yet elegant, running the whole range of time needed for completing the recipes from about 10 minutes to pull together an easy salad to longer, in-depth recipes for those special occasions. The book is full of advice on sourcing ingredients, caring for your knives, planning your meals and making your prep easier to manage; he covers so many little details that it makes the book more than just a cookbook, but something akin to treasured kitchen advice. The cover page is gorgeous, but if it gets torn, stained or otherwise in your exploration, the actual cover itself still has it’s beautiful logo. I like that in a book.
Even while still at the book signing event, chatting excitedly with a few friends and paging through the book, I came across the Golden Beet Tartare recipe and knew that would be tops on my list. I adore gold beets and it sounded like a delicious summery salad for a hot, sticky day.
I wasn’t wrong at all about that. The heat is on, Minnesota. It’s time to stay cool, right?
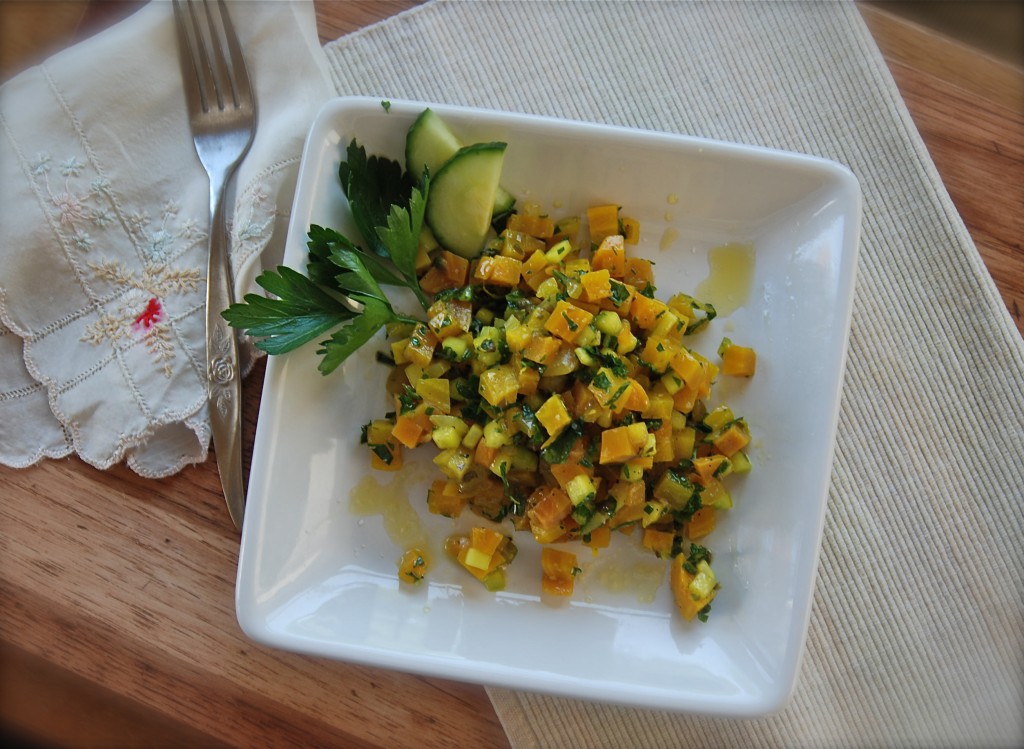
Fresh and bright, this simple salad has crunch and texture galore, the rich earthy taste of beets and mellow cucumber and onion. The original recipe called for raw red onion which I don’t ever use as I dislike raw allium in anything, so I substituted grilled vidalia onions with just enough snap remaining. Once it was all pulled together I thought it still needed a bit more color to jazz up the visual aspect, so I finely chopped some kale leaves that gave it the perfect balance.
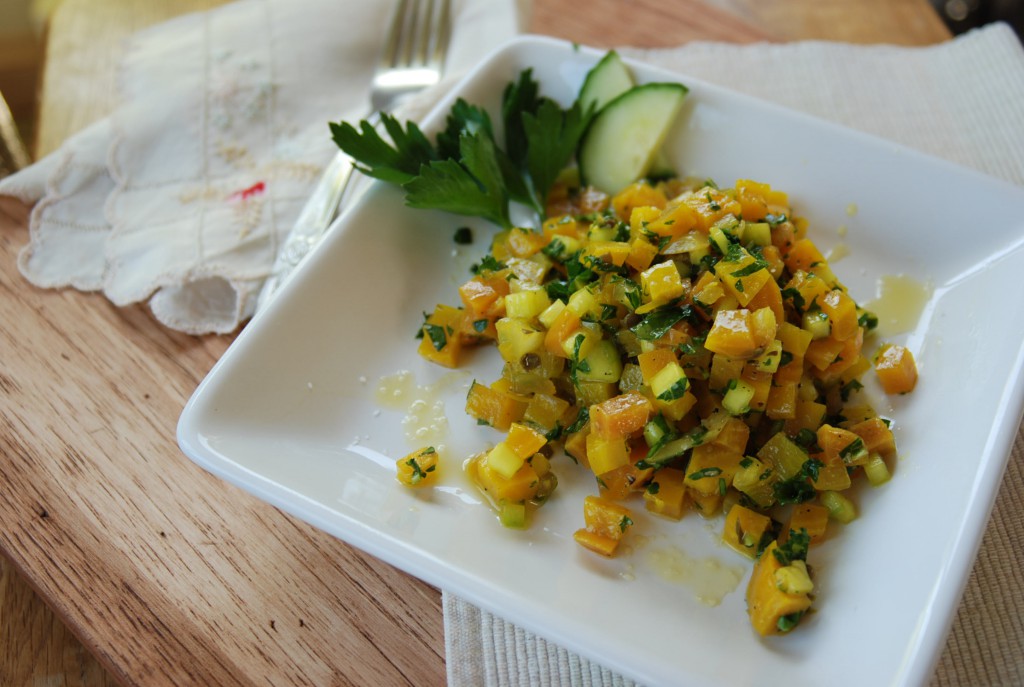
I can foresee this recipe becoming a regular in my kitchen, giving it repeated appearances and endangering my endless love of beets. With the upcoming beet season looming, and such pretty colors and patterns in this nutritious and healthy root vegetable, I vow to practice enough restraint to keep it fresh and desirable so we can continue to enjoy it’s benefits. Right now, I’m fighting off the urge to consume the entire container of this salad. A definite winner.
Please visit Michael’s site, for his complete recipe for Golden Beet Tartare. I’m going to give you my method, which, as Michael encourages, is my own take on the recipe.
Golden Beet Salad
3 medium beets, tops trimmed (save them and eat them if it’s your thing)
1/2 an English Cucumber, peeled and finely diced
1/2 medium Vidalia onion, grilled but still somewhat crunchy, finely diced
1 T. capers, drained and minced
1/2 c. kale leaves, finely minced
3 T. olive oil
1 t. fresh lemon zest
1 T. fresh squeezed lemon juice
1 T. fresh chives, minced
2 T. fresh parsley, minced (I used flat leaf; curly would work just as well)
Sea salt and fresh ground black pepper
Heat oven to 400°. Place a square of foil in an 8×8 baking pan and put beets in the foil. Drizzle with a bit of olive oil and fold the foil over the beets. Roast the beets until a knife inserted in them slips out easily. The time will depend on the size of your beets, but plan for at least 45 minutes to an hour. Allow the beets to cool, then peel and dice them.
In a bowl, add the beets, cucumber, onion, capers, kale, lemon zest and juice, chives and parsley. Drizzle in the oil, add a few shakes of sea salt and grinds of pepper. Stir to combine and taste for seasoning. Allowing the salad to sit for a few hours, or overnight before serving will deepen the flavors. Adjust seasonings before serving.
DISCLAIMER:
I received a complimentary copy of Herbivoracious from attending the book signing event.
All opinions and feedback about the book are strictly my own.
|


