November 15th, 2010
| 3 Comments »
Let’s think for a moment, about fast, simple meals with a high nutritional content. Let’s think about those first minutes in the door after a day at work, when your stomach is beginning to show signs of distress and you don’t even want to change your clothes before deciding on dinner. Let’s think, for just a minute, that you don’t pick up the phone and call the pizza guy.
Instead, you reach for a package of gnocchi.
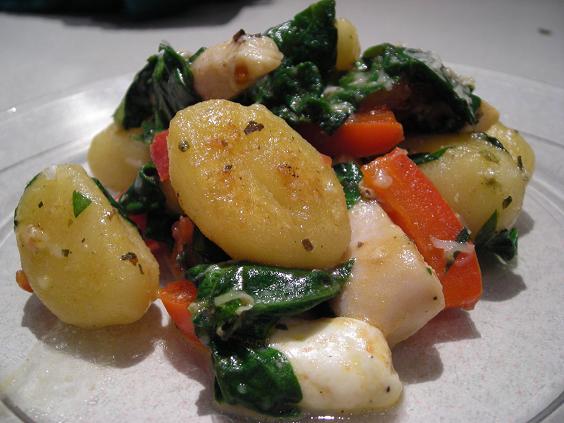
Gnocchi are potato dumplings and extremely versatile. Cooked potato is mixed with flour to form a dough, which is then rolled out and cut into the dumpling shape. The gnocchi are boiled like pasta. They can also be made with yams and sweet potato, possibly squash too. I’ve never made gnocchi from scratch. From what I understand it can be a bit challenging to get the texture right; too much flour and the dumplings are dense and heavy, too little flour and they fall apart.
Gnocchi can be used in many similar ways as pasta- added to soup, turned into a delicious gratin with assorted vegetables or made into a quick meal, sauteed with your favorite vegetables and boneless chicken breast if you so desire. That’s what I did in the photo. It was an amazing dish, and it came together very fast and was full of wonderful flavor.
They’re available frozen, or in vacuum sealed shelf-stable packages. I’ve seen them in regular and whole wheat versions.
Gnocchi In a Flash
adapted from Eating Well magazine
1 pkg shelf stable gnocchi
2-3 boneless chicken breasts, cut to strips (meat is totally optional in this dish)
1 medium red pepper, cored and seeded, cut to strips
1 bunch spinach, washed and de-stemmed (equal to a 10-oz bag)
1/4 c. canned diced tomato with italian seasonings
1/2 c. fresh mozzarella, cut into small dice
1/3 c. fresh grated parmesan cheese
Fresh basil to garnish
Season chicken breast strips with salt and pepper. Heat oil in 10-inch skillet, add chicken and cook, stirring occasionally, until strips are cooked through, about 5 minutes. Remove to bowl. Add red pepper and cook 3-5 minutes until tender. Add to chicken. Wipe out skillet with paper towel and add about a teaspoon of oil. When hot, add gnocchi and cook about 5 minutes until browned and slightly puffy. Add chicken and pepper to pan, and in bunches, add in spinach, stirring quickly until it’s all wilted. Toss in diced tomato and mozzarella cubes and shave some parmesan over the top. Stir to mix and allow to cook for 3 minutes or so until hot. Serve immediately topped with fresh basil.
Change up the vegetables according to your preferred tastes.

November 7th, 2010
| 9 Comments »
My apologies for starting this post out using the word ‘Winter’ in the title. Those of us in the northern climes are still experiencing a gorgeous Fall- and the sunshine that we’ve had through the early part of November is dazzling. And so unexpected. November around here is equated with a dense gray expanse of sky that rarely seems to break. It’s a gloomy month, usually, and for the sun and blue sky to be greeting us each morning is a gift. A true weather gift. One that I am savoring with all my might.
But then I go and say ‘Winter’.
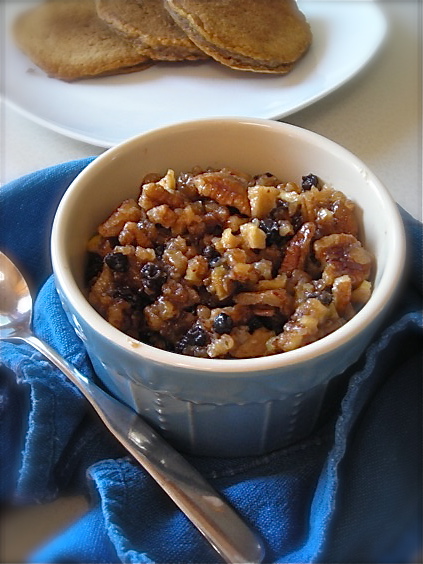
But bear with me friends, as you know I wouldn’t steer you wrong. Even with the still mild days of November to wrap around us, my mind is gearing up for cold. It’s inevitable, and I think people are taking bets around here on when the first real snowfall will drop from that leaden sky that we know so well. The first snow that sticks, snarls traffic, makes people grumble inside…. we know how it is around here. We may have resided here all our lives but there comes that first coating of white and it’s like folks have wiped any memory of it clear from their heads.
Like who could forget something like this?

Sorry, there I went and did it again.
But the thing is, it’s coming and when it does, and we wake on those chilly Winter mornings craving all forms of comfort food to fill our Minnesota bellies with warmth, what you should be making is this simple and delicious compote. It tops so many winter breakfast foods like it was meant to be, like the way Winter will eventually lead us to Spring. A spoonful in your Oatmeal is heavenly; a spread across your pancakes, waffles or french toast is worthy of your best food-lovin’ eye roll and exclamations of ‘Oh dear! This is good!’. It’s endlessly versatile and needs no special ingredients. And if you make it in your flannel jammies, with thick slippers on your feet while the furnace hums it’s way to warming your home, it might just make those Winter mornings a bit more pleasant.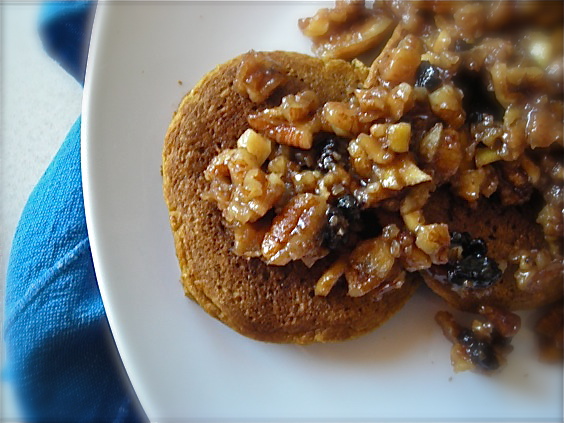
And as Minnesota goes, in the wintertime, we need as much of that as we can get.
Winter Fruit Compote
by Kate
1 medium tart apple, washed, cored and diced fine
1 c. chopped pecans
1/3 c. currants
1 T. butter
1/2 c. pure maple syrup
In a skillet over medium heat, melt the butter and add the apple. Saute for a few minutes until the apple is soft, then stir in the pecans and cook, stirring regularly, until the nuts are slightly toasted and fragrant. Pour in the maple syrup and reduce the heat to low. Cook, stirring occasionally until the maple syrup has been absorbed. Stir in the currants and heat through. Serve warm over pancakes or waffles. Will keep refrigerated for several days. If you can resist. Reheat in the microwave if desired. This tastes amazing if sprinkled with a light dusting of sea salt prior to serving. Something about that salty sweet crunch…..
KATE’S NOTES:
Winter pears, like Anjou or Red or even the Bosc would make a good substitute for the apple in this. Change up the nuts, use raisins instead of currants, or add other dried fruit. Toss in some shredded coconut if it’s your thing. Or even chop up an orange, mix it with dried cranberries and chopped pistachios and a dash of cardamom for an exotic option. The possibilities are endless, people. Endless.

October 21st, 2010
| 1 Comment »
I love finding new purposes for old, familiar products. Like Rice Krispies.

I loved this cereal as a kid, and of course, who doesn’t love the gooey marshmallow treats made with it? Loved those too, and my sisters and I would easily make pans of them to devour, as well as my friends and I as we got older. I recently was gifted with a large sack of Rice Krispies and have been searching for ways to use them up. Even if it’s free, waste is not something I’m comfortable with.
Griffin and I made a pan of Rice Krispie treats, and as an added flavor, I stirred about a half cup of butterscotch sauce into the butter/marshmallow mix. What a nice flavor! It added a lot of warmth and depth to them. We’re going to try hot fudge next and are expecting those to be equally as decadent.
I also love finding new recipes for old favorites. Coffee cake and I go wayyyyyy back; back to the little girl who quizzically looked at her Mom when offered a piece of coffee cake and said something to the extent of “But Mommy, I don’t drink coffee.” We had a tried and true Blueberry Coffee Cake recipe growing up. It was a stalwart, a non-negotiable breakfast/dessert that we trusted and utilized without question. Once my Mom found something in recipe format that she could trust, that her five darlings would eat without some form of revolt or complaint, she rarely deviated from it. But it’s been a while since I made that particular recipe of Mom’s because the last time I stirred it together and baked it, I found that I didn’t really enjoy it as much as I remember. It was good, but it wasn’t what I wanted in a coffee cake. I wanted moist and crunchy to work together; I wanted cake but I wanted muffin too, and I wanted fruit but I wanted more than just fruit. In short, I didn’t know what the heck I wanted. Or even how to make it happen.
Then the past, the present and the coincidence of having 2 pounds of Rice Krispies on hand to use up all came crashing together in one perfect serendipitous event.
I’m not sure where I came across this recipe for a Coffee Cake made with Rice Krispies as part of the base, but I printed it off and finally got mixing on it one morning. It’s certainly a simple concept; make a batter, top it with prepared jam, a bit more batter and then a crumb topping. Simple!
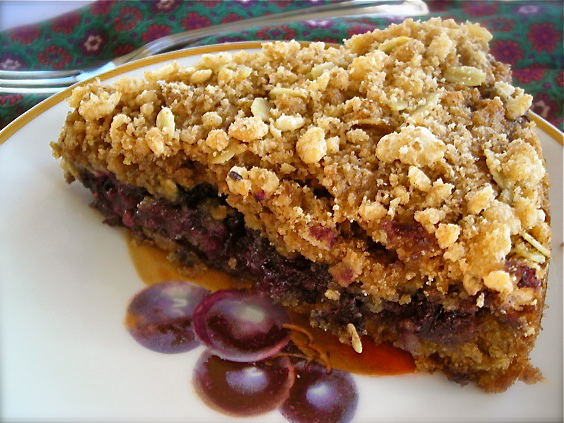
And delicious too! Here it was, the perfect, angels singing, clouds parting for the blazing sunshine coffee cake that my mind had conjured up before my hands had known how to create it. The Universe made it happen. Amen and amen. With this recipe, and the moist yet crunchy, cakey but sort of more muffin like, fruit but a whole lot more coffee cake that came from it will now be a regular occurrence in our kitchen. And the bonus part is, I know that Mom would agree. It was alchemy, magic and flavor all rolled into one.
Although the recipe called for blueberry jam, you could use any fruit spread you wish, and I imagine that pie filling would also be an acceptable substitute. It’s a perfect brunch option, or weekend treat and makes for an excellent dessert as well. We all agreed that it was a terrific way to use up some of the excess Rice Krispies we had on hand.
Blueberry Lemon Coffee Cake
3 c. Rice Krispies (or similar type) cereal
1-1/2 c. whole wheat flour
1/2 c. rolled oats
2/3 c. brown sugar
1 T. ground cinnamon
1 t. ground nutmeg
2 T. ground flaxseed (optional)
1/2 c. (1 stick) butter, softened
1/2 t. each baking soda and baking powder
1/4 t. sea salt
1 egg
1 c. buttermilk
1 T. grated lemon peel
2 t. fresh squeezed lemon juice
1/2 c. prepared blueberry jam
1 c. frozen blueberries (optional)
Spray a 9” springform cake pan with cooking spray. Heat oven to 350 degrees.
In a medium bowl, combine cereal, flour and sugar. With a pastry cutter or two forks, cut in butter until crumbly. Remove 3/4 c. and set aside.
To remaining cereal/flour mixture, add the baking soda, powder and salt and blend thoroughly.
In a small bowl or measuring cup, whisk together the buttermilk, egg, lemon peel and juice. Pour into the larger amount of cereal/flour mix and stir only until just combined. Spread about 2/3 of the batter in the bottom of the prepared pan. Evenly spread jam over batter to 1/2” of pan edge. Sprinkle blueberries over jam (if using). Dot remaining batter over fruit and gently spread to edge of pan. Sprinkle with reserved cereal/flour mix.
Bake for approximately 40 minutes, or until toothpick inserted into center comes out clean. Allow to cool in pan for 20-30 minutes, then release spring and gently slide cake onto platter.
September 15th, 2010
| 9 Comments »
As I write this, there’s quite a cool, blustery wind outside whipping the treetops around. I’m in fleece, and slippers. This morning after Mike arose at his customary hour of half-past the cat alarm, I pulled a wool throw over the quilt to snuggle under. It was raining, a cool breeze through the crack of the window left open was whispering it’s inevitable words to me: Fall is here.

Sometimes the change in seasons sneaks up on you, and other years it’s as if you awake one day and the very air around you is different. The sun seems to weaken, the air has a certain scent to it that hums of cooler nights and impending frost and you begin pulling open drawers holding clothes you almost forgot you owned. The jump from August to September was quick and precise. August kept showing us her gutsy heat and blazing sunshine, then with a swift turn of a page, September chased August away and said ‘There, there…. I’ll give you some relief.’ Instead of a cool smoothie for breakfast, now I want a cozy bowl of oatmeal. Soup recipes are more appealing. It’s time to bake, a warm oven competing with the breeze through the window. School buses rumble by on the road. There’s homework, earlier bedtimes, earlier sunsets.
I kind of got lost in August, only posting twice here. I’m sorry. It was a hard month for me, and the view from my eyes shrank considerably. I worked a lot, a crazy amount of hours. I slept, or tried to, a lot. It seems like the only thing I did at home was drink coffee and do laundry; I tried to stay cool in the terminal heat of the professional kitchen as the sun and humidity slackened the air outside, and I tried to keep my sanity through the seemingly never-ending parade of task after task after task. I sweated more than I ever have in my life. I missed my friends. I missed cooking in my own kitchen, the things I wanted to eat. I missed my life, quite frankly. I was caught in a vortex, and it was ugly. Then, like the seasonal change that’s happened outside, September brought it’s own reform to my life. Work slowed down considerably. On a few evenings I was able to leave while the sky was still light, miraculous indeed. I took some much needed time off and within a short weekend, there occurred several transforming events that filled the hollowness that had taken hold. I saw my friends. I became inspired. I met new people. I spent time with my family, splashing in the pool with Nina, snuggling in a hammock with baby Sara and getting that Love Bank filled to the brim. There were plenty of hugs and smiles. Life came back. And I took a hike.
  
And I spent some time in the kitchen. With apples.
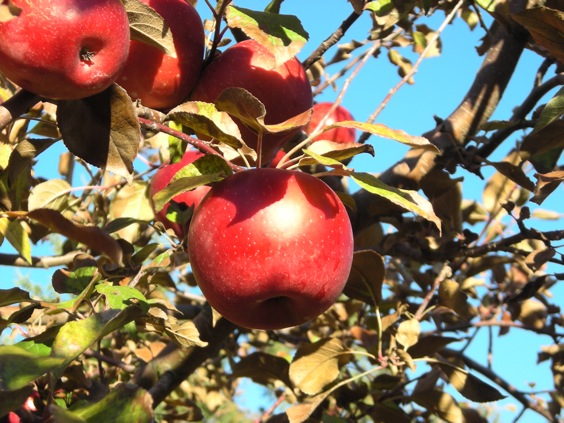
Making Applesauce with maple syrup and cinnamon.
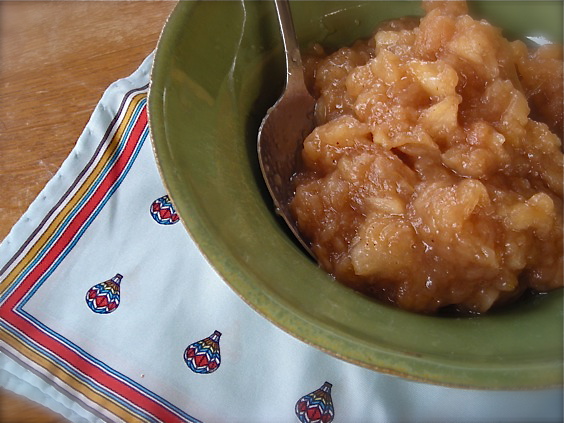
Really, can we be any more “Fall” than fresh Applesauce? Or anything with apples plucked right from an orchard tree? It’s quintessential. It’s perfect. It’s necessary. And this recipe is so, so simple. Any Applesauce recipe is, if you can manage the peeling and coring process required. I use one of those nifty devices that peels, cores and slices your apples all for the crank of a squeaky handle.
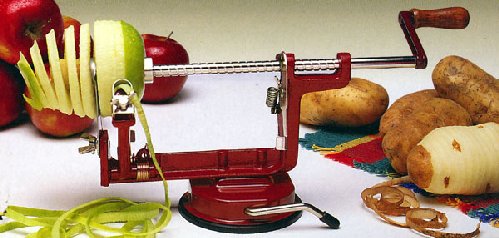 (photo courtesy of Nutrition Lifestyles) (photo courtesy of Nutrition Lifestyles)
I’ll tell you my friends, owning one of these is vital, even if I only pull it out in the Fall during Apple season. It makes any apple dessert almost like an afterthought because it does all the work for you. I placed it on the counter next to the stove, and as each apple came off the device, I simply broke it up right into the pot. In less than 10 minutes I had a 6-quart stockpot full of apple slices. I made an Apple Crisp too, and for almost the time it took to mix together the crumb topping and heat the oven, it was ready to bake. Kids love cranking the handle and watching their apples transform. And no, I’m not pitching anything, you blog-scoping watchdogs. Just telling it like it is.
But back to that Applesauce-
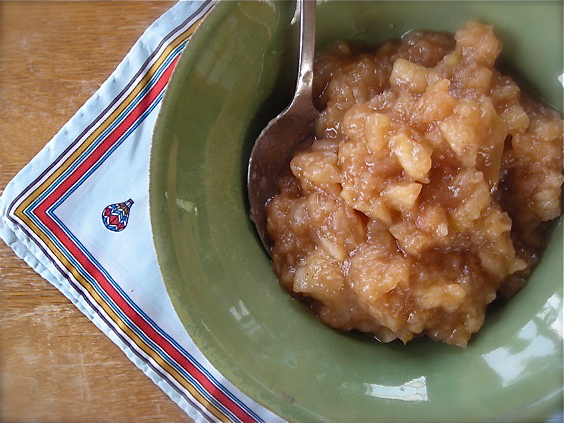
The recipe comes from Eating Well magazine. It’s three ingredients- apples, syrup and cinnamon. It takes about 20 minutes, not counting the time spent prepping your apples. After it was cooled I simply placed it in the fridge because I know we will devour it so there’s no need to think about canning. Does your family love applesauce, with thick chunks of fruit, a hint of maple and a nice warming dose of cinnamon? The markets are bursting with fruit and who doesn’t love a trip to an orchard, a walk among the sagging trees and the delight of plucking your own fruit to take home? This time of year your bag of apples will keep well in the garage, provided we don’t get too cold too early. Really, you have no excuses. Ok. Except time. I’ll give you that.
Maple Cinnamon Applesauce
from Eating Well magazine, Sept/Oct 2009
- 6 McIntosh or other tart apples, peeled, cored and cut into 1-inch pieces
- 2 Golden Delicious or other sweet apple, peeled, cored and cut into 1-inch pieces
- 1/4 cup water
- 2 tablespoons pure maple syrup
- 1/2 teaspoon ground cinnamon
Combine apple pieces and water in a large saucepan. Bring to a boil, then reduce heat to maintain a simmer. Cover and cook, stirring once or twice, until the apples are very soft and falling apart, about 30 minutes. Mash the apples to the desired consistency and stir in maple syrup and cinnamon.
KATE’S NOTES:
I made a 6-quart stockpot full of applesauce as we love it so much. It will freeze too, if you make a large batch and can’t eat it all within, say, a week. Adjust the syrup and cinnamon to taste when you make a larger quantity. I added some nutmeg too as it’s the BFF to cinnamon in baking recipes. My sweet apple was a PaulaRed, but feel free to swap the balance between tart and sweet to your own personal taste, and mix in the syrup accordingly. To make it ultra-smooth, place the mixture in a food processor or high-powered blender and process in batches until desired consistency.
July 6th, 2010
| 6 Comments »
This summer is no usual summer for me. At least not like the past five or so years when the span between May and September often found me barefoot, my head in the breezes and most likely staring down a day with little to no agenda. No, my friends, this summer is much different. There won’t be any tan lines, probably no exhilarating rides around the lake atop a kneeboard and it’s quite possible that my swimsuit will stay tucked away in the drawer. Which is kind of sad- I really like that suit.
I’m working a lot- as expected, and surprisingly, when I’m deep in my work, and not partaking in the forays into summertime that are going on around me, I don’t find myself wistfully gazing off into space, my knife in hand, fighting off an emotional tugging at my heart over what I’m missing. The moment that white coat goes on and I pick up my knife case, heading up to the kitchen with an armload of towels, my hair twisted at the nape of my neck, the rest of the world falls away and my passion takes over. I don’t miss out on anything because I am right where I want to be. Often I catch a glance out the back door of the kitchen, when someone opens it to toss out the cardboard boxes, and I see the blue sky above the tree line, sometimes peppered with fleecy cloud, but there isn’t an urge to drop what I’m doing and step out into the warmth. In fact, when I do go outside at meal time and gaze off over the lake, I have a moment of appreciation for the glorious summer weather, but I shrug it off and head back inside to do what needs to get done.
And no one is more surprised by this than I am. I’ve discovered a great deal about myself in the past two months at this job. Where I used to think that I could never spend another summer indoors, chained to a time clock, slogging through task after task, what I never realized before is that when you’re deep in a profession that you feel you were created to do, the hours slip away and the rest of the world ceases to matter until the day is done. If I struggled before to get through my work day, it’s because I hated what I was doing. There was no passion involved in the work. I may have been skilled, capable and good at what I was doing for 8 hours a day, but my heart didn’t swell with anticipation each time I stepped up to the plate. I cared enough to do what needed to get done, but it never stirred me. Now I’m being stirred each day, loving what I do and eager to go above and beyond to get done what needs to get done. I’ve discovered what it means to truly, truly love your job. And I’m so grateful for that.
And summertime, the sweetest months in Minnesota, are moving past me at the usual rapid rate and really, I’m fine with it. Still, the time that I do have to enjoy the sunshine has been more sweet and appreciated, simply because I know that it’s limited and I need to get out there, even if it means just taking a walk through my garden. In there, the summer is in full swing, strong and vocal and clamoring to be heard. With being so busy, I find myself living much more in the moment than I have in a very long time. For there’s no fretting about the future these days, there’s no financial stress or concern about wearing ourselves out tugging so hard at life to make it’s ends meet. And while I do know that this will come to an end, I can’t think about that. There’s still so much ahead, so much to learn, to do and to experience and many, many more days of work before it’s time to stop, to rest and to re-focus. For now, it’s nice to just ‘be’
My favorite time in the garden has arrived- it’s Hollyhock time!!

Every year I allow the Hollyhocks to take free range over wherever they decide to grow and am always amply rewarded with towering stalks and gigantic buttons of eye-popping color. These deep red ones on the left are a standard, jutting out against the pale backdrop of the house, offering a rich haven for lazy droning Bumblebees. The lovely pale yellow also come up each year.
This year’s surprise color is this gorgeous pink.
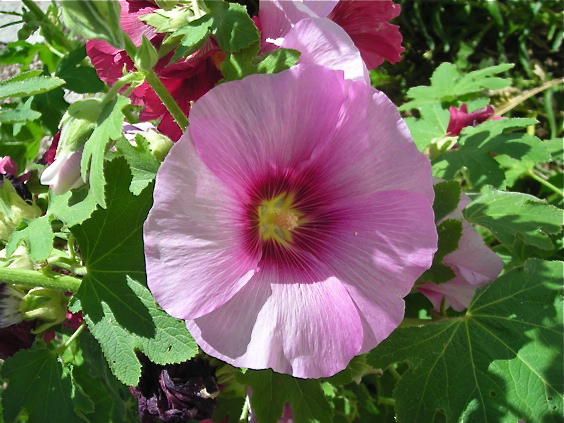
Almost every season brings a new color, one that’s morphed from a previous plant. This pink is so stunning, light and delicate around the edges with deep magenta accents in the center and along a few petals. The first bloom of this took my breath away.
Another surprise color this year is this lovely salmon.

I’ve gotten full on pink flowers in previous years, but this one shows more orange, giving it a nicer and richer color than just plain pink. The stalk of these bloomed so profusely that it fell over after a few days, so thick with blossoms. That’s the one drawback of the Hollyhock. It collapses under the weight of it’s own beauty.
This super delicate pink comes up every year. The center is a lovely rose color.

Here’s another return visitor each summer. The golden petals are set off by a deeper pink center that almost looks orange.

A brighter yellow made an appearance this year too.

And on top of it being prime Hollyhock time, the Echinacea are in bloom

One variety of DayLily managed to bloom this year. The others set their buds, which then dried up. Mysterious, huh? This one of my favorite though. It’s so exotic and beautiful.
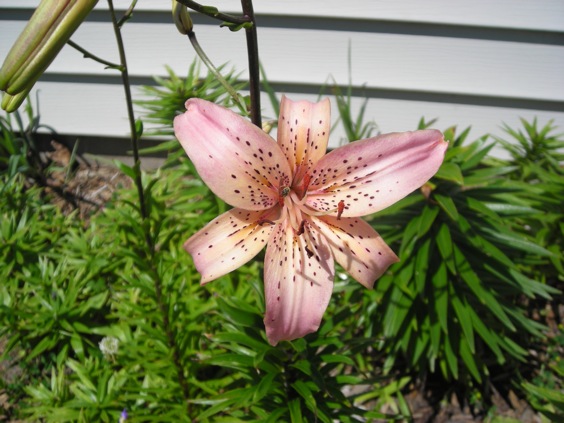
The very delicate and lacey Scabiosa have also started blooming.

These lovely flowers, waving from atop a thin but sturdy stem are wholly dependent on sunshine to unravel their frilly petals one at a time. One day I will look and see a few swollen buds, then over a few sunny days, the tiny petals unfurl like tentative sails until they are all gloriously open and blowing in the breeze. I have three Scabiosa plants that should have a variety of colors. So far, all that’s opened has been white, but the others are now blooming and I’m hoping to be pleasantly surprised soon.
The Bee Balm has opened it’s thin petals, much to the delight of the roaming Bumblebees.
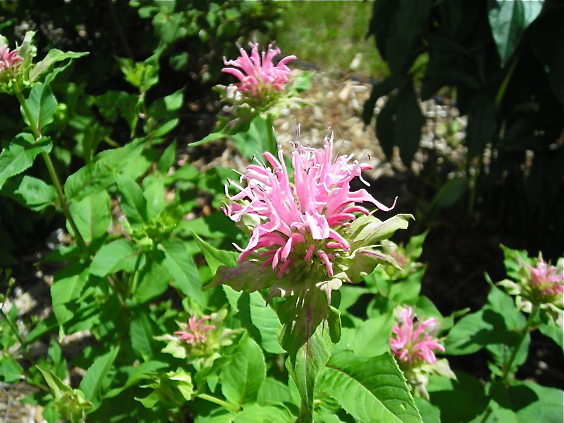
The Phlox stands tall and proud with deep pink fists of color.

And rounding out the current events in the garden is the ever cheerful and sunny Coreopsis.

The funnest part about the Coreopsis is that the petals sort of resemble duck feet.

Summer is also speaking warmly from the vegetable patch, with tiny tomatoes and peppers, abundant Thyme and Oregano. The wily resident rabbit has been fenced out of foraging on my vegetable plants, and I still see him, gazing wistfully through the barrier at the bounty he can no longer destroy. I don’t mind if he wants to gobble up all the sunflower sprouts, but he won’t be making a salad bar out of my food, thank you.
And another loud exclamation of summer? A sunny morning, complete with fresh cherries in a homemade bowl on faded redwood steps.
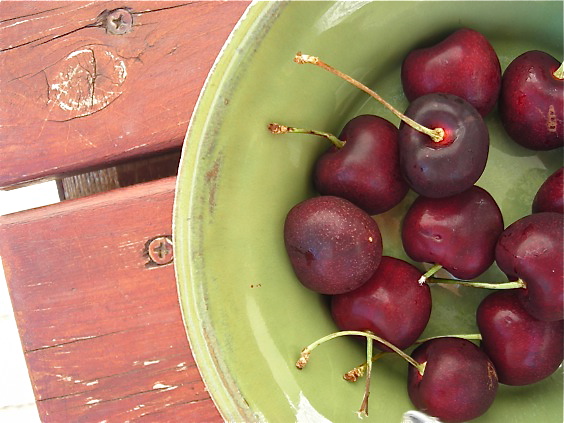
I hope your summer is happily bending your ear with it’s tales of sunshine and play, that there’s glorious fruits and vegetables filling your lives and tummies. Any surprises at your end? Please share them so we can all find the joy in this exquisite and fleeting time.
June 13th, 2010
| 13 Comments »
I often wonder whose idea it was to make Fish Tacos.
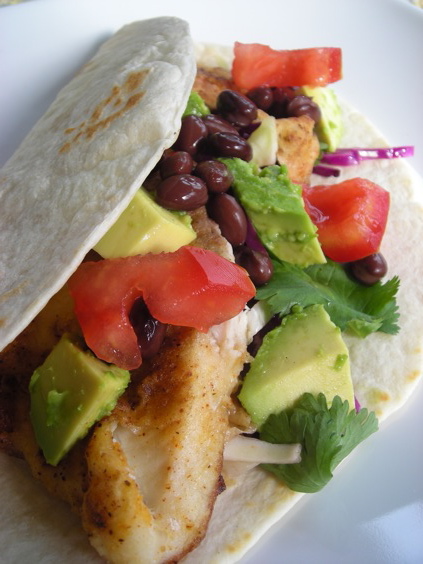
Fish. In a taco. That overloaded, cheese filled Tex-Mex staple. dripping with seasoned meat and shredded iceberg. At one point, someone thought to push a few pieces of fried and lightly seasoned mild fish into a flour tortilla and call it a meal. Now it’s everywhere and people just love them.
Problem is, they ARE everywhere, and often not done all that well. The fish is almost always fried, which yes, makes it crunchy and appealing and all, but certainly not very healthy. This is fish. It’s good for the body when done right. I’ve tried numerous offerings of fish tacos, eagerly anticipating the. one. that makes it all worthwhile. The epicenter of fish taco-ness that will make me swoon, and want to run home to my own kitchen to replicate.
Friends, it’s never happened. So I took matters into my own hands, in my own kitchen, and made them the way I wish they would always be made.
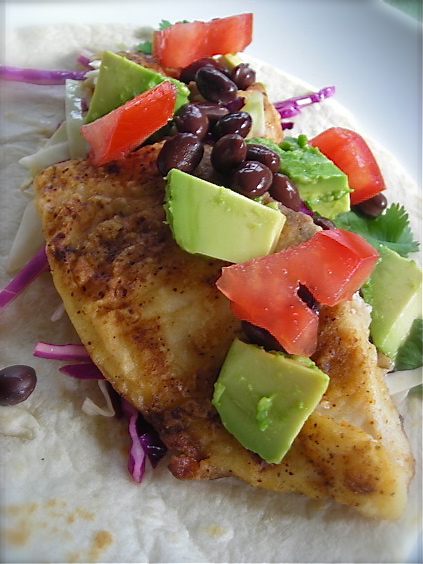
There’s just nothing to this meal. You need some perfectly ripe avocado, a plump tomato, some form of crunchy vegetable item such as gently seasoned cabbage to offset the tender fish and a simple can of black beans. Oh yes, and fish. I used tilapia but you could also use halibut or cod depending on availability.
And this is fish, which we all know from experience is on the Love-Hate scale in my house. Mike loves it, and Griffin hates it. Or at least he seems to think he hates it. Because this is new to him, in the past few years, this despising fish deal. When he was quite the young boy, in his adorable, always helpful/cheerful/talkative Can I hold your hand, Mom? stage, my boy simply LOVED fish. He denies it now, for certain, but it’s true. I would make fish for dinner and he would light up in the way only small adorable boys can and exclaim “Fish! Yum!” when he pulled out his chair to eat. It was always seared in a pan, never fried, and yes I did give him a blop of tartar sauce to push his fish through, but he would eat it all without one little complaint. How I long for those days.
He’s OK with it now; he’s stopped with the mega-fits when he knows it’s on the dinner menu, but will never ask for it like he does his beloved steak, and I do still keep tartar sauce on hand and allow for him to smear it on his fish as thick as he wishes. He will take the smallest piece possible to get by and eat it, almost holding his breath, only because it’s how we roll at dinnertime here. You eat what’s served or make your own.
Mild, flavorful and fresh beyond belief, these tacos were such a perfect summer meal. Simple too, which these days with my schedule and valued days off, I don’t want to be chained to any time consuming menus, making the few dinners I can put together at home. The weather was gorgeous, and after Mike and I trimmed some over-zealous bushes in our yard and then impulsively chopped a few large tree branches off, dinner was still on the table about a half an hour after we came inside. These fish tacos, with all the ease and flavor, were what I feel a good, healthy fish taco should be.
Fish Tacos
by Kate
1# tilapia filets
1/2 c. flour
1 T. each ground cumin, dry oregano and chili powder (for more convenience, use 3 T. prepared taco seasoning)
For serving: flour tortillas, diced avocado, diced tomato, shredded cabbage or romaine lettuce, drained and rinsed black beans, sour cream and salsa.
Heat a heavy skillet over medium high. Mix the flour and seasonings together. Adjust with salt and pepper if desired and dredge fish in mixture. When skillet is very hot, add a small amount of oil and quickly swirl to coat. Carefully place fish in pan and cook without moving for about 5 minutes. Turn over and cook other side until fish is done and flakes easily, about 5 minutes more. Cooking time is dependent on thickness of filets and will vary.
Top tortillas with hot fish and toppings as desired.
May 25th, 2010
| 7 Comments »
Does the weather ever slide subtly from one season to another? Because here in Minnesota, we jumped cannon-ball style from lovely Spring into all out Summer. Humidity levels rose, thickening the air and the thermometer leapt from something manageable, like the 60’s or 70’s, to a sticky number that begins with 9, and that which we rarely see before July around these parts.
And what did I do to manage this early season heat wave? I turned on the oven. Apparently, recipe inspiration can make me a little insane. But first, how about a glimpse into what the garden decided to do lately?
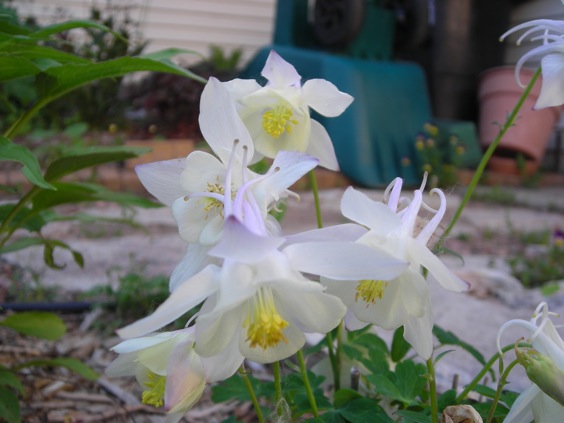
This White Hybrid Columbine is so lovely- see the lavender undertones? It’s stunning, but only about 4″ high. I had to lay on the ground to get this shot.
The heat wave opened the first of the California Poppies.

The Lupine are tall and graceful.

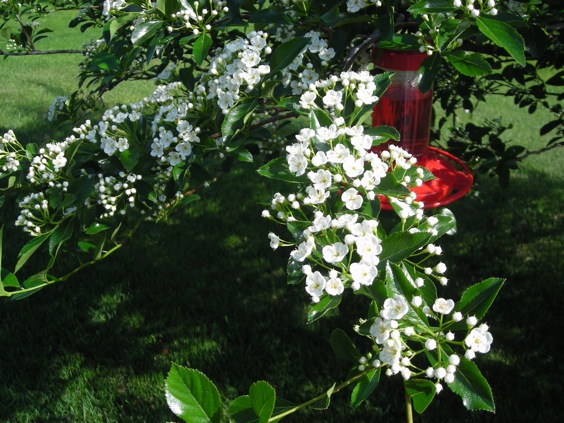
And there was plenty of other colorful happenings in the garden this week.
But I know, I know.
You just want the food, don’t you? I know that’s why you come here. I promise, this won’t disappoint.
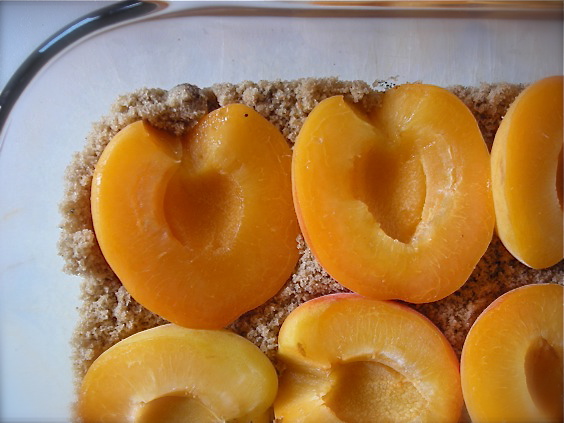 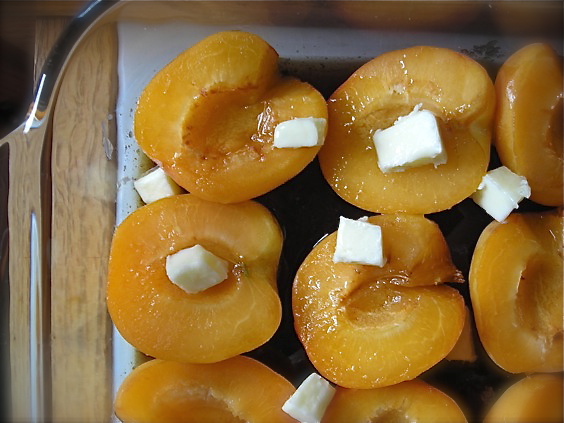
Yes, those are apricots. I roasted them on the hottest day of the year. It was probably in the mid 90’s outside when I turned the oven dial to 425° and prepared a small sack of apricots, nestling them in brown sugar and cardamom (again? you ask, well…. yes. Insane goes many ways, my friends) before drizzling them with honey and a splash of water. Butter dots too. What good is roasted fruit without a nice buttery sheen?
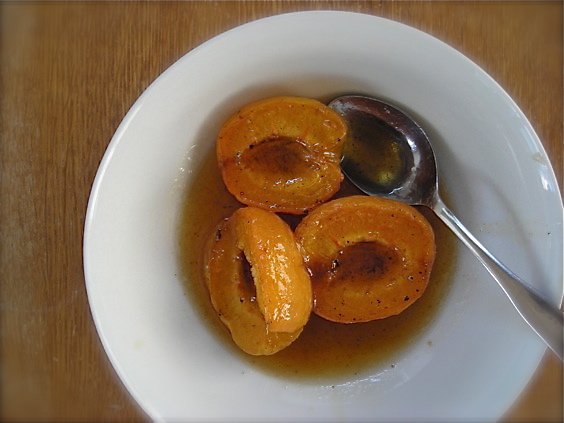 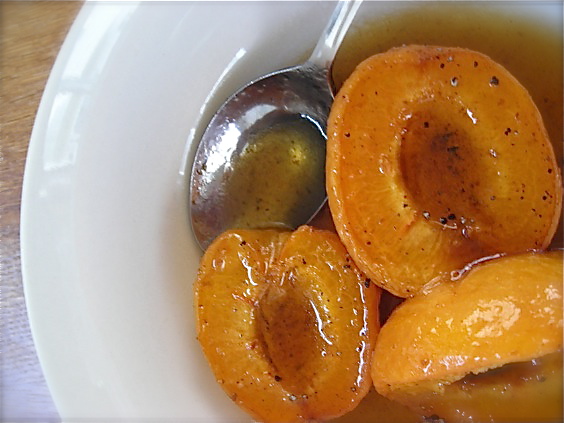
I pretty much left tire tracks on our driveway after spotting this recipe in the current issue of Bon Appetit. Roasted Apricots? I sure do love those most fickle of tiny stone fruits- one day so firm and tart, the next moving to a softness and sweet ripe juicy flavor that you could blink and miss it if you’re not careful. And yes, the grocer stocked fresh ones, many yielding to gentle pressure like they should, smelling of golden sunshine. I’ve loved apricots since I was a very young child, and recall with fondness when my own boy was but a wee one and we lived behind a natural foods store. Almost daily we would shop, it was so convenient then to bring home only what we needed and he loved the velvety softness of those tiny fruits that fit so well into his palm. I would purchase them carefully, knowing he would eat them like crazy and they needed to be perfectly ripe. By the time we walked out the door of that store, around the back and across the parking lot of our building, he would be slurping the last of the juice from his hand, the pit clenched between his fingers and eagerly looking to me to hand him another one. Yes, apricots are favorites. For both of us and for so long. I knew too, that roasting them in this manner probably wouldn’t thrill my now 16 year old young man, but for me, these days the recipes I make don’t have to thrill everyone. Especially this. If it doesn’t make the guys jump for joy, that’s OK. These apricots, they were mine.
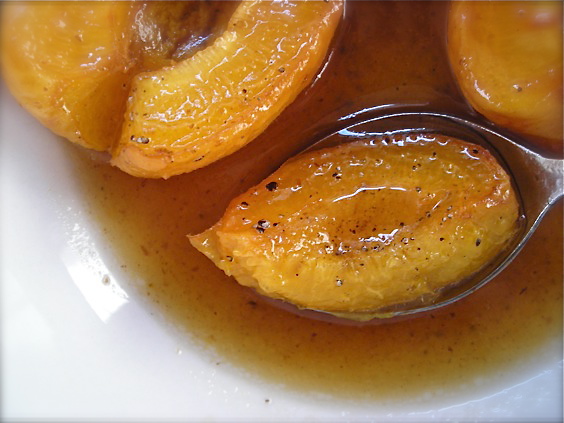
I imagine this recipe would work equally well with any stone fruit. Simply place the pitted fruit on a bed of brown sugar and cardamom (which, again- like the Rhubarb Crisp previously swooned over, you could leave out and never miss) drizzle the top with a little honey and pour a small amount of water over it all. Bake it at 425°, occasionally basting the fruit with the juices that form, until they are soft, fragrant and irresistible. Hold off the urge to eat them by the spoonful until they glaze has cooled. People, it’s searingly hot. My poor lip. But soft, tender, sweet and amazing in flavor is the result. You could do worse for yourself you know, on a stifling hot and sticky day, stuck inside under artificially cooled conditions to turn on your oven for 20 minutes and be rewarded like this. Summer? Bring it on.
Roasted Apricots with Cardamom Brown Sugar Glaze
From Bon Appetit, June 2010
- 1 cup (packed) golden brown sugar
- 1 teaspoon ground cardamom
- 6 large or 12 small apricots (about 1 1/2 pounds), halved, pitted
- 3 1/2 tablespoons honey, divided
- 2 tablespoons unsalted butter, diced
- 1 8-ounce container crème fraîche or sour cream
- 2 teaspoons vanilla extract
Preheat oven to 425°F. Mix brown sugar and cardamom in 11x7x2-inch glass baking dish. Add apricots. Pour 1/4 cup water and 2 tablespoons honey over fruit; dot with butter. Roast until apricots are tender, occasionally basting with syrup in dish, 12 to 15 minutes. Cool 5 minutes. Whisk crème fraîche, remaining 1 1/2 tablespoons honey, and vanilla in small bowl. Serve with warm apricots.
KATE’S NOTES:
When buying stone fruit to roast, they should be slightly under-ripe or they’ll become too mushy when you cook them. I found that the 12-15 minute window in the recipe was not nearly enough to make them tender. They cooked for maybe 20 minutes before I felt that the fruit was the soft texture I wanted.
Should there be a “Next time” when I make this, which I am certain there will be, I would probably stir the brown sugar, cardamom and water together. Once the fruit cooled, there were sugar crystals on the bottom of the baking dish from where the brown sugar did not dissolve. I also used whole cardamom seed and ground it down, but not enough. If cardamom is not finely ground, the remaining seed can be bitter. If you grind your own seeds, make sure it’s very fine. I ended up straining some of them out afterwards. And yes, by all means leave it out and you’ll never know.
My topping for it was mascarpone cheese sweetened with honey. I know. This truly does make me believe I am insane. But it was, sorry to reiterate, insanely good. Try the roasted apricots on yogurt, over ice cream, on top of shortcakes (if your strawberries run out) or alone as a simple treat.
March 17th, 2010
| 9 Comments »
My Wednesday evenings are one night of the week where both of my guys are gone, and I have been really treasuring the ‘Alone’ time, pampering myself with candlelight, a glass of wine, classical music and usually some simple meals that are for my mouth only. Do you eat differently when you’re alone? And I don’t mean standing over the sink munching on peanut butter off a spoon, or eating dry cereal by the handful while watching TV, what I mean is, do you take the time to really nurture yourself with good food when you’re alone? Because you should. It’s delightful, really. And with the way most people seem to cram their lives with activity and movement, some time alone is one aspect of our lives that we so desperately need. I know that for myself, I thrive on having some time that is just mine. And my life is pretty simple too; I don’t have much now that pulls me in every direction but that doesn’t change my need to be with myself, to remember what I like and enjoy, to be kind to the ‘Me’ that I know, to who I am. I’ve been this way ever since I can remember.
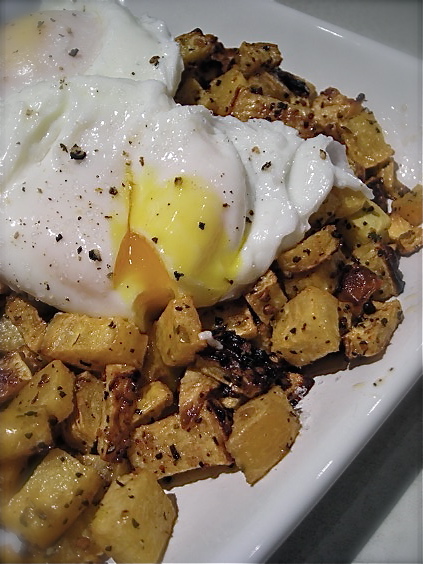
So my Wednesdays are a treasure. It’s my time to let go a deep sigh as I take in the empty house, and peruse the fridge for a few simple ingredients to fill my tummy. Since I won’t be off-putting to my egg-hating husband, many of these meals will include the cooking of eggs. One week it was a spicy dish of cooked chorizo and potato, topped with a hard-cooked egg, there was the phenomenal and by far most popular of blog posts when I made the shirred eggs in potato skins– that occurred on my solo Wednesday evening, and then just recently, with the desire to make something unique, I created a roasted rutabaga and poached egg dish that was divine, yet so simple and amazing.
 (I tell you, I am happy this winter light seems to be gone!) (I tell you, I am happy this winter light seems to be gone!)
I need to confess something about eggs; while I love them dearly, and really, think that it is one food item that I will never give up eating, I have been rather stubbornly affixed to only consuming them when cooked good and solid. I’ve had an aversion to the soft yolk ways for as long as I can recall, and I simply can’t say why. I don’t care for them scrambled either, and no matter how well they’re scrambled, so soft and pillowy and silky smooth, I just won’t eat them. I think it must be the texture. As I’ve grown and watched my food tastes change, the one aspect of it that I’ve noticed is that formerly despised foods were all about texture over flavor. Still, as I can now manage mushrooms, squash, tomato, avocado and a host of other goodies that were once verboten on my table, I draw the line at scrambled eggs. Still, the fact that I just knew this roasted rutabaga dish required a poached egg, that I then went ahead and made, beautifully, is huge growth for this egg lover. And I may never look back again.
The roasted rutabaga has become, at this latest stage of winter, a rather treasured foodstuff. That and parsnips are slowly integrating themselves into my life and I welcome them warmly. I diced the rutabaga into small pieces and tossed them with some oil and seasoning and set the pan in a 400° oven. I stirred them once, and about 20 minutes later, they were toasty and browned, smelling fantastic. The egg poaching method is standard; a pan of water with a teaspoon of white vinegar, bring to a boil, create the vortex in the center and slip the egg into it, reduce heat and allow to cook to your desired stage. I made two, and they were both perfect. As was the evening, alone and content.
March 3rd, 2010
| 13 Comments »
What’s that, you say? Ajvar? Is it AHJ-VAR? AGG-VAR? How do you say it?? And what the heck is it?!?
It’s delicious, delightful, piquant, sweet and when spread on a toasted pita, a tiny slice of food heaven. The origin is Balkan in nature, and it shares it’s etymology with caviar, although there is no fish roe involved.
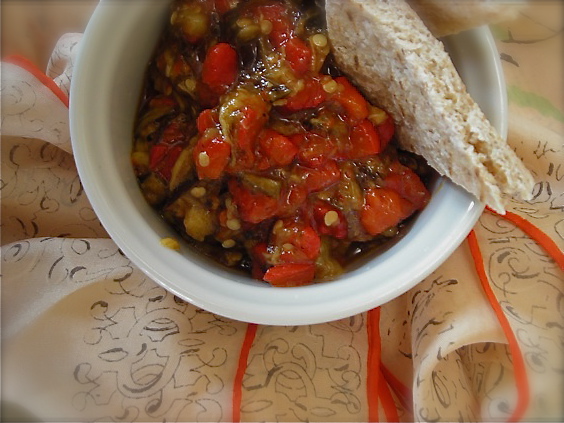
And it’s pronounced EYE-VAR. As with most foods that pass through this little blog of mine, it has a story. A pricey one. And it goes like this.
I love ethnic foods, and the more eclectic and unique the ethnicity is, the better I like it. I’m happy to browse any manner of unusual food market I come across, my eyes trailing the shelves, fingering the ingredients found there and trying to determine if I know what is is, first and foremost, and if I can take it home and use it. I am so blessed to live in a very culturally diverse city, and within many channels and pockets of the population one can find amazing stores full of ingredients that will elevate simple home dining. In the middle eastern market that I frequent in Columbia Heights, where the pita bread is often so fresh that the bags are still warm, I came across a jar of a bright red condiment that caught my eye. Roasted red peppers, roasted eggplant, garlic, oil. Oh my, what’s not to love? Despite the hefty price tag, I took one home. Big mistake.
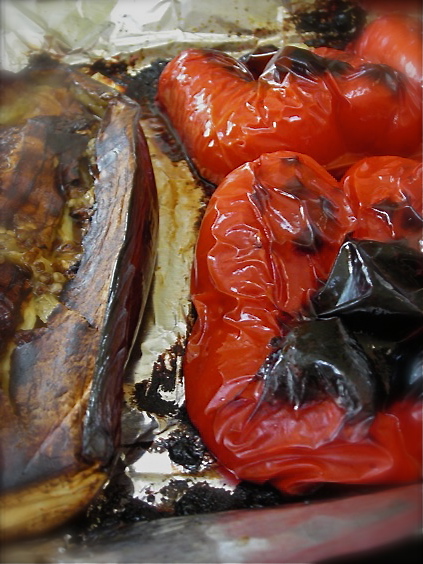
I toasted some of that wonderful pita bread and slipped it through the bowl of bright red Ajvar in front of me, lifting it to my mouth. I was lost. I fell hard and fast for this sweet, somewhat spicy and cool relish. Mixed with a bit of plain yogurt, I could eat it night or day. And I did. I made pilgrimages back to that market for more bread, for more Ajvar. The price always got me, but I forged on. I loved the stuff. But like all good things, bested as they can be by economic downturn, I had to suspend my tastebuds desire for it and stop driving back to that store to buy another jar.
But I didn’t forget. There would be a day to enjoy it again. I was certain of it.
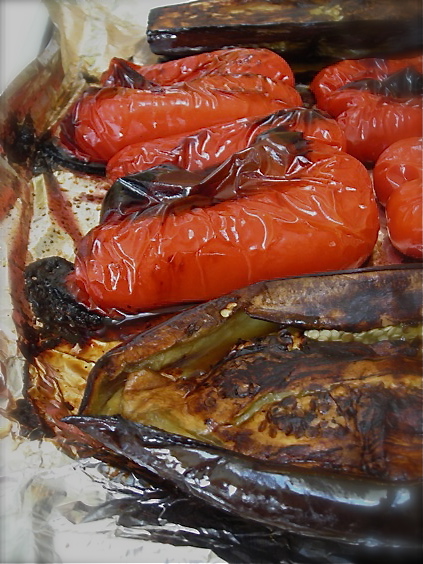
Like for many, that economic downturn hasn’t really let up it’s grip on us, and being the case, I’ve yanked up the bootstraps and found ways to further stretch the dollars and yet not go without some of the foods I really love. But it took coming across a superbly simple recipe for Ajvar to prompt me into actually making this at home.
What could be simpler than roasting vegetables to a nice rich blackened state and running my big knife over them? Because, you know, when looking at this, I yet again get that feeling that I wish I hadn’t waited so long.
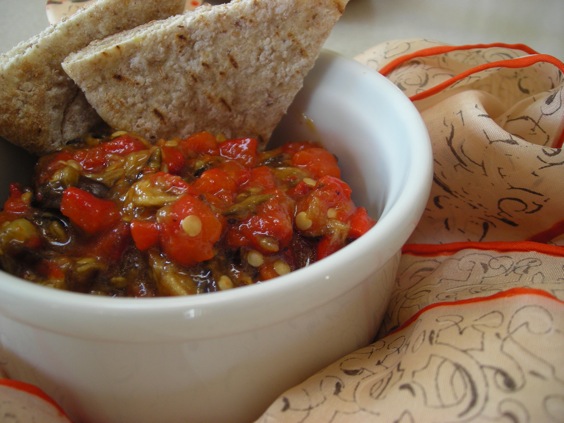 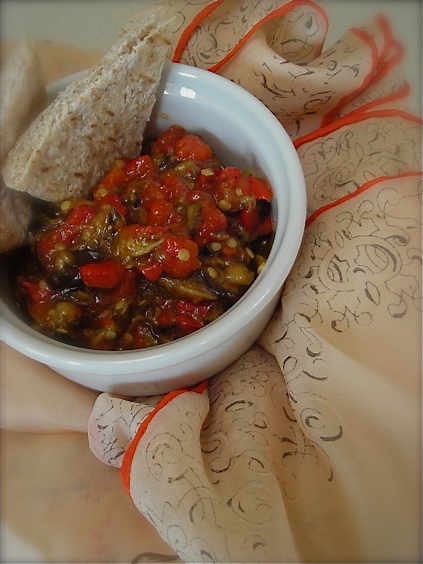
Ajvar
recipe source unknown (somewhere in Internet land)
1 large eggplant, sliced in half the long way
2 red bell peppers, split in half and de-seeded
2-4 garlic cloves (optional)
Preheat oven to 450° and adjust one rack to the lowest level in your oven. Cover a baking sheet with foil and spray the foil with cooking spray. Place the vegetables cut side down on the sheet and lightly mist the tops with cooking spray. This is optional, but I find it helps with the charring.
Roast the vegetables on the lowest rack until the tops of the peppers are black and wrinkly, and the eggplant has softened. Depending on your oven, this could take anywhere from 15-30 minutes, or maybe more. Check regularly to monitor. If your house is like mine, you may need to de-activate your smoke detector. This is a fragrant and hot process.
Remove the sheet when the veggies are ready and allow to cool completely. At this point, you can either place them in a food processor to blend, or simply mince them on a cutting board. I used the cutting board and my big chef’s knife. It took me about 2 minutes. Place minced veggies in a bowl, add about 1/4 cup of good quality olive oil, and then season to taste with salt and pepper. If you want it spicy, feel free to add crushed red pepper, or if you can find it, ground szechuan peppercorns would be amazing in this. I prefer mine on the mild side. It can be served room temperature, but the flavor will develop after a day or two in the fridge.
Eat it with toasted pita, carrots, or spread on hearty crackers. It tastes wonderful when mixed with a little plain yogurt too. I also think it would be delicious served over pasta.
February 22nd, 2010
| 8 Comments »
There are certain foods that are superstars of nutritional value, simple to prepare and easy on the pocketbook yet are really kind of ugly ducklings in terms of aesthetics. If we eat with our eyes first and foremost, and if we didn’t know that these foods were not only powerhouses in being good for us AND very tasty as well, we would take one look at them and likely turn away in scorn. Take lentils for example. These tiny legumes are so rich in the good things we need for our bodies. But I imagine there’s a huge population of people simply turned off by their unfortunate lot in the food world beauty contest. Cooked to perfection and placed in a bowl, they resemble more a pile of mud than something amazing you want to eat.
Now doesn’t that sound delicious?! Can’t wait to dig in!
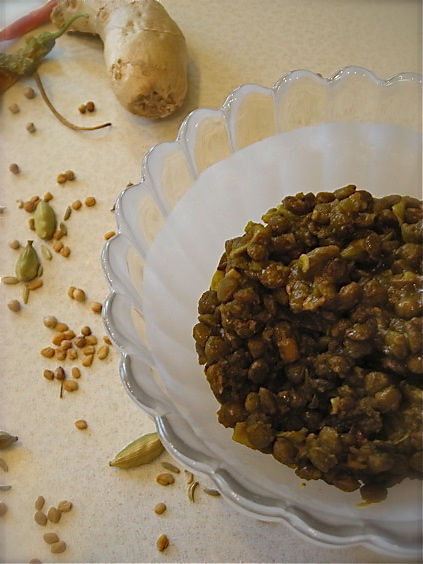
I do get it. Really, I do. If it wasn’t for the copious amounts of fragrant dhals and mounds of aromatic Indian food that I’ve come to adore in my life, I might not exactly be in the Lentil Fan Club. But I am. And I think that everyone should. As legumes go, the lentil is one that you can take from dried form to beautifully cooked with hardly a second thought. Even the largest brown lentils will cook up nicely in about 20-30 minutes, the smaller pink and red ones turn delightfully smooth even faster, making the lentil a smart choice to keep on hand for a hearty meal. With added vegetables, it turns into a perfect soup. Served over rice, maybe with a salad and you’ve got a complete meal. Add in one of the heady fragrant spices of Indian cuisine, such as fenugreek or cumin -or in this case, both- and you’ve got a delicious creamy, slightly spicy and overall compelling meal with little more than boiling some water and a measuring spoon or two.
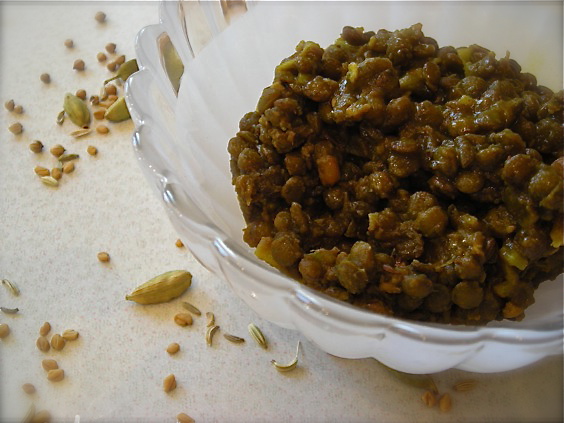
By far and away my favorite lentil is the French Puy, also known as the French Green lentil. It’s smaller than the brown, larger than the more colorful red and pink and will also cook up easily, all the while retaining it’s shape more without turning mushy. While the mushy lentil does have it’s place, I really prefer some texture to them. The Puy has a somewhat higher price tag than the brown, but I think it’s worth it. The flavor too, is deep and earthy, a bit more intense over the somewhat gritty taste I’ve come across in the brown.
My first exposure to lentils was as a wee lass in elementary school. Our schooling, up until I was in 5th grade, centered mostly around a loosely defined cooperative that rented space in an old Catholic school building. We had some pretty progressive education, I guess these days it ties in best with home schooling, and one year we did volunteer work at the Renaissance Festival in a soup booth, making both Beet Borscht and Lentil Soup. I did not like the lentil soup much, but I was a kid. Forgive me for thinking it was odd among my usual repertoire of fish sticks and Rice-a-Roni.
Then in college, I had a roommate for a time who was a vegetarian and loved to cook. On occasion I would tag along with her on her trips to The Wedge Co-Op, back in the long ago days when it was so tiny that barely two people could stand in any aisle. I often had no clue about the foods she would buy but I asked her endless questions and when she cooked she would share some of her meals with me. One meal was lentils, and although I didn’t fall down in love with them, I had a better idea of them than what my childhood memories had given me. Still, it took cementing my love of Indian food for me to begin actually making them at home. Once I did discover how good they could be, really there’s no stopping me now. If only I could convince The Teen to try them.
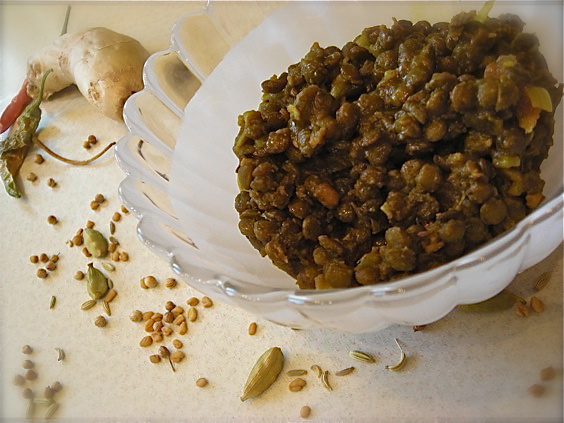
One of these days, maybe.
Dhal with Green Lentils
adapted slightly from The Curry Book by Nancy McDermott
1 c. french puy green lentils, rinsed and sorted
4-5 c. water
1 t. ground turmeric
1 t. fenugreek seeds, crushed
1/2 t. ground cayenne
2 t. cumin seeds
3 cloves finely minced garlic
2 T. finely minced fresh ginger
1 medium onion, finely minced
1 medium tomato, chopped
In a large saucepan, bring 4 cups of the water and lentils to a boil. Skim off any foam that may form. Reduce heat to medium-low and add the turmeric, fenugreek and cayenne. Allow to simmer, uncovered, until lentils are tender- approximately 25-35 minutes. You may need to add more water as the lentils cook to prevent them from sticking.
When lentils are tender, heat a small skillet over medium heat with oil of choice. Add the cumin seeds and cook until they become dark and fragrant, and begin to pop. Add in the onion, garlic and ginger and reduce the heat, sauteing gently and stirring occasionally until the vegetables are soft, about 5-7 minutes. Stir the mixture into the lentils and blend well. If the lentils are soupy, you can raise the heat and simmer the mixture to reduce the liquid. Keep an eye on it so it doesn’t burn and stir it to keep blended. When cooked to your desired consistency, stir in the tomato. It will thicken slightly as it stands. Season with salt if desired.
NOTE: It’s unlikely you can find fenugreek in anything other than seed form. To crush them, use a dedicated spice grinder if you have one, or place them in a sealed plastic bag and crush them with a rolling pin, a meat tenderizer or other hard implement. The seeds are pretty solid. Don’t be surprised if doing it by hand requires slight effort. It’s totally worth it for the flavor.
This dish definitely gets better with some time to sit in the fridge. It can be made with the smaller colored lentils but keep in mind that the cooking time will be much quicker, and it will have a different texture. One cup of red lentils will need less water, about 3-4 cups.
|


