May 14th, 2009
| 1 Comment »
I’ve been holding out on you, but not on purpose.
I’m guilty of thinking that somehow giving you a simple recipe as a means to serve frozen corn might just bore you to death. Really, it isn’t anything superbly fancy, but right about now, as we are staring down the summertime bounty of vegetables and with fresh corn season coming quicker than a May thunderstorm, I think it’s time to share the love. Especially since I enhanced the dish with my current love- bulgur- and made it a couple thousand times better.
I don’t even know when it was that I came across this method on Kim’s blog, but I was immediately transfixed and had to try it. Which I did, and which I almost regretted because I could barely think of anything else. Now I need to share it with you.

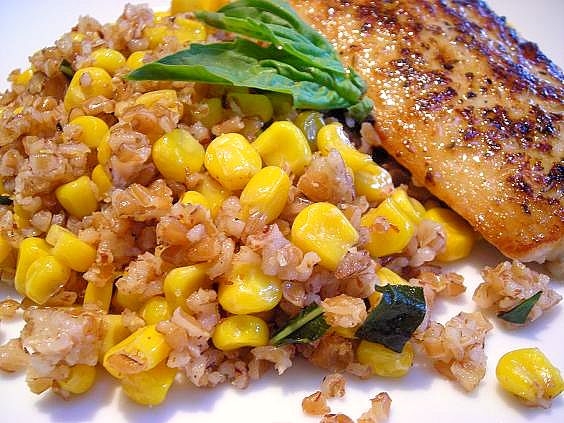
I simply call it Brown Butter Corn. How easy is that? You take some good butter and heat it in your pan until it’s toasty and brown, add in frozen corn and cook it until it’s tender and delicious, maybe tossing in a handful of fresh basil, or rosemary, or thyme and a seasoning of sea salt and fresh ground pepper. Pile it on your plate next to your main course and you’ve elevated your meal slightly from the humdrum to the hubba-hubba. (wow, did I just say that?)

Only this time, with a container of my current whole grain love all cooked and ready in the fridge, this side wasn’t just about the nutty and toasty, it was far better. Copious amounts of fresh basil really sent the flavor sky-ward. And with a perfectly cooked piece of Mahi-Mahi as an accompaniment, alongside an effusive smiling husband (and a kid-free evening), it quickly became one of those meals that sends shivers through you, making you slow down, smile more, sigh often and think “When can we have this again??”
Brown Butter Corn with Bulgur
by Kate
4 T. good quality butter
1 pkg frozen corn, shaken in a wire sieve to remove any ice or frost- NOT rinsed!
1-2 cups cooked bulgur
Fresh herb of choice- basil, rosemary and thyme all work well
Salt and fresh ground pepper
Heat butter gently in a large skillet over medium heat. When it’s darkened and smelling toasty, add corn (it will sizzle!!!) and quickly stir to combine. Allow to cook for about 10 minutes, stirring often. Add in bulgur and fresh herb, stir to combine and heat through. Season with salt and pepper.
KATE’S NOTES:
The simplicity of this dish is ridiculous. Even without the bulgur it’s delicious, and the variation of vegetables that you could use is astounding. I think of fresh summer squash, a julienne of root vegetables, diced eggplant or even a mix of greens. Sub in another grain for the bulgur- like farro, another of my current loves- or add in wild rice, red rice or a mix. I’ve loved corn and rice mixed together since I was a little girl, but there is something about the browning of the butter that makes it so much more elegant. Watch out though! The butter slips easily from ‘browned’ to ‘burned’ and once that happens, you need to throw it out and start over. ‘Burned’ butter corn, I’m thinking, isn’t all that appetizing. Heat it gently and stay close by. And by all means, DO NOT rinse the corn! The butter is scalding hot when you add the vegetable, and if there is water on it, the likelihood of bad splattering is quite high.
March 25th, 2009
| 5 Comments »
I am one of those cooks who use recipes only as a fundamental guideline to a finished product. I can trust my own cooking skills enough, and what I know about how my family eats, to be confident when I look at a recipe in determining what ingredients in it won’t work, or what needs to be enhanced. Even simple basic products can be made better with a little creativity and an eye towards a higher nutritional value.
Take a jar of spaghetti sauce. It’s high on the convenience scale, and has a reasonable amount of nutritional value, provided you avoid the sugar-laden brands and stick with a purer variety. With the addition of sauteed onion and garlic, along with shredded zucchini, carrot and spinach, a few chopped fresh roma tomatoes, some fresh basil or rosemary and a little tomato paste to bring it all together, you get a pasta sauce brimming with vegeteble content, better flavor and more nutrition.
I often come across recipes too, that when I do follow them to the letter and get that anticipatory excitement of what the finished product will be, I often end up sorely disappointed, especially if I ignore my inner urgings to add something of my own liking. It is a rare occurence indeed when I work through a recipe and come to a conclusion, after following the prescribed steps, that what I see in front of me might be way better than what the original end result offered. That was the case with this Savory Millet Risotto.
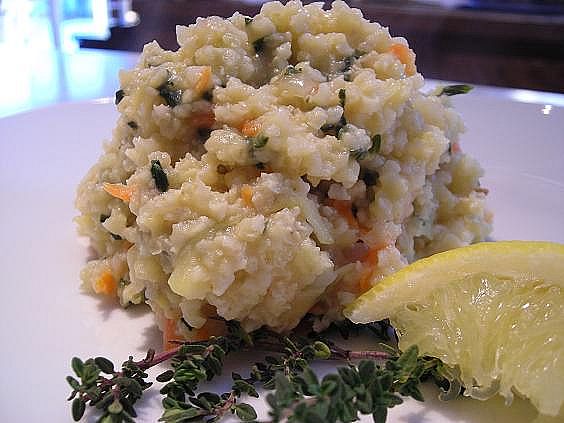
The recipe, from the current issue of Eating Well magazine, was supposed to be for a Millet Cake, similar in structure and use to Polenta. Even though I have given up on using Polenta in any of my meals after repeated attempts to enjoy it always fell flat, I earmarked this recipe as an option. The millet cooks with shredded vegetables, parmesan cheese, fresh thyme and lemon zest to a creamy consistency, at which point it would be cooled, then shaped into patties to sear in a pan. It never made it that far.
Come in to my kitchen…
March 15th, 2009
| 3 Comments »
Seemingly a whole lifetime ago, I worked for five years in the office of a wholesale bakery and I have to say, the smell of yeast has been and still is one of my most favorite smells of all. I loved walking through the production area in the early afternoons as the baking staff began their daily preparations; I loved standing by the enormous mixing bowls as hundreds of pounds of bread dough, pungent with the scent of yeast and flour, spun and smacked around inside. It was a happy day indeed when my boss would inform me that they would be making test batches that day because I knew he would be bringing me endless samples of warm bread to critique. And the best perk was free bread for the taking- crispy baguettes that snapped when you broke them, showering golden shards of crust everywhere, tangy sourdoughs, pillowy stirato loaves, rustic wheat breads and a mouth-watering marble rye that was my favorite sandwich loaf. The best lunch I could indulge myself in was a sliced baguette spread with a little of their scratch aioli and a few slices of salty ham. I was in carb heaven. I still miss the amazing bread, and it’s been a very long time since I last walked through those doors. I can buy the loaves in the grocers, and the flavor is still good, but I miss the experience of picking up a loaf off the rack that was only hours out of the oven, ethereal in it’s taste.
 I still love really good bread and for a long time I routinely spun loads of flour, water and yeast in my bread machine, so much so that I managed to effectively kill the thing outright, but I’m happy to have gotten my money’s worth. Since then, which was quite a while ago, I haven’t made a lot of bread from scratch despite having the time and the desire for it. I experimented with this amazing no-knead bread and loved the rich dense crumb and tangy flavor, but I am plagued with a ‘Must Have It Now’ mentality sometimes, and this just doesn’t work well with the patience and time required for a good loaf of scratch bread. There are some high quality artisan bakeries in the Twin Cities, including my old employ, and for a short trip in the car I can pick up a few loaves of bread to indulge myself in, but what I really need to do instead is lose the impatience inside of me and buckle down to make myself a good loaf on a regular basis. I still love really good bread and for a long time I routinely spun loads of flour, water and yeast in my bread machine, so much so that I managed to effectively kill the thing outright, but I’m happy to have gotten my money’s worth. Since then, which was quite a while ago, I haven’t made a lot of bread from scratch despite having the time and the desire for it. I experimented with this amazing no-knead bread and loved the rich dense crumb and tangy flavor, but I am plagued with a ‘Must Have It Now’ mentality sometimes, and this just doesn’t work well with the patience and time required for a good loaf of scratch bread. There are some high quality artisan bakeries in the Twin Cities, including my old employ, and for a short trip in the car I can pick up a few loaves of bread to indulge myself in, but what I really need to do instead is lose the impatience inside of me and buckle down to make myself a good loaf on a regular basis.
On a recent trip through the library, I came across the publication of a local group called The Saint Paul Bread Club. I barely hesitated before slipping the slim book off the shelf. It’s basic and fundamental, nothing glossy or fancy, just page after page of bread recipes from a local group of passionate bread bakers, along with plenty of insider tips and hints to making better breads at home. After a few perusals and some thought to the first loaf to try, I rolled out of bed on a particularly gloomy morning after a simply pathetic night’s sleep and all I could think about was the smell of yeast, a warm glowing oven and the taste of a fresh warm loaf. The weather promised everything from rain to an eventual accumulation of upwards of 6″ of snow. It instilled in me both a bluesy melancholy, and a fierce need for the routine of baking, the rhythmic kneading and the promise of carbohydrates.

This loaf contained bulgur and millet and I had both on hand. Bulgur is cracked and parboiled wheat and really simple to use- it requires little else but a soak in hot water. Millet is a hulled, wheat-free cereal grain- the outer husk is removed leaving tiny yellow balls. Millet requires cooking, but this recipe didn’t make any mention of pre-cooking the grain so I didn’t, and it plagued me on whether or not this would result in a tooth-cracking slice. It didn’t.
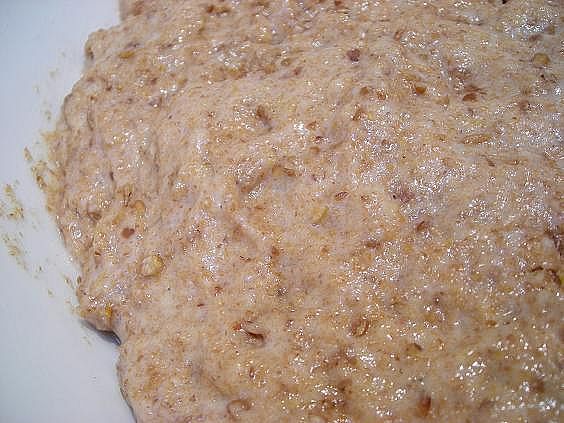
This recipe started with a sponge- honey, warm water and yeast were whisked together until foamy, then stirred with whole wheat flour, bulgur, oil and salt and allowed to sit until all puffy and fragrant. I mixed in the bread flour and millet, and pretty soon was faced with a coarse hairy blob of dough, and tiny grains of millet popping all over the kitchen. It seemed like hours before I stopped feeling their little hard knobs under my feet, even with obsessive sweeping. But the magic of kneading kicks in- and magic it is- taking a rough and craggy blob and transforming it into something smooth, elastic and uniform, dotted with the tiny yellow points of millet and smelling alive and warm.
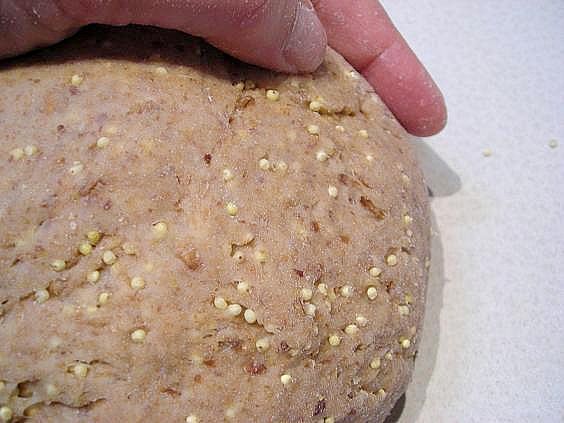 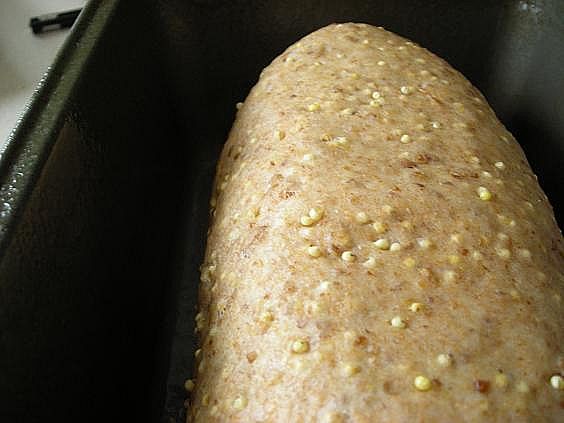 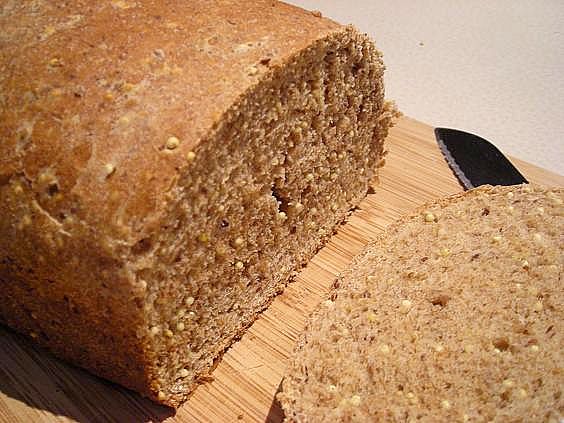
The rest is your basic bread instructions; rise until doubled, punch down and allow another rise (which I skipped for time purposes) shape the loaves and place in a pan, rise to double again and then bake. I won’t bore you with instructions.
And somewhere along the way, amidst all this tactile interaction and flour/yeast transformation, a tiny sliver of light knifed through me, lifting the melancholy, driving it far away. Was it the nap I took during the first rise? Maybe. It likely was something else altogether; the bread making lifted my spirits, even with the late winter storm blowing hard outside and the yeast saturated me with it’s own little charm. It could have been the workout I gave my arms and shoulders as I kneaded, driving a much appreciated blast of endorphins into me, or it could have been the fact that a hands-on loaf of bread is a thing of beauty. It transports you back to a simpler time, before cellophane loaves were the norm, where you watch a few pantry staples work a magic trick right before your very eyes. It’s nearly impossible to bury yourself in the blues with that happening in front of you.
And the taste….well, that’s enough right there to lift your spirits. This loaf was moist, a nice dense crust and crunchy little bites of millet throughout. It made awesome toast too- to me, the best indicator of a good bread. I’m thinking that I need to buy this little bread book.
(recipe after the jump)
Come in to my kitchen…
January 27th, 2009
| 3 Comments »
And how I got from hot steaming soup to a cool salad I have no idea, but I can’t throw off the desire to recreate something I see on a website, even if the weather outside is more comfort food appropriate than salad worthy.
I wish I could remember where I originally saw the photo of this Orzo salad with yellow pepper, kalamata olives and feta cheese because it would be nice to give due credit. Regardless, with a party to attend it was the perfect excuse to give it a whirl even if the temperatures outside plummeted to sub-zero once again.
I’m really glad I did.
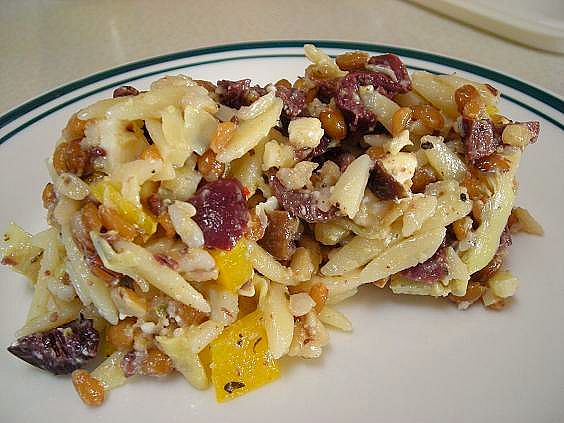
The original recipe called for orzo and israeli couscous- double pasta whammy- and although it probably would have tasted fine, it was too much in the carb department. As I browsed the grocer’s aisle in search of some type of substitute and appearing about as aimless as possible to all those frantic cart pushers around me, I finally spied, way on a top shelf and really obscure, a package of Kashi Original 7-Grain Rice Pilaf.
I am, admittedly, always willing to buy just about anything from Kashi, even without scrutinizing the label, the ingredients or even the expiration date like I tend to do. It’s one of the few items in a grocery store that I know is good quality. What I liked about this ‘pilaf’ if you can even go so far as to call it that, was that it was nothing more than a simple vacuum packed assortment of cooked whole grains. That’s it. No sodium laden, preservative choked flavor packet to add, no un-pronounceable ingredients, nothing but cooked grains. A quick turn in the microwave and they were ready to eat, or to be tossed into any preparation, mixed to your own liking. I love the idea of whole grain pilafs; the mix of nutty and healthy grains can compliment any dish, but since most of them require widely fluctuating cook times, it’s hard to think of putting them together myself without a whole lot of work. I do imagine though, that the work and effort would be totally worth it.

I did add some extra wheatberries to this dish. I love their chewy goodness and the added nutritional aspect of them. They are really simple to keep on hand to add to any number of preparations, especially pilafs. Eating Well magazine has the goods on cooking wheatberries. This is how I do it. Then I package them in one cup increments and freeze them. They break apart very easily once frozen and have a long shelf life. I add them to pasta dishes, pilafs, soups, oatmeal, breads…..the list is endless.
This is one of those dishes that tastes better once the flavors have a chance to get to know each other really well. I mixed it on a Saturday for a Sunday party and the sampling while I prepped didn’t impress me at all. By the time it was served the next day it was a lot better.
And I’m certain it will taste much more appropriate in July. It’s kind of nice to get ahead of myself on summer foods!
Orzo and 7-Grain Salad
1/2# cooked orzo pasta
1 pkg Kashi original 7-Grain rice pilaf
1/2 c. cooked wheatberries
1 yellow pepper, diced
1 4-oz can artichoke hearts, chopped
1/2 c. kalamata olives, chopped
1 3-oz pkg feta cheese
italian style vinaigrette
Salt and pepper
Prepare pilaf according to package directions. Stir all ingredients together in bowl and add about 1/3 c. dressing to coat. Season to taste with salt and pepper. Cover and refrigerate overnight or for several hours. Before serving, stir thoroughly and taste for seasoning. Add more dressing, salt and pepper if needed.
KATE’S NOTES:
I ran out of kalamata olives and to add more of that tangy flavor, I stirred some olive tapenade into the dish. This could easily sub for the olives. Go the extra mile and make your own vinaigrette, or use a good quality bottled option. The possibilities for extra additions to this are endless.
September 29th, 2008
| 8 Comments »
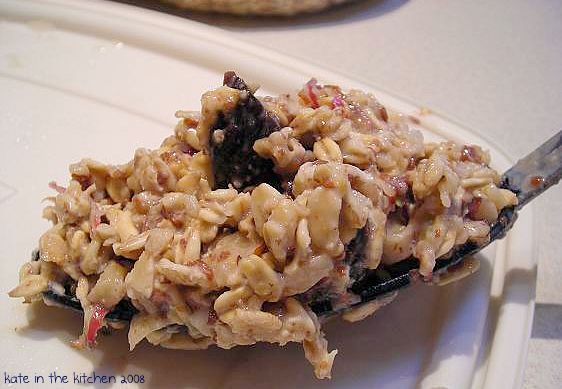
Overnight Apple-Date Muesli
By Robin Asbell, The New Whole Grains Cookbook
1/2 c. slivered almonds
2 medium apples
1 1/2 c. nut milk, or other milk
2 T. maple syrup
1 1/2 c. thick rolled oats
1/4 c. soy protein powder (optional)
1/2 c. pitted dates
Preheat oven to 325 and spread almonds on a baking pan. Bake for 10 minutes or until golden. Let cool.
Get out a large storage tub or bowl with a lid. Quarter the apples and core, then shred right into the bowl, skin and all. Add remaining ingredients, including almonds, and stir well to combine. Cover tightly and place in refrigerator overnight.
In the morning, stir thoroughly. Spoon desired amount into individual bowls and serve cold, or warm in the microwave for up to 2 minutes per bowl.
KATE’S NOTES:
I tried this the first time with the protein powder and decided I didn’t care for it, but that’s just me. I always, always, always add in about 2-3 tablespoons of ground flaxseed to this, regardless. I double it and we enjoy it for several days. It will get softer and a bit less flavorful the longer it sits, but if you’re like us, it rarely lasts that long.
I am not a fan of dates but I. Love. Figs. so I chop those up into it instead. The variations on this, like I said, are infinite. Use raisins, currants, dried cherries, craisins, dried apricots or any type of dried fruit you like in any combination; vary the apple flavor by going tart or sweet; add in a multitude of nuts, use other cereal flakes, like barley. Skip the maple syrup or use an alternative, like raw or maple sugar sprinkled over the top before you eat it. Give it your own fingerprint and I’m sure it will also become a favorite for you.
May 27th, 2008
| 7 Comments »
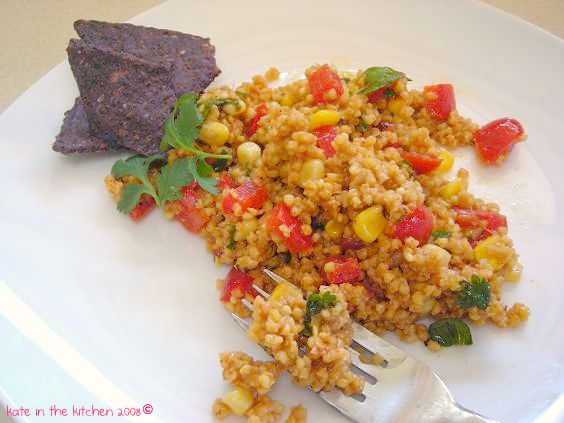
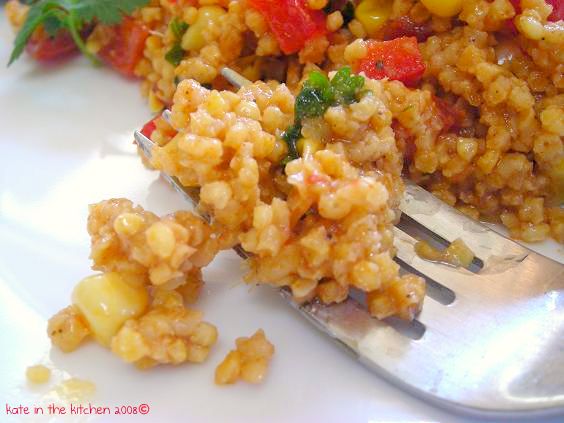
African Millet Salad with Corn and Peppers
from The New Whole Grains Cookbook by Robin Asbell
3 T. olive oil
1 medium onion, julienned
2 T. chopped garlic
2 T. minced ginger
1 T. paprika
1 t. black pepper
1/8 t. ground allspice
1/8 t. cayenne pepper, or to taste
1 c. millet
1 t. salt
1/4 c. lemon juice
1 T. brown sugar
1 8-oz can extra crunchy corn
1 small green bell pepper, chopped
1 roma tomato, chopped
1/4 c. parsley, chopped
1/4 c. roasted peanuts, chopped
In a 2-qt saucepan with a tight fitting lid, heat 1 T. of oil and saute onion until golden. Add garlic and ginger and cook for one minutes, then add paprika, black pepper, allspice, and cayenne and cook for one minute more. Wash millet quickly and drain; add to pan and stir, coating grains and cooking until hot to the touch. Add water and salt and bring to boil, then reduce heat and simmer on low for 20 minutes before checking for doneness**. When all liquid is absorbed and grain is tender, cover and remove from heat, allowing to steam for 10 minutes. Scrape millet into bowl and cover, then let cool. Whisk remaining oil with lemon juice and brown sugar in a small bowl. Stir corn, bell pepper, tomato and parsley in with the millet, then drizzle dressing over and stir to coat. Serve topped with peanuts.
KATE’S NOTES:
I used cilantro in place of parsley as I had it on hand; a red bell pepper instead of a green (don’t care for green) and frozen corn instead of canned.
**Despite following the cooking instructions faithfully, the grain, I felt, came out to be a little chewier than I expected and being unfamiliar with it, I contacted the cookbook author to ask her opinion on the texture. Her response was that millet can often be confounding in that way, and the amount of water listed in the recipe can sometimes be less than needed and other times it’s just enough. She feels this is simply one aspect of the grain’s natural humidity level, and can be adjusted during the final cooking stages. Once the grain has absorbed all the water, she suggested to quickly stir and remove a few pieces to test for tenderness, and if it is still firm and chewy to add in a little more water- 1/4 to 1/2 cup- quickly bring the temperature back to boiling, then reduce and simmer again for another 10 minutes.
April 29th, 2008
| 4 Comments »

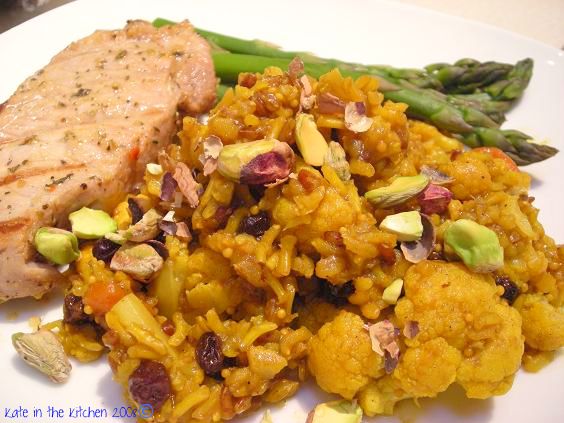
Indian Red Rice Pulao with Pistachios
From The New Whole Grains Cookbook by Robin Asbell
1 T. canola oil or ghee
1 T. chopped ginger
1 T. brown mustard seeds
1/2 t. chili powder
1 t. ground turmeric
1 c. red rice or brown basmati rice
2 c. water
1 medium carrot, sliced
2 T. brown sugar
1 t. salt
2 c. cauliflower florets
1/2 c. currants
2 T. lemon juice
2 large scallions, slivered
1/2 c. shelled pistachios or toasted slivered almonds
In a 2-qt saucepan, heat oil briefly and add ginger and mustard seed. When ginger is fragrant and seeds are popping slightly, add chili powder and turmeric and cook for a few seconds. Add rice, water, carrot, brown sugar and salt and bring to a boil. Cover tightly, reduce heat to low and set a timer for 35 minutes. When the timer goes off, quickly put cauliflower and currants on top of rice, cover and cook for 10 more minutes. Remove pan from burner and let stand, covered, for 5 minutes. Stir in lemon juice and serve topped with scallions and pistachios.
KATE’S NOTES: I used a combination of red and brown basmati rice for this dish and it was terrific. I felt that the finished dish was a little sweet; next time I think I will cut back on the brown sugar and maybe add less currants. By the time I added the cauliflower, all the water in the pan had been absorbed, so I poured in more, and it ended up cooking for a while longer than listed in the recipe, but it wasn’t a huge issue. The carrot, being small and thin had just about fallen apart by the time it was all done. Overall, it was a phenomenally flavored dish and I can’t wait to make it again.
November 7th, 2007
| 5 Comments »
Lentil and Couscous Salad
1 ½ c. lentils
3 c. water
Bring water and lentils to a boil, reduce heat and simmer until lentils are tender but not mushy; 20-25 minutes.
¾ c. couscous
1/3 c. broth or water
1 T/ olive oil
Bring water/broth and oil to a simmer and stir in couscous. Cover and remove from heat, let stand for 5 minutes then fluff with fork.
1 small red, orange or yellow pepper, seeded, cored and diced
1 shallot, peeled and diced
½ c. diced dried apricots
½ c. currants
½ c. chopped almonds
Saute shallot and pepper until soft, add in currants and apricots, cook for 5 minutes. Stir in almonds and remove from heat.
Dressing: Combine together:
½ c. olive oil
3 T white wine vinegar
3 T. lemon juice
2 T. lemon zest
1 t. cumin
1 clove garlic, mashed
2 T. fresh oregano, minced
salt and pepper to taste
In a large bowl, combine lentils, couscous and pepper/apricot mixture, stir to combine. Pour dressing over and toss gently. Chill or serve at room temp. Top with toasted almonds if desired.
Mix in one cup cooked wheatberries, if desired. Your choice.
Recipe Notes:
The original recipe called for the tiny french green lentils, but I used the larger brown ones because it was what I had on hand. Sub in any kind or color you like. You could even use a flavored couscous. Mix up the dried fruit too; cranberries might be yummy. Or omit it all together.
|


 I still love really good bread and for a long time I routinely spun loads of flour, water and yeast in my bread machine, so much so that I managed to effectively kill the thing outright, but I’m happy to have gotten my money’s worth. Since then, which was quite a while ago, I haven’t made a lot of bread from scratch despite having the time and the desire for it. I experimented with t


