July 10th, 2011
| 5 Comments »
Beyond the deep green of spinach, and now kale, I hadn’t yet moved towards other deep green leafy vegetables, such as collards, mustard greens, or chard of any variety. But I’m working slowly to incorporate more of this incredibly nutritional vegetable in to my diet though. It’s a work in progress, for sure. So, in consideration that I didn’t just wake up one morning in a “Hallelujah!!” moment and love spinach to death, or eat one bite of kale and declare myself transformed, trying out Chard, and finding that I liked it on the first attempt was somewhat surprising.
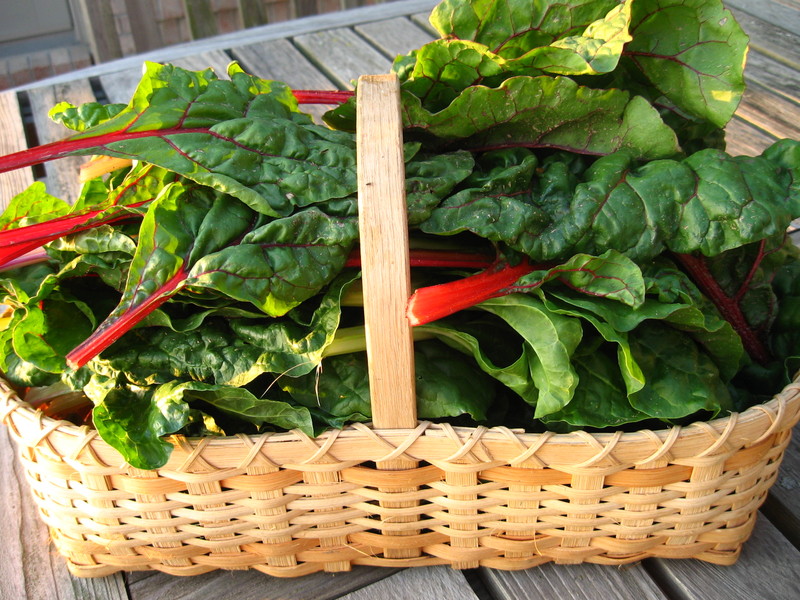 ( photo courtesy of Going Local ) ( photo courtesy of Going Local )
I’m exploring a lot more offerings on the tables at the Farmers Market these days. And really, I’m loving the results. Approaching my favorite organic farmer one afternoon, I spied a small bunch of delicate baby red chard sitting on his table, with it’s lush deep red veins and crisp, exceptionally dark leaves and something in my mind went “Get that now!” and so I held out a few dollars and walked away with this thick bunch of greens thinking “I have no clue what to do with this.”
But thankfully, that’s never stopped me before. And we learn a lot through often just following our will in to adventure; listening to the voice that tells us to turn left at the crossroads, even when you have no idea where ‘Left’ goes. I trust my gut instinct. And this bundle of red chard was that gut instinct telling me to branch out. So I sauteed the chard one morning, and topped it with a poached egg. I’d been making this breakfast for a while now, only with leafy braised kale and loving how energizing and delicious it was. It seemed the next logical step was to try it with chard.
And I was devouring – devouring – the last bite when I realized that I should have maybe tried to take a picture of it. So trust me, ok? It was divine.
The next week when I went back, there sat my favorite farmer, again with bunches of Red Chard on his table, although much larger and leafier than before. I told him how delicious that tiny bunch had been and his eyes lit up. You see, my very first experience with chard years ago, and subsequent experiences since then were not favorable. Maybe I wasn’t ready at that point to be going ‘Left’ in my exploration of leafy greens, of appreciating the merits of good health that they offered. It hadn’t left a very good impression, but that little bunch of organic chard, at this point in my life where I am firmly rooted in learning, exploring and embracing a plant-based eating plan, well that impulse purchase had Wow-ed me, and I happily handed over a few more dollars and stuffed another huge bunch in my sack. When I made it again, it was lunch for Mike and I.
And I remembered to take a picture.
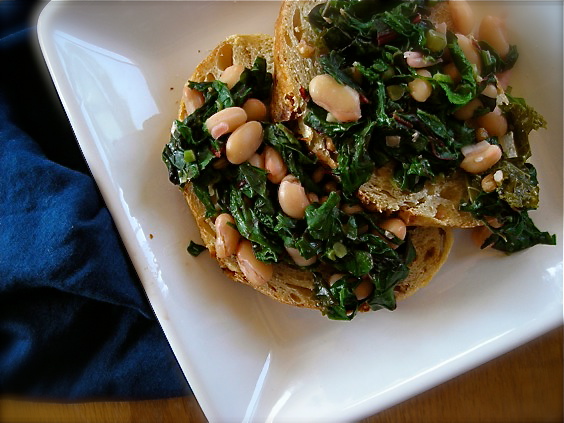
But like spinach, and beet greens, a whole enormous pile of leafy chard can be reduced to a little pile of barely anything by a few quick turns in a hot skillet. And with one lunch, plus me stealthily hiding the leftovers so only I could benefit from them, that delicious $2 bunch of red chard was gone in a matter of moments. But it left such a nice taste and experience in my mouth that I eagerly anticipated a return to said farmer, and maybe TWO bunches of it this time. Alas, by the time I got back to that market, his slot remained unhappily empty. Given that it was the day after July 4th, I’ll grant him his absence. But by golly, if next week rolls around and he isn’t in his usual place, his hat pushed back and a truck full of truly wonderful produce behind him, don’t be surprised if you hear that I’ve broken down crying.
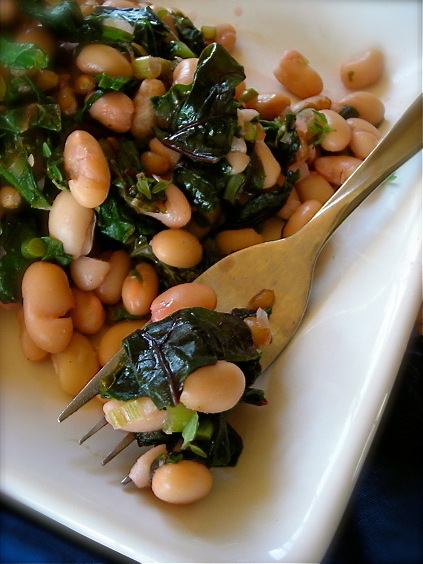
Because that’s how quickly, and deeply I’ve fallen for this rich and lush green. It’s dark and brooding, silky, tender and tastes like I’m in the middle of a deep forest drawing in the air, and the green. Can a vegetable taste like a color? Does color even have a taste? To me it does, and this chard tastes like it looks. Deep green, and rich with flavor and I’m sold, 100%.
Have you tried Chard? What do you like to do with it?
Chard and White Beans with Fresh Herbs
2 small shallots, finely minced
2-3 garlic cloves, minced (use minced garlic scapes if you have them, about 2 T. worth)
2 big bunches red chard, stems removed and rough chopped
1 15-oz can Great Northern Beans, drained and rinsed
1-2 T. each finely minced parsley and thyme
1/2 c. cooked wheatberries (optional- I had these on hand and they were delightful in this dish)
In a large skillet, saute shallot and garlic until tender. Add the chard in handfuls, stirring to saute. Cook chard for about 5 minutes, or until tender. Stir in white beans and herbs. Season with salt and pepper and cook for a few minutes to blend flavors. Add a few tablespoons of water if dry.
Recipe from Whole Foods, with heavy modifications
July 5th, 2011
| 2 Comments »
I’m learning a lot on this plant-friendly journey, with the biggest lesson being that all plants based meals, while gorgeous in color, aren’t always the easiest to photograph.
Take this Farro and Greens dish……
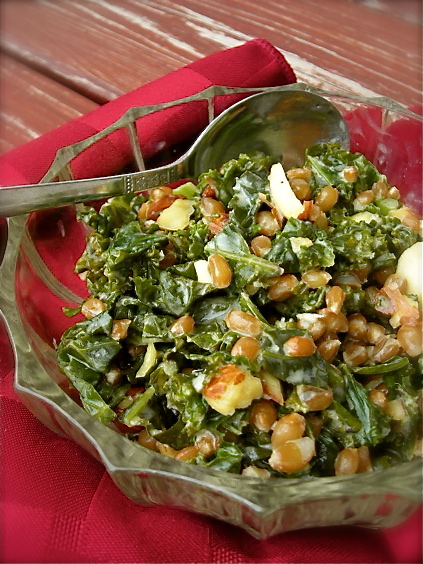
It was delicious, satisfying and full of textures and tastes. But when I tried to plate it to photograph, I stared down at it’s curly leaves of kale, it’s burnished grains and hearty nuts and said “Dang, you’re kind of homely.” Because it was, through no fault of it’s own though.
Thankfully I didn’t hurt it’s feelings.
I ended up having to take it outside into full on natural light, not the light through the west window in my sunroom where I usually set up my shots. Even then, outside it took about 8 shots before I really started getting the angle right, the focus firm and the shot like I wanted. And I was talking to it. Outside. On my patio steps, hunched over to get the right angle and mumbling to my food. Yeah. I’m THAT kind of blogger.
But enough already….. delicious? Did I mention that? Wow with a capital “W” !!! It was good at room temperature after I tossed all the ingredients together. It was fine, oh so fine, when I ate it cold for lunch the very next day. And it was still good heated up a day or two after that.
And that’s another thing I’m learning; plant-based foods can manage a patient wait in your fridge so much longer than a dish with meat. (yeah, I know…..duh) And they can happily sit on your counter for a while (like over an hour when you, ahem, forget about them there) and really there’s no loss to you, or risk in it at all.
And quick….. quick! Plant based meals are lickety-split quick, people. I had this done in the time it took to slowly simmer the kale to a great tenderness, all of 15 minutes. A recent lunch with red chard and great northern beans took maybe 5 minutes to pull together. A side salad, those amazing chickpeas I just talked about? Less than 10. My humongous salads topped with a whole rainbow of crunchy veggies? Well, if I take the time to prep all of it ahead of time and keep them in containers, I can have a giant heaping bowl of a masticator’s delight in maybe 5 easy minutes. I made Peanut Noodles, and in the time it took to boil water and cook the noodles, the pepper, cucumber, green onion and carrot were done and sitting on the counter.
So yeah…. quick. And delicious. And healthy….. I still feel so amazing, and the best part? Even on those nights I don’t sleep so good, which seems to be the story of my life, I still am energetic enough to get through the day without collapsing. I feel tired, but the exhaustion that I had come to expect just isn’t there anymore. I feel pretty humbled by this little experiment, and so grateful for the ability to swiftly change directions, to move into even better health and well-being and to be able to talk about it and share it with you.
Now if only these pretty, colorful and healthy little meals would step up their game under my camera lens.
Toasted Farro with Greens and Tahini
1 c. cooked farro, or wheatberries, cooled and chilled.
2 T. tahini
2 T. extra virgin olive oil
2 c. tightly packed greens, chopped- you can use kale, spinach, chard, mustard, collard, turnip… whatever you like
1/2 c. parsley leaves
2 T. fresh lemon juice
1/2 c. chopped nuts, such as pecans or almonds (optional)
Salt and pepper to taste
Whisk the tahini and olive oil with two tablespoon of water and set aside.
Heat a deep skillet over medium heat. When very hot, add the chilled farro. Don’t mind if a little moisture causes it to hiss or sizzle. It will cook off as you toast the grain. Shake the pan often, heating the grains until they’re very warm and fragrant, maybe 5 minutes. Be very careful not to burn them. When hot and toasty, remove grains to a bowl. To empty skillet, add 1/3 cup of water and the greens, stirring and cooking until they’re tender but still have a bit of toothy bite. Add the farro and the tahini mix, and stir to combine. Allow to cook for a few minutes to blend the flavors. Stir in the lemon juice, and season with salt and pepper. Serve topped with nuts, if using.
Source: Food and Wine magazine, with heavy modifications
KATE’S NOTES: I used wheatberries for the farro in the recipe as I had some already cooked in the freezer and farro is often hard to find. They make a perfect substitute. You could also sub in cilantro in place of the parsley, or add more fresh herbs, like thyme or oregano. I also added in lemon zest to make the overall flavor brighter.
May 25th, 2011
| 3 Comments »
No, not Impatiens, like the potted flower on everyone’s doorstep. This is true impatience, the feeling brought on by delayed spring time, blooms that just don’t occur, endless gray skies and parades of devastating storms and the fleeting thought that I can’t recall what my warm weather clothes are like anymore. It’s almost Memorial Day. We briefly met 70 degrees this Spring, only to quickly plunge back to the 60’s, the 50’s and a few shivering days where 40’s were all the atmosphere could muster. Who’s hogging all the 80-degree days? Minnesota needs you to share. Now.
Despite the cool weather, the lettuce and radish seeds I planted are flourishing and I’m dreaming of amazing salads. The annuals in the garden are coming along nicely, albeit several weeks behind schedule. And with the drenching rains and lack of sun, the emerald greens around us are amazing. Simply amazing. While Spring hasn’t exactly been the most glorious in terms of the temperatures and sunshine, it’s still showing me it’s fragrance and the visions that we wait all Winter to appreciate.
I missed the very brief window of opportunity to love up the crabapple tree in our front yard, as it hit full bloom on a Thursday, only to be wiped clean of it’s lush petals through a series of weekend storms that unleashed torrents of rain on us, and some terrifying sky.
 
And a subsequent walk through the neighborhood revealed glorious pink petal carpets from the stripped crabapple blooms.

In my garden, the Creeping Phlox filled out it’s little garden bed beautifully.

The Adjuga along the front garden path burst into a rich and full display, basking in a rare sunny day while hiding among the new Hosta blooms and the fallen pink petals.
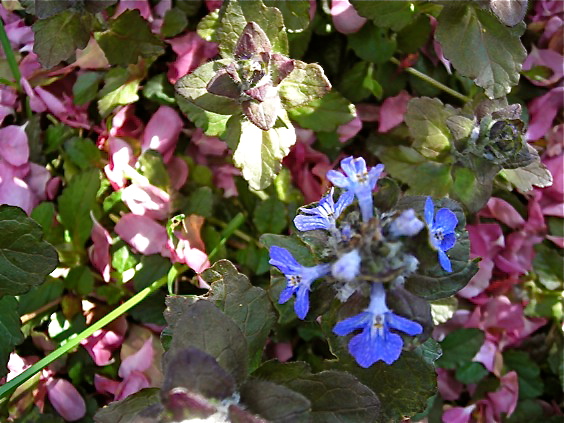 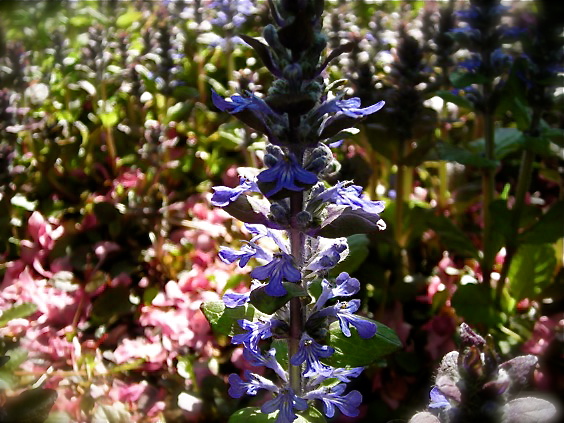 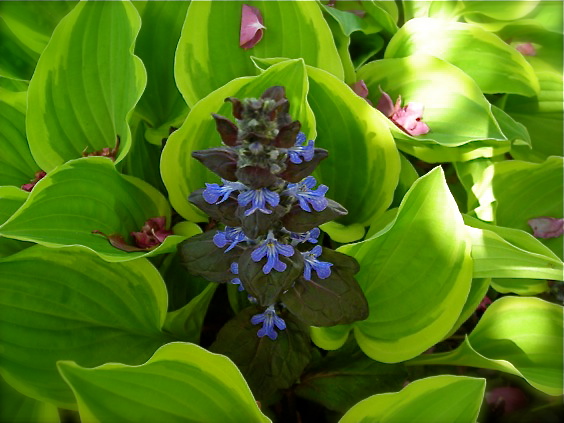
Adjuga is a wonderful ground cover, and it grows on a flagstone path right along the front of our house. It’s mostly for shade, but can handle a little sun and it forms a nice thick carpet. In the Spring, it sends up flower stalks about 6 inches high that have these tiny little blue flowers on them. It’s one of the most favorite, carefree and reliable plants in my yard.
What else has May brought?
Oh yeah. An adorable cat of course, with nary a care in the world it seems.

A gorgeous new stove!!!
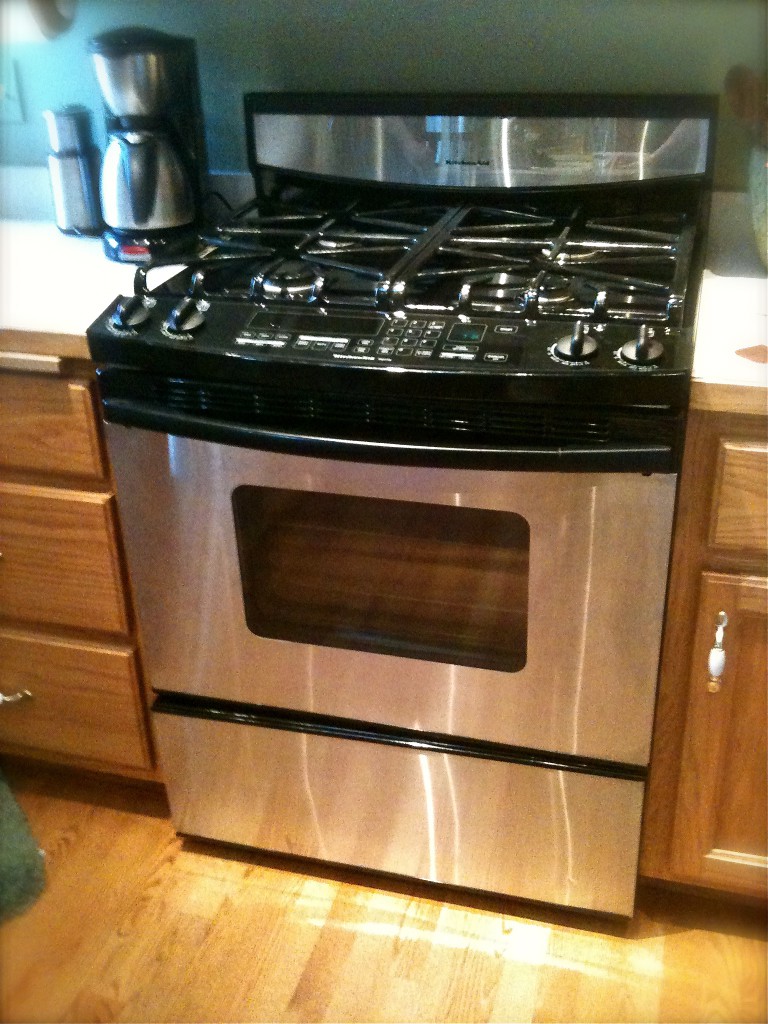
I’m still in awe over this acquisition. One of my food blogging cohorts is remodeling her kitchen and through a few Twitter exchanges, she offered to sell me her old stove for $100 and a case of beer for the guy who drove it from NE Minneapolis out to the far Northern suburbs for us. The door hinges were broken and it needed a power cleaning, but for $150 in parts and a bit of elbow grease, we landed a stove that retails for $2,200.00. I kid you not. It’s like going from driving a Yugo to being handed a Ferrari with a full tank of gas. We seriously lucked out and we’ve taken to calling it our ‘Grown Up’ stove, something a serious food lover should have in her kitchen.
There were a few lovely nights on beautiful restaurant patios with my beautiful laughing food-loving friends that only solidifies how much I am falling in love with them…..

This is #GirlsBigNight, hanging outside Cooper West End with (L–>R) Dania, (me) Jen and Virginia. Yes, we posed that way on purpose.

Enjoying the tree-shaded patio at Heidi’s 2.0 in Minneapolis with the #MNFoodBloggers, Shaina and I after a few amazing cocktails. Everyone really, was as happy as we look. It was just one of those all around perfect nights.
On a rare nice night following a hectic afternoon of rain and thunder, it’s nice to find the calm after the storm.

And then???
Roasted Chickpeas. Because this is a food blog, after all. For the most part anyway.
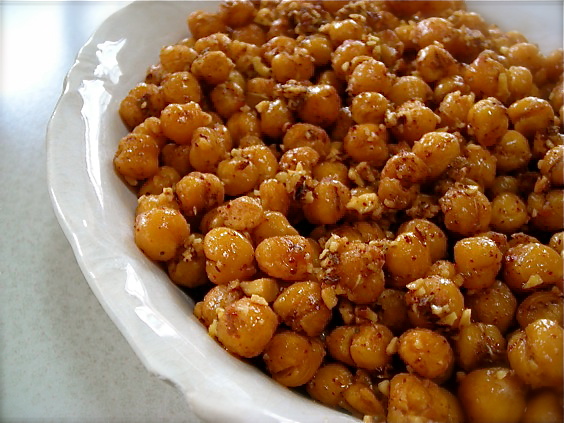
I’m super late to the whole ‘roast a can of chickpeas for the ultimate snack’ craze. Seriously late. And I’m ok with that. I don’t jump on too many bandwagons as I always seem to miss, fall flat on my face and then have to slink away in silence, tail between my legs. I like to watch these things go by, silently waiting to see if it endures, if it sticks around long enough to not be called a fad, a trend or the next big thing. These little golden nuggets of crunchy-ness are a perfect snack for the improved eating plan going on around here. I think I could even get my Teen to try a few handfuls. They’re like Corn Nuts, but less processed, less packaged without all the strange things. I feel that these will make a regular appearance in my kitchen for a long time to come.
Roasted Chickpeas
Preheat the oven to 400°. Drain two 15-oz cans of chickpeas and rinse well. Shake off excess water and pour chickpeas on a baking sheet lined with paper towel. Use another paper towel to blot chickpeas dry, then slip the off the bottom towel. You want them to be absolutely bone dry before roasting them. At this point, if the chickpea skins bug you in the same obsessive way they bug me, you can remove them. If not, then slip the pan in the oven and let roast for about 10 minutes. Shake the pan to loosen the chickpeas, then continue to bake, shaking the pan on occasion, until they are browned and crisp, with a rich nutty scent. Be careful not to allow them to burn. Depending on your oven, this should take 30-40 minutes. Watch them carefully.
Take them out of the oven and toss them with a little oil and any kind of seasoning you like. For this batch, I used a small amount of olive oil, the juice of half a lime and about 2-3 teaspoons each of chili powder and cumin, plus some sea salt. Toss to coat and serve warm or at room temperature.
For more flavoring options, see this post.
http://www.thekitchn.com/thekitchn/tips-techniques/15-more-ways-to-flavor-roasted-chikpeas-106112
May 16th, 2011
| 3 Comments »
If you recall, Whole Foods invited me to participate in a 28-day challenge based on the Engine 2 eating plan (I hate the word ‘diet’ and won’t use it) that calls for a 100% plant based way of food consumption. It goes so far as to exclude fats and salt as well. My take on it was to kick out the meat. We eat more than I want mostly because my teenager really loves meat, but Mike and I were getting tired of it. And it’s the costliest item in our food budget. As well as going meat-free, I’ve cut out my beloved butter, the only dairy I consume and I’ve cut down on oil usage and tried to avoid salt.
So… two weeks in to this eating plan, and what’s been happening?
#1- The teenager is a bit miffed. ‘What do we eat!?’ he says with emphatic resignation. But the meat free meals that leap from the stove top have him devouring his portion with gusto. I’ve given in to his need for meat on occasion, utilizing small amounts of chicken for him, and having a meal with shrimp. But this boy is not suffering. No no…..
#2- My pants fit better. And I can get myself in to two pairs of jeans that I haven’t been able to wear since last summer. Some of the belly fat is disappearing. I think my face looks thinner. I have a bit of a way to go with reaching what I think is an ideal weight for me, but this eating plan wasn’t about losing weight at all. I needed maybe a 10 pound drop at most and when I started the plan I had already lost about 5 of those pounds. For me, this is about eating more healthy foods and feeling better.
#3- This is a big one. Several months ago I started experiencing symptoms of menopause, mostly in the way of hot flashes. They had become really intense, and a constant in my day. They’d cover my neck and shoulders, resulting often in getting so overheated that the underside of my hair would become very damp. And the worse ones came at night, radiating through my pelvis and hips and down my legs, causing me to kick off the blankets to cool down. I’d fall asleep, then waken later absolutely freezing. This night cycle went on and on, and it wasn’t helping my sleep patterns at all. But since giving up meat consumption, the hot flashes have fallen off dramatically, the lower body ones disappeared completely and the consistency has been reduced to only a few light ones each day, mostly very manageable. No more damp hair!! And this happened within days of giving up meat. It’s been completely unexpected but such an amazing finding. If I’d known giving up meat would help this, I would have done it ages ago. Another physical aspect that has fully disappeared when meat left my meals is any kind of stomach upset. I’ve been blissfully comfortable for the past two weeks with no indigestion, no upset or gas and no bloating.
#4- I miss my popcorn fix, but that’s about the only food I really want to be eating that I’m not. I simply can’t eat popcorn without melted butter and salt, and at least once a week I would pop a big bowl of it and crunch crunch crunch my way through, sighing in contentment, slurping buttery salty fingers and smiling through eyes half closed in a popcorn induced ecstasy. I think I love the sensation of it, the textural pleasure of eating something so noisy, and so flavorful. I don’t really miss meat, nor crave it. See #3. But I really miss my popcorn.
What this plan is doing for me that I do love is really giving me a lot more reasons to look at the foods I eat and make the best possible choices. I was out for an evening with some friends and had to take a good hard look at the menu options for something that fit this challenge; thankfully I had three choices to pick from, all of them acceptable. Eating out may be more challenging, and thankfully we don’t do it that often. But we’ve also been eating pretty mindfully prior to starting this plan. This gives us a reason to take it one, or ten steps further.
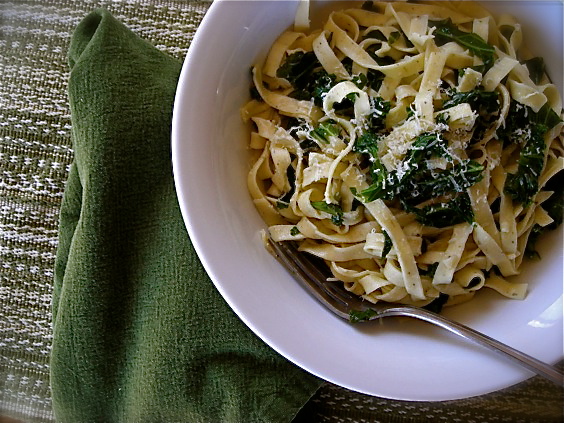
This pasta dish is halfway acceptable for the eating plan, in that it’s loaded with braised kale. The fettuccine isn’t exactly E2 friendly, but it was what I wanted to eat after an intense afternoon of gardening. Sometimes you’ve just got to allow for a dish that nourishes the soul as well as it fills the belly. I really struggle with any aspect of eating that deprives us of what we really want. If I really want popcorn, I’m going to make it. If I want a juicy bratwurst, I will grill one so that the skin splits and it sizzles in delight, pressed between the edges of a perfect bakery roll and slathered with the best mustard in my fridge.
But at the same time, what I put in this body of mine, the only one I’ve got, really does make a difference in how I feel, the energy I have and the way I get through my day. I’ve felt it, noticing when I don’t eat healthy foods and had to force myself through the side effects of poor eating; the sluggishness, the lack of energy, the belly aches or heartburn. I’m not harming myself by consuming a grilled piece of chicken, or some perfectly cooked shrimp. And I’ve found that by really paying attention to making 90% of the foods I eat be healthy, plant based foods, it really has made a huge difference in how I feel. Should I go to 100%? Should I give up the oils, the salt? Should I? For me, this alternative plan makes sense. I like the results, the way it makes me feel and the relative ease on my pocketbook. And if in just two weeks it’s got me thinking of even more ways to have healthier options in our meals then I feel it’s achieved something great.
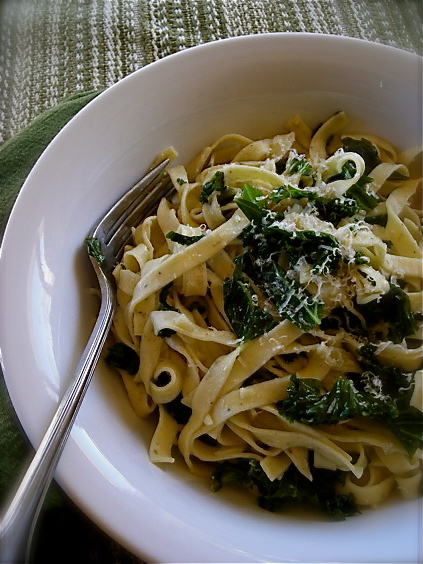
Like I said about this dish, it fit what I really wanted to be eating, when the hunger became so great from all the activity that I’d done I found myself with shaky hands and that trembly feeling of a deeply low blood sugar. I needed about 20 minutes to gently cook the kale until it was silky soft and lush, and only a few minutes to cook the fresh dried fettuccine I had on hand. A toss together in the deep skillet with a few dashes of lemon juice and some rosemary Manchego cheese I had on hand (totally not E2 friendly, but ah well…..) and I sat down with a deep bowl, a thick heavy fork and a content sigh. It had been a long day, but a full one, one with accomplishments and a lot of good spring sunshine. Eating a terrific and healthy meal was like placing a fancy top hat on the end of this day, and swinging off with a jaunty step.
Braised Kale with Spaghetti
1 pound lacinato kale (about 2 bunches), large center ribs and stems removed, cut crosswise into 1/2-inch slices
3 tablespoons olive oil, divided
1 medium onion, finely chopped (about 1 1/2 cups)
8 large garlic cloves, thinly sliced
1/2 pound spaghetti
2 teaspoons fresh lemon juice
Finely grated Parmesan cheese
Rinse kale. Drain; transfer to bowl with some water still clinging.
Heat 2 tablespoons olive oil in heavy large pot over medium heat. Add chopped onion and cook until soft and translucent, stirring occasionally, about 6 minutes. Add sliced garlic and sprinkle with salt; cook until onion is golden brown, stirring occasionally, about 5 minutes. Add kale and remaining 1 tablespoon olive oil and toss until wilted, about 3 minutes. Cover pot and reduce heat to medium-low. Continue cooking until kale is very tender, stirring occasionally and adding water by teaspoonfuls if dry, about 20 minutes.
Meanwhile, cook spaghetti in medium pot of boiling salted water until tender but still firm to bite, stirring occasionally. Drain, reserving 1/4 cup cooking liquid. Add cooked spaghetti to kale mixture in pot. Add lemon juice and 2 tablespoons reserved cooking liquid; toss to combine, adding more liquid by tablespoonfuls if dry. Sprinkle spaghetti with grated Parmesan cheese and serve.
Original recipe from Orangette.
KATE’S NOTES: I made this with regular curly leaf kale, and used a 16-oz bag of gourmet basil fettuccine in place of the spaghetti. I did not use onion, and only used 3 cloves of garlic; it was plenty! Do make sure you give the kale a nice slow simmer. The result is so tender and delicious that it’s positively addicting, and well it should be. This recipe is what turned Molly’s mind away from hating kale and I’m pretty sure if you let it, it will do the same for you.
April 25th, 2011
| 4 Comments »
Last Spring at this time, our perennial garden was full of glorious color. The tulips were opened….

The Creeping Phlox was a lovely carpet of purple…….

There were Johnny Jump Ups leaping up all around the garden beds.
 
And I had managed to keep the Prairie Smoke from being devoured by hungry critters.
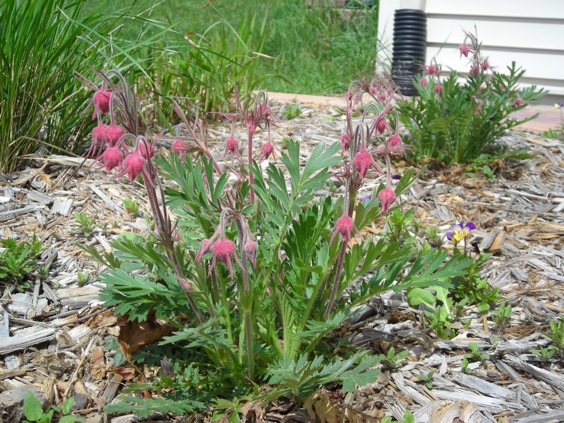
Which, unfortunately, I wasn’t able to do this year. Somebunny devoured all the pink buds and leafy greens on these native plants. Ah well…..
We’re a lot further behind this year on the revival of the earth, it’s flowers and new grass. It’s almost May and the Star Magnolia bush, my harbinger of Spring, has yet to open even one of it’s gorgeous and fragrant flowers, although with current warm temps and sun, it’s reaching it’s fat buds to the sky and starting to come alive. This is possibly the latest in the year that it’s started it’s bloom, according to the garden journal I’ve kept since 2006. I love recording the rhythm of the seasons, the sightings of birds in the yard, when the migrations start and the seasonal visitors like Hummingbirds and Orioles return, the first (and last) snowfall, the last ice-out on the area lakes, the foxes, possums and creatures that roam the night time. It’s a wonderful way to keep track of the ebb and flow of the life outside our windows.
And everyone is impatient for Spring, for warm weather, for shedding the pants, shoes and sleeves to bare their skin to the sun. For me, more this year than any I’ve been really, really eager to see the bounty of the season begin. I’m craving all forms of green; vegetables, tender baby lettuces, spring spinach, asparagus….. you name it. It’s like I can hear my body complaining loudly about the lack of chlorophyll. Even my Teen said that he was craving a salad. So when Mike pulled some items together for dinner recently, he brought home a large amount of lettuces from the store. Since Farmers Market time is still a few weeks away, these greens will have to do. We washed them, and consumed large bowls of salad with our burgers and roasted potatoes. It was the first real meal I’d eaten all week due to my sickness. And it tasted glorious.
Just prior to getting ill, I came across kale at the grocers for $.99 a bunch. I haven’t been that adventurous with kale much, although for the life of me I can’t figure out why. I bought a large, deeply green bunch and it promptly languished in my crisper drawer due to the toxic onslaught I endured. A small handful went into a smoothie I tried to drink, the rest just sat. And kale doesn’t mind sitting too much, as it’s quite hearty. When I finally pulled it out, it looked no worse for the week it spent in my fridge, and it happily blended with scrambled eggs to make an awesome breakfast sandwich, then later, with quinoa and toasted pecans for this nutritiously rich and flavorful salad.
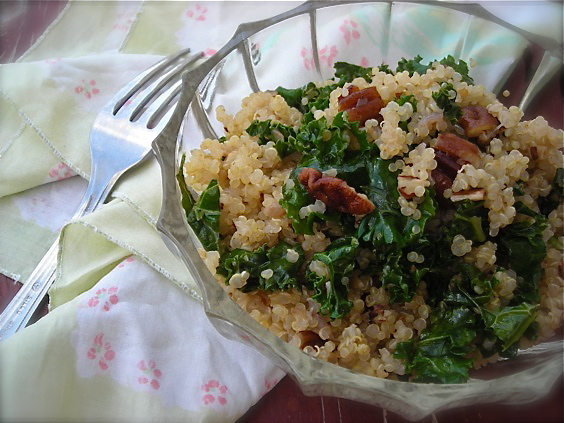
With finally climbing out of the ick and funk that settled on me last week, I really was feeling the need for some healthy options to start restoring my immune system and begin cleansing my body of the after-affects of a sinus/respiratory infection, especially the medications I took. What a perfect recipe for that, and so simple too. Cook quinoa, saute your kale with shallot and garlic, and toss it all together with a little salt and pepper. Add in toasted pecans, or pine nuts or almonds and get out your fork. There just doesn’t need to be anything more complicated than that.
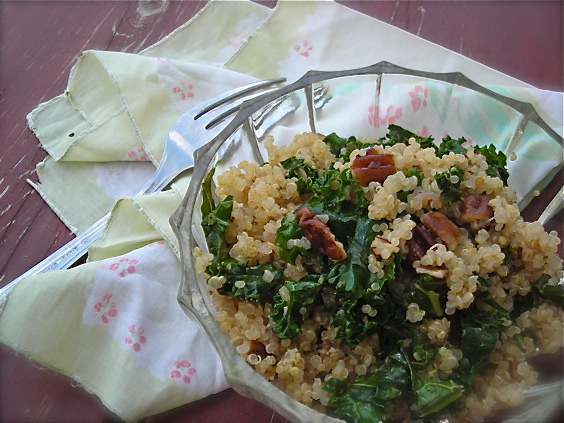
Add in the weathered redwood stairs to our patio, and a cat languishing on the sunlit bricks, it made the small bowl I consumed taste a little bit like Spring. It was just what I was craving, for both body and mind.
Quinoa with Kale and Toasted Pecans
1 c. quinoa, rinsed and shaken well
4 c. loosely packed kale, chopped
1 small shallot, minced
2 cloves garlic, minced
1/2 c. pecans, or nut of choice, lightly toasted
Start by cooking your quinoa. It can sit in the pan for quite some time after it’s done. Heat 1-3/4 c. water or broth of choice on the stove. Add half a teaspoon of sea salt and a thin drizzle of olive oil. When the water boils rapidly, add the rinsed quinoa, stir quickly and reduce the heat, allowing the quinoa to simmer gently. Cover the pan and let cook for 15 minutes, or until the water is mostly absorbed. Keep covered and remove from heat. Allow to stand for at least 10 minutes.
In a large deep skillet (with a cover), saute the shallot and garlic in olive oil until soft and translucent. Add in the kale and toss to coat. Stir and toss the kale until it’s a deep emerald green and starting to look a bit shiny. Add a half cup water to the pan, cover it and reduce the heat to a bare simmer. Steam the kale, stirring occasionally, until it’s slightly wilted but still has some toothy bite, maybe 10 minutes or so.
Add the quinoa to the skillet with the kale and toss until uniform. Taste and season with more sea salt and fresh ground black pepper. Add in the toasted nuts and combine. Can be eaten warm, room temperature or chilled. Reheat gently in the microwave.
April 4th, 2011
| 10 Comments »
I recently started working again. Just part-time, but for good pay and doing something I love, and really, that’s all anyone needs, isn’t it?
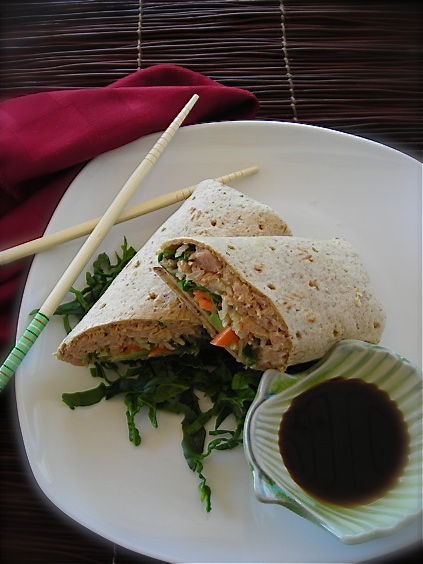
And I get to think about lunch too, bringing something with me when I work to help spur me through the day, give me a good dose of energy, keep me full but not stuffed with a strong healthy edge to it. Enter the Spicy Tuna Wrap.
I love lunch time. I’m not sure where this enamored state over the noon meal ever came from, but as long as I can remember, lunch has been my favorite meal. Maybe it’s the lunchtimes of grade school, where we clustered together, unwrapping our peanut butter sandwiches from brown paper bags, eagerly scanning the contents of our friends lunch sacks to see what treats they got each day. Maybe it was the excited chatter, the rustle of wax paper, the moment the last bites disappeared when we could all run outside for recess, for jump rope, Foursquare, tag and the incessant chatter that we’d bottled up inside us all morning long.
Lunch at home these past few months was a way to utilize anything from the refrigerator, crafting something unusual from the norm, making up a series of small plates to satisfy my hunger, re-purposing an original into a one-of-a-kind. It didn’t always matter if I made my lunch last through the afternoon, keeping hunger at bay until dinnertime, but now that I’m working and not always able to stop for a snack to re-energize, my lunches need to satisfy, and keep me full until I get home.
This Spicy Tuna Wrap sure does the trick. Based on the premise of a sushi roll, canned tuna is spiced with your favorite hot sauce and chopped green onion, then spread in a whole-grain wrap with brown rice, avocado, carrot matchsticks and shredded greens. The combination is full of flavor, and more importantly, crammed with nutrients to keep you going. It’s easy to have the ingredients on hand, and takes only a few minutes to put together in the morning.
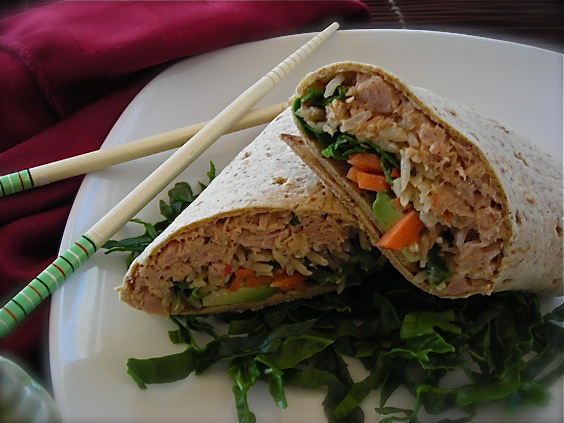
It tastes like a heartier version of one of my favorite sushi rolls. And it’s endlessly versatile, from the greens you add to the seasonings you mix with either the tuna or the rice. Switch out the tuna for salmon, or finely chopped chicken. Use arugula to add some bite, or watercress. Add thin strips of cucumbers or radish. And be sure to have a little soy sauce, mixed with some wasabi if it’s your preference. These wraps are made for dipping.
Spicy Tuna Wrap
2 5- to 6-ounce cans chunk light tuna, drained
1/3 c. low-fat mayonnaise
1 T hot sauce, such as Sriracha
1 scallion, chopped
2 c. cooked brown rice, cooled
2 T rice vinegar
1 T. sesame oil
1 T. soy sauce
4 10-inch whole-grain wraps
Shredded greens of choice
1 ripe avocado, cut into 16 slices
1 small carrot, cut into matchsticks
Combine tuna with hot sauce, mayo and scallion and mix to combine. To brown rice, add the rice vinegar, sesame oil and soy sauce, stir well.
On each wrap, layer tuna, rice, avocado, carrot and shredded greens. Roll up tightly and slice, or eat whole.
From Eating Well magazine, March/April 2011, with adaptations.
KATE’S NOTES:
I used a canned tuna in oil, leaving most of it with the tuna and then less mayo than the recipe needed. My hot sauce was Matouk’s Flambé Salsa. I added the soy sauce and sesame oil to the rice, but you can leave it out if you wish. I love the flavor it adds. Thin slices of cucumber in this wrap would be excellent. I used spinach for my greens, and Flat Out Whole Grain wraps, which made it a perfect size.
January 24th, 2011
| 7 Comments »
It’s January, and there are a million resolves to make healthier changes; to exercise more, to eat better, to get more sleep, to connect deeper, to make the 180° change that’s going to revolutionize our lives.
And by now, heading towards the end of the month, how’s everyone doing? Still holding on? Going strong? Let’s put our collective fingers on this a moment. We all think about it each year, come January. We’re determined, striving ahead. And somewhere along the way, there comes a realization that change is hard. As a species, we don’t handle change all that well. If you don’t agree, look at the amount of griping that occurs any time Facebook makes changes, or what happened when Twitter recently went through it’s re-design. (for the record, I like BOTH new sites much better) and you realize that it doesn’t take much to make us feel like the earth is being yanked out from underneath us. And inevitably, a lot of those changes we want end up falling by the wayside because if we’re truly honest with ourselves, we will admit that change is very, very hard.
I’ve been there. Done that. It is really hard to make positive and lasting changes, and these will take time, regardless of what they are. In August of 2007, I realized that I needed to lose some weight. What I saw in a photograph made me cringe. It was NOT pretty. Still, I didn’t actively embark on making those changes, much less following through until November of 2008, well over a year later. But by the time I did implement what I needed, I stuck with it, and in the Spring of 2009 I was 25# lighter and down two pants sizes. So the bottom line for me was to get both my head and my heart around what needed to get done. Once that happened, there was little to stop me.
Changes take time. Habits don’t form overnight. If you really want the success of integrating new habits into your life, give it time and give yourself a break. Berating failure only pushes us backwards, and we all have off days. There’s no goal you can reach for that has to have a set time limit, nor any that isn’t amendable along the way. If it’s weight loss you seek, take baby steps and celebrate the first 5 pounds, then the next. Pay attention to how your clothes fit because sometimes that’s a better indication of what your body is achieving than the number on the scale.
And please, please, please…… don’t use the word “DIET”.
For every person alive, “diet” rings with deprivation. A wonderful friend of mine admits she needs to make some big changes in her eating habits, but laments “I don’t want to be eating oatmeal and plain chicken breasts for the rest of my life.” So instead of considering it as a “diet” I suggested she think of it more as a permanent lifestyle change, because that’s what it boils down to in the long run. And it won’t happen overnight. Do the baby steps and celebrate each one instead of dumping the contents of your refrigerator and pantry in the trash and then thinking “What now?” The habits we’re ingrained with didn’t occur in a few days, they took months, and sometimes years to build up. And to reverse them, they could feasibly take months, or maybe even years to become something new, something better for you and wiser, overall.
And food habits are hard to change. Long ago I used to be addicted to Burger King french fries, and Wendy’s Chicken Nuggets. I would see their signs as I drove and get an undeniable craving, so bad that I almost broke out in a sweat. I know! It was awful! And on one occasion as I stuffed those first hot golden french fries in my mouth, I was hit with the realization that they tasted simply awful. But guess what I did? Yep. I ate the entire order anyway. My mouth felt like it had been assaulted; it was coated with this horrible aftertaste, heavy and greasy. And my stomach hurt. I was appalled at myself because even when I clearly realized that I didn’t even like the product, I kept eating it anyway. It was the same with Wendy’s; I could consume two orders of their Chicken Nuggets without a single hesitation despite knowing I didn’t even like them, yet the one day that my brain equated those nuggets with warm rubbery sponges was the last time I ever put one in my mouth. Still, I couldn’t tell you how long it took me to get there. It was an embarrassment to me, and I really struggled to kick those habits, as well as many other unhealthy ones I used to have.
I’ve made drastic changes to my eating in the last 5 years, and have noticed immeasurable improvement to my health in the process. It’s no cliche that when you eat better, you feel better. I know through personal experience. Just recently I drank Diet Coke- with fresh squeezed lime wedges in it!- for the first time in ages, and man what a stomachache! It tasted all right, in fact, it tasted really good but I seriously wanted to cry because my stomach was so twisted up in knots. As uncomfortable as I was, I rejoiced also, as it instilled in me the same resolve that the french fries and chicken nugget revelation did; this isn’t good for me, and I shouldn’t be consuming it. But still, it took time for me to get there. And it will take time for you too. Take the baby steps, celebrate the small victories and be kind to yourself in the process.
If there’s one meal you want to change this week, you could try out this nutritional powerhouse of a salad. It requires no special ingredients, and is really inexpensive to make.
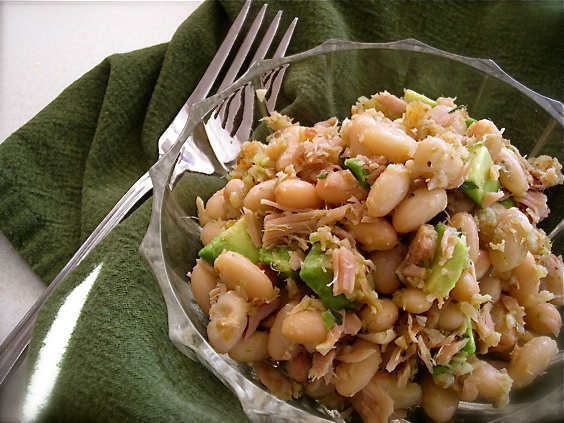
This garlicky White Bean Salad with Tuna and Avocado is a super-bomb of good food to put in your body. It’s full of fiber to keep you satiated and operating at open throttle all afternoon, with the very important Omega-3, and monounsaturated fats that our bodies need. It’s also quick, and works equally well as a warm main dish with a few good sides, or a quick cold salad for your lunch. And the garlic is cooked, so your family and co-workers are safe. I had a small bowl of this for lunch, along with some fruit and by dinnertime I wasn’t even hungry. I love meals like that.
Garlicky White Bean Salad with Tuna and Avocado
2 15-oz cans Great Northern Beans, rinsed well
1 3-oz can tuna in olive oil, drained
2-3 garlic cloves, finely minced
1 T. fresh thyme (use 1 t. of dried)
1 medium avocado, diced
Drain tuna well and place in a large bowl. Flake with fork until shredded.
Heat a skillet on the stove and add about a tablespoon of olive oil and the garlic. Heat gently over medium-low heat, stirring occasionally until the garlic is translucent and fragrant, 3-5 minutes. Be careful not to burn the garlic!! Stir in herbs and great northern beans. Heat through, stirring, for about 5 minutes more, drizzling in a bit more olive oil to coat. Remove from heat and add to bowl with tuna, mixing well. Stir in avocado, season with salt and pepper and serve warm. Can be chilled as well.
KATE’S NOTES:
Canned salmon can be subbed for the tuna, or chopped sardines if it’s your thing. You can add finely chopped veggies as well, like celery or red pepper or cucumber. Rosemary is really flavorful in this too. If you want to get creative with it, the entire dish can be put through a food processor and used as a spread for a wrap, on top of toasted baguette slices or thinned a little with milk or water and used as a dip for fresh vegetables.
January 9th, 2011
| 6 Comments »
I know, I know…. there you all are, patiently waiting for me to get my caboose in gear and start posting the food posts again. Enough of the extraneous stuff! Bring on the food! Get cooking again, would you? I can hear you all, I promise. And it’s good too, because it’s tossing me head-long back into the kitchen to start these next 12 months off in style.
With Amazing Wild Rice Stuffed Peppers
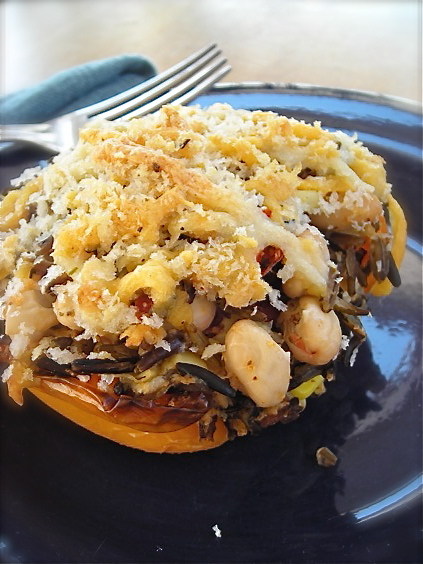
Honestly, I have no clue what happened to me between Christmas and New Years but I had ZERO desire to cook a thing. Nothing. Who was that girl? I get an extreme amount of pleasure in the kitchen; I love the act and the art of cooking, pulling something from the stovetop or oven that fills the room with incredible smells, moving tastes about on my tongue and delighting in the flavors within. This is who I am, it’s what I love. But there was that week, that flux week between holidays that always just feels odd, like the end of something when we’re not quite ready for the new thing to begin and everything in me just went swirling down the proverbial toilet. Good thing for a loving spouse who made a few meals and for copious amounts of leftovers.
But then, I came roaring back with an idea, a brainstorm that drove me to a creative new height. I wanted something light, healthy and easy to put together. I wanted to add a new line to my ever burgeoning arsenal of recipes, the list I go to time and again, options that fall into place in our dining repertoire with ease. What jumped out from under my hands was this Wild Rice Stuffed Pepper, that despite being completely meat-free, the Teen did eat part of his without one iota of complaint. There was no suspicious poking at it, no scowling or contempt.
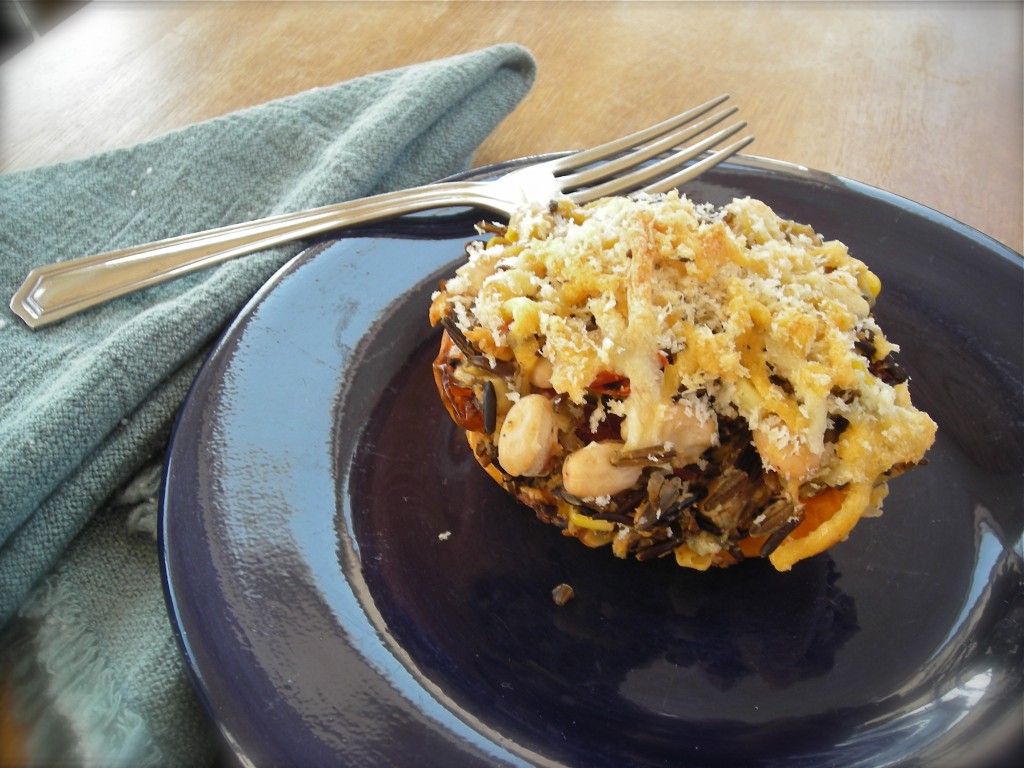
Yeah, who was that kid, you say? Mine. The young man who seems to be changing every day that I look at him, the one approaching his 17th birthday. He’s become a bit more acceptable to new things, less rigid about what he won’t eat. I’m liking the results.
Really, the adjectives necessary to describe this dish are extravagant. Mind-boggling. Flavorful and light, but hearty and comforting as well. Mike and I loved these too, but then, I knew we would. We’d be meat-free more often if it weren’t for the Carnivore. This dish, once the lovely colored peppers were home from the market, came together entirely from my pantry and freezer. I love those types of meals. Opt in the fresh produce, fill the edges with staples and sit down to a lovely meal. This is the cooking I like.
Wild Rice Stuffed Peppers
3 colored peppers of choice, sliced in half and cored
1 cup wild rice, washed and picked over
1 small shallot, minced
2 cloves garlic, minced
1 15-oz can great northern beans, rinsed
1 c. frozen corn kernels
1/2 c. canned tomatoes, or 2 chopped fresh Roma tomatoes
1 c. panko breadcrumbs
1 c. shredded cheese of choice, plus more for topping (I used cheddar and pepper jack together)
1/3 c. shredded parmesan, with more for topping
Salt and pepper to taste
In a medium saucepan, bring 4 cups of water to a boil. Add the wild rice, return to a simmer and cook, covered until the rice is tender 30-40 minutes. I used long grain, or regular wild rice so it took longer than if you use the cracked version. Adjust simmering time accordingly. Once rice is tender, drain excess water in a wire strainer and set aside.
Meanwhile, set your oven to Broil. Line a baking sheet with foil. Place prepared peppers on sheet, cut side up and broil for about 5-7 minutes, until edges are slightly browned and peppers are softened just a little. Remove from oven, set aside and set oven temperature to 400°.
In a deep skillet, saute shallot in oil for about 5 minutes, then add garlic and cook about a minute longer. Add the beans and corn, and heat through. Stir in the tomato and wild rice until just combined and remove from heat. Add the cheese and panko. Season to taste with salt and pepper.
When mixture is cool enough to handle, pick up a generous handful and press it together slightly, then mound it into a pepper half. Repeat with remaining peppers and filling, mounding the peppers full. You may not use all the filling but be generous. In a small bowl, place about a half cup of the shredded cheese and several tablespoons of shredded parmesan. Add two tablespoon of panko bread crumbs and toss to coat. Top the peppers with this and place in the oven for about 15 minutes, or until the filling is hot and the cheese on top has melted. Serve immediately.
KATE’S NOTES:
Look for good sturdy peppers that are heavy and full for this dish. They’ll hold the filling better. I like to find ones that have four ‘knobs’ on the bottom if I can. It makes for a more even cut. If you like to make stuffed peppers the regular way, by coring the entire pepper instead of cutting it in half, by all means do so. I like this method for the ease of eating them.
There is endless versatility in this recipe: use brown rice and black beans, or regular rice and red beans. Add frozen peas or even cooked cubes of squash. Add in a host of fresh herbs. Skip the panko to make them gluten-free. It helps to bind the ingredients but I will say that it’s not necessary at all. Change up your cheese, or add chopped leftover meat if you have it.
December 8th, 2010
| 7 Comments »
The primary reason for the type of cooking I do is my health. Our health. This has been at the front of my mind since Griffin began eating solid foods as a baby. Before he was even born I knew I wanted to be able to feed him in a healthy manner, with fresh scratch-made foods and a lot of variety. It felt at times like a monumental task, being entrusted to feeding. teaching and educating this blank palate he had, and giving him the tools to grow strong and vital from the inside out.
I made the majority of his baby foods from scratch, from the foods I was eating. Granted, this was only 15 years ago, but I came across an incredible amount of ignorance over it, people who told me he would suffer from malnutrition because of the foods I fed him. I was appalled at the ignorance. Here I was, cooking carrots, beans and squash, pureeing them smooth and using them for his meals and I was accused of not feeding him properly. What about that was wrong?
Now flash forward to the presence; this type of cooking for your baby is the gold standard. Scratch foods are the goal, and one’s health through the foods they eat is the #1 topic on most anyone’s mind. Obesity and diet related diseases are out of control. If ever there was a time to take control of one’s health by what we put in our mouths, now would be it. And so what moves through my kitchen has to pass a certain level of scrutiny; is it a whole food? without trans fats? no MSG? low in sodium? what are the health properties? and probably most importantly, how can I do all of this and maintain our food budget?
One aspect of cooking that I try to utilize as much as possible is to fill each meal with multiple items that all contribute to healthier eating. I use a lot of legumes when I can, fresh vegetables wherever possible and load up a pot of soup with everything imaginable.
This Hearty Minestrone is a perfect example of the type of soup we love in this house; rich and delicious, chock full of good things.

Canned tomato products make a regular appearance in my winter repertoire, my bubbling pots of chili, soups of all kinds, warming roasts and numerous pasta dishes. The presence of heart-healthy lycopene is very high in tomatoes, and has found to be much more readily absorbed from canned products than in fresh ones, and you know, finding a good tomato in Minnesota during the winter months is a laughable matter. Being able to pull out a can of tomato product to add the all-important element of health to our diet makes dinnertime a bit easier. On the plus side, using Hunts tomato products insures top quality standards, as the tomatoes are Flash steamed, preserving the full flavor of tomatoes for home use year round.
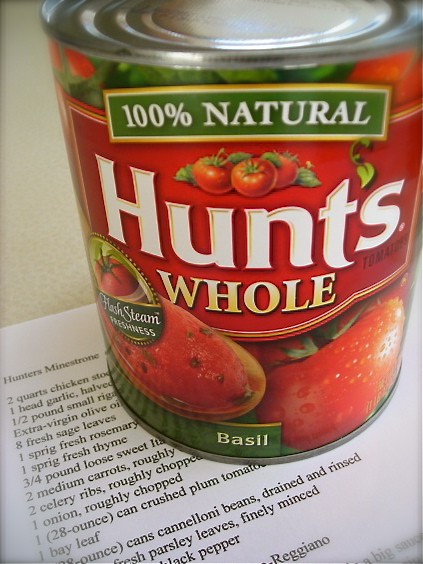
ConAgra Foods recently presented effective evidence for the benefits of lycopene in the American diet, stating that the health advantages of tomato products, in addition to the lycopene, include significant levels of Vitamin C, fiber and potassium, more than twice the potassium of notable sources such as bananas, potatoes or orange juice. In conjunction with research done at the University of California-Davis, participants in a six-week study who experience high blood pressure found a marked decrease in numbers when they consumed twice daily amounts of canned tomatoes. (Source: Tomatoes: The Everyday Superfood for Heart Health)
But back to that Minestrone, shall we?
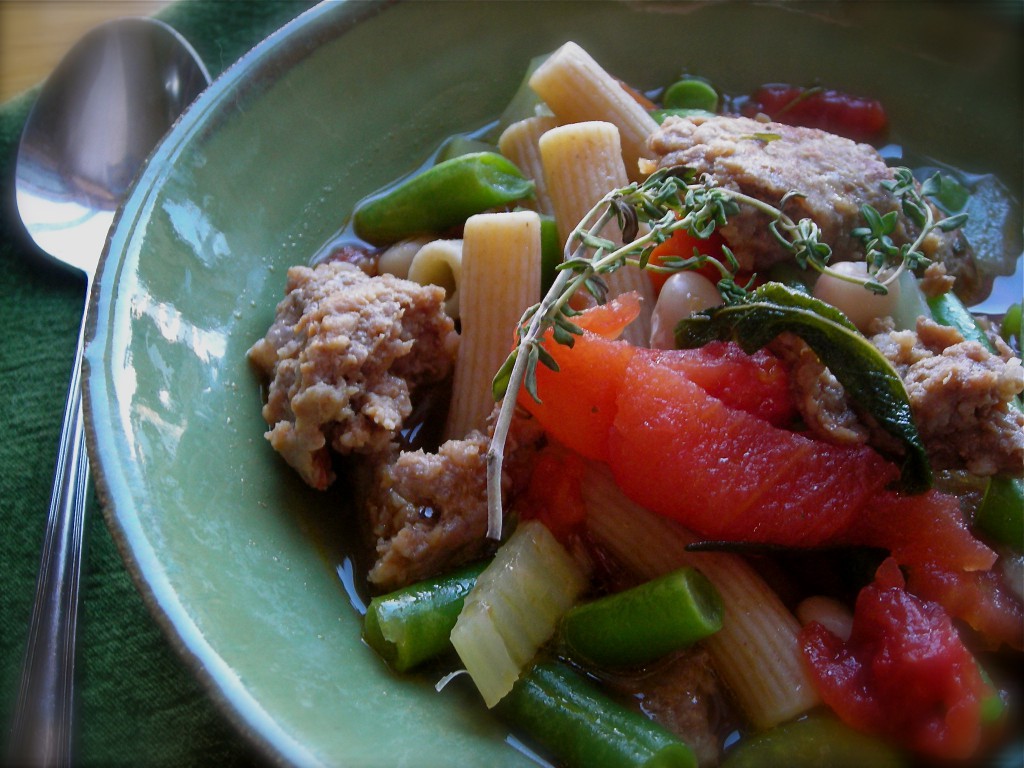
Hearty Minestrone
Adapted from Tyler Florence, Real Kitchen cookbook
2 quarts chicken stock
4 garlic cloves, crushed
1/2 # small rigatoni, or other hearty shape of pasta
Extra-virgin olive oil
8 fresh sage leaves
1 sprig fresh rosemary
2-3 sprigs fresh thyme
3/4 pound loose Italian pork sausage (sweet, or hot- both work well)
3 medium carrots, roughly chopped
2 celery ribs, roughly chopped
1 onion, roughly chopped
1 (28-ounce) can whole tomatoes (I like to use the Hunts brand with basil added.)
1 bay leaf
1-2 15-oz cans cannelloni or Great Northern beans, drained and rinsed
1 10-oz package frozen green beans, preferable the steam-in-the-packet kind
1/2 bunch fresh parsley leaves, finely minced
-Combine the stock, crushed garlic, rosemary, sage and thyme in a big saucepan and simmer for about 15 minutes to give the stock a nice, garlicky herbed taste. Keep warm.
-Bring a pot of salted water to boil for the rigatoni.
-Pour 1/4 cup olive oil in a large stockpot. Add the sausage and cook, breaking up the sausage with the side of a big spoon until well browned.
-Add the carrot, onion and celery to the saucepan and cook for about 5 minutes, until the vegetables are softened but not browned.
-Stir in the crushed tomatoes, bay leaf, cannelloni beans, green beans and chicken stock. Bring to a simmer and cook, stirring occasionally. The soup will develop more flavor the longer it simmers. Cook over a very low flame for up to two hours, or for as little as 30 minutes, depending on how much time you have. Remove the herb stems before serving.
-Cook the rigatoni according to package directions. Drain and rinse with cold water to stop the cooking.
-To serve soup, place a small amount of cooked pasta in the bottom of a soup bowl and ladle the hot soup over the top. Sprinkle with the parsley, and shredded parmesan cheese, if desired.
KATE’S NOTES:
I like to keep the pasta separate from the actual soup when I make Minestrone due to the pasta’s amazing ability to absorb a phenomenal amount of liquid. It is, however, entirely up to you and I certainly can’t deny the added flavor of cooking the pasta in the incredibly flavorful broth that this recipe makes. For an extra delicious added flavor, top slices of good crusty bread with shredded parmesan cheese and broil until browned and toasty, then float them on the soup.
Disclaimer:
I was compensated financially for this post in cooperation with The Motherhood.com We Heart Tomatoes campaign, ConAgra Foods and Hunts Tomatoes. Sources included information supplied by ConAgra Foods. All other information in this post was my own opinion.
November 19th, 2010
| 4 Comments »
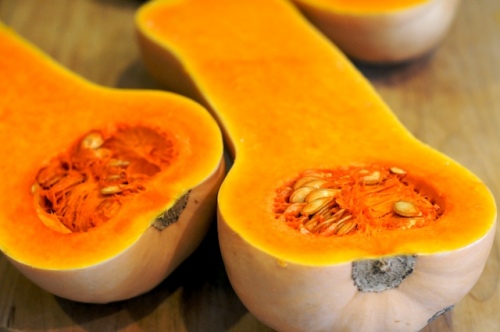
(photo from “That’s Yummy”)
We’re woefully into November’s gray and flat winter light. The cloud cover expanse across the sky is leaden and heavy and daylight begins to fade around 4:00pm, yet even in the best of midday light, the ability to take a good photo often is a crapshoot. I don’t really mind the changes that come around this time of year, this first adventure into winter, the shorter days and descent into wool sweaters, layers, warm socks and extra blankets on the bed. The coziness of it is good, it’s necessary, and there’s a lot of it that can be so soothing- like the leaping blue flame under the daily tea-kettle, the ritual of a warm steaming cup to carry me through the late afternoon; there’s the presence of the strands of tiny twinkling lights we’ve used to adorn certain areas of our home- the stairwell for those dark, dark mornings, the top of the cupboard in the kitchen, and the fancy festooned bakers rack in the corner of our kitchen.

The tiny lights are nice in those early mornings before the dawn when Mike is awake; it provides enough light to get the coffee pot going and the cat dishes filled without having that eye-burning glare that we encounter when first out of bed. The stairwell lights guide him safely down in the darkness. We put these lights up many years ago at Christmas time, and they’ve proven to be so useful that we never removed them. In those gloomy November afternoons they add a warm touch to our home, along with the singing tea kettle, and those steaming cups. Add a candle or two and you can chase those dark hours away a lot easier.
A good warm oven and simmering pot on the stove does that too. I recently came across a recipe for Butternut Squash Pasta, in Gourmet magazine’s Best of 65 Years cookbook. It was a simple process of cooking cubed squash then tossing it with garlic and pasta, but I thought to take it one step further and create an awesome squash puree to mix in with pasta, creating a saucy topping that clung to every single bite.
Problem was, as delicious as it tasted, it looked just ghastly. Imagine, brightly colored orange squash mixed with cooked whole wheat pasta. Oh gads…. it was homely as all get out, but tasted glorious and superbly like comfort in my bowl. I do recommend it, even if I can’t show you the result. Roast your halved butternut squash until it’s good and soft. Scrape the flesh into a bowl, add a little broth or milk to help thin it, then mash it smooth. You can whiz it in the food processor too. The resulting puree should be thick, close to the texture of canned pumpkin, and can be used like canned pumpkin, which, after all, is squash right?
Having the use of pureed squash on hand made it a cinch to whip up a batch of muffins too, and after finding a recipe for Whole Wheat Muffins with Pumpkin and Quinoa on Fork, Knife and Spoon, I knew those had to somehow come out of my oven in the near future. With a little trip towards the healthy side of muffins, these little beauties came out bouncy soft, only the slightest bite of sweet and full of chewy nibs of quinoa blended with the sweet taste of roasted squash.
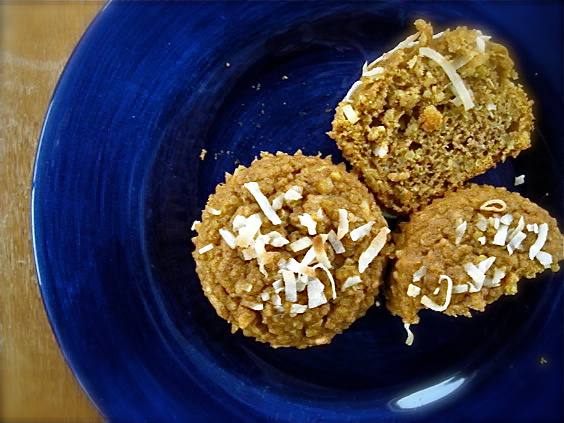
Touched inside and out with toasted coconut, they had a lot going for them. A bite for breakfast, a quick pick me up snack or a nice late night treat before climbing under piles of blankets, they fill in all parts of your day with a compliment for your tummy. Follow the link to Kate’s blog ( I know! Another Kate! ) for the original recipe. I doctored mine up to utilize what I had on hand for my version.
Whole Wheat Muffins with Quinoa and Squash
2 c. whole wheat flour
1-1/2 c. cooked quinoa
1/2 c. pure maple syrup
2 t. baking powder
1 t. baking soda
1 t. ground cinnamon
1/2 t. ground nutmeg
1/4 t. ground allspice
1/2 t. sea salt
1 c. cooked butternut squash
1 egg
3/4 c. buttermilk
3 T. oil
1 t. vanilla extract
1/2 c. shredded coconut, toasted
Preheat oven to 375 and spray muffin pans, or line with paper. You will get approximately 18 muffins.
To cook quinoa- measure one cup of water in a saucepan and place over medium burner. Rinse 1/2 cup of quinoa in a wire strainer under cold running water, shaking to rinse thoroughly. Place quinoa in saucepan and bring to a boil. Reduce heat, cover and simmer about 10-15 minutes until all the water is absorbed. Remove pan from heat and let stand for 10 minutes, then scrape cooked quinoa onto a plate and spread out to cool.
When cooled, measure flour and quinoa into a large bowl. With your hands, gently toss together until blended, and quinoa appears the size of tapioca pearls. Add in baking powder, soda, spices and salt and mix thoroughly.
In another bowl, measure buttermilk, then whisk in syrup, egg, squash, oil and vanilla. Whisk together, then add to dry ingredients with coconut. Using a rubber spatula, gently fold ingredients together until incorporated. Do not overmix. Scoop into muffin tins, about 2/3 full and bake for 15-18 minutes, or until tops are browned and spring back when touched. Allow to cool in muffin pans for 15 minutes or so, then turn out onto wire racks to cool completely.

And without even realizing it, I’m more than halfway through NaBloPoMo, or National Blog Posting Month. It’s proven to be way easier than I anticipated, but with 4-1/2 years of archives to wander through and re-introduce, I’m never at a loss for material.
|
 ( photo courtesy of Going Local )


