I have a tendency not to share these dishes we eat, mostly thrown together with ingredients from the fridge that likely need to be used up before they become this years compost material. This ‘Cowboy Cooking’, as Mike calls it, is a strange gift that I have, an ability to see what’s available and be able to make something delicious from it. Plenty of people do it, I’m sure.
I just need to share it more often. Because the results are often pretty spectacular.
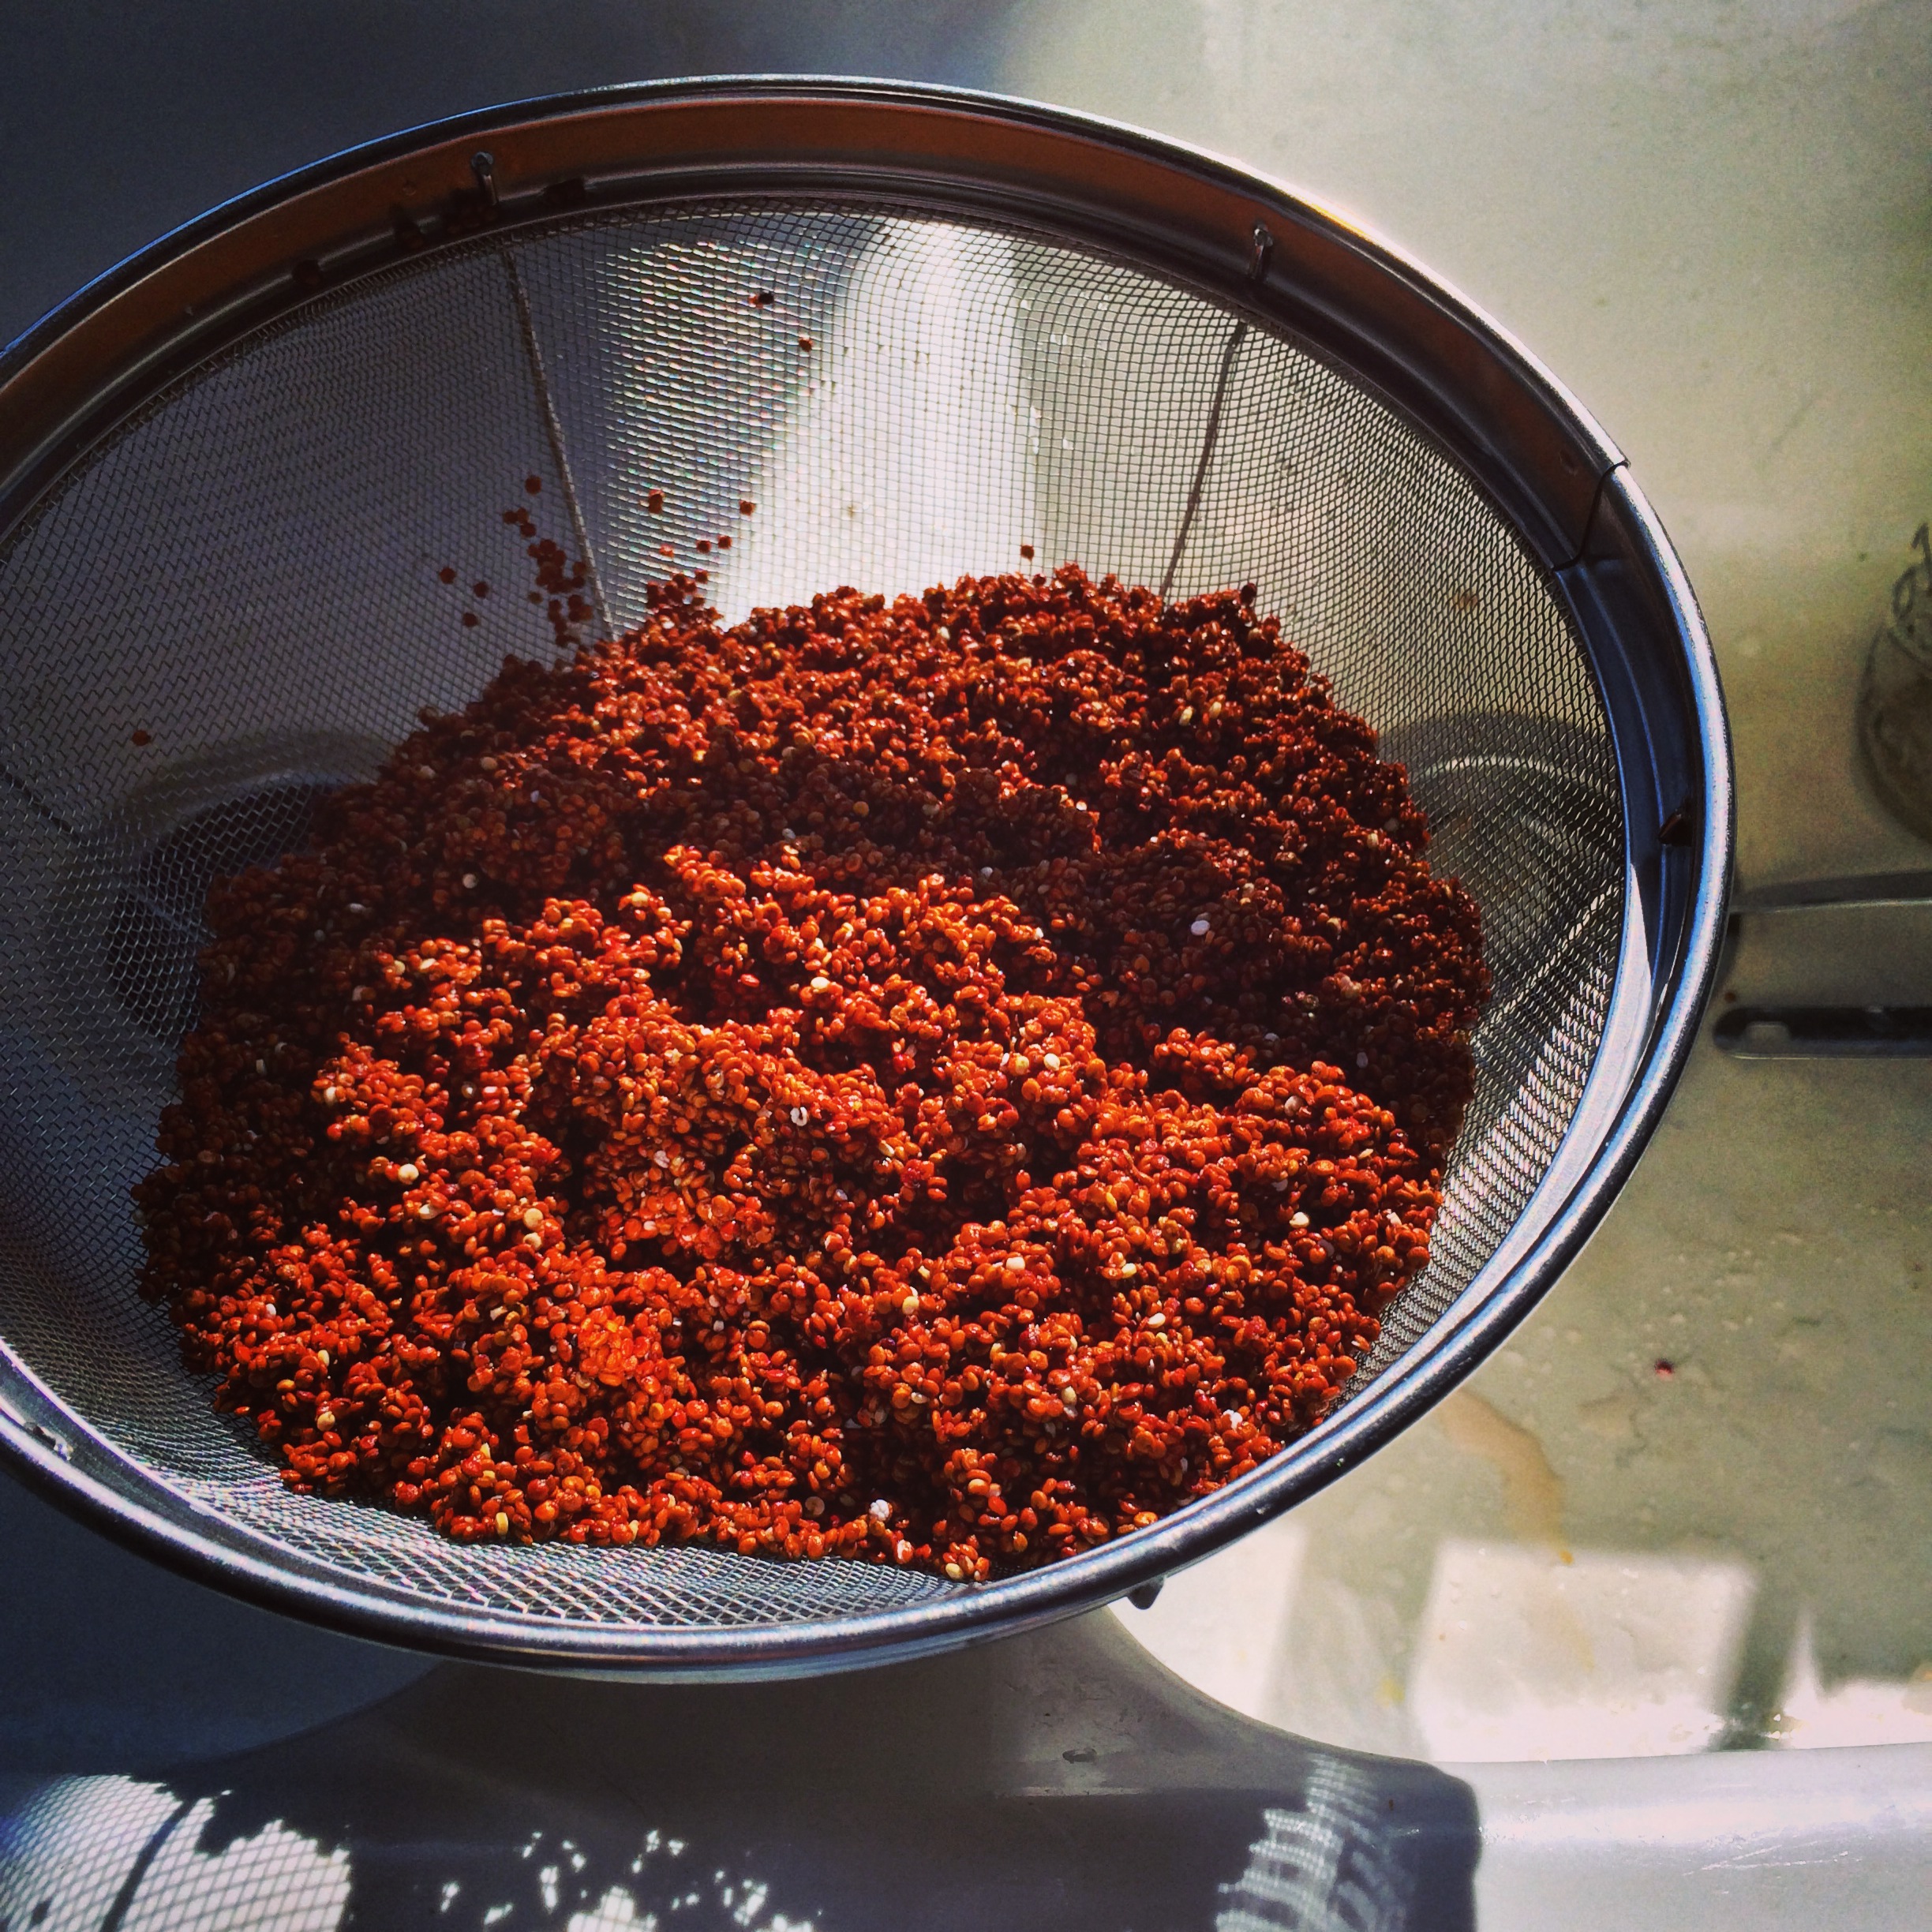
On one of my last trips through CostCo, I came across a 4-lb bag of red quinoa for $15.99. At $4 a pound, this gorgeously colored grain was significantly less expensive than any bulk option I’d ever seen anywhere, and I snatched a sack off the shelf as if they might vaporize right in front of my eyes. Cooking off a large pan at a time, I freeze what I don’t use, which then helps the ‘Cowboy Cooking’ at some point down the road. My favorite means of preparing this delicious grain is to use half coconut water and half coconut milk, along with smoked paprika and turmeric, as it creates a flavor bomb that blows off the top of your head in delight, as well as mixing in that beautiful yellow color that turmeric is known for, making the end result even more gorgeous. Pretty food makes everything better, doesn’t it?
I realize that everything about this dish screams of the current love of all things kale and roasted cauliflower and blah, blah blah with the addition of the ubiquitous quinoa, and more blah, blah, blah coconut water, and where is the creativity or uniqueness in any of that?? You’re right. There isn’t any. Maybe you’ve already done this dish; tossed together a pan of burnished cauliflower with your own uniquely cooked quinoa, and a pan of silky, slowly braised kale that’s pungently scented with garlic and thought that you were a million ways brilliant like I did. There’s nothing to it. And that’s part of why I want to share this delicious and superbly easy dish. There IS nothing to it. Which means you don’t need a whole resume of skills to get a fantastic dinner on the table. Or really, a lot of hands-on time.
Let’s take that quinoa: it’s one of the simplest grains ever to cook. Forget that whole 2:1 ratio of water to grain, though; with quinoa, it’s wrong, and will result in a mushy, unappetizing food that no one in your house will want to touch. Here’s the deal: one cup of quinoa needs 1-1/4 cups of liquid. That’s it. It needs a simple simmer, and then…. here’s the easiest part; it needs about 15 minutes of you ignoring it on a hot pad when it’s done. Yup. Take it off the heat when the water is absorbed, set it aside, covered, and ignore it. You can ignore it for an hour and it won’t care. In fact, it LOVES to be ignored. You can cook it in the morning and ignore it all day until dinner and it won’t care. Your result, however, will be a toothsome bite to the grain that reveals all of quinoa’s beautiful tastes. Nothing mushy here, folks.
And that kale? Have you ever found curly kale to be tough and chewy? Not to your liking? Try a slow braise of it, on the lowest heat setting your stove will offer, with just a tiny bit of liquid. I promise you this method will render the toughness right out of this nutritional bomb, making it silky, smooth and delicious to eat. Start with a small onion, or shallot, add a few cloves of garlic, then drop the chopped kale in the pan, stir for a few minutes, add enough liquid to cover the bottom of the pan, a pinch of kosher salt, and cover it to cook. You can ignore this one too for a while and it’s ok. Curly kale doesn’t mind. Stir it a few times, and after about 20 minutes or so, the kale will start to show you it’s better side. If it still tastes tough when you sample a leaf, give it more time. Add another pinch of salt, too. It helps break down the cellular walls and tenderize the leaves.
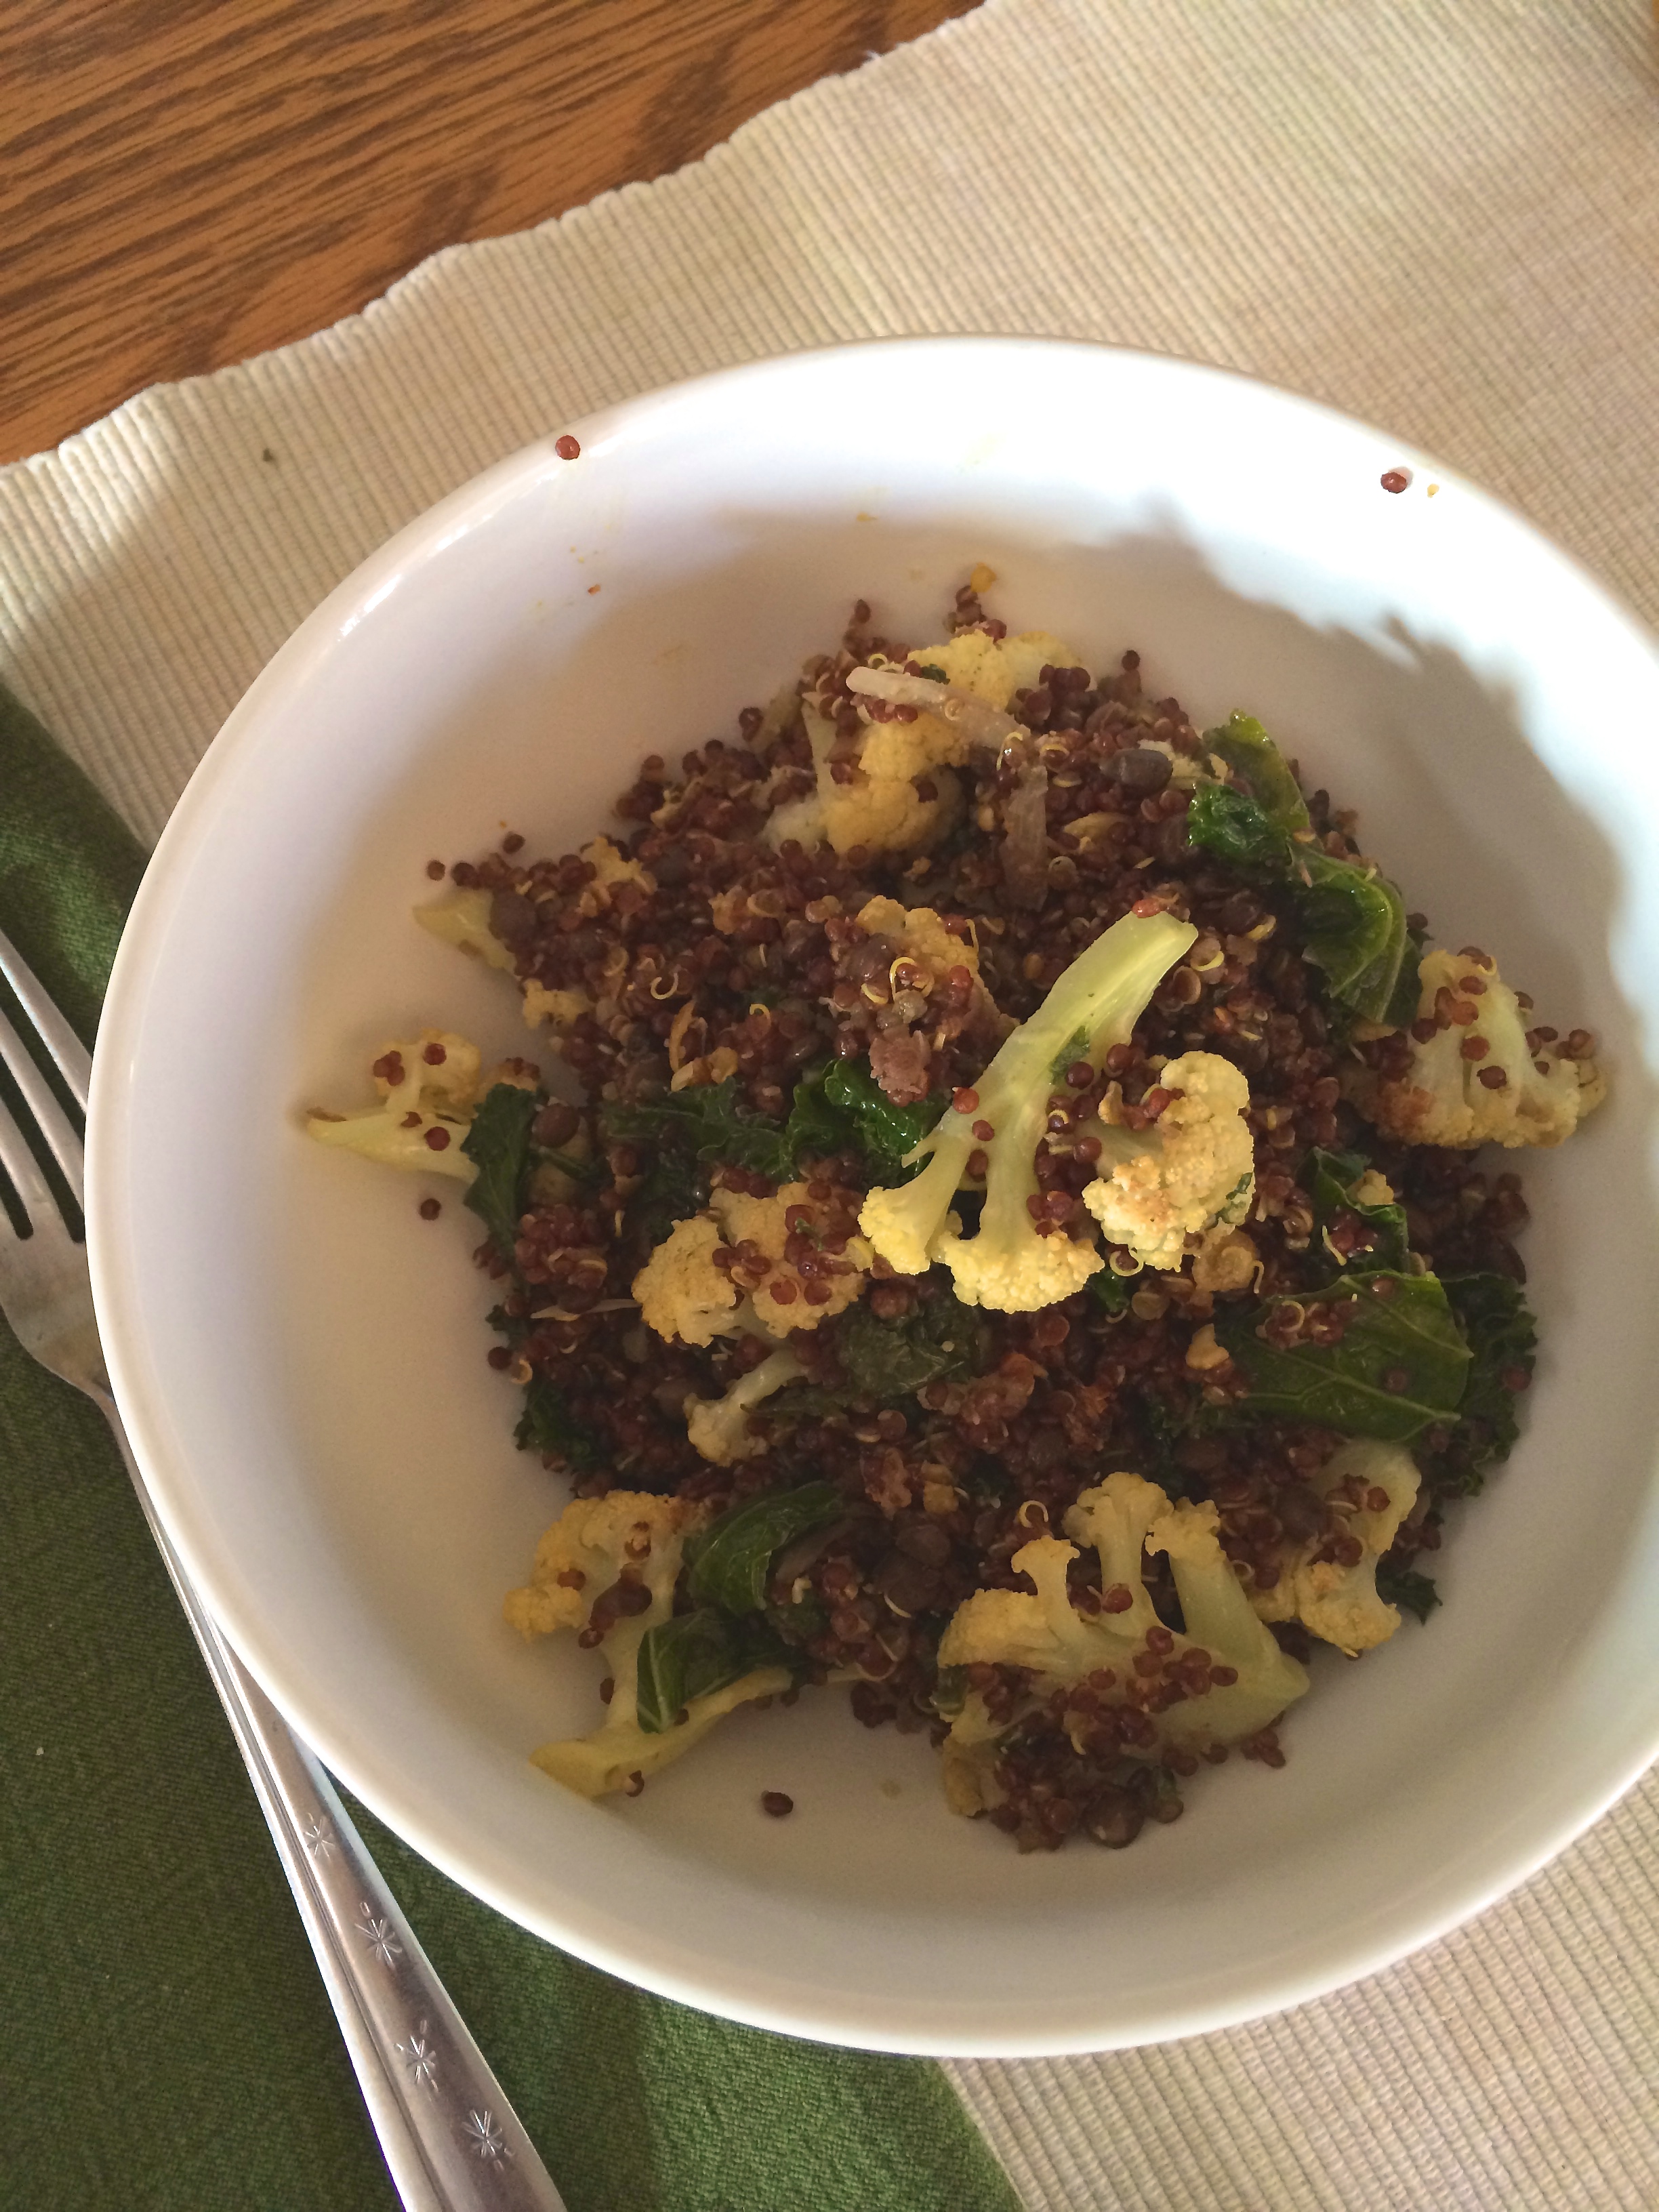
The tender cauliflower, nutty grain and silky kale make for a mouth-awakening dish. And just for fun, I dumped in a bunch of cooked lentils that I had in the fridge to add to all the lip-smacking goodness. This dish…. it’s good when it’s hot; it tastes great at room temperature, and it’s wonderful chilled too. Easy. Endlessly versatile. Colorful. Healthy. It’s got it all. Now YOU need to get it all.
Red Quinoa, Braised Kale & Roasted Cauliflower
1 c. red quinoa, washed well and drained (regular white is fine, too)
1-1/4 c. water (or combination of equal liquids such as coconut water & coconut milk)
1 T. ground turmeric
1 T. smoked paprika
1 bunch curly Kale, washed and de-stemmed
1 medium shallot, minced
2 cloves garlic, minced
1 head Cauliflower, washed and broken in to bite sized pieces.
Salt and pepper to taste.
In a small saucepan, bring water or liquids to a boil. Add the quinoa, turmeric and smoke paprika and stir to combine. Bring to a boil, reduce to simmer, cover and allow to cook until the liquid has been absorbed. Keep covered, remove from heat and set aside for at least 15 minutes, or up to several hours. No need to chill. Fluff the grains before utilizing.
Meanwhile, heat your oven to 400°. Place cauliflower on a baking sheet and drizzle with a bit of olive oil and a sprinkle of kosher salt. Mix well and place in hot oven. Stir occasionally and roast until fork-tender and browned in spots.
In a medium skillet, heat a small amount of oil and sear the shallot and garlic until tender and slightly browned. Add the kale and stir until coated. Pour about 1/3 cup of water in the pan, sprinkle a pinch of kosher salt on the kale and stir to combine. Cover the pan, reduce to the lowest heat setting and allow to cook, stirring once or twice, for 20-25 minutes. Taste a kale leaf; if it still tastes chewy, cook for 5-10 more minutes. The kale should be silky and tender in your teeth. Keep the heat LOW.
Combine the quinoa, cauliflower and kale in a large bowl and taste for seasoning, adding more salt or pepper if desired.
{NOTE: I don’t include cooking times for this recipe, or any of mine really, because your oven and stovetop is not the same as mine. Instinct, as a cook, is a necessity; your browned cauliflower might look different than mine. Your onions could cook quicker, and your Low setting on your stove could be higher than mine and cook that kale faster. Trust. Taste as you go. And trust some more. Your mouth will tell you when it’s done.}
“It is our moral obligation to give every child the very best education possible. In order to learn, children need to be nourished. The Lunchbox Fund ensures that ever child is equipped to embrace the future and change it for the better.”— Archbishop Emeritus Desmond Tutu
This year’s event by The Giving Table focuses on South Africa, and The Lunchbox Fund, which “…..has been feeding impoverished and orphaned schoolchildren since 2005. It brings communities together with the help of small local businesses and entrepreneurs, and provides vulnerable students with healthy meals that nourish their bodies and minds.”
The Lunchbox Fund identifies schools or forms partnerships with locally based NGOs or community organizations in order to evaluate and identify schools. It funds distributers to buy and deliver food, monitor the feeding scheme, implement a Project Manager, and deliver reports back to them for evaluation.
Maybe you were here last year when I told my own personal tale of being hungry, and the impact it had on me. Last year’s cause focused on children in the USA that went hungry every day, on families that struggled to make ends meet and provide enough food. But children go hungry all over the world. And we know they do. But what do we do about it?
What have YOU done about it? What are you WILLING you do about it?
While breakfast is one of my favorite meals ever, lunchtime is a treasured routine, a suspension in the middle of any day when all activity stops and we sit down to nourish ourselves for the rest of the day. As far back as I can recall, I have so many memories of lunchtime; from being able to come home for lunch when I was just a kid (do any school children actually do this anymore?? It was such a treat.) to a break in the action of high school to gather in the lunchroom and catch up with everyone. Then, we enter the workplace, and those moments when work ceases and we pick up our lunch totes, or head out for a quick fix. Weekend lunches of leisure and leftovers. It all resonates. I’ve always enjoyed lunchtime, no matter where I am, or how old I’ve become.
I cannot imagine being in school and not being able to eat lunch. When my boy was young, and when he allowed me to pack a lunch for him, I wanted it to be something special that he enjoyed and we worked together to make it fun, to be something he looked forward to and would eat when the time came. He would help me pack his tote, make sure that he had a napkin or the right utensil for his yogurt, a cup of dressing to dip his carrots in, an apple cut up just so. When he wasn’t looking, I would slip in a note just for him. Eventually, he wanted school lunch just like the other kids, and when he got home, we always talked about what he ate, why he liked it and what he didn’t. One day, I clearly recall when he told me how he and a few friends shared their lunch with a new boy in their class who had no food. When he asked me why that boy wasn’t given lunch, or didn’t bring any with him, I had no answer. We talked about how it was always a good idea to share if someone had none.
Lack of food can diminish concentration, erode willpower, and strip away a child’s potential; without food, a child’s attendance and performance at school is severely jeopardized.
65% of all South African children live in poverty. Receiving food encourages these children to stay in school and obtain their education.
We know, as adults, that being hungry makes it hard to concentrate. We know how it can affect our work, and most of us keep snacks at hand to ward off hunger if our meals don’t carry us through, but imagine being a child, in school and trying to concentrate while hunger gnaws at your belly. There are no snacks. Likely there’s little at home to even start the day. And there may even be no promise of food throughout the entire school day. No one should have to live like that.
Can you find it in your heart to donate even a small dollar amount to help? All you have to do is click on this link..….. it’s so easy, and so profound. We all spend money throughout our days that provides us with simple pleasures that we take solely for granted; our daily latte fix, that cup of yogurt with all the fancy toppings, a candy bar, a soda, the latest fashion or gossip magazine, even the money we spend on our own daily lunches. Where does that money go? Would you consider donating only $10 dollars? Most people spend that every day and rarely can recall on what, but $10 would help fill The Lunchbox Fund and provide 100 school children their only meal of the day for an entire year. Can you imagine the impact of that small of a donation? Compare that to a cup of yogurt, or your fancy latte and I think you’d agree it’s money well spent.
My lunch now is always fairly simple. I like quick, nourishing salads for my midday meal, or simple foods like an apple and peanut butter, a handful of nuts, hummus and vegetables, a quick meal of leftovers from the previous night. I like the calm of a quiet half hour to eat, to taste and enjoy, to watch the sun out the window and just be.
This raw kale salad has been on repeat in my lunch repertoire since discovering it’s simple tastes, the crunch of pistachios and the dreamy, chewy dates that bounce off the tart dressing. It’s a breeze to prepare, and taste much better the next day, after the lime juice, miso and sesame oil have a chance to penetrate the kale, soften it fully and infuse it with flavor. Make it the night before and by lunchtime, it will be perfect.
Raw Kale Salad with Lime-Sesame Dressing,
Pistachios & Dates
For the salad:
One bunch Lacinato Kale, washed, stems removed and rough chopped
1/3 c. pistachios, roasted & salted (or raw, if you prefer)
2 Medjool dates, pits removed and minced
1 t. fresh squeezed lime juice
Pinch of sea salt
For the dressing:
2 T. toasted sesame oil
1 T. extra virgin olive oil
2 T. fresh squeezed lime juice
2 t. white or brown miso
2 t. honey
2 T. white or brown sesame seeds, crushed
Pinch of sea salt
Place kale in a bowl. Drizzle with the teaspoon of lime juice and the pinch of sea salt. With your hands, gently massage the lime juice and kale for a few minutes until it becomes soft. Set aside
In a measuring cup or small bowl, place the crushed sesame seeds and sea salt. Drizzle with the lime juice, sesame and olive oils and whisk gently to combine. Add the miso and honey and whisk together thoroughly. Taste for seasoning. It should have a nice balance of tangy, salty and sweet. Adjust with a bit more miso or honey, if desired. Drizzle half the dressing over the massaged kale and toss to combine. Add more dressing if needed, but you may not use all of it. Add the pistachios and minced dates, toss well and serve. Salad will deepen in flavor if allowed to sit for a few hours, or overnight.
Hi everybody! Welcome to my new home! Do you like what we’ve done with the place?
The remodeling didn’t go as I had expected, but what remodeling project is smooth from start to finish? The first plan fell stupendously flat, the second plan required hiring an illustrator to design, and that landed amidst major car issues and had to be placed on the back burner. For now, this simpler design will suffice. I’m working on making it feel comfortable, inviting and a bit nostalgic when you come by for a visit; I want you to feel like you’ve opened the pages of a favorite book, kicking off shoes to stay a while, sip a warm cup of tea, share a simple meal and maybe pet the cats. They love having friends stop by; they gladly share their fur with anyone.
There are plenty of food items, when given a second chance (ok, and sometimes a third or fourth) will reveal much more to your palate than they did on the initial try. Every time I hear of someone disliking a specific food, I ask them how many times they’ve eaten it, how it was prepared or where they had it or any number of questions to determine what they don’t like about it. I always want to know the whys and hows and whats of someone’s intense aversion to a certain food.
When I first met Mike, he told me he did not like salmon. Not one bit. When pressed for more information, he revealed that when he’d eaten it, it was tough in texture (definitely overcooked) and tasted fishy (definitely not very fresh) and so I made him a salmon dinner one night of a terrific piece of fresh salmon that was perfectly cooked. I hooked him for life, pun intended. A poorly prepared food item can be a real turn off. For the longest time as a kid, I absolutely hated pork due to it being overcooked and tough as nails. Once I tasted the beauty of perfectly cooked pork, tender and succulent, I was reformed.
A lot of times, if it isn’t the way it’s cooked then it’s the texture. This was true of my tastes for a very long time. And almost all of the foods that I once disliked as a child, and even in to adulthood have now made themselves a permanent space in my life. Foods such as tomato, onion, squash of all kinds, eggplant, mushrooms…. this list is all about texture. And my initial introduction to Buckwheat groats, also known as Kasha, turned me off due to the texture as well. But the second glance, with a better cooking method in hand and some quick innovation in the kitchen, I turned this healthy grain into a mind-blowing salad that I can’t wait to make again.
As a singular food item, I’m still not enthralled with kasha, but I think that alone, this grain is pretty uninspiring. That all changes when mixed together with others, kind of like that quiet and unassuming person who comes alive in the right crowd. Kasha grains are tiny, heart-shaped and solid, similar to barley grains, with a sweet, nutty flavor and a nice chewy texture. Buckwheat groats are a potent nutritional item, with no cholesterol, sodium or saturated fat. It’s high in fiber and magnesium, with a low glycemic index. Mixed with shredded kale, dressed lightly in a simple oil & vinegar dressing and dusted with sea salt and cracked pepper, the grains added a perfect complement to kale’s crunchy personality. Chunks of tofu, seared crisp after a curry bath marinade, made for eye-catching color and a protein boost.
I was a little concerned that this salad would be a bit light, lacking the substance needed to fuel a body’s needs through the day, or evening, but after consuming a small plate of it, I was surprisingly full, and that satiation lasted until bedtime, and beyond. A small portion for lunch the next day easily carried me through the remainder of work too.
And speaking of second chances……
This delightful 4-cup Bodum Assam Teapot needs a new home. Do you love tea? I drink a lot of tea, and have a somewhat shocking collection of it in a cupboard. I also have a smaller Bodum Teapot that doesn’t get used as much as I would like. So this one could be yours, all for the sake of a comment. Tell me what kind of tea you like to drink, hot or cold or whatever, and you’ll have a chance. I will pick one name on Sunday May 13th.
And now, how about that recipe??
Kasha with Kale and Curried Tofu
1 pkg extra firm tofu, drained and cut in to cubes
2 T. curry powder
1/4 c. olive oil
1 c. raw buckwheat groats (available at co-ops)
2 c. water
Sea salt and fresh cracked pepper
1 pkg Cut N Clean Greens Rainbow Kale Salad (with or without the dressing- which can be used in lieu of a vinaigrette)
About a half cup of your favorite vinaigrette recipe, or similar bottled version
Crushed peanuts, optional (but a delicious and crunchy addition)
In a small skillet, begin toasting the buckwheat groats over medium-low heat. Have the water ready in a separate lidded pan. As the buckwheat begins to heat up and you start to smell a nice nutty scent, start the water heating. Continue toasting the buckwheat, shaking the pan to avoid scorching, while the water heats up. When the water begins boiling, carefully start shaking the toasted groats in to the water. They will sizzle and the water will steam up as you add the groats, so don’t dump them all at once, just a small amount at a time. Once they are all in the boiling water, reduce the heat to a bare simmer, cover the pan and cook the groats for about 15 minutes. The water should be completely absorbed and the top of the groats will look dry. Shut off the heat and allow the pan to sit for 10 minutes, then fluff the grain carefully.
In a small measuring cup, whisk the curry powder and olive oil together. Pour over cubed tofu and toss to coat. The tofu will soak up all the marinade. Allow to soak for about a half hour. (this is a good time to cook those groats) Heat a large skillet over medium heat and add a drizzle of olive oil. Sear the tofu to your desired browning. Place on paper towels to absorb any excess oil, and set aside.
Place rainbow kale in a large bowl and drizzle some of the vinaigrette over it. How much depends on your taste. I like a lightly dressed salad, but you may like a bit more. Add in the groats, about a cup at a time as you may not want all of it in the salad. Toss, taste, season and add more groats until you have a nice balance of kale and grain. Taste, add more vinaigrette or salt and pepper if needed, then gently add in the tofu and crushed peanuts, if using.
The salad can be eaten at room temperature, and the flavor deepens overnight in the fridge. Taste the next day to see if it needs more vinaigrette, salt or pepper. The kale and grains will absorb that overnight.
It’s been almost a year since we eliminated meat from our eating. I’m ecstatic over the way I’ve felt in the last year; I’ve got more energy even when I have a terrible time sleeping; my belly is superbly happy, and my skin looks so much better. Those pesky hot flashes are only a minor occurrence these days too, and I love that part of it the most.
I love the variety and simplicity of our meals too, the ease at preparing them now that we don’t have to wait for meat to cook, and it’s been wonderful to see Griffin expand the foods he eats and also to see that he’s learning to enjoy meatless meals so much more than I ever expected. I’m really proud of how he’s adapted to the changes; he still gets his meat too, so he has the best of both worlds.
One food item that he’s still on the fence about is greens. Mike and I have come to love greens like chard, beet greens and kale, but Griffin is still wary, only eating them in dishes where other flavors can mask their tastes. He’s trying greens, at least. That’s good enough for me right now. He’s also not a huge fan of gnocchi due to the texture, and that’s too bad all around because this Baked Pizza Gnocchi dish that I created is utterly divine in every way.
Recipes inspire me in the most fascinating way. I can read dozens of them and not have a spark of interest, and yet come across one that stirs my imagination and I’m suddenly inside my head putting ingredients together and dreaming of an outcome. That happened to me recently as I was browsing through my news feed on my phone and came across an article about using chard. One recipe for a Skillet Gnocchi with Chard sounded really delicious, and my creative spark was ignited.
Lately I’ve been thinking a lot more about meals with greens in them as I received an entire box of a wide variety of packaged and cleaned greens from Cut N Clean Greens to try out and it was probably the most exciting food stuff that’s landed on my door step because I just LOVE this product. It is so ridiculously easy to use greens with Cut N Clean Greens in your refrigerator. They’ve done all the work for you and the greens are ready to open and cook with. You don’t need to prep them, clean or do anything but enjoy. And for roughly the same price you’d pay for a bunch of greens, you get a great deal more yield and it goes a lot farther. Yet another wonderful thing to love about them.
(disclaimer: I received all the greens for free yet all opinions here are solely mine)
But…. back to this Gnocchi. Very simple and quick, rich with flavor and texture, this gratin came out fragrant, bubbling and with that perfect crunchy top to it. Grab a favorite pizza sauce (whether scratch or homemade) a package of shelf stable gnocchi (or…. knock yourself out and make a batch from scratch) and about a pound of good greens like chard, spinach or beet greens and give yourself about 15 minutes while the oven springs to life and heats up. It’s like pizza but it’s not; it resembles lasagna, but it’s better because it’s easier. The gnocchi become so incredibly soft and tender in the oven and it’s gorgeous enough for a special occasion, classy enough to taste like you really put out some effort.
I’ve noticed lately that when I write out my recipes here that I’m posting all sorts of side notes (in blue!) on what options you might do with your own version of the recipe. I hope this isn’t annoying. Is it? Because, here’s the thing; I don’t have the ego to think that the way I make anything would be exactly how someone else would make it. We all have our own tastes, right? We like different foods, flavors and we all have different methods, ovens that work differently, cookware and utensils that we love (go ahead, use that garlic press if it’s your way) and these recipes that slip through our computer screens in to our minds, making our mouths water, well they might mean something else entirely to another person. If I mention to saute your onions for 10 minutes and you think they should be cooked longer, or shorter, or if you don’t even like onions and don’t want to use them, then by all means, trust those instincts. Make the recipe your own. Learn the ways of your own stove, the cut of your favorite knife, dig through your cupboards and add your own flavor, spice, extra something that you love. This is how cooking should be. I’m thrilled to just be one of the stones you traverse in your own journey in the kitchen.
Baked Pizza Gnocchi with Greens
1 lb. gnocchi
1 15-oz can prepared pizza sauce (I love Muir Glen Organics)
2 small shallots, minced
2 cloves garlic, minced
1/2-3/4 lb. greens of choice (can be beet greens, spinach, chard or kale or a mix) 1/2 c. crumbled goat cheese (for a richer taste, use ricotta) 1/2 c. panko bread crumbs
2 T. melted butter (i used coconut oil)
1/4 c. grated parmesan cheese
1/4 c. mixed fresh herbs, like parsley, thyme, basil, oregano
Heat oven to 400°. Spray a 2-quart baking dish with cooking spray. Or live a little and rub butter in it.
In a deep skillet with a lid, heat oil of choice and add shallots, cooking for about 5 minutes while stirring over medium-high heat. Add the garlic, stir and cook for a few minutes, then begin adding the greens, a handful at a time and stirring so they begin to absorb some of the heat and oil and start to get a bit of wilt to the leaves. Once all the greens are in the pan and they’ve collapsed and are starting to soften, crumble in the goat cheese and stir to break it down. When it’s pretty well incorporated, add in the pizza sauce and about a half cup of water. (add the water to the can and swish to collect any remaining sauce). Stir the pan well, then bring it to a gentle simmer and cover it. Cook the greens until just tender. The timing will depend on which green you are using. Taste often so they don’t get away from you. When the greens are just tender, stir in the gnocchi, and turn off the heat. I used a mix of beet greens and chard and cooked them for maybe 10 minutes.
Mix the panko crumbs, butter and parmesan cheese together. Scrape the gnocchi in to the baking dish and sprinkle the top with the panko crumbs. Bake in the middle of the oven until bubbly, and the crumbs have browned nicely. Mine took about 20 minutes, and I rotated the dish a few times to brown the top evenly. Once removed from the oven, allow the dish to stand about 10 minutes before serving.
KATE’S NOTES: You can divide the gnocchi between individual ramekins if you want something fancier. But please keep in mind that your baking time will be drastically reduced. I baked a few ramekins, placing them on a baking sheet lest they rise up and bubble over the top. They didn’t. (whew)
You can double this for a crowd, baking it in a 9×13 pan. That’s a lot of greens, so add them patiently to the pan.
March gave us some exceptionally warm days, but the past few weeks haven’t been quite as toasty. Once the sun drops lower in the sky, I’m still shrugging in to sweatshirts and occasionally drawing wool slippers on my feet. I’ve got soup on the mind, with the chill in the air, but not the hearty simmering pots that I dreamed of in January.
What I’m dreaming about is this succulent chowder, light and refreshing for Spring, brightly colored with vibrant greens and flavored with the rich taste of smoked salmon. This is a simple soup to put together so it won’t be interfering with your outdoor time and you won’t feel bogged down from it when you finish.
The first time I made this soup I think we darn near polished off the entire pan. What was left over was barely worthy of lunch the following day, and instead of slipping this in the ‘Done’ pile and never looking at it again, I kept it front and center, and dropped another chunk of lovely smoked salmon in my grocery cart for a second showing. It’s a surprising recipe, as on first glance it just doesn’t look like a whole lot. Then you lift the spoon to your mouth and taste the coconut milk broth, rich with curry flavor, the delicious vegetables and then, the sharp smoky fish. It’s a bit sweet, it crunches and it delights.
The soup is wide open for your own personal interpretation too, employing just about any vegetable you have on hand. You could skip the smoked salmon if it isn’t to your liking, instead adding maybe some grilled shrimp or scallops for a bit of boldness. The curry is completely adjustable too. Add more for a bigger kick, if you like. Or just substitute turmeric to add the bright and sunny color. While I used broccoli and kale, I think green beans and bok choy would be delicious in this soup. Not a fan of corn? Skip it. Add peas instead. Or chunks of dark orange sweet potato. That’s the best part of this recipe; it’s superbly easy to make it your own.
Curried Vegetable and Smoked Salmon Chowder
Coconut oil for cooking
1 medium red onion, thinly sliced (I’ve used yellow onion too)
1 jalapeno pepper, cored and seeded, thinly sliced (for extra heat, use a serrano)
1 T. minced fresh ginger
2-4 garlic cloves, finely minced (the amount you use is entirely up to your taste)
2 Broccoli crowns, sliced to bite size (can sub in cauliflower)
2 c. fresh kale, roughly chopped (can sub in baby bok choy, chard or spinach too)
1 c. frozen corn kernels
1/2# smoked salmon
2 T. red curry paste (substitute your basic curry powder if it’s all you have)
1 15-oz can light coconut milk
3 c. broth of choice, or water (I filled the coconut milk can twice)
1 T. fish sauce, or fresh squeezed lime juice
1 T. pure honey
Cilantro, basil or mint, fresh lime wedges, crushed peanuts for toppings, if desired
In a medium stockpot with a lid, warm about a tablespoon of the coconut oil and add the onion. Cook, stirring occasionally, until the onion is softened, maybe 10 minutes or so. Add the jalapeno, ginger and garlic and cook for about 5 minutes, stirring. Pour in the coconut milk and broth (or water) and stir together. Then add in the curry paste, fish sauce, and honey and stir well to incorporate, add in the broccoli, kale, and corn. Stir to blend, then bring to a simmer, cover and allow to cook until the broccoli is tender to your liking. Add in the smoked salmon and heat through. Top each soup with some of the fresh herbs, a squeeze of lime juice and chopped peanuts, if you like those. The soup is perfectly fine without them as well.
There is something so perfect about a pot of soup, one that steams and seems to sing from the stovetop, humming it’s warmth throughout my kitchen, through my skin and right in to my bones. I feel the need for soup, sometimes as deep as the roots of my hair and permeating outward, and as any good Midwestern girl knows, when the cold winds scour you down and the light is so flat and gray and weak that it makes you weary and drawn, then soup, in all it’s aromatic glory and flavor, can be a shot of lifeblood that runs through you, chasing the chill away.
Soup has but a few simple secrets to making it shine, such as taking some time to caramelize the vegetables to form a flavor base, a good broth or stock to add more depth and a shot of love, really, to not rush the process. But good soup really starts from need. Or craving and desire.
I used to not be all that good at making soup, mostly because I just didn’t understand why a recipe that looked so simple could often turn out so darn wrong. I wanted depth, a rich flavor that penetrated the spoon and it’s contents, making it something so much more than broth and vegetables. All I really needed was a bit of patience, a lot of practice and tad more salt. Don’t be afraid of a shake of salt over that simmering pot, as it is the one ingredient that can transform a simple pot of soup to one that shimmers it’s warmth right down to your toes.
This Minestrone soup, as all Minestrone soups go, really has no clear outline, no real etymology. It creates itself for the most part, out of what you have on hand, and what you like in your soup. Or, like me on this particular cold January night, it leapt from under my hands out of sheer need. I couldn’t get warm, couldn’t shake a chill that had settled in my core like a wicked internal frost. Somehow, this chill and it’s accompanying rattle in my brain sounded like it was saying, over and over “Make Minestrone!” and I moved, on automatic it seemed, from fridge to stove to cupboard, seeking and searching ingredients. There were the green beans languishing in the drawer and in dire straits, there was Pomi tomatoes (my favorite packaged tomato- so amazingly fresh and flavorful) and there were thick, deeply orange carrots, fat tear-jerking onions, a partial box of orzo, a few zucchini beginning to look slightly sorry for themselves, just enough kale, a bounty of fresh oregano and parsley. And while the fragrance filled the house, and the soup simmered it’s coherent and rhythmic blup-blup-blup on the stove, a quick search for dunking material in the freezer yielded a container of croutons, spiked with herbs and olive oil, that I’d made from a loaf of stale semolina bread. Did I mention another key ingredient to perfect soup just might be a touch of serendipity?
Minestrone requires little of the hard and fast rules; you add what you’ve got, really. What is in season, what is available, what it is you like. It needs a good tomato-y base, without a doubt. But beyond that, it lives for your interpretation. Thick or thin, meat or not, one, two or three vegetables or a whole produce aisle of them, pasta, legumes or rice- it’s all up to you. This version that served to warm my very cold, rattling bones on that damp, chilly night made light of too many singular remnants from the fridge; bits and pieces of plans that maybe fell through or were forgotten, or the one too many of any vegetable that hadn’t been used up yet. It had oceans of freshly chopped oregano and parsley tossed casually over it all, with thick shavings of sharp parm-reggiano. It was like planning a party at the last moment, not so confident of how it will all turn out and right in the middle of it, you realize that everyone in attendance has created an impeccable presence that elevates the whole of it to something utterly sublime. Well, that was my Minestrone that night; a delicious party in a stockpot, gathered with fingers crossed. My intensely perfect Minestrone.
Rounding it all out were the crunchy croutons, oiled, herbed and perfect for soaking up the broth. Beyond that, my perfect soup needed little else but a spoon, a quiet table with two smiling handsome faces, because no day in my life is complete without it ending right there, with them. The darkness settles, chasing out the light with violet and gold tones. The first spoonful I lift easily helps me cross the threshold from day to night, pushing the cold away, warmly coursing through me. There is a sigh, with half-closed eyes, a look and a feel that says “Perfect. This is just what I need.”
Kate’s Minestrone
1 large onion, diced
3 carrots, peeled and diced
3 celery stalks, with leaves, diced
4 cloves garlic, minced (adjust to taste, I am a garlic lover)
2 small zucchini, peeled and diced
1/2# fresh green beans, cut to 1/2″ pieces
1 bunch fresh kale, rough stems removed and chopped (sub chard, collards, or spinach)
1 32-oz pkg Pomi Tomatoes (use equivalent of your choice)
1/2 c. Orzo pasta (use small pasta of choice)
1/4 c. bulgur (optional, but I like the heft and nutrition it adds)
1/4 c. fresh chopped parsley and oregano (basil and thyme are also good)
Parm-Reggiano shavings
In a large stockpot, heat a small amount of oil and add the onions. Cook over medium heat, stirring occasionally, for about 5 minutes, or until the onions are opaque. Add the carrots, celery and green beans and cook, stirring, until the vegetables begin to brown a little, maybe 10-15 minutes. Moderate the heat to prevent them from scorching.
Add the garlic and a pinch of kosher salt. Stir to incorporate and cook for a few minutes until it’s wonderfully fragrant. Add the zucchini and the tomatoes and a quart of broth or water. Bring to a simmer and cook until the vegetables are tender enough to pierce with a fork, but not completely soft.
Add the kale, the pasta and the bulgur, if using. Depending on what pasta shape you use, cook until the pasta is al dente. Taste the soup and season with salt and pepper. Make sure the pasta is cooked, but also remember that it will continue to absorb liquid as the soup sits.
Ladle soup into bowls and top with a sprinkling of the fresh herbs and some shavings of cheese. Serve with a good bread, if desired.
RECIPE NOTES: This soup is wide open to interpretation, and can be modified in a multitude of different ways. Brown some good sausage and use the fat rendered to cook the vegetables for an added punch of flavor. This was a favorite way to make this soup back in my meat eating days.
Legumes can be added to this as well, and most Minestrone soups have them. Use a good quality white bean, such as Great Northern or Cannellini. Chickpeas would also be a good option.
As is the case with most soups, it develops a lot of flavor as it sits overnight in the fridge, but it will also absorb a lot of liquid in to the pasta and the bulgur (if you use the bulgur). Adding a little water to the soup before reheating will help loosen it.
I collect a lot of recipes. Papers overflow the corner of our counter where they tend to land; recipes of all types from desserts to main dishes. Trouble is, I rarely use them, verbatim anyway. They serve as a sort of spiritual guidance, infusing me with inspiration to cull what I need to make up a dish all on my own. I’m only home a few nights a week to cook these days. And although I could give any one of the recipes to my guys and they’d likely be able to pull it off, there’s no way I could hand them two or three, with all sorts of odd instructions such as ‘Take this part’ and ‘Do this but not this’ and expect it will come out the way I envision it. My brain works way differently than theirs when it comes to putting recipes together.
Still, even with all the inspiration at my fingertips (or these days, stuffed in a drawer) sometimes the meals I create are derived from a leap or two of inspiration that comes not from a printed source, but from a few wild ideas my brain churns out that I think sound good together.
I certainly had no doubt that we would enjoy this silky braised kale, infused with coconut milk and some fragrant curry powder, but I had no idea that it would swirl through my mouth with such immense flavors, causing me to think almost obsessively about it, plotting the exact next time I could simmer up a large pan of it for us to enjoy. Griffin won’t eat it, and that’s fine. He has tried a few bites of cooked greens that we consume but he’s just not there yet. Mike and I fell over ourselves in adoration for this dish, easily a complete meal. Alone with a large helping of kale, it’s perfect as is, but the second go-round I made of it, I added a large bunch of red chard, complete with the chopped stems and if it’s even possible, the dish was so much better, with richer, deeper flavor and much more balanced.
The best part about making this dish on one of the first bone-chillingly cold days of December, was placing my nose down among the wisps of steam that rose from the pan and breathing in the fresh green scent of kale and chard. It easily transported my mind back to late summer, the bounty of chard bunches to be had for a dollar apiece that I would bring home from the markets each week. Thankfully I can find inexpensive one pound bags of prepared kale, and chard is reasonable for the taking so I won’t be missing my greens all that much. I just won’t be shopping in a flippy skirt and tank top when I buy them.
Braised Kale and Chickpeas in Coconut Milk
1/2# prepared kale, tough stems removed, roughly chopped
1 15-oz can lite coconut milk (you can use full-fat as well)
1 15-oz can chickpeas, rinsed well
2 garlic cloves, minced
2-3 t. prepared curry powder, or curry paste (both red or yellow would be perfect- adjust to taste)
In a large deep skillet with a lid, heat about a tablespoon of olive oil, and add garlic. Cook and stir for a few minutes until garlic becomes opaque. Add kale in handfuls, stirring continually, until it’s all in the pan. Continue to stir until it turns a very bright and dark green and has taken on the oil in the pan. Add about a half cup of water and cover the pan, allowing to simmer for about 10 minutes. Stir in the chickpeas, coconut milk and curry powder. Cover and allow to cook, slowly, anywhere from 5-15 minutes more, depending on how you like your kale to taste. Stir again, seasoning with salt and pepper, if desired. If the kale seems a bit watery, remove the lid and allow some of the liquid to cook off.
Kate’s Notes: If you wish to use chard as well, you can add that after the kale has simmered for the first 10 minutes. Stir in the rough chopped chard and allow the heat to steam it tender. If using the stems too, chop them fine and add them with the garlic in the beginning.
November 26th, 2011
| Comments Off on thanksgiving recovery
Thanksgiving is over, and with it goes the indulgent meals and heavy, rich food. I was exhausted by the time dinner was over on Thursday, and was asleep by 9pm or so. The following day, Mike and I took a nice hike through Otter Lake Regional Park, stretching our legs, pumping oxygen and working off the calories from the day before. It felt really good, but later in the afternoon, a mix of hunger and nausea took over my belly. I felt shaky and off, and I felt like my tummy desperately needed something other than rich carbs.
Thankfully there was a large bag of kale in the refrigerator, and some rutabagas that needed to be consumed. These rutabagas had begun to look a little unusual on the counter.
So I chopped them, seasoned them and placed them in a hot oven to roast. Then an entire pile of kale went in to a hot skillet to slowly braise.
I’ve really grown to enjoy kale this past year, and have found that when I let it cook slowly in a little liquid for about 20 minutes or so, it becomes silky and tender and incredibly flavorful. Recently I learned that coconut milk makes for a delicious addition on that kale, and last night, on a whim, I shook some curry powder in to the pan, as well as a can of chickpeas.
With a small pile of roasted rutabagas and a mound of this steaming kale, fragrant and lush, my belly began to forgive the indulgence of Thanksgiving and settle down to it’s more normal state. It was satisfying without being heavy or overwhelming to the body. And I felt stabilized, even-keeled. My hands stopped shaking and the nausea went away completely so that I was able to take a trip to the shopping mall with Griffin so he could buy a book he’s been wanting and spend a little bit of quality time with him.
The procedure for this method of cooking kale is quite simple. Heat a little oil in a large deep skillet and saute a few cloves of minced garlic for a minute or two. Add the kale in handfuls, stirring to sear; I used about a half pound of it and like any other dark leafy green, it will overwhelm the skillet at first, but cook down to a manageable amount in no time. Stir and cook the kale until it’s all turned a rich deep green, about 5 minutes. Add a half cup of water and cover the pan, allowing the kale to simmer on a low temp, and stirring the pot occasionally. You do this for about 20 minutes, adding more water if needed to keep the kale moist. Taste a few leaves to insure that it’s tender and not at all rough any longer. If you wish to use coconut milk instead of water, it adds a lot of terrific flavor. For this batch, I used about a half a can of it, plus a tablespoon or two of curry powder, and one can of drained and rinsed chickpeas. It was divine. To reduce the liquid, simply take off the cover and let it cook down a bit before you eat.
IS THERE ANYTHING YOU DO OR EAT THE DAY AFTER A HOLIDAY TO RECOVER FROM OVERINDULGENCE???
I spent a significant amount of time this past summer wandering up and down the aisles of our local farmers markets, as many, many people do. But I don’t venture in to the larger markets in Minneapolis or St Paul, instead preferring to go to the small satellite ones in the suburbs. I can always find what I needed, and as was the case this past year, I found a whole lot more than I ever anticipated.
Each summer for the last 5 years it seems some type of theme arises from a particular food I discover and experiment with; it might be a food type, such as the summer of 2007 when I learned a great deal about cooking with whole grains like quinoa, millet, bulgur and a multitude of colorful rice varieties. Or it might be a particular food, like in 2008 when I took the humble burger in different directions, and 2009 found me falling in love with beets and getting my fill of learning about those. In 2010, what I experimented with was a killer job. Cooking went by the wayside last year, but this summer, with a better schedule and actual time off during the week, trips to the Farmers Market were a must, and in those weekly visits, I came across a multitude of vegetables that I’d never tried or even considered prior to this past June.
And what was different about this year was the increase in the need for vegetable based meals, since we walked away from meat consumption in May and never looked back. So stretching the imagination and reaching for foods that were unfamiliar was going to have to stick. I needed to expand my palate, and this was the perfect spot to do so.
If I could pinpoint one item that I really learned a great deal about this year it would be Greens. Kale and chard crossed our plates and made appearances in our kitchen nearly every week. Enormous bunches of chard could be purchased from the market for a dollar a piece and easily could feed us for 2 meals or more, depending on what I did with it. I discovered the joys of making Chard Chips, and fell in love with a simple chard side dish, sauteed with a few cloves of garlic and simmered gently to bring out it’s deeply rich and slightly sweet flavor. I love Rainbow Chard for it’s colorful stems.
Then, in one visit to the market in Maplewood, I came across a giant bunch of greens on a farmers table and asked curiously “What is this?”
“That’s Sweet Potato Leaves.” She said, smiling widely. “They’re like spinach, only a little sweeter.”
Here was yet another enormous bunch of greens, and for a dollar as well. What did I have to lose? I handed over a buck and placed the bunch in my sack and as I turned away, the farmer said with a smile “Those are going to become your favorite green!!” To which I simply smiled and said ‘Thank you!’
She was 100% correct. I stripped the leaves that evening and sauteed them for dinner and with the first bite, I was raving over how tender and amazing they tasted and couldn’t wait to return the following week for more. Also known as Kamote, or Camote leaves, and as other dark leafy greens they are loaded with vitamins and minerals like iron, magnesium and calcium, making them a good choice for healthy eating. Each week I could, I returned to that market, and that farmer and scooped up large bunches of Sweet Potato leaves. While many cultures also eat the stems, I consumed only the leaves, tossing the stems in the garden to compost. Imagine my surprise when I noticed after a few weeks that those stems had taken root and were growing new leaves. I managed to get a small crop of my own Sweet Potato leaves from my garden before the first frost in September. Now that’s a nice bonus.
I’ve been on the fence with Eggplant for a while now, fighting back and forth with it, hoping to fall in love even when I fall on my face, but for some reason I keep trying and I’m really glad as I have discoveredmore waysthis summerto enjoy Eggplant. I came across Rosa Bianca eggplants too, and was immediately drawn to their unique colors.
The farmer told me that they could be roasted like regular eggplant. What she didn’t tell me, and what I discovered a bit too late was that this little orange variety is very bitter and is considered a delicacy in SE Asian cuisine. One bite and I had to admit that I’d found a vegetable I couldn’t eat.
A few more unique vegetables crossed my doorstep this summer, due to a relationship with Ocean Mist Farms. I was contacted by a representative of Ocean Mist back in July and asked if I was interested in some fresh Fennel to try. While Fennel isn’t really anything new, it was not a vegetable I’d done much with and while I did like it, the cost had always been prohibitive. I agreed to the Fennel they would send, and soon a case of it arrived at my house, holding six large, aromatic and superbly fresh bulbs. We had a wonderful time enjoying the light anise flavor, roasting them with potatoes and carrots. Fennel becomes so nicely sweet when roasted. I also added fennel to a slaw salad I made, loving it’s crisp texture and added taste to a favorite summery dish.
Recently, Ocean Mist contacted me again, offering to send me a vegetable I’d never even heard of: Cardones. Curiosity won me over, and I accepted. I had no idea what I was going to receive.
Cardones, or Cardoons, are very popular in Italy, come from the Thistle family and are considered a distant cousin of the Artichoke. They look like mutant celery, but they cannot be eaten raw. The internal part of the plant has slim silvery gray leaves that look like sage. And they are HUGE. Check out those stalks!!!
This was nothing like I’d known before; and I was initially at a loss as to what to do. After some research online, I decided to make a creamy cardone soup out of one of the bunches. They require a long simmering time, and mixed with onion and leek, it offered a warm and fragrant scent to a chilly evening. The finished soup was smooth, mild and creamy, and as we discovered, tasted amazing with some leftover wild rice pilaf stirred in to it.
The next two stalks I roasted, and this method was the best tasting. I tossed the slices with a bit of olive oil and a splash of an asiago caesar salad dressing I had on hand and after a nice long turn in a 425° oven, they were tender and flavorful enough to toss with pasta. The experience with Cardones was really interesting; I kept expecting celery flavor, but instead got something so unusual. It was like artichokes but richer. Cardones are similar to Artichokes in that they will discolor when cut apart, and should be soaked in acidulated water to prevent brown spots from forming. I did discover too, that they will change color even after cooking, and the roasted pieces I had in the refrigerator turned a strange shade of greenish gray after a day. The taste does not change though, even when they look just a bit unappetizing. I’m sure they have a lot more use in the kitchen, and maybe I’ll come across them again so I can experiment more.
WHAT NEW VEGETABLES ARE YOU LEARNING ABOUT? ARE THERE VEGETABLES YOU EAT NOW THAT YOU NEVER THOUGHT YOU WOULD LIKE?
DISCLAIMER:
Ocean Mist Farms provided me with both the case of Fennel and the Cardones free of charge.
I have no obligation to post any feedback or information on them, and all opinions are my own.


