February 3rd, 2009
| 5 Comments »
I’m a recent covert to ‘No Reservations’, Anthony Bourdain’s travelogue of the different cuisines indigenous to countries all around the world. His travels dig deep into the heart of the foods that come straight from the ancestry of a culture; for Tony, the more authentic it is, the better he likes it and the more he implores you to understand, to accept and explore for yourself. Admittedly, some of his meals don’t exactly make me want to run for the kitchen in joy- like the brains, bull penis, chicken rear ends, seal eyeball and live octopus I’ve watched him partake in- but there are times where I am so mesmerized by what’s on the plate in front of him that I simply can’t stop thinking about it. Like his two-episode sojourn through India.
I am a huge fan of Indian food, and I think that if Tony were sitting across from me in a bar with a lot of empty beer bottles between us and he was asking me his infamous question of “If you had one last meal before you were to die, what would you eat?” I would glaze over in a cumin and cardamom swoon and list off all my favorite Indian dishes, one after another. From pappadums to paratha, from smoky Bharta to Bise Bele Bath, fragrant Daals and fiery curries, I could go out in a haze of garlic, ginger and smoke, lost in the aromatic stupor brought on by the subtle yet aromatic flavors of this fabulous food. Watching Tony’s two episodes and all those familiar dishes left me craving something, anything Indian.
Mike and I took full advantage of a recent kid-free Saturday, and after a thorough sweat bath cross country ski outing in 35 degree weather- and a shower, of course- we dropped ourselves into the familiar surroundings of one of our favorite Indian restaurants for their lunch buffet. It helped. A lot. But it wasn’t enough. I had to have more.
I have no less than four Indian/curry cookbooks in my cabinet. Four. In prior times, I’ve cautiously turned the pages of Julie Sahni’s tome to Indian food- Classic Indian Cooking- only to close it and set it, with resignation, back in its spot. This book was a tough sell for me as I am extremely visual when it comes to food and it reads like a droning novel with no pictures. I like my pictures. But as I prepared my chosen recipe from this book, I began to realize why so few Indian cookbooks have any stunning photographs. Indian food, for all it’s red chili and striking turmeric glory, is not the prettiest cuisine to behold. My most treasured Baingan Bharta- a smooth blend of smoky, charcoal grilled eggplant with tomato and peas looks like a pile of mush on a plate, but explodes with flavor in the mouth. How do you photograph that? You can’t. It’s a cuisine that begs to be experienced, hands, eyes and nose with all tastebuds on high alert. It is not for the pages of a book.
This chicken dish I took on, simply called Chicken in Onion Tomato Gravy, started off as a massive amount of onion
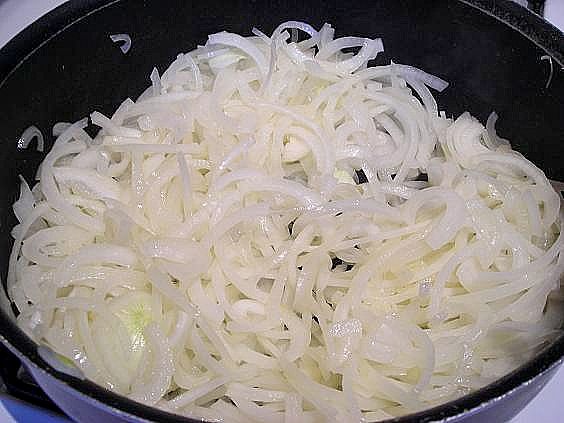
that you brown to a burnished hue and to which you add the small green cardamom pods and sultry cinnamon sticks essential to the heart of Indian food
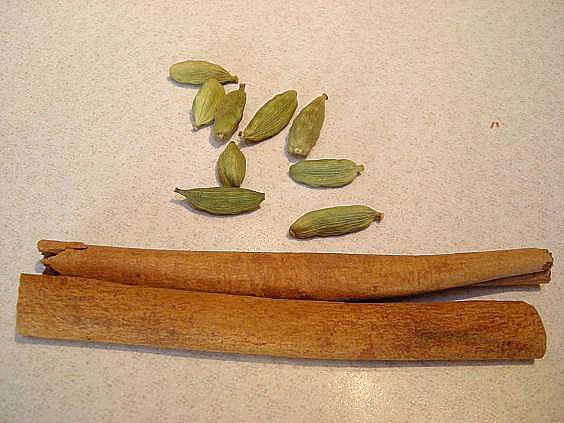
along with chopped tomato, an awful lot of minced ginger and garlic, the aforementioned turmeric, a dash of blazing red pepper and of course…..chicken, and cook it in that delightful mash until the meat falls apart at the touch. Then, as the cookbook tells you, you leave it for preferably two hours.
(insert the sound of tires screeching to a halt here)
Are you kidding me?
This smelled too good, and looked so amazing, that it was all I could do to leave it for a half hour while I fired up the rice cooker and steamed off the basmati. Two hours?? Maybe if I ate this way all the time I would have bestowed upon me the patience to await such a feast. But I don’t.
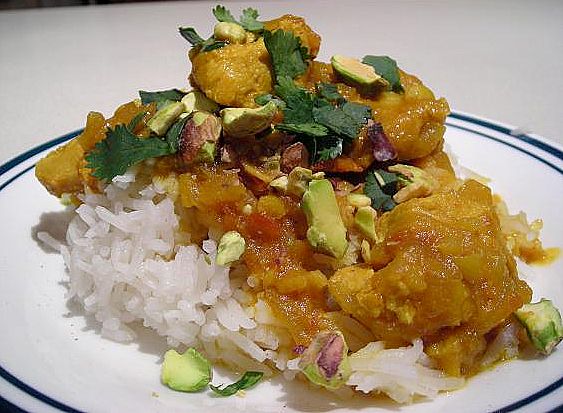
Now tell me….with all that goodness on a plate, would you wait? Naturally this is one of those dishes that develops its flavors more as it sits; I know that. The leftovers will likely rock my mouth. As it is, I can hardly even wait for that. The taste was marvelous- slightly sweet, deep and oniony, rich but not heavy. Several hours later, Mike turned to me and said “My dinner is still so nice and warm in my stomach!”
(cue the stars in my eyes, birds chirping, the lilting flute)
(jump for recipe and notes)
Come in to my kitchen…
January 27th, 2009
| 3 Comments »
And how I got from hot steaming soup to a cool salad I have no idea, but I can’t throw off the desire to recreate something I see on a website, even if the weather outside is more comfort food appropriate than salad worthy.
I wish I could remember where I originally saw the photo of this Orzo salad with yellow pepper, kalamata olives and feta cheese because it would be nice to give due credit. Regardless, with a party to attend it was the perfect excuse to give it a whirl even if the temperatures outside plummeted to sub-zero once again.
I’m really glad I did.
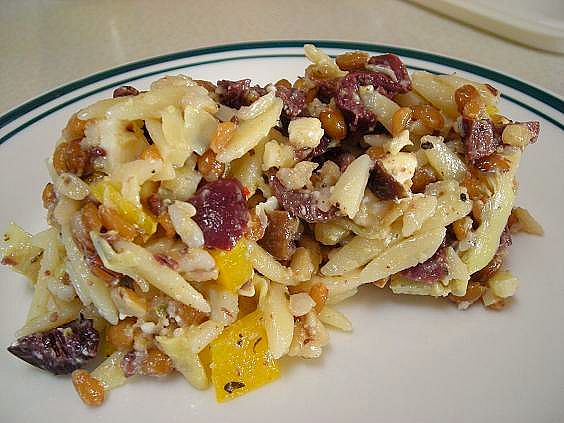
The original recipe called for orzo and israeli couscous- double pasta whammy- and although it probably would have tasted fine, it was too much in the carb department. As I browsed the grocer’s aisle in search of some type of substitute and appearing about as aimless as possible to all those frantic cart pushers around me, I finally spied, way on a top shelf and really obscure, a package of Kashi Original 7-Grain Rice Pilaf.
I am, admittedly, always willing to buy just about anything from Kashi, even without scrutinizing the label, the ingredients or even the expiration date like I tend to do. It’s one of the few items in a grocery store that I know is good quality. What I liked about this ‘pilaf’ if you can even go so far as to call it that, was that it was nothing more than a simple vacuum packed assortment of cooked whole grains. That’s it. No sodium laden, preservative choked flavor packet to add, no un-pronounceable ingredients, nothing but cooked grains. A quick turn in the microwave and they were ready to eat, or to be tossed into any preparation, mixed to your own liking. I love the idea of whole grain pilafs; the mix of nutty and healthy grains can compliment any dish, but since most of them require widely fluctuating cook times, it’s hard to think of putting them together myself without a whole lot of work. I do imagine though, that the work and effort would be totally worth it.

I did add some extra wheatberries to this dish. I love their chewy goodness and the added nutritional aspect of them. They are really simple to keep on hand to add to any number of preparations, especially pilafs. Eating Well magazine has the goods on cooking wheatberries. This is how I do it. Then I package them in one cup increments and freeze them. They break apart very easily once frozen and have a long shelf life. I add them to pasta dishes, pilafs, soups, oatmeal, breads…..the list is endless.
This is one of those dishes that tastes better once the flavors have a chance to get to know each other really well. I mixed it on a Saturday for a Sunday party and the sampling while I prepped didn’t impress me at all. By the time it was served the next day it was a lot better.
And I’m certain it will taste much more appropriate in July. It’s kind of nice to get ahead of myself on summer foods!
Orzo and 7-Grain Salad
1/2# cooked orzo pasta
1 pkg Kashi original 7-Grain rice pilaf
1/2 c. cooked wheatberries
1 yellow pepper, diced
1 4-oz can artichoke hearts, chopped
1/2 c. kalamata olives, chopped
1 3-oz pkg feta cheese
italian style vinaigrette
Salt and pepper
Prepare pilaf according to package directions. Stir all ingredients together in bowl and add about 1/3 c. dressing to coat. Season to taste with salt and pepper. Cover and refrigerate overnight or for several hours. Before serving, stir thoroughly and taste for seasoning. Add more dressing, salt and pepper if needed.
KATE’S NOTES:
I ran out of kalamata olives and to add more of that tangy flavor, I stirred some olive tapenade into the dish. This could easily sub for the olives. Go the extra mile and make your own vinaigrette, or use a good quality bottled option. The possibilities for extra additions to this are endless.
January 18th, 2009
| 10 Comments »
Yesterday was a wonderful day all around. The weather broke above zero for the first time all week- and actually made it to +22 degrees!!- and my guys took over the kitchen to make tasty treats and an amazing dinner.
First Mike made Chili Lime baked tortilla chips, a recipe he found in the current Eating Well magazine. It’s simple to prepare which is exactly what he likes.
Mix the juice of half a lime with 1/2 t. chili powder. Spray tortillas with oil on both sides, then brush tortillas on one side with the chili-lime mix.
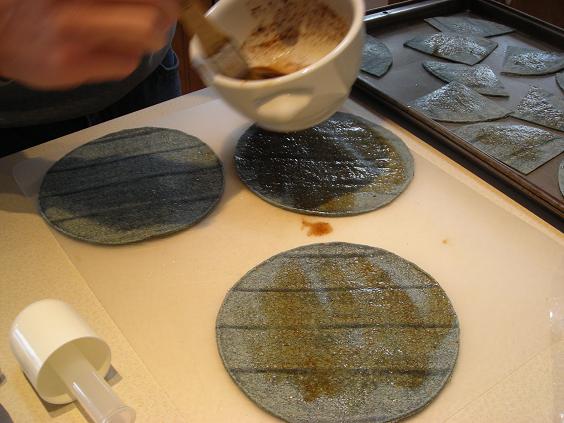
Cut tortillas into wedges
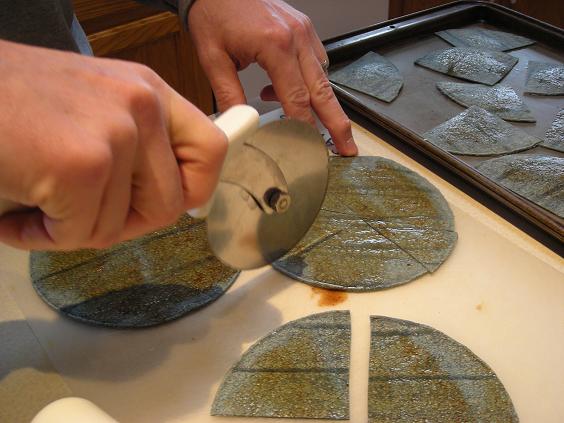
Place on cookie sheet and sprinkle with sea salt. Bake them until crispy at 375 degrees. Then enjoy them any way you want. We had fresh guacamole on hand from our Friday Night Nachos.
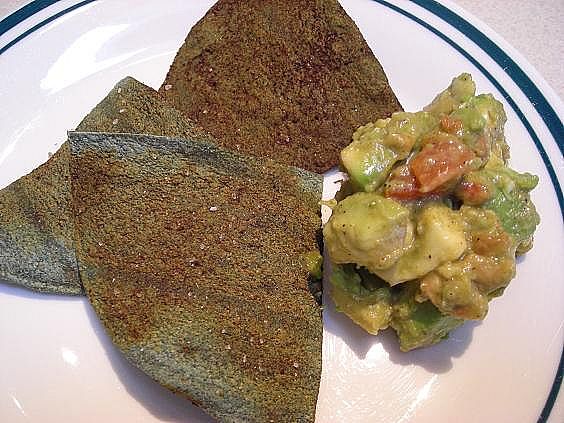
These are blue corn tortillas we had on hand. Use any soft tortilla type you wish. They are not burnt, as Griffin observed; that’s the chili-lime mix coloring the chip brown. They were fresh, crispy and just tart enough from the lime.
And for dinner, Griffin wanted his favorite Chicken Enchiladas. He’s made this dish for us before so I settled down in the kitchen to observe and direct. I really didn’t need to do much more. This guy is a chip off the block, I’ll tell you!
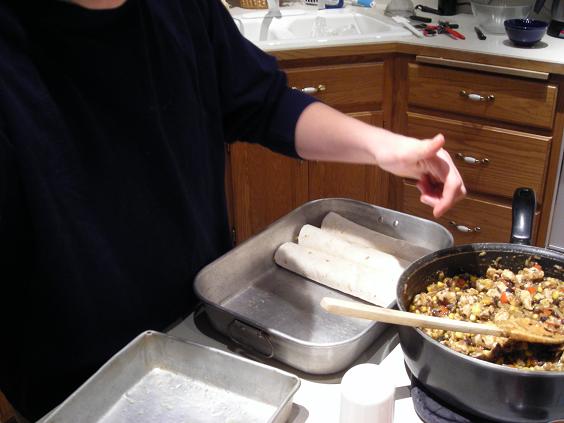  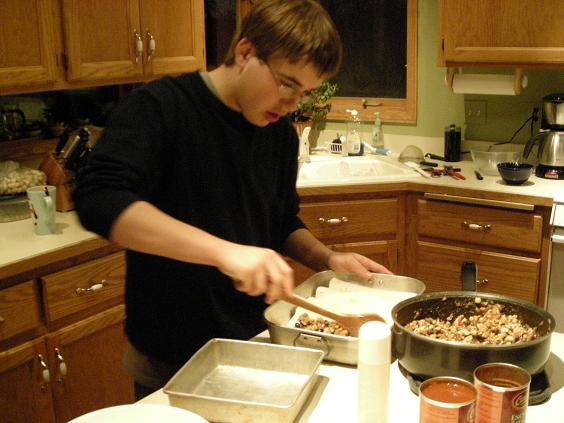
Enchiladas don’t really photograph that well, especially in winter light so there’s no finished product picture to show you. They were stellar, however. And Griffin was really proud of the effort and the result. We were too. I’ve been trying to get him to take over cooking more often. I guess I just need to motivate him with the right meals.
Here’s how we make enchiladas:
1 pkg boneless chicken breasts, diced (or of choice)
1 red pepper, seeded and diced
1 medium onion, diced
2-3 garlic cloves, minced
1 15-oz can drained and rinsed black beans
1 15-oz can hominy, drained (0r about 2/3 c. frozen corn kernels)
2 15-oz cans enchilada sauce of choice- we use Carlita brand
Shredded cheese
Flour tortillas
Saute onion and pepper in skillet until soft, add garlic and cook, stirring for about a minute. Remove to bowl and stir in hominy. Add chicken to pan and cook, stirring, until pink is gone, about 3-5 minutes. Add vegetables back to pan and half of one of the cans of sauce, stir to mix all together. Cook for about 5 minutes.
Spray a 9×13 pan with cooking spray. Lay one tortilla in pan and scoop about 3/4 c. of filling into center. Top with a sprinkle of shredded cheese. Roll up so seam side is down. Repeat until pan is full- ours hold six, and we use an 8×8 pan to hold three more. That’s about the extent of our filling. Pour enchilada sauce over top and cover with cheese.
Bake at 400 degrees for about 15 minutes or until cheese is melted and sauce bubbly.
KATE’S NOTES:
I added a shredded zucchini to the vegetable mix once it was added back to the pan with the chicken. This recipe is fine meat-less as well, and the vegetables can be substituted with others if you wish. I have also done this recipe with just beans, brown rice and vegetables with excellent results.
January 16th, 2009
| 5 Comments »
Don’t know gnocchi??- say no-keee or nyawk-eee…. may I suggest taking the time to get to know these delicious, quick and wonderful little pillows of potato dough.
You can make gnocchi from scratch and recipes are all over the Internets to those who choose to undertake the project. I made gnocchi absolutely eons ago, long before anyone even knew what blogging or the internet was, or even, really what gnocchi was. I don’t think they were all that good. I wasn’t all that good then either. So let’s fast forward.
I’ve read over recipe after recipe for handmade gnocchi and quite frankly, I’m not that interested in making them from scratch. It’s one of those labor-intensive recipes that seems easy enough but can be fraught with problems. I love to cook without issues, besides, when the grocer carries a perfectly acceptable brand of shelf-stable gnocchi that tastes wonderful and is a snap to put together for a meal, for what reason would I sweat over a bowl of floured cooked potato if I don’t have to? Right. I’m glad you agree.
The current issue of Eating Well magazine, my most favorite of all the food publications out there, had a very eye-catching recipe for gnocchi and I just had to try it. I knew it wouldn’t appeal to the little carnivore, but quite frankly, this was one of those meals I wanted no matter what. With plenty of leftovers in the fridge, it worked out fine.
Gnocchi is made from cooked potato that is mixed with flour, usually semolina, and sometimes bread crumbs. Gnocchi comes from the word nocchio, loosely translating to ‘knot in the wood’ and has been a traditional Italian offering since the time of the Romans. It is available in all it’s regional forms throughout Italy, although the potato version is considered to be the most recent, ever since the introduction of the potato to Europe in the 16th century.
Behold the gnocchi……from this
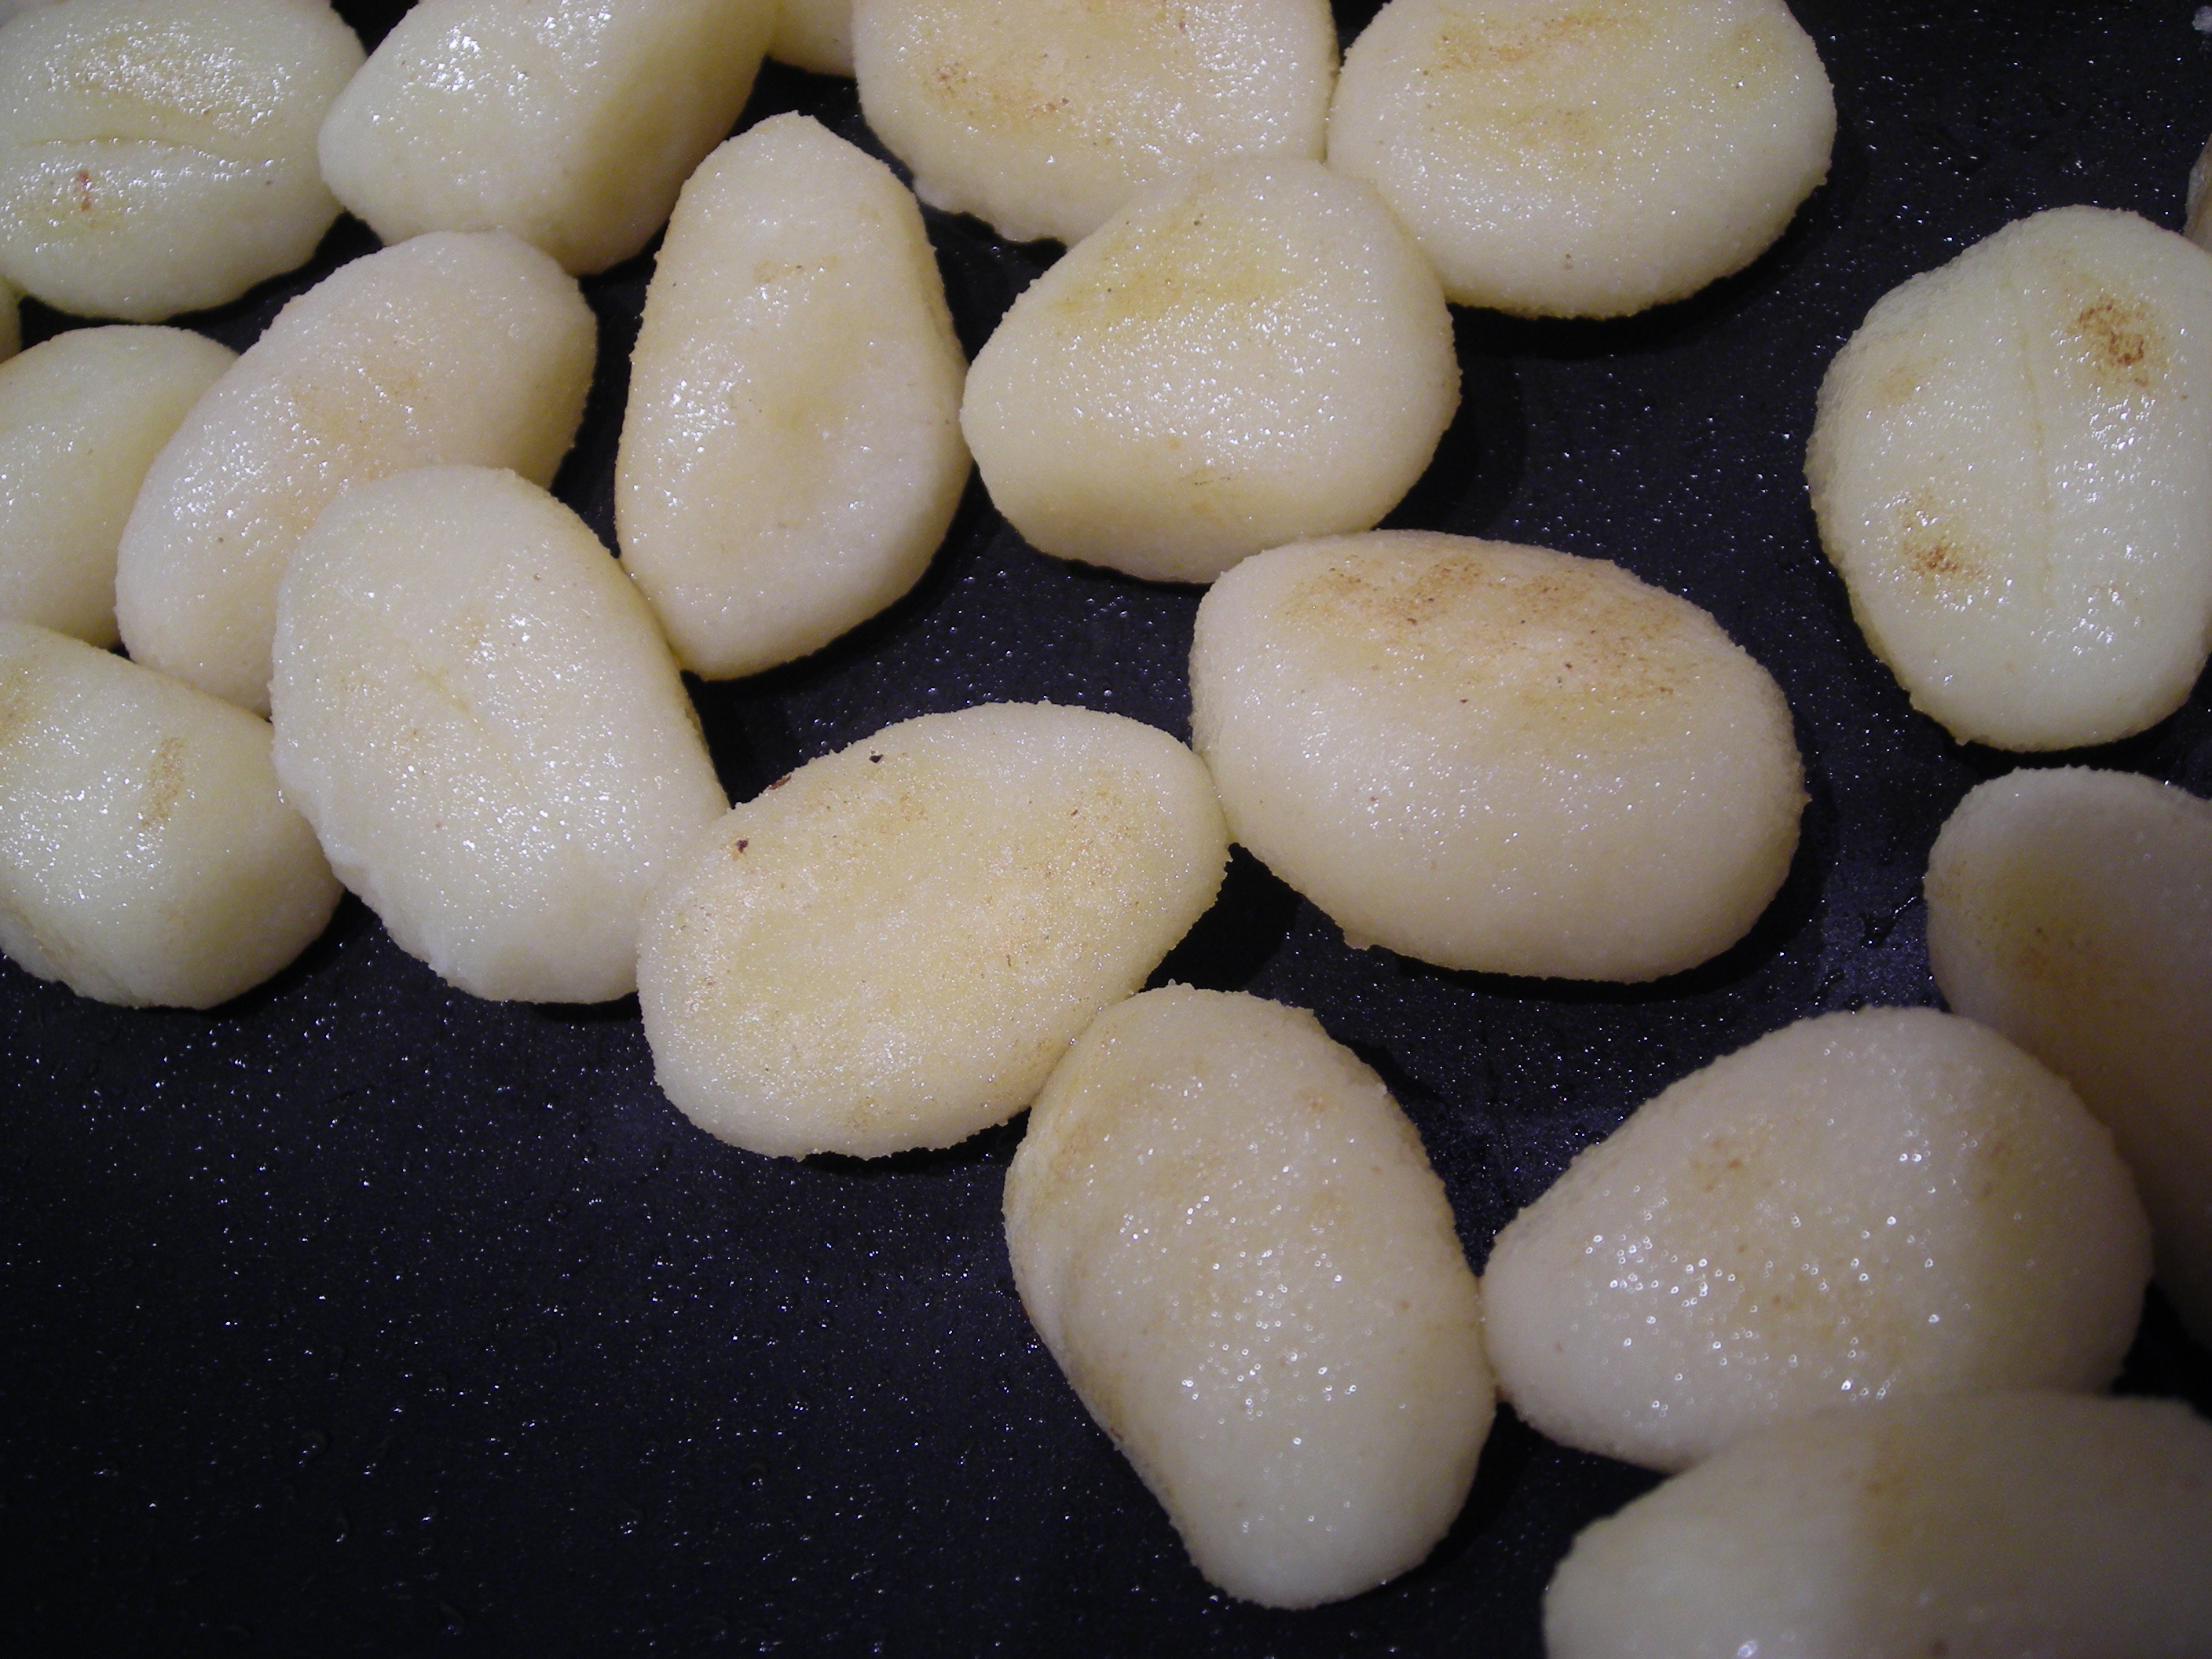
To this…..
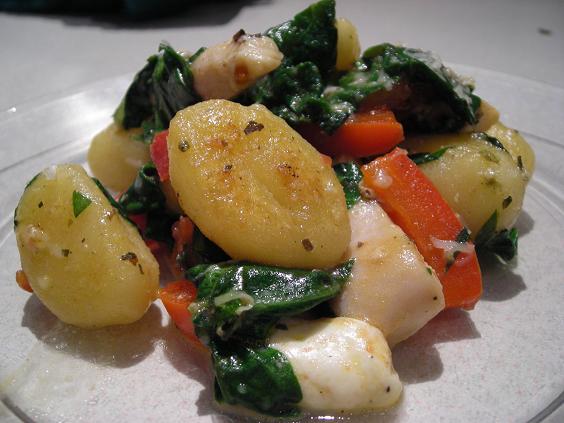
In about 20 minutes.
And it was all I could do not to eat all of it. This is definitely on the repeat list for us. It was amazingly good.
Gnocchi In a Flash
adapted from the February Eating Well magazine
For the orginal recipe, go <HERE>
1 pkg shelf stable gnocchi
2-3 boneless chicken breasts, cut to strips
1 medium red pepper, cored and seeded, cut to strips
1 bunch spinach, washed and de-stemmed* (equal to a 10-oz bag)
1/4 c. canned diced tomato with italian seasonings
1/2 c. fresh mozzarella, cut into small dice
1/3 c. fresh grated parmesan cheese
Fresh basil to garnish
Season chicken breast strips with salt and pepper. Heat oil in 10-inch skillet, add chicken and cook, stirring occasionally, until strips are cooked through, about 5 minutes. Remove to bowl. Add red pepper and cook 3-5 minutes until tender. Add to chicken. Wipe out skillet with paper towel and add about a teaspoon of oil. When hot, add gnocchi and cook about 5 minutes until browned and slightly puffy. Add chicken and pepper to pan, and in bunches, add in spinach, stirring quickly until it’s all wilted. Toss in diced tomato and mozzarella cubes and shave some parmesan over the top. Stir to mix and allow to cook for 3 minutes or so until hot. Serve immediately topped with fresh basil.
KATE’S NOTES:
The chicken is completely optional in this. Truthfully, it was an attempt to get Griffin to try some. He did, but didn’t like it. The original recipe has no meat in it, but it does have white beans. And no red pepper. I think this version is stellar.
The original recipe called for the entire can of diced seasoned tomato. For whatever reason, I just spooned in a few tablespoons and it was perfect. The rest can be frozen in a baggie for another use.
*A word on fresh greens, like the spinach; I always buy greens by the head. I don’t buy the bags of them at all- too expensive and chemically washed, plus they just don’t last as long- and some markets around me carry the ‘live’ lettuce heads with a root ball attached. They are cheap, mixed and wonderful. I clean the greens as soon as I can after getting them home and place them, wrapped in wet paper towels, in a plastic bag in the drawer of the fridge. They keep for up to a week for the more tender leaf varieties like spinach or field greens, and longer for heartier leaves like bok choy or romaine. Remove any wilted leaves if you notice them.
January 14th, 2009
| 4 Comments »
Thank you for the kind get-well wishes and emails. I appreciated them a lot. Mercifully, the illness that swept in so quickly, leaving me flat on the couch for three days, left just as swiftly as it arrived. I suffered mostly a numbing fatigue and head congestion, lacking energy to do much of anything except stare out the window.
And read. I blame my current thought process on the book at hand, ‘ A Slice of Life- Contemporary Writers on Food’ that has followed me around lately. It was an ‘A-HA’ find at Half Price Books- oh, probably back in the Fall, before holiday stuff, before the chill of Winter set in, before the lethargy that inevitably follows Christmas and New Years. It got dropped into a magazine rack and forgotten. When I pulled it out it was covered in dust. So well I treat my belongings.
But then I opened it and got swept away. It all started to make sense to me with just a few pages, this nagging sense of why, and how. Why do we constantly search for the perfect meal, the best ingredient, the finest eating experience? How do we achieve it, and better yet, maintain and hold on to it? And what exactly are we looking for anyway?
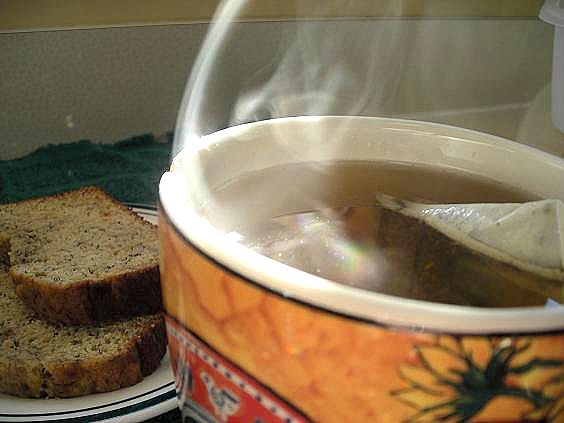
Outside of the pages of that book, I began to find my answer in a slice of this tea bread and the comfort of a favored, but cracked tea cup.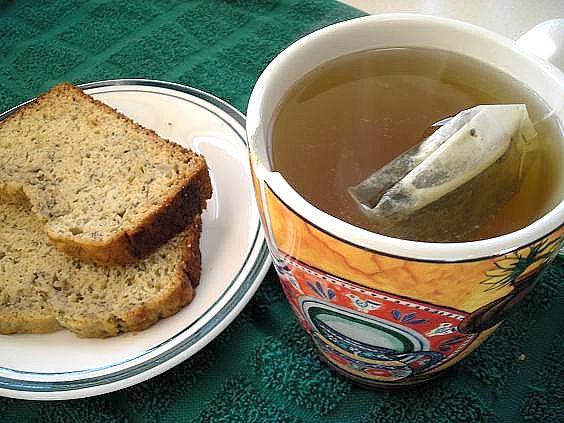
So it’s no secret to me that when I bake I feel like I am channeling my mother’s spirit, the one that would wake at dawn in the summer to bake cookies before the sun burned the air crisp and dry; this is simple for my mind to deduct, but there has always been something else that nags at me, and with the first bite of anything I make, I take from it several things. One- it’s comfort in the true sense of the word. Nothing touches us deeper than homebaked something, anything. We can eat a store-bought chocolate chip cookie, or nibble on a slice of bread from a plastic bag, but it really doesn’t touch us. It doesn’t soothe. The second has always been far more elusive, and less attainable and finally I know what it is. It’s the taste of home, and I think for most of us, it’s the one missing element in everything we cook.
This is not to say that we can’t find comfort in the foods we eat, the meals we prepare for others, but what is it, with Christmas still within a memory’s grasp, that makes us want to recreate ‘the meals we used to know’? Why is it so important for people to sit down- let’s say at holiday time- to a meal of familiar foods, the same tastes and textures we grew up with? Isn’t anyone interested in something new? No. We’re interested in being home.
In each bite, each dish we make or cookie baked or cake decorated, aren’t we just a wee bit eager to find that one spot in us that tells us, without a doubt, that we’re home again? Isn’t it why we search high and low for the perfect cookie recipe, try a dozen methods of roasting chicken, bake loaf after loaf of banana bread in a futile search for a missing ingredient that we’re never going to find? This is why home-cooking has become such an explosive and highly demanded part of our lives, why we gather at the table with eager eyes; it isn’t so much the food, it’s what the food can bring to us that nothing else can.
Take that banana bread, the reason for this post. My mother made banana bread all the time. I can picture our kitchen- it was small and so very dated- dulled yellow walls and a deeply blue and green carpet- carpet! in the kitchen!- the dishwasher we had to attach to the faucet, the jar of bacon grease on the stove. I can recall leaning on the counter, the southern window at my back, nibbling away at a slice of her banana bread, a small pile of unwanted walnuts growing on the counter next to my elbow. I loved her banana bread; she purposefully would buy too many bananas so that she could make it. It was perfectly flecked with banana, it smelled wonderful and she beamed with every loaf. I even have her recipe, yellowed as those walls, frail and old, crinkling at the edges. But I make the loaves and it doesn’t taste the same. I’m at my own kitchen counter with the bright southern light, my dishwasher tucked under the counter, no bacon grease in sight. But the recipe is the same and shouldn’t it taste like I remember? It never does. Something is always missing. It’s not the essence of those despised walnuts, or the scene out the window of my youth. It isn’t a method of her own that I never learned. It’s her kitchen; it’s her warmth and love, the very scent of home. We can have our own places we call home, and they feel that way to us the moment we step in the door. We turn out the lights and know, by heart and finger touch, just how to walk through the rooms. But what we make in our own kitchens, even with a treasured recipe, never seems to taste exactly like we remember. An old friend once extolled the merits of the Italian foods she ate while working on that continent, and her extreme disappointment, upon opening a small bottle of olive oil that she brought home, a favored flavor while “on the boot” to find that, in her words “It tasted just like any old olive oil. It wasn’t anything like I remembered.” Of course not. She wasn’t in Italy. The banana bread is the same thing; it’s the exact same recipe I ate when I was young, but I’m eating it on another continent, a figurative place that’s a whole lifetime away from what I remember. It’s the tea cup in our lives, with the crack that makes it imperfect, one we can’t throw out.
Growing up, our meals weren’t stellar. My mom wasn’t that great of a cook; she could cook, but it wasn’t creative, nor with an eye towards health. I have no fondness for much from my childhood, except an occasional meat loaf, or my own grown up version of Tuna Pasta. I still recall vividly a recipe I made two years ago that reminded me so much of an over-served childhood meal that I simply couldn’t eat it. There is no love lost for my food memories as a kid, what I eat now is all my doing, my likes and for my health. Griffin has many favorites that I make, one being his absolute beloved Curry Chicken. This was on the menu last night and I made sure that the quantity was large enough for him to load up on without depriving the rest of us. To see his eyes as he leapt down the stairs, and his eager dance around the stove, lifting the spoon, taking in the scent, I had to think to myself that somewhere in his future, he’s going to pull out what he needs for his favorite meal, in a kitchen of his own, maybe with an eager child waiting. He’ll have the same turmeric-stained spoon, the reliable straight side skillet to use, the same method and recipe, and with his first bite, will he lift his head, his mind wondering ‘Hey, what’s this missing?’
Applesauce Banana Bread
· 4 Bananas — ripe
· 1/2 c. Sugar
· 3/4 c. Applesauce
· 1 T. Vanilla Extract
· 2 Eggs
· 1 T. Baking Soda
· 1 T. Baking Powder
· 1 t. Salt
· 2 c. AP Flour
Preheat oven to 350 F. Place bananas in a large bowl and mash with fork. Stir in sugar and let stand for 15 minutes.
Add applesauce, vanilla and eggs, mix well. Stir dry ingredients together, add to banana mix and blend only until incorporated. Pour into standard loaf pan coated with nonstick cooking spray. Bake for 45 minutes, or until a wooden toothpick inserted in the center of the loaf comes out clean. Remove from oven and let stand 10 minutes before removing from pan. Cool on wire rack.
For the Chicken Curry recipe, the only one I use, go HERE.
January 8th, 2009
| 6 Comments »
Not long ago, I spoke about taking baby steps towards chickpea appreciation.
I’m getting there. Slowly.
And also slowly, I’m foraging into my cookbook cupboard and removing a few under-appreciated and under-utilized books; books that hold glorious recipes that make me drop my head back on the chair in a sort of agony, due to my tastebuds sorrow over never having tried it, and how delicious does this look anyway?? And why do I have this book with the almost perfect spine and unstained pages? These bitter days of January, bright with sunlight and diamond sparkling snow are perfect for experimentation, for exploring the vast untapped knowledge in these books. Now that I am getting my cross country skis out regularly, it gives me a much needed energy boost and all that drive needs to go somewhere, doesn’t it? Best get cooking, I say.
Well, hello there beautiful…..
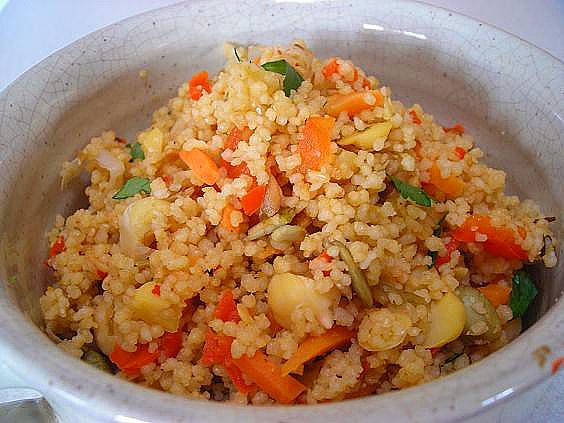
Couscous is about as much fun to say as it is to work with; what other product can you dump in boiling water and forget about, coming back to tender tiny little grains of perfection with zero fuss? What else can be fixed so quickly that you barely have time to chop up a few nuts, or grate some good asiago to mix into it for a stellar side dish? Let’s say couscous….. Cous…..cous.
And this dish turned out gorgeous, if I do say so myself. Brightly colored pepper and carrot nestled up to the rich green of cilantro and with a quick toss of chili garlic sauce, it became just a tiny breath of spice in the mouth, nothing 4-alarm, not a rush of sweat breaking on the brow but just a hint of the heady flavor of chilies. It’s like when you eat something and it evokes a memory that you can’t quite place. Fleeting. Perfect.
Yes, the chickpeas. Right.
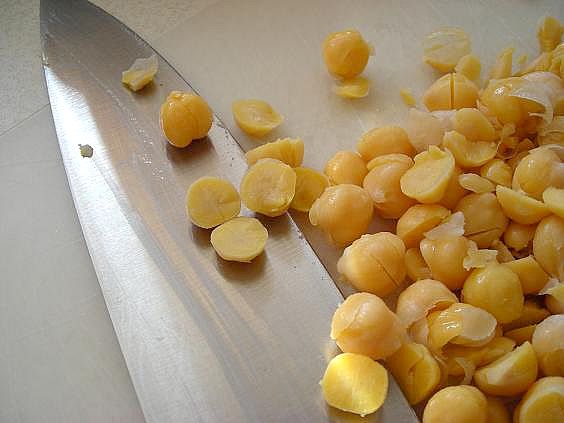
I liked the idea of mixing the chickpeas in the all that couscous goodness, the vegetables and bite of chili sauce, but I thought ‘Hey, y’know, they aren’t the right size!’ because it’s all about symmetry in my world- the towels folded edge to edge, the sheets and comforter hanging to the same length on both sides of the bed- symmetry, similar and even. Besides, when faced with a plate of food, especially something like this, it’s all about the teeny-weeny (it is couscous, after all) and so I blended the pepper and carrot in the food processor to mince them fine, whacked the nuts to pieces and took my chef knife to the chickpeas.
I then turned my kitchen into The Flying Chickpea Circus. Did I think at all that those little guys might be quite sprightly?
Oh, and the skins. Ew. That never occurred to me as I lifted my Wustof. I don’t like those skins. But it was time for chin up, marching forward to the finish line. Think symmetry; ignore the skins.
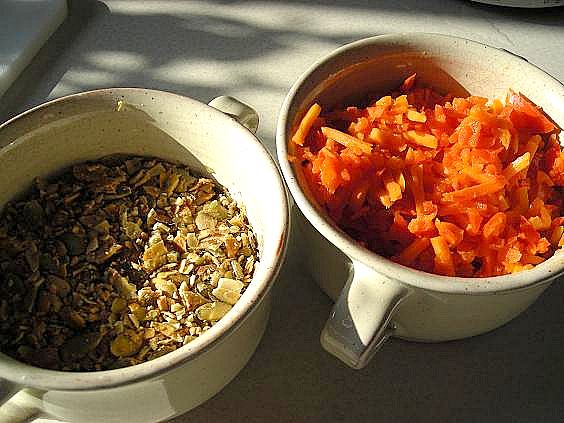
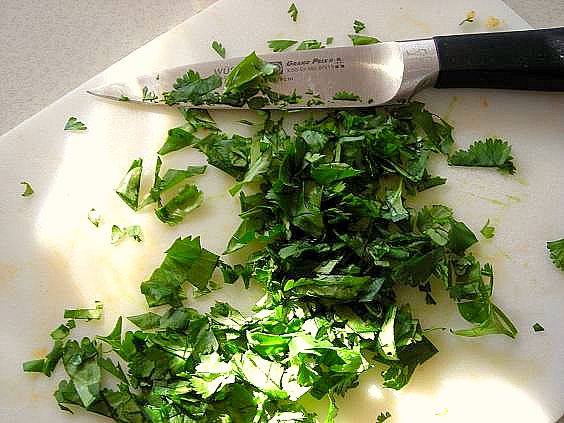
In real time this only took about 15 minutes to pull together, of course, minus the chickpea chasing. I had the vegetables seared and waiting, the cilantro chopped, the nuts fragrant and toasted. A few quick tosses and my fork was present and accounted for, heading to my mouth. So delightful. I think the best part of this dish came later, at dinnertime, as I sat down to a steaming bowl of soup I realized that I wasn’t even that hungry. My small bowl of grains, legumes and vegetables had given me some serious sustenance, a bonus to any recipe.
More chickpea appreciation and a great dish to boot; this works perfectly as a good main course or as a side dish. Increase the chili garlic sauce for your own heat level. Watch for the flying chickpeas.
Spicy Couscous and Chickpeas
The Food and Mood Cookbook by Elizabeth Somer and Jeanette Williams.
1/2 c. chopped pepitas
2 c. chicken broth
2 c. whole wheat couscous
2 t. olive oil
1 medium red bell pepper, stemmed seeded and diced
1 medium carrot, peeled and diced
1 15-oz can chickpeas, rinsed well
1-3 T. chili garlic sauce
Fresh chopped cilantro
Toast pepitas in a hot skillet until fragrant, remove to dish. In same skillet, saute pepper and carrot in oil until soft, about 5 minutes. Set aside. Bring broth to a boil, add couscous and stir, then cover and remove from heat to absorb. In large bowl, combine couscous, chickpeas, pepper, carrot, pepitas and chili garlic sauce. Salt if desired. Top with cilantro.
KATE’S NOTES:
In the original recipe, the nuts listed are slivered almonds, which would be delicious in this. Toast them as well. The original recipe did not call for carrot, but it definitely improves the overall appearance and nutrition of the dish. Whole wheat couscous was my addition and I think the heartier flavor of the grain is a real boon. Thin the chili garlic sauce with a little water to make mixing more uniform. I subbed cilantro for parsley as I like it better.
December 22nd, 2008
| 5 Comments »
And you thought I was done talking about food holidays!!
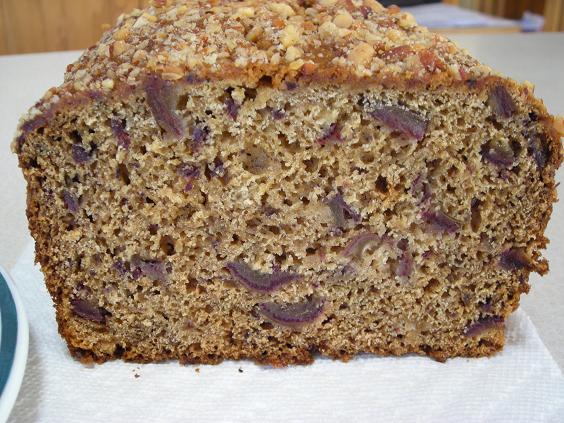
December is National Fruitcake and National Eggnog Month. Blech. Just the word ‘fruitcake’ conjures up images of crazy people, and the real deal is not at all appetizing although I would like to taste one, for real, that is fresh and worthy of praise instead of ridicule. The poor Fruitcake just never gets any respect- the lil’ Rodney Dangerfield of food.
Today is National Date Nut Bread Day. I’m a big fan of dates and have been since childhood. My mom made the standard Date Bars- you know, with the oat topping?- and I loved them dearly. Sadly, her recipe isn’t in my treasured recipe box of hers, and despite several attempts with recipes found on-line, I haven’t been able to duplicate her offering and gave up, full of sad face and regret, resigned to a date-less existence.
But the holiday intrigued me because this is bread, and it has dates and it shouldn’t be too hard to come up with an option that doesn’t make my teeth hurt from being too sweet. Dates are notoriously sweet and contain the highest concentration of sugar in any dried fruit. They are also higly caloric, but they are loaded with potassium and fiber and can be an enjoyable treat, in moderation. One thing they don’t need at all is any extra sugar, so in finding a recipe that relied on only the dates for sweetness was a bonus in my mind.
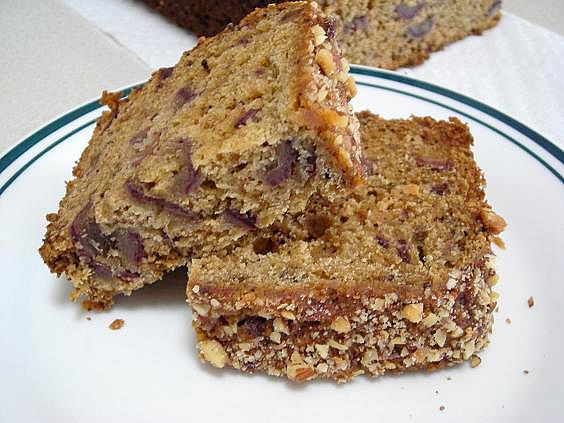
I’m not one to expend too much effort searching online recipe databases for the perfect recipe. I’m not patient enough for that. If I’m looking through Recipezaar, AllRecipes, Epicurious or any other site, I want to find something quickly and not spend endless time perusing through countless offerings, reading dozens of reviews and gazing at pictures. I trust reviews the most and they need to be unanimously positive. Coming across this bread recipe on the AllRecipes site, the first thing I noticed was that it had no added sugar, the next thing I read were the enthusiastic reviews that claimed this moist tender bread would surely be a hit. I didn’t need any more than that.
The best part was, they were right. Even slightly overcooked- which seems to be a recurring theme in my kitchen lately- the bread held a nice moist feel and was chock full of date flavor without making my eyes water from the sweetness. Without the sugar, the true flavor of the fruit shone through, and really, isn’t that why we eat something in the first place? This will be a repeat in my kitchen, with proper oven timing, whether it’s a food holiday or not.
Moist Date Nut Bread
from AllRecipes
- 2 1/2 cups chopped dates
- 1/4 cup butter
- 1 1/2 cups boiling water
- 1/2 cup packed brown sugar
- 1 egg
- 1 1/2 cups all-purpose flour
- 1 teaspoon baking soda
- 1 teaspoon baking powder
- 1 teaspoon salt
- 1 cup chopped walnuts
- Preheat the oven to 350 degrees F (175 degrees F). Grease and flour a 9×5 inch loaf pan.
- In a medium bowl, combine the dates and butter. Pour boiling water over them, and let stand until cool.
- When the dates have cooled, stir the mixture to break up any clumps. Mix in the brown sugar and egg until well blended. Combine the flour, baking soda, baking powder, and salt; stir into the date mixture until just blended. Pour into the prepared pan.
- Bake for 50 minutes in the preheated oven, or until a wooden pick inserted into the center comes out clean.
KATE’S NOTES:
I followed this to the letter except for the walnuts. I don’t do walnuts, not after a childhood of dealing with walnuts in every home baked goodie I ate. I loved my mother’s baking, just not her love for walnuts. Instead, I finely chopped almonds and sprinkled them over the top of the loaf before baking. I think pecans would be nice too.
Be sure to thoroughly allow the dates and butter to cool and absorb the liquid. It will become a thick fragrant paste and really, is quite delicious all on it’s own but keep your spoon out of it and use it in the bread! A little fresh grated nutmeg would probably add a nice flavor touch to this, but the date flavor all on it’s own is really delicious.
December 21st, 2008
| 3 Comments »
This amazing Stollen recipe that I’m posting has been made possible by the good folks who created Facebook and the hundred bajillion people who have made it the most popular (and fun) social networking site available.
Here’s the Stollen to keep you interested while I regale you with my tale of adoration. For the bread…… this love is about the bread, folks.
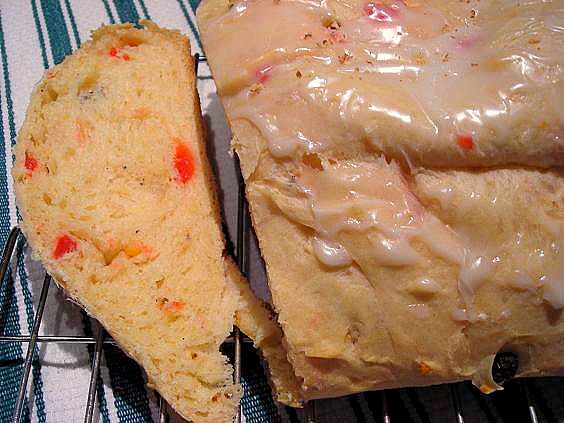
My love affair with Stollen started at the artisan bakery where I was employed in the office for five years. Every Christmas there would be Stollen, which I coveted heavily. It was rich and buttery, coated with dusty powdered sugar and full of sweet chewy fruit. After the chocolate cherry bread that was made there, I loved the Stollen the most and would look forward at Christmas to having a loaf or two of it to enjoy. It’s been one item sorely missed since departing that job, and that was almost seven years ago now. That’s a long time to miss bread, but that job introduced me to some of the most stellar breads I have ever had, and cemented a lifelong love affair with those yeasty fragrant loaves. I could never do low-carb; bread is like oxygen to me.
I was able though, through the magic of Facebook friends, to ask my former boss if the bakery was making Stollen this year, as it seemed all I could think about was the sweetness of that bread. He told me it was available at a local gourmet grocery store so I made a trip to find out and came across one gorgeous loaf that was stamped with a $12.00 price tag.
Um, no. And I mean a big ol’ ‘Oh HECK no!’
Even my coveted Stollen was not worthy enough of that amount. Not in these lean financial days. I knew in my culinary mind that I could probably make half a dozen loaves for less than the cost of one of those in that store.
Back home, full of sad face about Stollen, I set about making a pan of Scotcheroos for a party that night and again, with Facebook, I posted a status about wishing I could make Stollen instead and lo and behold, the very next day came a message from one of my distant FB friends (through the magic of networking) with an authentic German Stollen recipe from her grandmother, who brought it with her when she came to this country from Frankfurt.
By this point, I think I can’t get any more crazy about Facebook. There’s a tight community of food bloggers there and not only has it allowed me to reconnect with almost all of my old high school friends, some whom I haven’t spoken to in 20 years or more, it’s given me a lot of new connections, mostly through food lovers, that have led me to some pretty amazing finds. Like Stollen.
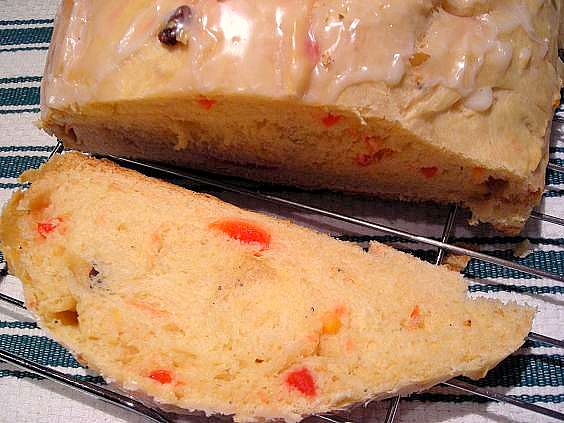
The message and recipe couldn’t have come at a more opportune time as a major winter storm descended on Minnesota yesterday, and there was little to do but hang tight in the domicile and do something to keep busy. I took my cross country skis out in the morning to the convenience store and, much to my surprise, found candied cherries there, but no yeast. Mike was gracious enough to brave the snowy roads to the grocer to get my needed ingredient- bless his kind heart. So I made Stollen and watched the snow come down, down, down. By dinnertime there were three glistening loaves on the countertop, my mouth was in the throes of sweet carb overload and there was a thick fresh layer of glorious winter white over everything in sight.
And for this very first official day of Winter ’08-’09, it was a terrific way to start.
(jump for recipe)
Come in to my kitchen…
December 19th, 2008
| 11 Comments »
In getting used to living without dairy in my diet, I have found some easy loopholes for my own personal use of casein. Most everyone lacks the enzyme in their body to digest cows milk protein, or casein, but many people simply don’t recognize any discomfort, or equate it with consumption of milk products. I do not have an allergy to dairy as many people quickly assume; when I eat dairy products I just get a very bad stomach ache as I’ve now been able to recognize that I can’t digest the protein in cows milk. A dairy allergy is when the body can go into shock upon consumption of dairy, or an anaphylactic reaction. My friend Angela has this. For me, it isn’t that dangerous, it’s just uncomfortable. But as I learn to manage this in my daily eats, I have found some interesting outcomes. I cannot consume any milk product made from mass-produced, factory raised cows. Period. A slice or two of supermarket cheese and I am in agony. A blob of sour cream has the same outcome and lets not even talk about cream or milk. Pizza has sadly disappeared from my menu, although sometimes I am willing to suffer for a slice or two, popping a Lactaid to help. But….and here’s the interesting part….. I can consume high quality cheeses, artisan style products that are made from small batches of humanely raised cows, grass fed cows, or pastured animals. These products do not affect me. Top quality yogurts that are chock full of beneficial flora also do not bother me. For these reasons, you will still see some dishes on the blog that contain cheese. I can still eat cheese, it’s just pricier for me to do so and that doesn’t bother me.
But…..back to cream-less pasta sauce.
One aspect of eating dairy free, obviously, is avoiding milk at all costs and thankfully it’s really easy these days as most outside sources such as restaurants, coffee shops and the like will offer a dairy-free alternative, but when I look at a restaurant menu and see pasta after pasta dish with cream sauces and the lone dairy free alternative is red sauce, that ain’t making me want to skip for joy. So I was thrilled upon opening a menu at one of my favorite little bistros to find a cream-less alfredo sauce on the menu. My friend Joanna and I pounced on it as we were splitting an entree that night along with our half-price bottle of wine. I do love a good alfredo, but with the heavy cream and butter, the calories and fat are astounding and now that most milk makes my insides implode, alfredo is definitely off the list.
This ‘alfredo’ dish, however, was made with pureed cauliflower, and although it did have cheese in it, it was an artisan style cheese that my stomach can tolerate. And it was divine. With my first mouthful I swore to recreate this at home.
My first attempt, surprisingly, was pretty good.
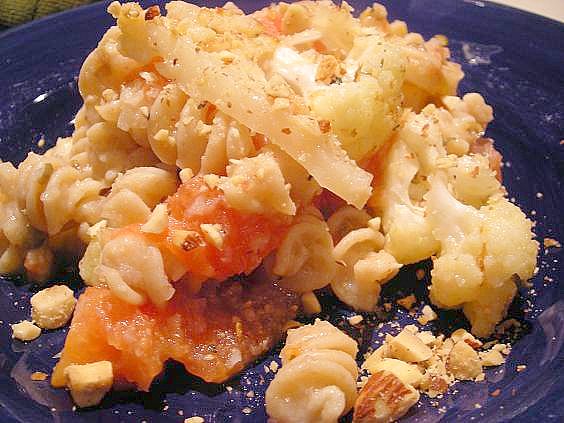
Nothing like the wan light of winter to make a food look so unappetizing! But then again, how do you photograph pasta to make it look good at all?
If you’ve ever used cauliflower as a sub for mashed potatoes then you can grasp the concept of this ‘sauce’ made from pureed cauliflower. Cooked until very tender, the cauliflower is placed in a food processor with some of the cooking liquid and processed until smooth. Cheese, salt and pepper is stirred into it, then it is mixed with cooked pasta. I also added in broiled roma tomato for some color and extra nutrition.
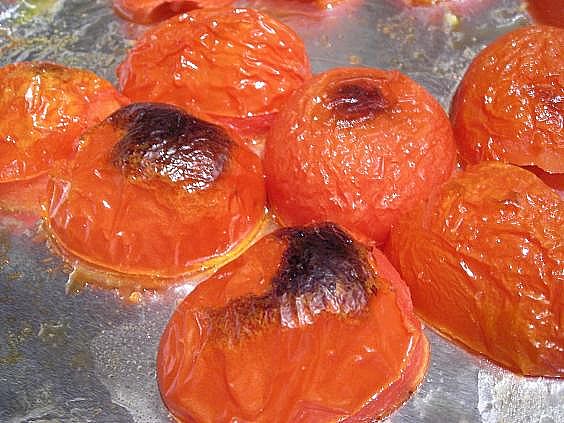
The first attempt was pretty good, but more cheese would have added to the flavor and I had thought my fridge held more than it did. It also needed a little more seasoning with the salt and pepper but overall was a really good first try. I think that a handful of chopped kalamata olives would have really sealed the deal. Be sure to cook the cauliflower until it’s pretty tender as it helps to make a very smooth ‘sauce’ once processed.
Cream-less Alfredo Sauce
One medium head cauliflower, washed and sectioned
1/2-3/4 c. top quality shredded parmesan cheese
salt and pepper to taste
Steam cauliflower until very tender, reserve cooking liquid. Spoon cooked cauliflower into food processor and add about a half cup of liquid. Process until smooth, scraping sides as needed. Pour back into saucepan and add cheese, stirring to melt. Season with salt and pepper and adjust to taste, adding more cheese or S&P if needed. Asiago, or romano cheese can also be used to add more flavor to the sauce.
December 17th, 2008
| 8 Comments »
I’ve often been wary of chickpeas.
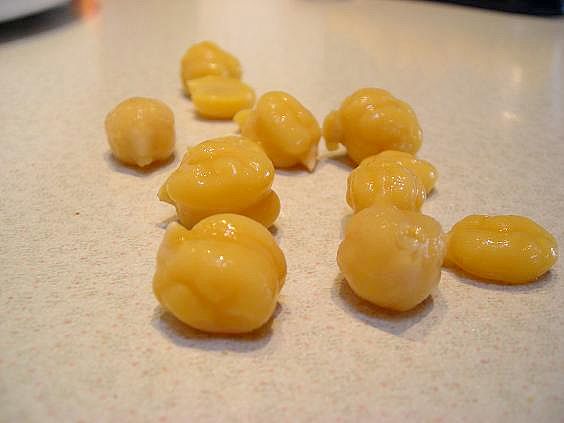
The very name sends images into my head of a certain something that I never consider to be a food, and for some reason, I expect a particular texture from them- something certainly un-legume like- and as a result, have been overly cautious about putting them, whole, into my meals.
But I’m more than willing to eat them after they’ve been ground to a pulp. I adore Hummus, and we are pretty regular consumers of the chickpea/tahini spread, usually adorned with kalamata olives and tangy with plenty of lemon juice and good zest.
This past summer I took a tentative foray into the world of whole chickpeas, or garbanzo beans as they are also called, and made a wonderful grilled eggplant and garbanzo bean salad that earned rave reviews and for me at least, a lot more respect to the round little legume I’ve been avoiding. The texture that had held me back was unsurprising- it was a legume and it tasted like a legume- primarily, it tasted like whatever I had added to my dish to create a flavor base. That’s the beauty of legumes, the empty palette of them, one of the many tabula rasas of the food world; alone they don’t taste like much but add them to a robust recipe that smacks of flavor and they become something else all together.
So back to Hummus. As I said, we love the stuff, and when I made it I always used canned chickpeas for ease and we were perfectly fine with it. Really, really fine with it, in fact we held more concern for the state and freshness of the pita bread we enjoyed as a means of transfer for the spread, often traveling across town to the Middle Eastern deli to buy bags of it that were fragrant with thick rounds, and often still warm or sweating from the days baking. We take our bread seriously in this house, no matter what form it comes in.
But then, I started noticing in my food magazines that recipes for Hummus were appearing regularly, and extolling the virtues of cooking garbanzo beans from scratch for the ultimate flavor. I was intrigued, but it took me a while to get my act together and really do it, and wow, do I wish I had taken this one on quicker. Fresh cooked chickpeas taste nothing like the canned that I have previously used. (Insert a great big ‘Duh’ right about now- it’s OK, I don’t mind) The Hummus that resides in my fridge right now has the nicest, freshest, most garbanzo bean-y flavor I have known; nothing has even remotely come close, not the containers I’ve tried, not the batches I’ve whirred up at home. Nothing. I’m hooked on the good stuff and ain’t looking back. And the most important aspect of it is that cost-wise, making anything from dried beans is really inexpensive.
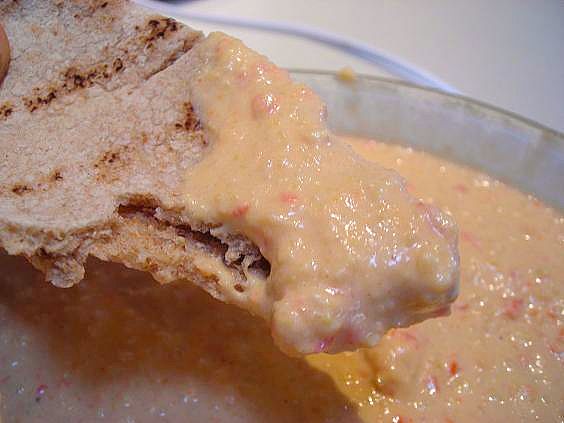
I cooked the garbanzos in the crockpot over the course of a lazy snowy Sunday afternoon. They took longer than I anticipated, and once finished, I simply drained and rinsed them-or tried to anyway- as the one thing about garbanzo beans I have a wee bit of trouble with finally reared it’s ugly head- the skins. Gads. I don’t know what it is about them but I became obsessed with removing the offensive looking milky little things and just try to do that to a pound of recently cooked chickpeas! It’s an act of futility, but I charged forward and did my darndest. It might be slightly easier if I just didn’t look at them, touch them, think about them or even start the process next time. They can’t possibly be all that bad, can they?
Ugh, now I can totally feel them clinging to my fingers and feel like I need to wash my hands. Rant over!
jump for the rest……
Come in to my kitchen…
|


