May 21st, 2012
| 2 Comments »
A really good bowl of perfect fried rice is one of my most favorite things to consume. Any restaurant with it on the menu sets it’s yardstick by how good their fried rice tastes, and with one bite I’m either over the moon or sadly disappointed. A matchless bowl will have the ultimate combination of firm grains of rice, a deep rich flavor from the wok and enough extras to make good flavor without sacrificing the overall taste of the dish.
I’ve made fried rice at home on occasion, and always with the caveat that my wok will never replicate that of a good restaurant. I enjoy it for what it is from my own kitchen and don’t expect perfection. Especially if I stray from a standard method and go off on my own path.
I’m like that as a cook, anyway. I’m not one to follow a crowd and stick to something tried and true. I like to push myself with my food and try many different means to fill my belly. My unconventional means to a steaming bowl of fried rice started with roasting a few pans of vegetables and ended up with a decent rendition for dinner that everyone enjoyed.
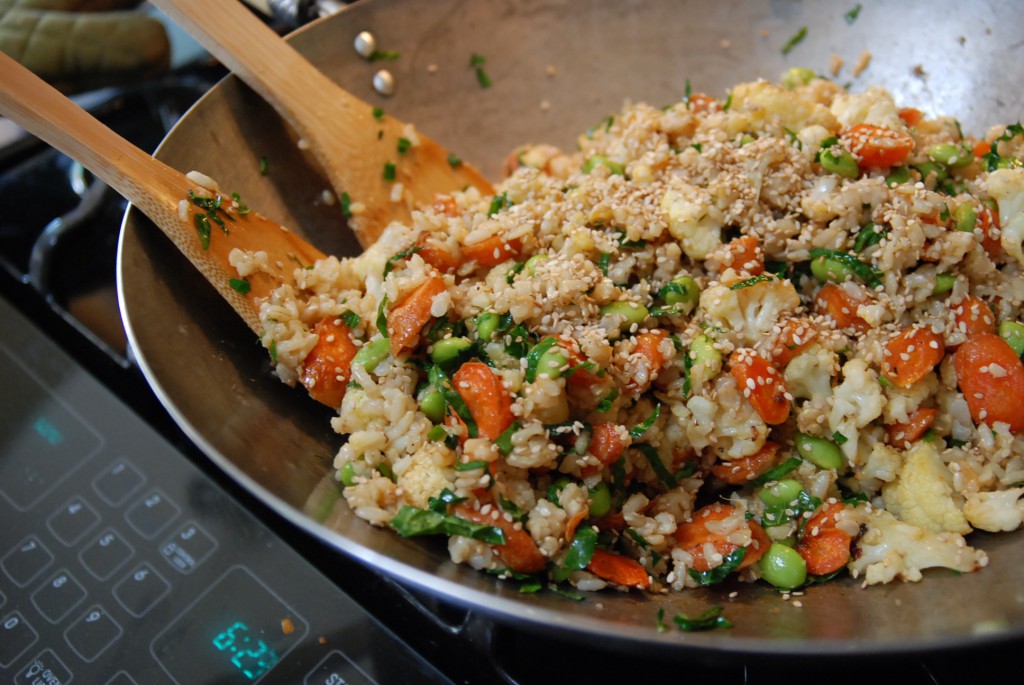
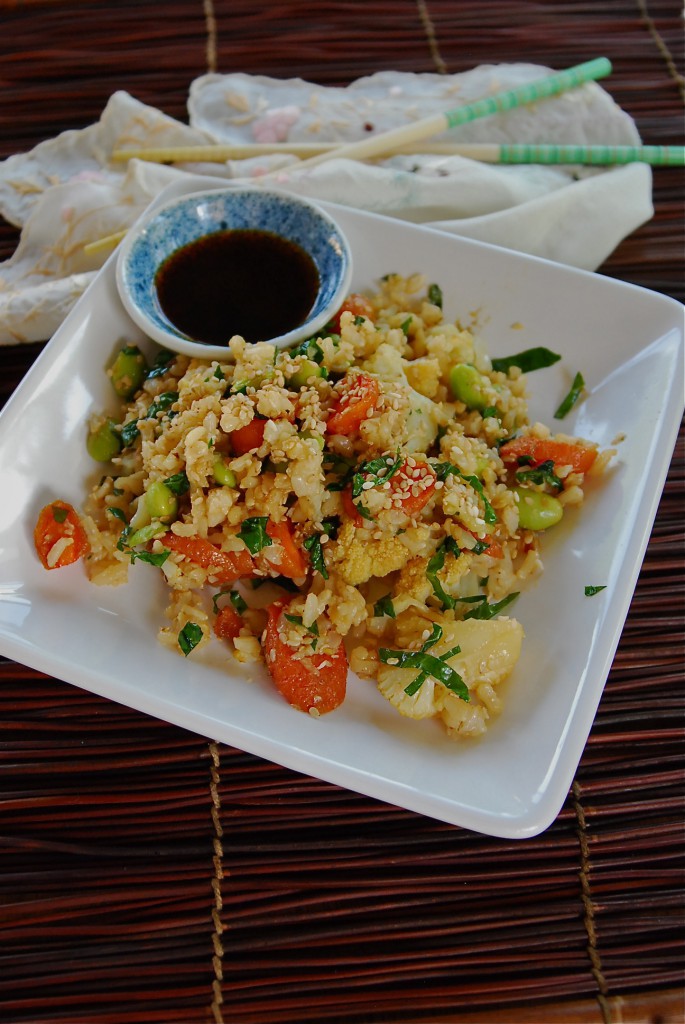
The best beginning to any fried rice is always cold, cooked rice. A few cups of that, along with any variety of vegetables and a hot pan and you’ve got what you need. My version had edamame, roasted cauliflower and carrots in it, plus the remains of some shredded lacinato kale that I had on hand. True proponents of fried rice likely would shake their heads at this combination, but that’s me, in a nutshell. Improvising is my strongest tool when it comes to cooking. There are many days that I stand, pantry doors open, fridge ajar, my mind churning with possibilities, and learning to utilize what’s on hand is a skill worthy of any home cook.
Plus? This was utterly delicious.
Roasted Vegetable Fried Rice
1 pkg frozen Edamame pods
1 head cauliflower, washed and cut to bite sized pieces
1/2# carrots, washed and sliced on a bias
1 c. shredded lacinato kale (or other greens, like spinach or chard)
2-3 cloves of garlic, finely minced
1 T. minced fresh ginger
4 c. cold cooked rice
2-3 T. sesame oil
Soy sauce to taste
Fresh squeezed lime juice (optional, but delicious!)
Sesame seeds for garnish (also optional, also delicious)
Peanut or coconut oil for frying. (You want an oil that will withstand the high heat needed in this dish. I don’t recommend using olive oil for fried rice as it breaks down at high heat.)
Cook Edamame according to package directions, cool and remove from the pods. Heat oven to 400°.
Roast cauliflower and carrots on separate baking sheets, as they will need different times to cook completely. Toss them in a bit of oil, salt and pepper prior to placing in the oven, and roast them to desired tenderness.
In a wok, or large skillet, heat a small amount of oil. When hot and shimmering, add the ginger and garlic and quickly stir for about 30 seconds. Add the rice and stir to combine, breaking up the clumps. Stir and toss the rice until it’s nice and hot, the drizzle about a tablespoon of sesame oil around the edge of the pan and stir the rice with the oil. Add in the vegetables and stir to heat through. Drizzle with soy sauce and a good squeeze of fresh lime juice. (the zest is really nice too!) Add a bit more sesame oil and a few tablespoons of sesame seeds, if you have them. Stir together to combine until it’s all nice and hot. Serve topped with more sesame seeds.
January 14th, 2012
| 5 Comments »
The cuisine of India is one of my favorites, almost hands down. I love the vibrant flavors and colors, the spice and aroma and the endless variations. I love the lentils, the vegetables, the breads and condiments. All of it.
I’m not alone in my love for this aromatic and delicious foods, and recently a group of my closest friends and I decided to get together one evening for Curry Night. We’d spent a talkative morning over coffee chatting endlessly about food and hit upon the topic of Indian food, each sighing in joy, rolling our eyes and declaring it’s lofty place in our lives. Paired with an intense desire to get our husbands in the same room together, we planned, plotted and perfected our recipes, and on an unseasonably warm January night, we carried fragrant dishes to Amanda and Brian‘s beautiful brownstone apartment in St Paul and gathered, loudly, to enjoy this amazing food, and some well deserved face time. The holidays, with their obligations and frenetic pace had kept us apart far too long and we needed a night together of food, wine, chatter and fun. The entire evening was a wonderful and delicious, with much needed laughter and camaraderie.
Dhal Makhani is one of my most favorite lentil dishes to order when I go out for Indian food, but I’d never attempted it at home, mostly due to the absence of an easy place to buy the requisite black beluga lentils required. But when a shipment from Marx Foods landed on my doorstep, with 8 2-lb containers holding a rainbow of colored lentils, all I needed was a good recipe. And an excuse.
Thankfully, I found both.
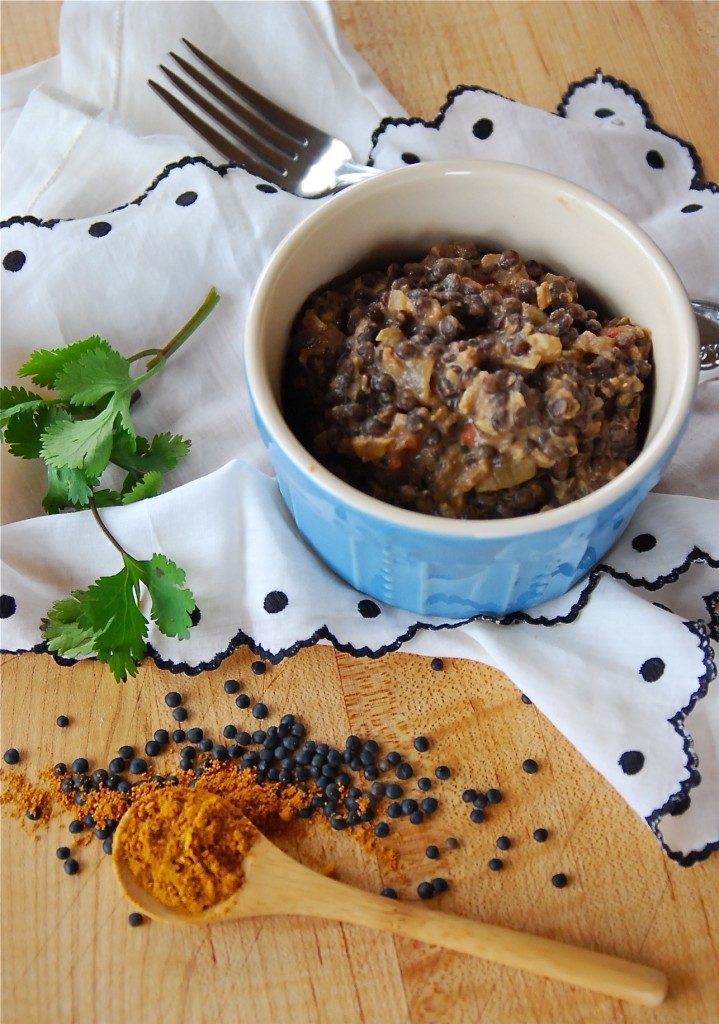
Lentils, as a food, don’t win many beauty contests. What they are beyond their rather homely end result is a quick-cooking, nutritional little powerhouse. This dish was deliciously fragrant and hearty; black lentils hold their shape beautifully after cooking, and with the right amount of garlic, ginger and onion, along with the heady blend of spices that make up many Indian dishes, this recipe was glamorous with flavor and it smelled simply amazing. A thin drizzle of cream gives it a wonderful rich taste, and it evolves over time and a day in your fridge to gain in taste what it lacks in eye appeal.
This recipe can easily be made vegan by eliminating the heavy cream, substituting an alternate of choice. It has no meat in it at all.
Dhal Makhani
1 cup black lentils, washed and picked over
2 large onions, minced
2 green chilies, sliced (remove seeds and inner membrane for less heat, if desired. I used jalapenos)
2 large tomatoes, peeled and chopped into cubes
2″ piece of ginger, chopped
1 T. garlic, minced
2 t. ground coriander
1 t. ground cumin
1/2 t. red chili powder
1/4 c. heavy cream
2 T. cooking oil of choice (i use grapeseed)
2 T. ghee
1 t. cumin seeds
In a small bowl, mix ground coriander, ground cumin and chili powder together. Set aside.
Place rinsed lentils in a medium pot and cover with 3 cups of cold water. Cover and bring to a boil. Reduce heat to simmering, and cook until lentils are tender, about 25-40 minutes. You can leave just a bit of bite to them, as they will cook more in the finished product.
Meanwhile, in a large, deep skillet, heat oil and add onions. Stir to coat and cook, stirring occasionally, until onions are beginning to brown. Add green chiles, ginger, garlic and the ground spice mix and stir to coat completely. Continue to cook and stir until the vegetables are tender and deeply browned, about 20-25 minutes. Keep heat regulated to avoid burning them, and stir often.
When the lentils are tender, transfer them to the skillet, reserving some of the cooking water. Stir the lentils to mix with the vegetables, and add the cooking water, 1/3 cup at a time until a smooth gravy forms. Bring to a simmer, and cook for about 15 minutes, stirring occasionally. Taste and season with salt. Cook for a few more minutes and taste for salt. Turn off heat and wait for the simmering to stop. Drizzle the heavy cream over the top and stir to incorporate.
For an authentic finish, heat ghee (or clarified butter) in a small skillet until very hot. Add the cumin seeds and quickly cover the pan. Shake the pan while the seeds pop, and when they stop, scrape the butter and seeds on to the Dhal Makhani and stir together. This mixture is very hot and will sputter so be careful.
December 7th, 2011
| 4 Comments »
I collect a lot of recipes. Papers overflow the corner of our counter where they tend to land; recipes of all types from desserts to main dishes. Trouble is, I rarely use them, verbatim anyway. They serve as a sort of spiritual guidance, infusing me with inspiration to cull what I need to make up a dish all on my own. I’m only home a few nights a week to cook these days. And although I could give any one of the recipes to my guys and they’d likely be able to pull it off, there’s no way I could hand them two or three, with all sorts of odd instructions such as ‘Take this part’ and ‘Do this but not this’ and expect it will come out the way I envision it. My brain works way differently than theirs when it comes to putting recipes together.
Still, even with all the inspiration at my fingertips (or these days, stuffed in a drawer) sometimes the meals I create are derived from a leap or two of inspiration that comes not from a printed source, but from a few wild ideas my brain churns out that I think sound good together.
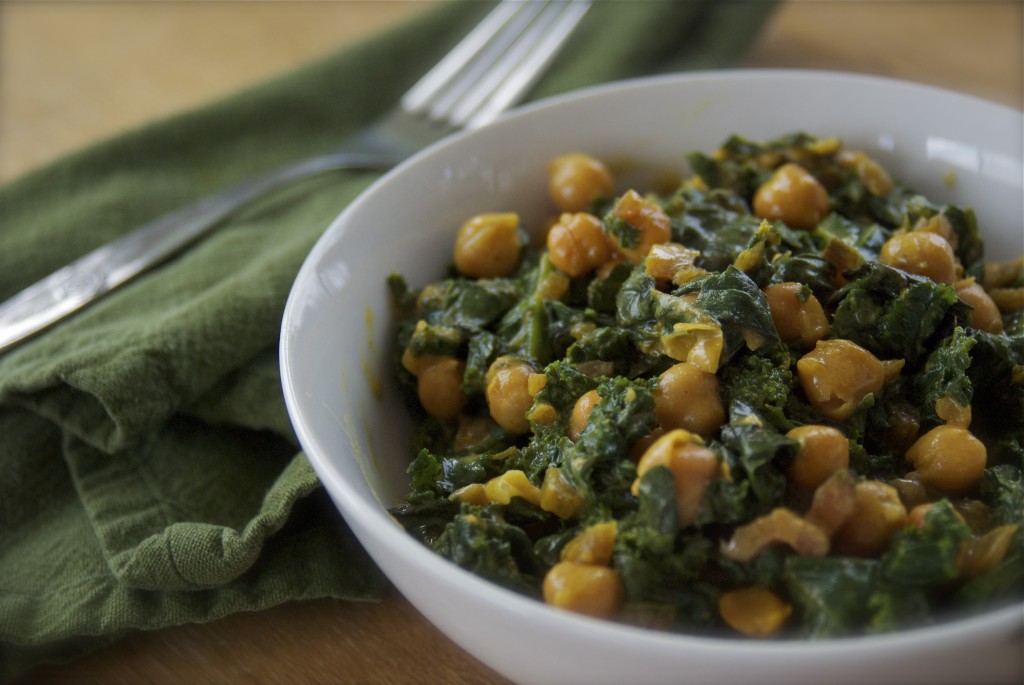
I certainly had no doubt that we would enjoy this silky braised kale, infused with coconut milk and some fragrant curry powder, but I had no idea that it would swirl through my mouth with such immense flavors, causing me to think almost obsessively about it, plotting the exact next time I could simmer up a large pan of it for us to enjoy. Griffin won’t eat it, and that’s fine. He has tried a few bites of cooked greens that we consume but he’s just not there yet. Mike and I fell over ourselves in adoration for this dish, easily a complete meal. Alone with a large helping of kale, it’s perfect as is, but the second go-round I made of it, I added a large bunch of red chard, complete with the chopped stems and if it’s even possible, the dish was so much better, with richer, deeper flavor and much more balanced.

The best part about making this dish on one of the first bone-chillingly cold days of December, was placing my nose down among the wisps of steam that rose from the pan and breathing in the fresh green scent of kale and chard. It easily transported my mind back to late summer, the bounty of chard bunches to be had for a dollar apiece that I would bring home from the markets each week. Thankfully I can find inexpensive one pound bags of prepared kale, and chard is reasonable for the taking so I won’t be missing my greens all that much. I just won’t be shopping in a flippy skirt and tank top when I buy them.
Braised Kale and Chickpeas in Coconut Milk
1/2# prepared kale, tough stems removed, roughly chopped
1 15-oz can lite coconut milk (you can use full-fat as well)
1 15-oz can chickpeas, rinsed well
2 garlic cloves, minced
2-3 t. prepared curry powder, or curry paste (both red or yellow would be perfect- adjust to taste)
In a large deep skillet with a lid, heat about a tablespoon of olive oil, and add garlic. Cook and stir for a few minutes until garlic becomes opaque. Add kale in handfuls, stirring continually, until it’s all in the pan. Continue to stir until it turns a very bright and dark green and has taken on the oil in the pan. Add about a half cup of water and cover the pan, allowing to simmer for about 10 minutes. Stir in the chickpeas, coconut milk and curry powder. Cover and allow to cook, slowly, anywhere from 5-15 minutes more, depending on how you like your kale to taste. Stir again, seasoning with salt and pepper, if desired. If the kale seems a bit watery, remove the lid and allow some of the liquid to cook off.
Kate’s Notes: If you wish to use chard as well, you can add that after the kale has simmered for the first 10 minutes. Stir in the rough chopped chard and allow the heat to steam it tender. If using the stems too, chop them fine and add them with the garlic in the beginning.
November 26th, 2011
| Comments Off on thanksgiving recovery
Thanksgiving is over, and with it goes the indulgent meals and heavy, rich food. I was exhausted by the time dinner was over on Thursday, and was asleep by 9pm or so. The following day, Mike and I took a nice hike through Otter Lake Regional Park, stretching our legs, pumping oxygen and working off the calories from the day before. It felt really good, but later in the afternoon, a mix of hunger and nausea took over my belly. I felt shaky and off, and I felt like my tummy desperately needed something other than rich carbs.
Thankfully there was a large bag of kale in the refrigerator, and some rutabagas that needed to be consumed. These rutabagas had begun to look a little unusual on the counter.
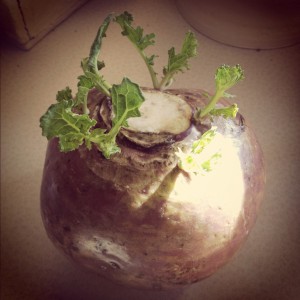
So I chopped them, seasoned them and placed them in a hot oven to roast. Then an entire pile of kale went in to a hot skillet to slowly braise.
I’ve really grown to enjoy kale this past year, and have found that when I let it cook slowly in a little liquid for about 20 minutes or so, it becomes silky and tender and incredibly flavorful. Recently I learned that coconut milk makes for a delicious addition on that kale, and last night, on a whim, I shook some curry powder in to the pan, as well as a can of chickpeas.
With a small pile of roasted rutabagas and a mound of this steaming kale, fragrant and lush, my belly began to forgive the indulgence of Thanksgiving and settle down to it’s more normal state. It was satisfying without being heavy or overwhelming to the body. And I felt stabilized, even-keeled. My hands stopped shaking and the nausea went away completely so that I was able to take a trip to the shopping mall with Griffin so he could buy a book he’s been wanting and spend a little bit of quality time with him.
The procedure for this method of cooking kale is quite simple. Heat a little oil in a large deep skillet and saute a few cloves of minced garlic for a minute or two. Add the kale in handfuls, stirring to sear; I used about a half pound of it and like any other dark leafy green, it will overwhelm the skillet at first, but cook down to a manageable amount in no time. Stir and cook the kale until it’s all turned a rich deep green, about 5 minutes. Add a half cup of water and cover the pan, allowing the kale to simmer on a low temp, and stirring the pot occasionally. You do this for about 20 minutes, adding more water if needed to keep the kale moist. Taste a few leaves to insure that it’s tender and not at all rough any longer. If you wish to use coconut milk instead of water, it adds a lot of terrific flavor. For this batch, I used about a half a can of it, plus a tablespoon or two of curry powder, and one can of drained and rinsed chickpeas. It was divine. To reduce the liquid, simply take off the cover and let it cook down a bit before you eat.
IS THERE ANYTHING YOU DO OR EAT THE DAY AFTER A HOLIDAY TO RECOVER FROM OVERINDULGENCE???
What’s on YOUR plate this month??

November 23rd, 2011
| 2 Comments »
There’s almost as much talk about re-purposing leftovers from Thanksgiving as there is talk of how to prepare the meal. Everyone loves something unique about the Thanksgiving meal; for one person it’s the succulent bird, for another they can’t get enough of the stuffing (or dressing, depending on regional dialect). Someone else loves the potatoes, or the vegetables, or sweet potatoes or dessert.
Thankfully, it’s a meal with appeal. To everyone. One of my favorites aspects of Thanksgiving is the stuffing. I do love a good aromatic, herb infused stuffing and every year I create a masterpiece with cornbread, fresh croutons and herbs, lots of celery and onion and a good dosing of broth. Rarely is it ever the same twice. But this year, because of my work schedule, I made a purchase of prepared stuffing from the deli at the grocery store where I work. I had reservations about this, especially with the final price, but for me, I’ve worked every day for the last week straight. I’ve been on my feet constantly, getting home well after dinner. That’s life in the grocery business. The last thing I want to do tomorrow is rise early in the morning tomorrow and cook all day. Cooking is a pleasure for me, but when I’m worn out, it’s really the last thing I want to do. My boy is willing to help me out this year, and with him being home all day, I can assign him tasks to make tomorrow easier for all of us. Still, I bit the bullet and bought some stuffing to lessen the task list.
But that stuffing, back to the topic at hand, is still a favorite for leftover use. I love to take a handful of it the next day, press it in to a cake and sear it in a pan for breakfast, topping it with a cooked egg. Mashed potatoes are good for this too. Dredge a potato patty in seasoned flour and sear in butter until a golden crust forms. Then flip it and repeat on the other side. A frittata of turkey and any leftover roasted vegetables is another favorite. One year I made a huge pan of roasted root vegetables and had plenty left, so this was breakfast the next day and it was divine.
Cranberry sauce, or any kind of relish or chutney made with cranberries turns in to a delicious spread for bread when making a turkey sandwich. Leftover dinner rolls can be split, toasted and topped with slices of turkey, add a spoonful of cranberries to make an excellent lunch.
Of course, the most popular option for leftovers is soup, especially if you’ve got some wild rice on hand. Turkey wild rice soup was a mainstay in our house after Thanksgiving, always a hearty and creamy welcome to the inevitably chilly days that follow. Got a good White Chicken Chili recipe? Try using turkey instead. Add turkey to regular chili as well, or make a Turkey Tetrazzini. How about Turkey Lasagna? Turkey Enchiladas?
I’ve made a delicious pasta salad with turkey as well, stirring in a spoonful or two of cranberries for that perfect tart flavor. My most favorite Curry Chicken salad is also delicious with turkey.
WHAT’S YOUR FAVORITE WAY TO RE-PURPOSE YOUR THANKSGIVING LEFTOVERS???
Curry Cashew Chicken Salad
2 c. cooked chicken
1/2 c. dried cherries, cranberries or raisins
1/2 c. chopped roasted salted cashews
2 green onions, finely chopped
Dressing:
1/2 c. mayo or preferred creamy spread
2 T. mango chutney or fruit spread of choice
2 t. curry powder
2 t. red wine vinegar
1/4 t. fresh ground pepper
1 t. dijon mustard
Combine chicken, fruit, nuts and onion in bowl. Separately, mix together dressing ingredients and stir until combined and creamy. Pour over salad and stir thoroughly to coat. Chill. Eat.
Turkey & Dried Cherry Pasta Salad
1# pasta of choice
2 c. cooked turkey, chopped
1 c. dried cherries (sub cranberries, or even raisins)
1/2 c. minced red onion
1/2 c. minced celery
1/2 c. chopped toasted almonds
Dressing:
1/4 c. powdered sugar
2 T. white vinegar
1-1/2 c. mayonnaise
2 T. cold water
2 T. poppyseeds
Salt and Pepper to taste
Combine cooked pasta, turkey, dried fruit, onion, celery and almonds in a bowl. Whisk dressing ingredients together until smooth and pour over pasta mixture, tossing to coat. Serve topped with extra almonds, if desired.
What’s on YOUR plate this month??

{{there's only 7 days left of Nablopomo 2011!!}}
November 14th, 2011
| 3 Comments »
This has to be one of my most favorite recipes.
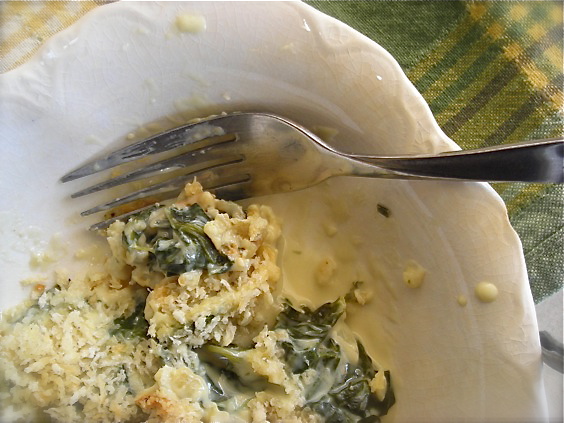 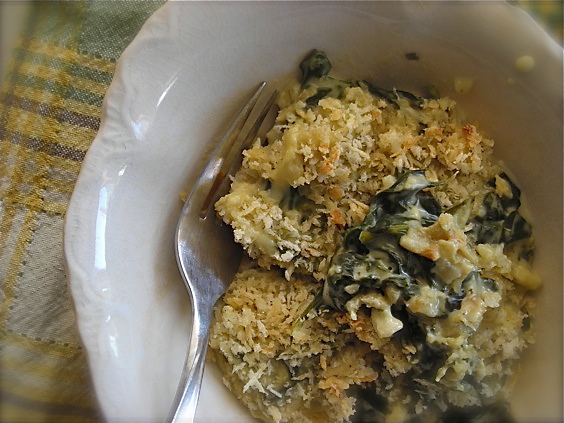
It’s rich, delectable and creamy….. I could go on and on. It would be equally welcome, that wealth of rich Boursin cheese sauce, when mixed with silky braised kale or chard too. Or! Or! Take an entire rainbow of vegetables and roast them, dress them to the nines with this coat of luscious sauce, topped with the toasted Panko crumbs and then a few minutes under a broiler to sputtering browned perfection and you’ve got a side dish worthy of any celebration. Or, just an ordinary dinner at home.
Believe me, there is nothing boring about this dish. Nothing run-of-the-mill, or plain or anything. This is one of those weapons in your recipe arsenal that you pull out for the good friends who grace your table, the ones who kick off their shoes without being asked, who bring wine while wearing faded blue jeans because you just don’t need to be fancy with your closest companions. And when they lift the first fork to their mouths, tasting the herbs, the seasoning of the succulent Boursin cheese, you know that smile that forms on their face tells it all. It’s impressive, yes. But simple and quick and anyone can make it. And it leaves you looking like a superstar, because it’s just that good.
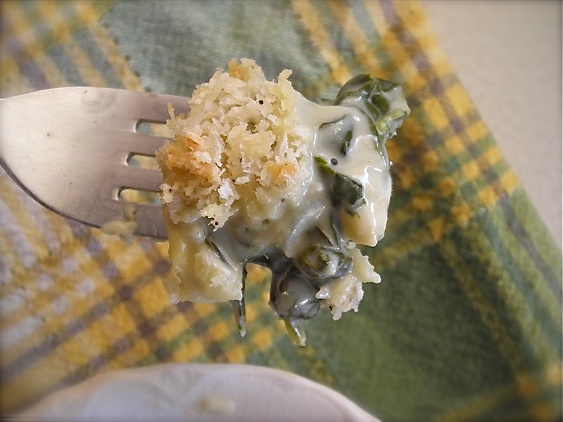
Boursin Spinach Gratin
1 bunch fresh spinach, destemmed, washed well and spun very dry ( sub in kale or chard too)
1 t. unsalted butter
1 small shallot, minced
3 T. AP flour
1-1/2 c. whole milk (alternately, use soymilk- it works perfectly!- or equivalent of 2%, or 1 c. skim & 1/2 c. heavy cream)
1 container Boursin Herb and Garlic cheese, 5.2oz
3 T. fresh shredded parmesan, or other hard cheese of choice
1 t. each fresh squeezed lemon juice and fresh grated lemon zest
2/3 c. panko bread crumbs
1 T. melted butter
Salt and pepper to tasteHeat oven to 425°In a medium oven proof skillet, melt butter and add shallot, cooking and stirring until soft, about 5 minutes. Stir in flour to coat and then slowly begin whisking in milk until fully incorporated. Stirring constantly, bring sauce to a gentle simmer to thicken slightly, then add in Boursin cheese, a small amount at a time, until all of it is blended into the sauce.Drop a handful of spinach leaves into sauce and stir to coat. Add more, a handful at a time, until all spinach is mixed well with the sauce. Bring to a simmer, cover and simmer for about 5 minutes. Mix panko, salt and pepper and melted butter, sprinkle over top of spinach and place pan, uncovered, into oven. Bake for 10 minutes, until bubbly and crumbs are browned. Remove from oven, allow to cool slightly (remember that pan handle is HOT!) and serve immediately, sprinkled with parmesan cheese.Alternately, mixture can be divided among smaller ovenproof ramekins to be baked. Divide spinach into ramekins before topping with bread crumbs. Baking time will be shorter.
What’s on YOUR plate this month??

November 6th, 2011
| Comments Off on farro pilaf with gold beets
There’s no other choice now. The clocks are switched, falling back; the light in the morning is better but soon the winter darkness will settle on our afternoons. Temps will drop and all sorts of things happen that we’ve been very fortunate, up until now, to have avoided.
But still, we’ve had some beautiful weather. And right now I’m sitting in the wan light of dawn watching the clouds scuttle across the sky at a fast, furious clip. The patio door is open and it’s mild for a November morning. The clouds are fascinating, wind-whipped deep blue patches racing along as if they’ve got somewhere important they need to be. I sip my coffee, watching, taking it all in.
In a few weeks we’ll have Thanksgiving, and I’m trying to take that in as well. I’m also trying to plan a menu that doesn’t focus around meat, even debating whether to just do what I want and make a completely meat-free meal, or bow to convention, and what the rest of my family expects and make a turkey. The jury is still out on that one.
I do know one of the sides I plan to make.
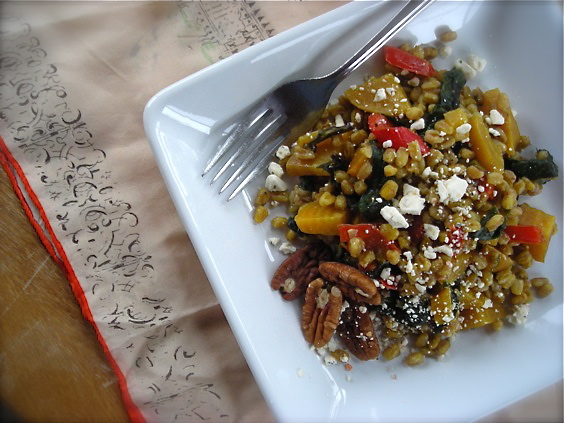 
Just about two years ago I came across this recipe, intrigued by Farro and the gold beets that I’d fallen in love with, and the first bite was a revelation. Somewhere in this dish, I began to see that a meal could be enjoyed without meat, and one that would leave me satiated without the bloat of something heavy. It was a good revelation, and something to start me on the road to better health.
Every component of this dish is not only perfect alone, but when mingled with each other makes for so much amazing texture and flavor. The Farro is chewy, with a deep nutty flavor; then you’ve got the beets and their greens to offer up a dark, earthy taste, a crisp pepper, robust cheese and a scatter of chopped pecans to add a bit more crunch. Every element of it is lovely, and on it’s own it could easily be a meal. Next to your turkey, it’s a terrific side dish.
I can’t complain about the seasonal change, the coming cold, or even the snow that’s rumored to fly soon. I’m ready, and with recipes like this, I’ll be warm from the inside too.
Got a favorite recipe or dish that keeps you warm and toasty in cold weather?
Farro Pilaf with Gold Beets
3 large gold beets, roasted and diced, with greens washed, de-ribbed and rough chopped
2-3 c. cooked farro (can sub brown rice)
1 red pepper, seeded, cored and diced
2 garlic cloves, minced
1 small shallot, diced
1/2 c. crumbled feta or goat cheese
1/3 c. pecan pieces
salt and pepper to taste
{{Farro can be cooked like any other grain, with a 2:1 ratio of water to grain; 1 cup uncooked will yield the amount needed for this recipe. It should be tender to the bite, not too firm with a texture similar to barley. Be sure to rinse it thoroughly in a wire sieve prior to cooking. It can be very dusty.}}
In a deep skillet with a tight fitting lid, heat oil of choice and add red pepper, cooking for about 5 minutes. Add shallot, cooking until soft and slightly browned, maybe 5-8 more minutes. Add garlic and cook until fragrant, 30 seconds or so. Add the chopped greens and cook, stirring continually until just barely wilted. Stir in the cooked farro and diced beets. Add about 1/3 cup of water and combine. Cover the pot, turn heat to low and cook, stirring occasionally until heated fully through. Season to taste with salt and pepper. Serve topped with cheese and nuts.
KATE’S NOTES:
The mellow flavors of the beets and farro simply beg for a good salty and robust cheese. Feta is perfect, goat cheese would be great but blue cheese and gorgonzola also would work nicely. If you can’t find Farro, use Wheat Berries, or long grain brown rice.
~~originally from The New York Times recipes for Health and Nutrition, March 27, 2009; adapted by Kate
What’s on YOUR plate this month??

August 30th, 2011
| 10 Comments »
Knife skills. It doesn’t just mean that you can hold a knife and cut an onion. It has nothing to do with being able to avoid cutting yourself. And it isn’t even about knowing the difference between chopped, diced and minced. (but do you know the difference??)
Knife skills are necessary in the culinary world. The proper grip, the best balance aside, knowing how to julienne, chiffonade and batonnet, make a brunoise and a tourné potato are de rigueur. We spent hours in culinary school, hunched over cutting boards of vegetables, practicing our cuts until our hands were cramped and sore. We hissed streams of profanity sometimes at our inability to get it right, and many poorly constructed cuts were lobbed across the kitchen in frustration. We are, after all, a profession of avowed perfectionists. Knife cuts, and making them the right way is a big deal, as they are a requirement in many, many professional kitchens.
In addition to the requirements of our classes, I participated in a student culinary competition where part of our score was judged on a variety of knife skills. We practiced these skills for months, creating mountains of carrot batons in perfect symmetry, perfect little tournés of potato like tiny white footballs and enormous amounts of parsley, chopped to the consistency of sand. I never once expected they would ever benefit me until I spent a summer in the kitchen of an upscale golf club where my ability with a knife was held in high esteem. It may seem strange to always make my diced onions perfect when all they’re going in to is a soup, or to slice those carrots in perfect coins, the garlic to micro-thin slices, but this is what I know, and what I was trained to do. It doesn’t matter that it now only benefits my family (and readers of this blog). It’s a skill I’ll never unlearn, no matter what.
And it came in very handy when creating this Kale Slaw.
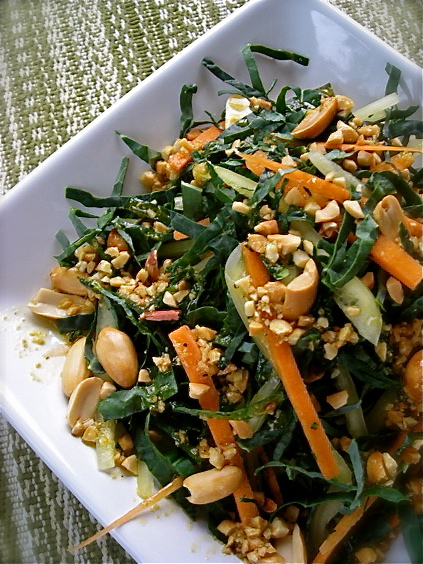
And this slaw was only for my eyes, really. I wasn’t making it for a magazine shoot, a fancy dinner or company at my house. But in creating something lovely, just for myself, I am raising the bar on my meals from a routine and mundane thing to a meal wtih some elegance. It didn’t have to be this good. I didn’t have to hone my chef’s knife before taking on the kale. I didn’t need to carefully slice the carrot and pepper. It didn’t have to be perfect.
But piled on a plate and dotted with crushed and whole peanuts, this Kale slaw, with it’s peanut dressing, was a thing of beauty. The dark rich green of the kale, the sharp orange carrot and pale white heirloom pepper, all snapped out from under the blade of my knife without much thought. And that’s part of the appeal. This wasn’t any special consideration. It just happens like this in my kitchen as a matter of fact. I’ve got amazing knife skills, and it isn’t something to hide, really. It’s something to share, to rejoice about and to say ‘Hey, look at that. Isn’t it pretty?’ Because it is. And it was worth all the pain in my hands, the stiff fingers and the endless amounts of hours put in to make it that way. It raises the bar on a simple meal, eaten at my patio table with a pretty basic glass of wine. It makes a Saturday evening alone just that much more fun and exciting.
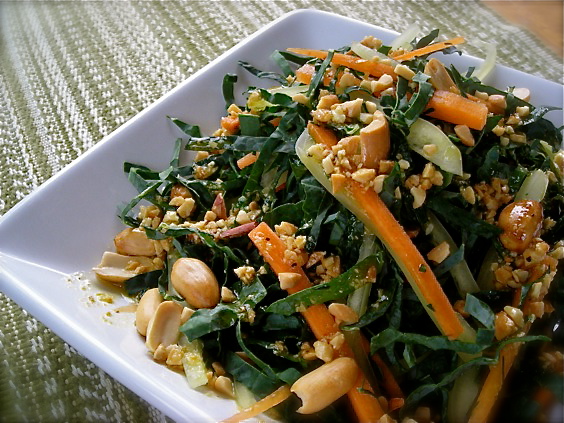
Those of you who know me outside of this site know I am not very boastful. I’m not one to accept praise all that often, but you put a knife in my hands and I’m going to show you what I can do because this is a skill I am proud of, and one that didn’t come easily. I have pretty severe repetitive stress injuries in both my wrists, and learning to do this in school was torturous and sometimes left me in tears, with my pained hands resting in ice water to reduce the inflammation. My work at the golf club was often hampered by this affliction, but to hear the chef comment on how nice my vegetable trays looked made the discomfort worthwhile, even as I bit back the pain and went home to ice baths and Advil.
I love the earthy crunch to this slaw and the nutty flavor of the dressing. The kale isn’t cooked, but the dressing soaks in to it and softens the texture nicely. I used lacinato kale and loved the dark color against the carrot and pepper. I think some red cabbage in this would be very pretty too, or the lighter frilly green of Savoy. If you don’t care for peanuts or can’t have them, try using almonds, or pecans. One nice aspect of this recipe, and using raw kale is that even the next day there’s no soggy leaves. The sturdy kale can withstand an overnight, bathed in this nice dressing and still maintain good crunch for lunch on the second day. The overall flavor of the salad was richer, and more pronounced too.
Kale Slaw with Peanut Dressing
2 large bunches of kale, either lacinato or curly, washed and spun dry
2 medium red pepper, sliced very thin
2 carrots, peeled and sliced lengthwise
1 c. roasted peanuts
1/4 c. olive oil
2 T. apple cider vinegar
1 T. packed brown sugar
1/4 t. sea salt
Pinch of red pepper flakes
Fold kale leaves in half and tear out tough stems. Roll leaves tightly and slice thinly into very fine ribbons. Toss kale in a bowl with the pepper, carrot and half a cup of whole peanuts.
In a measuring cup, whisk the oil, vinegar, sugar, salt and pepper flakes. Using a food chopper or small food processor, chop the remaining half cup of peanuts into mostly fine pieces. Remove from chopper and add 2-3 tablespoons of them to the dressing, and whisk to mix. Pour dressing over kale, toss to coat and allow to sit for 10-15 minutes. Toss again and serve, sprinkled with remaining crushed peanuts.
August 26th, 2011
| 2 Comments »
August is almost over.
And even writing that out doesn’t feel like it’s real. But it is; the month is over next week, then September comes and summer fades into the rear view mirror, leaving it’s fingerprints in our memory, waning like a summer tan. It has truly been an amazing and beautiful summer.
But it’s been a glorious August in Minnesota, a perfect end to this fleeting season. Despite June’s cool weeks, July roared in with it’s searing heat and choking humidity, and storm after storm after storm charged across the sky, darkening the hours, drowning us in rain. And what a delight too. I didn’t water my grass once this summer and it’s stayed lush and green through all the record-breaking heat. That’s pretty rare here. And the abundant rain has turned our surroundings in to a thick rainforest of growth, with a fresh earthy smell that’s nearly intoxicating. August ushered out the heat, and brought us gorgeous sun, endless blue sky and cool nights with fresh breezes. I’ve just fallen in love with August this year. If summer in Minnesota was like this month has been, no one would ever see the need to complain.
Then there’s the bounty, the amazing bounty sagging the tables at the Farmers Markets every week. It’s staggering how much produce is weighing down those tables, with over-loaded trucks parked behind, waiting to dispel their goods. I can take a $20 dollar bill and bring home two big sacks stuffed with food each week. My last trip was so fruitful that I could hardly stagger to the car with my load. And for only $28 dollars, I could have collapsed our kitchen island with the weight.
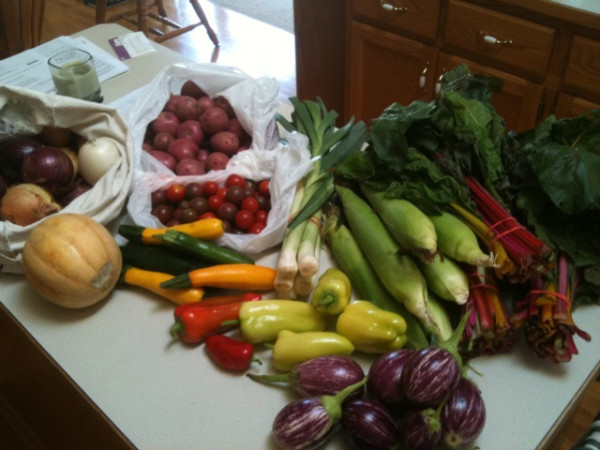
The one item I’ve been a bit disappointed with this season has been the sweet corn. I’ve had more misses with my ears than I’ve had wondrously sweet experiences, and one farmer I spoke to said that the intense heat and heavy rain can cause such quick ripening of the corn that it’s difficult to get it at that sweet tender state that so many people like.
A recent batch of corn that I purchased was a bit too starchy and dry for my liking, but mixed with red pepper, dark green kale and a few handfuls of good cheese, it turned in to a delightful dish that took the focus off the chewy over-ripe corn.
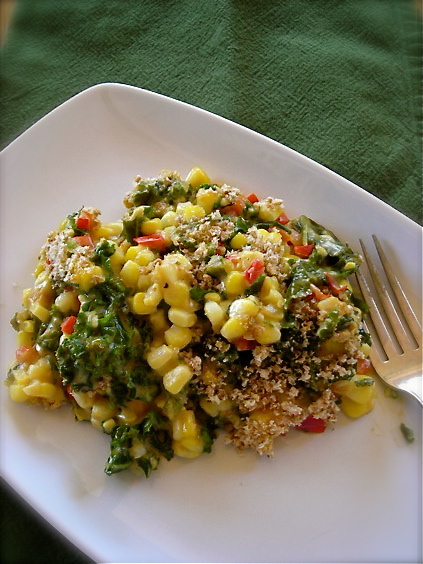
This cheesy baked dish was so yummy, rich with fresh summer flavor. I’d love to try it again, adding more vegetables to it, maybe change the cheese to something stronger, or try it with chard since I seem to have glided up and over the moon for this particular dark leafy green. Did you see in that photo that I bought THREE bunches of it? I am crazy.
But that’s what I need to do; dive head first into these seasonal delights and enjoy them while I can. Like summer, and August, they’ll be fading all too quickly, and I’ll be back in the produce aisle of the grocer, surveying my options, rubbing my arms from the cold, wishing I was dodging sunlight, an overstuffed sack slung on my bare shoulder.
Cheesy Corn and Kale Bake
1 red bell pepper, diced
1 medium leek, sliced thin (or an onion, if you wish)
2 garlic cloves, minced
1 large bunch of curly leaf kale, washed and spun dry then chopped
4 c. fresh corn kernels
2 T. unsalted butter
2 T. AP flour
1 c. milk (i used soy)
1 c. freshly grated cheddar cheese (or mix it up a bit with pepper jack)
1 T. cream cheese (I used sour cream)
Pinch of cayenne pepper
Salt and black pepper to taste
Preheat oven to 375°
In a deep cast iron skillet, or other oven proof skillet, sauté the leek and pepper in a bit of olive oil until soft. Add the garlic and cook, stirring, for about a minute or two. Add in the kale and stir until it’s coated with the oil, then cover the pan and cook for about 5 minutes, stirring once or twice. Scrape veggies in to a bowl and set aside.
In same pan, melt the butter, then add the flour and stir to make a roux. Cook, stirring, for about two minutes to cook out the raw flour taste. Slowly whisk in the milk until smooth, then cook, stirring constantly until the mixture is very thick. It may look a bit reddish brown from the pepper, but that’s just fine. Mix the cheese in a little at a time until you have a nice cheese sauce, stir in the cream cheese and cooked pepper mix, and then the corn kernels. It will be very thick. Season with salt, pepper and the cayenne and spread it evenly in the pan. Place the pan, uncovered, in to the oven and bake until hot and bubbly, about 30 minutes.
Original recipe is from The Kitchn website; I made heavy modifications.
You can use frozen corn in this if you wish, just be sure to run it under cold water to thaw it out, and shake all the extra moisture out before adding it to the cheese sauce mixture.
August 20th, 2011
| 2 Comments »
What’s that saying? ‘Necessity is the mother of invention?’
Many amazing recipes occur when the frantic need for something to add to dinner comes up and I wildly glance in the pantry to see what I’ve got. What odds and ends are laying about in the fridge? What needs to get used up? What tastes good together?
I fling a lot of ingredients in a pan, or a bowl and I cross my fingers a lot when I cook. Whether it’s out of ‘necessity’ like the quote, or just curiosity, it’s not often that I follow a recipe. More likely, I am making something up as I go. Thankfully, more often than not the results are pretty tasty.
The worst part of it all is that if I don’t write down what I did, I rarely remember it to be able to recreate the dish.
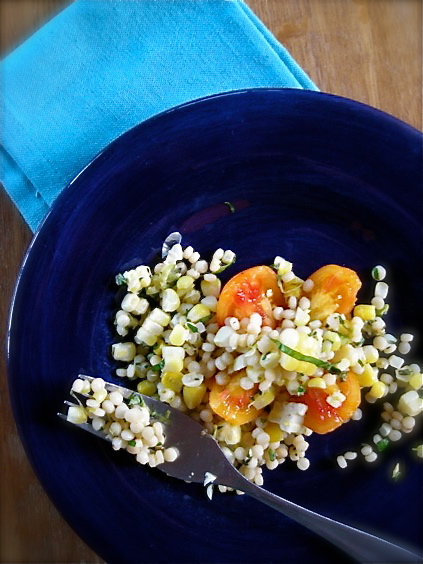
This one, however, did not get away from me.
Side dishes have always been a favorite of mine, and lately I’ve been on this kick of filling my plate with nothing but ‘side’ dishes. The nice thing about removing the focus of meat from our meals is that just about everything we do now can either be termed a ‘main’ dish, or a ‘side’ dish. And sometimes, all of what is being served at our table, technically, are sides.
Griffin was making fish for dinner recently (yes, we eat fish) and we both really wanted something unique on the side. I keep a lot of rice and grains handy, but we were short on time and didn’t want to wait for brown rice, or wild rice to cook. He was digging through our pantry and pulled out a jar of pearl couscous, asking me ‘What’s this?’ And as with necessity, and invention was born.
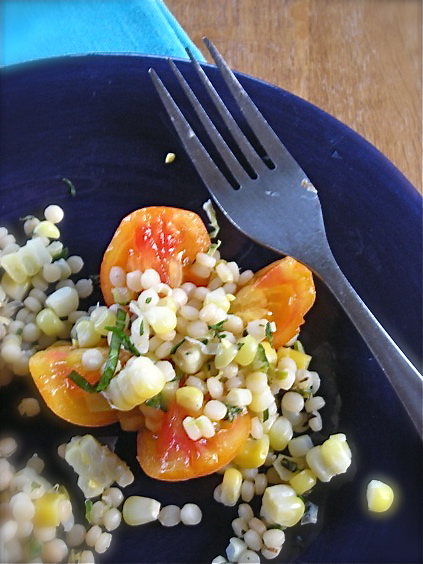
Pearl couscous, mostly recognized as Israeli couscous, is the thicker version of the tiny semolina grains that most people know best. Couscous isn’t really a ‘grain’ like farro, or quinoa; it’s pasta in minutiae form. The instant version of couscous cooks in a flash by adding the tiny beads to boiling broth. The larger form takes a bit longer, but still is quick enough to make for an easy dinner. We used chicken broth, some frozen corn and a generous handful of fresh herbs from the garden and the result was surprising to all of us. It’s light and flavorful and wondrously versatile, but not heavy like larger pasta shapes. I think some form of this will be making regular appearances on our dinner table. With enough fresh vegetables added to it, the dish becomes a meal in itself, or you can serve it over a garden fresh tomato for a perfect salad option. It actually tastes wonderful cold too.
Did you notice the new print button feature??? Pretty cool, huh??
Pearl Couscous Pilaf
1 c. pearl couscous
1-1/4 c. well seasoned broth (can use vegetable, mushroom, chicken….)
1 medium leek, or 2 small ones, sliced and washed well (can sub a finely diced onion)
2 cloves garlic, crushed
1/2 c. vegetable of choice (we used corn; try diced zucchini or other fresh seasonal vegetables)
1/4 c. fresh herbs, finely chopped (we used thyme, oregano and basil, then parsley to finish)
In a deep skillet with a cover, heat a few tablespoons of oil. Add the leek and cook, stirring regularly, until softened and beginning to brown in some places. Add in the garlic and cook, stirring for about a minute. Add the corn (or whatever vegetable you are using) and stir to coat with the oil mixture, then add the couscous and cook, stirring, for about 5 minutes. Pour in the broth, stir to combine and bring to a boil. Then reduce the heat so it simmers, cover the pan and allow to cook, undisturbed, until the couscous absorbs all the broth. It should take about 10 minutes. Allow it to sit for about 5 more minutes, off heat. Before serving, toss the fresh herbs in and stir to combine, seasoning with salt and fresh pepper. Top with parsley as a garnish.
|


