November 7th, 2011
| 3 Comments »

That’s a pretty way to end a long day, isn’t it?
I gave in yesterday to some unhealthy eating, including things fried, and eating meat. While the meat isn’t exactly unhealthy, it did it’s usual number on me with stomach upset and I found once again that after a few bites of it, I wasn’t enjoying it. Still, I ate what was remaining on my plate to be polite because my staff bought me that lunch, and they were thrilled to share with me.
Then for dinner, I was unmotivated, not to mention alone, as Mike and Griffin were at their Sunday night youth group gathering and dinner ideas just slipped in and out of my mind as the dark afternoon gathered in the quiet house. I was feeling off from the afternoon fare, and a few perusals of the refrigerator didn’t reveal anything exciting. Except a small wheel of Brie.
Soon enough, this delightfully warm and enchanting snack lay on the table in front of me. A variety of nuts, chopped and toasted, were spread over the top of the heated cheese, then drizzled with a fragrant balsamic-honey glaze. A sturdy knife, some multi-grain crackers and Etta James crooning over iTunes radio to me, and an unsettled day, busy with work and people, gave way to a calmer and more focused evening.
This creation would make a delicious and unique appetizer for a holiday party. It’s so simple to make too; I used pistachios, almonds and pecans for my nut topping. You could use whatever nuts appeal to you. My wheel of Brie was fairly small, and I used a cup of assorted nuts. I chopped them coarsely, and toasted them in a pan until golden and fragrant. Just before I removed them, I made space in the center and dropped in about a half tablespoon of butter. When it melted and the foam disappeared, I stirred it into the nuts, then scraped them in to a bowl.
Placing the same pan back on the burner, I poured about a half cup of balsamic vinegar in the pan and warmed it to steaming. The Brie was in a 375° oven on a small stoneware pan while I worked on the topping. When the balsamic was warm, I drizzled about 2 tablespoons of honey in to the pan and just let it melt and mix with the vinegar until the Brie was warmed through. Removing the Brie from the oven, I topped it with the nuts, then poured the warmed glaze over it, scraping the pan with a rubber spatula. The Brie wheel was in the oven for maybe 10 minutes, but I could have gone longer as the rind seemed a bit thick and the cheese was still firm in some spots. Time will depend on how warm and melty you want your cheese, and the thickness of the rind.
What’s on YOUR plate this month?

May 25th, 2011
| 3 Comments »
No, not Impatiens, like the potted flower on everyone’s doorstep. This is true impatience, the feeling brought on by delayed spring time, blooms that just don’t occur, endless gray skies and parades of devastating storms and the fleeting thought that I can’t recall what my warm weather clothes are like anymore. It’s almost Memorial Day. We briefly met 70 degrees this Spring, only to quickly plunge back to the 60’s, the 50’s and a few shivering days where 40’s were all the atmosphere could muster. Who’s hogging all the 80-degree days? Minnesota needs you to share. Now.
Despite the cool weather, the lettuce and radish seeds I planted are flourishing and I’m dreaming of amazing salads. The annuals in the garden are coming along nicely, albeit several weeks behind schedule. And with the drenching rains and lack of sun, the emerald greens around us are amazing. Simply amazing. While Spring hasn’t exactly been the most glorious in terms of the temperatures and sunshine, it’s still showing me it’s fragrance and the visions that we wait all Winter to appreciate.
I missed the very brief window of opportunity to love up the crabapple tree in our front yard, as it hit full bloom on a Thursday, only to be wiped clean of it’s lush petals through a series of weekend storms that unleashed torrents of rain on us, and some terrifying sky.
 
And a subsequent walk through the neighborhood revealed glorious pink petal carpets from the stripped crabapple blooms.

In my garden, the Creeping Phlox filled out it’s little garden bed beautifully.

The Adjuga along the front garden path burst into a rich and full display, basking in a rare sunny day while hiding among the new Hosta blooms and the fallen pink petals.
  
Adjuga is a wonderful ground cover, and it grows on a flagstone path right along the front of our house. It’s mostly for shade, but can handle a little sun and it forms a nice thick carpet. In the Spring, it sends up flower stalks about 6 inches high that have these tiny little blue flowers on them. It’s one of the most favorite, carefree and reliable plants in my yard.
What else has May brought?
Oh yeah. An adorable cat of course, with nary a care in the world it seems.

A gorgeous new stove!!!

I’m still in awe over this acquisition. One of my food blogging cohorts is remodeling her kitchen and through a few Twitter exchanges, she offered to sell me her old stove for $100 and a case of beer for the guy who drove it from NE Minneapolis out to the far Northern suburbs for us. The door hinges were broken and it needed a power cleaning, but for $150 in parts and a bit of elbow grease, we landed a stove that retails for $2,200.00. I kid you not. It’s like going from driving a Yugo to being handed a Ferrari with a full tank of gas. We seriously lucked out and we’ve taken to calling it our ‘Grown Up’ stove, something a serious food lover should have in her kitchen.
There were a few lovely nights on beautiful restaurant patios with my beautiful laughing food-loving friends that only solidifies how much I am falling in love with them…..

This is #GirlsBigNight, hanging outside Cooper West End with (L–>R) Dania, (me) Jen and Virginia. Yes, we posed that way on purpose.

Enjoying the tree-shaded patio at Heidi’s 2.0 in Minneapolis with the #MNFoodBloggers, Shaina and I after a few amazing cocktails. Everyone really, was as happy as we look. It was just one of those all around perfect nights.
On a rare nice night following a hectic afternoon of rain and thunder, it’s nice to find the calm after the storm.

And then???
Roasted Chickpeas. Because this is a food blog, after all. For the most part anyway.

I’m super late to the whole ‘roast a can of chickpeas for the ultimate snack’ craze. Seriously late. And I’m ok with that. I don’t jump on too many bandwagons as I always seem to miss, fall flat on my face and then have to slink away in silence, tail between my legs. I like to watch these things go by, silently waiting to see if it endures, if it sticks around long enough to not be called a fad, a trend or the next big thing. These little golden nuggets of crunchy-ness are a perfect snack for the improved eating plan going on around here. I think I could even get my Teen to try a few handfuls. They’re like Corn Nuts, but less processed, less packaged without all the strange things. I feel that these will make a regular appearance in my kitchen for a long time to come.
Roasted Chickpeas
Preheat the oven to 400°. Drain two 15-oz cans of chickpeas and rinse well. Shake off excess water and pour chickpeas on a baking sheet lined with paper towel. Use another paper towel to blot chickpeas dry, then slip the off the bottom towel. You want them to be absolutely bone dry before roasting them. At this point, if the chickpea skins bug you in the same obsessive way they bug me, you can remove them. If not, then slip the pan in the oven and let roast for about 10 minutes. Shake the pan to loosen the chickpeas, then continue to bake, shaking the pan on occasion, until they are browned and crisp, with a rich nutty scent. Be careful not to allow them to burn. Depending on your oven, this should take 30-40 minutes. Watch them carefully.
Take them out of the oven and toss them with a little oil and any kind of seasoning you like. For this batch, I used a small amount of olive oil, the juice of half a lime and about 2-3 teaspoons each of chili powder and cumin, plus some sea salt. Toss to coat and serve warm or at room temperature.
For more flavoring options, see this post.
http://www.thekitchn.com/thekitchn/tips-techniques/15-more-ways-to-flavor-roasted-chikpeas-106112
May 1st, 2011
| 7 Comments »
We’re trying so hard to go full steam ahead in to Spring. But around here, it seems like Mother Nature just wants to tease us, here with a lovely day then a blast of cold and rain, then yet another lovely day, then once again cold, and more rain. Lakes, streams, ponds, rivers and especially the people are overflowing their limits. We’ve had enough. Bring us the sunshine please, and for more than just one day.
So here we are, the first day of May. Our expected high likely won’t even reach 50 degrees. It feels weird to offer you a delicious crispy flatbread recipe, topped with a rich verdant pesto and some sassy caramelized onions because instinct is telling me to braise something hearty and warm. But it’s May and I refuse to get out my cast iron dutch oven anymore. In fact, I sure hope it got cleaned well the last time I used it because I’m desperately trying not to get reacquainted with it until October.
So, let’s move on to this, shall we?
 
This was actually a recipe covered on this site back in November of 2009. For most of the year previous to that, I’d made this simple and delicious herb flatbread about a half dozen times for various meals, or really, even to just snap a piece off here and there to snack on. It’s ridiculously easy, it tastes amazing and it works for so many meal options, especially something very simple like being topped with fresh pesto, a smattering of caramelized Vidalia onions and several dollops of goat cheese. Run that under a broiler for a few minutes and the simplest meal is yours, delicious and light, packing a flavorful Spring-like medley for your mouth.
Every day I’m at work I pass a display of enormous Vidalia onions. It’s set up right by the entrance for easy access, and every day I see them I think about this flatbread, those golden burnished onions and the deep dark green of this pesto. I’ve experimented with lots of greens for pesto, and two of my most favorite ones are beet greens or spinach. Beet greens make the most earthy, dark and appealing pesto, and spinach offers a lighter, fresher touch. When fresh spinach is available at the Farmers Markets by the bucketful, I will buy several loads of it and make pesto, freezing it for future use.
I’ve done large batches of caramelized onions, slicing up to four of them at a time and slowly cooking them down to a glittering golden mass. They’ll keep in the fridge for up to a week, and you can freeze them too. The pesto freezes beautifully as well, or simply use your favorite commercial brand to make it even easier. A batch of this flatbread comes together in no time, so you can get out to find the sunshine.
Well, whenever it comes back, that is.
Herb Flatbread
1 3/4 c. unbleached flour
1 t. baking powder
1/2 t. salt
1-2 T. fresh herb of choice
1/2 c. water
1/3 c. oil
Heat oven to 450° with a pizza stone on middle rack. Combine dry ingredients and herbs. Make well in center and pour in oil and water. Stir with spoon until a soft dough forms. Turn out onto parchment paper and knead about 5-6 times to bring dough together. Can be divided into 2-3 small balls and rolled flat, or rolled out as one large circle. Drizzle olive oil over top, sprinkle with sea salt and more herb and transfer, parchment and all to heated stone. Bake until browned in spots and fragrant- time will depend on how thin dough is rolled. Remove from oven and cool (don’t cool on stone- it will continue to bake). Slice with pizza cutter and enjoy.
Recipe from Gourmet magazine
Spinach Pesto
4 c. washed spinach leaves, stemmed
1/3 c. olive oil
3 T. toasted pine nuts
1 clove fresh garlic, chopped
Place all ingredients in a food processor and process until smooth, scraping down sides as needed. This pesto can be frozen for quite some time with only minimal loss of flavor. Do not add cheese to pesto if planning to freeze, otherwise, add to taste your preferred hard cheese.
KATE’S NOTES:
Pine nuts are ungodly expensive right now. I love subbing cashews in pesto for the meaty flavor, and have dabbled with the idea of using almonds too, as they’re my favorite nut. And instead of using traditional parmesan in my pesto, I love the addition of Manchego or Trugole, which is really similar to Asiago, only creamier and with a milder taste.
February 10th, 2011
| 4 Comments »
All right, all right…. you don’t want to talk about Winter anymore. I get it. How about we talk Banana Bread?
I grew up with regular and repeated doses of good banana bread. How about you? In our house, Mom would watch those bananas closely, and as soon as a few of them turned to the perfect spotty stage of brown, she would snatch them from the basket, peel them and put them on waxed paper, then mash them to mush with a fork for her golden fragrant loaves of banana bread. With walnuts. Which I hated, and yet, the banana bread was so glorious and perfect that I would carefully pick out the icky nuts and eat the rest. My favorite was the top of each slice, the softest part that often got so moist and tender. I always saved it for last.

I never varied from that banana bread recipe I had. Whenever bananas in my first kitchen made it further than a bowl of cereal, or an afternoon snack smeared with peanut butter, I would do as Mom did, peel them down, mash them with a fork and make a loaf of banana bread. But, as I could now do as an adult, with my own hand mixer, a container for flour and sugar in my cupboard that was always full, with the familiar can of baking powder next to them, I would leave out those gross nuts. My banana bread was spartan. All it needed was banana. Sometimes a smear of soft butter would coat the slice, or maybe peanut butter went on the bread too. But I never needed a reason to stray from the recipe that I’d known all my life. It was banana bread perfection and it was Mom and it was all I needed. When she died, making a loaf of her banana bread was like evoking her memory in my kitchen, with my heart breaking again, through each press of a fork into the banana, turning the flesh to the proper level of mashed for the recipe. Then each bite of her bread would send my very adult mind reeling backwards into the kitchen of childhood, the sunny window, the deeply patterned blue carpet and my Mom, happily peeling spotty brown bananas, the old familiar bread pan on the counter next to her.

I’m not sure what happened the last time I made Mom’s Banana bread recipe, but the first bite put me off quite a bit. It tasted…. I don’t know, odd. Fake, I guess. I was really kind of shocked by the flavor. I’d grown up with this recipe; I’d made it dozens of times since I was a kid and here I was, by leaps and bounds an adult and quite the responsible one too, with a good job, a home and a child and yet, I looked at the slice of banana bread in my hand and it didn’t fit anywhere with the life that I’d found. It didn’t even bring Mom’s face to mind, her laughing smile and the way she would grab my shoulders and squeeze me just a little, making a delighted teeny squeak of her love for me. My mouth, my taste and my opinion had grown right alongside my life, and this recipe didn’t do it for me anymore. Part of me was crushed. It was the familiar flavor of a life that was now gone, and it was failing to bring to me the comfort I was seeking, comfort away from a world of bills, deadlines, a hectic job and single parenting. I didn’t get rid of the recipe because that might feel a little like experiencing Mom’s death all over again. But I haven’t made that particular version for a long, long time.
Ever since then, I’ve been on the lookout for the next best Banana Bread recipe. When the bananas in my house get past their prime, I simply place them in the freezer and wait it out. I search the wide range of recipes available for one that might take me home again, a feeling of nostalgia, of banana bread perfection, a slice that might elicit that memorable squeak of love I recall. At one point, I think I had 10 frozen bananas in there, and part of me mourns the loss of that constant. I have looked over dozens of recipes and rejected most of them; too much fat, too much oil, wayyyyyy too much sugar and in almost all of them, not enough Mom. So I keep searching, finding a few gems here and there to sample in my own sunny kitchen, with it’s warped old bread pans. And the bananas meanwhile, well, they tend to pile up in the freezer, silently waiting to succumb to a fork, a whisk and a hot oven to be baked into a memory that will sustain me through the years ahead.

I’m still looking for that ultimate, that perfect banana bread, and I find that I’m really enjoying the experiments I’m coming across. This current one I’ve found is really quite good, in a clever and surprising way. What appeals to me about this particular recipe is that it includes crushed graham crackers crumbs in the base. This gives it a texture that’s a bit more crunchy than you would expect, and the taste of the graham crackers is really pronounced if you share the slice with a steaming cup of coffee. It’s perfect together, like banana and chocolate, like mothers and baking; with the familiarity of ritual, an old trusted bread pan and a freezer full of fruit at the ready.
Banana Chocolate Chip Bread
1-2/3 c. graham cracker crumbs (approx. one standard package from a box)
1-1/2 c. whole wheat flour
1/2 c. natural cane sugar (you can use regular granulated too)
1 T. baking powder
1/2 t. sea salt
3 medium bananas (i like to mash two of them fully, then leave the third in chunks for texture)
1/2 c. milk (any kind will do- I like vanilla soy, and almond would be wonderful)
3 T. canola oil (or get crazy and use olive oil- it tastes wonderful)
2 eggs, lightly beaten
6-oz semi-sweet chocolate chips
Preheat oven to 350°. Spray a standard 9×5 loaf pan with cooking spray.
Place graham cracker crumbs, flour, sugar, baking powder and salt in a bowl, and whisk well to combine.
In a large measuring cup, add bananas, oil, milk and eggs. Beat lightly with a fork to combine, then add to flour mixture. With a rubber spatula, carefully stir together until just blended with some streaks of flour remaining. Add in the chocolate chips and combine until mixture is fully incorporated. Scrape into prepared pan and bake for 50-60 minutes, or until top springs back when lightly touched and toothpick test comes out clean.
Allow to cool in pan for 30 minutes, then remove to wire rack to cool completely.
Need some other inspiration for banana baking? Try these:
Applesauce Banana Bread
Banana Poppyseed Bread
Peanut Butter Banana Bread
Whole Wheat Banana Pancakes
November 19th, 2010
| 4 Comments »

(photo from “That’s Yummy”)
We’re woefully into November’s gray and flat winter light. The cloud cover expanse across the sky is leaden and heavy and daylight begins to fade around 4:00pm, yet even in the best of midday light, the ability to take a good photo often is a crapshoot. I don’t really mind the changes that come around this time of year, this first adventure into winter, the shorter days and descent into wool sweaters, layers, warm socks and extra blankets on the bed. The coziness of it is good, it’s necessary, and there’s a lot of it that can be so soothing- like the leaping blue flame under the daily tea-kettle, the ritual of a warm steaming cup to carry me through the late afternoon; there’s the presence of the strands of tiny twinkling lights we’ve used to adorn certain areas of our home- the stairwell for those dark, dark mornings, the top of the cupboard in the kitchen, and the fancy festooned bakers rack in the corner of our kitchen.

The tiny lights are nice in those early mornings before the dawn when Mike is awake; it provides enough light to get the coffee pot going and the cat dishes filled without having that eye-burning glare that we encounter when first out of bed. The stairwell lights guide him safely down in the darkness. We put these lights up many years ago at Christmas time, and they’ve proven to be so useful that we never removed them. In those gloomy November afternoons they add a warm touch to our home, along with the singing tea kettle, and those steaming cups. Add a candle or two and you can chase those dark hours away a lot easier.
A good warm oven and simmering pot on the stove does that too. I recently came across a recipe for Butternut Squash Pasta, in Gourmet magazine’s Best of 65 Years cookbook. It was a simple process of cooking cubed squash then tossing it with garlic and pasta, but I thought to take it one step further and create an awesome squash puree to mix in with pasta, creating a saucy topping that clung to every single bite.
Problem was, as delicious as it tasted, it looked just ghastly. Imagine, brightly colored orange squash mixed with cooked whole wheat pasta. Oh gads…. it was homely as all get out, but tasted glorious and superbly like comfort in my bowl. I do recommend it, even if I can’t show you the result. Roast your halved butternut squash until it’s good and soft. Scrape the flesh into a bowl, add a little broth or milk to help thin it, then mash it smooth. You can whiz it in the food processor too. The resulting puree should be thick, close to the texture of canned pumpkin, and can be used like canned pumpkin, which, after all, is squash right?
Having the use of pureed squash on hand made it a cinch to whip up a batch of muffins too, and after finding a recipe for Whole Wheat Muffins with Pumpkin and Quinoa on Fork, Knife and Spoon, I knew those had to somehow come out of my oven in the near future. With a little trip towards the healthy side of muffins, these little beauties came out bouncy soft, only the slightest bite of sweet and full of chewy nibs of quinoa blended with the sweet taste of roasted squash.

Touched inside and out with toasted coconut, they had a lot going for them. A bite for breakfast, a quick pick me up snack or a nice late night treat before climbing under piles of blankets, they fill in all parts of your day with a compliment for your tummy. Follow the link to Kate’s blog ( I know! Another Kate! ) for the original recipe. I doctored mine up to utilize what I had on hand for my version.
Whole Wheat Muffins with Quinoa and Squash
2 c. whole wheat flour
1-1/2 c. cooked quinoa
1/2 c. pure maple syrup
2 t. baking powder
1 t. baking soda
1 t. ground cinnamon
1/2 t. ground nutmeg
1/4 t. ground allspice
1/2 t. sea salt
1 c. cooked butternut squash
1 egg
3/4 c. buttermilk
3 T. oil
1 t. vanilla extract
1/2 c. shredded coconut, toasted
Preheat oven to 375 and spray muffin pans, or line with paper. You will get approximately 18 muffins.
To cook quinoa- measure one cup of water in a saucepan and place over medium burner. Rinse 1/2 cup of quinoa in a wire strainer under cold running water, shaking to rinse thoroughly. Place quinoa in saucepan and bring to a boil. Reduce heat, cover and simmer about 10-15 minutes until all the water is absorbed. Remove pan from heat and let stand for 10 minutes, then scrape cooked quinoa onto a plate and spread out to cool.
When cooled, measure flour and quinoa into a large bowl. With your hands, gently toss together until blended, and quinoa appears the size of tapioca pearls. Add in baking powder, soda, spices and salt and mix thoroughly.
In another bowl, measure buttermilk, then whisk in syrup, egg, squash, oil and vanilla. Whisk together, then add to dry ingredients with coconut. Using a rubber spatula, gently fold ingredients together until incorporated. Do not overmix. Scoop into muffin tins, about 2/3 full and bake for 15-18 minutes, or until tops are browned and spring back when touched. Allow to cool in muffin pans for 15 minutes or so, then turn out onto wire racks to cool completely.

And without even realizing it, I’m more than halfway through NaBloPoMo, or National Blog Posting Month. It’s proven to be way easier than I anticipated, but with 4-1/2 years of archives to wander through and re-introduce, I’m never at a loss for material.
August 10th, 2010
| 8 Comments »
Well, hello August.
I can’t say I’m thrilled to see August because it’s sort of reminding me of all the summer that’s now past and how little I’ve been able to enjoy a most fleeting time. I can count on one hand the number of farmers market trips I’ve made. Just yesterday I shook out my swimsuit from the drawer where it’s been buried and ignored. The sun goes down quicker, and with a more resigned feeling than just a few weeks ago. People are talking about returning to school. Somehow, August just feels different; it feels like a slow, warm denouement, like the last dance of a spirited, eloquent party full of flushed faces and sighs of ‘The next one will be just as much fun.’
But at the same time, August is abundance. Corn is everywhere. And the heat of July is making my tomato plants nearly burst with crimson globes of homegrown tomato glory. Like this…. in one day.

Yes, that’s one day of harvest. But those tomatoes need barely a thing on them save a dash of good sea salt and a few grinds of pepper to make their way eagerly to my mouth. My Rutgers and Bonny’s Guy plants are nearly 5 feet tall, and still loaded with potential. There are peppers galore hanging from the seven pepper plants and I am eagerly awaiting the ripening of the mysterious Italian Heirloom peppers of which I discovered late in the Spring. Four plants, fully adorned with long and cylindrical deep green peppers hold a bounty and so much more. I eye them, thinking of stuffing, or sauteing or simply slicing on a salad. I love the anticipation held within the tiny patch out my window.
The rain has been copious in Minnesota, and the resulting humidity oppressive, but what the rain has done is unavoidable. My tiny Japanese lilac bushes, which faded so fast after an untimely Mother’s Day frost, sprung back into a lush fragrant bloom in mid-July, bringing a welcome surprise amidst the waves of high summer heat. The Delphinium is on a second bloom too, and the yard has stayed a rich verdant green. I even find humor in the huge weed that’s formed in our neglected fire pit, it’s long stems sneaking up and over the walls, potentially snagging unsuspecting varmints. The toad population in my garden is copious. Mike even found a small frog clinging to our sunroom window one evening. Just about the same time, we discovered a tiny amphibian clinging to a baking pan in the midst of the kitchen at work. It was a moment of surprise, and likely shock for the poor little green creature, which I quickly captured and took outside to release in the grass. His legs were too miniscule anyway, as luck would have it.
This past week has been very simple around the house. The Teen is off an the adventure of his young lifetime, away in the mountains of West Virginia spreading his faith and employing his helping hands. He returns to our fold this weekend, and I’ve missed his smile. Mike and I have enjoyed some much-needed quiet time, and a reprieve from chauffeur duties. My schedule, and the last of the July heat has kept the cooking to a minimum. Good bread, some cheese and those wonderful tomatoes have really been all I crave anyway.
I did turn on the oven for one short burst of creativity when I came across this Chipotle Lime Roasted Peanut recipe on Susan’s site. I’ve been indulging in this delicious smoothie , utilizing the frozen blueberries from my yearly berry picking adventure, and upon seeing her quick and simple method for this spicy snack, I jumped into action. One food item that we always keep on hand for snacking is nuts. Our favorite is almonds, with pistachios and peanuts coming in close behind. I took Susan’s recipe one step further, using all three nuts when I made my version.

With the first nibble, I was hooked. The nuts aren’t spicy right away, but a bit of heat builds up in the back of your mouth as you crunch away, and a slight salty tang of lime tangoes a little over your tongue. They’re utterly addictive. It’s a good thing I needed to run out to work soon after fixing up a batch of them, or I might have poured myself a cold drink, taken a book out to the patio along with a bowl of these nuts and settled in to satisfied munching. It would be nice of me to save some for Mike, don’t you think?
September 30th, 2009
| 12 Comments »

You’re not a potato, my chalky tuber. You are not even really considered a yam, by the true means of the word. But to avoid confusion and misunderstanding, you are required to carry the moniker ‘Sweet Potato’. You are golden, bright orange, pale yellow and the color of a sunrise, at once starchy and dry, as well as moist and tender. You make amazing oven fries, stunning side dishes, distinct risottos and perfect pies. You have that multiple personality trait down to a science, don’t you? Who would have thought that you were distantly related to gorgeous Morning Glory flowers? And aren’t you the healthy one? Rich in antioxidants like beta carotene and Vitamin A, complex carbs and fiber, you rank awfully high on the nutritional value chart, giving us iron and calcium to boot. Oprah is a big fan of you, lucky spud. That pretty much guarantees you’ll be the talk of the town, doesn’t it? We can come by you quite inexpensively too, although no one can call you cheap- you are a class act, my friend. You hold up well to storage too. And thankfully, you are in great supply, for our demand for you is high and you’re readily available all year round. And if we choose to cook you, mash you and store you in the freezer, you never complain. And patiently you wait for us to bring you back out and make something wonderful from you.
Like these muffins. Thanks for offering up all your golden glory to a humble breakfast and snack food.

You and I, though, we haven’t always been friends, and I’m sorry I ignored you all those years. Think of the fun we would have had! But no matter. We’re tight now, and that’s all that counts. I love it hanging out with you, and am so glad I introduced you to my good pal oatmeal. The two of you make quite a pair in this delicious and stout muffin, don’t you?

I’m not at all jealous that you get along so well, in fact, I really like it when my friends find something good about each other, something they enjoy that has little to do with me. I was happy to introduce you two; it seems to be a match made in heaven, and how easy is it to get you two to hang out? Really, it takes little effort, and for my gain I get delightful and simple muffins that speak poetically of Fall, warm with cinnamon and nutmeg and the hearty toothsome bite of whole oats. Not to mention that sweet tender tang of you, my tuberous pal. I’m so glad I gave you more than a passing glance. We’re great friends for life, yes we are.
Oh by the way, have you met another good friend of mine, her name is sweet cream butter?

Oatmeal Sweet Potato Muffins
from the Louisiana Sweet Potato Commission
1 c. old fashioned rolled oats
1 c. flour (AP or Whole Wheat, or both)
1 t. baking powder
1/2 t. baking soda
1 t. ground cinnamon
1/2 t. ground nutmeg
1 T. ground flaxseed
1 c. cooked and mashed sweet potato
3/4 c. brown sugar
1/3 c. canola oil
1/4 c. skim milk
1 large egg
1 t. pure vanilla extract
Preheat oven to 400°. Line two standard muffin tins with paper liners.
In a medium bowl, whisk oatmeal, flour, baking powder and soda, cinnamon, nutmeg and flaxseed. In another small bowl, combine sweet potato, brown sugar, oil, egg, milk and vanilla, whisking to blend well. Pour over dry ingredients and stir to combine. Mix until just moistened. Scoop into muffin tins and back for 15-20 minutes. Check at the 15 minute mark- these bake up quickly.
KATE’S NOTES:
This recipe doubles really easily. I doubled it using both AP and whole wheat flour and the result was nice and firm. You can substitute pumpkin for the sweet potato, or use garnet yams. Be sure that the vegetable is cooked and mashed well. I used soy milk in mine and it works just fine. For one batch of these, I added 1/2 c. of flaked coconut, and I think chopped and toasted pecans would be wonderful in these.
For an extra level of flavor, you can top these with a crumb topping made from 1/4 c. oats, 1/4 c. flour, 1/4 c. brown sugar, 1-2 T. softened butter and 1 t. vanilla extract. Combine these well and sprinkle over the muffins before baking. I have not used it, but imagine it would be excellent.
May 7th, 2007
| 6 Comments »
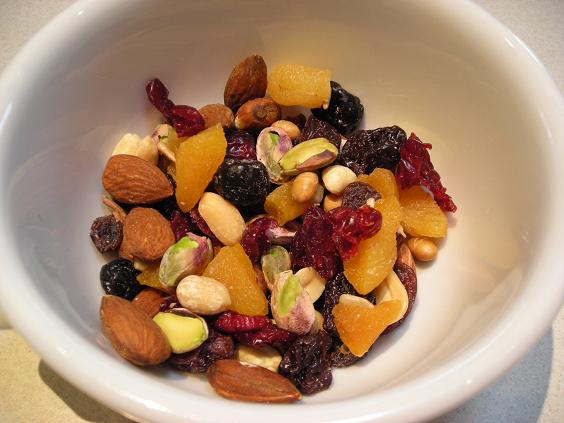
So with all the good news out there about the health benefits of eating nuts, having a container of trail mix, or gorp if you are so inclined, on your counter for snacks seems like it would be a great idea, doesn’t it? Lots of grocers and all natural food stores carry bulk products where you can scoop out what you want and customize your mix to your liking. It’s a simple, easy snack that you can take anywhere; Mike will scoop up a baggie full to have in the car when he has a client meeting and it keeps him from stopping to get something junky when he is on the road.
For our favorite blend, I like to use dried apricots, craisins, dried blueberries and black raisins for the fruit; soynuts, unsalted roasted almonds, unsalted sunflower nuts, pistachios and salted roasted peanuts for the nutty component. I throw in handfuls and stir until it looks right; it certainly isn’t rocket science. Some salt is ok, and for whatever oddball reason, I really like dried apricots dusted with some of that salt. I have sometimes put in chocolate chips, flaked coconut or currants too. It’s entirely up to you as to what you use, that’s the beauty of it. So if you’ll pardon me, I’ve got the munchies and a perfect snack to satisfy it.
|


