May 14th, 2009
| 1 Comment »
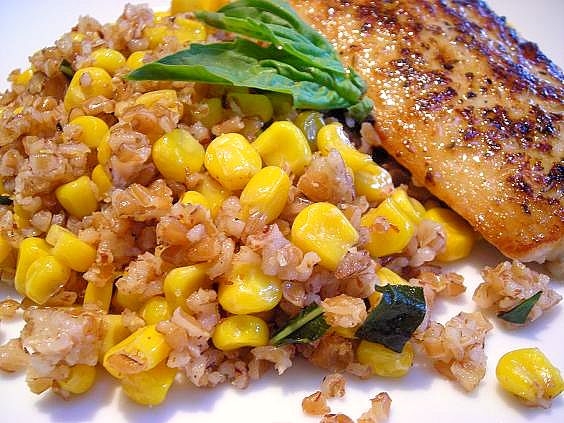
I’ve been holding out on you, but not on purpose.
I’m guilty of thinking that somehow giving you a simple recipe as a means to serve frozen corn might just bore you to death. Really, it isn’t anything superbly fancy, but right about now, as we are staring down the summertime bounty of vegetables and with fresh corn season coming quicker than a May thunderstorm, I think it’s time to share the love. Especially since I enhanced the dish with my current love- bulgur- and made it a couple thousand times better.
I don’t even know when it was that I came across this method on Kim’s blog, but I was immediately transfixed and had to try it. Which I did, and which I almost regretted because I could barely think of anything else. Now I need to share it with you.
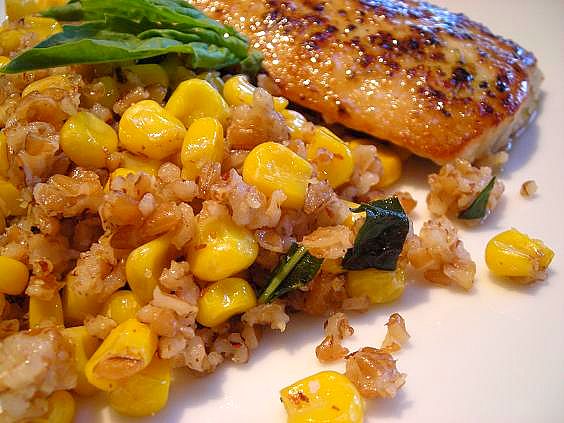
I simply call it Brown Butter Corn. How easy is that? You take some good butter and heat it in your pan until it’s toasty and brown, add in frozen corn and cook it until it’s tender and delicious, maybe tossing in a handful of fresh basil, or rosemary, or thyme and a seasoning of sea salt and fresh ground pepper. Pile it on your plate next to your main course and you’ve elevated your meal slightly from the humdrum to the hubba-hubba. (wow, did I just say that?)
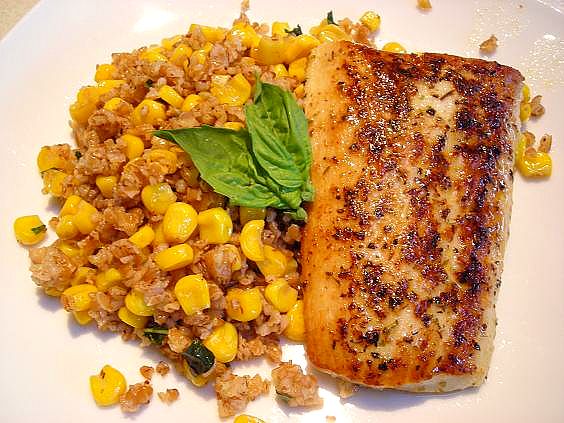
Only this time, with a container of my current whole grain love all cooked and ready in the fridge, this side wasn’t just about the nutty and toasty, it was far better. Copious amounts of fresh basil really sent the flavor sky-ward. And with a perfectly cooked piece of Mahi-Mahi as an accompaniment, alongside an effusive smiling husband (and a kid-free evening), it quickly became one of those meals that sends shivers through you, making you slow down, smile more, sigh often and think “When can we have this again??”
Brown Butter Corn with Bulgur
by Kate
4 T. good quality butter
1 pkg frozen corn, shaken in a wire sieve to remove any ice or frost- NOT rinsed!
1-2 cups cooked bulgur
Fresh herb of choice- basil, rosemary and thyme all work well
Salt and fresh ground pepper
Heat butter gently in a large skillet over medium heat. When it’s darkened and smelling toasty, add corn (it will sizzle!!!) and quickly stir to combine. Allow to cook for about 10 minutes, stirring often. Add in bulgur and fresh herb, stir to combine and heat through. Season with salt and pepper.
KATE’S NOTES:
The simplicity of this dish is ridiculous. Even without the bulgur it’s delicious, and the variation of vegetables that you could use is astounding. I think of fresh summer squash, a julienne of root vegetables, diced eggplant or even a mix of greens. Sub in another grain for the bulgur- like farro, another of my current loves- or add in wild rice, red rice or a mix. I’ve loved corn and rice mixed together since I was a little girl, but there is something about the browning of the butter that makes it so much more elegant. Watch out though! The butter slips easily from ‘browned’ to ‘burned’ and once that happens, you need to throw it out and start over. ‘Burned’ butter corn, I’m thinking, isn’t all that appetizing. Heat it gently and stay close by. And by all means, DO NOT rinse the corn! The butter is scalding hot when you add the vegetable, and if there is water on it, the likelihood of bad splattering is quite high.
May 6th, 2009
| 6 Comments »
May 4th, 2009
| 4 Comments »
I’m the total opposite of this guy.

Instead of warily watching over the masses, determining who best to give a bowl of soup to and weeding out the undeserving, I would be holding the door open, waving folks inside and pushing bowls into their hands; bowls of steaming, hearty and delicious soup with plenty of great bread for dunking.
I am no Soup Nazi. I’m a Soup Queen. We’re in May now, and I still can be swayed by a bowl of soup; I can read a recipe that is more suited to November’s chill, a thick blanket of fleece and a crackling fire and regardless of the fact that Spring is quite literally bursting out of it’s seams outside, I find myself lusting for that soup. It’s really a huge turn from even a few years ago. I used to never make soup. In fact, it intimidated me and I can’t explain why. I think I tried to make it on several occasions and was met with a thin, watery extraction, flavorless and vague that did nothing to satisfy the need inside of me for warmth or comfort. I can’t say; I’ve obviously blanked out the bad experiences of it. Back then, soup was a can for me, sad as it is. I cranked open a tin container to achieve a highly prized level of comfort, and wistfully dreamed of the steaming pot, bobbing with colorful vegetables and thick cuts of meat, or dripping with toothsome noodles and wished for the ability to do it from the ground up.
Obviously, what I didn’t know about soup was that it really needs to be built from the ground up in order to achieve that amazing soup quality that we all crave. Getting this…..
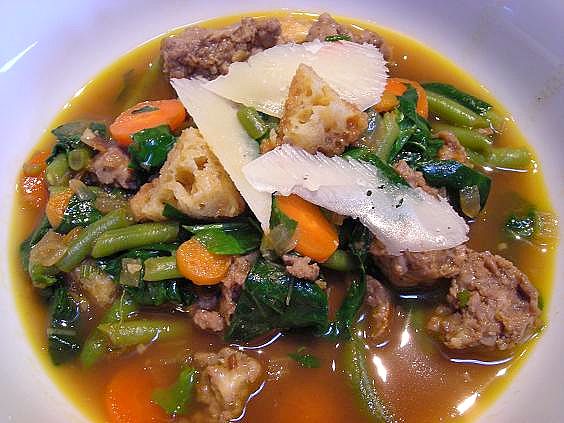
requires little else but a few tidbits of knowledge. Armed with that knowledge, I’ve knocked out soups by the score, at least one pot a week and often more.
Mmmmm, you can almost smell it, can’t you?
The origin of soup can be traced back nearly 6000 years. The word ‘soup’ is believed to have evolved from the term ‘sop’, when long before eating utensils were created and everything was consumed with your fingers, getting those precious drops of juices in the bottom of your bowl was necessary. A thick hunk of bread accomplished this task nicely.

Surprisingly, the word ‘restaurant‘ comes from a term first associated with soup, when in the 16th century in France, a highly concentrated and nutritious food known as a ‘restaurer‘ was sold by street vendors, advertised as an antidote to physical exhaustion. A Parisian entrepreneur opened a shop in 1765 specializing in servings ‘restaurers’, and the term ‘restaurant’ was coined to describe it. The ‘restaurer’ being served was but a humble bowl of soup used as a means to rejuvenate from the trappings of modern life. It’s no wonder that now, many hundreds of years later, when we crave comfort and seek solace from our own modern world, that a bowl of soup feels like a restorative shot in the arm.

Soup grew in popularity with the onset of canning in the 19th century, and today there are hundreds of options available in the supermarket; dried, canned and all designed to be quick and easy. There is soup for all weather too, and a soup found in all cultures, all cuisines and in every form from around the world. We have classic soups, cold soups, fruit soups and herb soups. It can be called bisque, chowder, stew and consomme. The Chinese have Egg Drop and Birds Nest soup; the Greek have their Avgolemono, Scots their Cock-a-Leekie, the French serve Bouillabaise, Hungarians love their Goulash, Russians their Borscht, the Spanish and Portugese revere their Gazpacho. Heated arguments ensue over which clam chowder is better- New England cream based, or Manhattan tomato based- and Gumbo pots simmer throughout the Southern United States. Ever heard of Canh Chua? Revithia? Caldo Verde? Lan Sikik? Callaloo? Fasolada? Bourou-Bourou? Kharcho? Snert? They’re all traditional, cultural representations of soup. Anthony Bourdain claimed that he fell in love with food after eating a bowl of Vichyssoise when he was a boy. And in the 80’s, a flash in the pan boy band went by the name Menudo. Soup is everywhere.
There tends to be a mindset about making soup that it has to take a long time in order for it to be good. While there is something to be said about creating a deep and flavorful pot, simmered for hours at a time, with the ingredients on hand and a quick turn with your knife, soup can be on the table in less than an hour. My Recipe Index has lots of good options for both an easy spin on the stove and a good pot to create over a lazy afternoon.
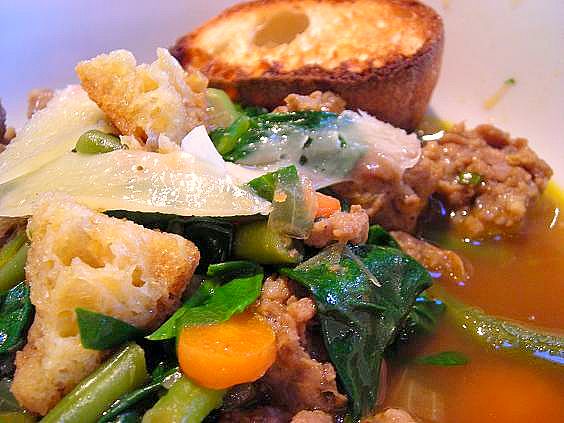 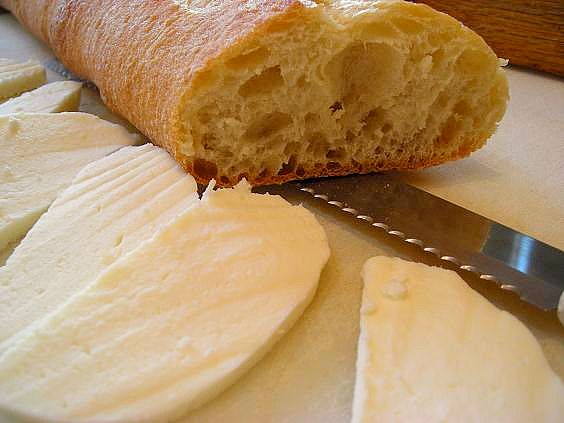
This soup- Zuppa Arcidossana or Rustic Italian Bread Soup- the recipe that prompted me to make a hearty rich Fall-like pot on a beautiful- but cool- Spring afternoon, was one of the simple means to that steaming goodness. Browsing through the New York Times Dining section each Wednesday often gets me in a state like this; I spot a recipe I know I would love and my mad culinary brain must have it. Now. It’s all Bittman’s fault. The soup was simple, hearty and really flavorful, not to mention very quick.
Zuppa Arcidossana
2 tablespoons olive oil
1/4 pound sweet Italian sausage, removed from casings
1 cup 1/2-inch-diced carrots
1 large onion, chopped
3 or 4 cloves garlic, chopped
Salt and black pepper
1 cup stale bread (use coarse, country-style bread), cut in 1/2-inch cubes
1/2 pound spinach, trimmed, washed and roughly chopped
1/4 to 1/2 cup ricotta salata, cut in 1/2-inch cubes (feta may be substituted)
1/4 cup freshly chopped parsley, optional.
Put oil in a large pot or deep skillet and brown sausage over medium-low heat, stirring occasionally. When sausage is cooked through and leaving brown bits in pan, add carrots, onion and garlic, and continue to cook until vegetables begin to soften and brown, about 10 minutes. Sprinkle with salt and pepper.
Add bread to pan and stir for a minute or 2; add spinach and continue cooking just until it wilts, a couple of minutes.
Add about 2 cups water and stir to loosen any remaining brown bits from pan. This is more of a stew than a soup, but there should be some broth, so add another cup of water if necessary. When broth is consistency of thin gravy, ladle stew into serving bowls and top with cheese and some freshly chopped parsley if you have it. Serve immediately.
Mark Bittman, NY Times, 4/29/09
KATE’S NOTES:
Browning the vegetables adds a lot of flavor. I browned the carrot, garlic and onion for quite some time before adding in the sausage and giving it a good searing as well. Since you are only adding water, the fond on the pan will add an immense depth to the pot.
I had some leftover green beans from a previous dinner that ended up in the soup as well. The bread I used was a baguette, and it wasn’t stale; I just cut off the super crusty ends and added them into the soup pot. The slices were toasted to make them nice and crunchy, then set in the broth to soften slightly. I added about a teaspoon of fresh rosemary for extra flavor.
Instead of ricotta, I used fresh mozzarella and of course, shaved parmesan which this soup absolutely cries out for in droves. Basil would also make a good garnish on the top.
March 25th, 2009
| 5 Comments »
I am one of those cooks who use recipes only as a fundamental guideline to a finished product. I can trust my own cooking skills enough, and what I know about how my family eats, to be confident when I look at a recipe in determining what ingredients in it won’t work, or what needs to be enhanced. Even simple basic products can be made better with a little creativity and an eye towards a higher nutritional value.
Take a jar of spaghetti sauce. It’s high on the convenience scale, and has a reasonable amount of nutritional value, provided you avoid the sugar-laden brands and stick with a purer variety. With the addition of sauteed onion and garlic, along with shredded zucchini, carrot and spinach, a few chopped fresh roma tomatoes, some fresh basil or rosemary and a little tomato paste to bring it all together, you get a pasta sauce brimming with vegeteble content, better flavor and more nutrition.
I often come across recipes too, that when I do follow them to the letter and get that anticipatory excitement of what the finished product will be, I often end up sorely disappointed, especially if I ignore my inner urgings to add something of my own liking. It is a rare occurence indeed when I work through a recipe and come to a conclusion, after following the prescribed steps, that what I see in front of me might be way better than what the original end result offered. That was the case with this Savory Millet Risotto.
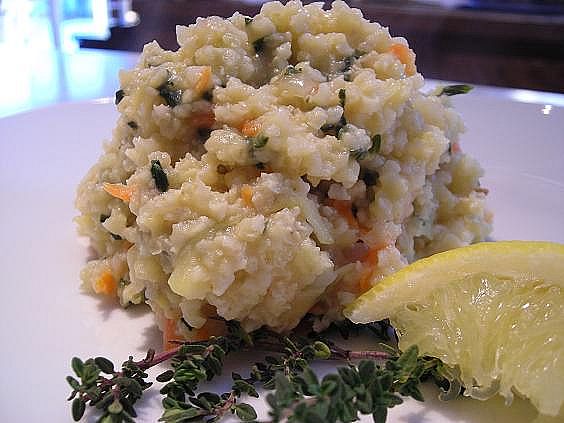
The recipe, from the current issue of Eating Well magazine, was supposed to be for a Millet Cake, similar in structure and use to Polenta. Even though I have given up on using Polenta in any of my meals after repeated attempts to enjoy it always fell flat, I earmarked this recipe as an option. The millet cooks with shredded vegetables, parmesan cheese, fresh thyme and lemon zest to a creamy consistency, at which point it would be cooled, then shaped into patties to sear in a pan. It never made it that far.
Come in to my kitchen…
February 11th, 2009
| 5 Comments »
Admittedly, I like to break convention. I’m not one to conform to stereo-typing, I don’t mold myself to any expectation and I refuse to adhere myself to a certain role. At home, I’m just as easily found outside shoveling, chopping ice on our north-facing driveway, spreading mulch or digging a hole for a new garden plant as I am in the kitchen whipping up something delicious. I don’t think in terms of ‘mans work’ or ‘womens work’, and while we do have some things in our house that may fall into those categories, I don’t think that any job should be defined by your gender. I would have never succeeded as a single parent for 7 years with that belief.
In my life too, I’m the one who would most likely encourage you to step outside the box. Years ago, in an outing with women I was working with, we spied a parking spot outside our destination on the opposite side of the street from where we were. Here’s me in the backseat telling the driver to make a U-turn, while the other women in the car want to play it safe and go around the block. When I’m in the minority, I tend to be slightly insistent about what I feel, and apparently I was loud enough that the driver whipped around the steering wheel in a speedy U-turn and scored the parking spot. Later she confessed that she’d never done anything like that. I asked her if she liked it, and after a moment’s repose, she replied with a grin “I think I did!” Stepping outside a comfort zone, or taking one of life’s U-turns is hard for some people. I’m generally not one of them.
This trait, good or bad as it can be, is part of me in the kitchen as well, and here it really tends to take off soaring because I’m the majority cook in the family and no one is standing about trying to tell me what to do with a recipe or certain dish. I rarely follow a written recipe, and when I do I’m most always disappointed. I know what I like, and after a lifetime of cooking, making mistakes and blending every ingredient under the sun, I have a storehouse of knowledge in my brain as to what works and what might not. My brain can see how any recipe from any source can become something else altogether, and knows just how to make it delicious.
Take this roasted vegetable pasta dish; I don’t recall the origin of the dish as the only note I have on it says “eggplant, tomato and pasta” – yeah, that’s concise- but I recalled enough to know that you roasted the veggies, pureed them with pasta water and some olive oil and mixed it with cooked rigatoni. I also recalled that the finished dish, while not a beauty queen, was delicious. Sometimes, ‘delicious’ is all I can remember, and really, do you need to know anything else? Well, a method might help.
For my roasted veggies, I used an eggplant and a pint of grape tomatoes, halved. I also cut an onion into eighths, large diced a red pepper and rough chopped six cloves of garlic as additions. Mix it all up in a bowl with a few good glugs of olive oil, some seasoning of choice, and toss.
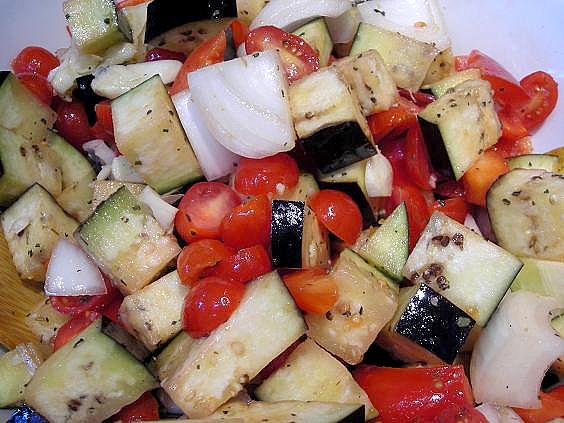
Don’t give in and add more oil; the notoriously thirsty eggplant will drink up some of it and the rest of the vegetables will get their fair share. Too much oil on eggplant in the oven and it just becomes soggy. Spread the veggies out on cookie sheets, with plenty of room, and roast at 400 until the tomatoes are nice and wrinkly, the eggplant is browned and everything smells amazing. This took me about 25-35 minutes.
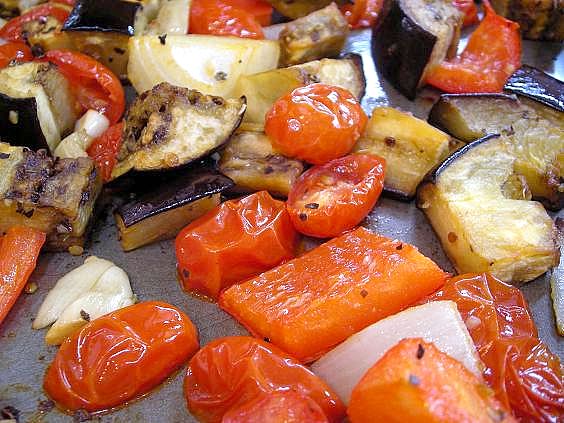
Cook the pasta while the veggies roast. You want the pasta water for the puree; I always place a pyrex measuring cup in the colander to help remind me to catch that good starch. Drain the pasta, reserving up to two cups of the water. Keep the pasta warm.
Place the veggies in the food processor with some salt and pepper. You can save some of the roasted pieces to top the pasta, if you wish.
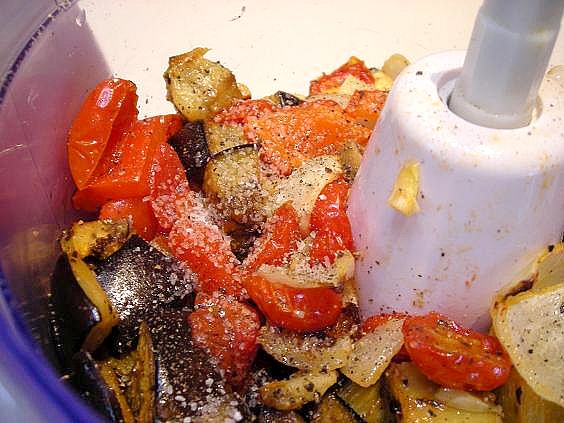
Add in about a cup of the pasta water and another healthy glug of olive oil. Whir the veggies to a consistency of choice- I like it a bit chunky- and scrape down the sides. Now take a look at the mix- it should be fairly thick. Add in a little more pasta water to make it to a spreading consistency. If it’s too thick, it won’t coat the pasta well enough.
You can also add in some kalamata olives, and be sure to have some fresh grated parmesan ready.
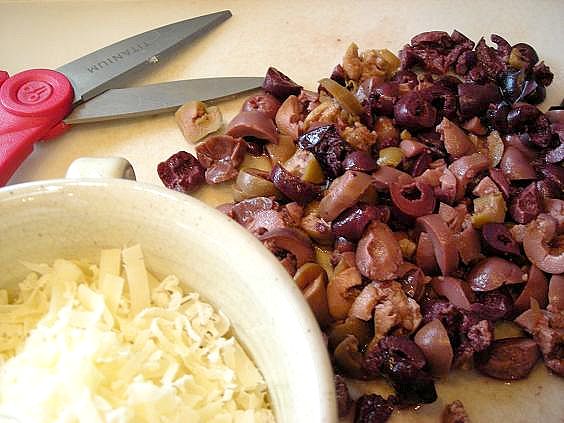
And if you’re like me and enjoy something crunchy, toasted and seasoned on top of your pasta, make some bread crumbs. I took a shortcut this time and put the remains of these bagel chips through the food processor.

Oh my, this was a really good addition!
Once the veggies are processed, scoop some of the puree onto your rigatoni or other large shape of pasta. This is such a hearty dish that a tiny shape would get lost in amongst the lovely vegetable mix. You may not need all the puree so add as you go to make it the consistency you like. Stir, taste, season with salt and pepper and taste some more.
Then, take your serving, add in the parmesan and crumbs and pick up a fork.
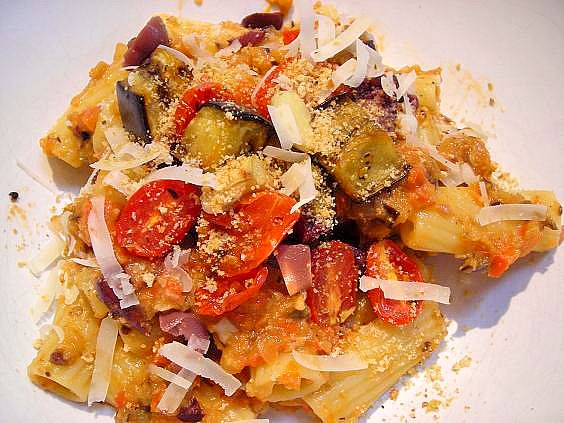 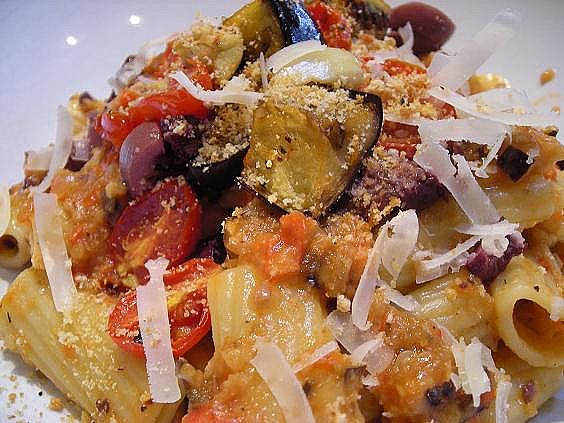
Mmmmm….. who needs convention anyway??
The puree was really thick and delicious- not so visible in these photos but trust me…each bite was a huge flavor burst in the mouth. There was plenty left over even after I coated the pasta with quite a bit. The next day I could hardly wait to take the remains of the vegetable mixture, spread it on toasted peasant bread and top it with fresh mozzarella. This made for a quick and delicious light lunch. I also think it would make a wonderful appetizer for a party.
Ok, if you need a set of instructions, follow the jump…..
Come in to my kitchen…
January 27th, 2009
| 3 Comments »
And how I got from hot steaming soup to a cool salad I have no idea, but I can’t throw off the desire to recreate something I see on a website, even if the weather outside is more comfort food appropriate than salad worthy.
I wish I could remember where I originally saw the photo of this Orzo salad with yellow pepper, kalamata olives and feta cheese because it would be nice to give due credit. Regardless, with a party to attend it was the perfect excuse to give it a whirl even if the temperatures outside plummeted to sub-zero once again.
I’m really glad I did.
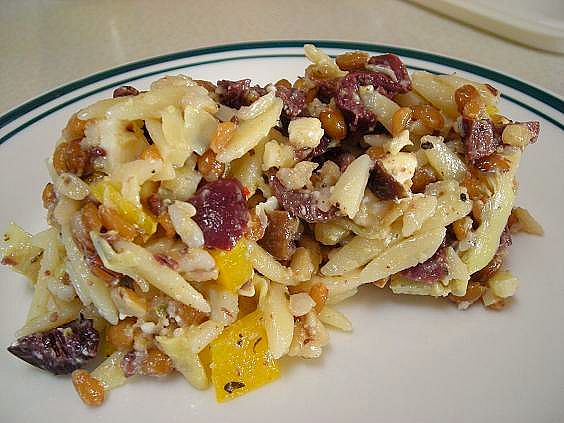
The original recipe called for orzo and israeli couscous- double pasta whammy- and although it probably would have tasted fine, it was too much in the carb department. As I browsed the grocer’s aisle in search of some type of substitute and appearing about as aimless as possible to all those frantic cart pushers around me, I finally spied, way on a top shelf and really obscure, a package of Kashi Original 7-Grain Rice Pilaf.
I am, admittedly, always willing to buy just about anything from Kashi, even without scrutinizing the label, the ingredients or even the expiration date like I tend to do. It’s one of the few items in a grocery store that I know is good quality. What I liked about this ‘pilaf’ if you can even go so far as to call it that, was that it was nothing more than a simple vacuum packed assortment of cooked whole grains. That’s it. No sodium laden, preservative choked flavor packet to add, no un-pronounceable ingredients, nothing but cooked grains. A quick turn in the microwave and they were ready to eat, or to be tossed into any preparation, mixed to your own liking. I love the idea of whole grain pilafs; the mix of nutty and healthy grains can compliment any dish, but since most of them require widely fluctuating cook times, it’s hard to think of putting them together myself without a whole lot of work. I do imagine though, that the work and effort would be totally worth it.

I did add some extra wheatberries to this dish. I love their chewy goodness and the added nutritional aspect of them. They are really simple to keep on hand to add to any number of preparations, especially pilafs. Eating Well magazine has the goods on cooking wheatberries. This is how I do it. Then I package them in one cup increments and freeze them. They break apart very easily once frozen and have a long shelf life. I add them to pasta dishes, pilafs, soups, oatmeal, breads…..the list is endless.
This is one of those dishes that tastes better once the flavors have a chance to get to know each other really well. I mixed it on a Saturday for a Sunday party and the sampling while I prepped didn’t impress me at all. By the time it was served the next day it was a lot better.
And I’m certain it will taste much more appropriate in July. It’s kind of nice to get ahead of myself on summer foods!
Orzo and 7-Grain Salad
1/2# cooked orzo pasta
1 pkg Kashi original 7-Grain rice pilaf
1/2 c. cooked wheatberries
1 yellow pepper, diced
1 4-oz can artichoke hearts, chopped
1/2 c. kalamata olives, chopped
1 3-oz pkg feta cheese
italian style vinaigrette
Salt and pepper
Prepare pilaf according to package directions. Stir all ingredients together in bowl and add about 1/3 c. dressing to coat. Season to taste with salt and pepper. Cover and refrigerate overnight or for several hours. Before serving, stir thoroughly and taste for seasoning. Add more dressing, salt and pepper if needed.
KATE’S NOTES:
I ran out of kalamata olives and to add more of that tangy flavor, I stirred some olive tapenade into the dish. This could easily sub for the olives. Go the extra mile and make your own vinaigrette, or use a good quality bottled option. The possibilities for extra additions to this are endless.
January 16th, 2009
| 5 Comments »
Don’t know gnocchi??- say no-keee or nyawk-eee…. may I suggest taking the time to get to know these delicious, quick and wonderful little pillows of potato dough.
You can make gnocchi from scratch and recipes are all over the Internets to those who choose to undertake the project. I made gnocchi absolutely eons ago, long before anyone even knew what blogging or the internet was, or even, really what gnocchi was. I don’t think they were all that good. I wasn’t all that good then either. So let’s fast forward.
I’ve read over recipe after recipe for handmade gnocchi and quite frankly, I’m not that interested in making them from scratch. It’s one of those labor-intensive recipes that seems easy enough but can be fraught with problems. I love to cook without issues, besides, when the grocer carries a perfectly acceptable brand of shelf-stable gnocchi that tastes wonderful and is a snap to put together for a meal, for what reason would I sweat over a bowl of floured cooked potato if I don’t have to? Right. I’m glad you agree.
The current issue of Eating Well magazine, my most favorite of all the food publications out there, had a very eye-catching recipe for gnocchi and I just had to try it. I knew it wouldn’t appeal to the little carnivore, but quite frankly, this was one of those meals I wanted no matter what. With plenty of leftovers in the fridge, it worked out fine.
Gnocchi is made from cooked potato that is mixed with flour, usually semolina, and sometimes bread crumbs. Gnocchi comes from the word nocchio, loosely translating to ‘knot in the wood’ and has been a traditional Italian offering since the time of the Romans. It is available in all it’s regional forms throughout Italy, although the potato version is considered to be the most recent, ever since the introduction of the potato to Europe in the 16th century.
Behold the gnocchi……from this
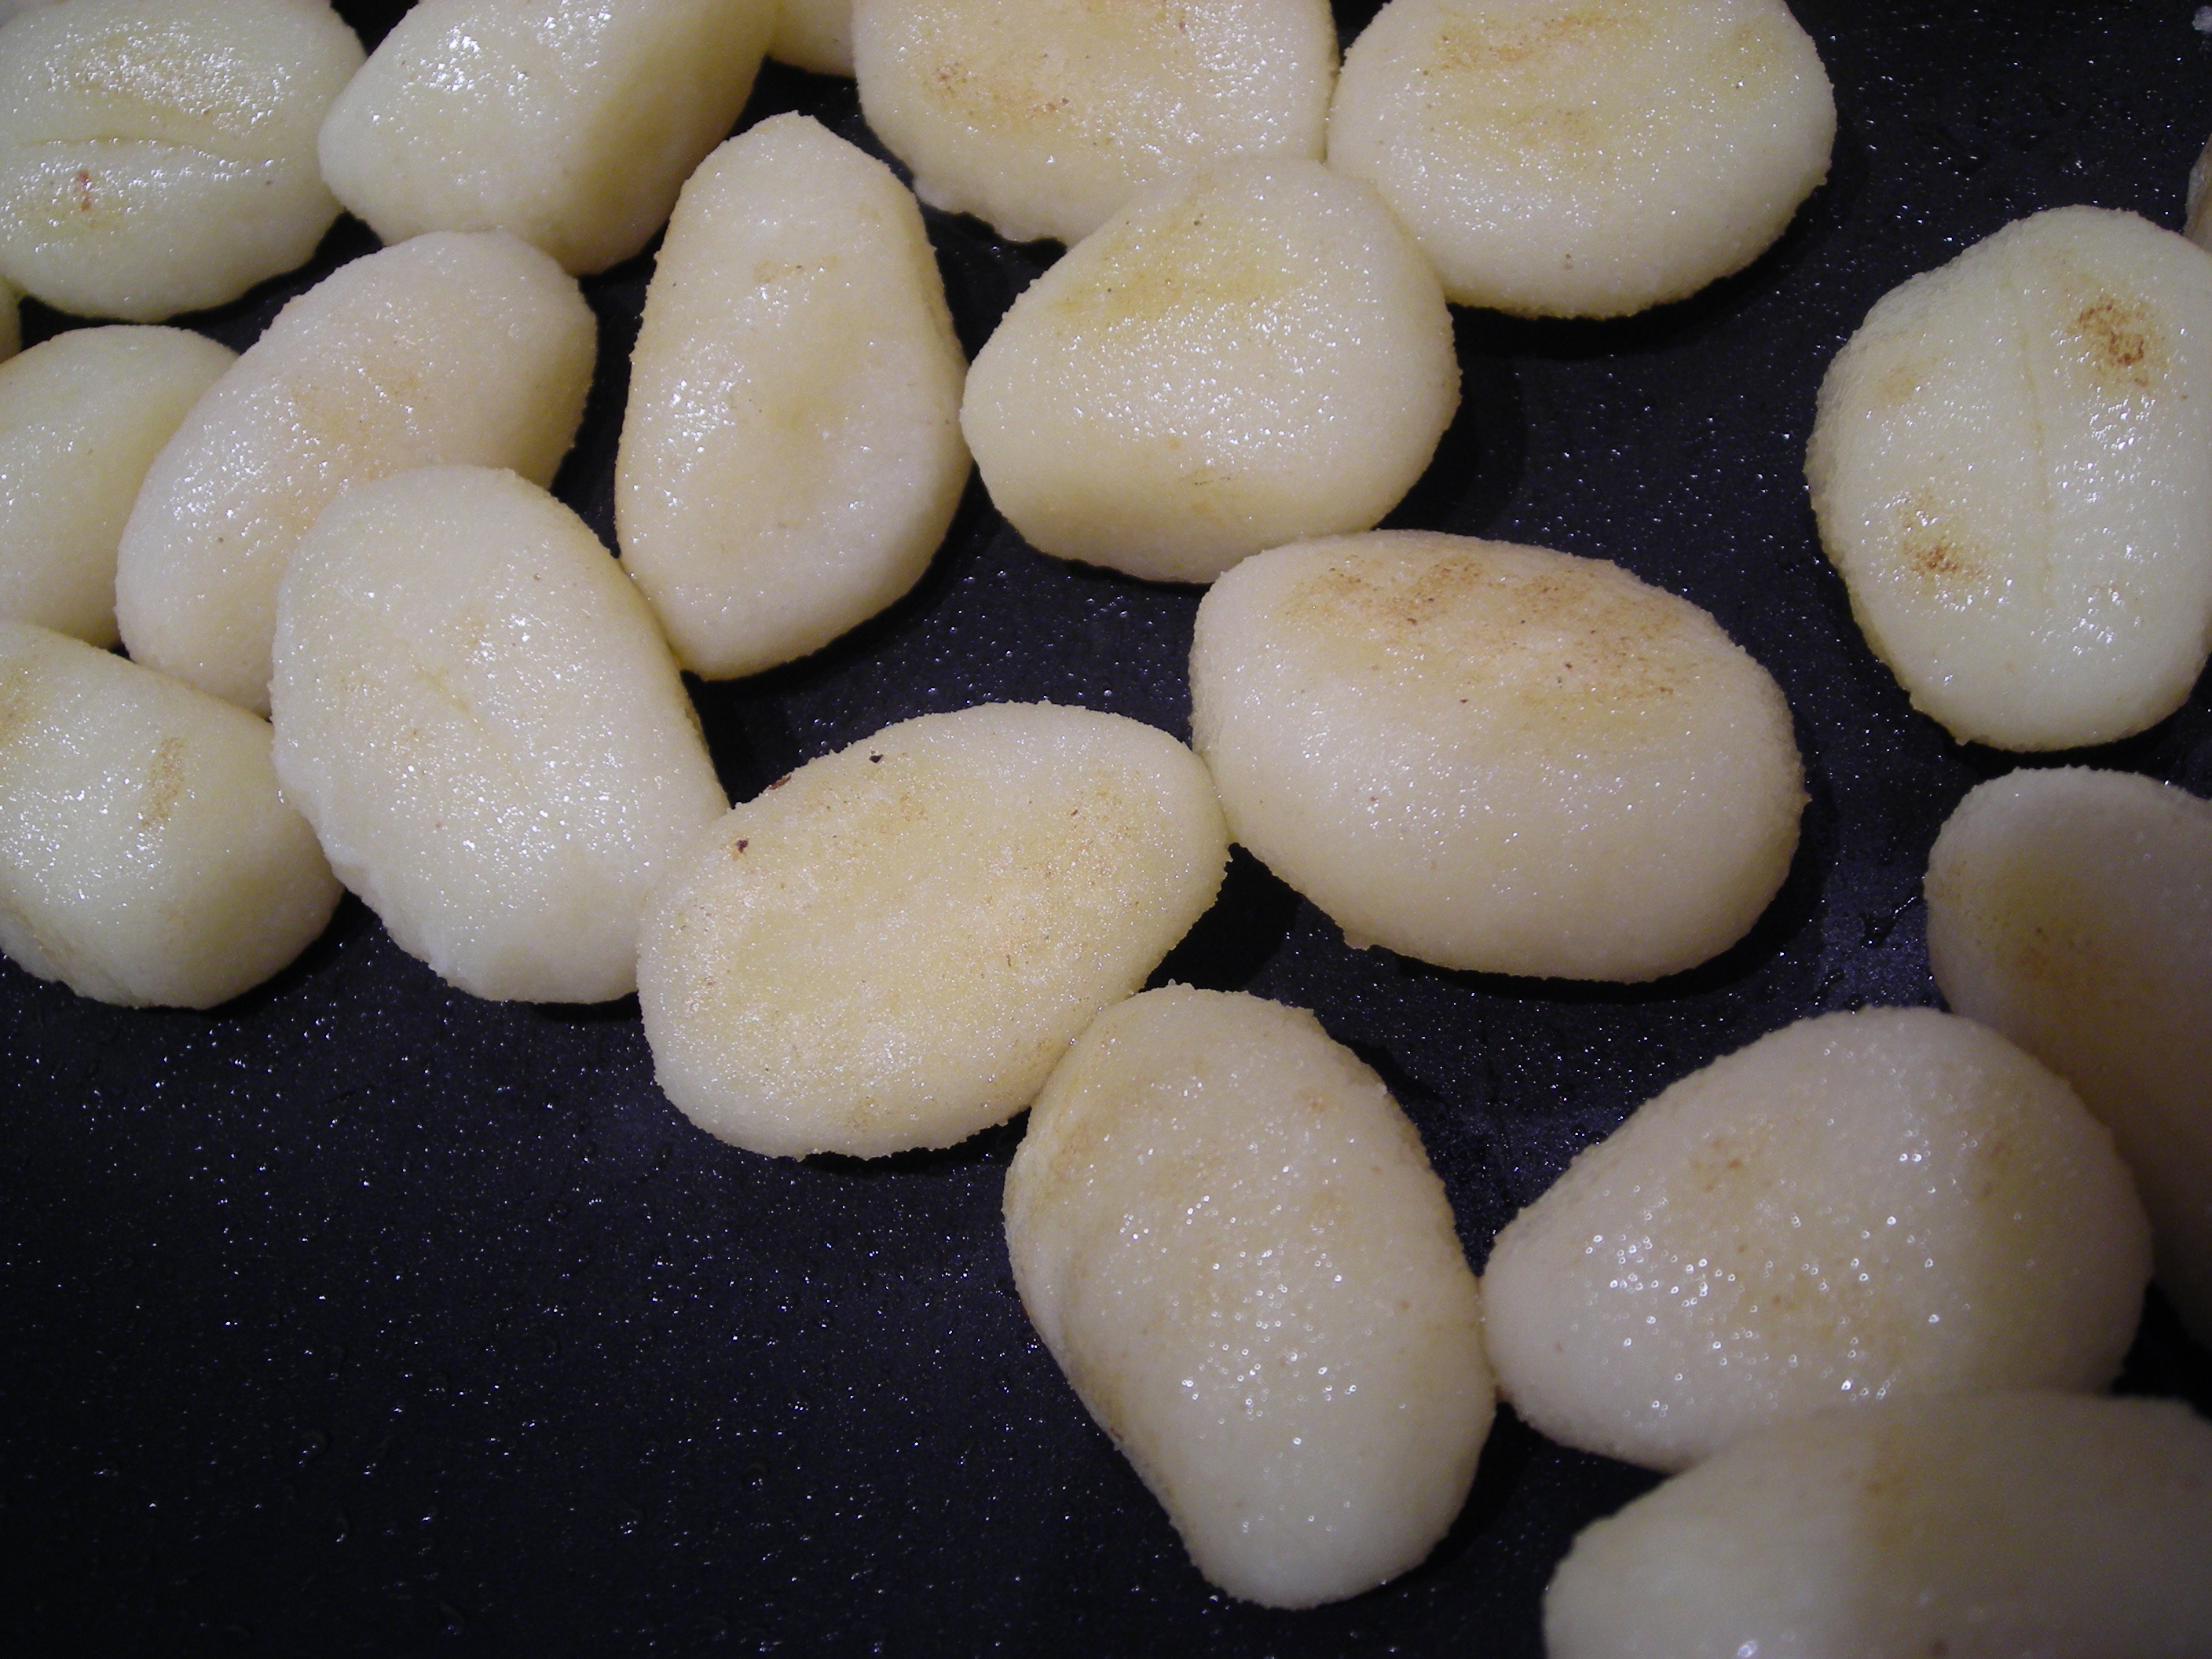
To this…..
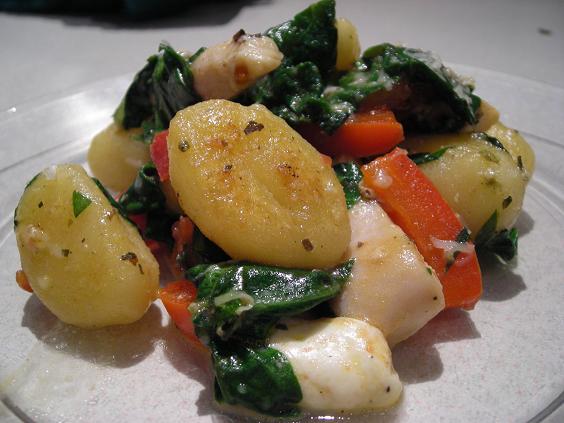
In about 20 minutes.
And it was all I could do not to eat all of it. This is definitely on the repeat list for us. It was amazingly good.
Gnocchi In a Flash
adapted from the February Eating Well magazine
For the orginal recipe, go <HERE>
1 pkg shelf stable gnocchi
2-3 boneless chicken breasts, cut to strips
1 medium red pepper, cored and seeded, cut to strips
1 bunch spinach, washed and de-stemmed* (equal to a 10-oz bag)
1/4 c. canned diced tomato with italian seasonings
1/2 c. fresh mozzarella, cut into small dice
1/3 c. fresh grated parmesan cheese
Fresh basil to garnish
Season chicken breast strips with salt and pepper. Heat oil in 10-inch skillet, add chicken and cook, stirring occasionally, until strips are cooked through, about 5 minutes. Remove to bowl. Add red pepper and cook 3-5 minutes until tender. Add to chicken. Wipe out skillet with paper towel and add about a teaspoon of oil. When hot, add gnocchi and cook about 5 minutes until browned and slightly puffy. Add chicken and pepper to pan, and in bunches, add in spinach, stirring quickly until it’s all wilted. Toss in diced tomato and mozzarella cubes and shave some parmesan over the top. Stir to mix and allow to cook for 3 minutes or so until hot. Serve immediately topped with fresh basil.
KATE’S NOTES:
The chicken is completely optional in this. Truthfully, it was an attempt to get Griffin to try some. He did, but didn’t like it. The original recipe has no meat in it, but it does have white beans. And no red pepper. I think this version is stellar.
The original recipe called for the entire can of diced seasoned tomato. For whatever reason, I just spooned in a few tablespoons and it was perfect. The rest can be frozen in a baggie for another use.
*A word on fresh greens, like the spinach; I always buy greens by the head. I don’t buy the bags of them at all- too expensive and chemically washed, plus they just don’t last as long- and some markets around me carry the ‘live’ lettuce heads with a root ball attached. They are cheap, mixed and wonderful. I clean the greens as soon as I can after getting them home and place them, wrapped in wet paper towels, in a plastic bag in the drawer of the fridge. They keep for up to a week for the more tender leaf varieties like spinach or field greens, and longer for heartier leaves like bok choy or romaine. Remove any wilted leaves if you notice them.
January 8th, 2009
| 6 Comments »
Not long ago, I spoke about taking baby steps towards chickpea appreciation.
I’m getting there. Slowly.
And also slowly, I’m foraging into my cookbook cupboard and removing a few under-appreciated and under-utilized books; books that hold glorious recipes that make me drop my head back on the chair in a sort of agony, due to my tastebuds sorrow over never having tried it, and how delicious does this look anyway?? And why do I have this book with the almost perfect spine and unstained pages? These bitter days of January, bright with sunlight and diamond sparkling snow are perfect for experimentation, for exploring the vast untapped knowledge in these books. Now that I am getting my cross country skis out regularly, it gives me a much needed energy boost and all that drive needs to go somewhere, doesn’t it? Best get cooking, I say.
Well, hello there beautiful…..
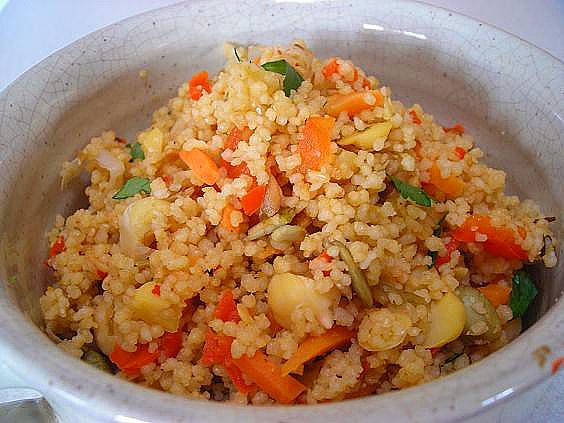
Couscous is about as much fun to say as it is to work with; what other product can you dump in boiling water and forget about, coming back to tender tiny little grains of perfection with zero fuss? What else can be fixed so quickly that you barely have time to chop up a few nuts, or grate some good asiago to mix into it for a stellar side dish? Let’s say couscous….. Cous…..cous.
And this dish turned out gorgeous, if I do say so myself. Brightly colored pepper and carrot nestled up to the rich green of cilantro and with a quick toss of chili garlic sauce, it became just a tiny breath of spice in the mouth, nothing 4-alarm, not a rush of sweat breaking on the brow but just a hint of the heady flavor of chilies. It’s like when you eat something and it evokes a memory that you can’t quite place. Fleeting. Perfect.
Yes, the chickpeas. Right.
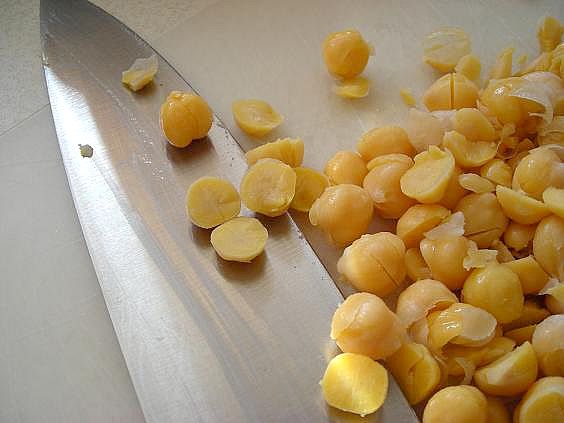
I liked the idea of mixing the chickpeas in the all that couscous goodness, the vegetables and bite of chili sauce, but I thought ‘Hey, y’know, they aren’t the right size!’ because it’s all about symmetry in my world- the towels folded edge to edge, the sheets and comforter hanging to the same length on both sides of the bed- symmetry, similar and even. Besides, when faced with a plate of food, especially something like this, it’s all about the teeny-weeny (it is couscous, after all) and so I blended the pepper and carrot in the food processor to mince them fine, whacked the nuts to pieces and took my chef knife to the chickpeas.
I then turned my kitchen into The Flying Chickpea Circus. Did I think at all that those little guys might be quite sprightly?
Oh, and the skins. Ew. That never occurred to me as I lifted my Wustof. I don’t like those skins. But it was time for chin up, marching forward to the finish line. Think symmetry; ignore the skins.
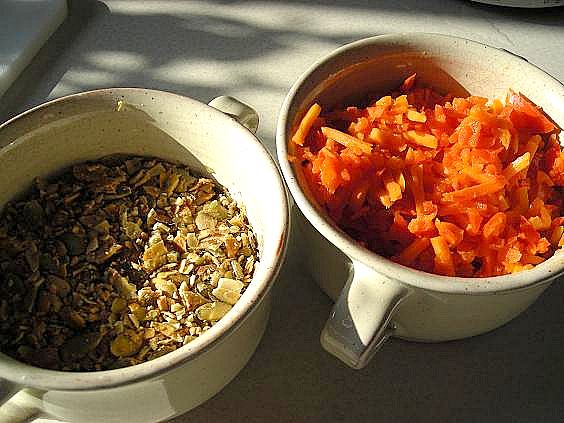
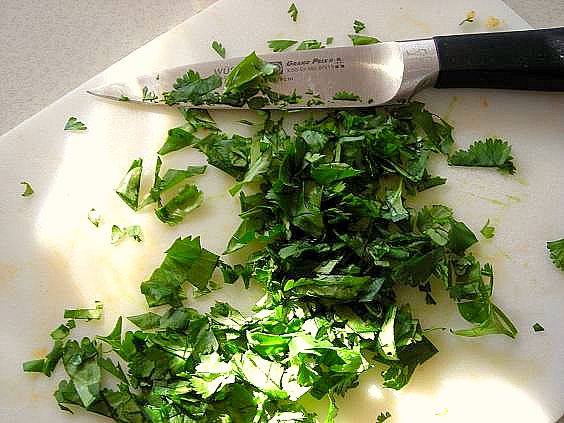
In real time this only took about 15 minutes to pull together, of course, minus the chickpea chasing. I had the vegetables seared and waiting, the cilantro chopped, the nuts fragrant and toasted. A few quick tosses and my fork was present and accounted for, heading to my mouth. So delightful. I think the best part of this dish came later, at dinnertime, as I sat down to a steaming bowl of soup I realized that I wasn’t even that hungry. My small bowl of grains, legumes and vegetables had given me some serious sustenance, a bonus to any recipe.
More chickpea appreciation and a great dish to boot; this works perfectly as a good main course or as a side dish. Increase the chili garlic sauce for your own heat level. Watch for the flying chickpeas.
Spicy Couscous and Chickpeas
The Food and Mood Cookbook by Elizabeth Somer and Jeanette Williams.
1/2 c. chopped pepitas
2 c. chicken broth
2 c. whole wheat couscous
2 t. olive oil
1 medium red bell pepper, stemmed seeded and diced
1 medium carrot, peeled and diced
1 15-oz can chickpeas, rinsed well
1-3 T. chili garlic sauce
Fresh chopped cilantro
Toast pepitas in a hot skillet until fragrant, remove to dish. In same skillet, saute pepper and carrot in oil until soft, about 5 minutes. Set aside. Bring broth to a boil, add couscous and stir, then cover and remove from heat to absorb. In large bowl, combine couscous, chickpeas, pepper, carrot, pepitas and chili garlic sauce. Salt if desired. Top with cilantro.
KATE’S NOTES:
In the original recipe, the nuts listed are slivered almonds, which would be delicious in this. Toast them as well. The original recipe did not call for carrot, but it definitely improves the overall appearance and nutrition of the dish. Whole wheat couscous was my addition and I think the heartier flavor of the grain is a real boon. Thin the chili garlic sauce with a little water to make mixing more uniform. I subbed cilantro for parsley as I like it better.
December 17th, 2008
| 8 Comments »
I’ve often been wary of chickpeas.
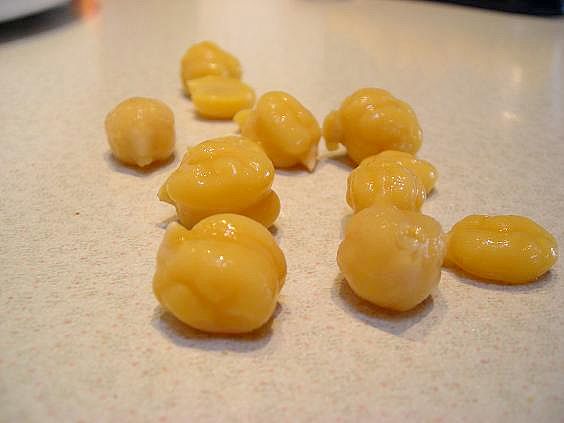
The very name sends images into my head of a certain something that I never consider to be a food, and for some reason, I expect a particular texture from them- something certainly un-legume like- and as a result, have been overly cautious about putting them, whole, into my meals.
But I’m more than willing to eat them after they’ve been ground to a pulp. I adore Hummus, and we are pretty regular consumers of the chickpea/tahini spread, usually adorned with kalamata olives and tangy with plenty of lemon juice and good zest.
This past summer I took a tentative foray into the world of whole chickpeas, or garbanzo beans as they are also called, and made a wonderful grilled eggplant and garbanzo bean salad that earned rave reviews and for me at least, a lot more respect to the round little legume I’ve been avoiding. The texture that had held me back was unsurprising- it was a legume and it tasted like a legume- primarily, it tasted like whatever I had added to my dish to create a flavor base. That’s the beauty of legumes, the empty palette of them, one of the many tabula rasas of the food world; alone they don’t taste like much but add them to a robust recipe that smacks of flavor and they become something else all together.
So back to Hummus. As I said, we love the stuff, and when I made it I always used canned chickpeas for ease and we were perfectly fine with it. Really, really fine with it, in fact we held more concern for the state and freshness of the pita bread we enjoyed as a means of transfer for the spread, often traveling across town to the Middle Eastern deli to buy bags of it that were fragrant with thick rounds, and often still warm or sweating from the days baking. We take our bread seriously in this house, no matter what form it comes in.
But then, I started noticing in my food magazines that recipes for Hummus were appearing regularly, and extolling the virtues of cooking garbanzo beans from scratch for the ultimate flavor. I was intrigued, but it took me a while to get my act together and really do it, and wow, do I wish I had taken this one on quicker. Fresh cooked chickpeas taste nothing like the canned that I have previously used. (Insert a great big ‘Duh’ right about now- it’s OK, I don’t mind) The Hummus that resides in my fridge right now has the nicest, freshest, most garbanzo bean-y flavor I have known; nothing has even remotely come close, not the containers I’ve tried, not the batches I’ve whirred up at home. Nothing. I’m hooked on the good stuff and ain’t looking back. And the most important aspect of it is that cost-wise, making anything from dried beans is really inexpensive.

I cooked the garbanzos in the crockpot over the course of a lazy snowy Sunday afternoon. They took longer than I anticipated, and once finished, I simply drained and rinsed them-or tried to anyway- as the one thing about garbanzo beans I have a wee bit of trouble with finally reared it’s ugly head- the skins. Gads. I don’t know what it is about them but I became obsessed with removing the offensive looking milky little things and just try to do that to a pound of recently cooked chickpeas! It’s an act of futility, but I charged forward and did my darndest. It might be slightly easier if I just didn’t look at them, touch them, think about them or even start the process next time. They can’t possibly be all that bad, can they?
Ugh, now I can totally feel them clinging to my fingers and feel like I need to wash my hands. Rant over!
jump for the rest……
Come in to my kitchen…
September 29th, 2008
| 8 Comments »
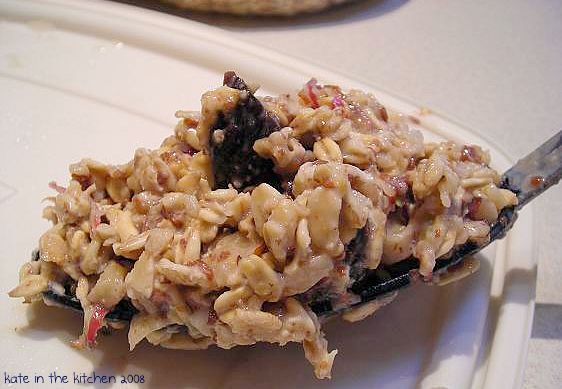
Overnight Apple-Date Muesli
By Robin Asbell, The New Whole Grains Cookbook
1/2 c. slivered almonds
2 medium apples
1 1/2 c. nut milk, or other milk
2 T. maple syrup
1 1/2 c. thick rolled oats
1/4 c. soy protein powder (optional)
1/2 c. pitted dates
Preheat oven to 325 and spread almonds on a baking pan. Bake for 10 minutes or until golden. Let cool.
Get out a large storage tub or bowl with a lid. Quarter the apples and core, then shred right into the bowl, skin and all. Add remaining ingredients, including almonds, and stir well to combine. Cover tightly and place in refrigerator overnight.
In the morning, stir thoroughly. Spoon desired amount into individual bowls and serve cold, or warm in the microwave for up to 2 minutes per bowl.
KATE’S NOTES:
I tried this the first time with the protein powder and decided I didn’t care for it, but that’s just me. I always, always, always add in about 2-3 tablespoons of ground flaxseed to this, regardless. I double it and we enjoy it for several days. It will get softer and a bit less flavorful the longer it sits, but if you’re like us, it rarely lasts that long.
I am not a fan of dates but I. Love. Figs. so I chop those up into it instead. The variations on this, like I said, are infinite. Use raisins, currants, dried cherries, craisins, dried apricots or any type of dried fruit you like in any combination; vary the apple flavor by going tart or sweet; add in a multitude of nuts, use other cereal flakes, like barley. Skip the maple syrup or use an alternative, like raw or maple sugar sprinkled over the top before you eat it. Give it your own fingerprint and I’m sure it will also become a favorite for you.
|


