June 19th, 2011
| 6 Comments »
I made mustard as a Christmas present last year.
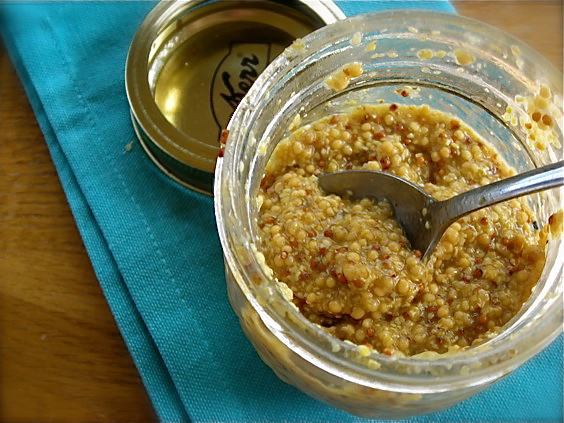
Mustard is one of my most favorite condiments, and it surprises no one more than me because I used to just hate it with a passion. Then as I got older, I managed to learn the delicious aspect of yellow mustard swirled with ketchup to drag your onion rings or french fries through, and I somehow realized that a swipe of yellow mustard and a few spoonfuls of sweet pickle relish were the ONLY way to eat a hot dog. Well, back in the day when I actually did eat hot dogs……
But then something happened. I discovered the delights of mustard, in it’s many forms. There was dijon, there was stone ground, and then we discovered jalapeno mustard. Along came honey mustard, and how wonderful it is warmed up as a dip for thick chunks of Snyders pretzels. There’s brown deli style mustard, chipotle mustard, raspberry mustard and Koop’s Arizona Heat. And where there once was only a small array of mustards on the grocers shelf, there now lies a vast display of mustard in so many flavors that it’s mind boggling to this mustard fiend. At one point, I think we had something like 6 or 7 different mustards in our refrigerator. We like our mustard.
And it’s really super easy to make too, that is, if you have a source for mustard seeds. Our local co-op carries both brown and yellow seeds, and once that was discovered, I had no reason not to whip up a mighty batch of this Roasted Garlic mustard to hand out as Christmas gifts last year. A mighty batch indeed; this made A TON of mustard. I gave away quite a bit, and kept three jars for us.
Now, our last jar stands open in the fridge.
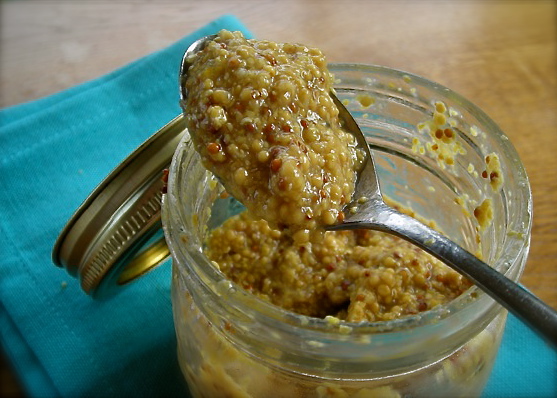
It’s vinegar-y. It’s spicy. It rocks my sandwiches with flavor, it’s tiny little seeds popping in my mouth. It’s killer good on a bratwurst, or spread on ham or salami. I’d happily down a thick sandwich chock full of meat just to swab my bread with this killer condiment. I sent a jar off to the East Coast too, to my blogging friend Kim, also known as The Yummy Mummy and the Queen of #Charcutepalooza, a blogging phenomena that swept through Twitter, urging bloggers to cook their way through Michael Ruhlman’s Charcuterie cookbook. It sparked a revolution and it’s been amazing to watch it unfold. I knew the mustard would come in handy for all that cured porky goodness and I was right. Kim has asked me probably six times to post the recipe and finally, with her last prompt, I gave in. She can be kind of a pain in the ass kind of persistent, that girl.
My last jar……. I should hoard it. If I give in and make another huge batch, I’d have to find homes for all that mustard again. But I think it likely won’t be that hard.
Roasted Garlic Mustard
2-1/4 c. whole yellow mustard seed
3/4 c. whole brown mustard seed
2-1/2 c. apple cider vinegar
1-1/2 c. water
2 whole heads garlic
2 T. olive oil
1/2 c. pure maple syrup
2 T. kosher salt
Combine both mustard seeds, vinegar and water in a large bowl and stir to combine. Cover and let stand at room temperature for a minimum of 8 hours, but I strongly recommend a full 24 hour soak for best flavor. Stir occasionally to mix it all up.
Slice the tops off of the garlic heads and remove most of the papery outer layer, leaving the cloves intact. Line an 8″ pie plate with foil and place garlic on foil, drizzle with the olive oil and fold the foil around the heads. Roast at 400° until very soft, 40-60 minutes. Allow to cool and gently squeeze the cloves from the skin. Place in a bowl and mash slightly.
Add half the mustard seed mixture to the bowl of a food processor. Scrape in half the mashed garlic and process in pulses, adding water by the tablespoon, until it begins to break down and look like grainy mustard. Process to whatever texture you wish, adding water and scraping the bowl as needed. Scrape processed mustard into a large bowl and repeat with remaining seed and roasted garlic, and add to processed mustard. Whisk in maple syrup and salt.
Spoon mustard into clean jars and seal lids tightly. Store in refrigerator. Makes about 8-10 cups.
Recipe from Eating Well magazine
Do you like mustard? What kinds do you like and how do you like to eat it?
June 5th, 2011
| 5 Comments »
I’m always on the look-out for quick and easy meal options, ideas for those nights that the guys take over dinner prep and want some good food to appear without a great amount of fuss. Long winded recipes don’t cut it with them, but these really easy Black Bean Tostadas make for a perfect summer dinner.
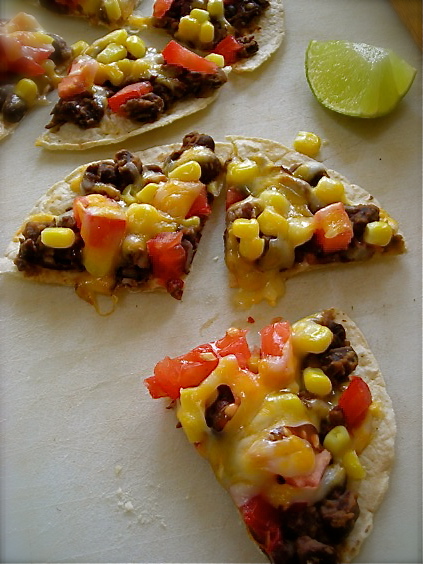
Based on this idea for a Black Bean and Corn Pizza, I took it one step more towards simple and used corn tortillas for the base, making a crispy shell that went from our toaster oven to my plate in about 10 minutes. The most time I spent was opening a can of black beans and shaking them under running water.
If you’ve got a toaster oven you’ve got the means to make this in a snap but are limited to only two at a time. Using a regular oven makes for more crowd appeal. Increase the amount of all ingredients as needed for the number of people you’re serving. I would imagine that adults could easily eat two or three of these. I myself managed to shotgun four without a blink of remorse.
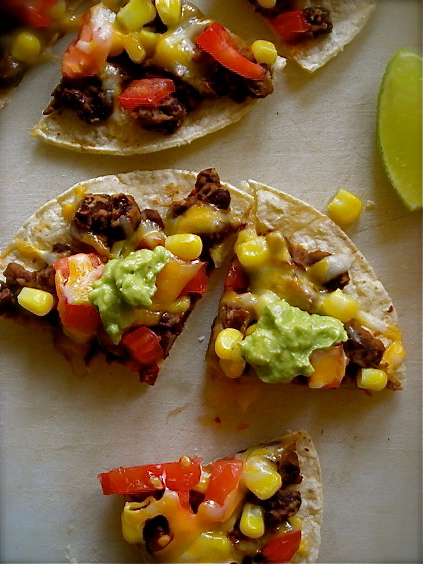
But I was stuffed. Happy. But stuffed. Delicious as a main meal, this would also be perfect for a nice appetizer, and could easily be done on a grill with tantalizingly smoky results. The black beans make for a hearty and filling addition and no one will miss any meat in this. Fresh tomato gave it a summery flavor, and a crumble of queso fresco would be a nice addition just prior to eating them.
Black Bean Tostadas
1 15-oz can black beans, drained and rinsed
2-3 t. chipotle en adobo
1-2 t. each ground cumin and chili powder
1 medium tomato, diced
1 c. frozen corn (no need to thaw)
1 avocado, diced
Corn tortillas
Pepper Jack, or Co-Jack cheese for topping
Lime wedges
Heat oven to 400°.
Place drained black beans in a small saucepan and add 1/3 cup of water, the chipotle en adobo, cumin and chili powder. Stir to combine and heat until simmering. Remove pan and mash beans coarsely with a sturdy wooden spoon. Add more water if needed to make beans spreadable, but not runny. You want them to be thick.
On a baking sheet, arrange corn tortillas and place in oven, turning once until tortillas are slightly firm. Remove pan from oven and carefully spread a few tablespoons of black bean mixture on them, then top with tomato, corn and diced avocado. Sprinkle a little cheese over them and return the pan to the oven. Bake until cheese is melted and tortillas are crispy around the edges, maybe 5 minutes. Squirt fresh lime juice over the tortillas before serving.
NOTE: Instead of using avocado chunks on the tostadas, mash the avocado with a little lime juice, salt and pepper and use either as a topping for the tostada when it comes out of the oven, or spread a thin layer atop the black beans before adding the other toppings and baking them. Either way you use it, it’s delicious.
May 25th, 2011
| 3 Comments »
No, not Impatiens, like the potted flower on everyone’s doorstep. This is true impatience, the feeling brought on by delayed spring time, blooms that just don’t occur, endless gray skies and parades of devastating storms and the fleeting thought that I can’t recall what my warm weather clothes are like anymore. It’s almost Memorial Day. We briefly met 70 degrees this Spring, only to quickly plunge back to the 60’s, the 50’s and a few shivering days where 40’s were all the atmosphere could muster. Who’s hogging all the 80-degree days? Minnesota needs you to share. Now.
Despite the cool weather, the lettuce and radish seeds I planted are flourishing and I’m dreaming of amazing salads. The annuals in the garden are coming along nicely, albeit several weeks behind schedule. And with the drenching rains and lack of sun, the emerald greens around us are amazing. Simply amazing. While Spring hasn’t exactly been the most glorious in terms of the temperatures and sunshine, it’s still showing me it’s fragrance and the visions that we wait all Winter to appreciate.
I missed the very brief window of opportunity to love up the crabapple tree in our front yard, as it hit full bloom on a Thursday, only to be wiped clean of it’s lush petals through a series of weekend storms that unleashed torrents of rain on us, and some terrifying sky.
 
And a subsequent walk through the neighborhood revealed glorious pink petal carpets from the stripped crabapple blooms.

In my garden, the Creeping Phlox filled out it’s little garden bed beautifully.

The Adjuga along the front garden path burst into a rich and full display, basking in a rare sunny day while hiding among the new Hosta blooms and the fallen pink petals.
  
Adjuga is a wonderful ground cover, and it grows on a flagstone path right along the front of our house. It’s mostly for shade, but can handle a little sun and it forms a nice thick carpet. In the Spring, it sends up flower stalks about 6 inches high that have these tiny little blue flowers on them. It’s one of the most favorite, carefree and reliable plants in my yard.
What else has May brought?
Oh yeah. An adorable cat of course, with nary a care in the world it seems.

A gorgeous new stove!!!
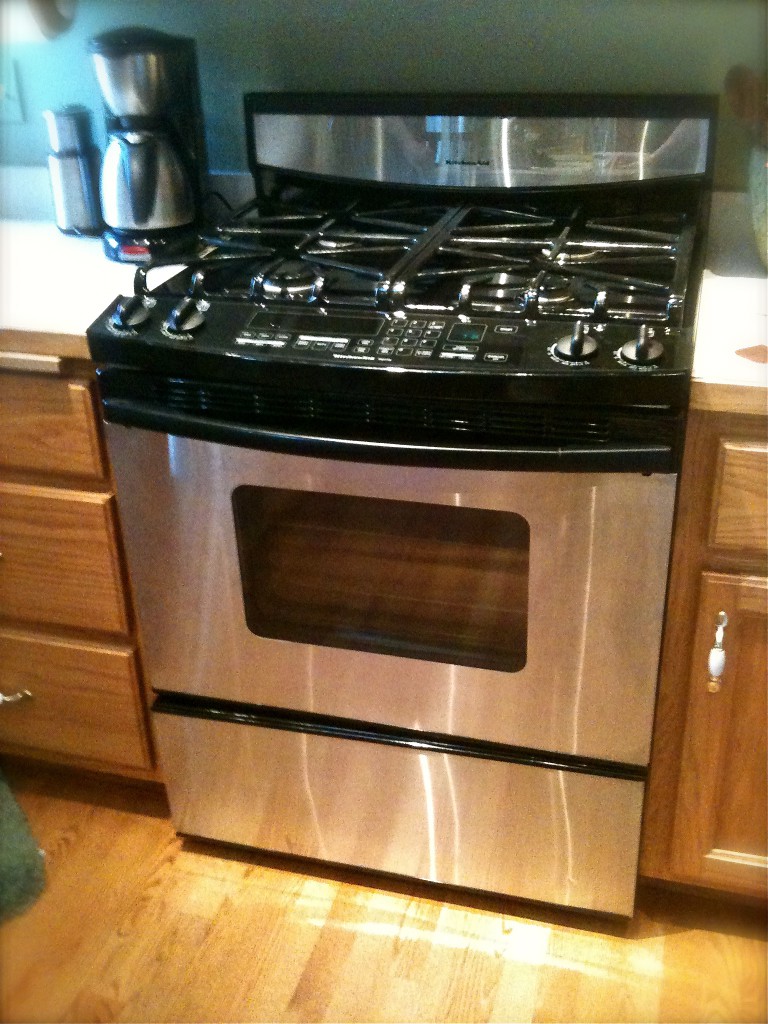
I’m still in awe over this acquisition. One of my food blogging cohorts is remodeling her kitchen and through a few Twitter exchanges, she offered to sell me her old stove for $100 and a case of beer for the guy who drove it from NE Minneapolis out to the far Northern suburbs for us. The door hinges were broken and it needed a power cleaning, but for $150 in parts and a bit of elbow grease, we landed a stove that retails for $2,200.00. I kid you not. It’s like going from driving a Yugo to being handed a Ferrari with a full tank of gas. We seriously lucked out and we’ve taken to calling it our ‘Grown Up’ stove, something a serious food lover should have in her kitchen.
There were a few lovely nights on beautiful restaurant patios with my beautiful laughing food-loving friends that only solidifies how much I am falling in love with them…..

This is #GirlsBigNight, hanging outside Cooper West End with (L–>R) Dania, (me) Jen and Virginia. Yes, we posed that way on purpose.

Enjoying the tree-shaded patio at Heidi’s 2.0 in Minneapolis with the #MNFoodBloggers, Shaina and I after a few amazing cocktails. Everyone really, was as happy as we look. It was just one of those all around perfect nights.
On a rare nice night following a hectic afternoon of rain and thunder, it’s nice to find the calm after the storm.

And then???
Roasted Chickpeas. Because this is a food blog, after all. For the most part anyway.
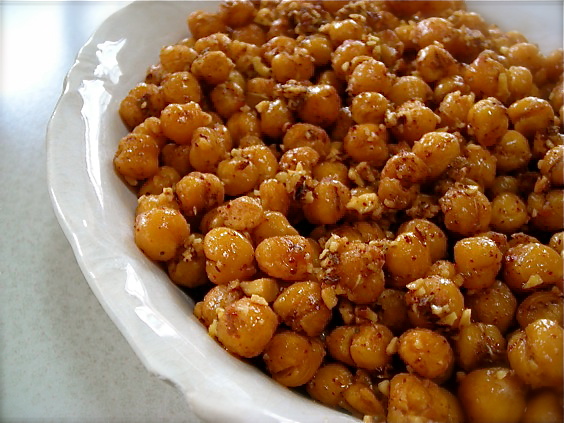
I’m super late to the whole ‘roast a can of chickpeas for the ultimate snack’ craze. Seriously late. And I’m ok with that. I don’t jump on too many bandwagons as I always seem to miss, fall flat on my face and then have to slink away in silence, tail between my legs. I like to watch these things go by, silently waiting to see if it endures, if it sticks around long enough to not be called a fad, a trend or the next big thing. These little golden nuggets of crunchy-ness are a perfect snack for the improved eating plan going on around here. I think I could even get my Teen to try a few handfuls. They’re like Corn Nuts, but less processed, less packaged without all the strange things. I feel that these will make a regular appearance in my kitchen for a long time to come.
Roasted Chickpeas
Preheat the oven to 400°. Drain two 15-oz cans of chickpeas and rinse well. Shake off excess water and pour chickpeas on a baking sheet lined with paper towel. Use another paper towel to blot chickpeas dry, then slip the off the bottom towel. You want them to be absolutely bone dry before roasting them. At this point, if the chickpea skins bug you in the same obsessive way they bug me, you can remove them. If not, then slip the pan in the oven and let roast for about 10 minutes. Shake the pan to loosen the chickpeas, then continue to bake, shaking the pan on occasion, until they are browned and crisp, with a rich nutty scent. Be careful not to allow them to burn. Depending on your oven, this should take 30-40 minutes. Watch them carefully.
Take them out of the oven and toss them with a little oil and any kind of seasoning you like. For this batch, I used a small amount of olive oil, the juice of half a lime and about 2-3 teaspoons each of chili powder and cumin, plus some sea salt. Toss to coat and serve warm or at room temperature.
For more flavoring options, see this post.
http://www.thekitchn.com/thekitchn/tips-techniques/15-more-ways-to-flavor-roasted-chikpeas-106112
May 16th, 2011
| 3 Comments »
If you recall, Whole Foods invited me to participate in a 28-day challenge based on the Engine 2 eating plan (I hate the word ‘diet’ and won’t use it) that calls for a 100% plant based way of food consumption. It goes so far as to exclude fats and salt as well. My take on it was to kick out the meat. We eat more than I want mostly because my teenager really loves meat, but Mike and I were getting tired of it. And it’s the costliest item in our food budget. As well as going meat-free, I’ve cut out my beloved butter, the only dairy I consume and I’ve cut down on oil usage and tried to avoid salt.
So… two weeks in to this eating plan, and what’s been happening?
#1- The teenager is a bit miffed. ‘What do we eat!?’ he says with emphatic resignation. But the meat free meals that leap from the stove top have him devouring his portion with gusto. I’ve given in to his need for meat on occasion, utilizing small amounts of chicken for him, and having a meal with shrimp. But this boy is not suffering. No no…..
#2- My pants fit better. And I can get myself in to two pairs of jeans that I haven’t been able to wear since last summer. Some of the belly fat is disappearing. I think my face looks thinner. I have a bit of a way to go with reaching what I think is an ideal weight for me, but this eating plan wasn’t about losing weight at all. I needed maybe a 10 pound drop at most and when I started the plan I had already lost about 5 of those pounds. For me, this is about eating more healthy foods and feeling better.
#3- This is a big one. Several months ago I started experiencing symptoms of menopause, mostly in the way of hot flashes. They had become really intense, and a constant in my day. They’d cover my neck and shoulders, resulting often in getting so overheated that the underside of my hair would become very damp. And the worse ones came at night, radiating through my pelvis and hips and down my legs, causing me to kick off the blankets to cool down. I’d fall asleep, then waken later absolutely freezing. This night cycle went on and on, and it wasn’t helping my sleep patterns at all. But since giving up meat consumption, the hot flashes have fallen off dramatically, the lower body ones disappeared completely and the consistency has been reduced to only a few light ones each day, mostly very manageable. No more damp hair!! And this happened within days of giving up meat. It’s been completely unexpected but such an amazing finding. If I’d known giving up meat would help this, I would have done it ages ago. Another physical aspect that has fully disappeared when meat left my meals is any kind of stomach upset. I’ve been blissfully comfortable for the past two weeks with no indigestion, no upset or gas and no bloating.
#4- I miss my popcorn fix, but that’s about the only food I really want to be eating that I’m not. I simply can’t eat popcorn without melted butter and salt, and at least once a week I would pop a big bowl of it and crunch crunch crunch my way through, sighing in contentment, slurping buttery salty fingers and smiling through eyes half closed in a popcorn induced ecstasy. I think I love the sensation of it, the textural pleasure of eating something so noisy, and so flavorful. I don’t really miss meat, nor crave it. See #3. But I really miss my popcorn.
What this plan is doing for me that I do love is really giving me a lot more reasons to look at the foods I eat and make the best possible choices. I was out for an evening with some friends and had to take a good hard look at the menu options for something that fit this challenge; thankfully I had three choices to pick from, all of them acceptable. Eating out may be more challenging, and thankfully we don’t do it that often. But we’ve also been eating pretty mindfully prior to starting this plan. This gives us a reason to take it one, or ten steps further.
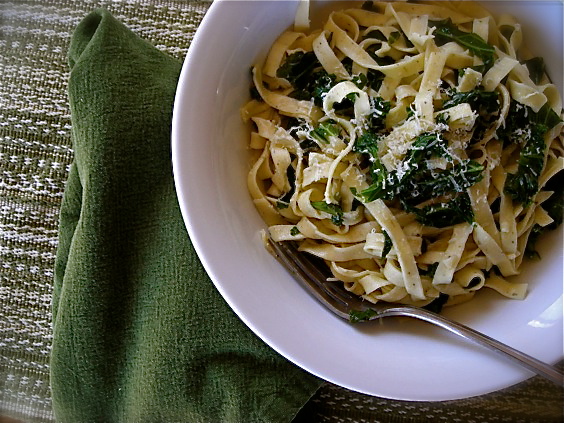
This pasta dish is halfway acceptable for the eating plan, in that it’s loaded with braised kale. The fettuccine isn’t exactly E2 friendly, but it was what I wanted to eat after an intense afternoon of gardening. Sometimes you’ve just got to allow for a dish that nourishes the soul as well as it fills the belly. I really struggle with any aspect of eating that deprives us of what we really want. If I really want popcorn, I’m going to make it. If I want a juicy bratwurst, I will grill one so that the skin splits and it sizzles in delight, pressed between the edges of a perfect bakery roll and slathered with the best mustard in my fridge.
But at the same time, what I put in this body of mine, the only one I’ve got, really does make a difference in how I feel, the energy I have and the way I get through my day. I’ve felt it, noticing when I don’t eat healthy foods and had to force myself through the side effects of poor eating; the sluggishness, the lack of energy, the belly aches or heartburn. I’m not harming myself by consuming a grilled piece of chicken, or some perfectly cooked shrimp. And I’ve found that by really paying attention to making 90% of the foods I eat be healthy, plant based foods, it really has made a huge difference in how I feel. Should I go to 100%? Should I give up the oils, the salt? Should I? For me, this alternative plan makes sense. I like the results, the way it makes me feel and the relative ease on my pocketbook. And if in just two weeks it’s got me thinking of even more ways to have healthier options in our meals then I feel it’s achieved something great.
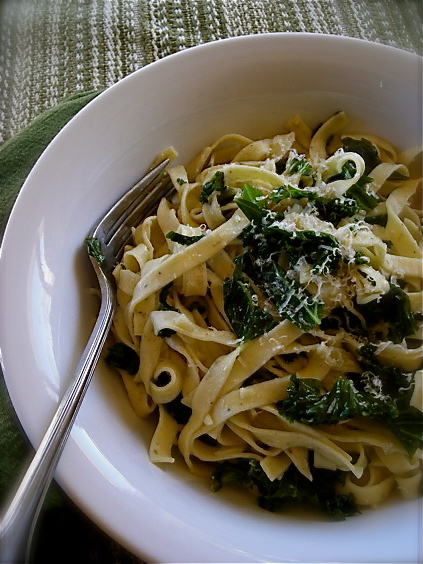
Like I said about this dish, it fit what I really wanted to be eating, when the hunger became so great from all the activity that I’d done I found myself with shaky hands and that trembly feeling of a deeply low blood sugar. I needed about 20 minutes to gently cook the kale until it was silky soft and lush, and only a few minutes to cook the fresh dried fettuccine I had on hand. A toss together in the deep skillet with a few dashes of lemon juice and some rosemary Manchego cheese I had on hand (totally not E2 friendly, but ah well…..) and I sat down with a deep bowl, a thick heavy fork and a content sigh. It had been a long day, but a full one, one with accomplishments and a lot of good spring sunshine. Eating a terrific and healthy meal was like placing a fancy top hat on the end of this day, and swinging off with a jaunty step.
Braised Kale with Spaghetti
1 pound lacinato kale (about 2 bunches), large center ribs and stems removed, cut crosswise into 1/2-inch slices
3 tablespoons olive oil, divided
1 medium onion, finely chopped (about 1 1/2 cups)
8 large garlic cloves, thinly sliced
1/2 pound spaghetti
2 teaspoons fresh lemon juice
Finely grated Parmesan cheese
Rinse kale. Drain; transfer to bowl with some water still clinging.
Heat 2 tablespoons olive oil in heavy large pot over medium heat. Add chopped onion and cook until soft and translucent, stirring occasionally, about 6 minutes. Add sliced garlic and sprinkle with salt; cook until onion is golden brown, stirring occasionally, about 5 minutes. Add kale and remaining 1 tablespoon olive oil and toss until wilted, about 3 minutes. Cover pot and reduce heat to medium-low. Continue cooking until kale is very tender, stirring occasionally and adding water by teaspoonfuls if dry, about 20 minutes.
Meanwhile, cook spaghetti in medium pot of boiling salted water until tender but still firm to bite, stirring occasionally. Drain, reserving 1/4 cup cooking liquid. Add cooked spaghetti to kale mixture in pot. Add lemon juice and 2 tablespoons reserved cooking liquid; toss to combine, adding more liquid by tablespoonfuls if dry. Sprinkle spaghetti with grated Parmesan cheese and serve.
Original recipe from Orangette.
KATE’S NOTES: I made this with regular curly leaf kale, and used a 16-oz bag of gourmet basil fettuccine in place of the spaghetti. I did not use onion, and only used 3 cloves of garlic; it was plenty! Do make sure you give the kale a nice slow simmer. The result is so tender and delicious that it’s positively addicting, and well it should be. This recipe is what turned Molly’s mind away from hating kale and I’m pretty sure if you let it, it will do the same for you.
May 13th, 2011
| 2 Comments »
Summer tomato season is heading our way. I don’t have a huge garden plot to grow produce in, but I always grow tomatoes as there is nothing finer on this earth than a homegrown organic tomato. Come August, we’re usually over-run with them, and are eating them in everything. And really, there’s nothing better than a fruit so delicious that you can slice it, grate a bit of fresh black pepper on it and eat it with a fork.
This year, we’ll be utilizing a lot more tomatoes in this delicious and simple Shrimp Panzanella Salad I’ve discovered
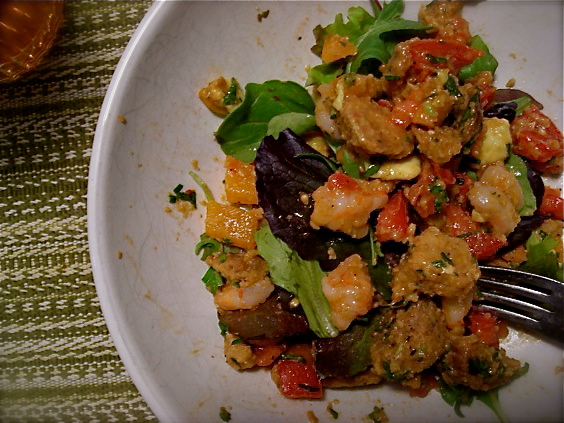
As luck would have it the night I made this, a gorgeous sunny day had turned dark and cloudy, with storms brewing, so this photo is nowhere near as bright and summery as this salad’s true appeal. Fresh chopped tomato and peppers, doused with a liberal amount of oil, a splash of good vinegar and a veritable shower of fresh parsley, basil and thyme and the taste that springs from your fork is all about Summer! Summer! Summer! Even when Spring! struggles to fully arrive here in Minnesota.
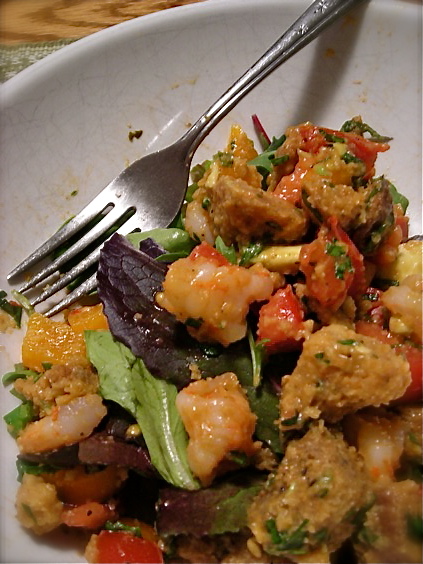
So imagine it yourself; the taste of a ripe juicy tomato, the crunch of seasoned and browned cubes of hearty bread, toasted to a firm crunch, the snap of bell pepper and the heady flavor of fresh herbs. Mix in pieces of perfectly cooked shrimp, doused with a bit of chili garlic sauce for spice, served over fresh spring greens and you’ve got a dinner salad with substance, not to mention a wild ride of textures, flavors and colors. I could have admired it in my bowl if I wasn’t so hungry.
And simple? This here’s an easy, quick dinner to have ready. With a few shortcuts like artisan croutons and cooked shrimp, you can get this together in about 15 minutes, yet it’s hearty enough to fill you up, but not leave you sluggish. It may even give you an extra burst of energy to head out after dinner for a gorgeous sunset walk.
Shrimp Panzanella Salad
4 c. multi-grain bread cubes, preferably day old. Or equivalent of pre-made croutons.
1# coarsely chopped cooked shrimp
4 large ripe but firm tomatoes
2 bell peppers, any color, chopped
3/4 c. fresh chopped parsley
1/4 c. fresh chopped basil
3 T. fresh thyme
1/4 c. pitted kalamata olives, plus 2-3 T. brine
3 T. red wine vinegar
1-1/2 t. fresh chopped chives
Spring greens of choice
Fresh ground black pepper and sea salt
If using fresh bread cubes, preheat oven to 350°. Place bread cubes in a large bowl and drizzle with 2-4 T. olive oil. Toss to coat and spread on a baking sheet. Bake the cubes, stirring every 5 minutes or so until they’re very crisp and dried, about 15-20 minutes. Watch them carefully. Allow them to cool completely before assembling the salad.
Combine the shrimp, tomato, bell pepper, fresh herbs, olives, brine and vinegar in a large bowl. Drizzle with 3-4 T. olive oil and toss to coat. Add cooled bread cubes, toss to combine. Season to taste with salt and pepper. Allow to sit for 15 minutes to mix flavors.
Serve over spring greens.
Adapted from Eating Well magazine.
May 1st, 2011
| 7 Comments »
We’re trying so hard to go full steam ahead in to Spring. But around here, it seems like Mother Nature just wants to tease us, here with a lovely day then a blast of cold and rain, then yet another lovely day, then once again cold, and more rain. Lakes, streams, ponds, rivers and especially the people are overflowing their limits. We’ve had enough. Bring us the sunshine please, and for more than just one day.
So here we are, the first day of May. Our expected high likely won’t even reach 50 degrees. It feels weird to offer you a delicious crispy flatbread recipe, topped with a rich verdant pesto and some sassy caramelized onions because instinct is telling me to braise something hearty and warm. But it’s May and I refuse to get out my cast iron dutch oven anymore. In fact, I sure hope it got cleaned well the last time I used it because I’m desperately trying not to get reacquainted with it until October.
So, let’s move on to this, shall we?
 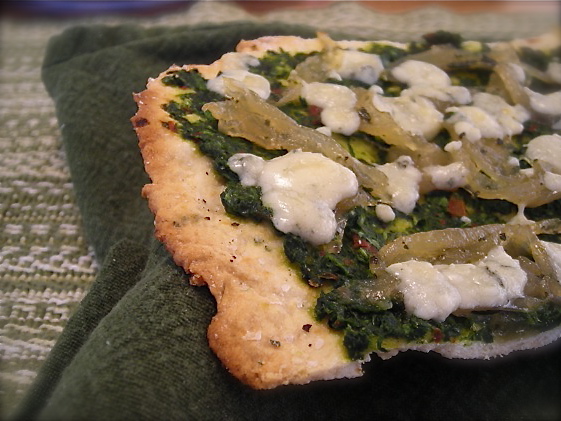
This was actually a recipe covered on this site back in November of 2009. For most of the year previous to that, I’d made this simple and delicious herb flatbread about a half dozen times for various meals, or really, even to just snap a piece off here and there to snack on. It’s ridiculously easy, it tastes amazing and it works for so many meal options, especially something very simple like being topped with fresh pesto, a smattering of caramelized Vidalia onions and several dollops of goat cheese. Run that under a broiler for a few minutes and the simplest meal is yours, delicious and light, packing a flavorful Spring-like medley for your mouth.
Every day I’m at work I pass a display of enormous Vidalia onions. It’s set up right by the entrance for easy access, and every day I see them I think about this flatbread, those golden burnished onions and the deep dark green of this pesto. I’ve experimented with lots of greens for pesto, and two of my most favorite ones are beet greens or spinach. Beet greens make the most earthy, dark and appealing pesto, and spinach offers a lighter, fresher touch. When fresh spinach is available at the Farmers Markets by the bucketful, I will buy several loads of it and make pesto, freezing it for future use.
I’ve done large batches of caramelized onions, slicing up to four of them at a time and slowly cooking them down to a glittering golden mass. They’ll keep in the fridge for up to a week, and you can freeze them too. The pesto freezes beautifully as well, or simply use your favorite commercial brand to make it even easier. A batch of this flatbread comes together in no time, so you can get out to find the sunshine.
Well, whenever it comes back, that is.
Herb Flatbread
1 3/4 c. unbleached flour
1 t. baking powder
1/2 t. salt
1-2 T. fresh herb of choice
1/2 c. water
1/3 c. oil
Heat oven to 450° with a pizza stone on middle rack. Combine dry ingredients and herbs. Make well in center and pour in oil and water. Stir with spoon until a soft dough forms. Turn out onto parchment paper and knead about 5-6 times to bring dough together. Can be divided into 2-3 small balls and rolled flat, or rolled out as one large circle. Drizzle olive oil over top, sprinkle with sea salt and more herb and transfer, parchment and all to heated stone. Bake until browned in spots and fragrant- time will depend on how thin dough is rolled. Remove from oven and cool (don’t cool on stone- it will continue to bake). Slice with pizza cutter and enjoy.
Recipe from Gourmet magazine
Spinach Pesto
4 c. washed spinach leaves, stemmed
1/3 c. olive oil
3 T. toasted pine nuts
1 clove fresh garlic, chopped
Place all ingredients in a food processor and process until smooth, scraping down sides as needed. This pesto can be frozen for quite some time with only minimal loss of flavor. Do not add cheese to pesto if planning to freeze, otherwise, add to taste your preferred hard cheese.
KATE’S NOTES:
Pine nuts are ungodly expensive right now. I love subbing cashews in pesto for the meaty flavor, and have dabbled with the idea of using almonds too, as they’re my favorite nut. And instead of using traditional parmesan in my pesto, I love the addition of Manchego or Trugole, which is really similar to Asiago, only creamier and with a milder taste.
April 25th, 2011
| 4 Comments »
Last Spring at this time, our perennial garden was full of glorious color. The tulips were opened….

The Creeping Phlox was a lovely carpet of purple…….

There were Johnny Jump Ups leaping up all around the garden beds.
 
And I had managed to keep the Prairie Smoke from being devoured by hungry critters.

Which, unfortunately, I wasn’t able to do this year. Somebunny devoured all the pink buds and leafy greens on these native plants. Ah well…..
We’re a lot further behind this year on the revival of the earth, it’s flowers and new grass. It’s almost May and the Star Magnolia bush, my harbinger of Spring, has yet to open even one of it’s gorgeous and fragrant flowers, although with current warm temps and sun, it’s reaching it’s fat buds to the sky and starting to come alive. This is possibly the latest in the year that it’s started it’s bloom, according to the garden journal I’ve kept since 2006. I love recording the rhythm of the seasons, the sightings of birds in the yard, when the migrations start and the seasonal visitors like Hummingbirds and Orioles return, the first (and last) snowfall, the last ice-out on the area lakes, the foxes, possums and creatures that roam the night time. It’s a wonderful way to keep track of the ebb and flow of the life outside our windows.
And everyone is impatient for Spring, for warm weather, for shedding the pants, shoes and sleeves to bare their skin to the sun. For me, more this year than any I’ve been really, really eager to see the bounty of the season begin. I’m craving all forms of green; vegetables, tender baby lettuces, spring spinach, asparagus….. you name it. It’s like I can hear my body complaining loudly about the lack of chlorophyll. Even my Teen said that he was craving a salad. So when Mike pulled some items together for dinner recently, he brought home a large amount of lettuces from the store. Since Farmers Market time is still a few weeks away, these greens will have to do. We washed them, and consumed large bowls of salad with our burgers and roasted potatoes. It was the first real meal I’d eaten all week due to my sickness. And it tasted glorious.
Just prior to getting ill, I came across kale at the grocers for $.99 a bunch. I haven’t been that adventurous with kale much, although for the life of me I can’t figure out why. I bought a large, deeply green bunch and it promptly languished in my crisper drawer due to the toxic onslaught I endured. A small handful went into a smoothie I tried to drink, the rest just sat. And kale doesn’t mind sitting too much, as it’s quite hearty. When I finally pulled it out, it looked no worse for the week it spent in my fridge, and it happily blended with scrambled eggs to make an awesome breakfast sandwich, then later, with quinoa and toasted pecans for this nutritiously rich and flavorful salad.
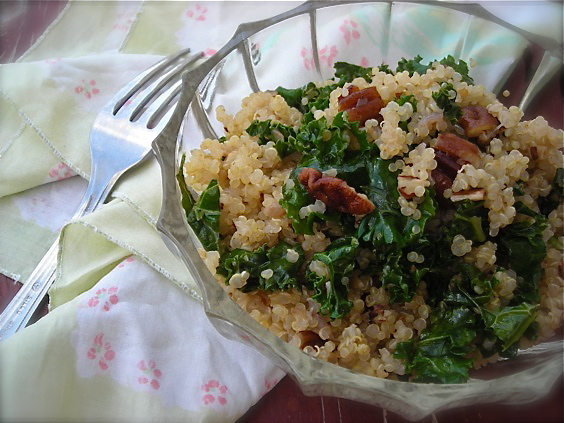
With finally climbing out of the ick and funk that settled on me last week, I really was feeling the need for some healthy options to start restoring my immune system and begin cleansing my body of the after-affects of a sinus/respiratory infection, especially the medications I took. What a perfect recipe for that, and so simple too. Cook quinoa, saute your kale with shallot and garlic, and toss it all together with a little salt and pepper. Add in toasted pecans, or pine nuts or almonds and get out your fork. There just doesn’t need to be anything more complicated than that.
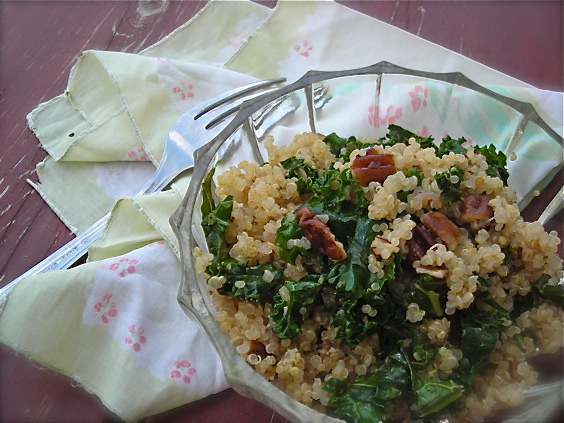
Add in the weathered redwood stairs to our patio, and a cat languishing on the sunlit bricks, it made the small bowl I consumed taste a little bit like Spring. It was just what I was craving, for both body and mind.
Quinoa with Kale and Toasted Pecans
1 c. quinoa, rinsed and shaken well
4 c. loosely packed kale, chopped
1 small shallot, minced
2 cloves garlic, minced
1/2 c. pecans, or nut of choice, lightly toasted
Start by cooking your quinoa. It can sit in the pan for quite some time after it’s done. Heat 1-3/4 c. water or broth of choice on the stove. Add half a teaspoon of sea salt and a thin drizzle of olive oil. When the water boils rapidly, add the rinsed quinoa, stir quickly and reduce the heat, allowing the quinoa to simmer gently. Cover the pan and let cook for 15 minutes, or until the water is mostly absorbed. Keep covered and remove from heat. Allow to stand for at least 10 minutes.
In a large deep skillet (with a cover), saute the shallot and garlic in olive oil until soft and translucent. Add in the kale and toss to coat. Stir and toss the kale until it’s a deep emerald green and starting to look a bit shiny. Add a half cup water to the pan, cover it and reduce the heat to a bare simmer. Steam the kale, stirring occasionally, until it’s slightly wilted but still has some toothy bite, maybe 10 minutes or so.
Add the quinoa to the skillet with the kale and toss until uniform. Taste and season with more sea salt and fresh ground black pepper. Add in the toasted nuts and combine. Can be eaten warm, room temperature or chilled. Reheat gently in the microwave.
April 4th, 2011
| 10 Comments »
I recently started working again. Just part-time, but for good pay and doing something I love, and really, that’s all anyone needs, isn’t it?
And I get to think about lunch too, bringing something with me when I work to help spur me through the day, give me a good dose of energy, keep me full but not stuffed with a strong healthy edge to it. Enter the Spicy Tuna Wrap.
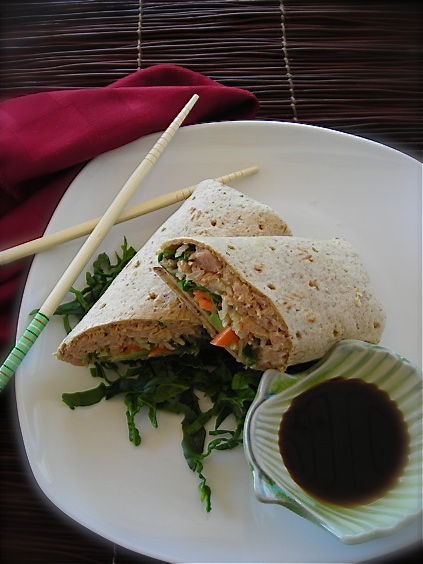
I love lunch time. I’m not sure where this enamored state over the noon meal ever came from, but as long as I can remember, lunch has been my favorite meal. Maybe it’s the lunchtimes of grade school, where we clustered together, unwrapping our peanut butter sandwiches from brown paper bags, eagerly scanning the contents of our friends lunch sacks to see what treats they got each day. Maybe it was the excited chatter, the rustle of wax paper, the moment the last bites disappeared when we could all run outside for recess, for jump rope, Foursquare, tag and the incessant chatter that we’d bottled up inside us all morning long.
Lunch at home these past few months was a way to utilize anything from the refrigerator, crafting something unusual from the norm, making up a series of small plates to satisfy my hunger, re-purposing an original into a one-of-a-kind. It didn’t always matter if I made my lunch last through the afternoon, keeping hunger at bay until dinnertime, but now that I’m working and not always able to stop for a snack to re-energize, my lunches need to satisfy, and keep me full until I get home.
This Spicy Tuna Wrap sure does the trick. Based on the premise of a sushi roll, canned tuna is spiced with your favorite hot sauce and chopped green onion, then spread in a whole-grain wrap with brown rice, avocado, carrot matchsticks and shredded greens. The combination is full of flavor, and more importantly, crammed with nutrients to keep you going. It’s easy to have the ingredients on hand, and takes only a few minutes to put together in the morning.
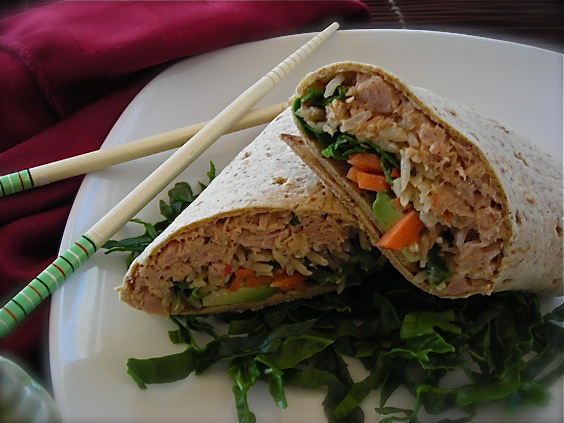
It tastes like a heartier version of one of my favorite sushi rolls. And it’s endlessly versatile, from the greens you add to the seasonings you mix with either the tuna or the rice. Switch out the tuna for salmon, or finely chopped chicken. Use arugula to add some bite, or watercress. Add thin strips of cucumbers or radish. And be sure to have a little soy sauce, mixed with some wasabi if it’s your preference. These wraps are made for dipping.
Spicy Tuna Wrap
2 5- to 6-ounce cans chunk light tuna, drained
1/3 c. low-fat mayonnaise
1 T hot sauce, such as Sriracha
1 scallion, chopped
2 c. cooked brown rice, cooled
2 T rice vinegar
1 T. sesame oil
1 T. soy sauce
4 10-inch whole-grain wraps
Shredded greens of choice
1 ripe avocado, cut into 16 slices
1 small carrot, cut into matchsticks
Combine tuna with hot sauce, mayo and scallion and mix to combine. To brown rice, add the rice vinegar, sesame oil and soy sauce, stir well.
On each wrap, layer tuna, rice, avocado, carrot and shredded greens. Roll up tightly and slice, or eat whole.
From Eating Well magazine, March/April 2011, with adaptations.
KATE’S NOTES:
I used a canned tuna in oil, leaving most of it with the tuna and then less mayo than the recipe needed. My hot sauce was Matouk’s Flambé Salsa. I added the soy sauce and sesame oil to the rice, but you can leave it out if you wish. I love the flavor it adds. Thin slices of cucumber in this wrap would be excellent. I used spinach for my greens, and Flat Out Whole Grain wraps, which made it a perfect size.
March 20th, 2011
| 7 Comments »
More sugar. Must be winter’s end…..
I’ve been lamenting a lack of fresh foods lately. The transition season is approaching rapidly; that between the depths of winter when root vegetables and long slow aromatic braises seem to be the elixir we all need to the first snap of green vegetables that promise warmer days and less outerwear. March comes along and it’s like we all draw a long slow breath, eagerly awaiting the day where the very air shifts and the warmth blows in and we forget about 85″ of snow, the endless drifts, the nerve-wracking commutes. Our winter has been memorable, and it’s a noticeable grimace when flakes continue to fall and the slack jaws at the produce counter scan the same old, same old and try to drum up a different beat for those carrots, the sweet potatoes and rutabagas.
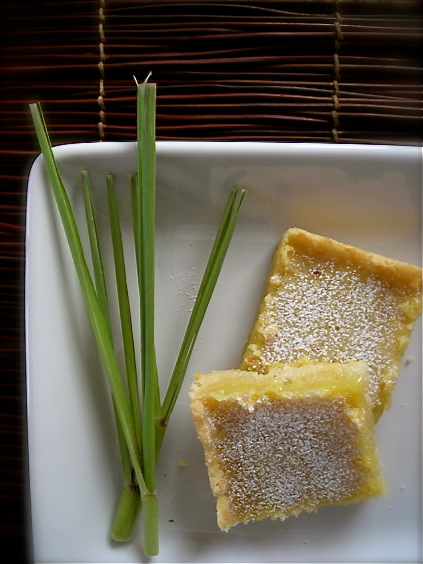
For me, some respite came with one definitive twist of a channel knife, cutting through the thick zest of a fat lemon and releasing the minuscule spray, that spritz of aromatic citrus that at once says to my weary winter white brain ‘Sunshine!’ ‘Warmth!’ Because we all know that those golden orbs carry the very essence of the sun within their tart flesh; with a firm grip they release their juice, carrying an altogether different sensation to our nose. The white of winter, the stinging scent of a fresh snowfall and a glacial chill in the air is quite distinctive, and it settles into us with a thud as those flakes fall, fall and fall, but among that endless snow, the never-ending white, I twisted up a bowl of lemons, ground the zest off their hides and, in addition to all that sunshine filling my kitchen (if I closed my eyes I could see white sand, a hammock and the blue of the Caribbean) I crushed up three stalks of lemongrass, with it’s sharp citrus-y aroma and racy bite and turned it all into the most amazing and tantalizing Lemon Bar I’ve ever had the pleasure of biting in to. Spring is a tease in March; we have days of sunshine, fickle sun, torrents of rain and then a bone-chilling wind descends to remind us that we’re not quite out of the woods yet, so finding this Lemongrass Bar recipe in the current Bon Appetit, with it’s crumbly tender Coconut Shortbread crust was a perfect tonic for the weary landscape of white that turns gray and gritty as we slip through the doorway to another season.
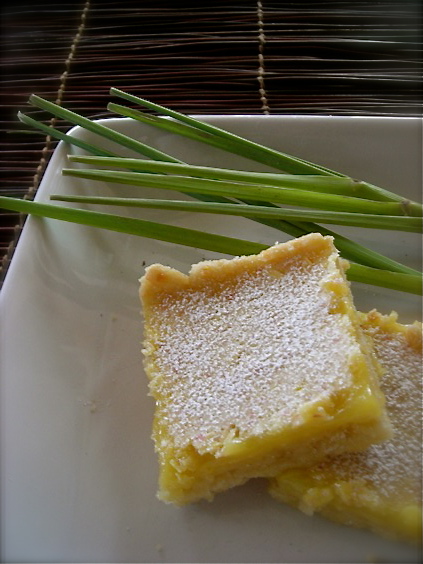
And yes, sugar. Sweet sugar and the tang of lemon, but cut with the flavor of lemongrass, a perennial grass native to the Philippines. Widely used in Asian cuisine is soups, teas and curries, it’s suitable for all meats, and can be made into lemongrass oil which is used as a pesticide and preservative, and is known to have anti-fungal properties. I’ve used lemongrass in savory recipes and love the simple flavor it adds, but the addition of it to these Lemon Bars was genius; the tender white bulb is ground fine with your sugar, then blended with eggs and a little flour to create a luscious filling. The bonus to these bars? Coconut in the crust.
Recently I was given several bags of sweetened shredded coconut that I tossed in the freezer to await inspiration. I do love coconut, but find the sweetened version too overwhelming to add to my oatmeal or muffins as I prefer, but in this recipe, cooked into a tender buttery shortbread crust, it was perfect. With the addition of the lemongrass in the filling, adding an extra level of flavor but without the cloying teeth-clenching sweetness of your standard Lemon Bar, these offered up a nice dose of Springtime to push all thoughts of late Winter faster to it’s timely demise.
Lemongrass Bars with
Coconut Shortbread Crust
Crust:
1-1/2 c. AP flour
1 c. sweetened shredded coconut
1/2 c. powdered sugar
1/2 c. (1 stick) unsalted butter, slightly chilled and cut into chunks
Filling:
1-1/4 c. sugar
3 lemongrass stalks, bottom 4 inches only, tough outer layer removed & finely chopped
6 T. fresh squeezed lemon juice
2 t. fresh grated lemon zest
3 large eggs
1/4 c. AP flour
Heat oven to 350° and spray a 13×9 cake pan with cooking spray.
For the crust, whisk flour, coconut and powdered sugar together, add butter and cut butter into mixture until it resembles fine crumbs. Use a pastry cutter, two forks or knives or your bare hands. Press dough onto bottom, and 1/2″ up sides of prepared pan. Bake crust until golden (edges will darken more) about 20-25 minutes.
For filling: Place sugar and lemongrass in food processor and blend until finely ground, about a minute. Add lemon juice and zest, pulse 3-5 times. Add eggs and pulse to blend. Add in flour, and a pinch of salt. Blend until smooth.
Pour filling over hot crust. Reduce oven to 325° and bake until filling is firm, 20-25 minutes. Cool bars completely in pan then cut to desired shape. Dust with powdered sugar, if desired, before serving.
Recipe: Bon Appetit magazine (with small modifications)
March 16th, 2011
| 5 Comments »
Little that’s gone on lately has been ordinary, especially in other parts of the world. I’ve watched a few videos, scanned the headlines and saw a few photos, but for the most part, I’ve stayed far, far away from immersing myself in the news coverage of what’s gone on in Japan. I’m not posting on Facebook about it; I don’t tweet, or retweet about it. And quite frankly, if you want to call me insensitive, go ahead. That’s your right. Just remember that it’s my right too, to decide how I deal with it. And this is how I manage it, because the last time I was soaked in a tragedy, it ended up being stuck with me for the rest of my life.
Back when the world seemed a lot less harsh, I woke on a gorgeous September morning in Las Vegas, ready to spend my day at an International Baking Convention. I was the office manager for a large wholesale bakery in the Cities, and was there to check out new equipment, new software, and new procedures, and I never got the chance. Because that morning was the 11th, in 2001. And we all know what happened then. I watched the entire horror play out on television, right in front of me. I watched bodies plummet through the sky; I watched people on the streets, staring in terror. I watched those towers fall and I cried my eyes out. The country fell apart before my eyes, and I was stranded thousands of miles from home. Everywhere I went for the next six days until I returned home, it was like the tragedy was embedded in my skin, my ears, my eyes. It was all everyone talked about. It was on every television, in every podunk spot that the car stopped as I made my way home, across the gorgeous country amidst the worst times in recent memory. Yes, my boss and I drove home from Nevada; it took 2-1/2 days. We drove through the mountains of the West, through Utah and Colorado and were surrounded by stunning vistas while the sorrow poured out of the radio. A pall had settled on the nation and every gas station, every coffee shop, every tiny diner along the way were full of grim faces and tears. It’s been 10 years since that all happened and I still can see every detail; I can still feel my stomach sinking in agony, like it did that morning while I watched, unable to tear my eyes away. If I catch a glimpse of the clock, and it happens to read 9:11, I can’t get away from the image it leaves with me. And I can’t fill my head, again, with such sorrow.
I’m a sponge; I absorb my surroundings and it gets under my skin to stay with me. And it isn’t just events. It’s people, it’s daily situations, it’s the crabby strangers in passing, the nasty drivers on the road. Negativity can easily fill me up and just as easily take me down. I need to protect myself from drowning in it and so I simply turn away. It’s isn’t that I don’t care. The problem is that I care too much and me, this tiny individual, can’t offer much more than a solitary prayer of compassion. My repetitive tweets won’t do anyone any good; yet another posting on yet another heart-wrenching video won’t do anything. There are plenty of people to spread the news, and I just turn and walk away because to do otherwise would be more images seared in my brain that will stick with me forever. I can’t do that to myself. It’s bad enough that in the darkness I sometimes still see a burning skyscraper, and bodies falling through the smoke. After 10 years you’d think they would fade, but they haven’t. Even the few images of the destruction in Japan won’t replace the shocking pictures of that gorgeous September morning. In fact, they’ve joined them. And that’s not something I need.
So I made pancakes.
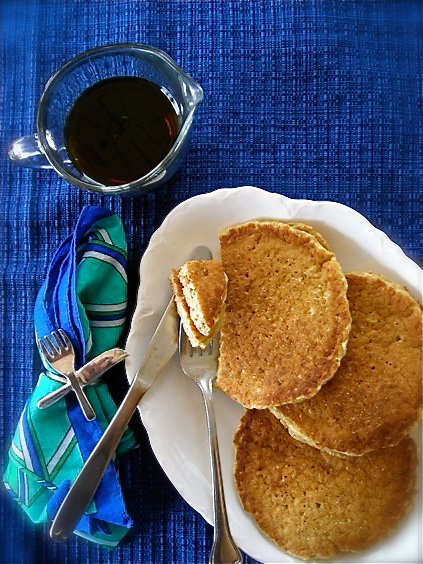 
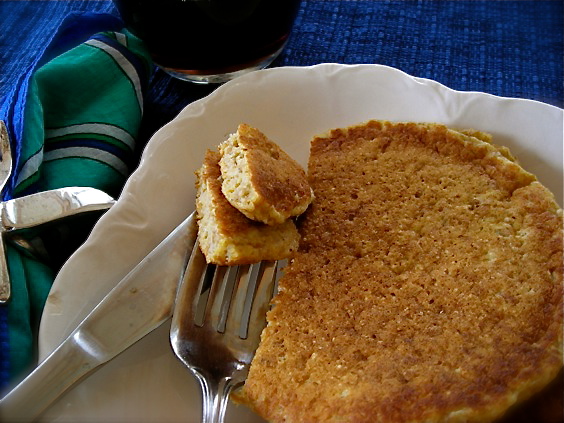
Because I needed to feel ordinary and plain, to have something of a constant come up during a time that is now written indelibly in the history books. And for me, it was Pancakes. And not just any Pancakes; these were Wheat Crumb Pancakes, made with fresh bread crumbs as the base. It was odd, to say the least, and maybe not exactly what I would reach for to try and raise some ordinary sense to my day, but it worked. Strangely enough.
The recipe came from Marion Cunningham’s The Breakfast Book. I picked this book up at a used book store many years ago, and it languished in my cookbook cupboard for a long time. I glanced at it once or twice, but never really absorbed it, and last year in a book purge, I almost added it to the boxes I was giving away. But something made me leave it on the shelf and I’m so glad I did because what exists in those pages is a treasure trove of simple, hearty, wholesome and flavorful breakfast recipes, and everyone I’ve tried has been delicious. These Wheat Crumb Pancakes were amazing; fluffy and light and so flavorful. I added some texture to them by tossing finely chopped honey-roasted peanuts into the batter, and replacing some of the liquid with pureed mango and peaches. They cook up thick and hearty, and beg for a dousing of maple syrup. A plate of them set my emotions and grounded me, just as I had hoped they would.
Wheat Crumb Pancakes
1-1/2 c. fresh wheat bread crumbs
1-1/2 c. buttermilk
2 T. butter
1/2 c. whole wheat flour
2 eggs, lightly beaten
2 t. baking powder
1/2 t. salt
Place bread crumbs in a large bowl. Heat milk and butter in small saucepan until butter is melted and milk is hot. Pour over bread crumbs and let stand for 5-10 minutes, stirring to fully combine.
Add flour, eggs, baking powder and salt to bread crumb mix. Fold together until just mixed and let stand for a few minutes. Cook pancakes on stovetop, or an electric skillet. Top with maple syrup and butter, if desired, or toppings of choice.
From ‘The Breakfast Book’ by Marion Cunningham
NOTE: Fresh bread crumbs can be made from several slices of good quality whole wheat bread. Place them in a food processor and process until they’re the size of peas. Do not sub in dried bread crumbs, croutons or Panko. I like to keep a ziploc bag of fresh breads crumbs in the freezer. Any leftover bread gets processed and added to the bag. The crumbs are wonderful to have on hand for many uses in the kitchen.
More Pancake love from Kate’s Kitchen:
Whole Grain Pancakes
Oatmeal Pancakes
Pumpkin Pancakes with Winter Fruit Compote
Whole Wheat Banana Pancakes
Fresh Cherry Syrup
Fresh Blueberry Syrup
|


