March 2nd, 2013
| 5 Comments »
Hi everybody! Welcome to my new home! Do you like what we’ve done with the place?
The remodeling didn’t go as I had expected, but what remodeling project is smooth from start to finish? The first plan fell stupendously flat, the second plan required hiring an illustrator to design, and that landed amidst major car issues and had to be placed on the back burner. For now, this simpler design will suffice. I’m working on making it feel comfortable, inviting and a bit nostalgic when you come by for a visit; I want you to feel like you’ve opened the pages of a favorite book, kicking off shoes to stay a while, sip a warm cup of tea, share a simple meal and maybe pet the cats. They love having friends stop by; they gladly share their fur with anyone.
Come in to my kitchen…
October 10th, 2012
| 1 Comment »
I adore muffins.
But I should clarify something; I like real muffins, not cupcakes masquerading as muffins. While there are those in the camps of muffin lovers that think sweet muffins are perfect, I’m generally not one of them. I like a hearty muffin. Small in stature but huge in flavor. I like them to be full of grains, nuts, fruits and the good stuff that makes me feel all right about eating them. And apparently, given that there are more than half a dozen recipes in this blog (and wayyyy more that never made it long enough to be photographed and talked about), one could stand to reason that if given a choice of what to bake on a very chilly, rainy October morning, it would be muffins.
And even though I likely would LOVE to re-make all these muffin recipes, frankly, it wouldn’t be so hot for my waistline. So I’ll just re-visit some of my favorites instead. You’re ok with that, aren’t you?
{{Before moving in to Muffin Mania, have you checked out this week’s Cookbook giveaway yet??}}
Songs and soundtracks make up the background for this indulgent Fig Muffin with Honey Lemon Cream Cheese filling.
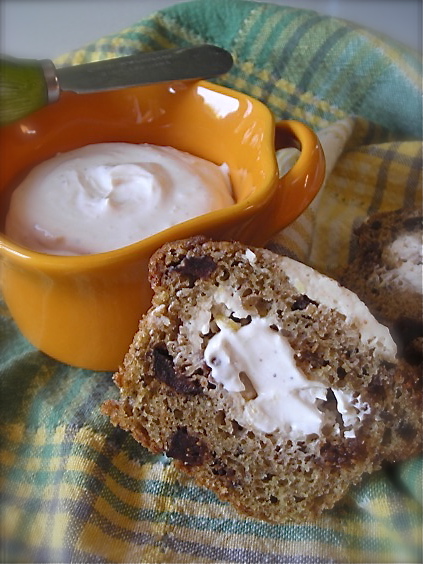
Just right for the season, Pumpkin Maple Muffins. Sorry the photo is missing……
Butternut squash, November light and Whole Wheat Muffins with Quinoa & Squash.
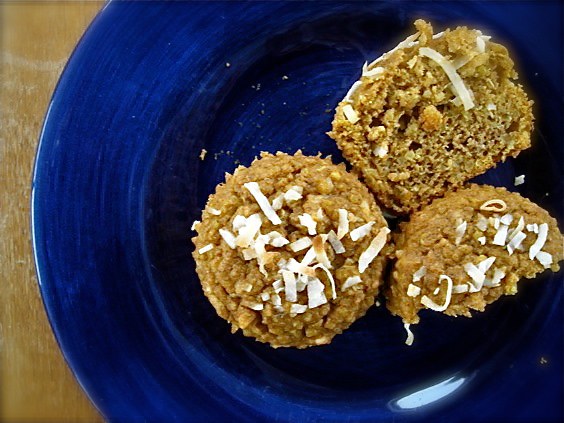
Whole Wheat Muffins, a blank palette for so much imagination and flair.
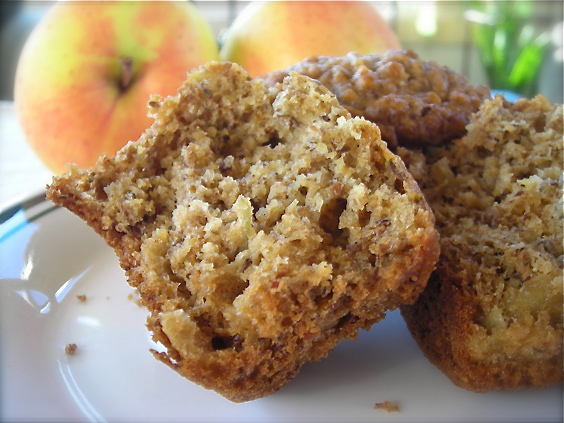
Another good choice for Fall; Oatmeal Sweet Potato Muffins. *sigh*
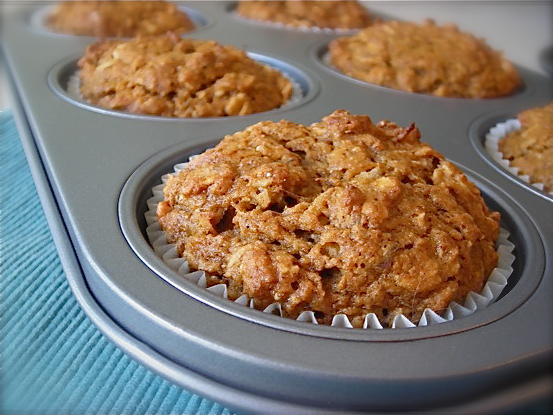
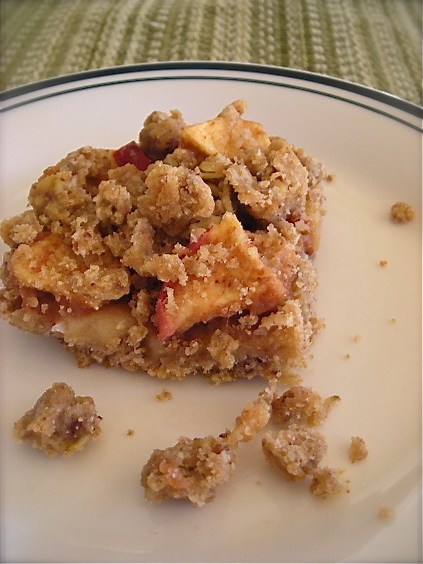
And of course, there has to be something with Apples. The Apple Cheddar Muffin recipe is tops, but quite frankly, these Apple Streusel Bars just had to be snuck in because they are SO darn good.
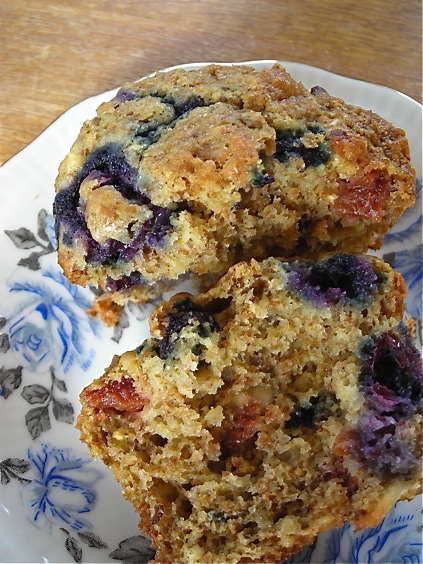
How about a Blueberry Bran Muffin? This particular creation had a handful of fresh cherries tossed in as well.
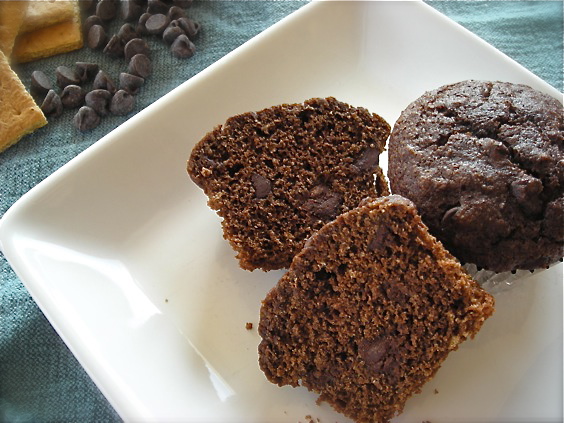
And finally, a Chocolate Graham Muffin that thinks it should be a cupcake. Add marshmallows and it might be S’Mores.
Next time, I’ll tell you all about my love for Tea Breads. And of course, share that bounty of recipes as well. 🙂
July 8th, 2012
| 1 Comment »
Summer kind of smacked us around this past week in Minnesota. We’re a state that lives for Summer, for beach time and hours spent outdoors engaging in just about any activity that means we escape our houses and enjoy the weather, but then there are those Summer days that are so hot, so thickly humid and uncomfortable that we have no choice but to stay home, avoid the triple digits outdoors and attempt to entertain ourselves while the sun tries to burn holes in our roof.
I’ve experienced some hot Summers in my lifetime; 1988 was a blistering hot Summer that saw temperature records fall by the score, knocking out ones that had stood the test of time since the 1930’s. I was living in a third floor walk-up apartment with no A/C and I’ve never been so miserable in my life. One evening in July, as I sat out on the stoop with other exhausted and over-heated residents of our building, the night air at 10:30 was still hovering around 105°. Trying to sleep was impossible. At 3:30 that morning, I finally gave up and turned on the radio, only to hear that the current temperature was 88°. During that particular Summer, we saw a stretch of weather where the temperature did not fall below 85° for more than a week. At that point in time, central air-conditioning was still a novelty.
I don’t recall much about what I ate during that sweltering Summer, and having this cool, crunchy and fresh salad around might have made those awful days a bit more tolerable, but at that point in my life, my culinary exploits were just about non-existent. Thankfully, for our current heat wave, and after a quick and sweaty trip through the Farmers Market, we were stocked to the hilt with fresh greens and lettuces and crisp vegetables, making this dish a mainstay of those sticky days blessedly spent inside our comfortable, fully air-conditioned house.
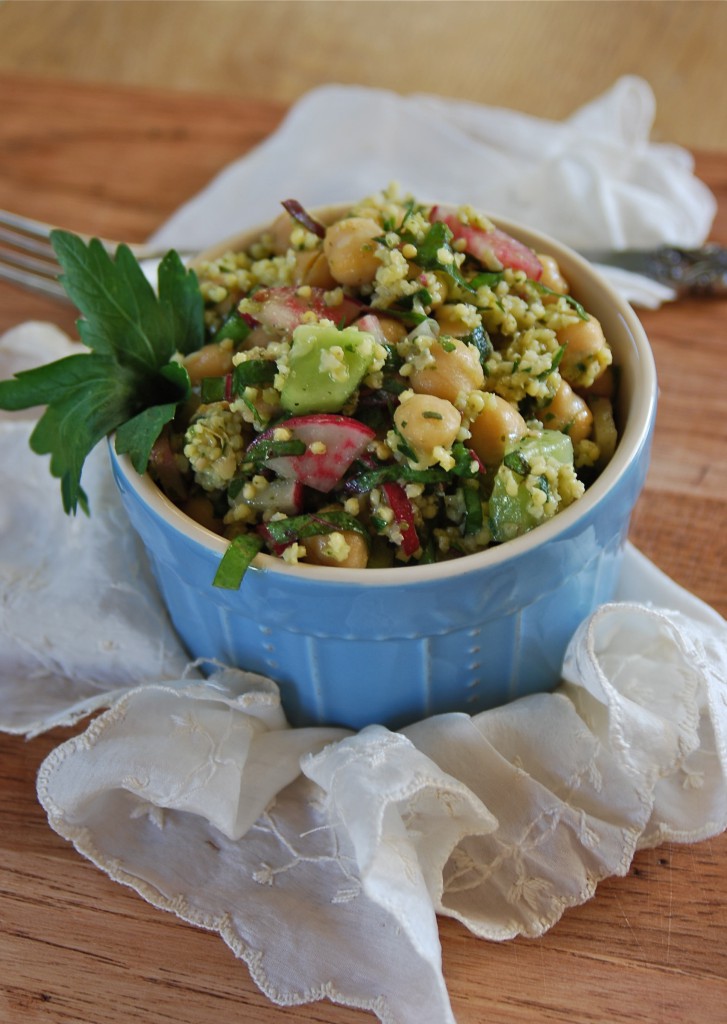
Not familiar with millet? Most of us in the USA see it only in birdseed, and that’s a sad fate for us humans, but terrific for the birds. Millet is widely cultivated in the form of pearl millet in India and parts of Africa, and is popular there due to it’s high productivity and and short growing season. In the USA, the most widely cultivated form of millet is proso millet, grown and used as birdseed. Millet is an ancient grain, known for being the least allergenic and most digestible of the gluten-free ancient grains that are becoming more popular. Millet is high in fiber and all the B vitamins, iron, calcium and zinc. It cooks in less time than quinoa and has a pleasantly sweet and nutty flavor.
This salad, born of desperation and some choice nightmares over stressful memories of past sticky summers, made our stretch of housebound days feel a bit easier. Even in the cool comfort of home, with the heat and humidity kept at bay by closed shades, eating becomes almost an afterthought. There’s no comfort in foods that are heavy or rich; no desire for flame or heat, and when the mood strikes to eat something, it’s good to just reach in the refrigerator and pull out a bowl of summertime goodness. The crunch and snap of fresh vegetables, the headiness of herbs cut straight from the garden outside your door and a blind eye turned from the weather forecast was welcome relief as the calendar page turned to July.
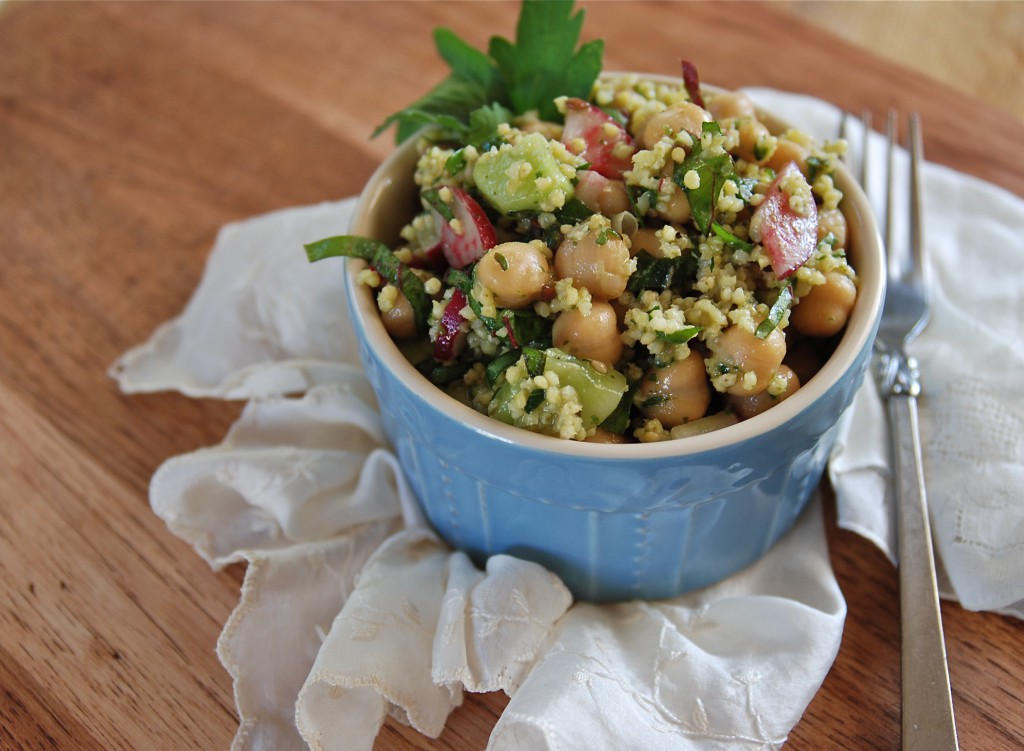
This salad is endlessly versatile, and if Millet isn’t available, you can use just about any small grain you wish. With the wide variety of fresh vegetables in season, as well as delicious greens, putting your own personal thumbprint on this salad is a cinch. I loved the addition of the radish greens to the salad, offering their unique peppery bite, but if you use them, seek out organic radishes to insure that the greens aren’t laden with pesticide residue. And as always, with time in the refrigerator, this salad takes on a lot more flavor.
Now we’re all set for the next heat wave. Let’s just hope it’s not too soon.
Millet & Chickpea Salad
1/2 c. raw millet
1 15-oz can chickpeas, drained and rinsed
1 small cucumber, peeled and diced (remove the seeds if desired)
1 small bunch radishes and their greens, washed and sliced
1 c. fresh chopped herbs such as basil, oregano, thyme and parsley
1/4 c. good quality olive oil
2 T. white or red wine vinegar
Sea salt and fresh cracked pepper to taste
In a small saucepan, bring 1-1/2 cups of water to a boil. Rinse millet in a wire mesh strainer until the water runs clear. Add millet to boiling water with a generous pinch of salt. Bring to a boil, reduce the heat and simmer for about 10 minutes. Test the grains. They should still be firm, with a bit of softness, like rice. All the water might not be absorbed either. If tender, remove from heat and drain remaining water. Spread cooked millet on a parchment lined baking sheet to cool.
In a large bowl, combine the cooled millet, chickpeas, cucumber, and radish, greens included. Whisk the oil and vinegar together in a small measuring cup, season with salt and pepper. Pour over vegetables and toss to coat. Taste and season with more salt and pepper, if you wish. Add half the herbs, toss together. Chill for about an hour. Taste before serving, adding more seasoning and herbs to boost flavor.
June 27th, 2012
| Comments Off on raw pea salad with jicama, cucumber & mint
I’ve never liked peas. Never. But again, as always, I’d been exposed only to frozen cooked peas, often overdone and alarming in their color and consistency. Even the smell made me want to gag.
But then again, up until just last year, I’d never had peas fresh, raw and straight from the shell. I popped this raw pea in to my mouth in a moment of bravery and bit down. It was, obviously, a revelation, and the continuation of these eye-opening food experiences as an adult has been nothing short of wondrous, proving that it is never, ever to late to learn about new foods.
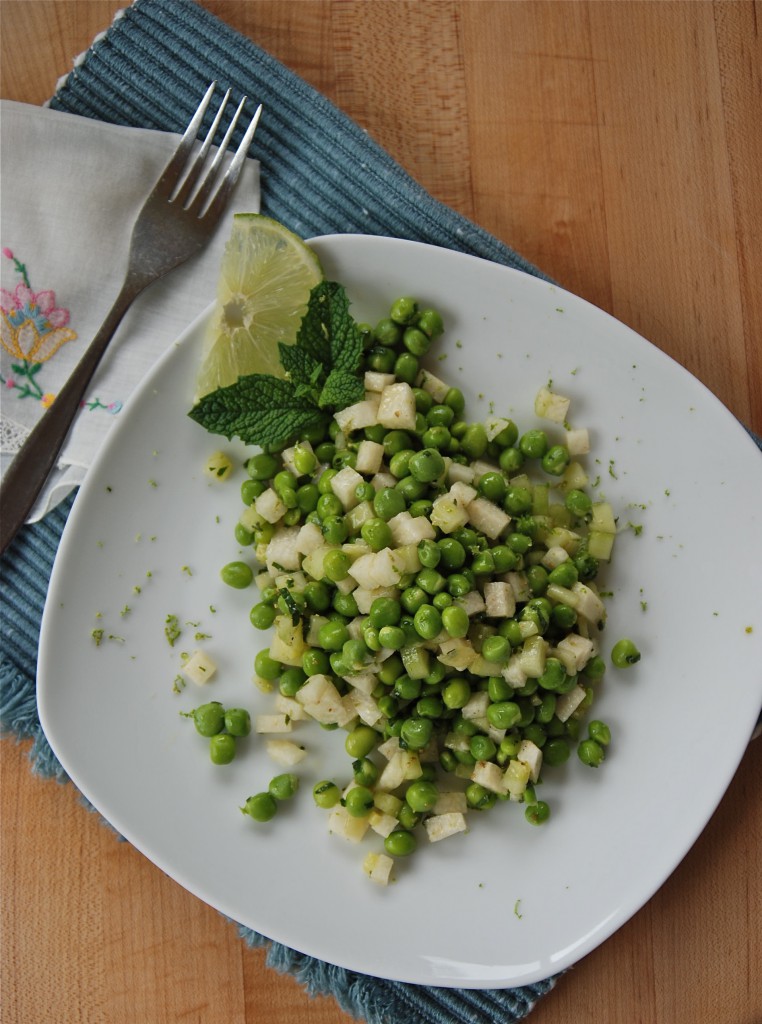
Still, I’d never decided to push myself in to making something with raw peas until this summer when the idea began forming in my head for this salad. Coupled with the opening day of the Shoreview Farmers Market near us (and a day off of work for me) I picked up two baskets of sugar snap peas and spent an ungodly amount of time shelling them. As I stood there, thumbs slipping through the shells, watching the peas tumble in to the water, I thought back over time to how many women had done this task before me, sitting on a breezy porch or back steps in the warmth of late Spring, a basket of peas in their lap listening to the ‘plup plup’ of tiny peas hitting the bowl. I love the nostalgia of food, how the simple means of connecting with our sustenance has been practiced for generations, going back in time when eating local wasn’t considered trendy because it was all anyone could ever do. Sometimes I long for that ability to connect, to be caught deeply in a season of plenty sitting right outside my kitchen door.
Maybe I was born in the wrong era.
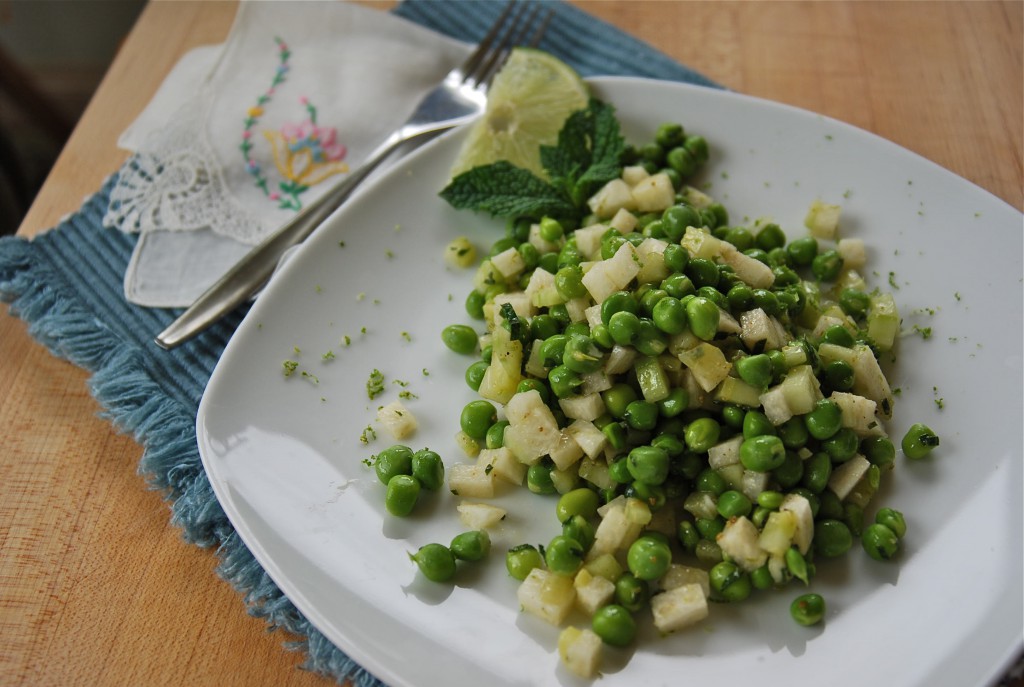
I couldn’t begin to tell you where the urge for this salad came from; it arrived with the heat blasting Minnesota, wringing us out in humidity and a continual dance of thunderstorms bringing severe damage, flooding and devastation. I’ve been shocked and saddened every day as photos flit across my screen showing the aftermath of these storms. Amidst all the chaos and rain-soaked days, the idea shimmered like the waves of sunlight, boiling up in me and urging itself along. Peas. Jicama. Cucumber and especially the mint. For some reason in my head, it all worked so I shelled, chopped, mixed and crossed my fingers. A squeeze of fresh lime juice, a few shakes of cumin and salt and a spoon lifted to my mouth assured me that my mind was right, as right as heat in the summertime and peas that will always need shelling. Right in the ways of that only simple can be.
I’d be completely at home in the wide open country, on an open back porch under the sunshine and immensely fresh air. I know I would. But in my lifetime that’s unlikely to happen. I won’t be picking sugar snap peas in my garden, warm in the heat, listening to them fall in a bowl but rest assured, I will be making this salad again. From the first bite, to the next and finally a stolen spoonful the following day to remind myself of how good it was, how fresh and summery it tasted in my mouth, it was so perfect, so crunchy sweet and all mixed up with flavor and snap. Here’s to the joy of Summer time.
Raw Pea Salad with Jicama, Cucumber & Mint
3# shelled sugar snap peas
1 c. english cucumber, peeled and diced fine
1 c. jicama, peeled and diced fine
1/4 c. chopped mint
1/3 c. good quality olive oil
3 T. fresh squeezed lime juice
1 T. fresh lime zest
1/2 t. ground cumin
Sea salt and fresh ground black pepper to taste
In a large bowl, combine the peas, cucumber, jicama and mint. Whisk together the oil, lime juice and zest, cumin, salt and pepper. Adjust to taste and pour over salad. Stir to combine, adjust salt and pepper. Chill for an hour before serving; taste for seasoning.
This salad was excellent served atop a bed of fresh salad greens, too. The vinaigrette dresses the greens beautifully.
Once chilled, the olive oil will solidify slightly;
you can let the salad sit at room temperature for a few minutes if that doesn’t appeal to you.
May 10th, 2012
| 16 Comments »
There are plenty of food items, when given a second chance (ok, and sometimes a third or fourth) will reveal much more to your palate than they did on the initial try. Every time I hear of someone disliking a specific food, I ask them how many times they’ve eaten it, how it was prepared or where they had it or any number of questions to determine what they don’t like about it. I always want to know the whys and hows and whats of someone’s intense aversion to a certain food.
When I first met Mike, he told me he did not like salmon. Not one bit. When pressed for more information, he revealed that when he’d eaten it, it was tough in texture (definitely overcooked) and tasted fishy (definitely not very fresh) and so I made him a salmon dinner one night of a terrific piece of fresh salmon that was perfectly cooked. I hooked him for life, pun intended. A poorly prepared food item can be a real turn off. For the longest time as a kid, I absolutely hated pork due to it being overcooked and tough as nails. Once I tasted the beauty of perfectly cooked pork, tender and succulent, I was reformed.
A lot of times, if it isn’t the way it’s cooked then it’s the texture. This was true of my tastes for a very long time. And almost all of the foods that I once disliked as a child, and even in to adulthood have now made themselves a permanent space in my life. Foods such as tomato, onion, squash of all kinds, eggplant, mushrooms…. this list is all about texture. And my initial introduction to Buckwheat groats, also known as Kasha, turned me off due to the texture as well. But the second glance, with a better cooking method in hand and some quick innovation in the kitchen, I turned this healthy grain into a mind-blowing salad that I can’t wait to make again.
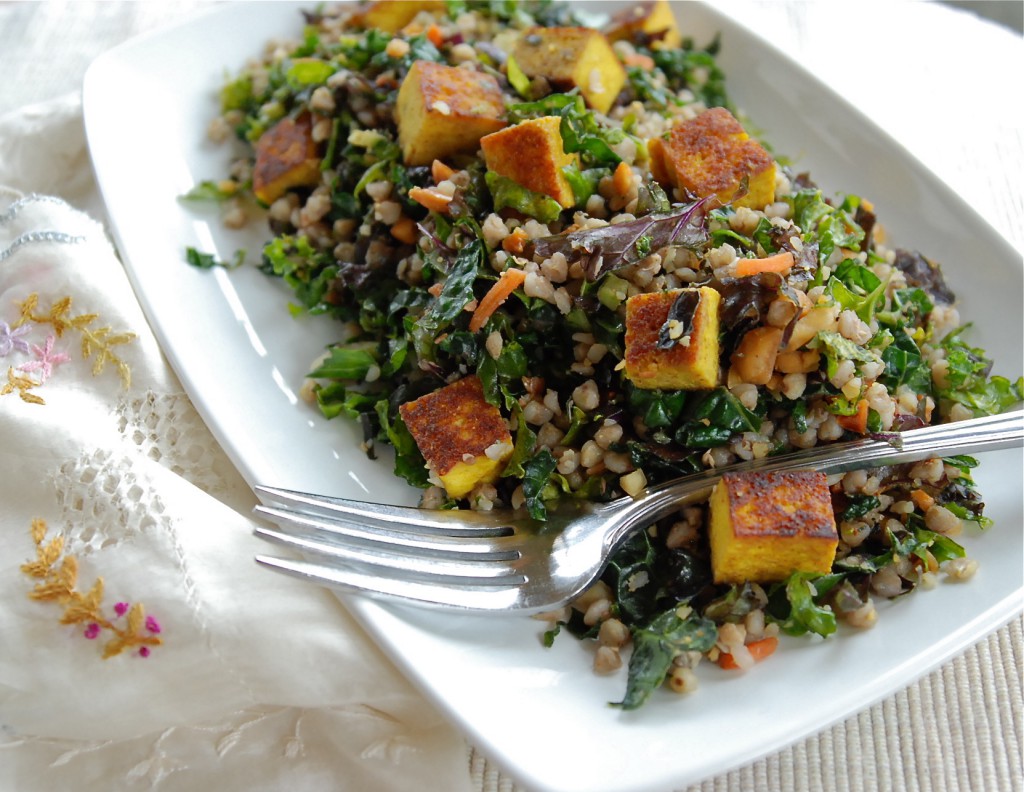
As a singular food item, I’m still not enthralled with kasha, but I think that alone, this grain is pretty uninspiring. That all changes when mixed together with others, kind of like that quiet and unassuming person who comes alive in the right crowd. Kasha grains are tiny, heart-shaped and solid, similar to barley grains, with a sweet, nutty flavor and a nice chewy texture. Buckwheat groats are a potent nutritional item, with no cholesterol, sodium or saturated fat. It’s high in fiber and magnesium, with a low glycemic index. Mixed with shredded kale, dressed lightly in a simple oil & vinegar dressing and dusted with sea salt and cracked pepper, the grains added a perfect complement to kale’s crunchy personality. Chunks of tofu, seared crisp after a curry bath marinade, made for eye-catching color and a protein boost.
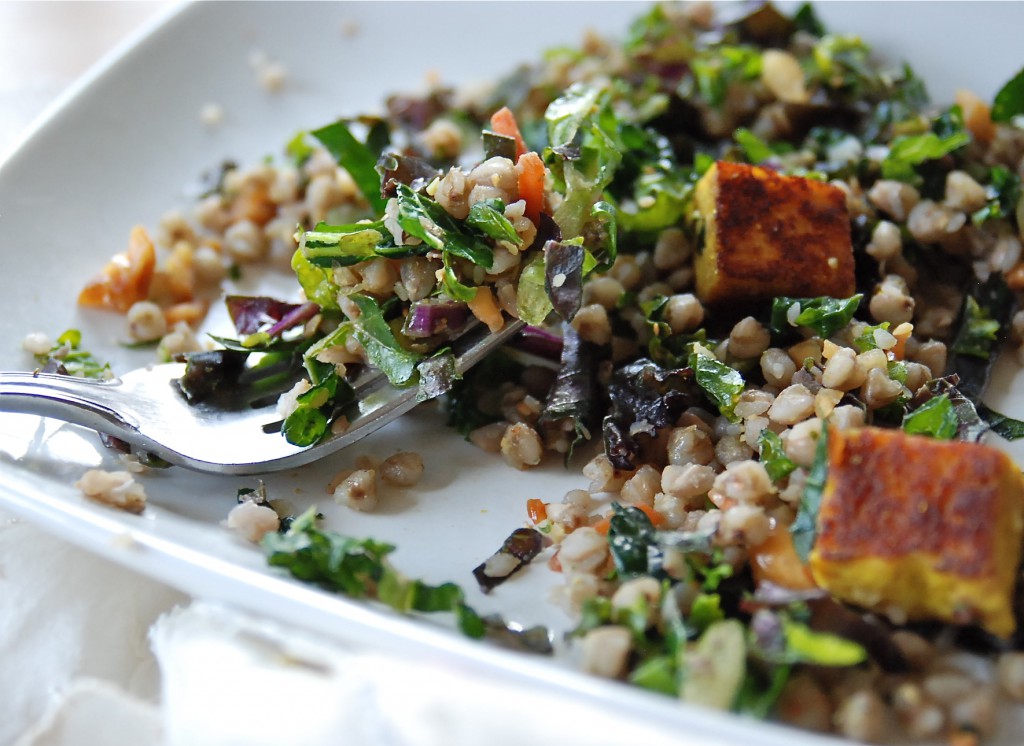
I was a little concerned that this salad would be a bit light, lacking the substance needed to fuel a body’s needs through the day, or evening, but after consuming a small plate of it, I was surprisingly full, and that satiation lasted until bedtime, and beyond. A small portion for lunch the next day easily carried me through the remainder of work too.
And speaking of second chances……
 This delightful 4-cup Bodum Assam Teapot needs a new home. Do you love tea? I drink a lot of tea, and have a somewhat shocking collection of it in a cupboard. I also have a smaller Bodum Teapot that doesn’t get used as much as I would like. So this one could be yours, all for the sake of a comment. Tell me what kind of tea you like to drink, hot or cold or whatever, and you’ll have a chance. I will pick one name on Sunday May 13th. This delightful 4-cup Bodum Assam Teapot needs a new home. Do you love tea? I drink a lot of tea, and have a somewhat shocking collection of it in a cupboard. I also have a smaller Bodum Teapot that doesn’t get used as much as I would like. So this one could be yours, all for the sake of a comment. Tell me what kind of tea you like to drink, hot or cold or whatever, and you’ll have a chance. I will pick one name on Sunday May 13th.
And now, how about that recipe??
Kasha with Kale and Curried Tofu
1 pkg extra firm tofu, drained and cut in to cubes
2 T. curry powder
1/4 c. olive oil
1 c. raw buckwheat groats (available at co-ops)
2 c. water
Sea salt and fresh cracked pepper
1 pkg Cut N Clean Greens Rainbow Kale Salad (with or without the dressing- which can be used in lieu of a vinaigrette)
About a half cup of your favorite vinaigrette recipe, or similar bottled version
Crushed peanuts, optional (but a delicious and crunchy addition)
In a small skillet, begin toasting the buckwheat groats over medium-low heat. Have the water ready in a separate lidded pan. As the buckwheat begins to heat up and you start to smell a nice nutty scent, start the water heating. Continue toasting the buckwheat, shaking the pan to avoid scorching, while the water heats up. When the water begins boiling, carefully start shaking the toasted groats in to the water. They will sizzle and the water will steam up as you add the groats, so don’t dump them all at once, just a small amount at a time. Once they are all in the boiling water, reduce the heat to a bare simmer, cover the pan and cook the groats for about 15 minutes. The water should be completely absorbed and the top of the groats will look dry. Shut off the heat and allow the pan to sit for 10 minutes, then fluff the grain carefully.
In a small measuring cup, whisk the curry powder and olive oil together. Pour over cubed tofu and toss to coat. The tofu will soak up all the marinade. Allow to soak for about a half hour. (this is a good time to cook those groats) Heat a large skillet over medium heat and add a drizzle of olive oil. Sear the tofu to your desired browning. Place on paper towels to absorb any excess oil, and set aside.
Place rainbow kale in a large bowl and drizzle some of the vinaigrette over it. How much depends on your taste. I like a lightly dressed salad, but you may like a bit more. Add in the groats, about a cup at a time as you may not want all of it in the salad. Toss, taste, season and add more groats until you have a nice balance of kale and grain. Taste, add more vinaigrette or salt and pepper if needed, then gently add in the tofu and crushed peanuts, if using.
The salad can be eaten at room temperature, and the flavor deepens overnight in the fridge. Taste the next day to see if it needs more vinaigrette, salt or pepper. The kale and grains will absorb that overnight.
March 31st, 2012
| 3 Comments »
When I was 15 or 16, my Mom broke her left elbow roller skating. Outside of the fact that my MOM -gasp!- was roller skating (and apparently getting rather cocky about it) she happened to be left-handed, and in breaking her elbow, this rendered her incapable of doing much of anything. She lamented one day, as I helped her in the kitchen, “I wish I had learned to use my right arm more.” and somehow this struck a chord with me, as did her inability to manage even the most mundane of daily tasks.
It’s been in the back of my mind since then to train my hands to work equally. Although my left handed writing looks like an overly caffeinated six year old, and my knife skills in my left hand are nothing compared to my right, I can whisk, scoop, stir, twist, grind, mix and pour from either right or left. I can reach and function and do just about anything needed during the course of my day without having to switch gears, hands or mindset.
There is always more that your body can do, when allowed. If you’ve learned how to type on a standard keyboard, then you can teach your non-dominant hand to do any number of things. Even though one side of our brain dominates, and we develop a set of skills with that dominant hand, there is far more that one is capable of if you’re willing to put your mind to it.
That goes for recipe usage too. Recipes are not cut in stone; they should serve as a guideline, a base from which we can expand exponentially in many different directions. I love recipes because someone else has already done most of the work for me, but I am free to remove this and substitute that, increase this or decrease that or look at how it comes out in one form and think “I know this can be better.” and then trust that my skills can take me there. These skills have been especially useful in the re-development of this incredible Red Rice Pulao.
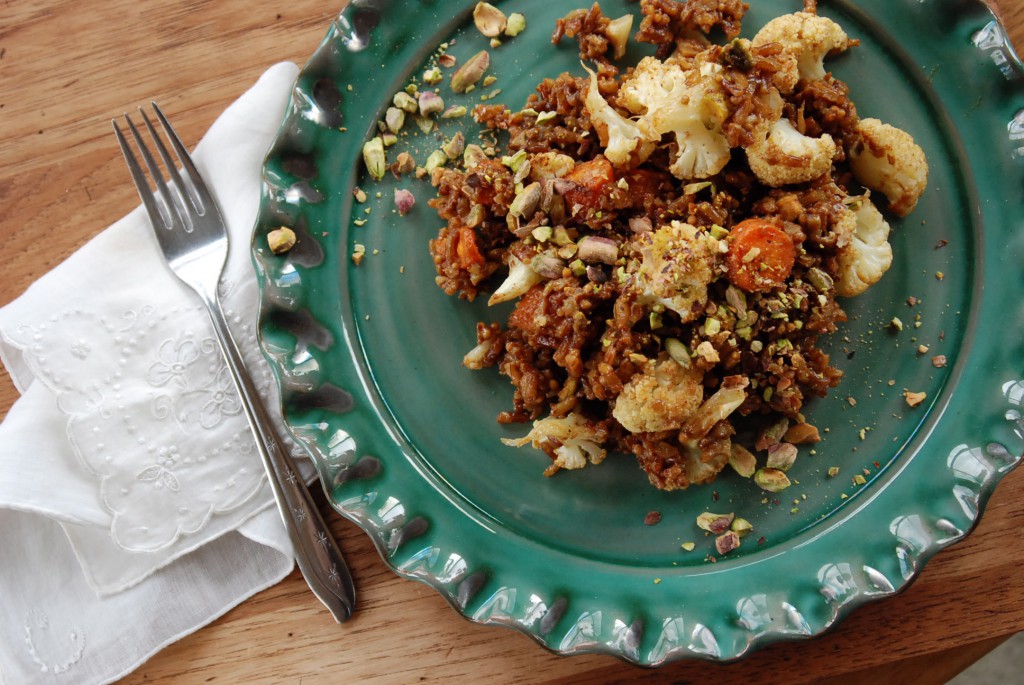
The origin of this recipe comes from Robin Asbell‘s New Whole Grains Cookbook, which, in a soft yet grand way simply changed my life in 2008. Long before the intense embrace by food lovers of all things whole grain, I’d run through a bookful of recipes using quinoa, millet, bulgur and various rices, finding great things to love about these simple staples. Grains are one of the easiest foods to work with in any kitchen, and require no special treatment. Particularly fond of the vibrant rices available, this Red Rice Pulao made for an chewy and delicious experience, and like many wonderful recipes on this blog, I simply posted it once and never went back. What a mistake.
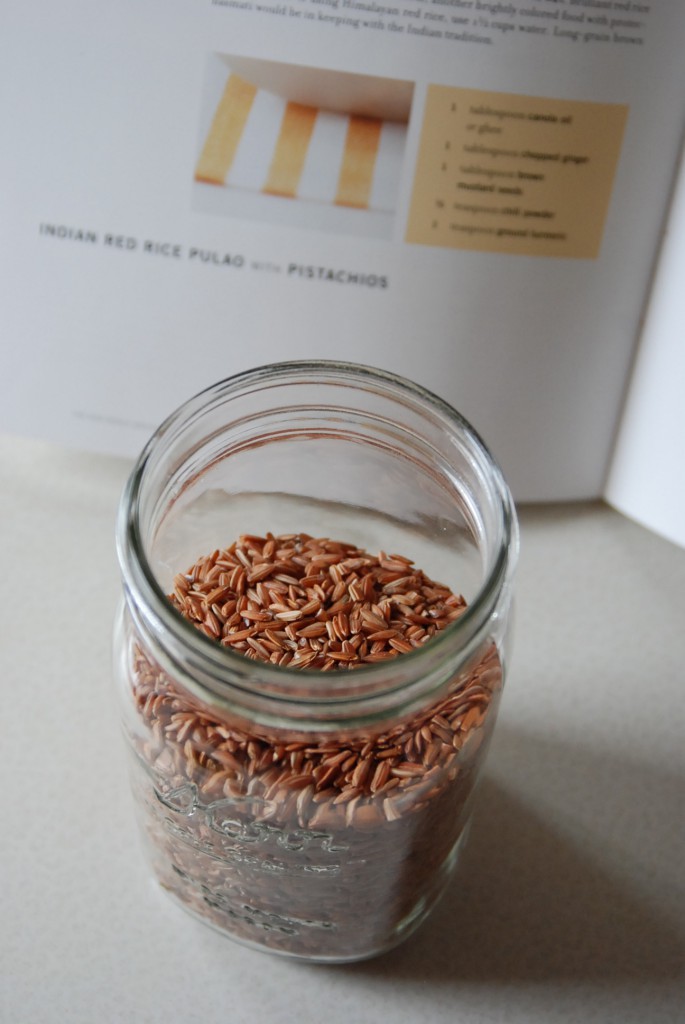
Because that means no one’s ever going to see it, as really, does anyone look in to the archives of a food blog? Rarely. And I loved the recipe when followed to a ‘T’. As I thought about it again, with more capability to be flexible in my cooking, I decided a second go of this dish was in order and am I ever glad I stepped up and made a few changes because this 2.0 version is light years better than the original. No offense to Robin, but the very task of cooking is to learn to feed oneself in the manner that makes you happiest. No cookbook author outside of us knows what makes us happy; only we do, and we owe it to ourselves to learn just enough kitchen skills to take the humblest of foods, such as rice and vegetables, and make them extraordinary. Let the recipe author be your guide, but let your imagination, your tastes and your skills drive you to cook with instinct instead of blind faith.
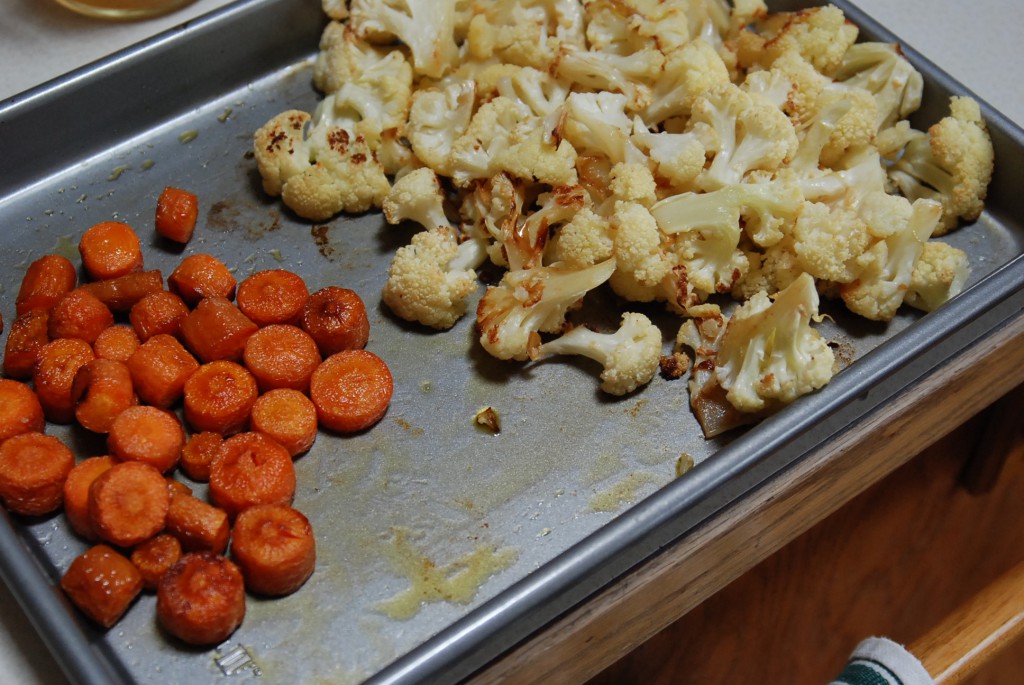
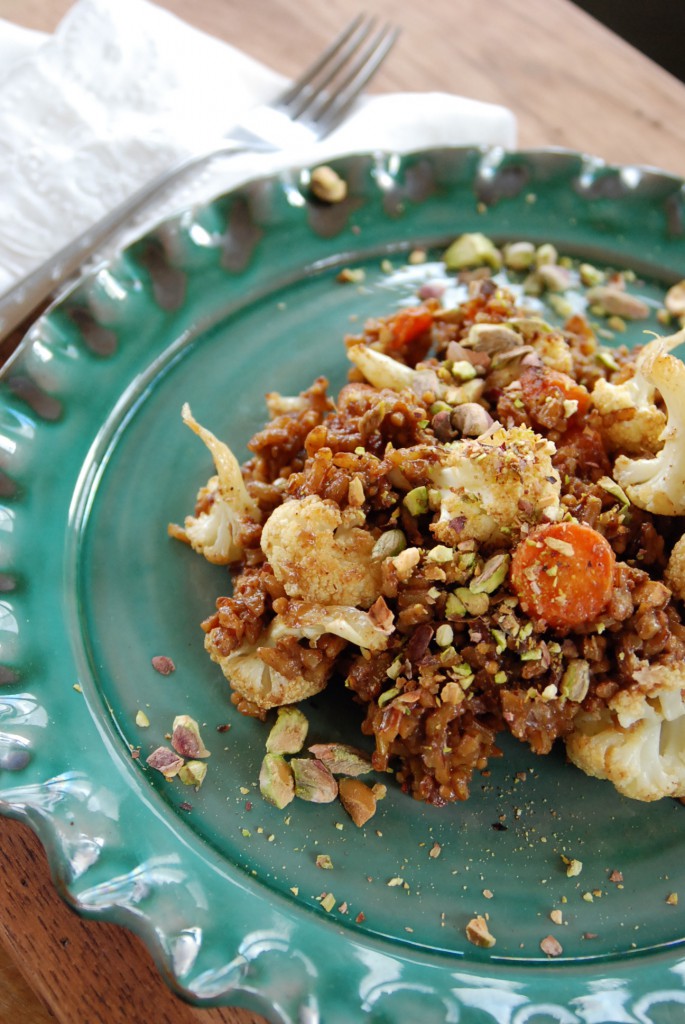
Task-wise, this has a few moments of chopping and prep, but largely you are passing a great deal of idle time as rice simmers, and vegetables roast, while heady fragrances take over your home. This isn’t high-tech stuff here; with the heat of an oven and the magic alchemy of boiling water with rice, you can make an exceptional dish that tastes far more grand than it’s humble beginnings. If you’re unfamiliar with red rice, it’s an intensely chewy rice, often found labeled as Himalayan Red Rice, or Wehani. Properly cooked, it takes up to an hour, all hands off. Finished, it’s a really hearty and satisfying grain, deeper in flavor than brown rice, not as earthy as wild rice. This dish is easily a main course, or can be eaten as a side with any number of proteins. I can vouch that it’s especially good with grilled pork tenderloin.
Here’s where you get to decide what you do with this recipe, because if you want, outside of making the rice you can experiment wildly, with everything else. Instead of carrots and cauliflower, add whatever vegetables you have on hand, or swap almonds, walnuts, pecans or peanuts for the pistachios. This is your base, and when you read through it, your tastes will direct you, just as they should. Trust those instincts. And enjoy.
Red Rice Pulao with Roasted Vegetables
1 T. oil of choice
1 T. chopped ginger
1 T. brown mustard seeds
1 shallot, finely chopped
1/2 t. chili powder
1 t. ground turmeric
1 c. red rice or brown basmati rice
2 c. water
1 T. brown sugar
1 t. salt
2 T. lemon juice
1 head of cauliflower, cut to bite sized pieces
2 medium carrots, sliced
1/2 c. shelled pistachios or toasted slivered almonds
In a 2-qt saucepan, heat oil briefly and add ginger, mustard seed and shallot. Cook for a few minutes, until the ginger is fragrant and the seeds are popping slightly, then add chili powder and turmeric. Stir it up well and cook for a few seconds until the smell is amazing. Add rice, water, brown sugar and salt, stir it up good to combine it all and bring to a boil. Cover tightly, reduce heat to low. The amount of time needed to cook the rice will depend on what rice you use. Test the grains after the time specified on the package, and adjust to your personal taste. Allow to cool slightly. If you are using a true red rice, be patient with it. The time required for me to make mine was slightly over an hour. And every minute was well worth it.
While the rice cooks, heat the oven to 400°, and toss the vegetables with a bit of oil and salt. Since these two cook differently, I put the cauliflower on one pan, the carrots on another and roast until each are tender, shaking the pan often, and stirring to insure even browning. They can hang out in their finished state, until the rice is done.
If you love a good deep flavor for pistachios, take a few minutes and toast them in a skillet over medium heat. It’s well worth it, and that rice gives you plenty of time.
When the rice is done and cooled, dump it all in a large bowl and add the roasted vegetables. Toss together gently and add a few tablespoons of those nicely toasted pistachios. Toss a bit more, taste and add salt and pepper if you wish, then serve it, topped with more pistachios. This dish is good whether served cold, hot or at room temperature. You can garnish it with chopped scallions too, for a bit more flavor.
March 4th, 2012
| 1 Comment »
This time of year is a hard one.

I seem to start slipping off the tightrope each February. Bored, restless, tired and too stunted by the dull landscape, I stand on the figurative ledge and think ‘Ugh.’ as I look around. The vertigo makes me twitchy, and thankfully, a trusted friend is there to pull me back and say ‘You know, you go through this every year at this time.’. I’m grateful for someone standing outside of me, who can rationalize this wandering mind, drawing it back to the reality that it’s just late winter and I could use some green and some color in my life.


Surrounding myself with a few hours of plant life, of colorful flowers, weeping ferns and a warmth that left me sweaty certainly helped a great deal, and it seems to become more important in the last gasp of winter to put sunny, warm foods in to the body, like an infusion of heat and sunshine that lights us up from the inside. Like this lemony pasta.
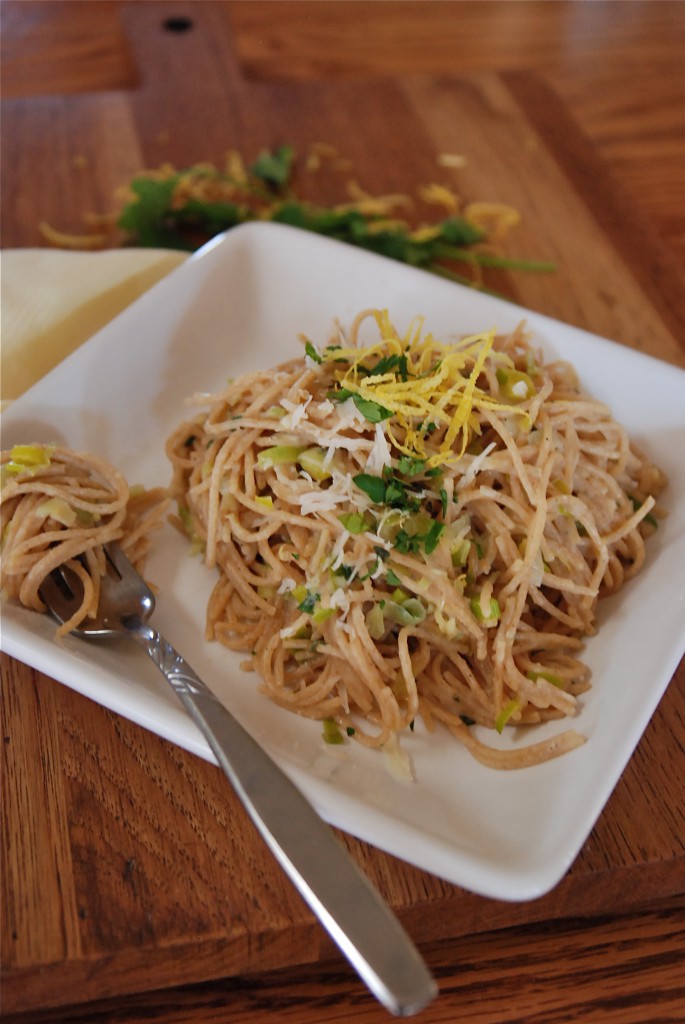
Eating anything with lemon in it is like ingesting sunshine, it’s so bright and engaging. This couldn’t be simpler to make, with a few leeks, a juicy lemon and a shower of fresh herbs, and parmesan cheese. I’ve done so much with lemons in my baking, like this Lemon Pound Cake, these intense Lemongrass Bars, and a delicious Lemon Ricotta Cookie, but adding sparkling citrus flavor to savory dishes has been few and far between, with maybe the exception of these exceptional Garlicky Lemon White Beans. That’s to an end though, after discovering this bright and lively pasta dish.
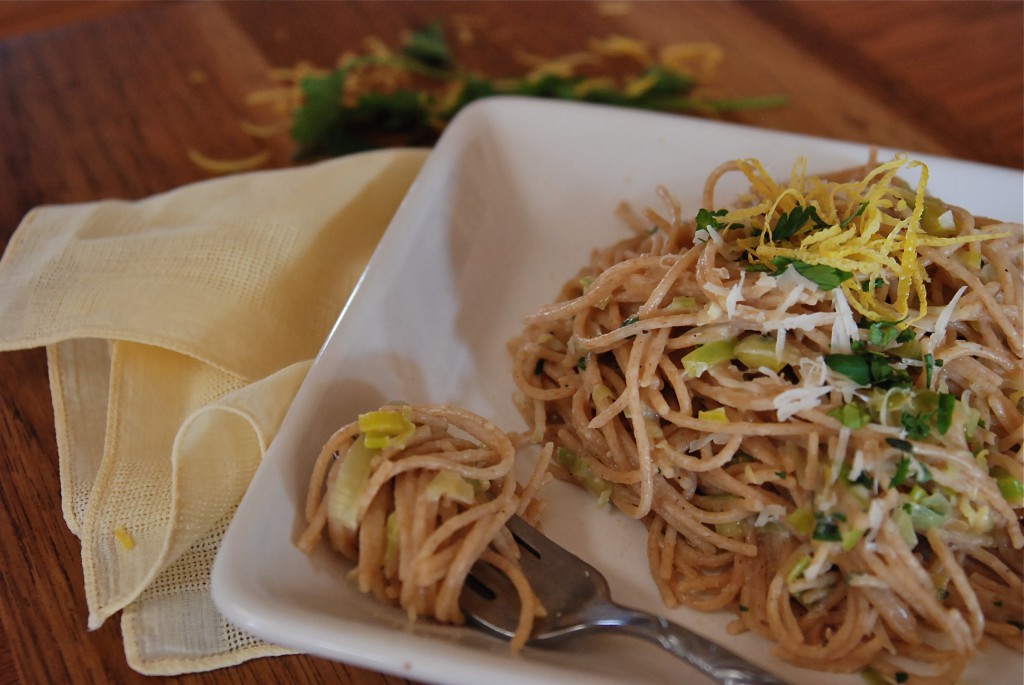
From the February issue of Eating Well magazine, resplendent with juicy lemon slices on it’s cover, this is a quick and easy recipe to put together. In the time it takes you to make a pot of pasta, you can have the leeks sauteed, ready and waiting. A few turns in the pan, with a splash of that ever-important pasta water and dinner is served.
Leek and Lemon Pasta
1# whole-wheat linguine or thin spaghetti
2 large lemons, plus lemon wedges for garnish
2 medium leeks (white and pale green parts only), thinly sliced and rinsed well
2 tablespoon extra-virgin olive oil
1/2 cup chopped flat-leaf parsley, divided
2 cloves garlic, crushed
1/4 teaspoon salt
1/8 teaspoon freshly ground pepper
3/4 cup finely grated Parmesan cheese, divided
1/4 cup snipped fresh chives, divided (I used thyme and it was delicious)
Cook pasta in a large pot of boiling water until just tender or according to package directions. Reserve 1-1/2 cups of the cooking liquid and drain the pasta in a colander.
Meanwhile, finely grate the zest from one lemon and squeeze juice from both lemons; set the juice aside. Pat leek slices dry. Heat oil in a large nonstick skillet over medium-high heat. Add the leek, the lemon zest, 1/4 cup parsley, garlic, salt and pepper. Cook, stirring frequently, until the leek is lightly browned and softened, about 6 minutes.
Add the pasta, 1 cup of the reserved cooking liquid, 1/4 cup of the lemon juice and the remaining 1/4 cup parsley to the pan. Cook, stirring constantly, until the liquid is mostly absorbed, 30 seconds to 1 minute. Add the remaining 1/2 cup liquid, or more lemon juice, if desired. Remove from the heat. Toss the pasta with 1/4 cup Parmesan and 2 tablespoons chives. Transfer to a serving bowl or bowls; sprinkle with the remaining Parmesan and 2 tablespoons chives and serve with lemon wedges, if desired.
Recipe in full, from Eating Well magazine, February 2012.
RECIPE NOTES: A simple reminder to yourself to catch the pasta water when draining it is to place a pyrex measuring cup in the bottom of your strainer when you put it in the sink. Pour some of the pasta water in it, set it aside, then drain the pasta completely. Another method, which I prefer, is to remove the cooked pasta from the water with tongs and add it directly to the skillet. It takes a bit of timing to get it right, but instead of draining all that beneficial starch away, it clings to the pasta and helps to create the pan sauce needed.
This dish would be wonderful with a broiled mild fish, such as Cod or Tilapia, some seared Scallops or Shrimp would also taste good. If you like chicken, a good lemon-herb rub and a run under the broiler would make a perfect accompaniment to this pasta.
February 10th, 2012
| 4 Comments »
There is something so perfect about a pot of soup, one that steams and seems to sing from the stovetop, humming it’s warmth throughout my kitchen, through my skin and right in to my bones. I feel the need for soup, sometimes as deep as the roots of my hair and permeating outward, and as any good Midwestern girl knows, when the cold winds scour you down and the light is so flat and gray and weak that it makes you weary and drawn, then soup, in all it’s aromatic glory and flavor, can be a shot of lifeblood that runs through you, chasing the chill away.
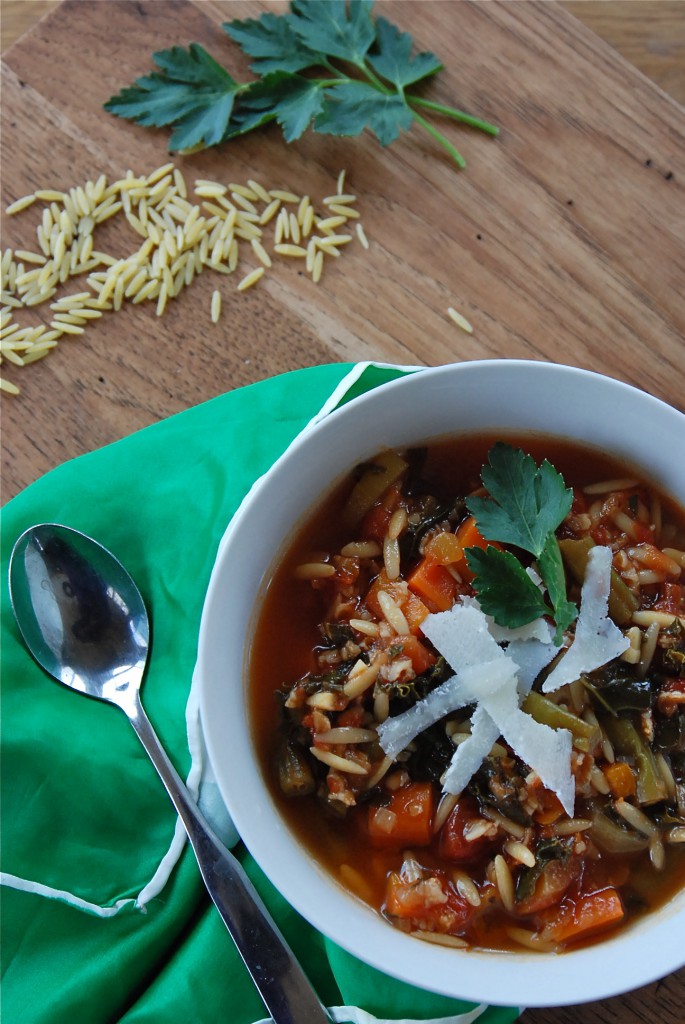
Soup has but a few simple secrets to making it shine, such as taking some time to caramelize the vegetables to form a flavor base, a good broth or stock to add more depth and a shot of love, really, to not rush the process. But good soup really starts from need. Or craving and desire.
I used to not be all that good at making soup, mostly because I just didn’t understand why a recipe that looked so simple could often turn out so darn wrong. I wanted depth, a rich flavor that penetrated the spoon and it’s contents, making it something so much more than broth and vegetables. All I really needed was a bit of patience, a lot of practice and tad more salt. Don’t be afraid of a shake of salt over that simmering pot, as it is the one ingredient that can transform a simple pot of soup to one that shimmers it’s warmth right down to your toes.
This Minestrone soup, as all Minestrone soups go, really has no clear outline, no real etymology. It creates itself for the most part, out of what you have on hand, and what you like in your soup. Or, like me on this particular cold January night, it leapt from under my hands out of sheer need. I couldn’t get warm, couldn’t shake a chill that had settled in my core like a wicked internal frost. Somehow, this chill and it’s accompanying rattle in my brain sounded like it was saying, over and over “Make Minestrone!” and I moved, on automatic it seemed, from fridge to stove to cupboard, seeking and searching ingredients. There were the green beans languishing in the drawer and in dire straits, there was Pomi tomatoes (my favorite packaged tomato- so amazingly fresh and flavorful) and there were thick, deeply orange carrots, fat tear-jerking onions, a partial box of orzo, a few zucchini beginning to look slightly sorry for themselves, just enough kale, a bounty of fresh oregano and parsley. And while the fragrance filled the house, and the soup simmered it’s coherent and rhythmic blup-blup-blup on the stove, a quick search for dunking material in the freezer yielded a container of croutons, spiked with herbs and olive oil, that I’d made from a loaf of stale semolina bread. Did I mention another key ingredient to perfect soup just might be a touch of serendipity?
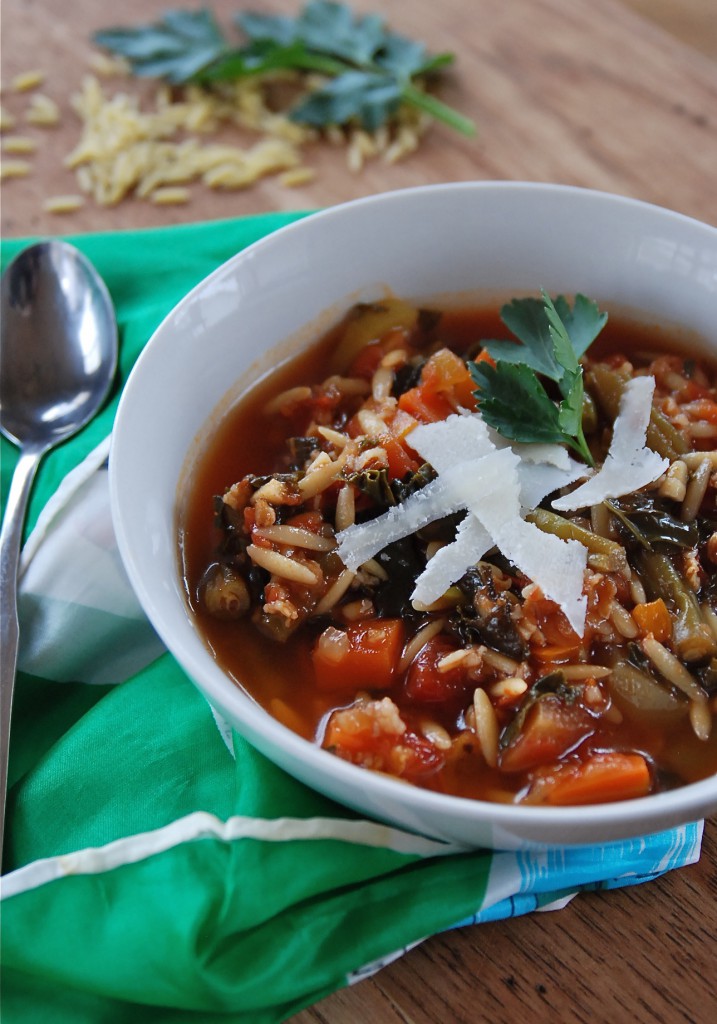
Minestrone requires little of the hard and fast rules; you add what you’ve got, really. What is in season, what is available, what it is you like. It needs a good tomato-y base, without a doubt. But beyond that, it lives for your interpretation. Thick or thin, meat or not, one, two or three vegetables or a whole produce aisle of them, pasta, legumes or rice- it’s all up to you. This version that served to warm my very cold, rattling bones on that damp, chilly night made light of too many singular remnants from the fridge; bits and pieces of plans that maybe fell through or were forgotten, or the one too many of any vegetable that hadn’t been used up yet. It had oceans of freshly chopped oregano and parsley tossed casually over it all, with thick shavings of sharp parm-reggiano. It was like planning a party at the last moment, not so confident of how it will all turn out and right in the middle of it, you realize that everyone in attendance has created an impeccable presence that elevates the whole of it to something utterly sublime. Well, that was my Minestrone that night; a delicious party in a stockpot, gathered with fingers crossed. My intensely perfect Minestrone.
Rounding it all out were the crunchy croutons, oiled, herbed and perfect for soaking up the broth. Beyond that, my perfect soup needed little else but a spoon, a quiet table with two smiling handsome faces, because no day in my life is complete without it ending right there, with them. The darkness settles, chasing out the light with violet and gold tones. The first spoonful I lift easily helps me cross the threshold from day to night, pushing the cold away, warmly coursing through me. There is a sigh, with half-closed eyes, a look and a feel that says “Perfect. This is just what I need.”
Kate’s Minestrone
1 large onion, diced
3 carrots, peeled and diced
3 celery stalks, with leaves, diced
4 cloves garlic, minced (adjust to taste, I am a garlic lover)
2 small zucchini, peeled and diced
1/2# fresh green beans, cut to 1/2″ pieces
1 bunch fresh kale, rough stems removed and chopped (sub chard, collards, or spinach)
1 32-oz pkg Pomi Tomatoes (use equivalent of your choice)
1/2 c. Orzo pasta (use small pasta of choice)
1/4 c. bulgur (optional, but I like the heft and nutrition it adds)
1/4 c. fresh chopped parsley and oregano (basil and thyme are also good)
Parm-Reggiano shavings
In a large stockpot, heat a small amount of oil and add the onions. Cook over medium heat, stirring occasionally, for about 5 minutes, or until the onions are opaque. Add the carrots, celery and green beans and cook, stirring, until the vegetables begin to brown a little, maybe 10-15 minutes. Moderate the heat to prevent them from scorching.
Add the garlic and a pinch of kosher salt. Stir to incorporate and cook for a few minutes until it’s wonderfully fragrant. Add the zucchini and the tomatoes and a quart of broth or water. Bring to a simmer and cook until the vegetables are tender enough to pierce with a fork, but not completely soft.
Add the kale, the pasta and the bulgur, if using. Depending on what pasta shape you use, cook until the pasta is al dente. Taste the soup and season with salt and pepper. Make sure the pasta is cooked, but also remember that it will continue to absorb liquid as the soup sits.
Ladle soup into bowls and top with a sprinkling of the fresh herbs and some shavings of cheese. Serve with a good bread, if desired.
RECIPE NOTES: This soup is wide open to interpretation, and can be modified in a multitude of different ways. Brown some good sausage and use the fat rendered to cook the vegetables for an added punch of flavor. This was a favorite way to make this soup back in my meat eating days.
Legumes can be added to this as well, and most Minestrone soups have them. Use a good quality white bean, such as Great Northern or Cannellini. Chickpeas would also be a good option.
As is the case with most soups, it develops a lot of flavor as it sits overnight in the fridge, but it will also absorb a lot of liquid in to the pasta and the bulgur (if you use the bulgur). Adding a little water to the soup before reheating will help loosen it.
Linking up to Soupapalooza 2012!!
“Come join SoupaPalooza at TidyMom and Dine and Dish; sponsored by KitchenAid, Red Star Yeast and Le Creuset”
January 14th, 2012
| 5 Comments »
The cuisine of India is one of my favorites, almost hands down. I love the vibrant flavors and colors, the spice and aroma and the endless variations. I love the lentils, the vegetables, the breads and condiments. All of it.
I’m not alone in my love for this aromatic and delicious foods, and recently a group of my closest friends and I decided to get together one evening for Curry Night. We’d spent a talkative morning over coffee chatting endlessly about food and hit upon the topic of Indian food, each sighing in joy, rolling our eyes and declaring it’s lofty place in our lives. Paired with an intense desire to get our husbands in the same room together, we planned, plotted and perfected our recipes, and on an unseasonably warm January night, we carried fragrant dishes to Amanda and Brian‘s beautiful brownstone apartment in St Paul and gathered, loudly, to enjoy this amazing food, and some well deserved face time. The holidays, with their obligations and frenetic pace had kept us apart far too long and we needed a night together of food, wine, chatter and fun. The entire evening was a wonderful and delicious, with much needed laughter and camaraderie.
Dhal Makhani is one of my most favorite lentil dishes to order when I go out for Indian food, but I’d never attempted it at home, mostly due to the absence of an easy place to buy the requisite black beluga lentils required. But when a shipment from Marx Foods landed on my doorstep, with 8 2-lb containers holding a rainbow of colored lentils, all I needed was a good recipe. And an excuse.
Thankfully, I found both.
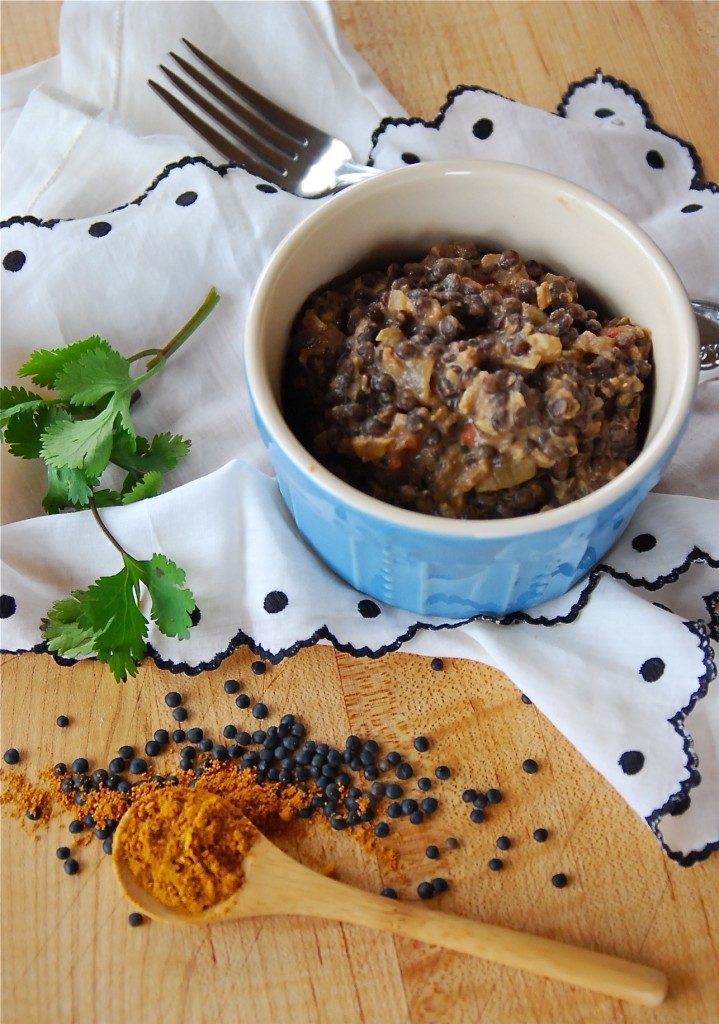
Lentils, as a food, don’t win many beauty contests. What they are beyond their rather homely end result is a quick-cooking, nutritional little powerhouse. This dish was deliciously fragrant and hearty; black lentils hold their shape beautifully after cooking, and with the right amount of garlic, ginger and onion, along with the heady blend of spices that make up many Indian dishes, this recipe was glamorous with flavor and it smelled simply amazing. A thin drizzle of cream gives it a wonderful rich taste, and it evolves over time and a day in your fridge to gain in taste what it lacks in eye appeal.
This recipe can easily be made vegan by eliminating the heavy cream, substituting an alternate of choice. It has no meat in it at all.
Dhal Makhani
1 cup black lentils, washed and picked over
2 large onions, minced
2 green chilies, sliced (remove seeds and inner membrane for less heat, if desired. I used jalapenos)
2 large tomatoes, peeled and chopped into cubes
2″ piece of ginger, chopped
1 T. garlic, minced
2 t. ground coriander
1 t. ground cumin
1/2 t. red chili powder
1/4 c. heavy cream
2 T. cooking oil of choice (i use grapeseed)
2 T. ghee
1 t. cumin seeds
In a small bowl, mix ground coriander, ground cumin and chili powder together. Set aside.
Place rinsed lentils in a medium pot and cover with 3 cups of cold water. Cover and bring to a boil. Reduce heat to simmering, and cook until lentils are tender, about 25-40 minutes. You can leave just a bit of bite to them, as they will cook more in the finished product.
Meanwhile, in a large, deep skillet, heat oil and add onions. Stir to coat and cook, stirring occasionally, until onions are beginning to brown. Add green chiles, ginger, garlic and the ground spice mix and stir to coat completely. Continue to cook and stir until the vegetables are tender and deeply browned, about 20-25 minutes. Keep heat regulated to avoid burning them, and stir often.
When the lentils are tender, transfer them to the skillet, reserving some of the cooking water. Stir the lentils to mix with the vegetables, and add the cooking water, 1/3 cup at a time until a smooth gravy forms. Bring to a simmer, and cook for about 15 minutes, stirring occasionally. Taste and season with salt. Cook for a few more minutes and taste for salt. Turn off heat and wait for the simmering to stop. Drizzle the heavy cream over the top and stir to incorporate.
For an authentic finish, heat ghee (or clarified butter) in a small skillet until very hot. Add the cumin seeds and quickly cover the pan. Shake the pan while the seeds pop, and when they stop, scrape the butter and seeds on to the Dhal Makhani and stir together. This mixture is very hot and will sputter so be careful.
January 5th, 2012
| 4 Comments »
The new year is starting out with a bit less motivation than I was expecting. This isn’t such a bad thing; I did have the last five days off work, and after the busy, frenetic pace of the holidays that was a very welcome change. Maybe the sloth that settled on me was just a reminder to take the time off wisely, to relax, regenerate and just be.
But I wanted to cook and I wanted to stretch. I’ve been lacking in the desire to stretch in the kitchen, to experiment with a few recipes that press against the norm of what I’ve been doing lately, which admittedly, isn’t a whole lot. That work thing sort of stunted my creativity for a while, and before that…. well, I was just coasting. But we’re on a fresh calendar page, with new beginnings for everyone; resolves to take a healthier approach to life, to strive for better in our personal lives; I’ve even seen people who are eager to expand their eating repertoire, promising to try one new food item each week. These are resolves I can get behind. And along with continuing on our meat-free journey, I need to explore more options for our meals. Because while soups, meatless chili and braised greens are all tremendous and satisfying, there is so much more in this vegetable world that can be taken on.
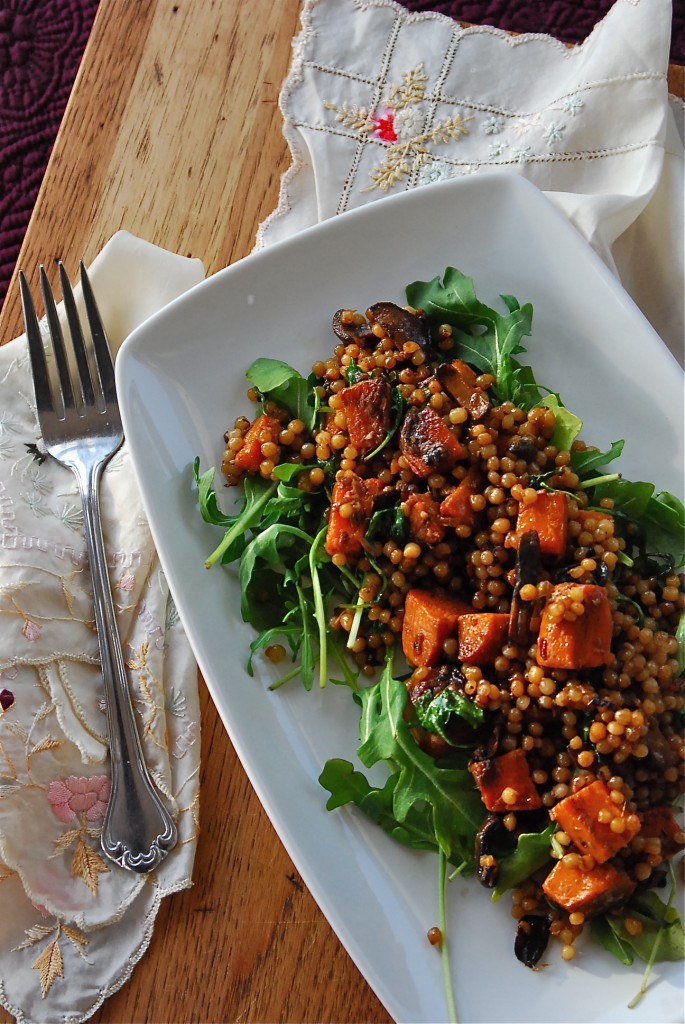
This recipe was bookmarked back in October, most likely. As is the norm, I’m just not sure why I don’t tackle these things as soon as they land in my radar. I could have been enjoying this dish on repeat each week, changing up the vegetables and inhaling it’s deeply dark and sweet flavor through these last few months, but as usual, it languished. And we missed out. That’s too bad. The flavor in this dish was incredible, invading our senses not only as it cooked, but as we gathered over our steaming bowls, forks poised in anticipation. I looked down at my bowl and turned to Mike. “This is a total restaurant dish.” and he nodded as the first bite crossed his lips. His eyes lit up and he smiled.
And there’s another reason why I kick myself for waiting so long to enjoy this. To miss out on seeing that is criminal.
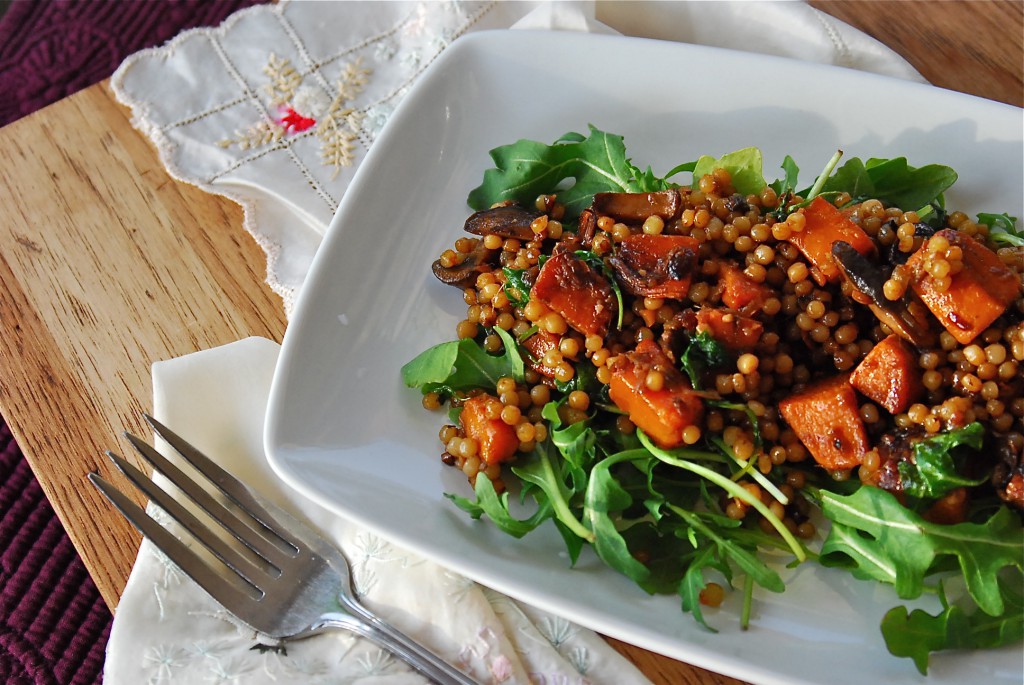
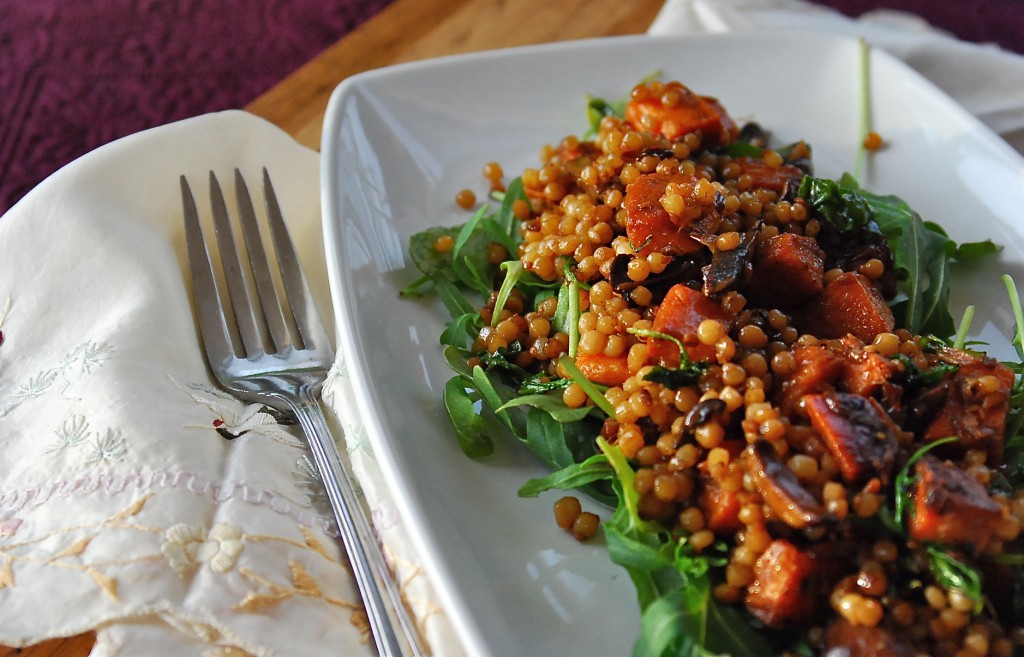
The creation of this dish isn’t difficult; it does require some attention as you methodically caramelize your vegetables in stages on the stovetop. I evolved the process from the original instructions to make it even easier for your average cook. You need a big pan with lots of surface area- I used a 12″ skillet with straight sides- and patience to allow the vegetables to cook, undisturbed, so they achieve that golden flavor and color. The original recipe calls for using orzo, but I’m slightly enamored of pearl couscous these days, so any excuse to throw that in the mix is fine with me. A good hearty brown rice would even work. While there are a lot of steps to this recipe, it flows very well so don’t let the length intimidate you.
Don’t you just love that color? Not only is the dish gorgeous all on it’s own, placing it in the morning sun, as it rose behind a thin band of clouds brought out all it’s burnished caramel-y tones. Even with it being 9:00am when I took these photos, I could have eaten this for breakfast without a second thought. Hmmmm….. don’t mind if I do.
Caramelized Vegetables with Pearl Couscous
Salt
2 c. pearl couscous
Grapeseed, peanut, or vegetable oil
1 large sweet potato (about 3/4 pound), peeled and diced, about 1/4″-1/2″
1 large onion (about 1 pound), finely diced
4 cloves garlic, minced
3-inch piece fresh ginger — peeled and chopped fine, about 1 tablespoon
1-8oz pkg portabella mushrooms, sliced, with stems removed
1 T. balsamic vinegar
2 T. soy sauce
3 big leaves chard or kale, stalks removed and leaves finely chopped — about 2 cups (I subbed in the equivalent of arugula)
Freshly ground black pepper
Parmesan, optional
Heat a large pot of water to boiling and salt it generously. Cook the couscous until barely al dente — about 5 minutes. Drain and toss with a generous drizzle of oil so that the grains are lightly coated with oil. Set aside.
Heat a large sauté or frying pan (the largest you have — you want plenty of room and hot surface) over high heat. Drizzle in a little grapeseed or vegetable oil (not olive oil — you want an oil with a high smoke point) and heat until very hot. Add the sweet potatoes and arrange them in one layer. Cook them over high heat until they are beginning to caramelize and turn brown — about 4 minutes. Flip them over and cook for another 3 minutes or so.
Turn the heat down to medium and add the onions, sprinkling them with about a teaspoon of salt. Cook, stirring occasionally, until the onions are beginning to turn brown. Add the minced garlic and chopped ginger and stir them into the onions. Push the sweet potato and onions to the edges of the pan, making room in the center.
Add the sliced portabella mushrooms to the hot center of the pan and cook them for 4 minutes without turning them. Then flip and stir them and cook for another 4 minutes. Once browned, stir them in to the sweet potato and onions. Keep the heat at medium, or slightly higher. Stir the vegetables occasionally. You want them richly browned.
At this point everything should be getting well-cooked; the onions should be quite dark brown and the garlic should be golden and soft. The potatoes should be softening.
Whisk together the vinegar, soy sauce, and 2 tablespoons of oil. Pour this into the pan with the vegetables and mix everything together, scraping the bottom as you go. Cook all the elements together for about 3 minutes on medium heat. Then turn the heat up to high, as high as it will go.
Add the couscous gradually, shaking in about a cup at a time, stirring and scraping constantly. Cook the couscous over high heat with the rest of the vegetables for about 5 minutes, letting the couscous get browned on the bottom of the pan, then scraping it up. You are developing a little more color and flavor on the pasta, and helping all the flavors combine. (I cooked this a bit longer to get more flavor in the couscous. The browning of it smells glorious)
Finally, toss the greens into the mix and cook for 1 more minute or until the greens are barely wilted. Turn off the heat and taste. Add salt and pepper if needed. Serve hot, with shavings of Parmesan if desired. (We didn’t even consider the parmesan. And I don’t think it even needed it.)
Original recipe from The Kitchn, by Faith Durand. Here with my own modifications.
|


