June 4th, 2012
| 7 Comments »
It’s almost ridiculous how simple and delicious this vinaigrette is, how a few smashed berries and a drop or two of balsamic vinegar can transform into a delightful, light and spring-like marinade for the freshest of fresh greens, but this is the very reason why we blog, share and shout our discoveries. These delicious surprises need to be more widely known.
Do you ever feel like the very fiber of your body fills up sometimes with the grimy bits of your life? Sucking you down and drawing all the energy out of you? I’m very blessed with an easy job that’s only {barely} part-time, but it’s a whacky schedule that leaves only a few days a week completely free and I often cram them with activity with friends, or cooking, household needs, market trips, etc… so much that there comes a time when my body just wants to scream “WAIT! Will you SLOW down a minute???” My sweet husband sees this on my face much clearer than I ever feel it in my bones, and gently urges me to listen. I love that man. So Memorial Weekend came, I had a whopping FIVE DAYS OFF and our lake home called, and finally, I listened. Complete with said husband’s urging me to “Just go.” And within the walls of a beloved summer home, rich with memory and the ability to lull me to a state of relaxation that releases all those icky, grimy bits, the creative mind floods with possibility.
Prior to my escape, and ahead of a pending thunderstorm, I browsed the insanely crowded St. Paul Farmers Market and packed a large sack of fresh greens to take along with me. Thunderous clouds chased me home, and by the time I pulled the greens out to clean them, the sky had opened, lightning flashed and thunder rolled and the cat climbed in a cupboard to hide, poor thing.

{{mr. big eyes}}
I certainly don’t blame him. Thunder does that to a soul, sometimes.
And away from the city, with the sparkling lake outside and lush humid air circulating, I opened the bag of freshly washed pea shoots I’d purchased, a bunch so enormously large that my two hands could not span the circumference and they thoughtfully conveyed “We need something more than what comes in a bottle.” and with the pack of strawberries saying ‘Hey! What about me?’ I spurred a breakthrough. What? Your food doesn’t speak to you? Shame. There’s is a lot to hear from our food these days.
And if pea shoots haven’t yet been discovered in your eating repertoire – and mercy, do you like peas? try the pea shoots, you will not regret it!- microgreens of any kind are a perfect option, as well as the freshest of spring lettuces, spinach, chard, kale….. the possibilities choke with potential, all dancing about, trying to show us the best they can offer. And if you’re privy to a garden with teeny root vegetable greens that require thinning, like radish or beets, those little shoots that you pull from the ground are delicious too. We thinned baby lettuce and radish from the lake garden, then the beets at home were thinned and the bag of greens that resulted nearly made me weep with joy. Silly, I know. But that abundance is sweet manna, no greater thing to a hungry soul drawn tight from the grimy bits of life.
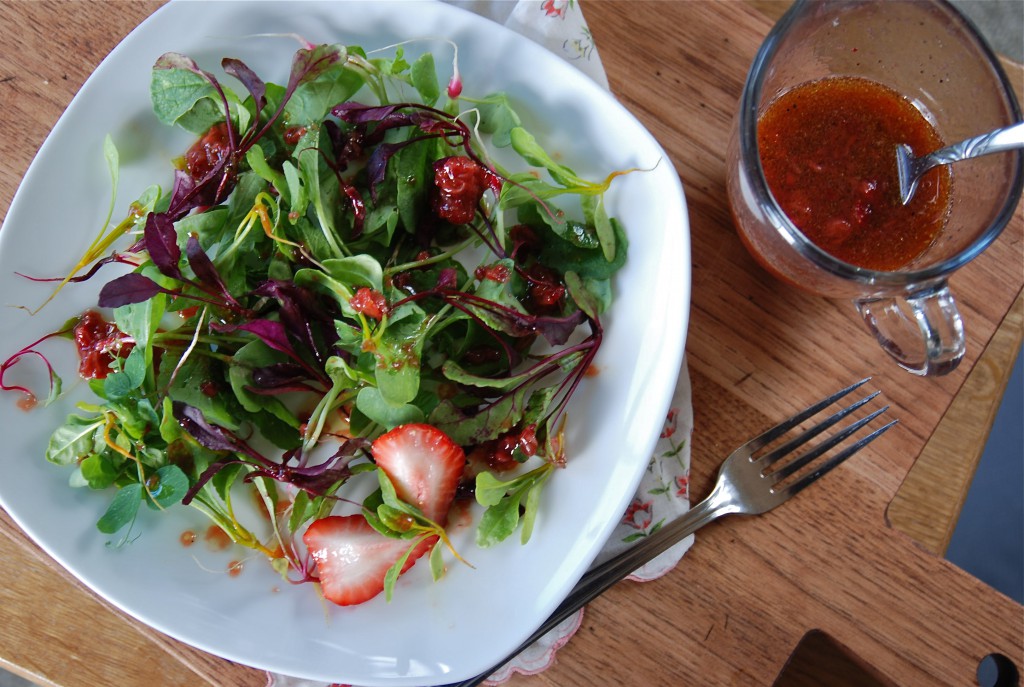
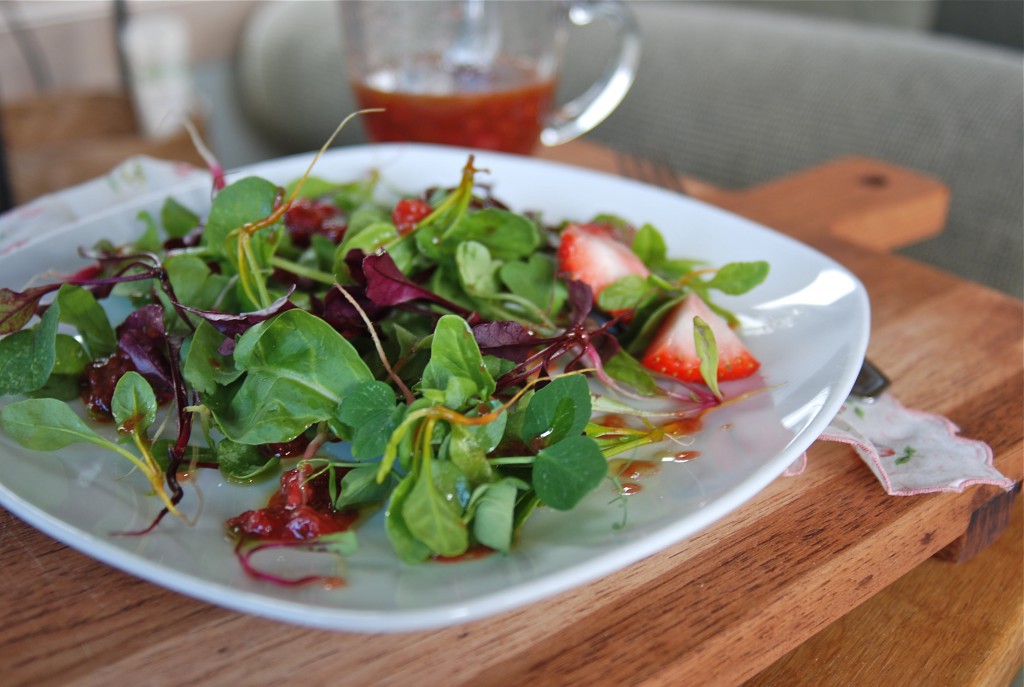
This kind of salad, where freshness is bursting from every corner of the plate is where you would happily pull out your very best bottle of olive oil to use in this vinaigrette. You can’t imagine the taste of that plate up there; I was so enamored of it myself and I’m the impetus behind it, but when the first bite slipped between my lips, coating them with sweet-tart strawberry, dressed in perfect olive oil, I wondered if this truly was heaven on earth, bound in a plate of über-local garden greens and a super simple vinaigrette. I ate it for breakfast, it was that good.
Strawberry Balsamic Vinaigrette
This “recipe”, so to speak, isn’t precise with measurements. And I apologize to those who require those parameters. Do your best with these suggestions.
1 pint of strawberries, washed and hulled
Balsamic vinegar
Good quality olive oil
Brown sugar
Sea salt and fresh ground pepper
Salad greens of the proper quantity for the number of people you’re serving.
As you wash your berries, keep an eye out for the inevitably softer, slightly mushy berries. Set these aside, as their sharper, wine-y taste make them perfect for your vinaigrette.
Wash and spin dry your greens.
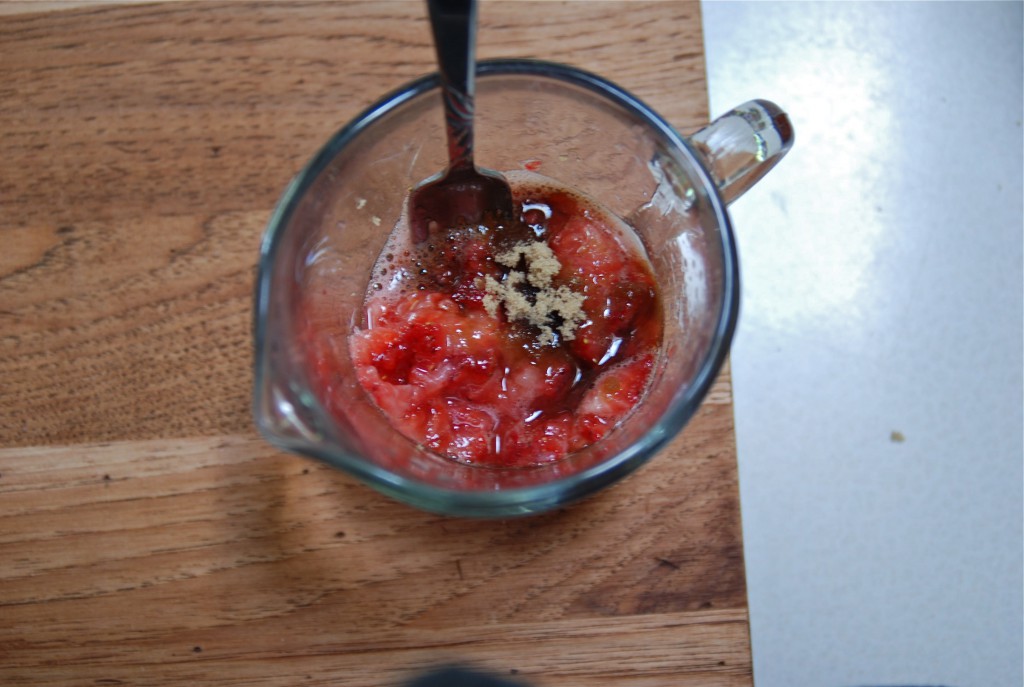
In a small measuring cup, place 3-6 chopped berries (dependent on how much vinaigrette you wish to make) and mash them with a fork to release their juice. Add a few drops of balsamic vinegar and a generous pinch of brown sugar. Stir it together and leave it on the counter. How long? My first batch sat for nearly three hours. The second, only about 15 minutes. Mash the berries on occasion, and stir to keep it emulsified.
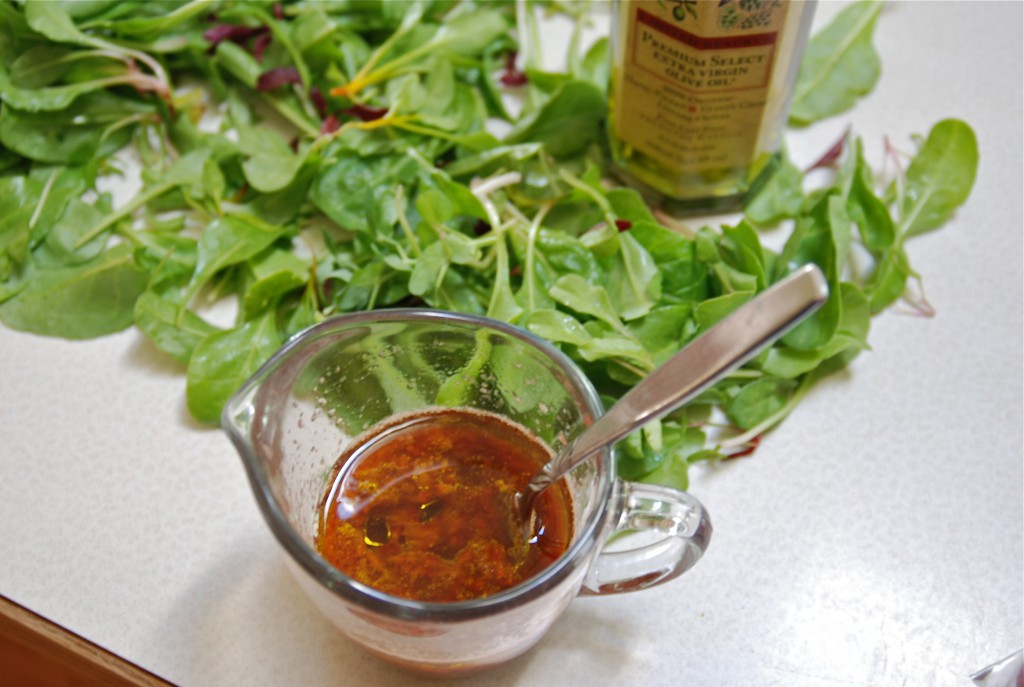
Just before serving your salad, add the olive oil. How much you add depends on how many berries make up the base. More berries? More oil. Add less than you think at first, as you can always pour in a bit more. You want a nice balance of sweet berry, tart balsamic and smooth oil. Shake a few more drops of balsamic as needed, add a dash of salt and pepper and taste everything along the way. You’ll know when it’s perfect.
Plate the greens, add a few sliced berries and drizzle the vinaigrette over the top. I like to keep the chunks of mashed fruit in there, but if you’re a purist, strain it before using. But those chunks are delicious.
May 23rd, 2012
| 1 Comment »
I’ve been phenomenally absorbed by Tamar Adler’s An Everlasting Meal. I’ve barely even gotten through half of it because I read, re-read, underline, contemplate, read AGAIN and then think about it like my very life depends on those words filling every pore in my body. Have you read it? If you love food, and you love simple, easy, good food, I strongly encourage you to pick it up, but be warned….. this book could change the way you cook and I urge you to own it so you can really enjoy the prose, the story, the thoughtful way that Tamar looks at the very things that sustain us.
I’m grateful to this book too, as it came to me through a renewed relationship with an old friend from high school. Connecting on Facebook, even though she lives in Brussels, Belgium, we’ve exchanged many emails about food, and her quest for some information on what constitutes ‘good’ olive oil led to a long discussion about this book. A few days later, the book itself arrived on my doorstep, courtesy of this friendship, and now I know why Barbara was so moved by it.
Tamar’s philosophy about food is utterly simple. It doesn’t have to be complex in the least, and she states this over and over again, through every chapter, rich with descriptives of meals so ridiculously simple that it honestly could inspire even the most timid home cook to become brazen in their own kitchen. The chapter on beans gave me more to think about regarding the humble legume than I’d ever imagined, and was the inspiration when along came a day where a simmering pot of beans just seemed like the thing to do.
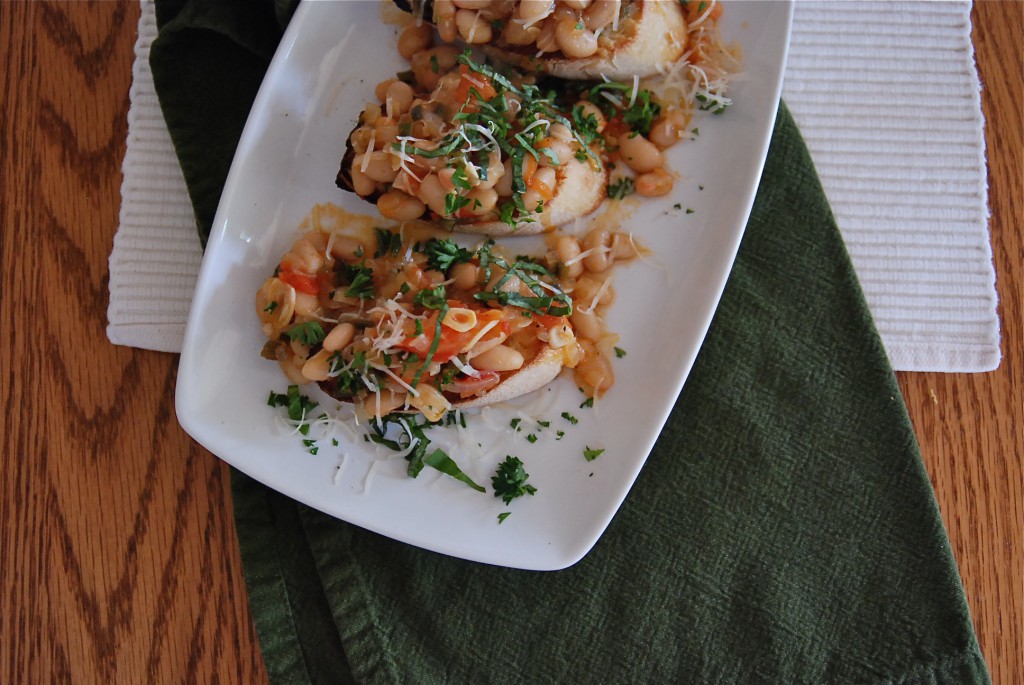
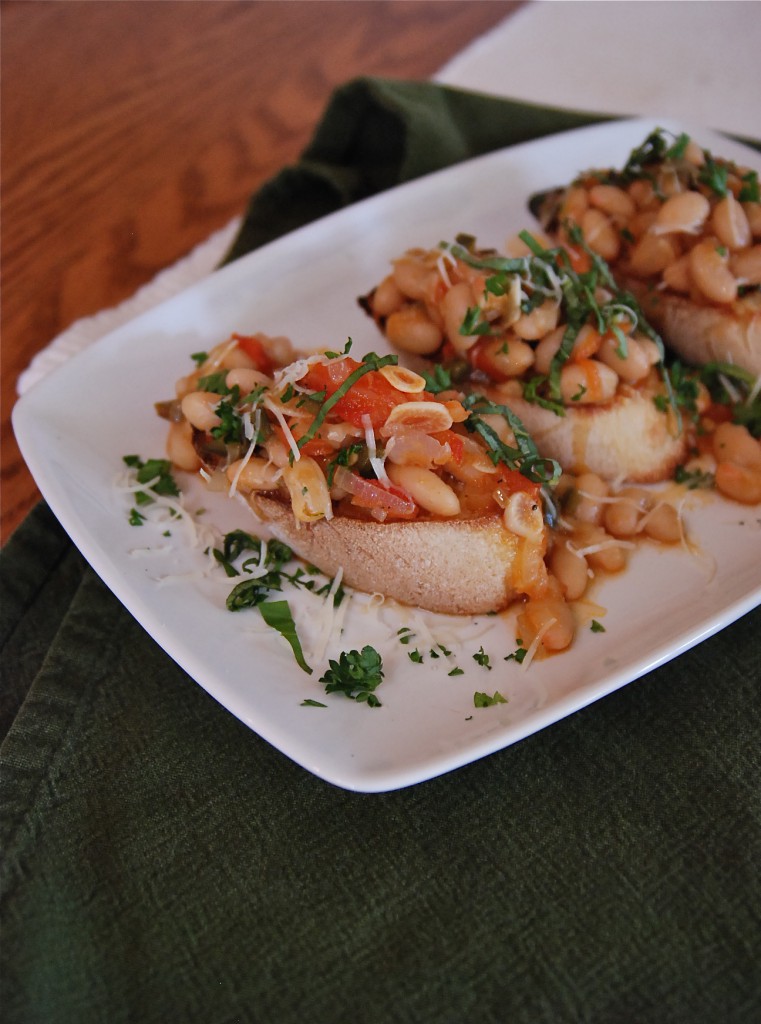
Simple and fulfilling meals have always been my most favorite. I don’t mind fancy eating, once in a great while, but my start on food was a humble beginning, and I’ve lived through some seasons where there just wasn’t enough on the table. I’m not particular about my food, either. I’ll eat most anything I’m served and I’m grateful for it, as the memories of hunger will always remain within me. To me, a pot of beans is a thing of beauty; savory without a lot of work, filling without heft, satisfying like an old friend. It’s soul {filling} food, that which makes you just feel good. Although I do enjoy the long process, on occasion, that a dried bean requires for preparation, I keep on hand a wide variety of canned beans, and in a pinch, these have saved dinner, lunch and even breakfast from mediocrity. A good time simmering and they become so creamy soft and perfect. With a loaf of chewy bread, it’s royalty on a plate, by way of a peasant’s wage.
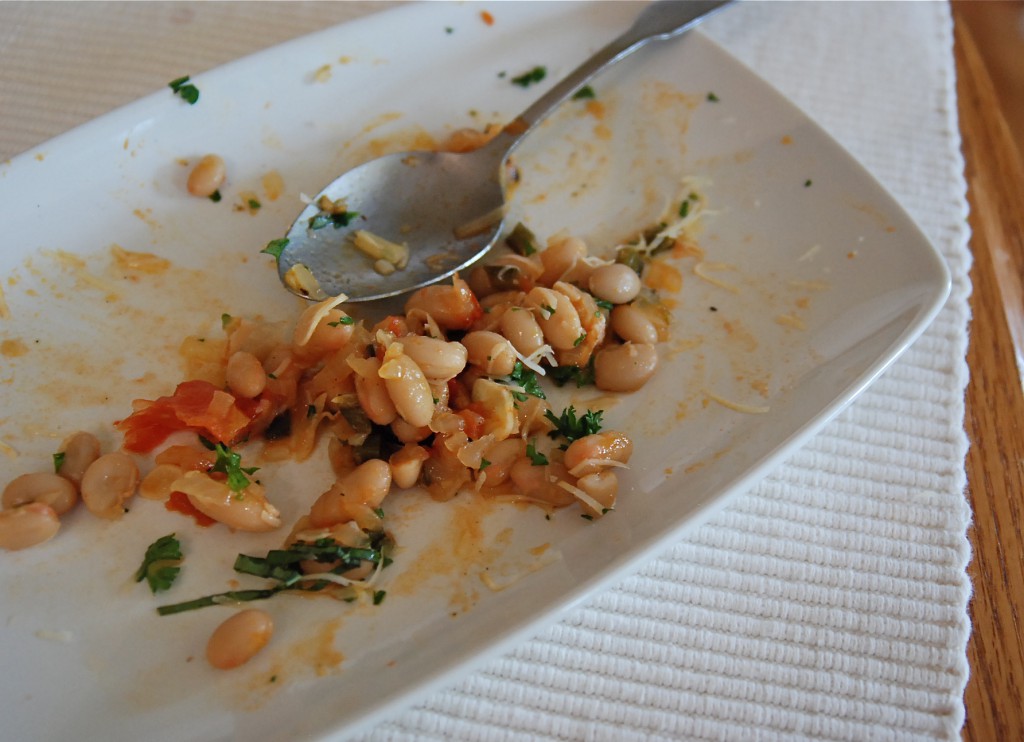
White Bean Ragout
2 large onions, minced fine
1 bell pepper, minced fine
3-4 cloves garlic, thinly sliced
2 medium tomatoes
2 15-oz cans Great Northern white beans, or Cannellini
2 c. vegetable broth
1/2 c. chopped fresh parsley and basil (I don’t recommend subbing in dried)
1/2 c. shredded fresh parmesan cheese
Baguette slices
First, we’ll roast those tomatoes. Slice each one in to quarters, remove the tough core and place on a baking sheet. Heat the oven to 400°. Drizzle the tomato wedges generously with good olive oil, and sprinkle with a bit of sea salt and fresh cracked pepper. Place in the oven and roast until the skins blacken slightly and get all puffy, but not to the point of collapse. You want some heft left in them. Allow them to cool slightly, discard the skins and gently lift them in to a small bowl. Any oil remaining on the pan can be scraped in to the bowl as well.
As the tomatoes roast, heat a large, deep skillet and add oil of choice. Saute the onions and bell pepper, stirring occasionally, for about 25-30 minutes, or until they are very, very soft. Add in the sliced garlic and continue to cook for about 15 more minutes. Don’t allow the vegetables to brown too much. A little is good. Sprinkle them with sea salt and some cracked pepper.
Take the tomatoes and add them to the pan, breaking them up with a spoon. Make sure you add all the juice and oil that’s accumulated too. That’s delicious. Stir in the beans and add the broth. Allow the mixture to simmer, gently, stirring it on occasion, until the broth is thickened and the beans are nice and creamy. If it seems to get too dry and/or sticks to the pan, add more liquid, like broth, or even water. Taste for salt and pepper, adding more if you wish. Add a few tablespoons of shredded parm to the vegetables.
Sprinkle the baguette slices with more parmesan and either broil or toast in a toaster oven until browned and crispy. Alternately, you can grill the bread too, adding the parm when the bread is slightly charred and hot. Place your toasted bread on a plate and scoop the beans over them, making sure to drizzle the liquid on as well. Top with more parm and the fresh herbs. Serve warm, or at room temperature.
Recipe origin: Bon Appetit magazine, May 2012; here with adaptations
May 21st, 2012
| 2 Comments »
A really good bowl of perfect fried rice is one of my most favorite things to consume. Any restaurant with it on the menu sets it’s yardstick by how good their fried rice tastes, and with one bite I’m either over the moon or sadly disappointed. A matchless bowl will have the ultimate combination of firm grains of rice, a deep rich flavor from the wok and enough extras to make good flavor without sacrificing the overall taste of the dish.
I’ve made fried rice at home on occasion, and always with the caveat that my wok will never replicate that of a good restaurant. I enjoy it for what it is from my own kitchen and don’t expect perfection. Especially if I stray from a standard method and go off on my own path.
I’m like that as a cook, anyway. I’m not one to follow a crowd and stick to something tried and true. I like to push myself with my food and try many different means to fill my belly. My unconventional means to a steaming bowl of fried rice started with roasting a few pans of vegetables and ended up with a decent rendition for dinner that everyone enjoyed.
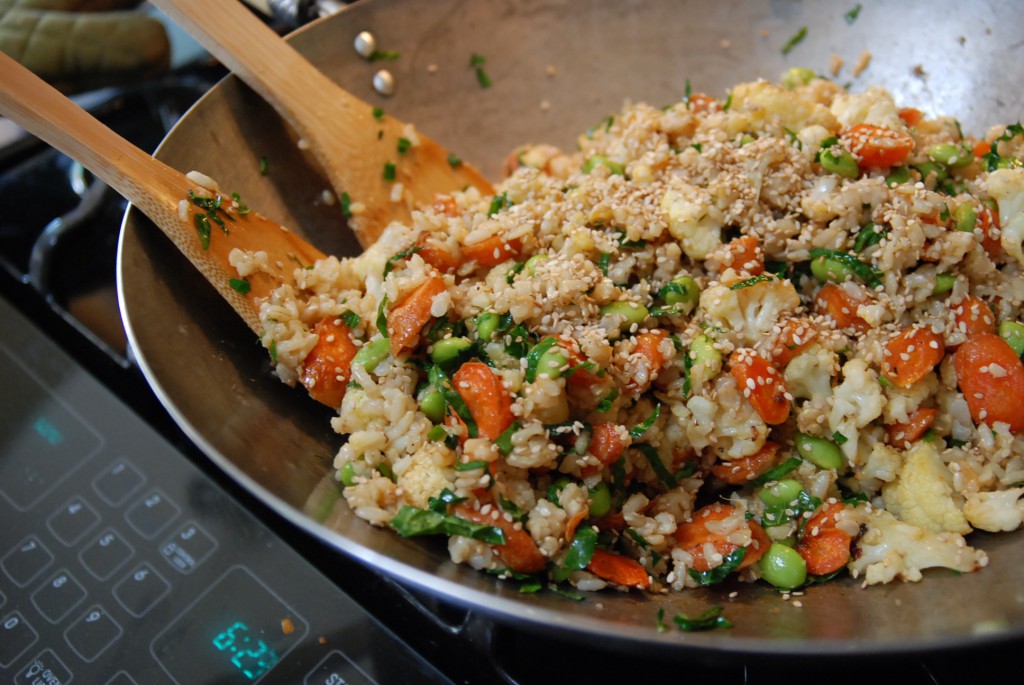
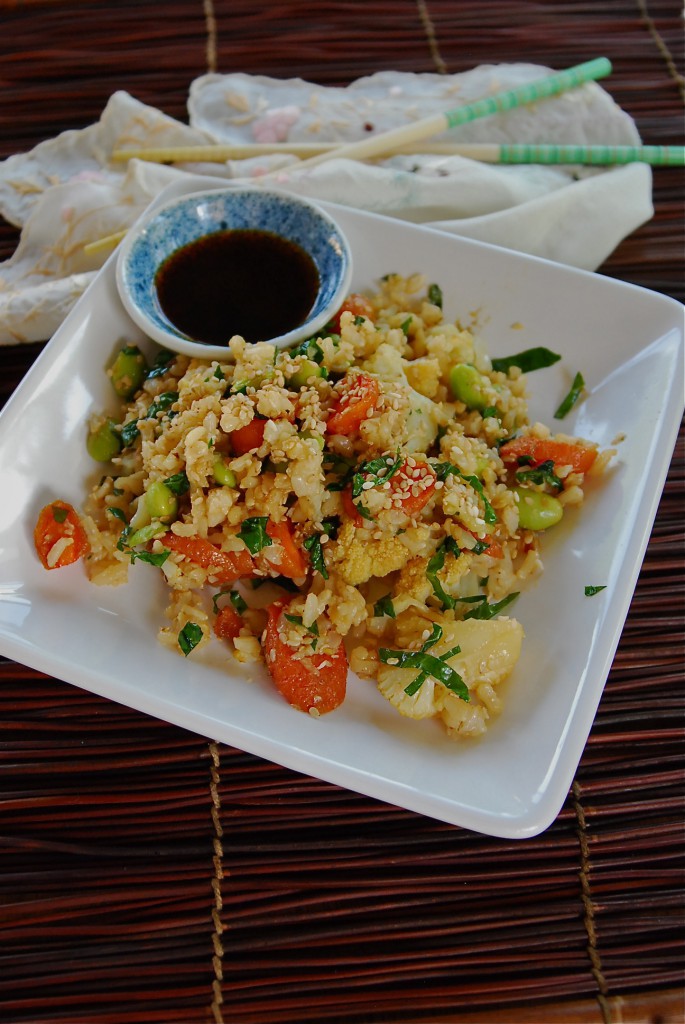
The best beginning to any fried rice is always cold, cooked rice. A few cups of that, along with any variety of vegetables and a hot pan and you’ve got what you need. My version had edamame, roasted cauliflower and carrots in it, plus the remains of some shredded lacinato kale that I had on hand. True proponents of fried rice likely would shake their heads at this combination, but that’s me, in a nutshell. Improvising is my strongest tool when it comes to cooking. There are many days that I stand, pantry doors open, fridge ajar, my mind churning with possibilities, and learning to utilize what’s on hand is a skill worthy of any home cook.
Plus? This was utterly delicious.
Roasted Vegetable Fried Rice
1 pkg frozen Edamame pods
1 head cauliflower, washed and cut to bite sized pieces
1/2# carrots, washed and sliced on a bias
1 c. shredded lacinato kale (or other greens, like spinach or chard)
2-3 cloves of garlic, finely minced
1 T. minced fresh ginger
4 c. cold cooked rice
2-3 T. sesame oil
Soy sauce to taste
Fresh squeezed lime juice (optional, but delicious!)
Sesame seeds for garnish (also optional, also delicious)
Peanut or coconut oil for frying. (You want an oil that will withstand the high heat needed in this dish. I don’t recommend using olive oil for fried rice as it breaks down at high heat.)
Cook Edamame according to package directions, cool and remove from the pods. Heat oven to 400°.
Roast cauliflower and carrots on separate baking sheets, as they will need different times to cook completely. Toss them in a bit of oil, salt and pepper prior to placing in the oven, and roast them to desired tenderness.
In a wok, or large skillet, heat a small amount of oil. When hot and shimmering, add the ginger and garlic and quickly stir for about 30 seconds. Add the rice and stir to combine, breaking up the clumps. Stir and toss the rice until it’s nice and hot, the drizzle about a tablespoon of sesame oil around the edge of the pan and stir the rice with the oil. Add in the vegetables and stir to heat through. Drizzle with soy sauce and a good squeeze of fresh lime juice. (the zest is really nice too!) Add a bit more sesame oil and a few tablespoons of sesame seeds, if you have them. Stir together to combine until it’s all nice and hot. Serve topped with more sesame seeds.
May 10th, 2012
| 16 Comments »
There are plenty of food items, when given a second chance (ok, and sometimes a third or fourth) will reveal much more to your palate than they did on the initial try. Every time I hear of someone disliking a specific food, I ask them how many times they’ve eaten it, how it was prepared or where they had it or any number of questions to determine what they don’t like about it. I always want to know the whys and hows and whats of someone’s intense aversion to a certain food.
When I first met Mike, he told me he did not like salmon. Not one bit. When pressed for more information, he revealed that when he’d eaten it, it was tough in texture (definitely overcooked) and tasted fishy (definitely not very fresh) and so I made him a salmon dinner one night of a terrific piece of fresh salmon that was perfectly cooked. I hooked him for life, pun intended. A poorly prepared food item can be a real turn off. For the longest time as a kid, I absolutely hated pork due to it being overcooked and tough as nails. Once I tasted the beauty of perfectly cooked pork, tender and succulent, I was reformed.
A lot of times, if it isn’t the way it’s cooked then it’s the texture. This was true of my tastes for a very long time. And almost all of the foods that I once disliked as a child, and even in to adulthood have now made themselves a permanent space in my life. Foods such as tomato, onion, squash of all kinds, eggplant, mushrooms…. this list is all about texture. And my initial introduction to Buckwheat groats, also known as Kasha, turned me off due to the texture as well. But the second glance, with a better cooking method in hand and some quick innovation in the kitchen, I turned this healthy grain into a mind-blowing salad that I can’t wait to make again.
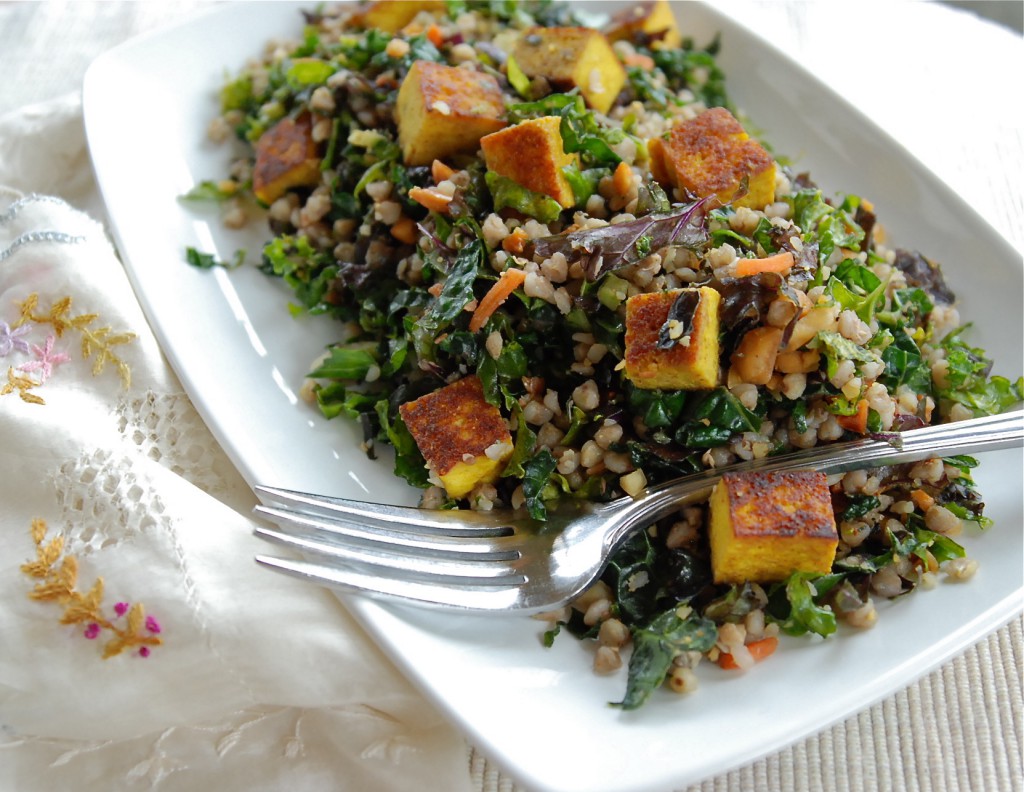
As a singular food item, I’m still not enthralled with kasha, but I think that alone, this grain is pretty uninspiring. That all changes when mixed together with others, kind of like that quiet and unassuming person who comes alive in the right crowd. Kasha grains are tiny, heart-shaped and solid, similar to barley grains, with a sweet, nutty flavor and a nice chewy texture. Buckwheat groats are a potent nutritional item, with no cholesterol, sodium or saturated fat. It’s high in fiber and magnesium, with a low glycemic index. Mixed with shredded kale, dressed lightly in a simple oil & vinegar dressing and dusted with sea salt and cracked pepper, the grains added a perfect complement to kale’s crunchy personality. Chunks of tofu, seared crisp after a curry bath marinade, made for eye-catching color and a protein boost.
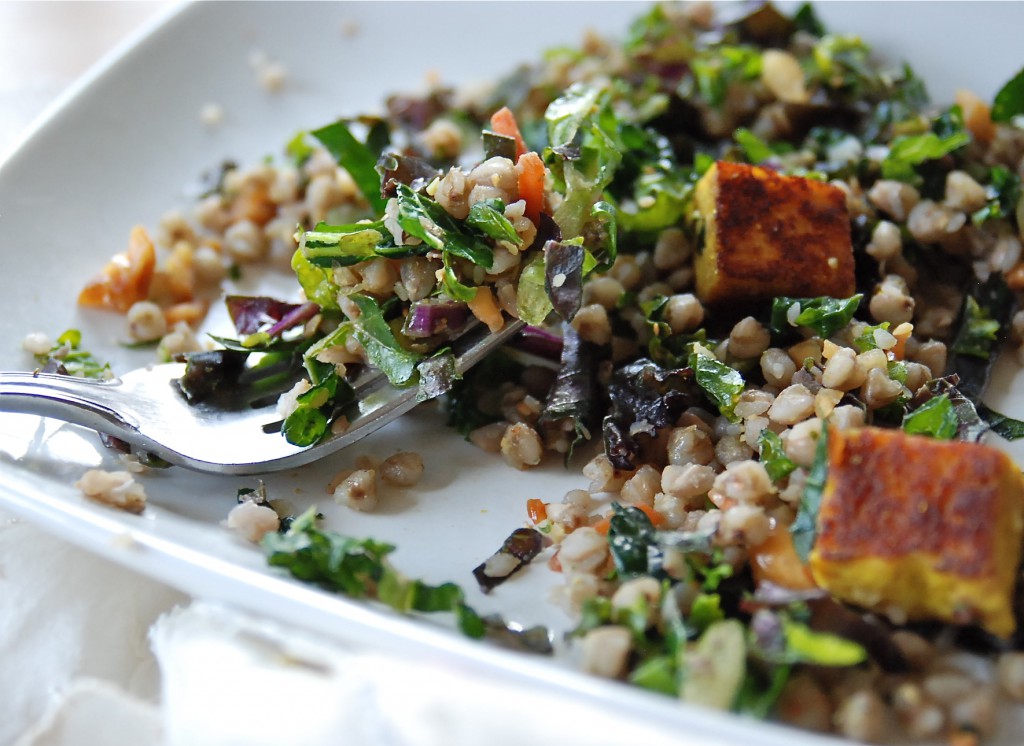
I was a little concerned that this salad would be a bit light, lacking the substance needed to fuel a body’s needs through the day, or evening, but after consuming a small plate of it, I was surprisingly full, and that satiation lasted until bedtime, and beyond. A small portion for lunch the next day easily carried me through the remainder of work too.
And speaking of second chances……
 This delightful 4-cup Bodum Assam Teapot needs a new home. Do you love tea? I drink a lot of tea, and have a somewhat shocking collection of it in a cupboard. I also have a smaller Bodum Teapot that doesn’t get used as much as I would like. So this one could be yours, all for the sake of a comment. Tell me what kind of tea you like to drink, hot or cold or whatever, and you’ll have a chance. I will pick one name on Sunday May 13th. This delightful 4-cup Bodum Assam Teapot needs a new home. Do you love tea? I drink a lot of tea, and have a somewhat shocking collection of it in a cupboard. I also have a smaller Bodum Teapot that doesn’t get used as much as I would like. So this one could be yours, all for the sake of a comment. Tell me what kind of tea you like to drink, hot or cold or whatever, and you’ll have a chance. I will pick one name on Sunday May 13th.
And now, how about that recipe??
Kasha with Kale and Curried Tofu
1 pkg extra firm tofu, drained and cut in to cubes
2 T. curry powder
1/4 c. olive oil
1 c. raw buckwheat groats (available at co-ops)
2 c. water
Sea salt and fresh cracked pepper
1 pkg Cut N Clean Greens Rainbow Kale Salad (with or without the dressing- which can be used in lieu of a vinaigrette)
About a half cup of your favorite vinaigrette recipe, or similar bottled version
Crushed peanuts, optional (but a delicious and crunchy addition)
In a small skillet, begin toasting the buckwheat groats over medium-low heat. Have the water ready in a separate lidded pan. As the buckwheat begins to heat up and you start to smell a nice nutty scent, start the water heating. Continue toasting the buckwheat, shaking the pan to avoid scorching, while the water heats up. When the water begins boiling, carefully start shaking the toasted groats in to the water. They will sizzle and the water will steam up as you add the groats, so don’t dump them all at once, just a small amount at a time. Once they are all in the boiling water, reduce the heat to a bare simmer, cover the pan and cook the groats for about 15 minutes. The water should be completely absorbed and the top of the groats will look dry. Shut off the heat and allow the pan to sit for 10 minutes, then fluff the grain carefully.
In a small measuring cup, whisk the curry powder and olive oil together. Pour over cubed tofu and toss to coat. The tofu will soak up all the marinade. Allow to soak for about a half hour. (this is a good time to cook those groats) Heat a large skillet over medium heat and add a drizzle of olive oil. Sear the tofu to your desired browning. Place on paper towels to absorb any excess oil, and set aside.
Place rainbow kale in a large bowl and drizzle some of the vinaigrette over it. How much depends on your taste. I like a lightly dressed salad, but you may like a bit more. Add in the groats, about a cup at a time as you may not want all of it in the salad. Toss, taste, season and add more groats until you have a nice balance of kale and grain. Taste, add more vinaigrette or salt and pepper if needed, then gently add in the tofu and crushed peanuts, if using.
The salad can be eaten at room temperature, and the flavor deepens overnight in the fridge. Taste the next day to see if it needs more vinaigrette, salt or pepper. The kale and grains will absorb that overnight.
April 11th, 2012
| 1 Comment »
There’s nothing, really, to making a pan of enchiladas. Tortillas, filling, sauce and cheese, a bit of time in a hot oven and you’ve got a dinner that should please just about anyone. I probably don’t even need to give you a recipe, do I? (but I will…..)
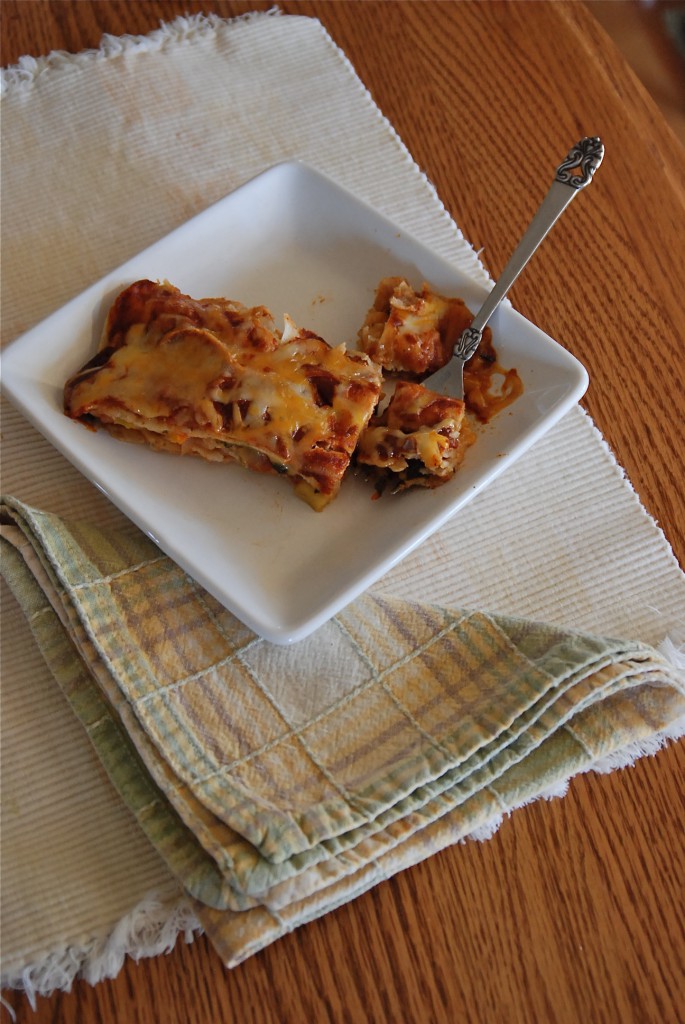
What enchiladas are though, is reliable. At least in my home they are. I know they’re something that all of us will eat without a shred of complaining. And we all need those types of meals in our homes, on our tables and in our back pockets, don’t we? The ones that no one whines over, or rolls their eyes. A meal that everyone will gobble down with reckless abandon. I know with a few peppers, canned beans, frozen corn, a pack of tortillas and a bit of time, that a meal will land in our midst and pull us together, drawing the day to a close. And long before we stopped eating meat, I could make Vegetable Enchiladas and Griffin wouldn’t care one whit about them. Thankfully, that’s still true.
We’ve slipped back to somewhat more normal weather these days, now that April has come and set her softly budding Spring on us. March’s heat wave gave us all a taste of warmth and summer and we all want it back, but these days, the nights come cold and brisk and for me, this past week of frost warnings and cold sunshine was enough to want the oven humming and a warming dish in our bellies. I know soon enough that it won’t feel like these comforting dishes will be necessary, so along with our old reliable Enchiladas, I wanted to have one last send off of a favorite meal before the heat comes and dinner plates are full of fresh and lighter meals.
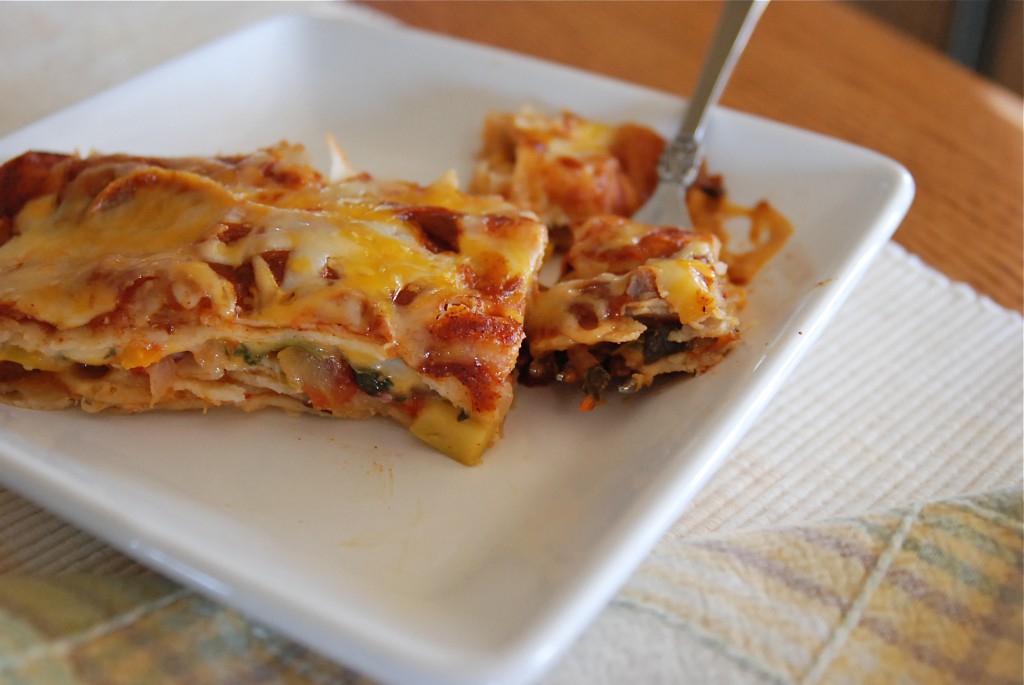
There’s really two ways you can make Enchiladas, outside of choosing between corn and flour tortillas; you can roll up the filling inside the tortillas, or you can layer the filling between the tortillas, creating a more ‘lasagna’ style dish that’s equally as good, and sometimes a bit easier to negotiate out of the pan. I like them both ways, and the ‘lasagna’ method is a bit less work, but if you’ve got willing hands to help, the rolling part happens pretty fast. The best part of this meal is having LOTS of good leftovers, and I think the flavor gets much better overnight.
And as for sauces….. I’ve never made an enchilada sauce from scratch that even came close to tasting like a few canned varieties I’ve found. My go-to brand of enchilada sauce is Carlita; it’s a deep, rich red sauce that’s got just the right amount of seasoning and spice. Las Palmas is another good option; they’ve got both red and green enchilada sauce, and have a Mild, Medium or Hot option. The Medium is plenty for us, and their green enchilada sauce is really amazing.
(disclaimer: nobody paid me to say that, or gave me free products to say that. Just so you know)
Vegetable Enchiladas
2 bell peppers, cored, seeded and diced (any color you choose)
1 large yellow onion, diced
2 cloves garlic, minced
1 jalapeno pepper, cored, seeded and diced (like it spicier? make it a serrano)
2 small zucchini, peeled and diced
1 c. frozen corn kernels
1 15-oz can black beans, drained and rinsed (can sub any kind, really)
1 15-oz can fire roasted tomatoes
1 T. chili powder (can sub in canned chipotle in adobo if you have it on hand- it’s a wonderful flavor)
1 T. ground cumin
2 c. washed and finely chopped spinach, chard or beet greens (optional, but it adds a good amount of flavor and nutrition)
8-oz shred cheese of choice
1 15-oz can enchilada sauce of choice (you can use two if you like a lot of sauce)
Tortillas of choice (use the small 6″ corn, or the 8″ flour; you’ll need 12-15 corn, 10-12 flour)
Oil of choice for cooking
Spray a 9×13 baking pan with cooking spray. You may have enough filling to make more enchiladas, so have a smaller pan at the ready, like an 8×8. Heat the oven to 400°. Have your tortillas on the counter to warm slightly as they’ll roll better, but if you’re using corn tortillas, don’t leave them uncovered or they will dry out.
In a deep skillet with a cover, heat a bit of oil and add the onion. Cook about 10 minutes, or until softened and then add the bell pepper and jalapeno. Cook, stirring occasionally until the peppers begin to soften. Add in the garlic, zucchini, frozen corn and canned beans. Stir it all together and get it simmering. Cover the pan and cook for about 10 minutes. Stir in the greens, cover and turn off the heat. Let stand for about five minutes.
Place a tortilla in the pan and drop a few tablespoons of shred cheese down the middle. Spoon some of the filling in (the amount depends on the size of your tortilla) and spread it to the edge. Gently roll the tortillas up, making sure the seam side is down. Repeat until the pan is full. The tortillas can be moved closer to one another as your roll. You want them pretty snug, but not crammed in the pan or it will be impossible to get them out.
Spoon the sauce down each tortilla, spreading it out as you go. They should be well covered. Sprinkle the top with cheese and cover with foil. Bake for about 20 minutes, then take the foil off and allow the cheese to brown just a bit more. Thirty minutes should be plenty of time. If you allow the Enchiladas to sit for 10-15 minutes, they are A LOT easier to get out of the pan.
These are delicious served with avocado, sour cream, or both.
KATE’S NOTES: To make Enchiladas ‘Lasagna’ style, lay the tortillas on the bottom of the baking pan. Spread some filling over them, then top with a bit of cheese and a drizzle of sauce. Layer more tortillas and repeat. You should be able to get at least three layers, finishing with sauce over the top, and cheese before baking. Allow this to also sit for a spell before cutting in to squares.
If you wish to add meat to the filling, please do so. I used to make these all the time with chicken, and once in a while with pork or beef. One pack of boneless skinless chicken breasts is perfect; dice them, and sear the meat in with the onions, then proceed with the remaining steps.
Any leftover filling is wonderful for breakfast. I had about 1-1/2 cups left from this meal, and for breakfast I heated it in a pan then cracked two eggs in it, covered the pan and cooked it for about five minutes. I scooped it on to a plate that had a handful of tortilla chips on it. It was the finest breakfast I’ve had in a long time.
March 31st, 2012
| 3 Comments »
When I was 15 or 16, my Mom broke her left elbow roller skating. Outside of the fact that my MOM -gasp!- was roller skating (and apparently getting rather cocky about it) she happened to be left-handed, and in breaking her elbow, this rendered her incapable of doing much of anything. She lamented one day, as I helped her in the kitchen, “I wish I had learned to use my right arm more.” and somehow this struck a chord with me, as did her inability to manage even the most mundane of daily tasks.
It’s been in the back of my mind since then to train my hands to work equally. Although my left handed writing looks like an overly caffeinated six year old, and my knife skills in my left hand are nothing compared to my right, I can whisk, scoop, stir, twist, grind, mix and pour from either right or left. I can reach and function and do just about anything needed during the course of my day without having to switch gears, hands or mindset.
There is always more that your body can do, when allowed. If you’ve learned how to type on a standard keyboard, then you can teach your non-dominant hand to do any number of things. Even though one side of our brain dominates, and we develop a set of skills with that dominant hand, there is far more that one is capable of if you’re willing to put your mind to it.
That goes for recipe usage too. Recipes are not cut in stone; they should serve as a guideline, a base from which we can expand exponentially in many different directions. I love recipes because someone else has already done most of the work for me, but I am free to remove this and substitute that, increase this or decrease that or look at how it comes out in one form and think “I know this can be better.” and then trust that my skills can take me there. These skills have been especially useful in the re-development of this incredible Red Rice Pulao.
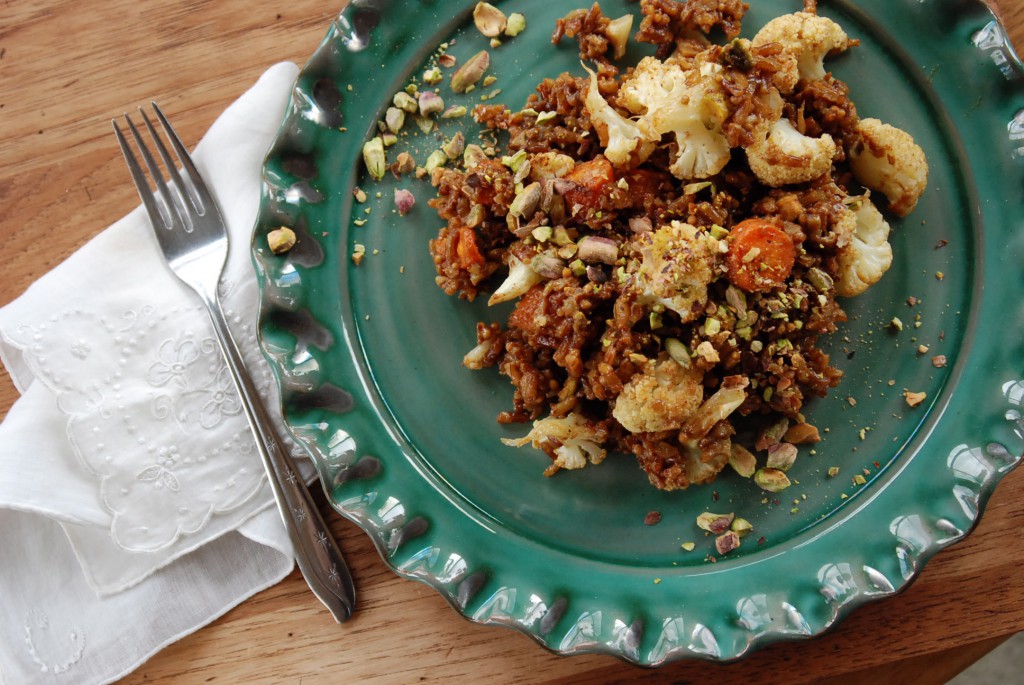
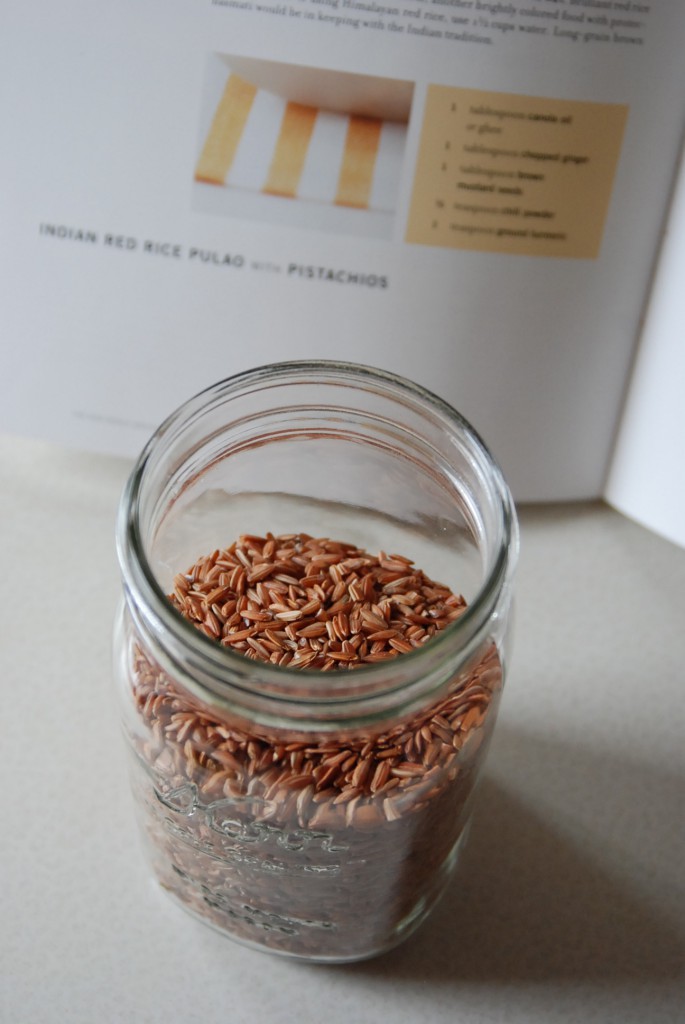
The origin of this recipe comes from Robin Asbell‘s New Whole Grains Cookbook, which, in a soft yet grand way simply changed my life in 2008. Long before the intense embrace by food lovers of all things whole grain, I’d run through a bookful of recipes using quinoa, millet, bulgur and various rices, finding great things to love about these simple staples. Grains are one of the easiest foods to work with in any kitchen, and require no special treatment. Particularly fond of the vibrant rices available, this Red Rice Pulao made for an chewy and delicious experience, and like many wonderful recipes on this blog, I simply posted it once and never went back. What a mistake.
Because that means no one’s ever going to see it, as really, does anyone look in to the archives of a food blog? Rarely. And I loved the recipe when followed to a ‘T’. As I thought about it again, with more capability to be flexible in my cooking, I decided a second go of this dish was in order and am I ever glad I stepped up and made a few changes because this 2.0 version is light years better than the original. No offense to Robin, but the very task of cooking is to learn to feed oneself in the manner that makes you happiest. No cookbook author outside of us knows what makes us happy; only we do, and we owe it to ourselves to learn just enough kitchen skills to take the humblest of foods, such as rice and vegetables, and make them extraordinary. Let the recipe author be your guide, but let your imagination, your tastes and your skills drive you to cook with instinct instead of blind faith.
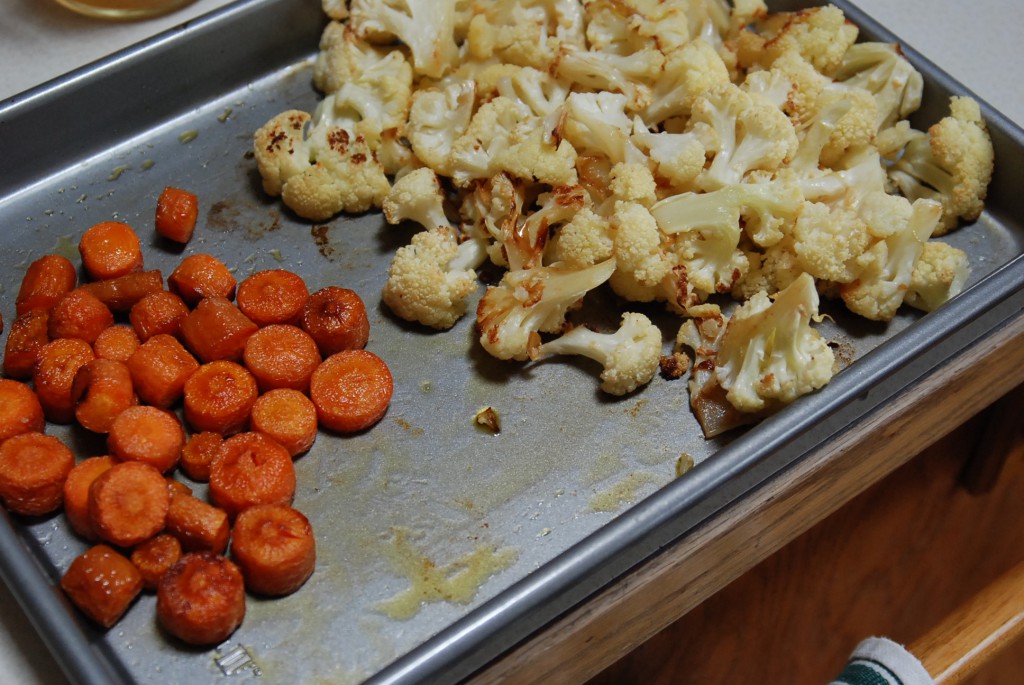
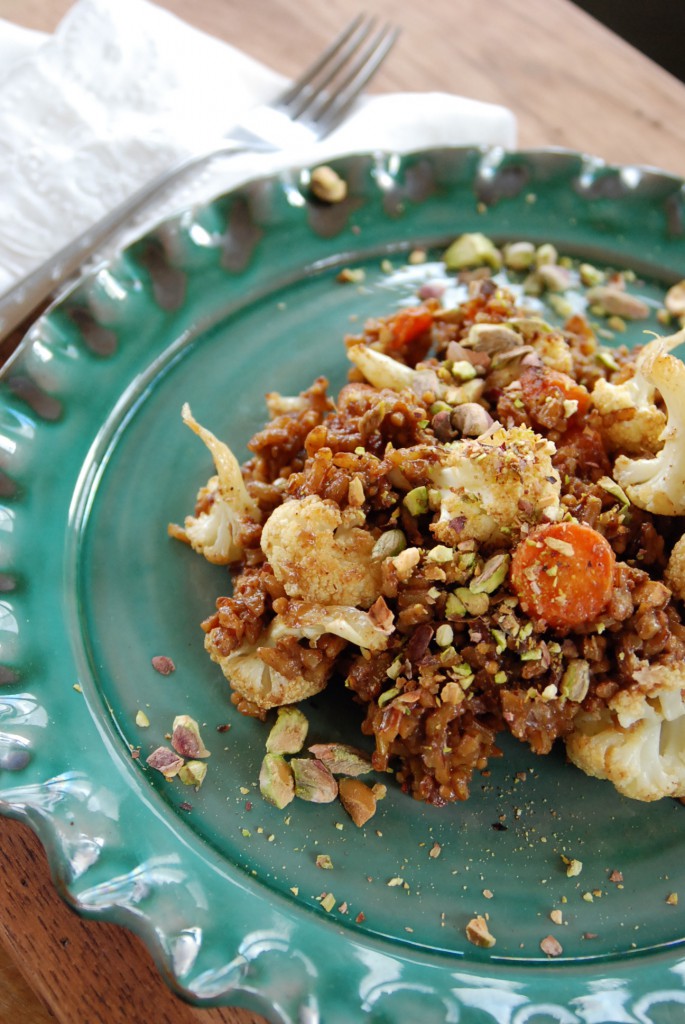
Task-wise, this has a few moments of chopping and prep, but largely you are passing a great deal of idle time as rice simmers, and vegetables roast, while heady fragrances take over your home. This isn’t high-tech stuff here; with the heat of an oven and the magic alchemy of boiling water with rice, you can make an exceptional dish that tastes far more grand than it’s humble beginnings. If you’re unfamiliar with red rice, it’s an intensely chewy rice, often found labeled as Himalayan Red Rice, or Wehani. Properly cooked, it takes up to an hour, all hands off. Finished, it’s a really hearty and satisfying grain, deeper in flavor than brown rice, not as earthy as wild rice. This dish is easily a main course, or can be eaten as a side with any number of proteins. I can vouch that it’s especially good with grilled pork tenderloin.
Here’s where you get to decide what you do with this recipe, because if you want, outside of making the rice you can experiment wildly, with everything else. Instead of carrots and cauliflower, add whatever vegetables you have on hand, or swap almonds, walnuts, pecans or peanuts for the pistachios. This is your base, and when you read through it, your tastes will direct you, just as they should. Trust those instincts. And enjoy.
Red Rice Pulao with Roasted Vegetables
1 T. oil of choice
1 T. chopped ginger
1 T. brown mustard seeds
1 shallot, finely chopped
1/2 t. chili powder
1 t. ground turmeric
1 c. red rice or brown basmati rice
2 c. water
1 T. brown sugar
1 t. salt
2 T. lemon juice
1 head of cauliflower, cut to bite sized pieces
2 medium carrots, sliced
1/2 c. shelled pistachios or toasted slivered almonds
In a 2-qt saucepan, heat oil briefly and add ginger, mustard seed and shallot. Cook for a few minutes, until the ginger is fragrant and the seeds are popping slightly, then add chili powder and turmeric. Stir it up well and cook for a few seconds until the smell is amazing. Add rice, water, brown sugar and salt, stir it up good to combine it all and bring to a boil. Cover tightly, reduce heat to low. The amount of time needed to cook the rice will depend on what rice you use. Test the grains after the time specified on the package, and adjust to your personal taste. Allow to cool slightly. If you are using a true red rice, be patient with it. The time required for me to make mine was slightly over an hour. And every minute was well worth it.
While the rice cooks, heat the oven to 400°, and toss the vegetables with a bit of oil and salt. Since these two cook differently, I put the cauliflower on one pan, the carrots on another and roast until each are tender, shaking the pan often, and stirring to insure even browning. They can hang out in their finished state, until the rice is done.
If you love a good deep flavor for pistachios, take a few minutes and toast them in a skillet over medium heat. It’s well worth it, and that rice gives you plenty of time.
When the rice is done and cooled, dump it all in a large bowl and add the roasted vegetables. Toss together gently and add a few tablespoons of those nicely toasted pistachios. Toss a bit more, taste and add salt and pepper if you wish, then serve it, topped with more pistachios. This dish is good whether served cold, hot or at room temperature. You can garnish it with chopped scallions too, for a bit more flavor.
March 4th, 2012
| 1 Comment »
This time of year is a hard one.

I seem to start slipping off the tightrope each February. Bored, restless, tired and too stunted by the dull landscape, I stand on the figurative ledge and think ‘Ugh.’ as I look around. The vertigo makes me twitchy, and thankfully, a trusted friend is there to pull me back and say ‘You know, you go through this every year at this time.’. I’m grateful for someone standing outside of me, who can rationalize this wandering mind, drawing it back to the reality that it’s just late winter and I could use some green and some color in my life.


Surrounding myself with a few hours of plant life, of colorful flowers, weeping ferns and a warmth that left me sweaty certainly helped a great deal, and it seems to become more important in the last gasp of winter to put sunny, warm foods in to the body, like an infusion of heat and sunshine that lights us up from the inside. Like this lemony pasta.
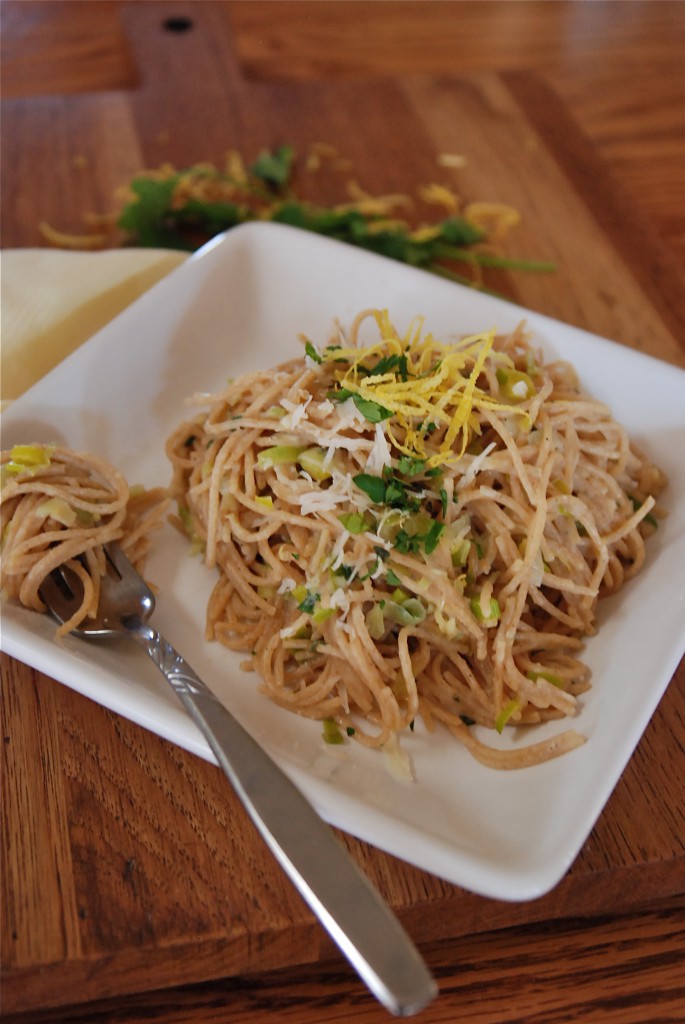
Eating anything with lemon in it is like ingesting sunshine, it’s so bright and engaging. This couldn’t be simpler to make, with a few leeks, a juicy lemon and a shower of fresh herbs, and parmesan cheese. I’ve done so much with lemons in my baking, like this Lemon Pound Cake, these intense Lemongrass Bars, and a delicious Lemon Ricotta Cookie, but adding sparkling citrus flavor to savory dishes has been few and far between, with maybe the exception of these exceptional Garlicky Lemon White Beans. That’s to an end though, after discovering this bright and lively pasta dish.
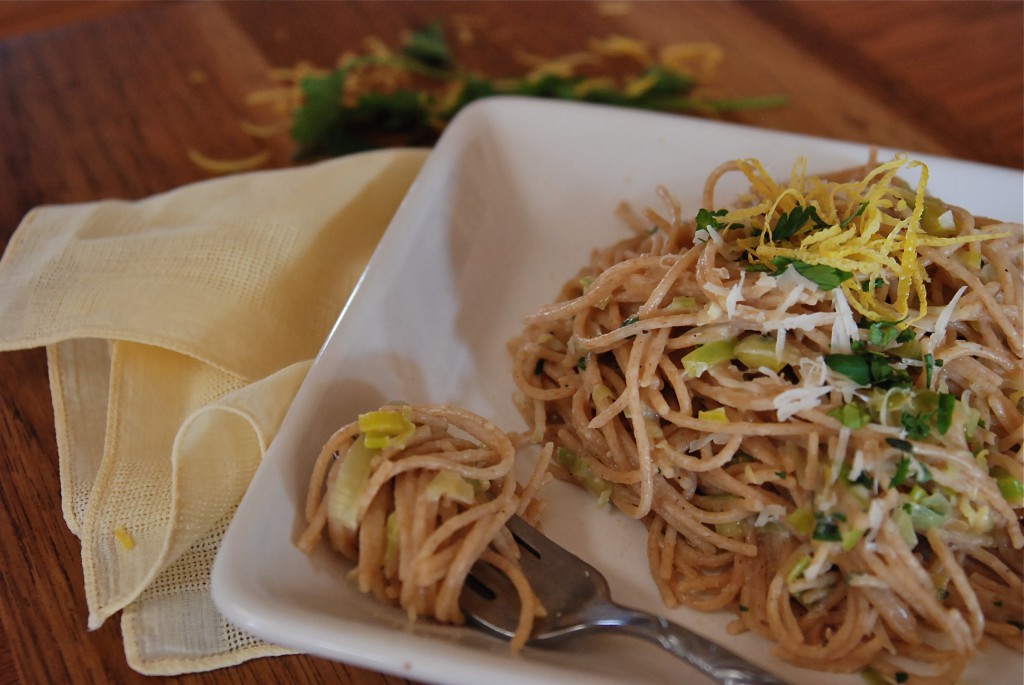
From the February issue of Eating Well magazine, resplendent with juicy lemon slices on it’s cover, this is a quick and easy recipe to put together. In the time it takes you to make a pot of pasta, you can have the leeks sauteed, ready and waiting. A few turns in the pan, with a splash of that ever-important pasta water and dinner is served.
Leek and Lemon Pasta
1# whole-wheat linguine or thin spaghetti
2 large lemons, plus lemon wedges for garnish
2 medium leeks (white and pale green parts only), thinly sliced and rinsed well
2 tablespoon extra-virgin olive oil
1/2 cup chopped flat-leaf parsley, divided
2 cloves garlic, crushed
1/4 teaspoon salt
1/8 teaspoon freshly ground pepper
3/4 cup finely grated Parmesan cheese, divided
1/4 cup snipped fresh chives, divided (I used thyme and it was delicious)
Cook pasta in a large pot of boiling water until just tender or according to package directions. Reserve 1-1/2 cups of the cooking liquid and drain the pasta in a colander.
Meanwhile, finely grate the zest from one lemon and squeeze juice from both lemons; set the juice aside. Pat leek slices dry. Heat oil in a large nonstick skillet over medium-high heat. Add the leek, the lemon zest, 1/4 cup parsley, garlic, salt and pepper. Cook, stirring frequently, until the leek is lightly browned and softened, about 6 minutes.
Add the pasta, 1 cup of the reserved cooking liquid, 1/4 cup of the lemon juice and the remaining 1/4 cup parsley to the pan. Cook, stirring constantly, until the liquid is mostly absorbed, 30 seconds to 1 minute. Add the remaining 1/2 cup liquid, or more lemon juice, if desired. Remove from the heat. Toss the pasta with 1/4 cup Parmesan and 2 tablespoons chives. Transfer to a serving bowl or bowls; sprinkle with the remaining Parmesan and 2 tablespoons chives and serve with lemon wedges, if desired.
Recipe in full, from Eating Well magazine, February 2012.
RECIPE NOTES: A simple reminder to yourself to catch the pasta water when draining it is to place a pyrex measuring cup in the bottom of your strainer when you put it in the sink. Pour some of the pasta water in it, set it aside, then drain the pasta completely. Another method, which I prefer, is to remove the cooked pasta from the water with tongs and add it directly to the skillet. It takes a bit of timing to get it right, but instead of draining all that beneficial starch away, it clings to the pasta and helps to create the pan sauce needed.
This dish would be wonderful with a broiled mild fish, such as Cod or Tilapia, some seared Scallops or Shrimp would also taste good. If you like chicken, a good lemon-herb rub and a run under the broiler would make a perfect accompaniment to this pasta.
February 10th, 2012
| 4 Comments »
There is something so perfect about a pot of soup, one that steams and seems to sing from the stovetop, humming it’s warmth throughout my kitchen, through my skin and right in to my bones. I feel the need for soup, sometimes as deep as the roots of my hair and permeating outward, and as any good Midwestern girl knows, when the cold winds scour you down and the light is so flat and gray and weak that it makes you weary and drawn, then soup, in all it’s aromatic glory and flavor, can be a shot of lifeblood that runs through you, chasing the chill away.
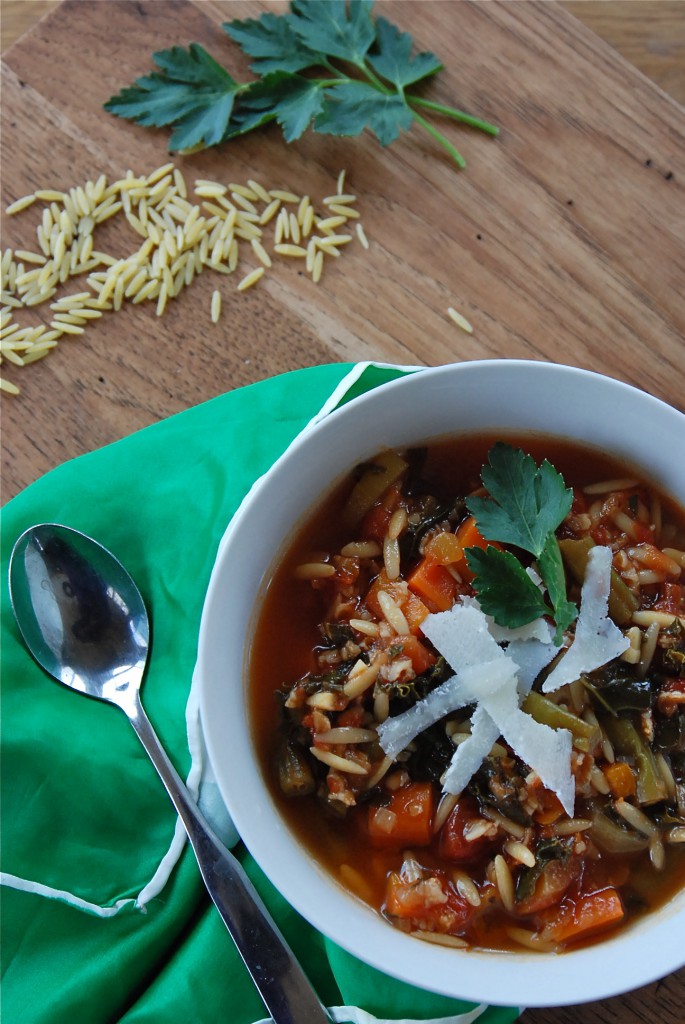
Soup has but a few simple secrets to making it shine, such as taking some time to caramelize the vegetables to form a flavor base, a good broth or stock to add more depth and a shot of love, really, to not rush the process. But good soup really starts from need. Or craving and desire.
I used to not be all that good at making soup, mostly because I just didn’t understand why a recipe that looked so simple could often turn out so darn wrong. I wanted depth, a rich flavor that penetrated the spoon and it’s contents, making it something so much more than broth and vegetables. All I really needed was a bit of patience, a lot of practice and tad more salt. Don’t be afraid of a shake of salt over that simmering pot, as it is the one ingredient that can transform a simple pot of soup to one that shimmers it’s warmth right down to your toes.
This Minestrone soup, as all Minestrone soups go, really has no clear outline, no real etymology. It creates itself for the most part, out of what you have on hand, and what you like in your soup. Or, like me on this particular cold January night, it leapt from under my hands out of sheer need. I couldn’t get warm, couldn’t shake a chill that had settled in my core like a wicked internal frost. Somehow, this chill and it’s accompanying rattle in my brain sounded like it was saying, over and over “Make Minestrone!” and I moved, on automatic it seemed, from fridge to stove to cupboard, seeking and searching ingredients. There were the green beans languishing in the drawer and in dire straits, there was Pomi tomatoes (my favorite packaged tomato- so amazingly fresh and flavorful) and there were thick, deeply orange carrots, fat tear-jerking onions, a partial box of orzo, a few zucchini beginning to look slightly sorry for themselves, just enough kale, a bounty of fresh oregano and parsley. And while the fragrance filled the house, and the soup simmered it’s coherent and rhythmic blup-blup-blup on the stove, a quick search for dunking material in the freezer yielded a container of croutons, spiked with herbs and olive oil, that I’d made from a loaf of stale semolina bread. Did I mention another key ingredient to perfect soup just might be a touch of serendipity?
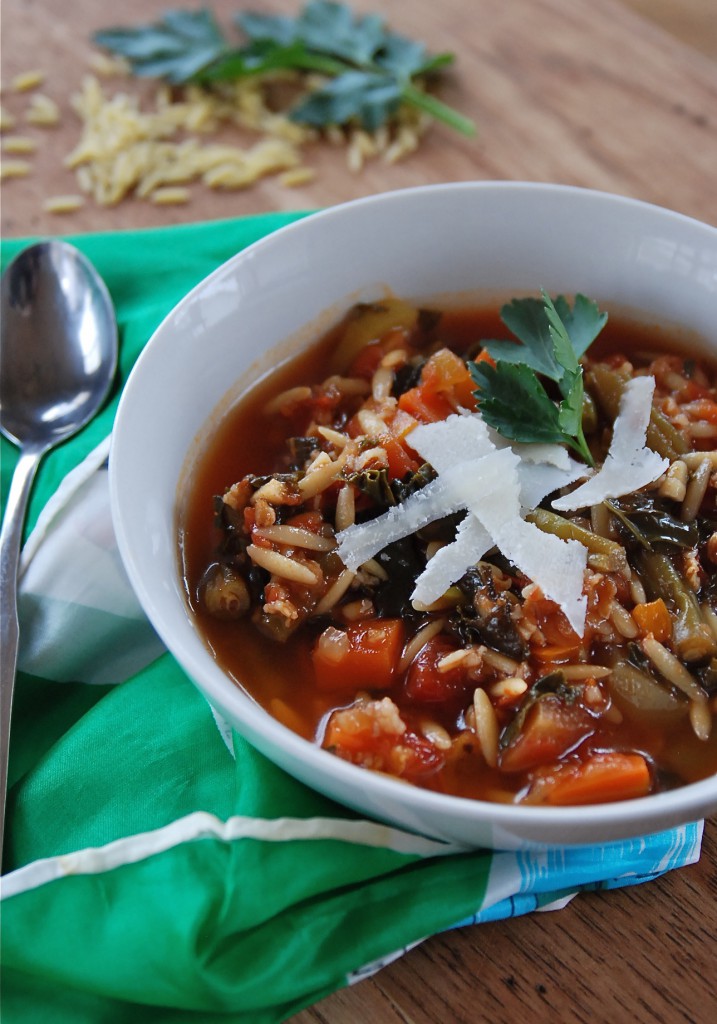
Minestrone requires little of the hard and fast rules; you add what you’ve got, really. What is in season, what is available, what it is you like. It needs a good tomato-y base, without a doubt. But beyond that, it lives for your interpretation. Thick or thin, meat or not, one, two or three vegetables or a whole produce aisle of them, pasta, legumes or rice- it’s all up to you. This version that served to warm my very cold, rattling bones on that damp, chilly night made light of too many singular remnants from the fridge; bits and pieces of plans that maybe fell through or were forgotten, or the one too many of any vegetable that hadn’t been used up yet. It had oceans of freshly chopped oregano and parsley tossed casually over it all, with thick shavings of sharp parm-reggiano. It was like planning a party at the last moment, not so confident of how it will all turn out and right in the middle of it, you realize that everyone in attendance has created an impeccable presence that elevates the whole of it to something utterly sublime. Well, that was my Minestrone that night; a delicious party in a stockpot, gathered with fingers crossed. My intensely perfect Minestrone.
Rounding it all out were the crunchy croutons, oiled, herbed and perfect for soaking up the broth. Beyond that, my perfect soup needed little else but a spoon, a quiet table with two smiling handsome faces, because no day in my life is complete without it ending right there, with them. The darkness settles, chasing out the light with violet and gold tones. The first spoonful I lift easily helps me cross the threshold from day to night, pushing the cold away, warmly coursing through me. There is a sigh, with half-closed eyes, a look and a feel that says “Perfect. This is just what I need.”
Kate’s Minestrone
1 large onion, diced
3 carrots, peeled and diced
3 celery stalks, with leaves, diced
4 cloves garlic, minced (adjust to taste, I am a garlic lover)
2 small zucchini, peeled and diced
1/2# fresh green beans, cut to 1/2″ pieces
1 bunch fresh kale, rough stems removed and chopped (sub chard, collards, or spinach)
1 32-oz pkg Pomi Tomatoes (use equivalent of your choice)
1/2 c. Orzo pasta (use small pasta of choice)
1/4 c. bulgur (optional, but I like the heft and nutrition it adds)
1/4 c. fresh chopped parsley and oregano (basil and thyme are also good)
Parm-Reggiano shavings
In a large stockpot, heat a small amount of oil and add the onions. Cook over medium heat, stirring occasionally, for about 5 minutes, or until the onions are opaque. Add the carrots, celery and green beans and cook, stirring, until the vegetables begin to brown a little, maybe 10-15 minutes. Moderate the heat to prevent them from scorching.
Add the garlic and a pinch of kosher salt. Stir to incorporate and cook for a few minutes until it’s wonderfully fragrant. Add the zucchini and the tomatoes and a quart of broth or water. Bring to a simmer and cook until the vegetables are tender enough to pierce with a fork, but not completely soft.
Add the kale, the pasta and the bulgur, if using. Depending on what pasta shape you use, cook until the pasta is al dente. Taste the soup and season with salt and pepper. Make sure the pasta is cooked, but also remember that it will continue to absorb liquid as the soup sits.
Ladle soup into bowls and top with a sprinkling of the fresh herbs and some shavings of cheese. Serve with a good bread, if desired.
RECIPE NOTES: This soup is wide open to interpretation, and can be modified in a multitude of different ways. Brown some good sausage and use the fat rendered to cook the vegetables for an added punch of flavor. This was a favorite way to make this soup back in my meat eating days.
Legumes can be added to this as well, and most Minestrone soups have them. Use a good quality white bean, such as Great Northern or Cannellini. Chickpeas would also be a good option.
As is the case with most soups, it develops a lot of flavor as it sits overnight in the fridge, but it will also absorb a lot of liquid in to the pasta and the bulgur (if you use the bulgur). Adding a little water to the soup before reheating will help loosen it.
Linking up to Soupapalooza 2012!!
“Come join SoupaPalooza at TidyMom and Dine and Dish; sponsored by KitchenAid, Red Star Yeast and Le Creuset”
February 5th, 2012
| 4 Comments »
This post could also be aptly titled “The end of searching for the perfect banana bread” but that just seemed too long and a bit too final. I should never think I’ve ‘arrived’ at any destination, be it a quest for knowledge, a higher level of health and well-being or never-ending search for perfect banana bread, as somewhere out there, a recipe may exist that could bring this loaf to shame, but for now, I’m sticking with what I’ve got.
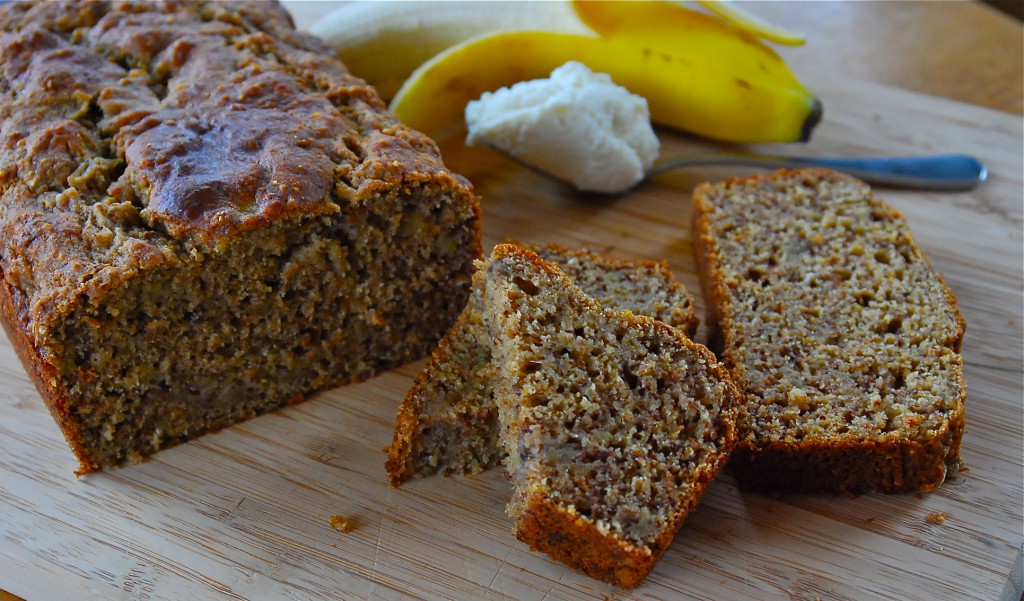
I grew up eating banana bread, from the earliest memories that I have. My Mom made it almost weekly, in fact, I’m pretty sure she bought way more bananas than she needed just so she’d have an excuse. She put walnuts in it, which I despised, so these days, my banana bread is always without nuts. When I got old enough to make my own banana bread, I turned to her tried and true recipe from my youth, and as an adult, I found it sorely lacking, so I moved on. And on. And on.
The goal that I’ve strived for, over recipes and time and growing older, was pure banana bread bliss and perfection that existed as a mental taste somewhere in my mind. And with the first bite of this grain-studded loaf, rich with banana flavor, I about leapt in the air with delight, shouting ‘Eureka!! I have found it!’ while my son chuckled in delight at my antics, he himself wide-eyed and excited over the taste of his piece. This IS pure banana bread delight, and I don’t say that lightly. Folks, I have made and eaten A LOT of banana breads in my lifetime, as I sought out that elusive fine balance of moist and tender crumb, ultimate banana taste and now, a higher level of health than a loaf crushing the scales with sugar and fat. After researching low-fat, and healthier banana bread options for over an hour, I settled on one recipe that gave me a pretty good start, and then started tweaking it to my liking.
I think my biggest disappointment with banana bread has always been that it just doesn’t have as much banana flavor as I want. I add more banana to any number of recipes, and I get mushy bread that turns soggy after a few days, so clearly, without some changes to the base, that’s not a workable option. And I needed a substantial heft other than what flour and leavening can offer in order to stand against that large dose of delicious bananas. When making muffins, I’ve turned to the use of cereals and grains to add more heft, and to make them a bit more nutritious. When faced with adjusting a banana bread recipe in the same way, that’s where I went as well. This recipe has whole rolled oats, All-Bran cereal and a commercial 10-grain cereal as a majority of the dry base. Cutting back on the use of eggs, I added some ground flaxseed for binder (you could also use unsweetened applesauce for this as well). The ricotta cheese, along with a small amount of milk, provides a richness in the texture that’s particularly pleasing to the mouth. The sugar was another matter; I took a gamble, using only a mere half cup in a recipe that makes two loaves. Most tea-bread recipes that I come across have, at least in my opinion, way, way too much sugar, and this amount was perfect. The end result is a bread without the teeth clenching sweetness, so the rich banana flavor just shines through. The cereal and grain base makes the texture nubbly and firm, and helps it retain a lot of moisture. Best of all, the loaves are simply packed with banana flavor.
A lot of this was pure kitchen chemistry, mixed with a lifetime of learning why the recipes I tried were so disappointing. After so many experiments, it’s nice to finally land on something that lifts your heart and elevates your taste-buds, all the while being reasonably healthy enough to enjoy without much guilt.
If you’re like me, when bananas get past the point of consumption in your house, they get tossed in the freezer to await a baking urge, and this recipe is perfect for when you’ve gotten a large stockpile of them.
Whole Grain Banana Ricotta Bread
Yield: Two loaves. It can easily be cut in half.
Preheat the oven to 350°. Spray two 9×5 standard loaf pans with cooking spray.
In a large bowl, mix together the following:
6 large, very ripe bananas, mashed
3/4 c. ricotta cheese
1/3 c. milk of choice
1/2 c. sugar
3 T. grape-seed oil (or other neutral flavored oil)
1 t. pure vanilla extract
1 egg
2 T. ground flaxseed
1/2 c. whole rolled oats
1/2 c. All-Bran cereal
1/2 c. commercial 10-grain cereal, such as Bob’s Red Mill (sub 7-Grain, or 5-Grain if you can only find those)
Whisk this until well blended and allow to sit for about 15 minutes to soften the grains.
In a large measuring cup, combine the following:
2 c. whole wheat flour
1 c. unbleached AP flour
1 t. sea salt
1-1/2 t. baking soda
2 t. baking powder
Add the dry ingredients to the bowl with the banana mixture, and with a rubber spatula, gently fold them together until all the dry ingredients are incorporated. Be careful not to overmix. The batter will be very thick.
Divide the batter between the two loaf pans and smooth the top. Drop the pans on the counter a few times to settle the batter and release any air pockets. Bake for 50-60 minutes, or until a toothpick inserted in the center comes out clean. Allow loaves to cool in pan for up to a half hour before turning them out to cool completely on a rack.
RECIPE NOTES: I use All-Bran cereal a lot in baking, and it keeps a long time in your cupboard. Bob’s Red Mill 10-grain cereal is not only a delicious breakfast cereal, but it’s wonderful for breads too, and I’ve also used it in muffins. I keep it in a plastic bag in the freezer and it lasts indefinitely. I also keep a baggie of ground flaxseed in the freezer.
If all you have on hand is whole rolled oats, this recipe would work just fine to use those in the full amount.
If you wish to cut the recipe in half, don’t use the flaxseed, as it acts as a second ‘egg’.
December 7th, 2011
| 4 Comments »
I collect a lot of recipes. Papers overflow the corner of our counter where they tend to land; recipes of all types from desserts to main dishes. Trouble is, I rarely use them, verbatim anyway. They serve as a sort of spiritual guidance, infusing me with inspiration to cull what I need to make up a dish all on my own. I’m only home a few nights a week to cook these days. And although I could give any one of the recipes to my guys and they’d likely be able to pull it off, there’s no way I could hand them two or three, with all sorts of odd instructions such as ‘Take this part’ and ‘Do this but not this’ and expect it will come out the way I envision it. My brain works way differently than theirs when it comes to putting recipes together.
Still, even with all the inspiration at my fingertips (or these days, stuffed in a drawer) sometimes the meals I create are derived from a leap or two of inspiration that comes not from a printed source, but from a few wild ideas my brain churns out that I think sound good together.
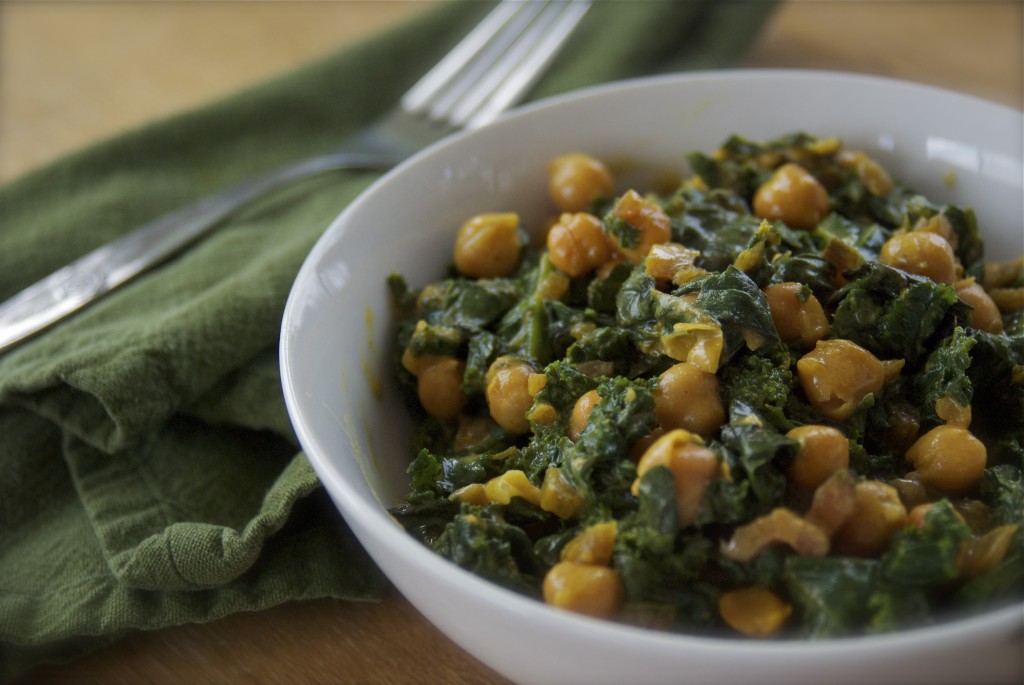
I certainly had no doubt that we would enjoy this silky braised kale, infused with coconut milk and some fragrant curry powder, but I had no idea that it would swirl through my mouth with such immense flavors, causing me to think almost obsessively about it, plotting the exact next time I could simmer up a large pan of it for us to enjoy. Griffin won’t eat it, and that’s fine. He has tried a few bites of cooked greens that we consume but he’s just not there yet. Mike and I fell over ourselves in adoration for this dish, easily a complete meal. Alone with a large helping of kale, it’s perfect as is, but the second go-round I made of it, I added a large bunch of red chard, complete with the chopped stems and if it’s even possible, the dish was so much better, with richer, deeper flavor and much more balanced.

The best part about making this dish on one of the first bone-chillingly cold days of December, was placing my nose down among the wisps of steam that rose from the pan and breathing in the fresh green scent of kale and chard. It easily transported my mind back to late summer, the bounty of chard bunches to be had for a dollar apiece that I would bring home from the markets each week. Thankfully I can find inexpensive one pound bags of prepared kale, and chard is reasonable for the taking so I won’t be missing my greens all that much. I just won’t be shopping in a flippy skirt and tank top when I buy them.
Braised Kale and Chickpeas in Coconut Milk
1/2# prepared kale, tough stems removed, roughly chopped
1 15-oz can lite coconut milk (you can use full-fat as well)
1 15-oz can chickpeas, rinsed well
2 garlic cloves, minced
2-3 t. prepared curry powder, or curry paste (both red or yellow would be perfect- adjust to taste)
In a large deep skillet with a lid, heat about a tablespoon of olive oil, and add garlic. Cook and stir for a few minutes until garlic becomes opaque. Add kale in handfuls, stirring continually, until it’s all in the pan. Continue to stir until it turns a very bright and dark green and has taken on the oil in the pan. Add about a half cup of water and cover the pan, allowing to simmer for about 10 minutes. Stir in the chickpeas, coconut milk and curry powder. Cover and allow to cook, slowly, anywhere from 5-15 minutes more, depending on how you like your kale to taste. Stir again, seasoning with salt and pepper, if desired. If the kale seems a bit watery, remove the lid and allow some of the liquid to cook off.
Kate’s Notes: If you wish to use chard as well, you can add that after the kale has simmered for the first 10 minutes. Stir in the rough chopped chard and allow the heat to steam it tender. If using the stems too, chop them fine and add them with the garlic in the beginning.
|


