May 21st, 2012
| 2 Comments »
A really good bowl of perfect fried rice is one of my most favorite things to consume. Any restaurant with it on the menu sets it’s yardstick by how good their fried rice tastes, and with one bite I’m either over the moon or sadly disappointed. A matchless bowl will have the ultimate combination of firm grains of rice, a deep rich flavor from the wok and enough extras to make good flavor without sacrificing the overall taste of the dish.
I’ve made fried rice at home on occasion, and always with the caveat that my wok will never replicate that of a good restaurant. I enjoy it for what it is from my own kitchen and don’t expect perfection. Especially if I stray from a standard method and go off on my own path.
I’m like that as a cook, anyway. I’m not one to follow a crowd and stick to something tried and true. I like to push myself with my food and try many different means to fill my belly. My unconventional means to a steaming bowl of fried rice started with roasting a few pans of vegetables and ended up with a decent rendition for dinner that everyone enjoyed.
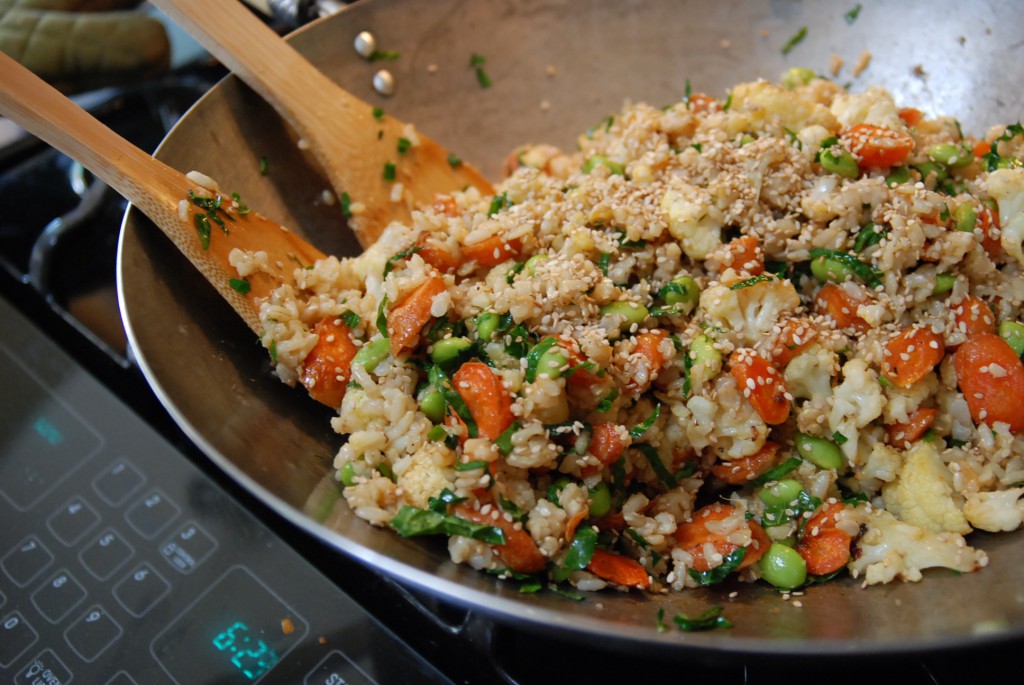
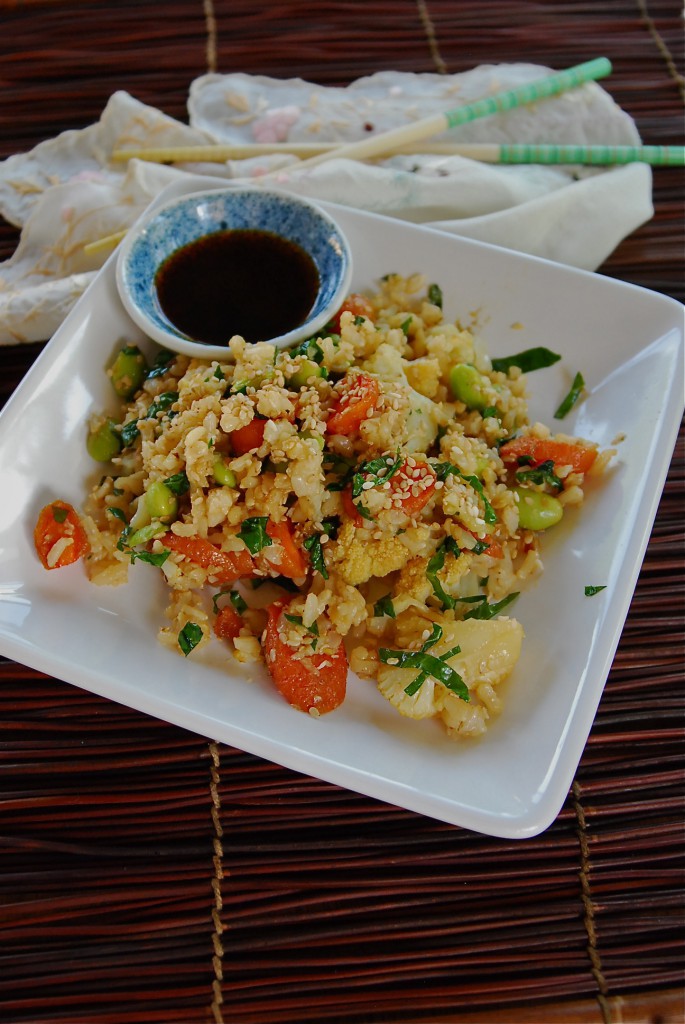
The best beginning to any fried rice is always cold, cooked rice. A few cups of that, along with any variety of vegetables and a hot pan and you’ve got what you need. My version had edamame, roasted cauliflower and carrots in it, plus the remains of some shredded lacinato kale that I had on hand. True proponents of fried rice likely would shake their heads at this combination, but that’s me, in a nutshell. Improvising is my strongest tool when it comes to cooking. There are many days that I stand, pantry doors open, fridge ajar, my mind churning with possibilities, and learning to utilize what’s on hand is a skill worthy of any home cook.
Plus? This was utterly delicious.
Roasted Vegetable Fried Rice
1 pkg frozen Edamame pods
1 head cauliflower, washed and cut to bite sized pieces
1/2# carrots, washed and sliced on a bias
1 c. shredded lacinato kale (or other greens, like spinach or chard)
2-3 cloves of garlic, finely minced
1 T. minced fresh ginger
4 c. cold cooked rice
2-3 T. sesame oil
Soy sauce to taste
Fresh squeezed lime juice (optional, but delicious!)
Sesame seeds for garnish (also optional, also delicious)
Peanut or coconut oil for frying. (You want an oil that will withstand the high heat needed in this dish. I don’t recommend using olive oil for fried rice as it breaks down at high heat.)
Cook Edamame according to package directions, cool and remove from the pods. Heat oven to 400°.
Roast cauliflower and carrots on separate baking sheets, as they will need different times to cook completely. Toss them in a bit of oil, salt and pepper prior to placing in the oven, and roast them to desired tenderness.
In a wok, or large skillet, heat a small amount of oil. When hot and shimmering, add the ginger and garlic and quickly stir for about 30 seconds. Add the rice and stir to combine, breaking up the clumps. Stir and toss the rice until it’s nice and hot, the drizzle about a tablespoon of sesame oil around the edge of the pan and stir the rice with the oil. Add in the vegetables and stir to heat through. Drizzle with soy sauce and a good squeeze of fresh lime juice. (the zest is really nice too!) Add a bit more sesame oil and a few tablespoons of sesame seeds, if you have them. Stir together to combine until it’s all nice and hot. Serve topped with more sesame seeds.
April 21st, 2012
| 4 Comments »
If you hang around me and the blog long enough, you’ll realize that I really love quick breads. Scan my Recipe Index and you’ll see the spoils of a bowl of dry, a bowl of wet, a loaf pan or paper lined muffin tins and a hot oven. Some gals get their bake on through cookies, or lofty cakes slathered with buttercream; they perfect treats of sugar and spice, with fondant or piping, bars and brownies worth gloating over. I do love cake, and grew up with a Mom who never bought cookies from a store, rising in the summer before daybreak to bake prior to the sun releasing it’s intense heat on the day. But there’s something magical about a muffin, or tempting tea breads with a perfect moist crumb. I can’t get enough of them.
I’m always paying attention to quick bread recipes, but am often driven to dismay over ones that are choked with sugar and oil. I’ve managed to make a few of these into something a bit more healthy, but these days, I want recipes that offer abundant flavor without the tooth-aching sweetness.
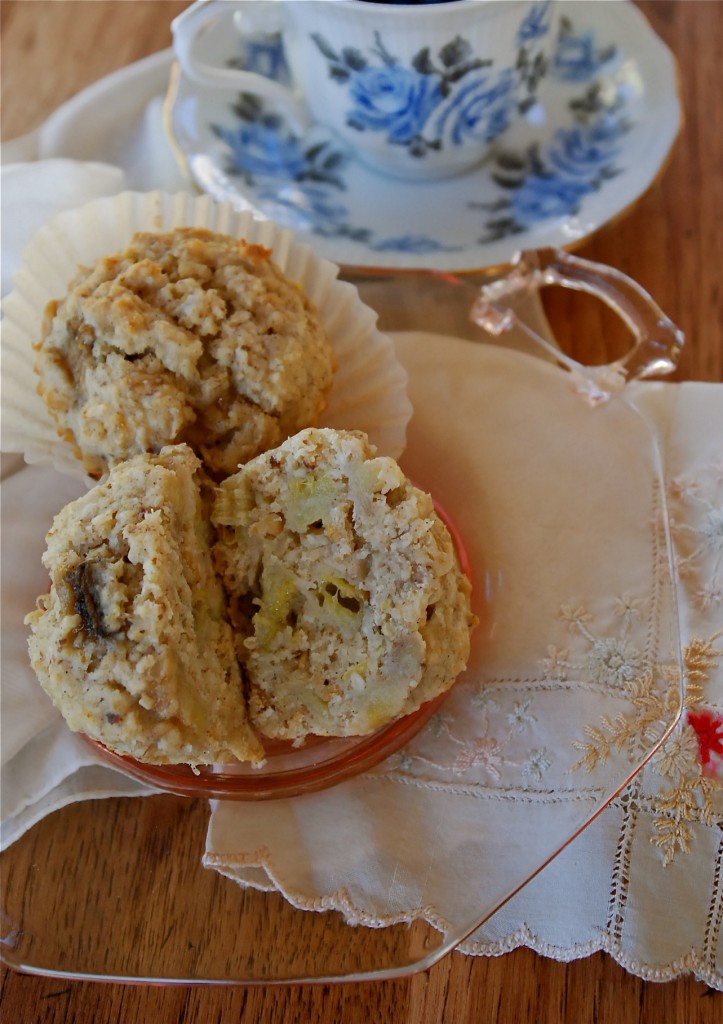
I came across this muffin recipe on The Kitchn and immediately wanted to make it as I’ve sufficiently restocked on Coconut Oil for a while now, and in glancing over the ingredients I was impressed with the amount of flavor these muffins would have, without dumping a ton of sugar in them. They’ve got coconut oil! And flaked coconut!! A vanilla bean! Whole oats! Fruit! What’s not to love?? The original recipe called for mango, so I selected one from the store and a few days later when it was ripe, I began tossing flour and oats together, melting coconut oil and tenuously scraping down the ONE vanilla bean that I had remaining in my kitchen. Then I cut open the mango, and nearly started crying. It was stringy and bone dry inside. I angrily tossed in in the trash, envisioning a few dollars being dumped there, then glanced around my kitchen, studded with lined muffin pans, full bowls and an oven blinking its readiness. What now??
Thank goodness there lay several bananas in the utmost condition for baking in to a tropical themed muffin.
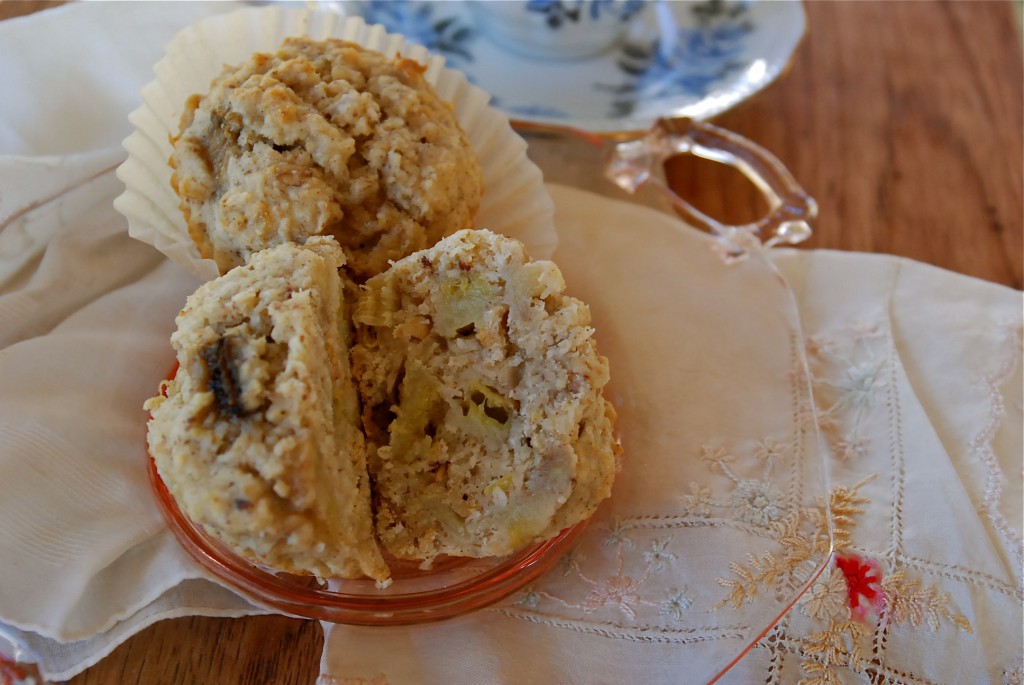
A few deft turns of a sharp knife, and swipes of a rubber spatula to pull it all together and soon I was being treated to the most amazing scent coming from my oven. I know that I should never think that I’ve ever found the most perfect muffin recipe because there is always something out there to top it. Guaranteed.
These moist and perfect muffins are one of the finest I’ve eaten. And I’ve consumed a great deal of muffins. The tender banana chunks in them get sweeter and more intense after a day or two, and the coconut, subtle taste of vanilla and the crunchy oats add oh so much goodness. Although I’m certain that a perfectly ripe and juicy mango would be utterly divine in them, having only a banana to work with was not a step down, by any means. I’d do these again, without one change. They’re that good.
Coconut Oat Banana Muffins
1/2 c. virgin coconut oil
3/4 c. wheat flour
3/4 c. oat flour (you can make this by grinding whole oats in a food processor or coffee grinder)
1/2 c. old fashioned whole oats
2 T. ground flaxseed
1-1/2 t. baking powder
1/4 t. kosher salt
1/2 c. unsweetened flake coconut (if you have the wide flakes, the original recipe called for those; I only had fine)
1 c. full fat sour cream, room temperature (I used Noosa Honey flavored yogurt and would do that again, hands down)
1/3 c. granulated sugar
1 large egg, room temperature
1 t. lemon zest
1 T. fresh squeezed lemon juice
1/4 c. milk of choice (I used vanilla almond milk)
1 split vanilla bean
1 c. diced banana (I used two bananas, which came out to be more than 1 cup)
1/4 c. shredded coconut to sprinkle on top of muffins, if desired
NOTE: You DO want the sour cream (or yogurt) and egg at room temp because if you mix those cold with the melted coconut oil, the oil will just seize back up again. Measure the sour cream and egg in a large 4-cup measuring cup, or small bowl and let it sit on the counter for a few hours.
Preheat the oven to 375°. Line two six-cup muffin tins with paper liners.
Split the vanilla bean and scrape the insides, adding it to the sour cream/egg mixture. Heat the coconut oil gently in a microwave safe container (I did about 40-50 seconds on 60% power) and add the vanilla bean shell to it. Allow the oil to cool, but not to the point of being solid again.
In a medium bowl, whisk both flours, the oats, flaxseed, baking powder and salt together. Stir in the half cup of unsweetened flake coconut.
To the sour cream/egg and vanilla bean mixture, add the sugar, milk, lemon zest and juice. Strain the coconut oil through a wire strainer right into the bowl and whisk to combine everything. Mix this with the dry ingredients until about halfway incorporated, then add the banana and fold gently until everything is uniform. Be sure to scrape across the bottom of the bowl with the spatula to get all the dried ingredients.
Scoop into the muffin tins. You can fill them pretty full, but if you don’t care to, you may need another tin. I filled 12 cups completely full and still had a bit of batter left in the bowl. Next time, I will make them smaller and use another six-cup tin.
Bake for 20-25 minutes until tops spring back when you touch them, or a toothpick inserted in the center comes out clean. Dare to wait until cool enough to eat; they will smell so enticing that you’ll find that to be a challenge.
Original recipe from The Kitchn, here with heavy modifications.
April 15th, 2012
| 1 Comment »
It’s been almost a year since we eliminated meat from our eating. I’m ecstatic over the way I’ve felt in the last year; I’ve got more energy even when I have a terrible time sleeping; my belly is superbly happy, and my skin looks so much better. Those pesky hot flashes are only a minor occurrence these days too, and I love that part of it the most.
I love the variety and simplicity of our meals too, the ease at preparing them now that we don’t have to wait for meat to cook, and it’s been wonderful to see Griffin expand the foods he eats and also to see that he’s learning to enjoy meatless meals so much more than I ever expected. I’m really proud of how he’s adapted to the changes; he still gets his meat too, so he has the best of both worlds.
One food item that he’s still on the fence about is greens. Mike and I have come to love greens like chard, beet greens and kale, but Griffin is still wary, only eating them in dishes where other flavors can mask their tastes. He’s trying greens, at least. That’s good enough for me right now. He’s also not a huge fan of gnocchi due to the texture, and that’s too bad all around because this Baked Pizza Gnocchi dish that I created is utterly divine in every way.
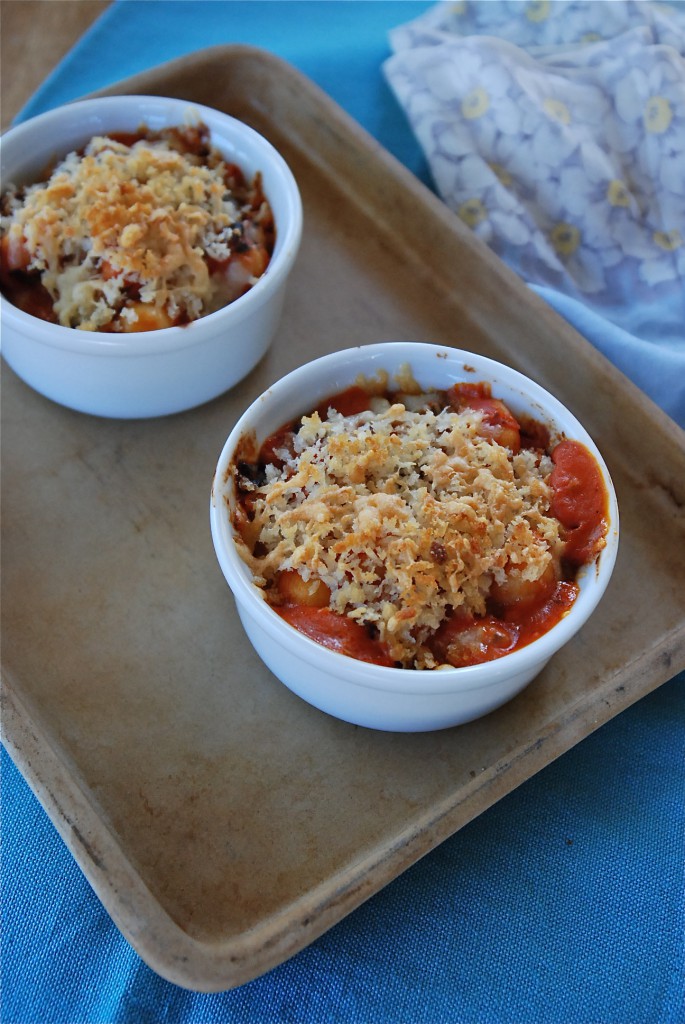
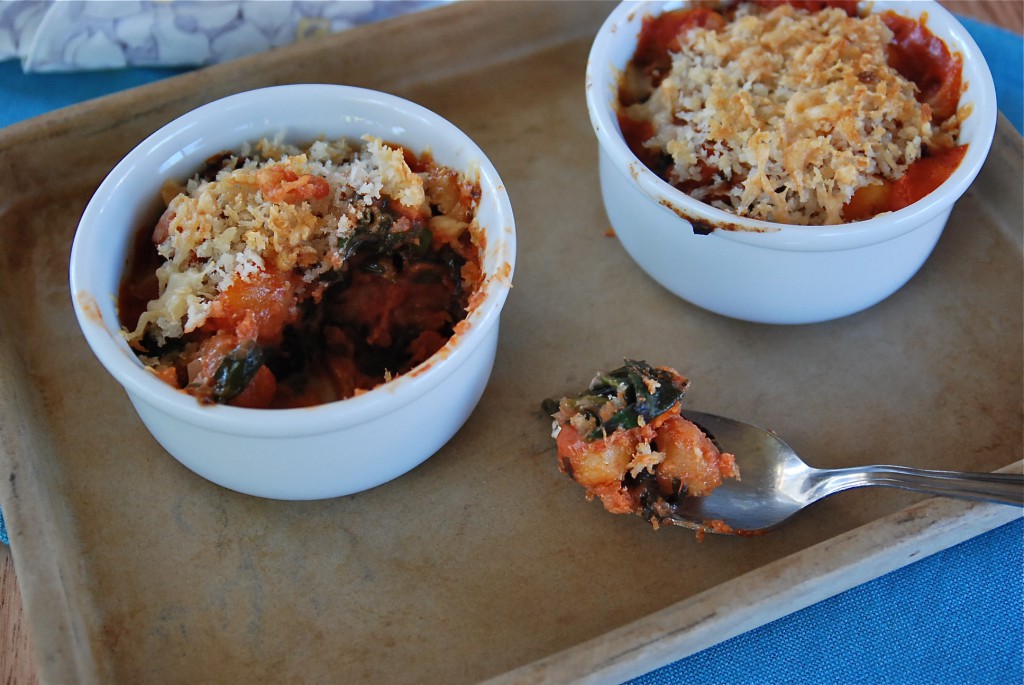
Recipes inspire me in the most fascinating way. I can read dozens of them and not have a spark of interest, and yet come across one that stirs my imagination and I’m suddenly inside my head putting ingredients together and dreaming of an outcome. That happened to me recently as I was browsing through my news feed on my phone and came across an article about using chard. One recipe for a Skillet Gnocchi with Chard sounded really delicious, and my creative spark was ignited.
Lately I’ve been thinking a lot more about meals with greens in them as I received an entire box of a wide variety of packaged and cleaned greens from Cut N Clean Greens to try out and it was probably the most exciting food stuff that’s landed on my door step because I just LOVE this product. It is so ridiculously easy to use greens with Cut N Clean Greens in your refrigerator. They’ve done all the work for you and the greens are ready to open and cook with. You don’t need to prep them, clean or do anything but enjoy. And for roughly the same price you’d pay for a bunch of greens, you get a great deal more yield and it goes a lot farther. Yet another wonderful thing to love about them.
(disclaimer: I received all the greens for free yet all opinions here are solely mine)
But…. back to this Gnocchi. Very simple and quick, rich with flavor and texture, this gratin came out fragrant, bubbling and with that perfect crunchy top to it. Grab a favorite pizza sauce (whether scratch or homemade) a package of shelf stable gnocchi (or…. knock yourself out and make a batch from scratch) and about a pound of good greens like chard, spinach or beet greens and give yourself about 15 minutes while the oven springs to life and heats up. It’s like pizza but it’s not; it resembles lasagna, but it’s better because it’s easier. The gnocchi become so incredibly soft and tender in the oven and it’s gorgeous enough for a special occasion, classy enough to taste like you really put out some effort.
I’ve noticed lately that when I write out my recipes here that I’m posting all sorts of side notes (in blue!) on what options you might do with your own version of the recipe. I hope this isn’t annoying. Is it? Because, here’s the thing; I don’t have the ego to think that the way I make anything would be exactly how someone else would make it. We all have our own tastes, right? We like different foods, flavors and we all have different methods, ovens that work differently, cookware and utensils that we love (go ahead, use that garlic press if it’s your way) and these recipes that slip through our computer screens in to our minds, making our mouths water, well they might mean something else entirely to another person. If I mention to saute your onions for 10 minutes and you think they should be cooked longer, or shorter, or if you don’t even like onions and don’t want to use them, then by all means, trust those instincts. Make the recipe your own. Learn the ways of your own stove, the cut of your favorite knife, dig through your cupboards and add your own flavor, spice, extra something that you love. This is how cooking should be. I’m thrilled to just be one of the stones you traverse in your own journey in the kitchen.
Baked Pizza Gnocchi with Greens
1 lb. gnocchi
1 15-oz can prepared pizza sauce (I love Muir Glen Organics)
2 small shallots, minced
2 cloves garlic, minced
1/2-3/4 lb. greens of choice (can be beet greens, spinach, chard or kale or a mix)
1/2 c. crumbled goat cheese (for a richer taste, use ricotta)
1/2 c. panko bread crumbs
2 T. melted butter (i used coconut oil)
1/4 c. grated parmesan cheese
1/4 c. mixed fresh herbs, like parsley, thyme, basil, oregano
Heat oven to 400°. Spray a 2-quart baking dish with cooking spray. Or live a little and rub butter in it.
In a deep skillet with a lid, heat oil of choice and add shallots, cooking for about 5 minutes while stirring over medium-high heat. Add the garlic, stir and cook for a few minutes, then begin adding the greens, a handful at a time and stirring so they begin to absorb some of the heat and oil and start to get a bit of wilt to the leaves. Once all the greens are in the pan and they’ve collapsed and are starting to soften, crumble in the goat cheese and stir to break it down. When it’s pretty well incorporated, add in the pizza sauce and about a half cup of water. (add the water to the can and swish to collect any remaining sauce). Stir the pan well, then bring it to a gentle simmer and cover it. Cook the greens until just tender. The timing will depend on which green you are using. Taste often so they don’t get away from you. When the greens are just tender, stir in the gnocchi, and turn off the heat. I used a mix of beet greens and chard and cooked them for maybe 10 minutes.
Mix the panko crumbs, butter and parmesan cheese together. Scrape the gnocchi in to the baking dish and sprinkle the top with the panko crumbs. Bake in the middle of the oven until bubbly, and the crumbs have browned nicely. Mine took about 20 minutes, and I rotated the dish a few times to brown the top evenly. Once removed from the oven, allow the dish to stand about 10 minutes before serving.
KATE’S NOTES: You can divide the gnocchi between individual ramekins if you want something fancier. But please keep in mind that your baking time will be drastically reduced. I baked a few ramekins, placing them on a baking sheet lest they rise up and bubble over the top. They didn’t. (whew)
You can double this for a crowd, baking it in a 9×13 pan. That’s a lot of greens, so add them patiently to the pan.
April 11th, 2012
| 1 Comment »
There’s nothing, really, to making a pan of enchiladas. Tortillas, filling, sauce and cheese, a bit of time in a hot oven and you’ve got a dinner that should please just about anyone. I probably don’t even need to give you a recipe, do I? (but I will…..)
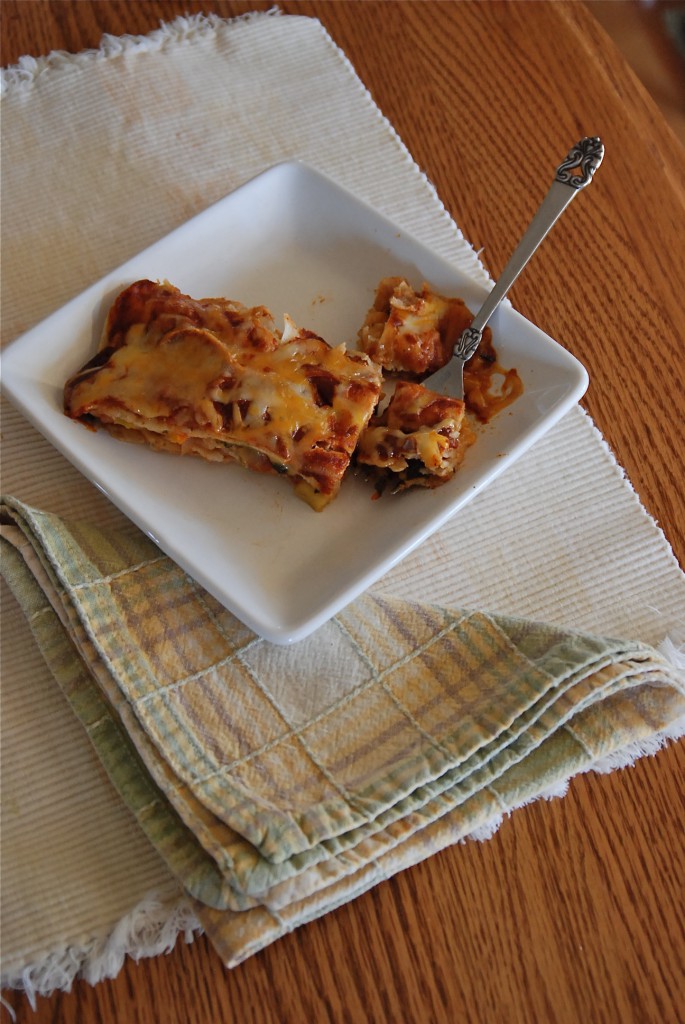
What enchiladas are though, is reliable. At least in my home they are. I know they’re something that all of us will eat without a shred of complaining. And we all need those types of meals in our homes, on our tables and in our back pockets, don’t we? The ones that no one whines over, or rolls their eyes. A meal that everyone will gobble down with reckless abandon. I know with a few peppers, canned beans, frozen corn, a pack of tortillas and a bit of time, that a meal will land in our midst and pull us together, drawing the day to a close. And long before we stopped eating meat, I could make Vegetable Enchiladas and Griffin wouldn’t care one whit about them. Thankfully, that’s still true.
We’ve slipped back to somewhat more normal weather these days, now that April has come and set her softly budding Spring on us. March’s heat wave gave us all a taste of warmth and summer and we all want it back, but these days, the nights come cold and brisk and for me, this past week of frost warnings and cold sunshine was enough to want the oven humming and a warming dish in our bellies. I know soon enough that it won’t feel like these comforting dishes will be necessary, so along with our old reliable Enchiladas, I wanted to have one last send off of a favorite meal before the heat comes and dinner plates are full of fresh and lighter meals.
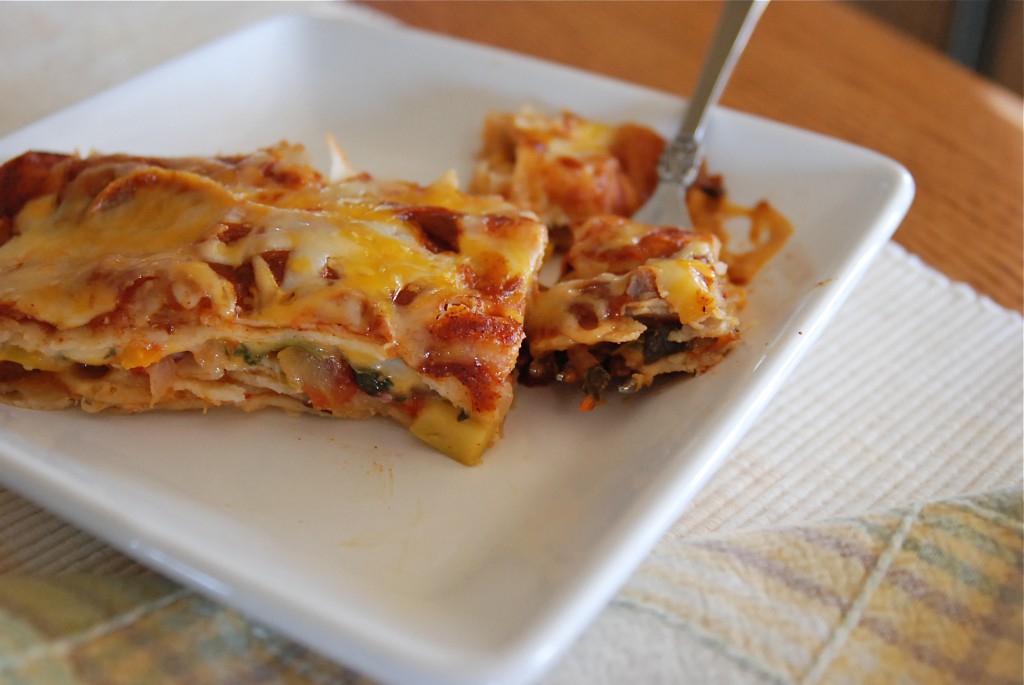
There’s really two ways you can make Enchiladas, outside of choosing between corn and flour tortillas; you can roll up the filling inside the tortillas, or you can layer the filling between the tortillas, creating a more ‘lasagna’ style dish that’s equally as good, and sometimes a bit easier to negotiate out of the pan. I like them both ways, and the ‘lasagna’ method is a bit less work, but if you’ve got willing hands to help, the rolling part happens pretty fast. The best part of this meal is having LOTS of good leftovers, and I think the flavor gets much better overnight.
And as for sauces….. I’ve never made an enchilada sauce from scratch that even came close to tasting like a few canned varieties I’ve found. My go-to brand of enchilada sauce is Carlita; it’s a deep, rich red sauce that’s got just the right amount of seasoning and spice. Las Palmas is another good option; they’ve got both red and green enchilada sauce, and have a Mild, Medium or Hot option. The Medium is plenty for us, and their green enchilada sauce is really amazing.
(disclaimer: nobody paid me to say that, or gave me free products to say that. Just so you know)
Vegetable Enchiladas
2 bell peppers, cored, seeded and diced (any color you choose)
1 large yellow onion, diced
2 cloves garlic, minced
1 jalapeno pepper, cored, seeded and diced (like it spicier? make it a serrano)
2 small zucchini, peeled and diced
1 c. frozen corn kernels
1 15-oz can black beans, drained and rinsed (can sub any kind, really)
1 15-oz can fire roasted tomatoes
1 T. chili powder (can sub in canned chipotle in adobo if you have it on hand- it’s a wonderful flavor)
1 T. ground cumin
2 c. washed and finely chopped spinach, chard or beet greens (optional, but it adds a good amount of flavor and nutrition)
8-oz shred cheese of choice
1 15-oz can enchilada sauce of choice (you can use two if you like a lot of sauce)
Tortillas of choice (use the small 6″ corn, or the 8″ flour; you’ll need 12-15 corn, 10-12 flour)
Oil of choice for cooking
Spray a 9×13 baking pan with cooking spray. You may have enough filling to make more enchiladas, so have a smaller pan at the ready, like an 8×8. Heat the oven to 400°. Have your tortillas on the counter to warm slightly as they’ll roll better, but if you’re using corn tortillas, don’t leave them uncovered or they will dry out.
In a deep skillet with a cover, heat a bit of oil and add the onion. Cook about 10 minutes, or until softened and then add the bell pepper and jalapeno. Cook, stirring occasionally until the peppers begin to soften. Add in the garlic, zucchini, frozen corn and canned beans. Stir it all together and get it simmering. Cover the pan and cook for about 10 minutes. Stir in the greens, cover and turn off the heat. Let stand for about five minutes.
Place a tortilla in the pan and drop a few tablespoons of shred cheese down the middle. Spoon some of the filling in (the amount depends on the size of your tortilla) and spread it to the edge. Gently roll the tortillas up, making sure the seam side is down. Repeat until the pan is full. The tortillas can be moved closer to one another as your roll. You want them pretty snug, but not crammed in the pan or it will be impossible to get them out.
Spoon the sauce down each tortilla, spreading it out as you go. They should be well covered. Sprinkle the top with cheese and cover with foil. Bake for about 20 minutes, then take the foil off and allow the cheese to brown just a bit more. Thirty minutes should be plenty of time. If you allow the Enchiladas to sit for 10-15 minutes, they are A LOT easier to get out of the pan.
These are delicious served with avocado, sour cream, or both.
KATE’S NOTES: To make Enchiladas ‘Lasagna’ style, lay the tortillas on the bottom of the baking pan. Spread some filling over them, then top with a bit of cheese and a drizzle of sauce. Layer more tortillas and repeat. You should be able to get at least three layers, finishing with sauce over the top, and cheese before baking. Allow this to also sit for a spell before cutting in to squares.
If you wish to add meat to the filling, please do so. I used to make these all the time with chicken, and once in a while with pork or beef. One pack of boneless skinless chicken breasts is perfect; dice them, and sear the meat in with the onions, then proceed with the remaining steps.
Any leftover filling is wonderful for breakfast. I had about 1-1/2 cups left from this meal, and for breakfast I heated it in a pan then cracked two eggs in it, covered the pan and cooked it for about five minutes. I scooped it on to a plate that had a handful of tortilla chips on it. It was the finest breakfast I’ve had in a long time.
April 4th, 2012
| 2 Comments »
March gave us some exceptionally warm days, but the past few weeks haven’t been quite as toasty. Once the sun drops lower in the sky, I’m still shrugging in to sweatshirts and occasionally drawing wool slippers on my feet. I’ve got soup on the mind, with the chill in the air, but not the hearty simmering pots that I dreamed of in January.
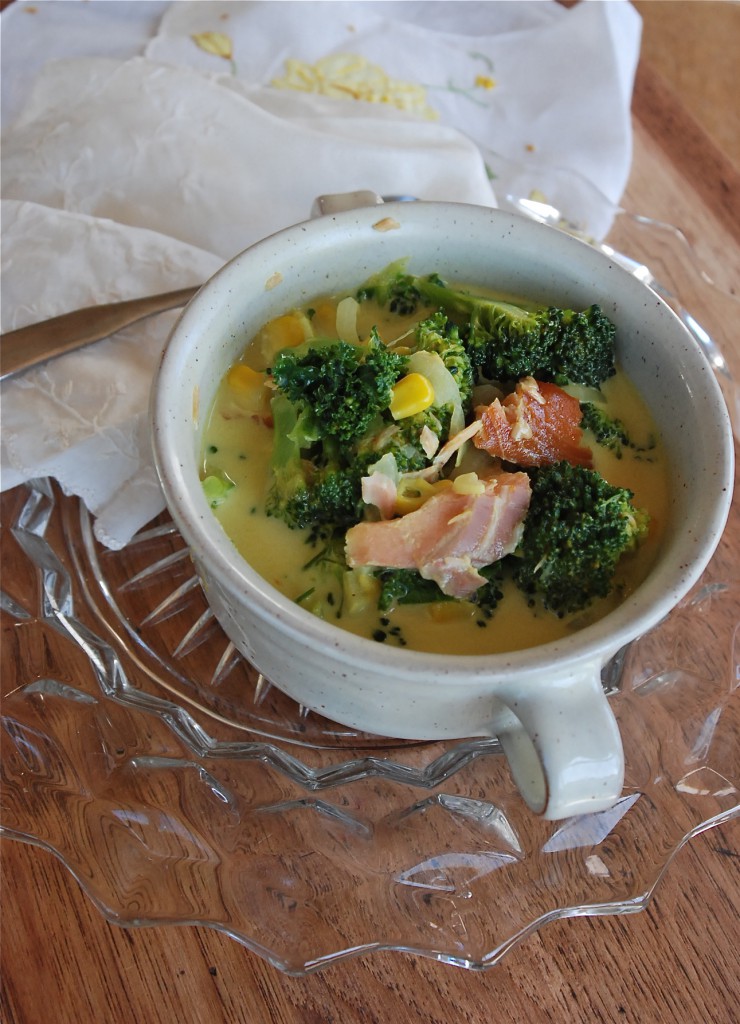
What I’m dreaming about is this succulent chowder, light and refreshing for Spring, brightly colored with vibrant greens and flavored with the rich taste of smoked salmon. This is a simple soup to put together so it won’t be interfering with your outdoor time and you won’t feel bogged down from it when you finish.
The first time I made this soup I think we darn near polished off the entire pan. What was left over was barely worthy of lunch the following day, and instead of slipping this in the ‘Done’ pile and never looking at it again, I kept it front and center, and dropped another chunk of lovely smoked salmon in my grocery cart for a second showing. It’s a surprising recipe, as on first glance it just doesn’t look like a whole lot. Then you lift the spoon to your mouth and taste the coconut milk broth, rich with curry flavor, the delicious vegetables and then, the sharp smoky fish. It’s a bit sweet, it crunches and it delights.
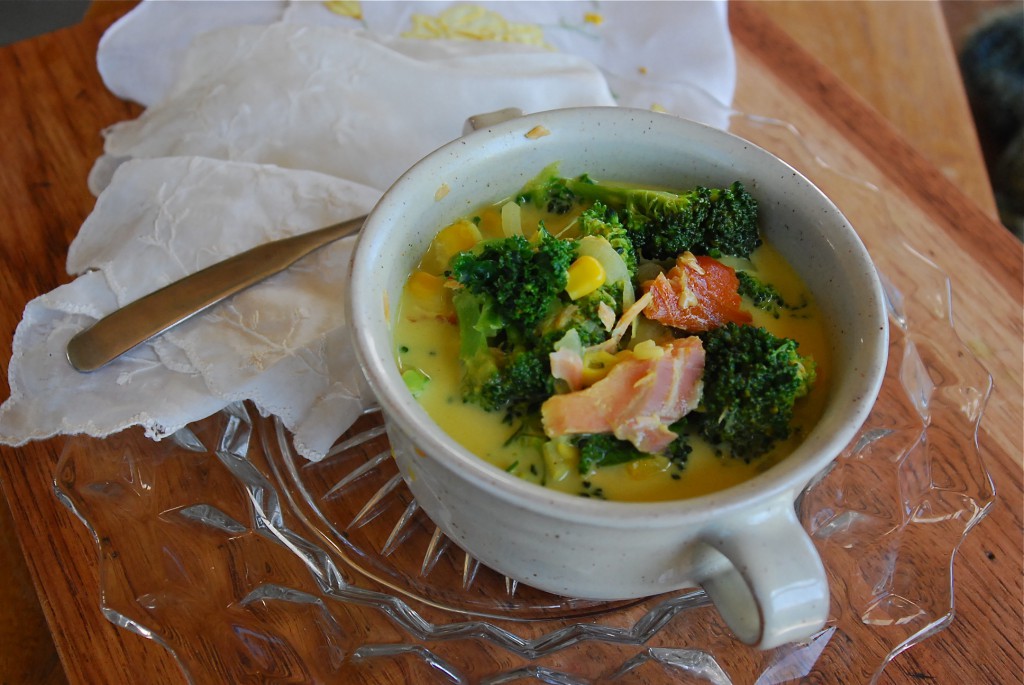
The soup is wide open for your own personal interpretation too, employing just about any vegetable you have on hand. You could skip the smoked salmon if it isn’t to your liking, instead adding maybe some grilled shrimp or scallops for a bit of boldness. The curry is completely adjustable too. Add more for a bigger kick, if you like. Or just substitute turmeric to add the bright and sunny color. While I used broccoli and kale, I think green beans and bok choy would be delicious in this soup. Not a fan of corn? Skip it. Add peas instead. Or chunks of dark orange sweet potato. That’s the best part of this recipe; it’s superbly easy to make it your own.
Curried Vegetable and Smoked Salmon Chowder
Coconut oil for cooking
1 medium red onion, thinly sliced (I’ve used yellow onion too)
1 jalapeno pepper, cored and seeded, thinly sliced (for extra heat, use a serrano)
1 T. minced fresh ginger
2-4 garlic cloves, finely minced (the amount you use is entirely up to your taste)
2 Broccoli crowns, sliced to bite size (can sub in cauliflower)
2 c. fresh kale, roughly chopped (can sub in baby bok choy, chard or spinach too)
1 c. frozen corn kernels
1/2# smoked salmon
2 T. red curry paste (substitute your basic curry powder if it’s all you have)
1 15-oz can light coconut milk
3 c. broth of choice, or water (I filled the coconut milk can twice)
1 T. fish sauce, or fresh squeezed lime juice
1 T. pure honey
Cilantro, basil or mint, fresh lime wedges, crushed peanuts for toppings, if desired
In a medium stockpot with a lid, warm about a tablespoon of the coconut oil and add the onion. Cook, stirring occasionally, until the onion is softened, maybe 10 minutes or so. Add the jalapeno, ginger and garlic and cook for about 5 minutes, stirring. Pour in the coconut milk and broth (or water) and stir together. Then add in the curry paste, fish sauce, and honey and stir well to incorporate, add in the broccoli, kale, and corn. Stir to blend, then bring to a simmer, cover and allow to cook until the broccoli is tender to your liking. Add in the smoked salmon and heat through. Top each soup with some of the fresh herbs, a squeeze of lime juice and chopped peanuts, if you like those. The soup is perfectly fine without them as well.
March 24th, 2012
| 3 Comments »
Long ago, through some rather perfect serendipity, I came across this recipe (method, really) in both a cookbook I happened to pick up for browsing in a bookstore, and again, in an New York Times article just about the same day. Both times, reading of softly boiled red potatoes topped with briny tapenade, my mouth did that sort of happy dance that one gets when a food is particularly appealing. I made them. Once. And then, every time I see tiny little red potatoes I think ‘Why have I not repeated that dish?’
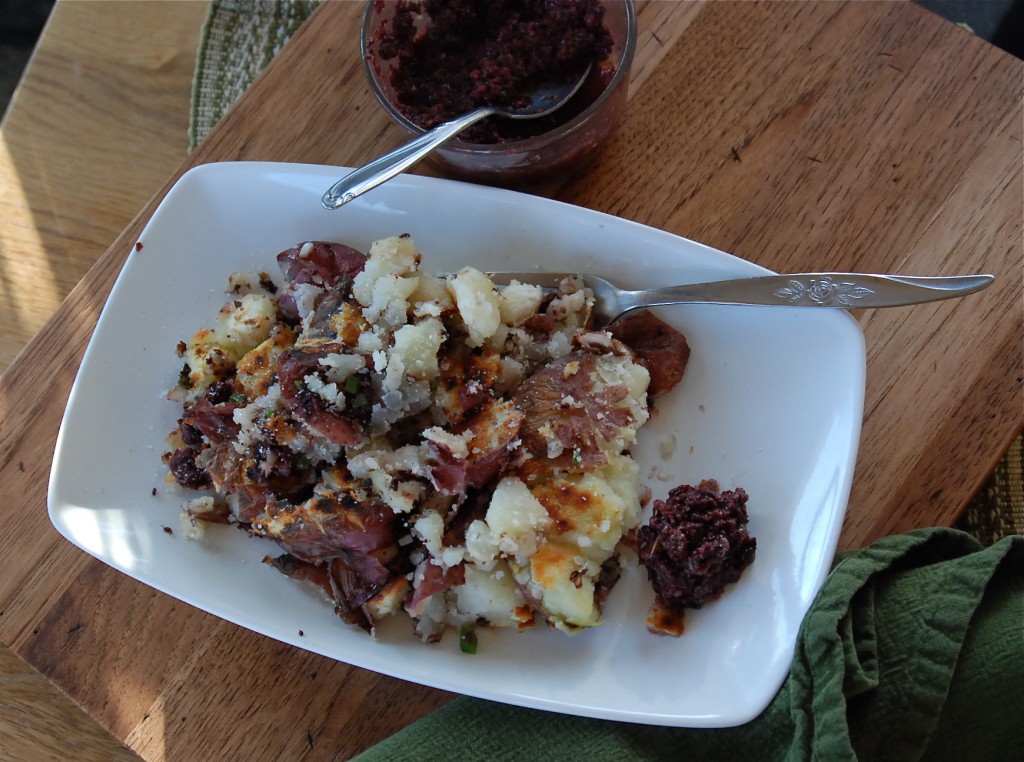
I don’t have much of an excuse, really. And it isn’t that it’s even that difficult. You can use prepared tapenade, instead of making your own and you’ve got half the battle done, right there. And really, does boiling little red potatoes take up SO much of my time? Who am I?
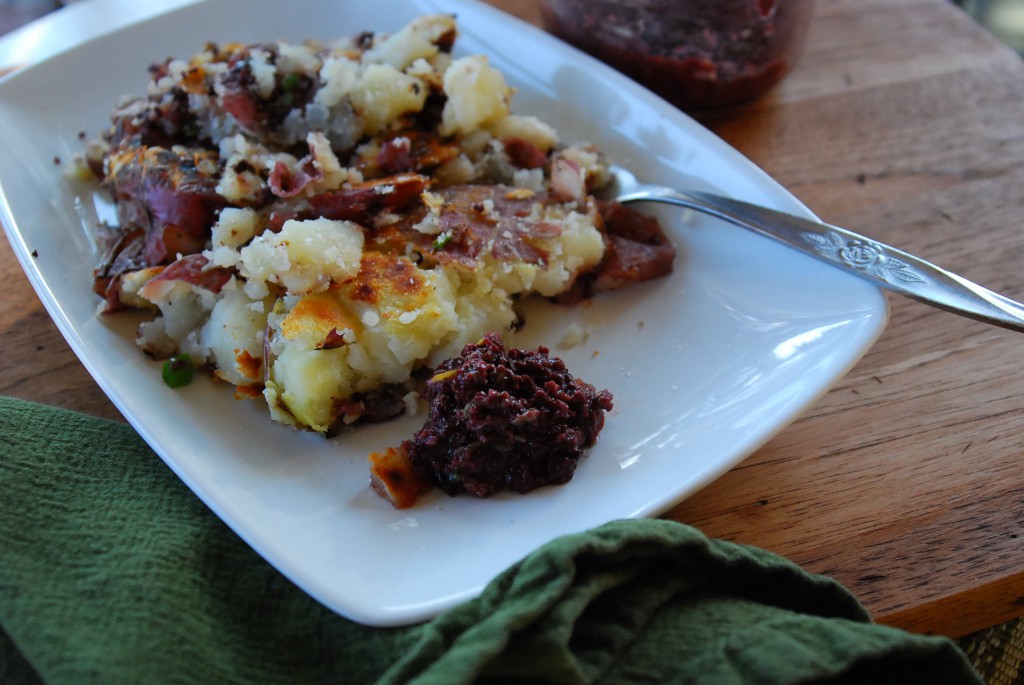
The flavors marry in the most unusual way. Soft and simple, a boiled potato isn’t a whole lot all on it’s own; it needs a friend to help wake it up, make someone take notice. That’s the tapenade’s job. It’s a loudmouth, all right. Sharp, briny and out there, it sidles up next to the humble boiled potato and says ‘Hey, let’s make some noise’ and pretty soon, with the addition of half a jalapeno pepper languishing in the fridge, and a shallot for good measure (potatoes and onions are so utterly complimentary) you’ve got yourself a plate of something that’s risen to greater gustatory heights. It’s humble and basic, still. But fantastically more. It’s the type of dish that soothes the rough spots out of your week, gives you pause. A forkful raised to your mouth is at once sharp and fragrant, then through the bite of olive, lemon and caper, soft in the way only a perfectly boiled potato can be.
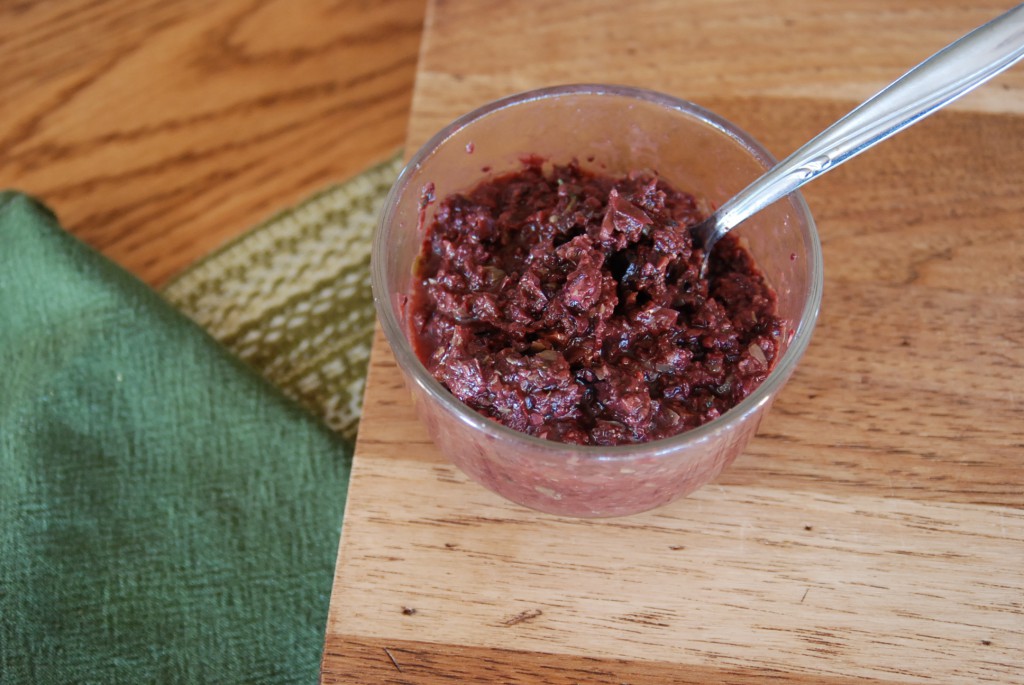
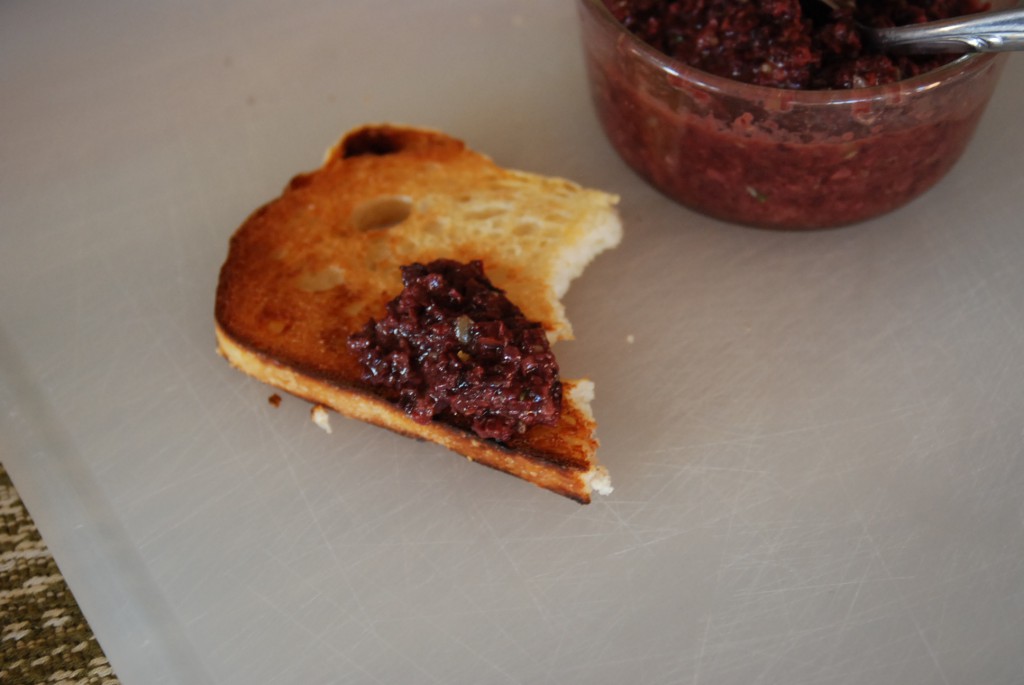
Best part about making this simple and humble dish is that you’re likely to have leftover tapenade, and spreading that on a bit of toasted bread is one of my most memorable treats. In fact, eyeing the simmering pot of potatoes while I scooped tapenade on freshly toasted asiago cheese bread, I quickly calculated the merits of actually finishing the recipe, versus sitting down with the remains of the bread and the tiny dish of olive spread, but soon realized how boring that would sound. I’d had enough of boring, and it was time to make a little noise.
Smashed Potatoes and Olive Tapenade
For the Tapenade:
1 c. kalamata olives, minced
2 T. capers, minced
1 t. grated lemon zest
1 T. fresh lemon juice
1 1/2 t. fresh thyme, chopped
1/2 c. extra virgin olive oil
Fresh ground black pepper
Mix everything together in a bowl and allow to stand for a while to blend. You can whiz everything in a food processor to make it easier. Don’t skip the lemon zest and juice. It’s delightful in this.
For the Potatoes:
About 1-1/2 pounds of waxy small red or white potatoes,
2 T. red wine vinegar
1 bay leaf
6 black peppercorns
Salt
Wash potatoes. If not uniform in size, cut to size and boil, with all added seasonings, until tender. Drain and discard seasonings. Allow the potatoes to cool slightly, then gently crush them with your palm so they break open, but don’t bust them apart too much.
Heat a heavy skillet over medium-high heat. Cast iron works beautifully for this. Add a small amount of butter and oil and swirl to coat the pan. When hot, place potatoes in a single layer in the pan. You may not use all of them. Cook for 10 minutes or so, until a good crust forms on the bottom. Dot the top with about 1/4 cup of the tapenade, and carefully turn the potatoes over. Allow to cook on the other side for an additional 5-10 minutes. Serve with tapenade on the side.
NOTE: You can add a finely minced shallot and jalapeno at the same time you add the tapenade. These added a nice dimension of flavor to the finished dish.
Original recipe: “Seven Fires: Grilling the Argentine Way” by Francis Mallman and Peter Kaminsky (via the New York Times Dining Section, 5/20/09)
March 4th, 2012
| 1 Comment »
This time of year is a hard one.

I seem to start slipping off the tightrope each February. Bored, restless, tired and too stunted by the dull landscape, I stand on the figurative ledge and think ‘Ugh.’ as I look around. The vertigo makes me twitchy, and thankfully, a trusted friend is there to pull me back and say ‘You know, you go through this every year at this time.’. I’m grateful for someone standing outside of me, who can rationalize this wandering mind, drawing it back to the reality that it’s just late winter and I could use some green and some color in my life.


Surrounding myself with a few hours of plant life, of colorful flowers, weeping ferns and a warmth that left me sweaty certainly helped a great deal, and it seems to become more important in the last gasp of winter to put sunny, warm foods in to the body, like an infusion of heat and sunshine that lights us up from the inside. Like this lemony pasta.
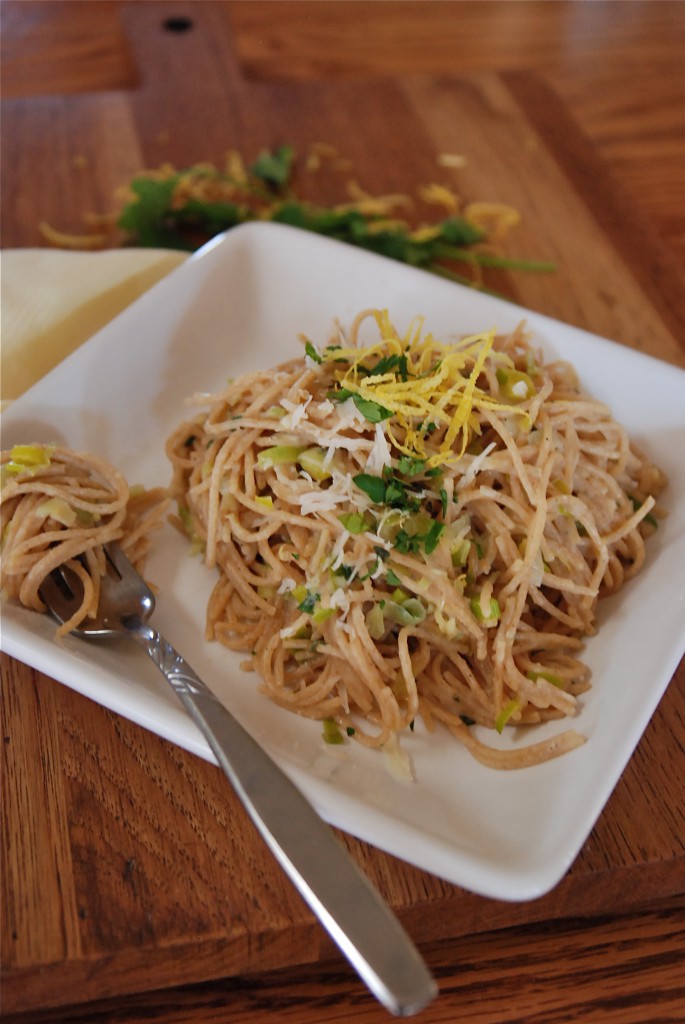
Eating anything with lemon in it is like ingesting sunshine, it’s so bright and engaging. This couldn’t be simpler to make, with a few leeks, a juicy lemon and a shower of fresh herbs, and parmesan cheese. I’ve done so much with lemons in my baking, like this Lemon Pound Cake, these intense Lemongrass Bars, and a delicious Lemon Ricotta Cookie, but adding sparkling citrus flavor to savory dishes has been few and far between, with maybe the exception of these exceptional Garlicky Lemon White Beans. That’s to an end though, after discovering this bright and lively pasta dish.
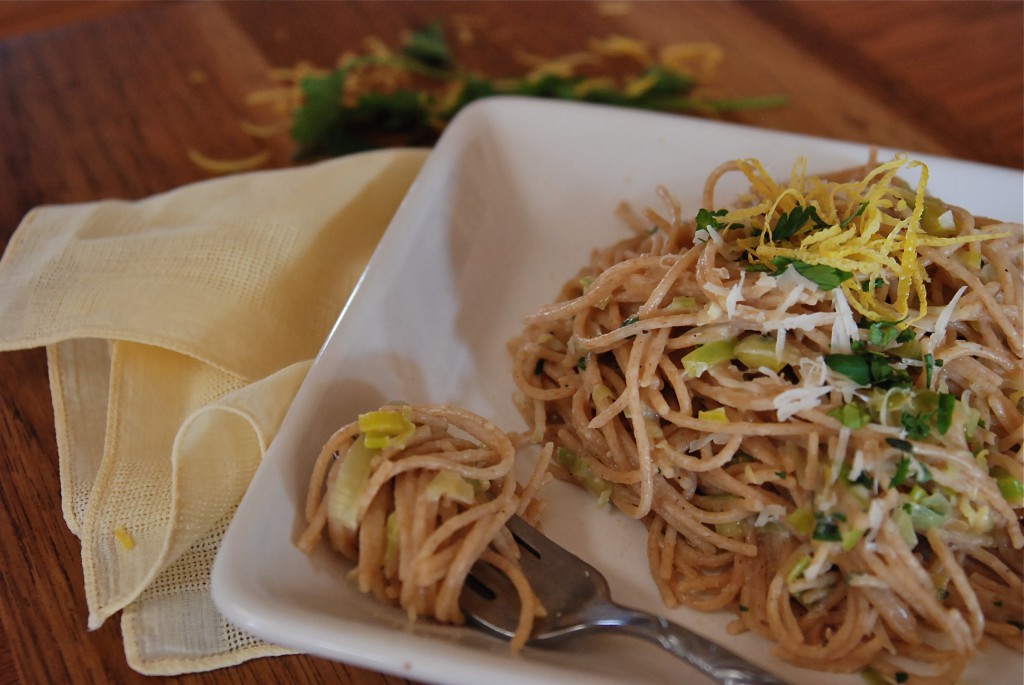
From the February issue of Eating Well magazine, resplendent with juicy lemon slices on it’s cover, this is a quick and easy recipe to put together. In the time it takes you to make a pot of pasta, you can have the leeks sauteed, ready and waiting. A few turns in the pan, with a splash of that ever-important pasta water and dinner is served.
Leek and Lemon Pasta
1# whole-wheat linguine or thin spaghetti
2 large lemons, plus lemon wedges for garnish
2 medium leeks (white and pale green parts only), thinly sliced and rinsed well
2 tablespoon extra-virgin olive oil
1/2 cup chopped flat-leaf parsley, divided
2 cloves garlic, crushed
1/4 teaspoon salt
1/8 teaspoon freshly ground pepper
3/4 cup finely grated Parmesan cheese, divided
1/4 cup snipped fresh chives, divided (I used thyme and it was delicious)
Cook pasta in a large pot of boiling water until just tender or according to package directions. Reserve 1-1/2 cups of the cooking liquid and drain the pasta in a colander.
Meanwhile, finely grate the zest from one lemon and squeeze juice from both lemons; set the juice aside. Pat leek slices dry. Heat oil in a large nonstick skillet over medium-high heat. Add the leek, the lemon zest, 1/4 cup parsley, garlic, salt and pepper. Cook, stirring frequently, until the leek is lightly browned and softened, about 6 minutes.
Add the pasta, 1 cup of the reserved cooking liquid, 1/4 cup of the lemon juice and the remaining 1/4 cup parsley to the pan. Cook, stirring constantly, until the liquid is mostly absorbed, 30 seconds to 1 minute. Add the remaining 1/2 cup liquid, or more lemon juice, if desired. Remove from the heat. Toss the pasta with 1/4 cup Parmesan and 2 tablespoons chives. Transfer to a serving bowl or bowls; sprinkle with the remaining Parmesan and 2 tablespoons chives and serve with lemon wedges, if desired.
Recipe in full, from Eating Well magazine, February 2012.
RECIPE NOTES: A simple reminder to yourself to catch the pasta water when draining it is to place a pyrex measuring cup in the bottom of your strainer when you put it in the sink. Pour some of the pasta water in it, set it aside, then drain the pasta completely. Another method, which I prefer, is to remove the cooked pasta from the water with tongs and add it directly to the skillet. It takes a bit of timing to get it right, but instead of draining all that beneficial starch away, it clings to the pasta and helps to create the pan sauce needed.
This dish would be wonderful with a broiled mild fish, such as Cod or Tilapia, some seared Scallops or Shrimp would also taste good. If you like chicken, a good lemon-herb rub and a run under the broiler would make a perfect accompaniment to this pasta.
February 5th, 2012
| 4 Comments »
This post could also be aptly titled “The end of searching for the perfect banana bread” but that just seemed too long and a bit too final. I should never think I’ve ‘arrived’ at any destination, be it a quest for knowledge, a higher level of health and well-being or never-ending search for perfect banana bread, as somewhere out there, a recipe may exist that could bring this loaf to shame, but for now, I’m sticking with what I’ve got.
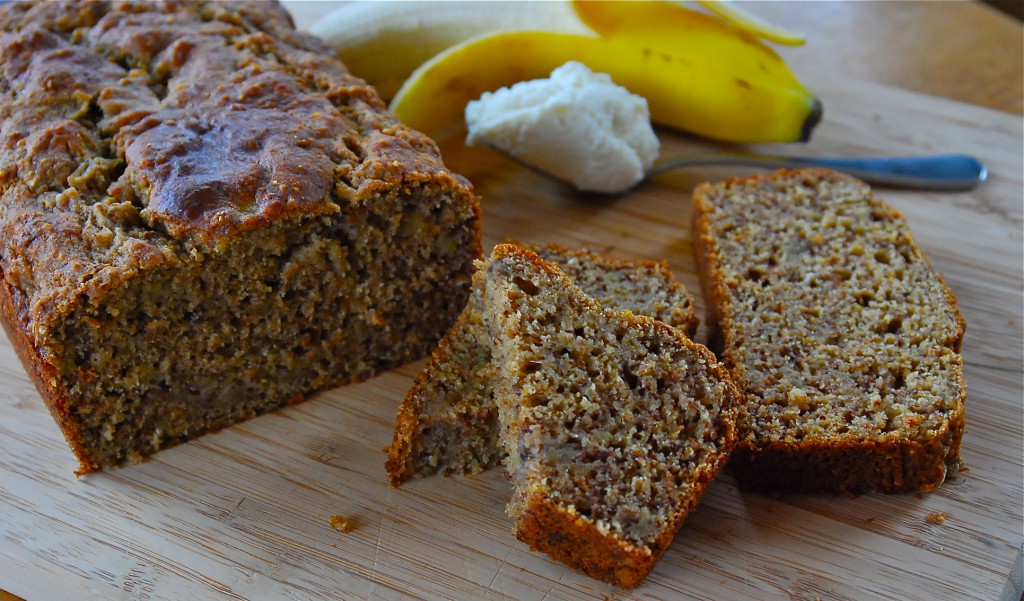
I grew up eating banana bread, from the earliest memories that I have. My Mom made it almost weekly, in fact, I’m pretty sure she bought way more bananas than she needed just so she’d have an excuse. She put walnuts in it, which I despised, so these days, my banana bread is always without nuts. When I got old enough to make my own banana bread, I turned to her tried and true recipe from my youth, and as an adult, I found it sorely lacking, so I moved on. And on. And on.
The goal that I’ve strived for, over recipes and time and growing older, was pure banana bread bliss and perfection that existed as a mental taste somewhere in my mind. And with the first bite of this grain-studded loaf, rich with banana flavor, I about leapt in the air with delight, shouting ‘Eureka!! I have found it!’ while my son chuckled in delight at my antics, he himself wide-eyed and excited over the taste of his piece. This IS pure banana bread delight, and I don’t say that lightly. Folks, I have made and eaten A LOT of banana breads in my lifetime, as I sought out that elusive fine balance of moist and tender crumb, ultimate banana taste and now, a higher level of health than a loaf crushing the scales with sugar and fat. After researching low-fat, and healthier banana bread options for over an hour, I settled on one recipe that gave me a pretty good start, and then started tweaking it to my liking.
I think my biggest disappointment with banana bread has always been that it just doesn’t have as much banana flavor as I want. I add more banana to any number of recipes, and I get mushy bread that turns soggy after a few days, so clearly, without some changes to the base, that’s not a workable option. And I needed a substantial heft other than what flour and leavening can offer in order to stand against that large dose of delicious bananas. When making muffins, I’ve turned to the use of cereals and grains to add more heft, and to make them a bit more nutritious. When faced with adjusting a banana bread recipe in the same way, that’s where I went as well. This recipe has whole rolled oats, All-Bran cereal and a commercial 10-grain cereal as a majority of the dry base. Cutting back on the use of eggs, I added some ground flaxseed for binder (you could also use unsweetened applesauce for this as well). The ricotta cheese, along with a small amount of milk, provides a richness in the texture that’s particularly pleasing to the mouth. The sugar was another matter; I took a gamble, using only a mere half cup in a recipe that makes two loaves. Most tea-bread recipes that I come across have, at least in my opinion, way, way too much sugar, and this amount was perfect. The end result is a bread without the teeth clenching sweetness, so the rich banana flavor just shines through. The cereal and grain base makes the texture nubbly and firm, and helps it retain a lot of moisture. Best of all, the loaves are simply packed with banana flavor.
A lot of this was pure kitchen chemistry, mixed with a lifetime of learning why the recipes I tried were so disappointing. After so many experiments, it’s nice to finally land on something that lifts your heart and elevates your taste-buds, all the while being reasonably healthy enough to enjoy without much guilt.
If you’re like me, when bananas get past the point of consumption in your house, they get tossed in the freezer to await a baking urge, and this recipe is perfect for when you’ve gotten a large stockpile of them.
Whole Grain Banana Ricotta Bread
Yield: Two loaves. It can easily be cut in half.
Preheat the oven to 350°. Spray two 9×5 standard loaf pans with cooking spray.
In a large bowl, mix together the following:
6 large, very ripe bananas, mashed
3/4 c. ricotta cheese
1/3 c. milk of choice
1/2 c. sugar
3 T. grape-seed oil (or other neutral flavored oil)
1 t. pure vanilla extract
1 egg
2 T. ground flaxseed
1/2 c. whole rolled oats
1/2 c. All-Bran cereal
1/2 c. commercial 10-grain cereal, such as Bob’s Red Mill (sub 7-Grain, or 5-Grain if you can only find those)
Whisk this until well blended and allow to sit for about 15 minutes to soften the grains.
In a large measuring cup, combine the following:
2 c. whole wheat flour
1 c. unbleached AP flour
1 t. sea salt
1-1/2 t. baking soda
2 t. baking powder
Add the dry ingredients to the bowl with the banana mixture, and with a rubber spatula, gently fold them together until all the dry ingredients are incorporated. Be careful not to overmix. The batter will be very thick.
Divide the batter between the two loaf pans and smooth the top. Drop the pans on the counter a few times to settle the batter and release any air pockets. Bake for 50-60 minutes, or until a toothpick inserted in the center comes out clean. Allow loaves to cool in pan for up to a half hour before turning them out to cool completely on a rack.
RECIPE NOTES: I use All-Bran cereal a lot in baking, and it keeps a long time in your cupboard. Bob’s Red Mill 10-grain cereal is not only a delicious breakfast cereal, but it’s wonderful for breads too, and I’ve also used it in muffins. I keep it in a plastic bag in the freezer and it lasts indefinitely. I also keep a baggie of ground flaxseed in the freezer.
If all you have on hand is whole rolled oats, this recipe would work just fine to use those in the full amount.
If you wish to cut the recipe in half, don’t use the flaxseed, as it acts as a second ‘egg’.
January 18th, 2012
| 7 Comments »
I did not grow up loving mushrooms. I didn’t even like them, not one little bit. But I surely can’t blame myself, for my only exposure to them as a child of the ’70’s was from a can. And I can’t imagine anything more disgusting than canned mushrooms to a kid. No wonder I was never a fan of the fungus.
As I got older, I allowed a bit of mushroom to pass my lips; I loved them sauteed on a burger, or with a grilled steak. Provided I could have something in my mouth with them, they became only slightly more palatable to me, but I still struggled with texture, and that rich, loamy earthiness to them. Cover them with good red wine, and sauté them in copious amounts of butter and it was ok. Just ok though. Still, they weren’t on my favorites list by any means.
Then I had an epiphany, last summer. A major turning point in my culinary taste occurred at one of the wonderful events I attended last year with the Minnesota Food Bloggers group. It was at Cafe Levain in Minneapolis, and Chef Adam Vickerman created grilled portabella mushrooms, richly glazed in balsamic vinegar. I took a few tentative bites of them and my eyes were opened. I was re-born, re-newed and suddenly, all-out crazy for mushrooms. And to Adam’s credit, I’ve been slightly obsessed, and eating them weekly, ever since.
Mushrooms fit well into a healthy eating plan, and that makes them far more desirable given my all-enveloping obsession. Mushrooms have been revered in Eastern culture for thousands of years for their nutritional properties. Mushrooms are low in calories, fat-free, cholesterol-free and very low in sodium, yet they provide important nutrients, including minerals like selenium, potassium, copper, and vitamins such as riboflavin, niacin (the all important B vitamins) and vitamin D. And then there’s beta-glucans- something I’d never heard of before, and according to Mushroom Info:
“Beta-glucans, found in numerous mushroom species, have shown marked immunity-stimulating effects, contribute to resistance against allergies and may also participate in physiological processes related to the metabolism of fats and sugars in the human body. The beta-glucans contained in oyster, shiitake and split gill mushrooms are considered to be the most effective.”
So I can feel good about the amount of mushrooms passing my lips, and I like that. I can incorporate mushrooms in to just about any dish, but I hadn’t really done much with them in a soup so it was fun to come across this amazing Wild Rice & Mushroom soup recipe on The Kitchn, even better that I stumbled upon it as the coldest air of the month landed on Minnesota, making for a perfect backdrop to a steaming bowl of this thick and hearty soup.
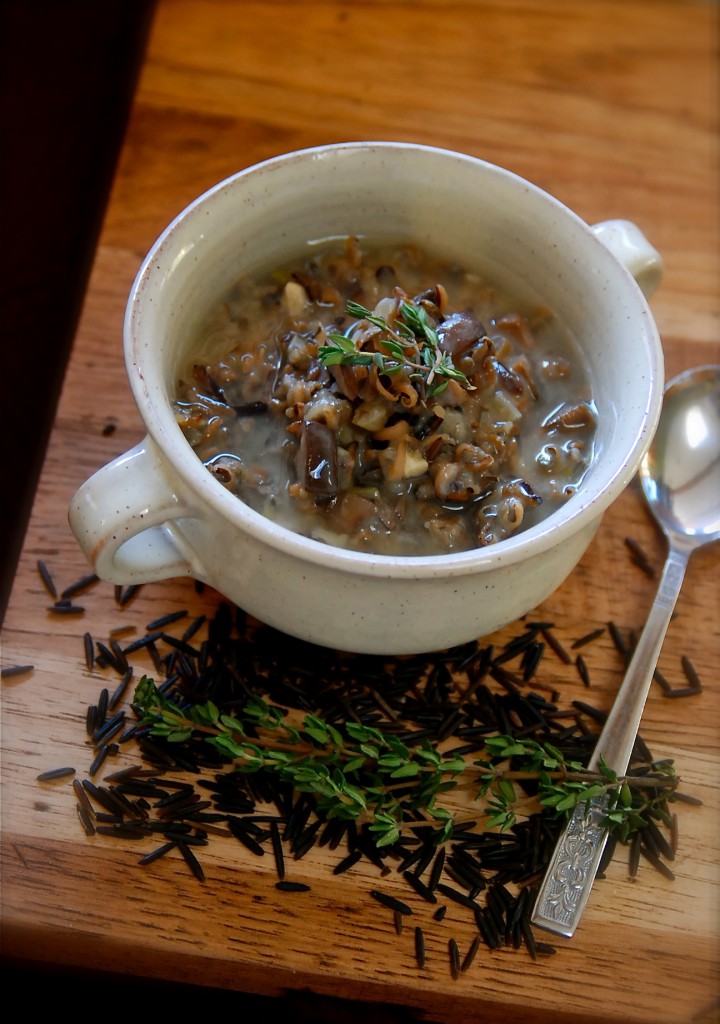
If you love a good wild rice soup with chicken, or turkey, you’ll love this lush recipe, which deeply browns mushrooms to develop their rich flavor. A bath of white wine and some good vegetable broth helps round out the simple but complex flavors. Wild rice was another food item I had to learn how to love, but thankfully, this wasn’t that difficult, and we’ve been enjoying wild rice soups for years. This one, with it deep earthy flavors and thick broth will be on repeat now. We all loved it, and soup is such a good leftover item to have on hand.
Wild Rice and Mushroom Soup
1 c. wild rice, washed
1 large onion, diced
4 celery stalks, diced (I love the flavor of the leaves and used a lot of those)
2 cloves garlic, minced
1 pound of mushrooms, rough chopped (I used baby portabella, but adding some porcini or oyster would be delicious)
1 t. fresh thyme
3 T. AP flour
1 c. white wine (I use pinot grigio in cooking. DO NOT use cooking wine from the grocer. Ugh)
1 Bay leaf
1-2 cheese rinds, optional
2 t. fresh rosemary, chopped
1 c. whole milk or heavy cream (I used a lot less, but adjust according to your taste)
1 T. cider vinegar
Salt and fresh ground pepper
Bring a pot of water to a boil and add the rice with 1 teaspoon of salt. Reduce to a simmer and cook for 40-50 minutes, or until the rice has burst open and is soft. You can leave it a bit underdone if you wish, and cook it to taste with the final soup. Drain the rice, reserving the cooking water to use in the soup if you wish. (I did this. Wow. What a flavor)
Meanwhile, heat a teaspoon of oil in a large dutch oven or stock pot over medium-high heat. Add the onions and celery with a pinch of salt and cook until softened and translucent, about 5-7 minutes. Turn the heat down to medium and add the mushrooms and another pinch of salt. Cook until the mushrooms have released their liquid and start to brown; this should take anywhere from 20-40 minutes depending on the size of your stock pot. I cooked them to a really deep brown. Don’t skip this step as this is where a lot of the flavor of your soup will come from.
Once they are nicely browned, add the garlic and thyme and cook for about a minute. Sprinkle the flour over the vegetables and stir to coat. Stir the flour until the mixture becomes sticky, and no visible dry flour remains. Increase the heat to medium-high and add the white wine. Stir and scrape the bottom of the pan, simmering until the wine has reduced and thickened.
Add the bay leaf, cheese rinds (if using) and stock or the cooking water from the rice. Bring to a boil, then reduce and simmer for about 20 minutes to blend the flavors. Add the rosemary, milk or cream and the wild rice, cooking for another 10-15 minutes, or until the soup has thickened to your liking. Stir in the cider vinegar, season with salt and pepper to taste.
Original recipe from The Kitchn, by Emma Christenson.
***This soup will thicken as it stands, and the rice absorbs more of the liquid. I’ve found that when re-heating it the next day, it tastes best to scoop out a serving and add water to loosen it up.
Linking up to Soupapalooza 2012!!
“Come join SoupaPalooza at TidyMom and Dine and Dishsponsored by KitchenAid, Red Star Yeast and Le Creuset”
January 3rd, 2012
| 2 Comments »
January is a good month for waffles. Just the word ‘January’ in the Midwest conjures images of bracing wind, snow whipped sidewalks, scarves and thick mittens. It’s the aftermath of December, a holiday-less month of Winter. Nothing but winter. It needs something to lighten it up a bit, to warm us against the long dark months ahead.
My most favorite Buttermilk Cornmeal Waffle was born in January, bringing it’s crunchy warmth to a bitterly cold sub-zero day, just about 2 years ago. I’ve relied on that waffle recipe without question, reaching for it time and again to stir myself to face Winter’s white bite, to fill me with the gumption to dress for a day that rattles the windows like an angry giant. Our December was so uncharacteristic for Minnesota; unseasonable warmth, no snow and mild temperatures. We celebrated Christmas without a trace of snowflakes, then came New Years Eve, and rain began to fall, quickly changing over to the fattest, wettest flakes I’ve seen in ages, and by the time the sun rose on 2012, it looked a bit more like January should, and it felt like it too. Waffles needed to bridge the gap between the past year, and the start of this one. But not just any old waffle.
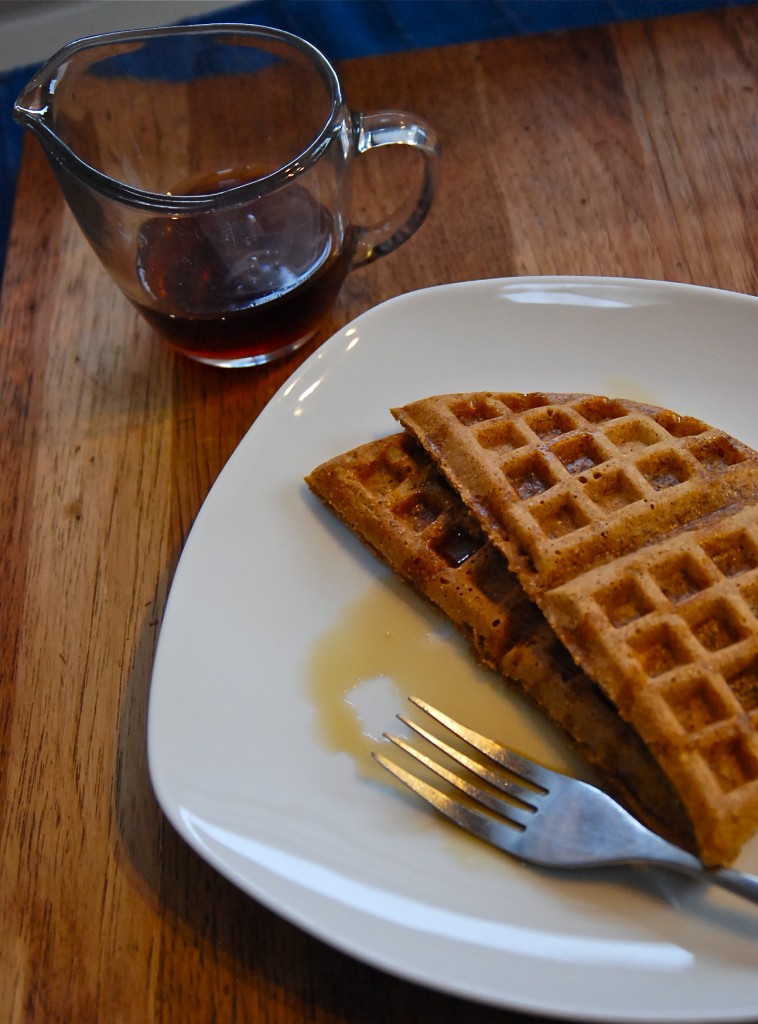
That burnished beauty isn’t exactly showing off it’s best in the photo, but that plain looking waffle is hiding a rich, spicy secret; cardamom, cinnamon and nutmeg, mingling with tiny chunks of tender sweet potato. A bit of inspiration, and an urge to start off the New Year with more than just the same old waffle, I reached for a container of cooked squash, opened the spice cabinet and crossed my fingers. The scent rising from the steaming waffle iron was heady and enticing; the first bite, amazing. Tangy with buttermilk, hearty with wheat flour and altogether a knock-out way to start 2012, this will definitely be on ‘Repeat’ for the remainder of Winter, whether it chooses to snow like crazy as it did last year, or remain mercilessly un-winter-like, there is one thing for sure; bellies will need filling, and this is the key that slips perfectly in to place.
Spiced Sweet Potato Waffles
3/4 c. whole wheat flour
3/4 c. AP flour
2 t. baking powder
1 t. baking soda
1/2 t. salt
1 t. ground cardamom
1 t. ground cinnamon
1/2 t. ground nutmeg
1 T. sugar (or honey would work too)
1-1/2 c. buttermilk (I like to use vanilla soymilk, and add two tablespoon vanilla yogurt for tang)
2 eggs
1/3 c. neutral flavored oil, such as rapeseed or canola
1 c. cooked mashed sweet potato or other cooked squash
In a large bowl, whisk together the wheat flour, AP flour, powder, soda, salt, cardamom, cinnamon, nutmeg and sugar. If using honey, add that to the wet ingredients.
In a separate medium sized bowl, add the buttermilk, eggs, oil and squash. Whisk until smooth. Add to the dry ingredients and gently fold together using a rubber spatula. Be sure to scrape across the bottom of the bowl to mix thoroughly. Do not overmix the batter. Allow to rest for 15 minutes. You’ll see bubbles form on the batter. Don’t stir it anymore.
Bake waffles according to your individual waffle maker. Mine makes 8″ round waffles, and I used 1/3 c. batter per waffle. This recipe made 6-8 waffles.
The original recipe used for this batter comes from The Breakfast Book, by Marion Cunningham.
|


