November 4th, 2013
| Comments Off on the amazing sweet potato cornbread {gluten free}
I talked about walking away from wheat in my last post, with that delicious Maple Apple Cake that had no wheat whatsoever in it, and I couldn’t resist sharing this incredible Sweet Potato Cornbread recipe with you as well.
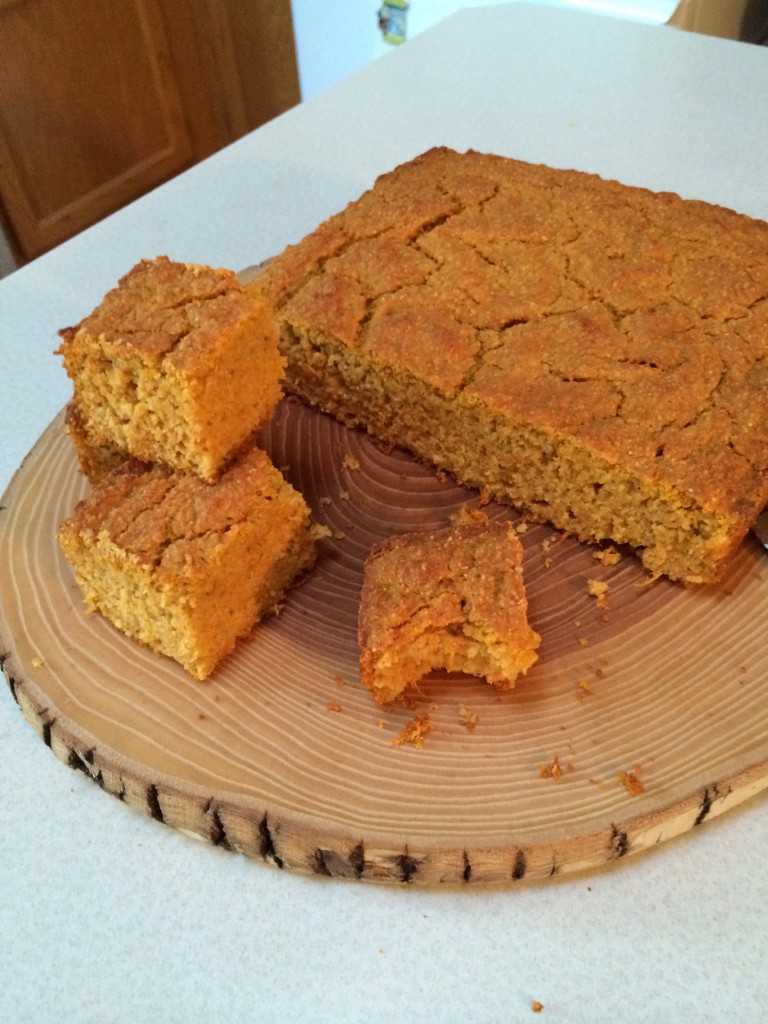
Cornbread is a staple around here in the cold months. We eat it with all manner of soups, chili and such, and all of us love a good hearty piece, drizzled with honey as a side to a steaming bowl. I needed to find a wheat-free option for this quickly.
Fortunately, it didn’t take much searching to come across this recipe for Pumpkin Cornbread on Ashley’s delicious blog, Edible Perspective. I’ve been following Ashley’s site for quite some time now and love all her simple yet inventive recipes. She inspires a great deal of dazzling food thought for me in my own kitchen.
Ashley has no less than three versions of her Pumpkin Cornbread in the referenced post and the last one she lists is the one that nailed the homerun of wheat-free Cornbread that will now be my go-to recipe. Again, like that phenomenal cake I just made, the base is a mix of flours and does not rely on a commercial blend. I just don’t want to take the lazy route to make my favorite baked goods without wheat, and exploring the means of creating these standards is half the fun.
Texture is of vital importance in baked goods without wheat. A good quality result shouldn’t immediately raise a red flag that something is missing, and this cornbread’s texture is spot on for what I love about top-notch cornbread; it has that cracked, rugged top and a dense crumb that holds just enough moisture to keep it from crumbling with the first bite. Adding roasted and mashed sweet potato helps with that tenderness. Sinking my teeth in to that first piece, cut while still warm from the pan, and I rolled my eyes in joy. It was perfect. The crumb was perfect. The taste- superb. The texture was pure cornbread, with hardly a hint that the wheat was missing.
It’s results like this that I can’t resist praising. I LOVE this cornbread, and can’t wait for the next bubbling pot of soup so I have an excuse to make it again.
Like I need one, right?
Sweet Potato Cornbread
1/2 c. gluten free oat flour (I grind Bob’s Red Mill GF oats to make mine)
1/2 c. medium grind cornmeal
1 c. corn flour (use Masa Harina in a pinch- this is different than cornmeal)
1 T. baking powder
1/2 t. baking soda
3/4 t. fine grain sea salt
2 large eggs
1 c. mashed sweet potato (about one good sized spud; I roasted mine until it collapsed, cooled, skinned and mashed)
2 T. maple syrup
3/4 c. unsweetened almond milk (use whatever milk you wish)
2 T. olive oil
Heat your oven to 375°. Spread a few tablespoons of oil around the pan you chose for baking. I used an 8×8 square baking pan.
Whisk together the oat flour, corn meal, corn flour, baking powder, soda, and sea salt. In a large measuring cup, measure out the milk, then add the sweet potato, maple syrup, eggs and oil. Whisk wet ingredients together until smooth, then pour over the dry ingredients and gently mix with a rubber spatula, scraping across the bottom of the bowl. Mix only until combined, then scrape in to prepared pan and smooth the top.
Bake 30-40 minutes, or until tested done in the center of the pan. Allow to cool before removing from the pan.
This recipe is adapted slightly from Ashley’s. Please check out her post on how she created, and re-created this cornbread, and the multiple ways she made her version.
March 21st, 2013
| 2 Comments »

For a simple supper or easy appetizer, these crunchy tostadas are a snap to put together. And they have me craving Summer.
Come in to my kitchen…
July 5th, 2012
| 4 Comments »
Cauliflower is so endlessly versatile, and to think up until a few years ago, I’d only eaten it raw or boiled. Boiled? Ugh. Steamed is a much better, albeit bland, option, but if you allow it to go too far in the steamer, it’s lack of inspiration becomes legendary. The epiphany, thankfully, was the pan of deeply roasted cauliflower that changed my mind about the stark white florets forever. I’ve tried it mashed like potatoes, and also pureed smooth with parmesan for a creamless alfredo sauce. But time and again, I placed a pan loaded with it in to a hot oven and devoured the results.
That was about it for that vegetable, and I was fine with it. I could eat cauliflower year-round, and I do, but now with a few new methods in my arsenal, I can enjoy this vegetable a whole lot more.
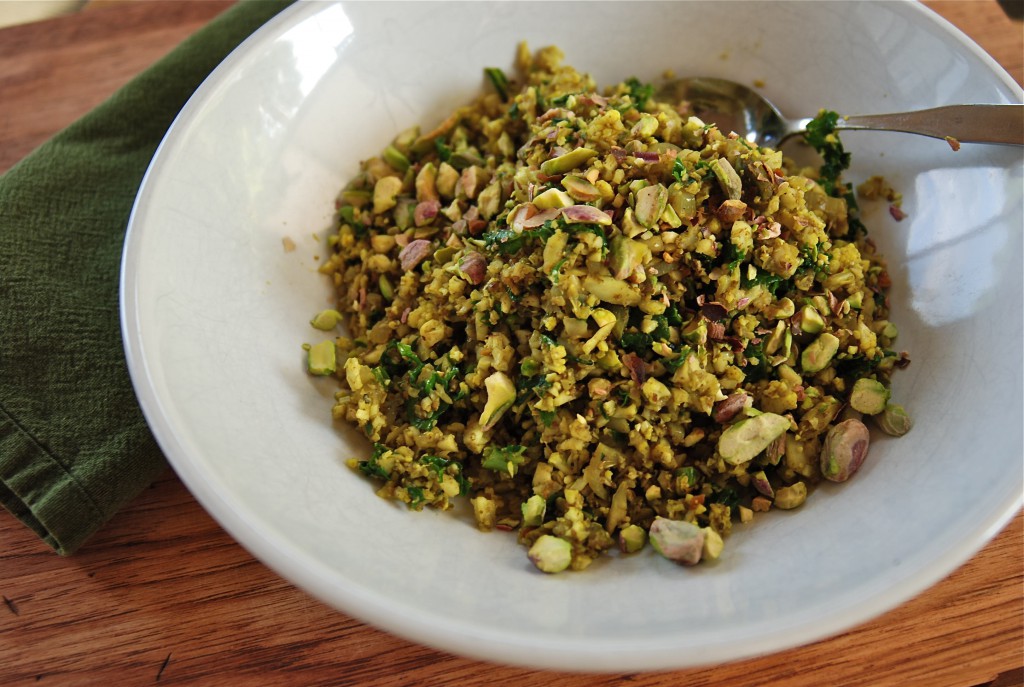
I came across this fried ‘rice’ recipe for Cauliflower on Shanna’s blog and knew that I had to get that going in my own kitchen. While I do love fried rice to the depths of my heart, it’s best when you have cold, cooked rice on hand and that’s not just something that materializes in this kitchen every day. But a head of cauliflower, ground in a few pulses in your food processor and mixed with the same type of seasonings in a hot wok can be a dynamite substitute, with a lot less calories and carbs.
And simple doesn’t even do this justice. It’s ridiculous how easy and quick this is. I spent more time prying the leaves from the core of cauliflower than any other aspect of putting this together, including chopping an onion. Given that you’re basically pulverizing the vegetable, you can use the core of it as well and no one would ever know the difference. In less than 10 minutes after heating up my wok, we sat down to steaming bowls of this fragrant meal.
Shanna has two options for this recipe on her blog, which is a wealth of beautiful writing (with a love story that’s almost as good as ours…..) and this base of ground cauliflower could really withstand just about any treatment to create your own version. I made a rich curry flavored dish, enhanced with ground pistachios for flavor and as I tossed and cooked it, inhaling the fragrance from the wok, I started thinking of all sorts of vegetables I could add to this to make it better and deeper in flavor, and in a second round of this simple meal, I added in some leftover vegetables from a coconut curry stir fry that Griffin had made, as well as a few handfuls of cold rice and the results were equally spectacular. This will be a new favorite in our house, you can bet on that.
Another mind-blowing option for Cauliflower that I’d been thinking about lately is to prepare it on the grill. I’ve seen methods of doing this by slicing through the head, creating a ‘steak’ and laying that on the grill. In my attempt to cut my Cauliflower though, my ‘steaks’ broke apart, leaving me with no other choice but to toss them on my grill plate to cook. Probably one of my best purchases for outdoor cooking, my cast iron grill plate lays directly on top of the grate and is perfect for cooking all manner of small foods; I can grill peppers and onions for fajitas, asparagus without losing any stalks, mushrooms, small fruit and a wide range of other foods, and it was perfect to create this smoky, sensational grilled cauliflower. I could barely contain myself from eating the entire bowl of it.
My most favorite marinade to use on grilled vegetables is a spicy mustard vinaigrette, brushed or tossed with the vegetable prior to being placed on the grate. It imparts terrific flavor, with just a bit of punch from the mustard. I’ve found that it works well on almost every vegetable I’ve ever grilled. Which, admittedly, has been A LOT. I love to grill just about anything.
Cauliflower Fried Rice
1 small head cauliflower, leaves removed and broken in to large chunks
1 small onion, diced
2 garlic cloves, minced
1 T. fresh ginger, minced
1 t. crushed red pepper flakes
Coconut oil for cooking
Soy sauce and sesame oil to finish
Place the cauliflower in the work bowl of your food processor and pulse to break it down. You want small pieces but not too deeply ground up. It happens fast too, and I need about 3-4 good pulses before it’s perfect.
Heat a small amount of coconut oil in your wok, or other large deep skillet. Add the onion and cook, stirring continually, until it’s softened, maybe 5 minutes tops. Add the garlic and ginger and cook, stirring, for several more minutes. Add the cauliflower and stir to mix everything up. At this point, once the cauliflower is warmed, you can be done. I cooked it through a bit so it wasn’t completely crunchy, retaining just enough bite to be toothsome. It’s entirely up to you.
Drizzle the cauliflower with a bit of soy sauce and sesame oil, if desired, before serving.
RECIPE NOTES: This can be treated like any fried rice recipe, using vegetables to bulk up the finished product. The variations you can make are positively endless.
April 15th, 2012
| 1 Comment »
It’s been almost a year since we eliminated meat from our eating. I’m ecstatic over the way I’ve felt in the last year; I’ve got more energy even when I have a terrible time sleeping; my belly is superbly happy, and my skin looks so much better. Those pesky hot flashes are only a minor occurrence these days too, and I love that part of it the most.
I love the variety and simplicity of our meals too, the ease at preparing them now that we don’t have to wait for meat to cook, and it’s been wonderful to see Griffin expand the foods he eats and also to see that he’s learning to enjoy meatless meals so much more than I ever expected. I’m really proud of how he’s adapted to the changes; he still gets his meat too, so he has the best of both worlds.
One food item that he’s still on the fence about is greens. Mike and I have come to love greens like chard, beet greens and kale, but Griffin is still wary, only eating them in dishes where other flavors can mask their tastes. He’s trying greens, at least. That’s good enough for me right now. He’s also not a huge fan of gnocchi due to the texture, and that’s too bad all around because this Baked Pizza Gnocchi dish that I created is utterly divine in every way.
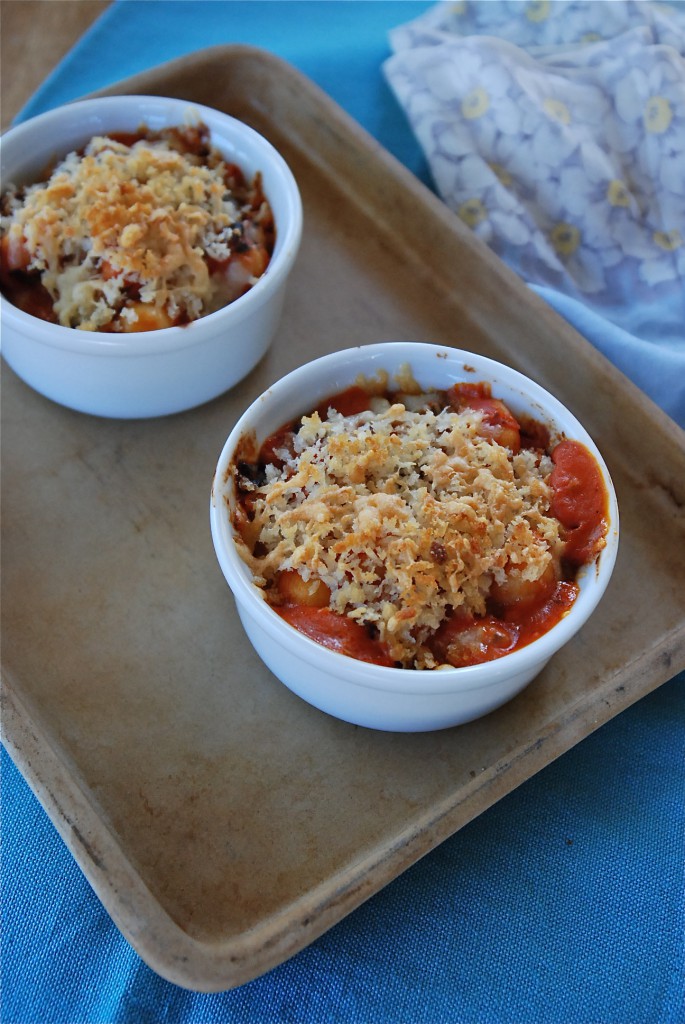
Recipes inspire me in the most fascinating way. I can read dozens of them and not have a spark of interest, and yet come across one that stirs my imagination and I’m suddenly inside my head putting ingredients together and dreaming of an outcome. That happened to me recently as I was browsing through my news feed on my phone and came across an article about using chard. One recipe for a Skillet Gnocchi with Chard sounded really delicious, and my creative spark was ignited.
Lately I’ve been thinking a lot more about meals with greens in them as I received an entire box of a wide variety of packaged and cleaned greens from Cut N Clean Greens to try out and it was probably the most exciting food stuff that’s landed on my door step because I just LOVE this product. It is so ridiculously easy to use greens with Cut N Clean Greens in your refrigerator. They’ve done all the work for you and the greens are ready to open and cook with. You don’t need to prep them, clean or do anything but enjoy. And for roughly the same price you’d pay for a bunch of greens, you get a great deal more yield and it goes a lot farther. Yet another wonderful thing to love about them.
(disclaimer: I received all the greens for free yet all opinions here are solely mine)
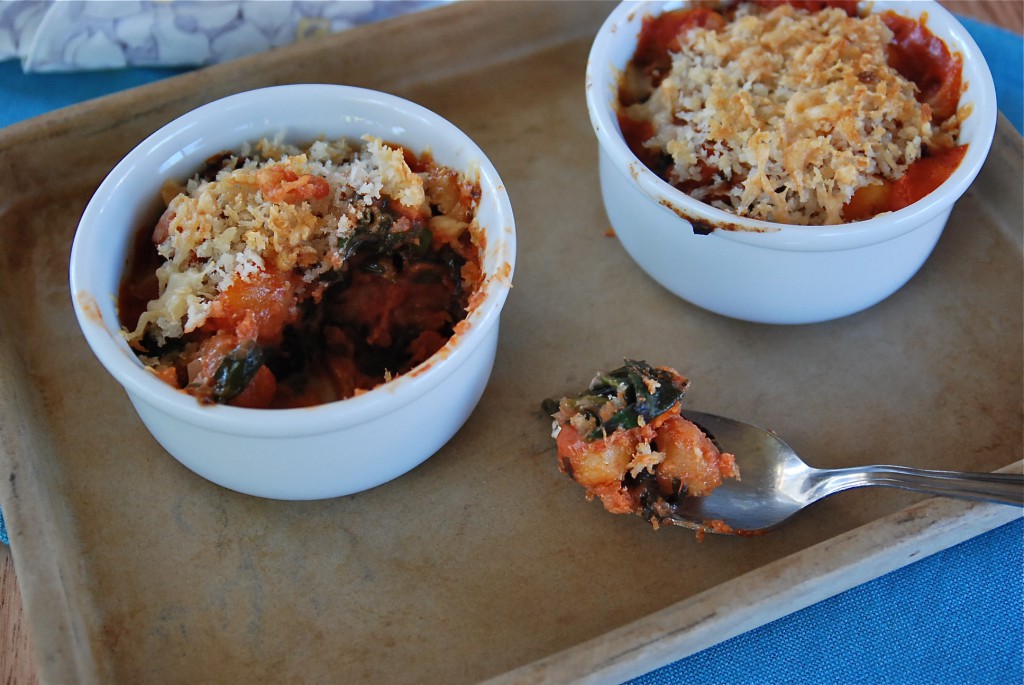
But…. back to this Gnocchi. Very simple and quick, rich with flavor and texture, this gratin came out fragrant, bubbling and with that perfect crunchy top to it. Grab a favorite pizza sauce (whether scratch or homemade) a package of shelf stable gnocchi (or…. knock yourself out and make a batch from scratch) and about a pound of good greens like chard, spinach or beet greens and give yourself about 15 minutes while the oven springs to life and heats up. It’s like pizza but it’s not; it resembles lasagna, but it’s better because it’s easier. The gnocchi become so incredibly soft and tender in the oven and it’s gorgeous enough for a special occasion, classy enough to taste like you really put out some effort.
I’ve noticed lately that when I write out my recipes here that I’m posting all sorts of side notes (in blue!) on what options you might do with your own version of the recipe. I hope this isn’t annoying. Is it? Because, here’s the thing; I don’t have the ego to think that the way I make anything would be exactly how someone else would make it. We all have our own tastes, right? We like different foods, flavors and we all have different methods, ovens that work differently, cookware and utensils that we love (go ahead, use that garlic press if it’s your way) and these recipes that slip through our computer screens in to our minds, making our mouths water, well they might mean something else entirely to another person. If I mention to saute your onions for 10 minutes and you think they should be cooked longer, or shorter, or if you don’t even like onions and don’t want to use them, then by all means, trust those instincts. Make the recipe your own. Learn the ways of your own stove, the cut of your favorite knife, dig through your cupboards and add your own flavor, spice, extra something that you love. This is how cooking should be. I’m thrilled to just be one of the stones you traverse in your own journey in the kitchen.
Baked Pizza Gnocchi with Greens
1 lb. gnocchi
1 15-oz can prepared pizza sauce (I love Muir Glen Organics)
2 small shallots, minced
2 cloves garlic, minced
1/2-3/4 lb. greens of choice (can be beet greens, spinach, chard or kale or a mix)
1/2 c. crumbled goat cheese (for a richer taste, use ricotta)
1/2 c. panko bread crumbs
2 T. melted butter (i used coconut oil)
1/4 c. grated parmesan cheese
1/4 c. mixed fresh herbs, like parsley, thyme, basil, oregano
Heat oven to 400°. Spray a 2-quart baking dish with cooking spray. Or live a little and rub butter in it.
In a deep skillet with a lid, heat oil of choice and add shallots, cooking for about 5 minutes while stirring over medium-high heat. Add the garlic, stir and cook for a few minutes, then begin adding the greens, a handful at a time and stirring so they begin to absorb some of the heat and oil and start to get a bit of wilt to the leaves. Once all the greens are in the pan and they’ve collapsed and are starting to soften, crumble in the goat cheese and stir to break it down. When it’s pretty well incorporated, add in the pizza sauce and about a half cup of water. (add the water to the can and swish to collect any remaining sauce). Stir the pan well, then bring it to a gentle simmer and cover it. Cook the greens until just tender. The timing will depend on which green you are using. Taste often so they don’t get away from you. When the greens are just tender, stir in the gnocchi, and turn off the heat. I used a mix of beet greens and chard and cooked them for maybe 10 minutes.
Mix the panko crumbs, butter and parmesan cheese together. Scrape the gnocchi in to the baking dish and sprinkle the top with the panko crumbs. Bake in the middle of the oven until bubbly, and the crumbs have browned nicely. Mine took about 20 minutes, and I rotated the dish a few times to brown the top evenly. Once removed from the oven, allow the dish to stand about 10 minutes before serving.
KATE’S NOTES: You can divide the gnocchi between individual ramekins if you want something fancier. But please keep in mind that your baking time will be drastically reduced. I baked a few ramekins, placing them on a baking sheet lest they rise up and bubble over the top. They didn’t. (whew)
You can double this for a crowd, baking it in a 9×13 pan. That’s a lot of greens, so add them patiently to the pan.
March 4th, 2012
| 1 Comment »
This time of year is a hard one.

I seem to start slipping off the tightrope each February. Bored, restless, tired and too stunted by the dull landscape, I stand on the figurative ledge and think ‘Ugh.’ as I look around. The vertigo makes me twitchy, and thankfully, a trusted friend is there to pull me back and say ‘You know, you go through this every year at this time.’. I’m grateful for someone standing outside of me, who can rationalize this wandering mind, drawing it back to the reality that it’s just late winter and I could use some green and some color in my life.


Surrounding myself with a few hours of plant life, of colorful flowers, weeping ferns and a warmth that left me sweaty certainly helped a great deal, and it seems to become more important in the last gasp of winter to put sunny, warm foods in to the body, like an infusion of heat and sunshine that lights us up from the inside. Like this lemony pasta.
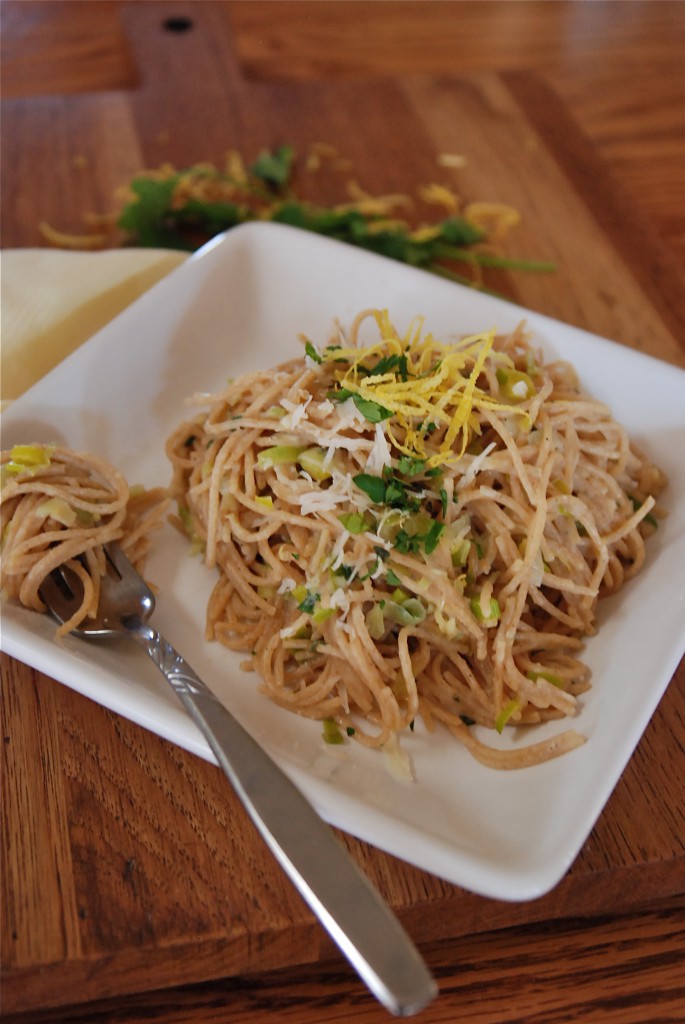
Eating anything with lemon in it is like ingesting sunshine, it’s so bright and engaging. This couldn’t be simpler to make, with a few leeks, a juicy lemon and a shower of fresh herbs, and parmesan cheese. I’ve done so much with lemons in my baking, like this Lemon Pound Cake, these intense Lemongrass Bars, and a delicious Lemon Ricotta Cookie, but adding sparkling citrus flavor to savory dishes has been few and far between, with maybe the exception of these exceptional Garlicky Lemon White Beans. That’s to an end though, after discovering this bright and lively pasta dish.
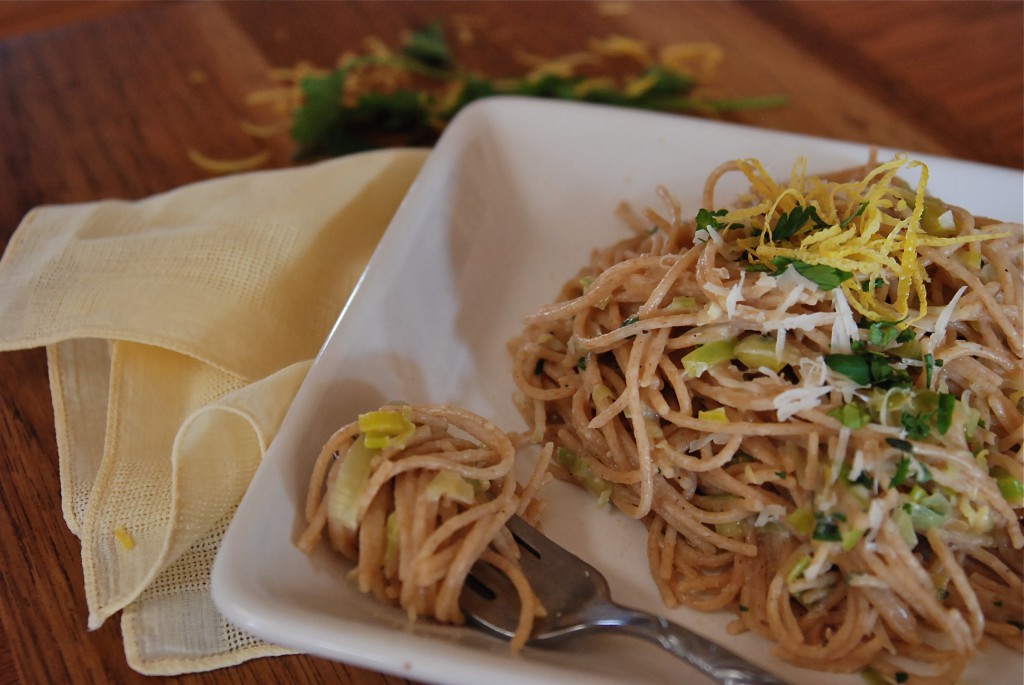
From the February issue of Eating Well magazine, resplendent with juicy lemon slices on it’s cover, this is a quick and easy recipe to put together. In the time it takes you to make a pot of pasta, you can have the leeks sauteed, ready and waiting. A few turns in the pan, with a splash of that ever-important pasta water and dinner is served.
Leek and Lemon Pasta
1# whole-wheat linguine or thin spaghetti
2 large lemons, plus lemon wedges for garnish
2 medium leeks (white and pale green parts only), thinly sliced and rinsed well
2 tablespoon extra-virgin olive oil
1/2 cup chopped flat-leaf parsley, divided
2 cloves garlic, crushed
1/4 teaspoon salt
1/8 teaspoon freshly ground pepper
3/4 cup finely grated Parmesan cheese, divided
1/4 cup snipped fresh chives, divided (I used thyme and it was delicious)
Cook pasta in a large pot of boiling water until just tender or according to package directions. Reserve 1-1/2 cups of the cooking liquid and drain the pasta in a colander.
Meanwhile, finely grate the zest from one lemon and squeeze juice from both lemons; set the juice aside. Pat leek slices dry. Heat oil in a large nonstick skillet over medium-high heat. Add the leek, the lemon zest, 1/4 cup parsley, garlic, salt and pepper. Cook, stirring frequently, until the leek is lightly browned and softened, about 6 minutes.
Add the pasta, 1 cup of the reserved cooking liquid, 1/4 cup of the lemon juice and the remaining 1/4 cup parsley to the pan. Cook, stirring constantly, until the liquid is mostly absorbed, 30 seconds to 1 minute. Add the remaining 1/2 cup liquid, or more lemon juice, if desired. Remove from the heat. Toss the pasta with 1/4 cup Parmesan and 2 tablespoons chives. Transfer to a serving bowl or bowls; sprinkle with the remaining Parmesan and 2 tablespoons chives and serve with lemon wedges, if desired.
Recipe in full, from Eating Well magazine, February 2012.
RECIPE NOTES: A simple reminder to yourself to catch the pasta water when draining it is to place a pyrex measuring cup in the bottom of your strainer when you put it in the sink. Pour some of the pasta water in it, set it aside, then drain the pasta completely. Another method, which I prefer, is to remove the cooked pasta from the water with tongs and add it directly to the skillet. It takes a bit of timing to get it right, but instead of draining all that beneficial starch away, it clings to the pasta and helps to create the pan sauce needed.
This dish would be wonderful with a broiled mild fish, such as Cod or Tilapia, some seared Scallops or Shrimp would also taste good. If you like chicken, a good lemon-herb rub and a run under the broiler would make a perfect accompaniment to this pasta.
November 17th, 2011
| 1 Comment »
Who doesn’t like a good cake?
 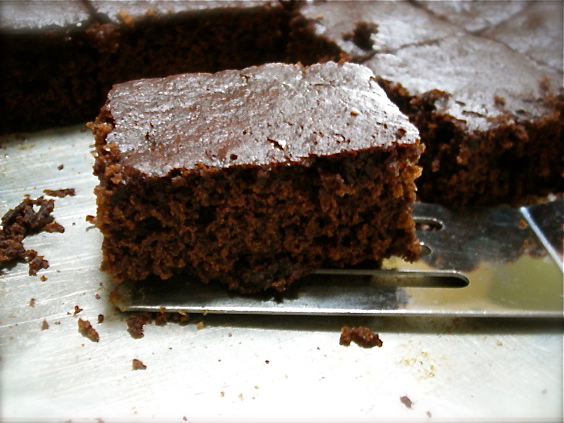
Especially one that combines the best of two important cake flavors; chocolate and gingerbread. I admit a bit of skepticism when I first saw the recipe, but I love chocolate and I adore gingerbread so I took a deep breath and cranked out the recipe.
And then over the course of two days, it magically kept disappearing every time I looked in the pan.
It’s from Martha. Can we really go wrong here? She doesn’t do much that makes me shrug with indifference. And I tend not to favor many of her recipes, but I loved this cake. My guys did too, hence the magic ‘poof and it’s gone’ act. It’s a snack cake, a breakfast cake, a perfect dessert with ice cream or yogurt and it just plain tastes delicious. It’s chocolate. It’s gingerbread. It’s a keeper.
Martha Stewart’s Chocolate Gingerbread Cake
- 4 tablespoons (1/2 stick) unsalted butter, melted, plus more for pan
- 1/4 cup unsweetened cocoa powder, plus more for pan
- 3/4 cup all-purpose flour (spooned and leveled)
- 1 teaspoon ground ginger
- 1 teaspoon pumpkin-pie spice
- 1/2 teaspoon baking soda
- 1/2 cup packed dark-brown sugar
- 1/4 cup unsulfured molasses
- 1 large egg
- 1/4 cup sour cream
- 1/2 cup semisweet chocolate chips
- confectioners’ sugar, for dusting (optional)
- Preheat oven to 350 degrees. Butter an 8-inch square baking pan. Line bottom with a strip of parchment paper, leaving an overhang on two sides; butter paper. Dust paper and sides of pan with cocoa; set aside. In a medium bowl, whisk together cocoa, flour, ginger, pumpkin-pie spice, and baking soda; set aside.
- In a large bowl, whisk together butter, brown sugar, molasses, egg, and sour cream until smooth. Add flour mixture; stir just until moistened (do not overmix). Stir in chocolate chips. Transfer batter to prepared pan; smooth top.
- Bake until a toothpick inserted in center comes out clean, 30 to 35 minutes. Transfer to a wire rack; let cool completely. Using paper overhang, lift gingerbread from pan. Transfer to a cutting board, and cut into 16 squares. Before serving, dust bars with confectioners sugar, if desired. (To store, keep in an airtight container at room temperature, up to 3 days.)
What’s on YOUR plate for November??
{{{Yesterday's post included a pretty awesome giveaway for a gift code to Red Envelope.
Go back and comment on the post for a chance to win. That's all you do!!}}}
November 13th, 2011
| 2 Comments »
There are dozens of recipes in my Recipe Index. I’ve been writing this blog for 5-1/2 years, and the content is huge, but my audience doesn’t go back that far. I could write forever about what’s been covered in the past, but instead, for this post, I’m culling together an entire array of quick bread baking options- muffins and tea breads alike- for you to enjoy. There are a lot of really good recipes for warming up your kitchen on these chilly November days.
I think there is nary a food item more perfect than a muffin; and I don’t mean a muffin so sweet and cloying that you might as well slap buttercream on it and call it a cupcake, I mean a MUFFIN. I real, honest to goodness muffin, made for breakfast, or a snack. I mean a substantial, hand held baked good. I’m talking MUFFINS, one of the baking world’s most perfect little foods, in my well-explored opinion. I love a good muffin, and have no less than eight in my Recipe Index. Muffins lend well to just about any flavor, take only a few minutes to put together and let’s face it, everyone loves them, right? Got flour, baking powder and a few spotty bananas? Make a muffin. Leftover grains from dinner? Make muffins! Blueberries? Raspberries? Nuts? Oats? Bulgur?? It’s all good for going in a muffin.
And oh, how I do love these fragrant and simple little things!!
Oatmeal Sweet Potato Muffins
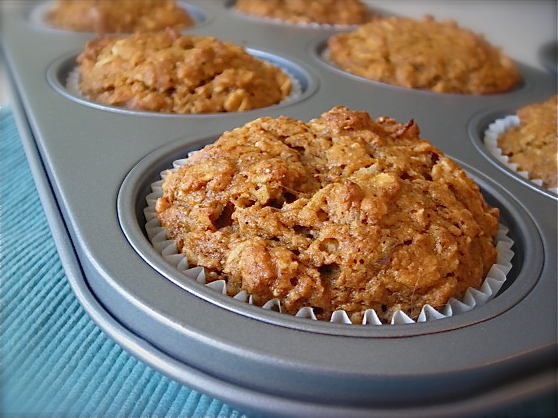
Apple Bran Muffins
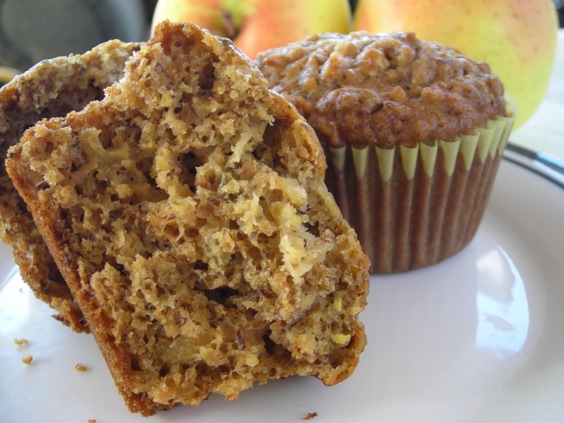
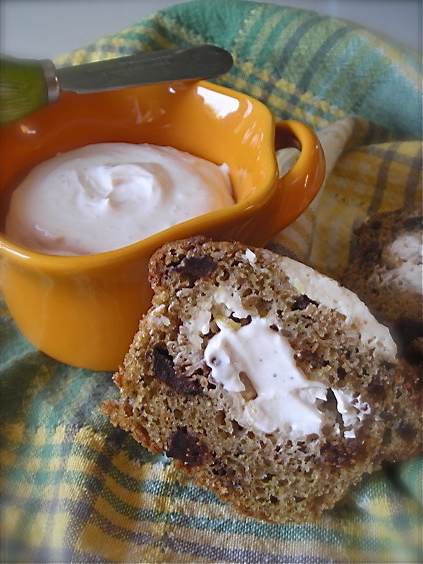
Fig Muffins with Honey-Lemon Cream Cheese
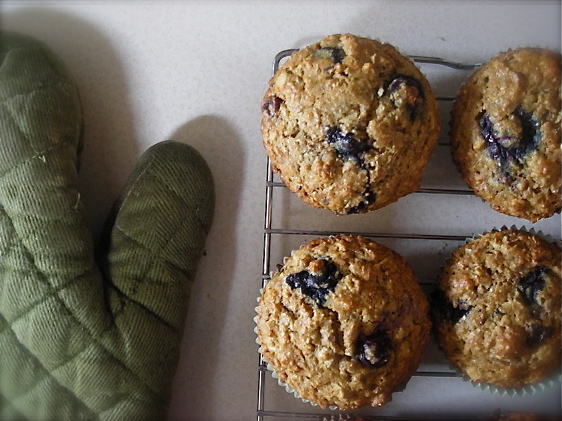
Whole Grain Blueberry Muffins
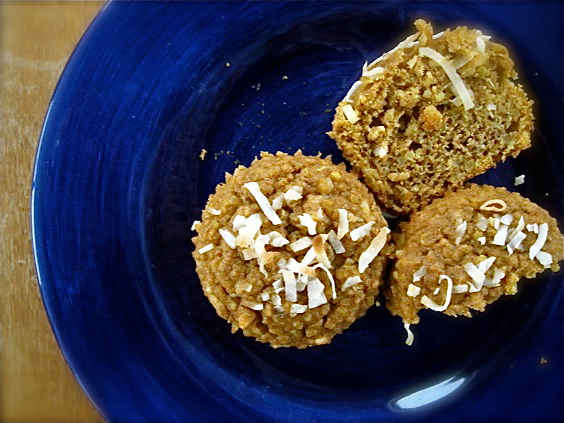
Squash and Quinoa Muffins with Toasted Coconut
Chocolate Graham Muffins
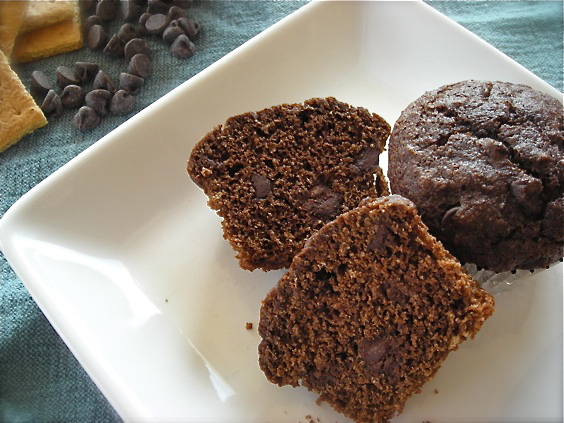
And then there are a few recipes without photos:
Pumpkin Maple Muffins
Apple Cheddar Muffins
And….. because quick breads are created the same way, only baked in a loaf pan, they too can be stellar muffin options and I have plenty of those as well.
Applesauce Banana Bread
Banana Chocolate Chip Bread
Cherry Fig Tea Bread
Moist Date Nut Bread
Harvest Tea Bread
Peanut Butter Banana Bread
Cranberry Orange Date Bread
What’s on YOUR plate this month??

November 11th, 2011
| 4 Comments »
I’m not sure if everyone with a blog is receiving an undue amount of spam comments lately, but every day I open my Dashboard, I see upwards of 100 or more spam waiting for me to delete. I rarely look them over to see if anyone real has been caught up in the filter; i’m trusting they haven’t, but my apologies if you’ve left a comment that hasn’t appeared. I am too impatient to sift through the drivel.
But today when I opened the spam, and readied myself to hit ‘Delete’, one comment caught my eye, and I had to wonder if it was actual, or not. It said “I’m not sure how you can survive on this dreck. For pete’s sake would it kill you to eat a little meat now and then?’ The sender’s name seemed authentic, the email was normal, and the website looked legit. Still, after a moment of shock, I deleted it with the others. Even if it was real, harsh criticism of my blog, my words and my life have no place here. This is my home, and I’m not interested in anyone bringing their scorn in to it.
My friends and I have had a discussion about this type of intolerance a lot. I am blessed with a bevy of amazing women in my life that share a desire for good health and well-being through our food and lifestyle. Through changes in our diets, my friends and I have found incredible health benefits that we never expected to be possible. We don’t avoid certain foods because it’s trendy and everyone is doing it; we avoid them because our bodies have clearly shown us that this is what they want. And we don’t get it, this bashing of choice. Not at all. Our choices, regardless of how anyone else views them, whether they understand or not why we do them, or really, any opinion about them, these are OUR decisions, and should never be vilified for being different than someone else’s. And since giving up meat, I get this a lot. The worst part is when it comes from family. I don’t expect anyone outside of myself to agree 100% with what I choose to do, and I consider it to be great fortune that Mike is completely on board with our healthy eating habits. I find it odd, and also disheartening though, that others feel they can impart their beliefs on me, or dump a whole lot of disrespect on my choices. They’re MY choices. Choices made for reasons of health and well-being. Choices that took time to develop, and that my body has made very clear, are correct for me. I don’t ask anyone else to believe it, accept it, or even participate in it. I just ask that it be respected.
Is that really so difficult?
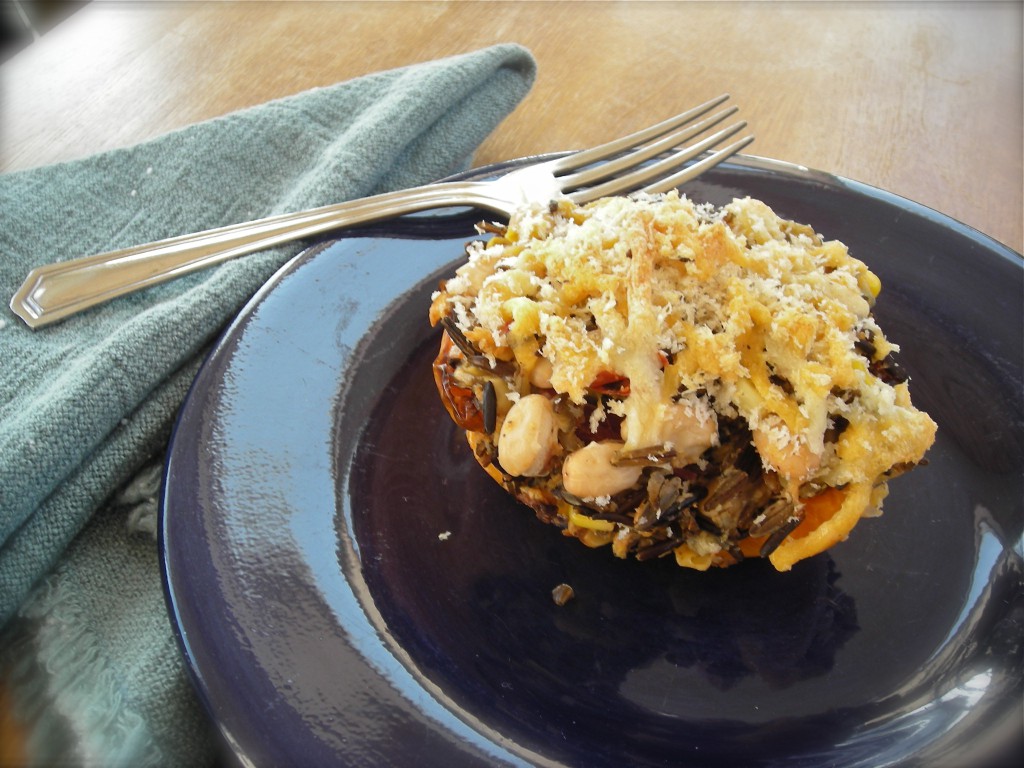
I mean, really, does that pepper there LOOK so terrible? Stuffed with whole grain wild rice, legumes, vegetables and cheese, this has “Delicious!!” written all over it. You can eat it and still feel light inside, yet fully satisfied too. And it will stick with you, despite it’s feathery appearance. This is comfort food through and through.
I realize that everyone has the sense that their choices are the right ones, and that sense, as deeply ingrained as it is, seems implausible that others don’t share the same vision. What they do, what anyone does, is the right one however, for those making the decision. And this bashing about of others, a dressing down of someone who chooses differently for their life and health, can we all just agree to stop so much judging? What does it really say about someone who thinks that muscling their beliefs on others is acceptable? Does it make them seem secure in what they preach? Or does the very act of questioning someone else, of scorn and laughter over another person’s choice speak to an insecurity they have about themselves?
I don’t have the answers. I doubt this conversation will end, ever, and that makes me sad. The consumption of food has become such a hot-button issue, and everyone thinks they have the right way of doing it. We make very powerful statements by what we put in our mouths, and it seems that instead of it polarizing us, it’s turning us against each other.
What food choices do YOU make for your health? Do you ever feel like those choices are questioned by others?
How do you respond to those questions?
Wild Rice Stuffed Peppers
3 colored peppers of choice, sliced in half and cored
1 cup wild rice, washed and picked over
1 small shallot, minced
2 cloves garlic, minced
1 15-oz can great northern beans, rinsed
1 c. frozen corn kernels
1/2 c. canned tomatoes, or 2 chopped fresh Roma tomatoes
1 c. panko breadcrumbs
1 c. shredded cheese of choice, plus more for topping (I used cheddar and pepper jack together)
1/3 c. shredded parmesan, with more for topping
Salt and pepper to taste
In a medium saucepan, bring 4 cups of water to a boil. Add the wild rice, return to a simmer and cook, covered until the rice is tender 30-40 minutes. I used long grain, or regular wild rice so it took longer than if you use the cracked version. Adjust simmering time accordingly. Once rice is tender, drain excess water in a wire strainer and set aside.
Meanwhile, set your oven to Broil. Line a baking sheet with foil. Place prepared peppers on sheet, cut side up and broil for about 5-7 minutes, until edges are slightly browned and peppers are softened just a little. Remove from oven, set aside and set oven temperature to 400°.
In a deep skillet, saute shallot in oil for about 5 minutes, then add garlic and cook about a minute longer. Add the beans and corn, and heat through. Stir in the tomato and wild rice until just combined and remove from heat. Add the cheese and panko. Season to taste with salt and pepper.
When mixture is cool enough to handle, pick up a generous handful and press it together slightly, then mound it into a pepper half. Repeat with remaining peppers and filling, mounding the peppers full. You may not use all the filling but be generous. In a small bowl, place about a half cup of the shredded cheese and several tablespoons of shredded parmesan. Add two tablespoon of panko bread crumbs and toss to coat. Top the peppers with this and place in the oven for about 15 minutes, or until the filling is hot and the cheese on top has melted. Serve immediately.
What’s on YOUR plate this month??

November 10th, 2011
| 2 Comments »
The last two years for NaBloPoMo I’ve gone back in to my Recipe Index and re-introduced items that are worthy of a second look. Most people following my blog now weren’t doing so a year ago, and if readers are anything like I am, finding a new blog usually means going forward with what they post, not going back in the archives to find the hidden gems.
And it’s also a way for me to remember what I’ve posted to these pages over the past 5-1/2 years. There is a great deal of content in my Recipe Index; way more than one could ever browse through, and a lot of it from way back when contains poorly photographed foods that I would be a bit embarrassed to even show you. Part of me often thinks about re-doing some of these recipes, with updated photos of better quality, and that’s still in the back of my mind.
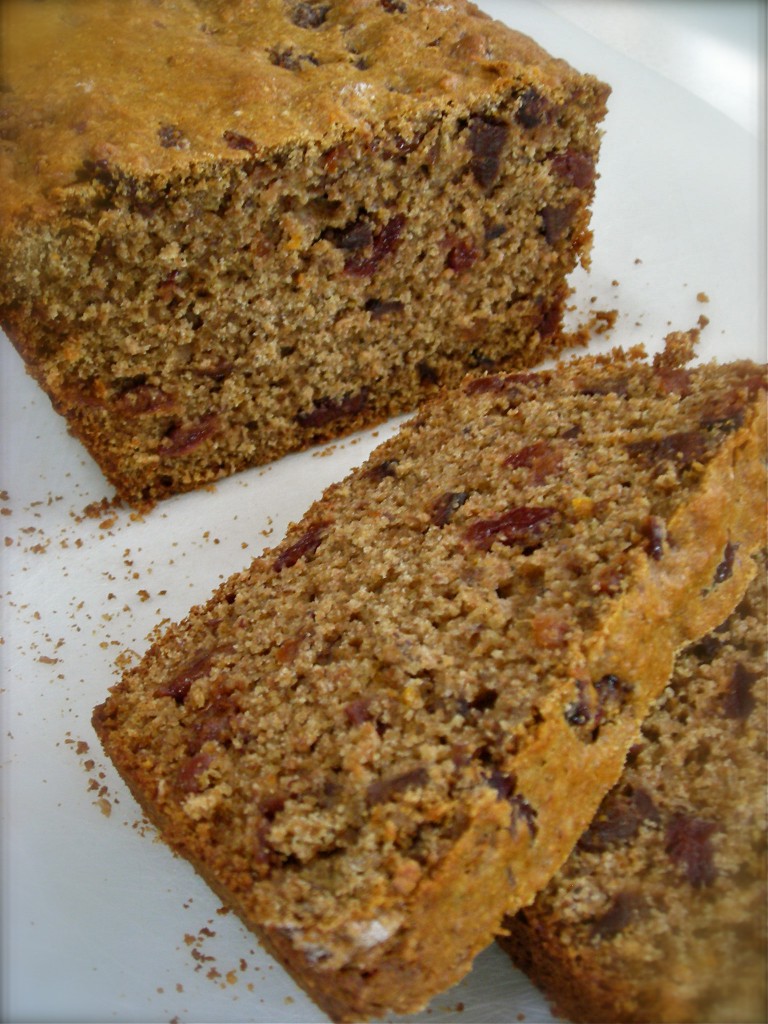
This bread made an appearance in my kitchen last Spring, and I loved it immensely, forgetting it until today, while scrolling through to find something interesting to share. Dried figs and cherries gave it a wide appeal of flavor, and tea breads are one of my favorite items to make because they are so simple to put together. Mix a bowl of wet ingredients, then a bowl of dried and blend them just so. A greased pan, a hot oven and an hour later, a steaming and fragrant loaf awaits you and a cup of tea or coffee. I could probably do a month alone on tea breads in all their various forms and still not exhaust this easy item.
What I love about this recipe is that it has a lot of healthier options for baking. I’ve tried to get away from using refined sugar in my baking for much of the past year or so, experimenting with honey or maple syrup, and actively seeking recipes that offer delicious flavor without a ton of food items that our bodies can do without. This recipe relies on the cooked dried fruit to provide sweetness, along with a small amount of honey. Whole wheat flour and wheat bran make for a healthier base too. I’m not fooling myself that this is good enough to eat all the time; the bread still has a lot of calories, but overall, if I’m going to make myself a treat, I want it to be better for me in any way I can manage.
Because deprivation just isn’t an option.
Do you have a favorite baked good that YOU like to make??
Cherry Fig Tea Bread
1 c. dried tart cherries
1 c. chopped dried figs
1 c. orange juice
2 c. whole wheat flour
1/2 c. honey
1/4 c. wheat bran
2 t. freshly grated orange zest
2 t. baking powder
1 t. baking soda
1/2 t. salt
2 large eggs
2/3 c. plain soy milk
3 T canola oil
1 t. pure vanilla extract
Preheat oven to 350°F. Coat a 9 1/2-by-5 1/2-inch loaf pan with cooking spray.
Combine cherries, figs and orange juice in a medium saucepan. Bring to a simmer over low heat. Simmer, covered, for 5 minutes. Strain, reserving 1/3 cup of the fruit-cooking liquid. Set the fruit and liquid aside in separate bowls.
Stir together flour, sugar, wheat bran, orange zest, baking powder, baking soda and salt in a large bowl. Whisk together eggs, buttermilk, oil, vanilla and the reserved 1/3 cup fruit-cooking liquid in another large bowl. Add to the flour mixture and stir with a rubber spatula until just combined. Fold in the reserved fruit. Turn the batter into the prepared pan.
Bake until the top is golden and a cake tester inserted in the center of the loaf comes out clean, 35 to 45 minutes. Let cool in the pan on a rack for 10 minutes. Loosen edges and invert the loaf onto a rack to cool. Serve warm or at room temperature.
Original recipe from Eating Well magazine.
What’s on YOUR plate this month??

November 7th, 2011
| 3 Comments »
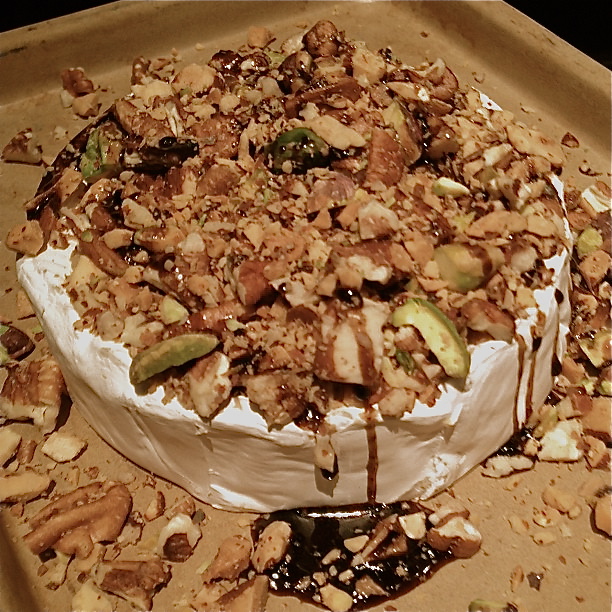
That’s a pretty way to end a long day, isn’t it?
I gave in yesterday to some unhealthy eating, including things fried, and eating meat. While the meat isn’t exactly unhealthy, it did it’s usual number on me with stomach upset and I found once again that after a few bites of it, I wasn’t enjoying it. Still, I ate what was remaining on my plate to be polite because my staff bought me that lunch, and they were thrilled to share with me.
Then for dinner, I was unmotivated, not to mention alone, as Mike and Griffin were at their Sunday night youth group gathering and dinner ideas just slipped in and out of my mind as the dark afternoon gathered in the quiet house. I was feeling off from the afternoon fare, and a few perusals of the refrigerator didn’t reveal anything exciting. Except a small wheel of Brie.
Soon enough, this delightfully warm and enchanting snack lay on the table in front of me. A variety of nuts, chopped and toasted, were spread over the top of the heated cheese, then drizzled with a fragrant balsamic-honey glaze. A sturdy knife, some multi-grain crackers and Etta James crooning over iTunes radio to me, and an unsettled day, busy with work and people, gave way to a calmer and more focused evening.
This creation would make a delicious and unique appetizer for a holiday party. It’s so simple to make too; I used pistachios, almonds and pecans for my nut topping. You could use whatever nuts appeal to you. My wheel of Brie was fairly small, and I used a cup of assorted nuts. I chopped them coarsely, and toasted them in a pan until golden and fragrant. Just before I removed them, I made space in the center and dropped in about a half tablespoon of butter. When it melted and the foam disappeared, I stirred it into the nuts, then scraped them in to a bowl.
Placing the same pan back on the burner, I poured about a half cup of balsamic vinegar in the pan and warmed it to steaming. The Brie was in a 375° oven on a small stoneware pan while I worked on the topping. When the balsamic was warm, I drizzled about 2 tablespoons of honey in to the pan and just let it melt and mix with the vinegar until the Brie was warmed through. Removing the Brie from the oven, I topped it with the nuts, then poured the warmed glaze over it, scraping the pan with a rubber spatula. The Brie wheel was in the oven for maybe 10 minutes, but I could have gone longer as the rind seemed a bit thick and the cheese was still firm in some spots. Time will depend on how warm and melty you want your cheese, and the thickness of the rind.
What’s on YOUR plate this month?

|


