July 16th, 2011
| 7 Comments »
People, I’ve madly fallen in love with radishes.
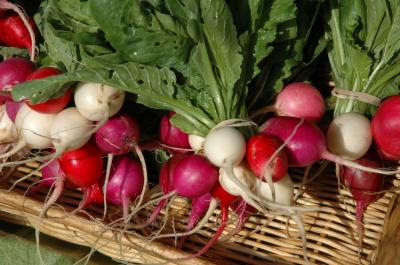 (photo courtesy of Really Natural) (photo courtesy of Really Natural)
I do remember not particularly liking them as a kid. But then again, I didn’t care for much then anyway, being raised on a typically 1970’s diet, I was your typically picky little thing. Fresh foods weren’t that present in our home so my exposure was lacking and my palate not particularly advanced; it’s no shock I wasn’t at all enamored with the radish’s peppery bite, a sting to the tongue that I found unpleasant. My sister Karen loved them, dragging them through a plate of table salt before popping them in her mouth. Even that typical dressing did nothing to take the edge off the flavor. So for the most part, I’d ignored them.
Then something happened a few years back. On a trip to the Farmers Market, I spied a large bunch of red, white and pink radishes- it was an enormous amount- and was only a dollar. I picked them up, passed a buck to the farmer and placed them in my bag. Once home, I stared at them and thought ‘Great. Now what?’ I ate one, and it was divine. Fresh, snappy, crisp and tart, but not harsh and sour like I recalled. Still, I didn’t leap headfirst into devouring them. I remained rather skeptical. And they languished in my fridge until I was forced to do something, anything, with them.
So I pickled them. On a whim. And went tuckus over teakettle for the crisp little discs, eating them on sandwiches, with my fingers and finally with a fork to grab the last little slices from the dredges of their vinegary brine. And it was soon after that when I first dragged a cold fresh radish through a slab of creamy butter to discover one of the best, and most surprising treats I’ve ever tasted. My eyes were now opened to the radish. Once again. Adulthood is a wonder around every corner, especially when discovering the foods from your childhood that once caused you to turn up your nose are now part of your regular gustatory delight.
So they’ve happily made a comeback; the inexpensive little things can be had sometimes on a 2-fer deal with any farmer willing to move their bounty. I scrub them down and place them in a baggie where they happily keep for days on end, willing that they last that long in my fridge. I eat them for breakfast a lot, sliced thick on good toasted bread with slices of butter, or most recently, this delicious sandwich creation that I’m thoroughly ga-ga over.
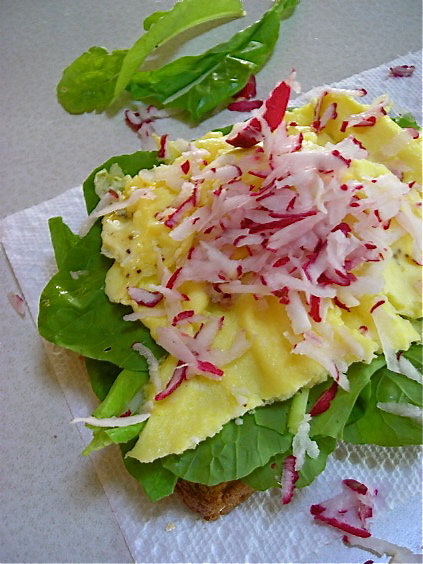
A cooked egg, nice and firm is placed a top a bed of greens on nicely toasted bread, and covered with several shredded radishes. The key is to shred the radish directly over the egg. Something about the fresh spray of liquid released makes for a much better flavor. I like spinach with this, but I’ve used spring greens, garden lettuce and romaine as well. This is a summery breakfast, if I’ve ever dreamed of one.
I took my radish love one step further too, recently, when I roasted an entire batch of them.
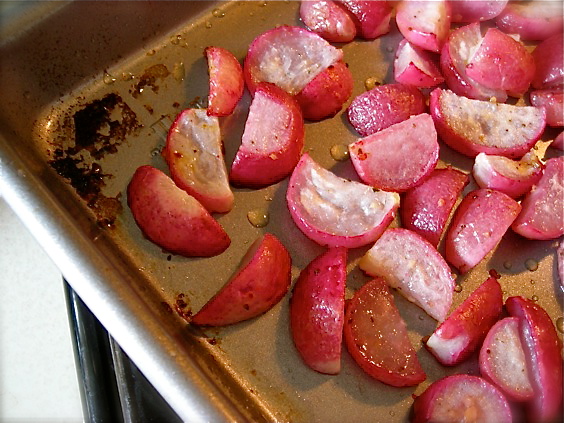
Roasting radishes takes the sharp flavor away, and replaces it with a mellow soft rendition that is palatable to anyone, even the most avowed radish hater. One would hope, anyway. I could have eaten these like candy, but instead, I caramelized a big pan of vidalia onions and made the two of them into a delicious tart atop a flaky puff pastry crust.
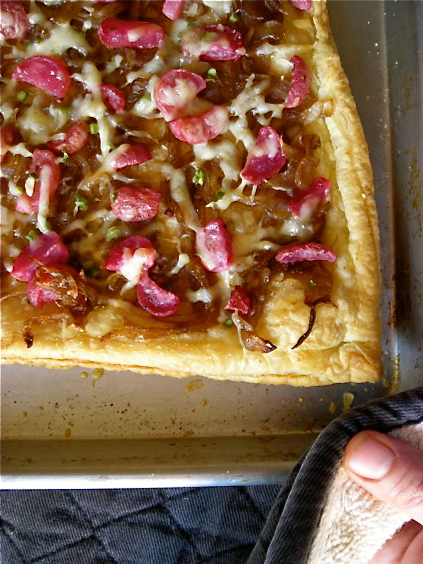 
This was a sweet, tender and amazing hand held meal, soft like summer nights, fresh as the season and when topped with just a little Gouda cheese, a bit of savory tang that balanced the vegetables perfectly. Eating a slice of it, on my patio, with a lovely glass of Rosé wine and a perfect summer night surrounding me, I felt a million miles away from my life, but in the simplest way possible. I love how a good meal, with gentle ease can transform an ordinary day into something surreal and dreamy. That’s the magic in a plate of really, really good food.
So…. do you like radishes? What do you like to do with them?
Roasted Radish & Caramelize Onion Tart
Scrub one bunch of radishes well, removing tops and roots. Cut into halves or quarters and toss with a bit of seasoned oil of choice. Roast at 400° until tender. It won’t take too long, maybe 10 minutes.
Slice two Vidalia onions and place in a hot skillet. Cook onions over medium heat, turning frequently, until browned and tender, about 15 minutes. Reduce heat to low, add a few tablespoons of brown sugar (or a drizzle of good honey) a tablespoon of kosher salt and a dash or two of balsamic vinegar. This is my favorite way to caramelize onions, but you may have your own method. Continue cooking the onions for about 20-30 more minutes, or until they are very soft and richly browned. Stir them on occasion, and be careful not to let them burn.
Thaw one sheet of puff pastry. Roll out sheet to desired thickness on parchment paper, then transfer to baking sheet. Poke holes in pastry with a fork and place in 400° oven, baking until lightly browned, about 10-15 minutes. Remove from oven, spread caramelized onion over the crust then top with roasted radish and a small amount of a good sharp aged cheese of your choice. I used Gouda because I had a some on hand. Fontina and Gruyere would be good options too. Place back in oven and bake for about 15 more minutes, until edges of pastry are crisp and brown and toppings are hot. Allow to cool slightly, then serve. Can also be served at room temperature.
July 5th, 2011
| 2 Comments »
I’m learning a lot on this plant-friendly journey, with the biggest lesson being that all plants based meals, while gorgeous in color, aren’t always the easiest to photograph.
Take this Farro and Greens dish……
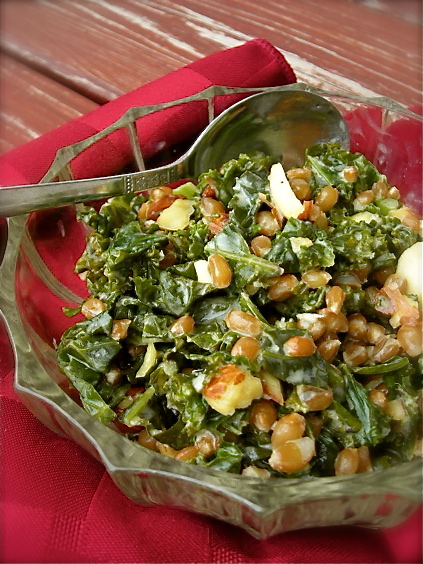
It was delicious, satisfying and full of textures and tastes. But when I tried to plate it to photograph, I stared down at it’s curly leaves of kale, it’s burnished grains and hearty nuts and said “Dang, you’re kind of homely.” Because it was, through no fault of it’s own though.
Thankfully I didn’t hurt it’s feelings.
I ended up having to take it outside into full on natural light, not the light through the west window in my sunroom where I usually set up my shots. Even then, outside it took about 8 shots before I really started getting the angle right, the focus firm and the shot like I wanted. And I was talking to it. Outside. On my patio steps, hunched over to get the right angle and mumbling to my food. Yeah. I’m THAT kind of blogger.
But enough already….. delicious? Did I mention that? Wow with a capital “W” !!! It was good at room temperature after I tossed all the ingredients together. It was fine, oh so fine, when I ate it cold for lunch the very next day. And it was still good heated up a day or two after that.
And that’s another thing I’m learning; plant-based foods can manage a patient wait in your fridge so much longer than a dish with meat. (yeah, I know…..duh) And they can happily sit on your counter for a while (like over an hour when you, ahem, forget about them there) and really there’s no loss to you, or risk in it at all.
And quick….. quick! Plant based meals are lickety-split quick, people. I had this done in the time it took to slowly simmer the kale to a great tenderness, all of 15 minutes. A recent lunch with red chard and great northern beans took maybe 5 minutes to pull together. A side salad, those amazing chickpeas I just talked about? Less than 10. My humongous salads topped with a whole rainbow of crunchy veggies? Well, if I take the time to prep all of it ahead of time and keep them in containers, I can have a giant heaping bowl of a masticator’s delight in maybe 5 easy minutes. I made Peanut Noodles, and in the time it took to boil water and cook the noodles, the pepper, cucumber, green onion and carrot were done and sitting on the counter.
So yeah…. quick. And delicious. And healthy….. I still feel so amazing, and the best part? Even on those nights I don’t sleep so good, which seems to be the story of my life, I still am energetic enough to get through the day without collapsing. I feel tired, but the exhaustion that I had come to expect just isn’t there anymore. I feel pretty humbled by this little experiment, and so grateful for the ability to swiftly change directions, to move into even better health and well-being and to be able to talk about it and share it with you.
Now if only these pretty, colorful and healthy little meals would step up their game under my camera lens.
Toasted Farro with Greens and Tahini
1 c. cooked farro, or wheatberries, cooled and chilled.
2 T. tahini
2 T. extra virgin olive oil
2 c. tightly packed greens, chopped- you can use kale, spinach, chard, mustard, collard, turnip… whatever you like
1/2 c. parsley leaves
2 T. fresh lemon juice
1/2 c. chopped nuts, such as pecans or almonds (optional)
Salt and pepper to taste
Whisk the tahini and olive oil with two tablespoon of water and set aside.
Heat a deep skillet over medium heat. When very hot, add the chilled farro. Don’t mind if a little moisture causes it to hiss or sizzle. It will cook off as you toast the grain. Shake the pan often, heating the grains until they’re very warm and fragrant, maybe 5 minutes. Be very careful not to burn them. When hot and toasty, remove grains to a bowl. To empty skillet, add 1/3 cup of water and the greens, stirring and cooking until they’re tender but still have a bit of toothy bite. Add the farro and the tahini mix, and stir to combine. Allow to cook for a few minutes to blend the flavors. Stir in the lemon juice, and season with salt and pepper. Serve topped with nuts, if using.
Source: Food and Wine magazine, with heavy modifications
KATE’S NOTES: I used wheatberries for the farro in the recipe as I had some already cooked in the freezer and farro is often hard to find. They make a perfect substitute. You could also sub in cilantro in place of the parsley, or add more fresh herbs, like thyme or oregano. I also added in lemon zest to make the overall flavor brighter.
June 27th, 2011
| 6 Comments »
I stopped eating meat with every meal on May 2. And I love how I feel nowadays, but I didn’t expect that I’d enter in to a time of total culinary paralysis when faced with re-working a lifelong habit of making meat the center of my meals.
We haven’t wasted away, thank goodness, and we never will. We’ve made some delicious foods but I haven’t stretched myself a whole lot. I’m grilling a lot of veggies, sticking them on amazing breads or tying them up in delicious pilafs. I made this fragrant and savory Red Lentil Dhal that we’ve loved since the first time it crossed our stove and landed in our bowls. We’ve enjoyed plenty of legumes, super fresh salads topped with a wide array of ingredients and terrific grilled cheese sandwiches. But I’m not content to play it safe, to stick with what I know will be wonderful. I want to expand, to grow and to embrace fully this new method of eating and not just end up a Junk Food Vegetarian.
So I’m scouring the ‘net for inspiration, grabbing books with gusto from library shelves, from Half Price Books and from friends hands (not really, but I would if the opportunity came up) just to get my mind rolling into this new territory. And it is new territory. It’s a new and totally different way of life and even being as good a cook as I am, I’ve had moments of sheer panic in thinking ‘What the hell do I make now?’, hence the aforementioned grilled cheese.
The worst part was finding the time. I had to stop over-scheduling all my time away from work into activities that were taking me away from home, away from time to experiment and work up some of these new options. I think, subconsciously, I was avoiding it. No more. It’s time to start applying tabs to the cookbook pages, plot out a few weeks worth of meals and get back on track. The nicest part of being meat-free is how much it frees up in our budget. I knew we spent a lot on meat, but folks, it’s outrageous what we have to work with now that this aspect of our eating is gone.
So I started with chickpeas. But not just any chickpeas. This is a kick in the mouth, heady and WOW recipe that will just plain knock you on your tush.
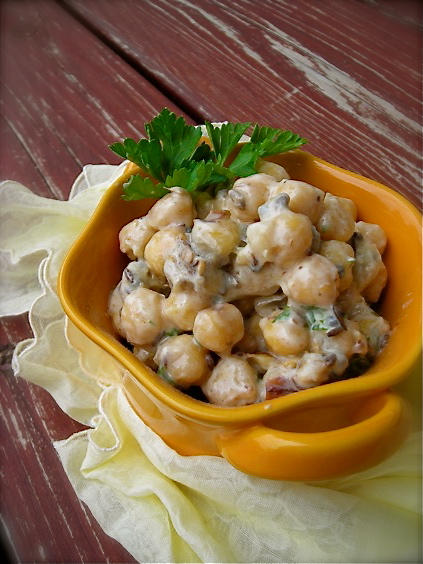
And they look so innocent, don’t they?!
We do love our chickpeas around here, and Mike has taken to making some pretty tasty hummus for us to snack on. Then I discovered Roasted Chickpeas and my life suddenly seemed more complete. But really, that was just the tip of the iceberg because I found a recipe for this Indian Spiced Chickpea salad and now I’ve got something going with this handy and nutritious little legume. It’s called love. Luuuuurrrrrve, people. Straight up legume love.
With no cholesterol, no sodium, no saturated fat; an excellent source of protein and fiber, as well as minerals like folate, calcium, magnesium and potassium, it’s a super-duper powerhouse for the meatless maniac such as myself. And when paired with toasted mustard, fennel and cumin seeds with a nice shake of crushed red pepper, plus smooth creamy greek yogurt to soften the flavorful blow to your tongue, it a cool little force to be reckoned with. Like my resolve. This is just a few steps for me, this quick jaunt out of the starting gate. The gun has sounded. And there’s a lot of road to cover up ahead so hang on, all right? Here we go.
Note: This recipe is ridiculously simple to make, but the flavor improves over time as it sits. Make it up and allow an hour, or even more if you can, for sitting, stirring regularly. If you like less of a crunchy seed factor, grind the fennel and cumin seed before adding it to the oil. You’ll still get a load of flavor without the crunch. Don’t grind the mustard seeds. Those soften really well.
Indian Spiced Chickpeas
Two 15-ounce cans chickpeas—rinsed, drained and patted dry
2 tablespoons peanut oil
1 teaspoon mustard seeds
3/4 teaspoon cumin seeds
3/4 teaspoon fennel seeds
1/4 teaspoon crushed red pepper
3/4 cup plain whole-milk yogurt
1 1/2 tablespoons fresh lemon juice
2 scallions, thinly sliced
1/4 cup chopped cilantro
1/4 cup chopped mint
1 teaspoon kosher salt
Pour the chickpeas into a large bowl. In a small skillet, heat the peanut oil until shimmering. Add the mustard seeds, partially cover the skillet and cook over moderately high heat until the mustard seeds stop popping, about 1 minute. Add the cumin and fennel seeds and the crushed red pepper and cook until the mixture is fragrant, about 30 seconds. Pour the hot oil and spices over the chickpeas. Stir in the yogurt, lemon juice, sliced scallions, chopped cilantro and mint and salt. Serve the chickpea salad at room temperature.
Recipe Credit: Food and Wine magazine
May 1st, 2011
| 7 Comments »
We’re trying so hard to go full steam ahead in to Spring. But around here, it seems like Mother Nature just wants to tease us, here with a lovely day then a blast of cold and rain, then yet another lovely day, then once again cold, and more rain. Lakes, streams, ponds, rivers and especially the people are overflowing their limits. We’ve had enough. Bring us the sunshine please, and for more than just one day.
So here we are, the first day of May. Our expected high likely won’t even reach 50 degrees. It feels weird to offer you a delicious crispy flatbread recipe, topped with a rich verdant pesto and some sassy caramelized onions because instinct is telling me to braise something hearty and warm. But it’s May and I refuse to get out my cast iron dutch oven anymore. In fact, I sure hope it got cleaned well the last time I used it because I’m desperately trying not to get reacquainted with it until October.
So, let’s move on to this, shall we?
 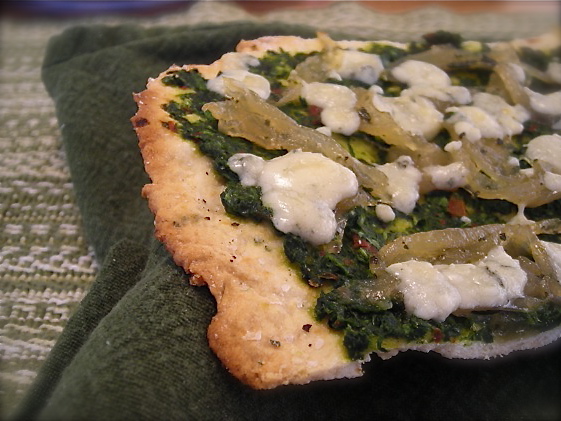
This was actually a recipe covered on this site back in November of 2009. For most of the year previous to that, I’d made this simple and delicious herb flatbread about a half dozen times for various meals, or really, even to just snap a piece off here and there to snack on. It’s ridiculously easy, it tastes amazing and it works for so many meal options, especially something very simple like being topped with fresh pesto, a smattering of caramelized Vidalia onions and several dollops of goat cheese. Run that under a broiler for a few minutes and the simplest meal is yours, delicious and light, packing a flavorful Spring-like medley for your mouth.
Every day I’m at work I pass a display of enormous Vidalia onions. It’s set up right by the entrance for easy access, and every day I see them I think about this flatbread, those golden burnished onions and the deep dark green of this pesto. I’ve experimented with lots of greens for pesto, and two of my most favorite ones are beet greens or spinach. Beet greens make the most earthy, dark and appealing pesto, and spinach offers a lighter, fresher touch. When fresh spinach is available at the Farmers Markets by the bucketful, I will buy several loads of it and make pesto, freezing it for future use.
I’ve done large batches of caramelized onions, slicing up to four of them at a time and slowly cooking them down to a glittering golden mass. They’ll keep in the fridge for up to a week, and you can freeze them too. The pesto freezes beautifully as well, or simply use your favorite commercial brand to make it even easier. A batch of this flatbread comes together in no time, so you can get out to find the sunshine.
Well, whenever it comes back, that is.
Herb Flatbread
1 3/4 c. unbleached flour
1 t. baking powder
1/2 t. salt
1-2 T. fresh herb of choice
1/2 c. water
1/3 c. oil
Heat oven to 450° with a pizza stone on middle rack. Combine dry ingredients and herbs. Make well in center and pour in oil and water. Stir with spoon until a soft dough forms. Turn out onto parchment paper and knead about 5-6 times to bring dough together. Can be divided into 2-3 small balls and rolled flat, or rolled out as one large circle. Drizzle olive oil over top, sprinkle with sea salt and more herb and transfer, parchment and all to heated stone. Bake until browned in spots and fragrant- time will depend on how thin dough is rolled. Remove from oven and cool (don’t cool on stone- it will continue to bake). Slice with pizza cutter and enjoy.
Recipe from Gourmet magazine
Spinach Pesto
4 c. washed spinach leaves, stemmed
1/3 c. olive oil
3 T. toasted pine nuts
1 clove fresh garlic, chopped
Place all ingredients in a food processor and process until smooth, scraping down sides as needed. This pesto can be frozen for quite some time with only minimal loss of flavor. Do not add cheese to pesto if planning to freeze, otherwise, add to taste your preferred hard cheese.
KATE’S NOTES:
Pine nuts are ungodly expensive right now. I love subbing cashews in pesto for the meaty flavor, and have dabbled with the idea of using almonds too, as they’re my favorite nut. And instead of using traditional parmesan in my pesto, I love the addition of Manchego or Trugole, which is really similar to Asiago, only creamier and with a milder taste.
April 25th, 2011
| 4 Comments »
Last Spring at this time, our perennial garden was full of glorious color. The tulips were opened….

The Creeping Phlox was a lovely carpet of purple…….

There were Johnny Jump Ups leaping up all around the garden beds.
 
And I had managed to keep the Prairie Smoke from being devoured by hungry critters.
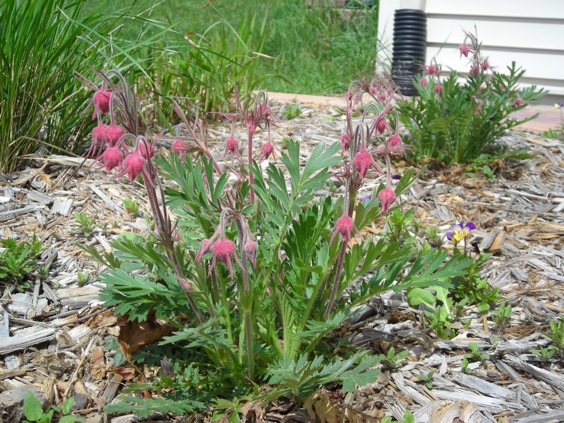
Which, unfortunately, I wasn’t able to do this year. Somebunny devoured all the pink buds and leafy greens on these native plants. Ah well…..
We’re a lot further behind this year on the revival of the earth, it’s flowers and new grass. It’s almost May and the Star Magnolia bush, my harbinger of Spring, has yet to open even one of it’s gorgeous and fragrant flowers, although with current warm temps and sun, it’s reaching it’s fat buds to the sky and starting to come alive. This is possibly the latest in the year that it’s started it’s bloom, according to the garden journal I’ve kept since 2006. I love recording the rhythm of the seasons, the sightings of birds in the yard, when the migrations start and the seasonal visitors like Hummingbirds and Orioles return, the first (and last) snowfall, the last ice-out on the area lakes, the foxes, possums and creatures that roam the night time. It’s a wonderful way to keep track of the ebb and flow of the life outside our windows.
And everyone is impatient for Spring, for warm weather, for shedding the pants, shoes and sleeves to bare their skin to the sun. For me, more this year than any I’ve been really, really eager to see the bounty of the season begin. I’m craving all forms of green; vegetables, tender baby lettuces, spring spinach, asparagus….. you name it. It’s like I can hear my body complaining loudly about the lack of chlorophyll. Even my Teen said that he was craving a salad. So when Mike pulled some items together for dinner recently, he brought home a large amount of lettuces from the store. Since Farmers Market time is still a few weeks away, these greens will have to do. We washed them, and consumed large bowls of salad with our burgers and roasted potatoes. It was the first real meal I’d eaten all week due to my sickness. And it tasted glorious.
Just prior to getting ill, I came across kale at the grocers for $.99 a bunch. I haven’t been that adventurous with kale much, although for the life of me I can’t figure out why. I bought a large, deeply green bunch and it promptly languished in my crisper drawer due to the toxic onslaught I endured. A small handful went into a smoothie I tried to drink, the rest just sat. And kale doesn’t mind sitting too much, as it’s quite hearty. When I finally pulled it out, it looked no worse for the week it spent in my fridge, and it happily blended with scrambled eggs to make an awesome breakfast sandwich, then later, with quinoa and toasted pecans for this nutritiously rich and flavorful salad.
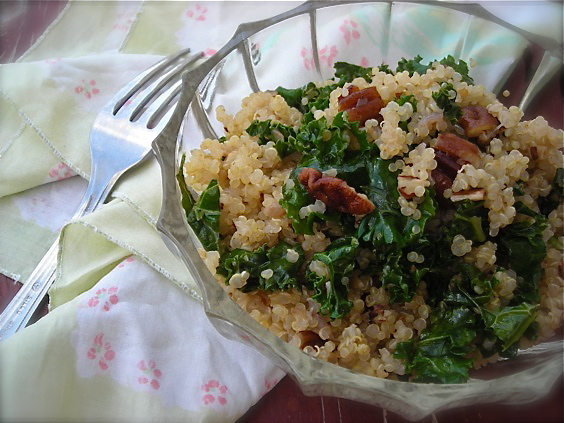
With finally climbing out of the ick and funk that settled on me last week, I really was feeling the need for some healthy options to start restoring my immune system and begin cleansing my body of the after-affects of a sinus/respiratory infection, especially the medications I took. What a perfect recipe for that, and so simple too. Cook quinoa, saute your kale with shallot and garlic, and toss it all together with a little salt and pepper. Add in toasted pecans, or pine nuts or almonds and get out your fork. There just doesn’t need to be anything more complicated than that.
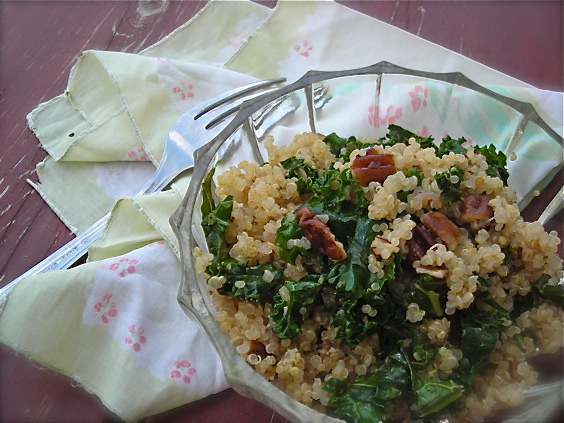
Add in the weathered redwood stairs to our patio, and a cat languishing on the sunlit bricks, it made the small bowl I consumed taste a little bit like Spring. It was just what I was craving, for both body and mind.
Quinoa with Kale and Toasted Pecans
1 c. quinoa, rinsed and shaken well
4 c. loosely packed kale, chopped
1 small shallot, minced
2 cloves garlic, minced
1/2 c. pecans, or nut of choice, lightly toasted
Start by cooking your quinoa. It can sit in the pan for quite some time after it’s done. Heat 1-3/4 c. water or broth of choice on the stove. Add half a teaspoon of sea salt and a thin drizzle of olive oil. When the water boils rapidly, add the rinsed quinoa, stir quickly and reduce the heat, allowing the quinoa to simmer gently. Cover the pan and let cook for 15 minutes, or until the water is mostly absorbed. Keep covered and remove from heat. Allow to stand for at least 10 minutes.
In a large deep skillet (with a cover), saute the shallot and garlic in olive oil until soft and translucent. Add in the kale and toss to coat. Stir and toss the kale until it’s a deep emerald green and starting to look a bit shiny. Add a half cup water to the pan, cover it and reduce the heat to a bare simmer. Steam the kale, stirring occasionally, until it’s slightly wilted but still has some toothy bite, maybe 10 minutes or so.
Add the quinoa to the skillet with the kale and toss until uniform. Taste and season with more sea salt and fresh ground black pepper. Add in the toasted nuts and combine. Can be eaten warm, room temperature or chilled. Reheat gently in the microwave.
March 13th, 2011
| 5 Comments »
A few recipes have crossed my path lately that call for crushed graham crackers in the base. If this is a trend, it’s one I can get behind 100%. There is little else that will swiftly chuck me deep into a well of nostalgia quite like biting into a crisp graham cracker, especially one spread with butter and sprinkled with a little cinnamon sugar.
But to come across a muffin recipe, with chocolate AND graham crackers in it? To quietly utter the words ‘Oh my’ accompanied by a deep sigh of contentment doesn’t even begin to tell you how that made me feel.
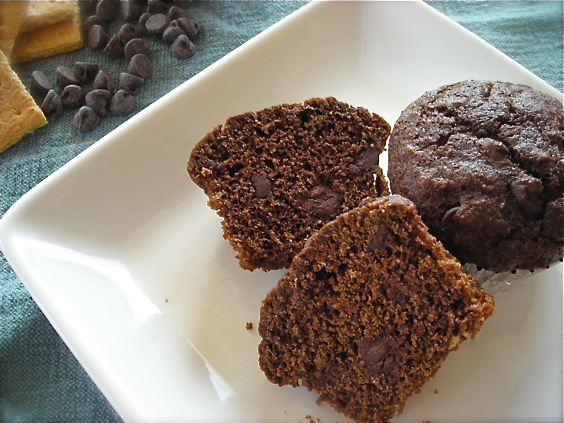
And you know I love muffins, a primordial love for a small palm sized bit of moist cake-like goodness. But it has to solidly BE a muffin, as so many of them are nothing short of a dumbed down cupcake. This was a muffin, through and through, although to the eye it was cake at it’s finest. I loved the trickery; the coy visual tease that delivered an altogether different taste once the rich dark crumbs burst across your mouth, scattered with soft chocolate chips to satisfy a sweet tooth.
Yet the word ‘sweet’ wouldn’t be what I would use to describe these muffins. I expected sweet; like chocolate-y cake kind of sweet and I didn’t get that. It solidified further the rather unscientific findings that I am coming across by removing all refined white sugar from anything I bake. Almost everything I’ve baked since last Fall has been with some alternative form of sugar, usually drastically reduced, in an effort to remove products with poor nutritional value from what I eat.
Now please, let me be clear; I have no illusions that any form of sugar is healthy; sugar is sugar and too much of it is problematic. I know this. I’m not pulling a thick armor of wool over my eyes and happily drowning myself in cookies and cake. I love to bake, but the idea of white refined sugar, and also white processed flour has quietly taken siege on my common sense and demanded change. So…. gone is white flour and in it’s place is stone ground whole wheat flour. Gone is white sugar, to be replaced by pure maple syrup, artisan honey, organic natural cane sugar and on occasion, like in these muffins, brown sugar. And yes, I do know brown sugar is refined white sugar costumed with molasses, and in this form I use much less when I bake. But from all the research I’ve read on the use of sugar, when substituting a natural form of it- as in the maple syrup, honey or natural cane sugar- you avoid the chemicals found in the processing of the product. Natural forms of sugar are more readily digestible for humans than anything refined, and have less of an adverse effect on the blood sugar levels in your body. And while I’ll never advocate relentless consumption of anything chock full of sugar, regardless of it’s origin, I will quietly say that a little sweet treat is acceptable, at least for me and my guys. And I’ll feel better about giving them some indulgent goodies, especially when I can pronounce all the ingredients.
I’m planning to write a bit more on this topic at a later date, but really….. if you sat through my little science class, you deserve a Chocolate Graham Muffin.
Chocolate Graham Muffins
1 sleeve regular (or chocolate) graham crackers
1-1/2 c. whole wheat flour
1/3 c. cocoa powder
1-1/2 t. baking powder
1/2 t. baking soda
1/4 t. sea salt
2 large eggs
1/2 c. packed brown sugar
1/4 c. pure maple syrup
1 c. buttermilk
3 T. canola oil
1 heaping teaspoon instant espresso powder
1 t. vanilla extract
1/2 c. semi-sweet chocolate chips
Preheat oven to 400°. Line muffin tins with paper liners. The recipe makes between 12 and 18 depending on the size of your tins.
Crush graham crackers, either in a food processor, or by placing contents of the sleeve in a large plastic bag and using a rolling pin to crush. In a large bowl, whisk crumbs with flour, cocoa powder, baking powder, soda and salt.
In another large bowl, whisk eggs, brown sugar, syrup, buttermilk, oil, espresso powder and vanilla until smooth and well blended. Pour into bowl with dry ingredients, and using a rubber spatula, gently fold together until just combined. Add chocolate chips and turn them carefully into batter.
Spoon into muffin tins and bake approximately 15-18 minutes. Check for doneness by either using a toothpick or touching the top of the muffin to see if it springs back. You may need a little more time if your oven, like mine, tends to be fussy. Cool muffins in pans on counter for 15 minutes or so, then turn out to cool completely.
Recipe adapted from Eating Well magazine
Other Muffin Recipes from my Kitchen:
Healthy Whole Grain Muffins
Whole Wheat Muffins with Squash and Quinoa
Oatmeal Sweet Potato Muffins
Fig Muffins with Honey Lemon Cream Cheese
Blueberry Bran Muffins
Pumpkin Maple Muffins
Apple Cheddar Muffins with Almonds
March 6th, 2011
| 2 Comments »
Sometimes I come across a recipe by accident, through a bevy of channels found by clicking here, clicking there, following some promising links and then WHAM! you spot something that looks so delicious that you know you have to make it, right there and right now.

Of course, it helps when I have everything on hand to make it, with the bonus of it being a much healthier version of tea bread, which, let’s face it, is just a big oblong cake, isn’t it? Most tea bread recipes could easily be baked in a bundt pan, or as rounds, covered with frosting of any sort and masqueraded as a cake. No one would really know the difference.
But this tea bread, with it’s luscious compote of cooked sweet dried cherries and figs comes out as something else. It’s dense and moist, yes, but it’s much more bread-like than your typical rectangular 9×5 offering. And I’m kind of a sucker for anything with figs in it. Back to my childhood, when a Fig Newton, fresh and cakey filled with thick pureed figs was my most favorite store-bought cookie, to the now of my adult life, and the soft magical collapse of a fresh fig in my mouth, or the sweet bite of a dried one in my morning oatmeal, there really isn’t a time that I’ll pass up noshing on figs. The glorious fig has no fat whatsoever, no saturated fat, and no cholesterol or sodium. They’re loaded with calcium too, a half cup worth of dried figs fills your entire daily requirement for calcium intake. They’re a complex carbohydrate, rich in fiber and loaded with essential minerals like potassium and iron. Excellence all around.
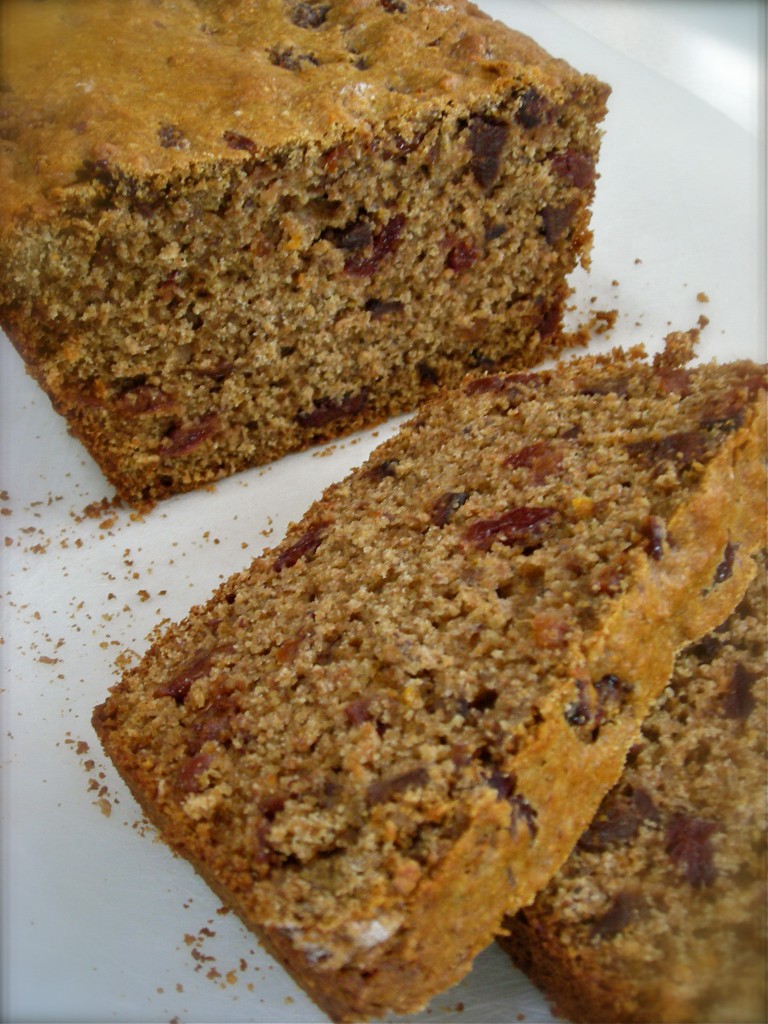
The recipe comes, not surprisingly, from Eating Well magazine, a publication that consistently offers up health, nutrition and simple good taste. You don’t need much in the way of fancy ingredients or advanced cooking skills to make the majority of offerings in the magazines, and along with consistently good recipes, they offer plenty of up to date nutritional information and honest discourse about food trends.
And recipes with figs. Enough said.
Cherry Fig Tea Loaf
1 c. dried tart cherries
1 c. chopped dried figs
1 c. orange juice
2 c. whole wheat flour
1/2 c. honey
1/4 c. wheat bran
2 t. freshly grated orange zest
2 t. baking powder
1 t. baking soda
1/2 t. salt
2 large eggs
2/3 c. plain soy milk
3 T canola oil
1 t. pure vanilla extract
Preheat oven to 350°F. Coat a 9 1/2-by-5 1/2-inch loaf pan with cooking spray.
Combine cherries, figs and orange juice in a medium saucepan. Bring to a simmer over low heat. Simmer, covered, for 5 minutes. Strain, reserving 1/3 cup of the fruit-cooking liquid. Set the fruit and liquid aside in separate bowls.
Stir together flour, sugar, wheat bran, orange zest, baking powder, baking soda and salt in a large bowl. Whisk together eggs, buttermilk, oil, vanilla and the reserved 1/3 cup fruit-cooking liquid in another large bowl. Add to the flour mixture and stir with a rubber spatula until just combined. Fold in the reserved fruit. Turn the batter into the prepared pan.
Bake until the top is golden and a cake tester inserted in the center of the loaf comes out clean, 35 to 45 minutes. Let cool in the pan on a rack for 10 minutes. Loosen edges and invert the loaf onto a rack to cool. Serve warm or at room temperature.
This version was adapted slightly from the original one published by Eating Well magazine. To view that, please go here.
February 10th, 2011
| 4 Comments »
All right, all right…. you don’t want to talk about Winter anymore. I get it. How about we talk Banana Bread?
I grew up with regular and repeated doses of good banana bread. How about you? In our house, Mom would watch those bananas closely, and as soon as a few of them turned to the perfect spotty stage of brown, she would snatch them from the basket, peel them and put them on waxed paper, then mash them to mush with a fork for her golden fragrant loaves of banana bread. With walnuts. Which I hated, and yet, the banana bread was so glorious and perfect that I would carefully pick out the icky nuts and eat the rest. My favorite was the top of each slice, the softest part that often got so moist and tender. I always saved it for last.
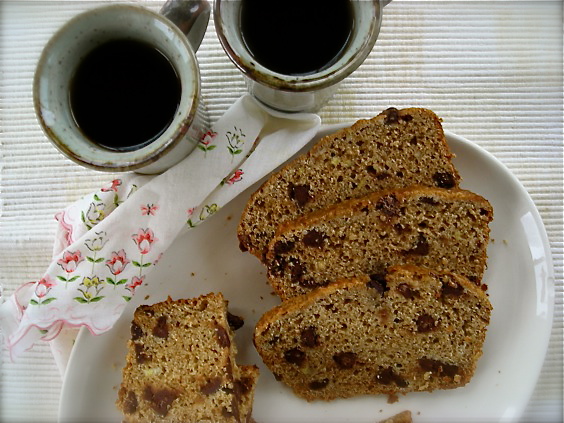
I never varied from that banana bread recipe I had. Whenever bananas in my first kitchen made it further than a bowl of cereal, or an afternoon snack smeared with peanut butter, I would do as Mom did, peel them down, mash them with a fork and make a loaf of banana bread. But, as I could now do as an adult, with my own hand mixer, a container for flour and sugar in my cupboard that was always full, with the familiar can of baking powder next to them, I would leave out those gross nuts. My banana bread was spartan. All it needed was banana. Sometimes a smear of soft butter would coat the slice, or maybe peanut butter went on the bread too. But I never needed a reason to stray from the recipe that I’d known all my life. It was banana bread perfection and it was Mom and it was all I needed. When she died, making a loaf of her banana bread was like evoking her memory in my kitchen, with my heart breaking again, through each press of a fork into the banana, turning the flesh to the proper level of mashed for the recipe. Then each bite of her bread would send my very adult mind reeling backwards into the kitchen of childhood, the sunny window, the deeply patterned blue carpet and my Mom, happily peeling spotty brown bananas, the old familiar bread pan on the counter next to her.
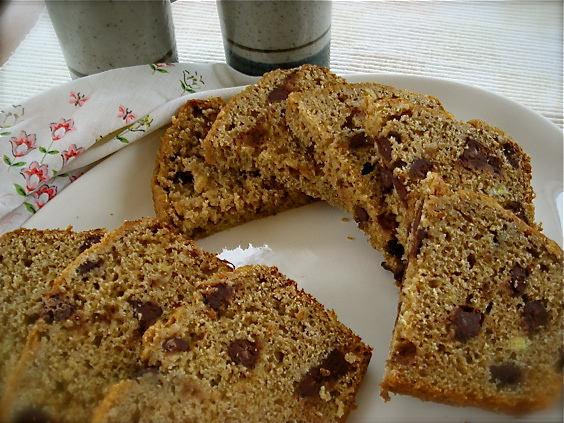
I’m not sure what happened the last time I made Mom’s Banana bread recipe, but the first bite put me off quite a bit. It tasted…. I don’t know, odd. Fake, I guess. I was really kind of shocked by the flavor. I’d grown up with this recipe; I’d made it dozens of times since I was a kid and here I was, by leaps and bounds an adult and quite the responsible one too, with a good job, a home and a child and yet, I looked at the slice of banana bread in my hand and it didn’t fit anywhere with the life that I’d found. It didn’t even bring Mom’s face to mind, her laughing smile and the way she would grab my shoulders and squeeze me just a little, making a delighted teeny squeak of her love for me. My mouth, my taste and my opinion had grown right alongside my life, and this recipe didn’t do it for me anymore. Part of me was crushed. It was the familiar flavor of a life that was now gone, and it was failing to bring to me the comfort I was seeking, comfort away from a world of bills, deadlines, a hectic job and single parenting. I didn’t get rid of the recipe because that might feel a little like experiencing Mom’s death all over again. But I haven’t made that particular version for a long, long time.
Ever since then, I’ve been on the lookout for the next best Banana Bread recipe. When the bananas in my house get past their prime, I simply place them in the freezer and wait it out. I search the wide range of recipes available for one that might take me home again, a feeling of nostalgia, of banana bread perfection, a slice that might elicit that memorable squeak of love I recall. At one point, I think I had 10 frozen bananas in there, and part of me mourns the loss of that constant. I have looked over dozens of recipes and rejected most of them; too much fat, too much oil, wayyyyyy too much sugar and in almost all of them, not enough Mom. So I keep searching, finding a few gems here and there to sample in my own sunny kitchen, with it’s warped old bread pans. And the bananas meanwhile, well, they tend to pile up in the freezer, silently waiting to succumb to a fork, a whisk and a hot oven to be baked into a memory that will sustain me through the years ahead.
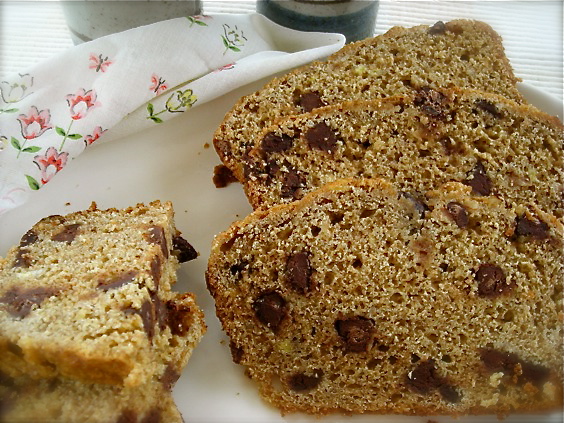
I’m still looking for that ultimate, that perfect banana bread, and I find that I’m really enjoying the experiments I’m coming across. This current one I’ve found is really quite good, in a clever and surprising way. What appeals to me about this particular recipe is that it includes crushed graham crackers crumbs in the base. This gives it a texture that’s a bit more crunchy than you would expect, and the taste of the graham crackers is really pronounced if you share the slice with a steaming cup of coffee. It’s perfect together, like banana and chocolate, like mothers and baking; with the familiarity of ritual, an old trusted bread pan and a freezer full of fruit at the ready.
Banana Chocolate Chip Bread
1-2/3 c. graham cracker crumbs (approx. one standard package from a box)
1-1/2 c. whole wheat flour
1/2 c. natural cane sugar (you can use regular granulated too)
1 T. baking powder
1/2 t. sea salt
3 medium bananas (i like to mash two of them fully, then leave the third in chunks for texture)
1/2 c. milk (any kind will do- I like vanilla soy, and almond would be wonderful)
3 T. canola oil (or get crazy and use olive oil- it tastes wonderful)
2 eggs, lightly beaten
6-oz semi-sweet chocolate chips
Preheat oven to 350°. Spray a standard 9×5 loaf pan with cooking spray.
Place graham cracker crumbs, flour, sugar, baking powder and salt in a bowl, and whisk well to combine.
In a large measuring cup, add bananas, oil, milk and eggs. Beat lightly with a fork to combine, then add to flour mixture. With a rubber spatula, carefully stir together until just blended with some streaks of flour remaining. Add in the chocolate chips and combine until mixture is fully incorporated. Scrape into prepared pan and bake for 50-60 minutes, or until top springs back when lightly touched and toothpick test comes out clean.
Allow to cool in pan for 30 minutes, then remove to wire rack to cool completely.
Need some other inspiration for banana baking? Try these:
Applesauce Banana Bread
Banana Poppyseed Bread
Peanut Butter Banana Bread
Whole Wheat Banana Pancakes
November 28th, 2010
| 8 Comments »
This is the best kind of morning. It’s so quiet as I’m the only one awake. We decided last night to attend the late church service this morning, so instead of rolling everyone out of bed to get out of the house by 8:30, we’re not needing to be coherent until a few hours later. And when the cats started their pre-dawn routine of scratching at the bed to get someone up, I arose to greet the sunrise with them, affording my hard-working spouse yet another day of extended sleep. Five days a week he rises before the sun to delve into his work, to think and sip his coffee and deal with these cats that somehow think going outside on these dark, cold mornings is a really good idea. And apparently, it is for like 2 minutes, then they race back in for the nearest blanket and cozy fleece bed. The little turds.
But today is my day. And I’ve found an amazing sense of calm in these quiet hours. I can write, and think and plot and dream. I can surf, lurk and sip dark, rich coffee. I can hear myself think and often find some wonders brewing in my own head.
And I can nibble on these incredible Sweet Potato biscuits.
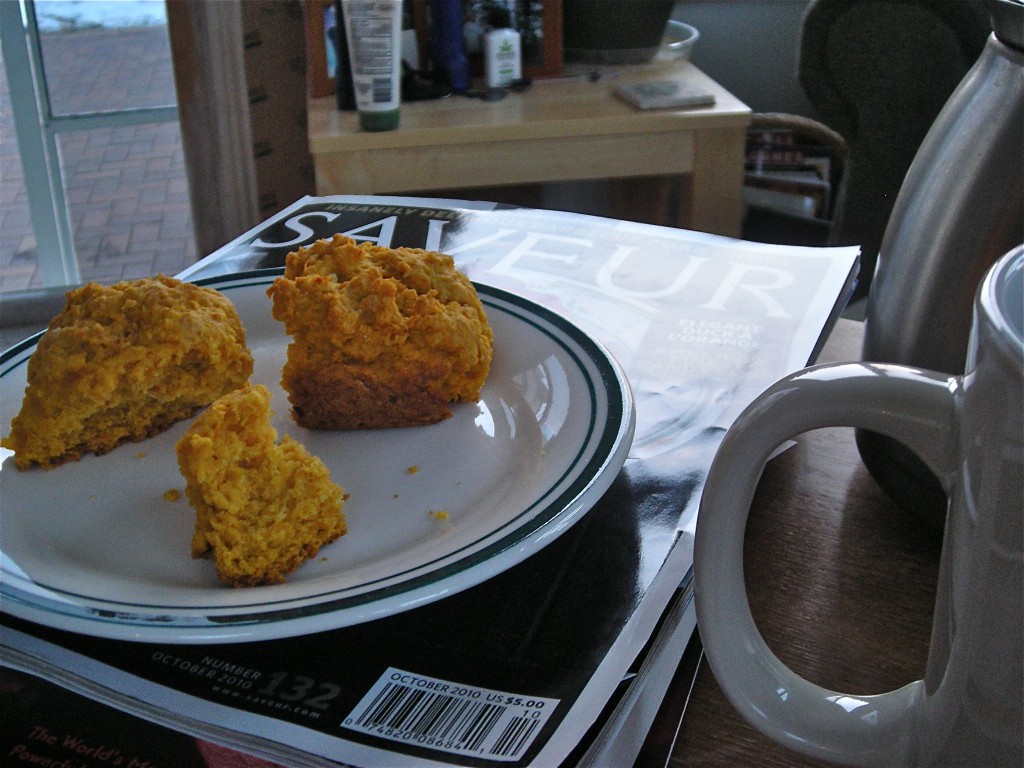
This is my morning; it’s me, the coffee pot, my big mug and a stack of inspiration. It’s the sunrise outside the windows, a fleece blanket on my lap and sometimes a cat. It’s peaceful. It’s contemplative. The birds flit around the feeders outside, gathering in the hawthorn tree while I watch and observe. The cardinal flashes his bright red feathers against the white of the snow. The bluejay squawks. The goldfinch chatter. The crows call from the rooftops and the sun turns the sky from winter’s deep blue to hints of azure and bronze. The sunrises lately have been lovely, even when so fleeting. I’m happy to be sitting here to appreciate them.
It’s my morning time. It’s perfect. And these biscuits? Well, you would do yourself a favor to have a pan of them at any meal, and then steal away one quiet morning with a mug of dark coffee and a few of them on a plate to fill your belly. The lovely hue of orange is one of their many appealing features, but the fluffy, moist and tender crumb that spills out when you crack one open is the best part about them. With a cat, or not; with a sunrise or a bowl of steaming soup, served with any meal they will compliment it highly. They will inspire. Like the sunrise and a quiet morning.
Sweet Potato Biscuits
from The Kitchen Sink Recipes (and from Bon Appetit)
Yield: 12 to 15 biscuits
One 3/4-pound red-skinned sweet potato (yam), peeled, cut into 1/2-inch cubes
1 3/4 cups all purpose flour
1 tablespoon (packed) dark brown sugar
2 1/2 teaspoons baking powder
1 teaspoon salt
1/2 teaspoon baking soda
Pinch of cayenne pepper
8 tablespoons (1 stick) chilled unsalted butter, cut into 1/2-inch cubes, plus 2 tablespoons butter, melted
1/3 cup chilled buttermilk
Cook sweet potato in medium saucepan of boiling salted water until tender, 8 to 10 minutes. Drain, cool, and mash.
Position rack in lower third of oven; preheat to 425°F. Butter bottom and sides of 8- or 9-inch cast iron skillet (or 8- or 9-inch cake pan).
Whisk flour and next 5 ingredients in large bowl. Add cubed butter to flour mixture; toss to coat and rub in with fingertips until mixture resembles coarse meal. Whisk 3/4 cup mashed sweet potatoes and buttermilk in medium bowl. Add to flour mixture; toss with fork. Gather mixture in bowl, kneading until dough comes together. Turn dough out onto floured work surface and pat into 1-inch-thick round. Using 2-inch round biscuit cutter, cut out biscuits, flouring cutter after each cut. Gather scraps; pat into 1-inch-thick round. Cut out additional biscuits, until the dough has been used.
Arrange biscuits side by side in prepared skillet or pan. Brush with melted butter. Bake until puffed and golden on top and tester inserted into center biscuit comes out clean, about 22 minutes. Cool 10 minutes in pan. Turn biscuits out and gently pull them apart.

Just a few days left of National Blog Posting Month!!!
November 20th, 2010
| 2 Comments »
It’s the weekend before Thanksgiving. I’ve done my shopping and planning and am ready to cook, and eat and enjoy. I love Thanksgiving, especially the turkey and stuffing. I always buy a huge bird to insure plenty of leftovers, and there’s always a soup in the days after, or a few morning of making crunchy little cakes from leftover stuffing, or a frittata maybe, with some cranberries and bits of turkey mixed in.
Looking for a nice treat to start your holiday off right? How about a Dried Cherry Poppyseed Scone?
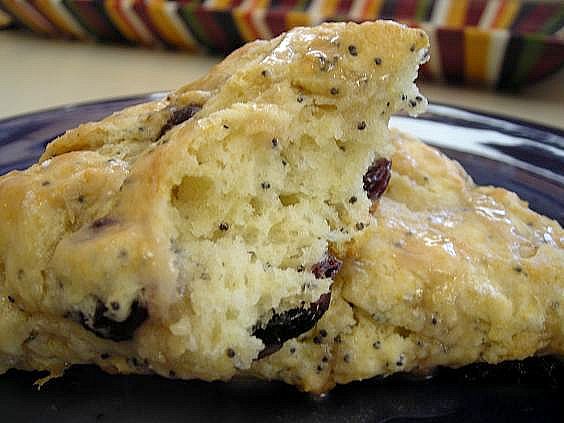
If you’ve got house guests coming, these delicious dried cherry scones are a perfect offering for a simple, but elegant start to your day. Heck, even without house guests, you should find a reason to put these on your weekend menu. They’re light and fluffy, with chewy cherries and the crunch and snap of poppy seeds. No cherries? Use cranberries, or even raisins. A wintery morning, chilly and bright can be made much nicer with the humming oven and the warmth of a fresh scone. Next to a fragrant cup of coffee or tea, I can’t think of a nicer way to wake up.
Dried Cherry Poppyseed Scones
from Tyler Florence, Real Kitchen
2 c. AP flour
1 T. baking powder
1/2 t. salt
2 T. sugar
3 T. poppyseeds
5 T. butter, cold
1 c. milk or cream
1 c. dried cherries
Heat oven to 400 degrees. Place parchment on a cookie sheet. Place cherries in a heat proof bowl. Boil water to vigorous bubbles and pour just enough in the bowl to cover the cherries. Stir to combine and allow to sit, stirring occasionally until the water is tepid and the fruit soft. Drain the fruit, reserving the juice.
Sift together flour, baking powder, salt, sugar and poppyseeds. Using a pastry blender, cut in the butter until the mixture looks like coarse crumbs. You want to leave larger pieces of butter. Make a well in the center and add the milk, stir to just combine everything, making sure you scrape across the bottom of the bowl. Toss the drained fruit with just enough flour to coat them lightly, then add to the dough, stirring carefully until just incorporated.
Lightly flour your countertop and turn the dough out. With your hands, shape into a square, roughly about 10″x12″ or so. With a sharp knife, bench scraper or spatula, cut the square into four equal portions, then cut each portion in half, corner to corner, to form triangles. Carefully lift the triangles with a spatula onto your prepared sheet. Alternately, you can scoop the dough straight from the bowl to the cookie sheet. Bake for 15-18 minutes until lightly browned and fragrant. Allow to cool.
For a glaze, combine reserved juice with about 1 1/3 cups powdered sugar and a little melted butter. Drizzle over scones before serving.
|
 (photo courtesy of Really Natural)


