October 24th, 2013
| 3 Comments »
Several months ago I started having pretty severe discomfort in my belly and immediately suspected that wheat might be the problem. I decided to eliminate it from what I ate for a week to see if there was any relief, and it was clear after only two days that my belly was happier without it. I had been considering cutting back on my consumption of wheat anyway, so it wasn’t much of a change to stop eating it all together. Once dropping it completely, I’ve realized that eating a small amount here and there is not that disruptive on my digestive system, and can enjoy a bit of good quality bread if need be, but along with dairy, I’ve learned that the more processed the product is, the worse it affects my gut. I think it’s so amazing that our bodies know what’s not good for us, and all we need to do is pay attention.
Along with eliminating wheat came the need to understand substituting gluten-free flours for baking, a process that is expansive and often dizzyingly complicated, with the starches, the gums, bean flours, ancient grain flours, rice flours and such, but thankfully there is a huge wealth of knowledgable people out there who can take the mystery out of replacing whole wheat with delicious alternatives. I’m not interested in just subbing in an AP GF flour blend when I bake; I want to understand how blending GF flours can enhance your baked goods, and make them more flavorful, instead of just relying on what someone else decides is a good alternative. Plus, the more I read about GF baking, the more I realize that not one blend will produce similar quality results for breads, cakes, muffins or scones. Each of those baked goods requires different blends, gums and starches to produce the textures that we crave, that are often gone missing in GF baked goods.
It’s been a learning curve, no doubt. I made a GF Lemon Coconut Cake that sounded amazing on paper, but the first bite was akin to a balloon rapidly leaking air. It wasn’t good. Not even close, and despite my hatred of throwing out food, the whole cake went in the trash. I’ve spent a lot of time reading GF blogs, researching and absorbing. I’ve purchased small bags of all the options I want to try, and slowly am working towards a fuller understanding, but folks, it’s a long way off. We all have to start somewhere, don’t we?
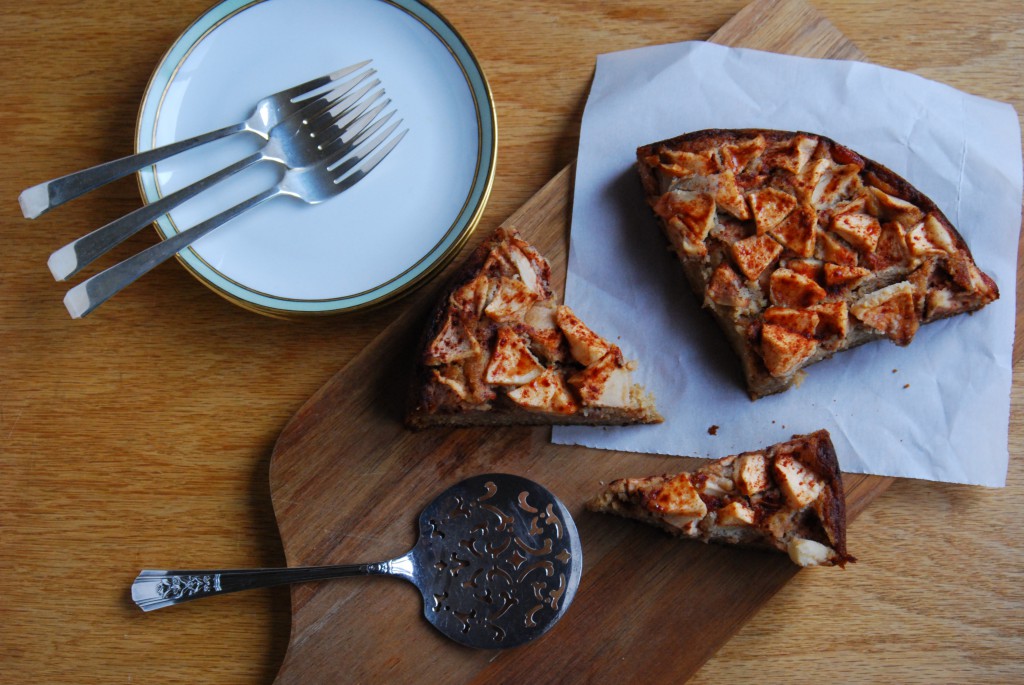
Yesterday, while pining for something cake-like and warm to use the apples that are sitting in storage, I found this cake recipe on Healthy Green Kitchen, which is one of my go-to sites for healthy eating. I had everything necessary to make it, too, which was miraculous. And Winnie is a source to trust, as far as I’m concerned, so I wasn’t all that concerned that this cake was going to end up in the garbage.
And if you’re one of those folks who think sugar is the devil itself, please read her current post containing her thoughts on the whole sugar uproar. It’s worth a few minutes of your time.
Now, back to that cake.
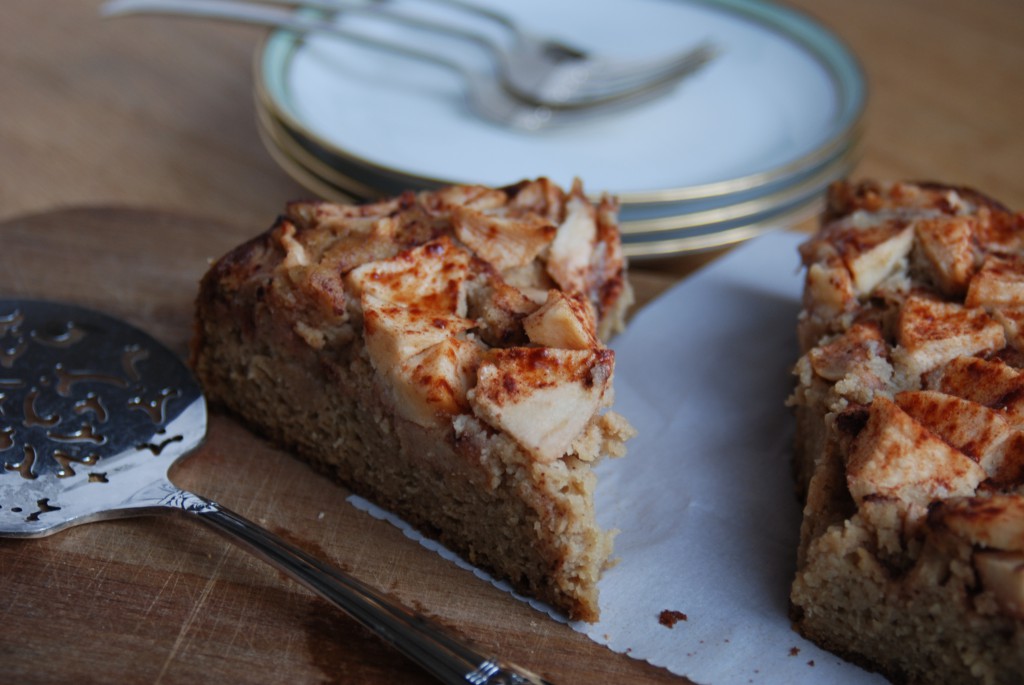
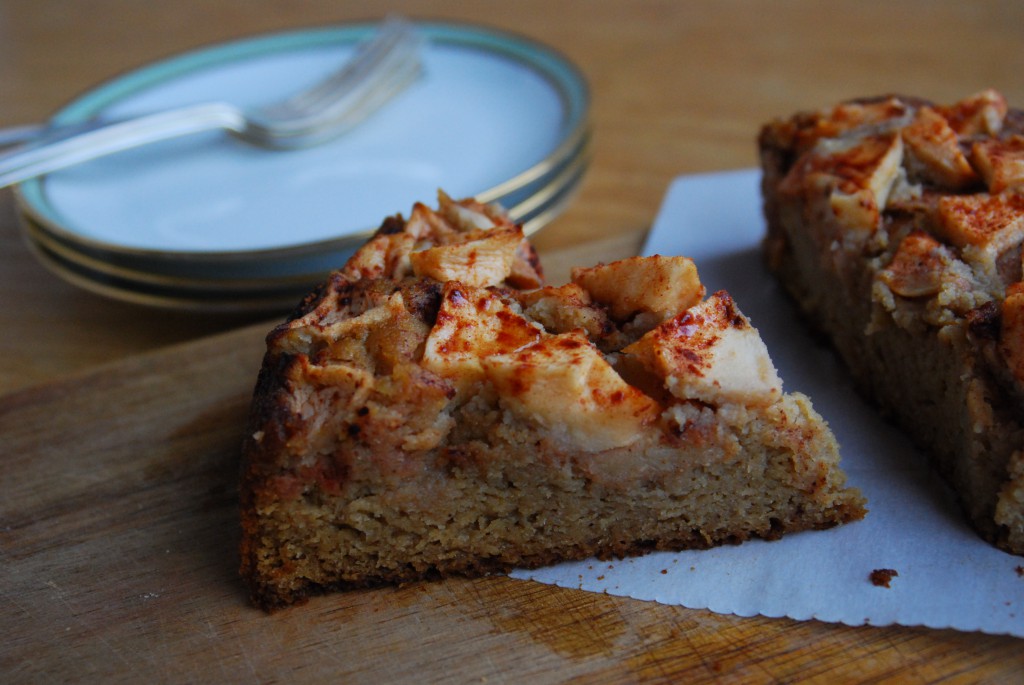
This recipe was heavily adapted from the one on Winnie’s blog, mostly because I discovered that I was out of white sugar so I subbed in a brown sugar/maple syrup blend. Her recipe called for straight almond flour too, but due to it’s expense, I don’t like to use it so freely, plus I love how coconut flour works to add bulk and texture in baked goods, and with the extra liquid from the syrup, it needed that bulk. I also wanted to add sorghum for experimental purposes. The texture, crumb and flavor of this cake was delicious and tender, with a flavor that we all gave an enthusiastic thumbs up! I’d make it again, exactly the same way.
Please note that it can be made with regular AP flour in the same amount as the total of the three GF options I’ve listed.
Maple Apple Cake
3 eggs
1/2 c. packed brown sugar
1/4 c. pure maple syrup
1 c. almond flour
1/2 c. sorghum flour
1/2 c. coconut flour
3/4 c. cup plain almond milk
3 T. butter, melted
2 t. baking powder
1 t. pure vanilla extract
3 medium apples, about 1 3/4 pounds peeled, cored, and chopped. I used Haralson.
Optional: Powdered sugar for dusting the top, ice cream or yogurt to serve along side.
Preheat oven to 350° and prepare a 9″ springform pan by spraying with cooking spray, or rubbing with butter. Coat with a sprinkle of almond flour, if desired. {{My springform pan always seems to leak, so I wrap the bottom in tin foil}}
In the bowl of a stand mixer, place the eggs, brown sugar and maple syrup. Beat on medium speed for 5 minutes, until light brown and thickened. Reduce the speed to medium-low and add the flour, scraping sides if needed, then the milk and melted butter. Scrape if needed, increase to medium, and blend for 3 minutes. Add in baking soda and vanilla extract, then blend for 2 minutes.
Scrape batter in to prepared pan and arrange chopped apples on top. Sprinkle with a few pinches of brown sugar and a sprinkle of cinnamon, then place in pre-heated oven. Bake for 50 minutes, or until a toothpick inserted in the center comes out clean. Do not over bake.
Allow to cool for 15 minutes, then release the spring on the pan. Cake can be served warm.
March 14th, 2013
| 1 Comment »
A sweet cookie, a fresh burst of corn flavor; this unique treat was an eye-opening experience, with unbelievable flavor.
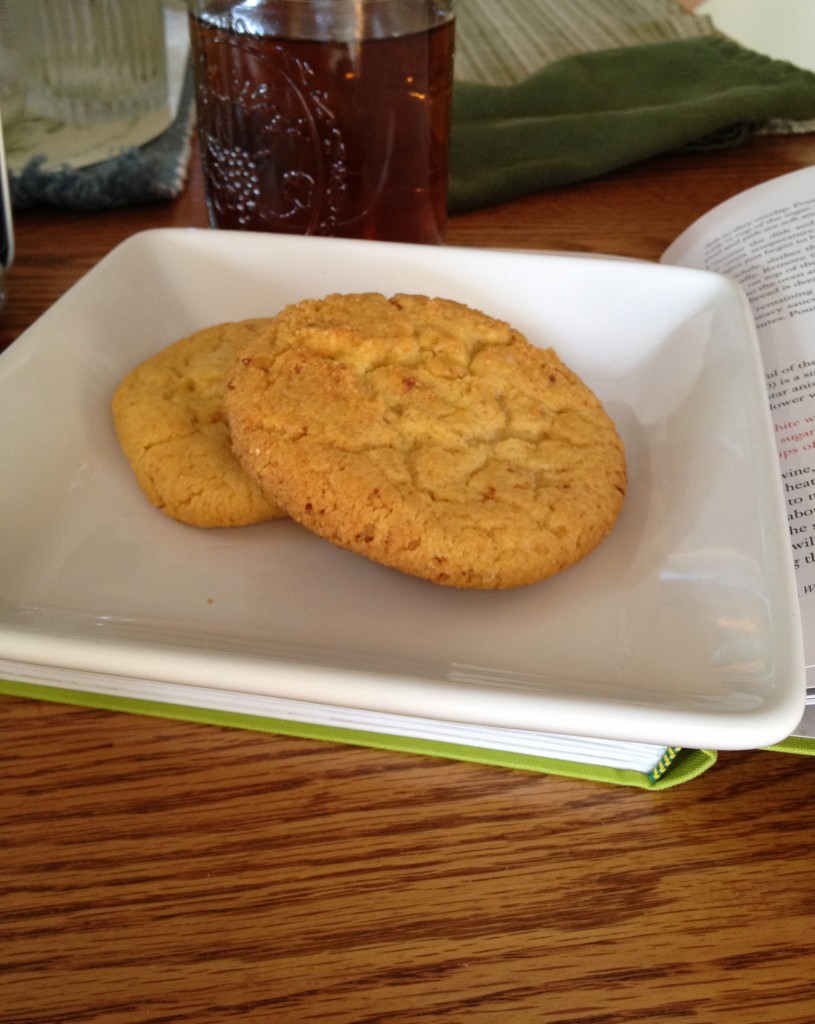
Come in to my kitchen…
December 17th, 2012
| 2 Comments »
The downside of shopping for your Christmas tree the day after a rare December rainstorm is that you’re bringing a soaking wet pine tree in to your home. As you set it up, it’s dripping down on your shoulders while you twist the screws on the stand in to place. You need a sheet underneath, an old one, to catch the water as it falls and those boxes you’ve stockpiled, filled with decades of memories and treasures and pressed tin icicles, baubles and bangles and bows now must sit and wait for your tree to dry.
Waiting is what the month of December is all about, it seems. We wait for the birth day of Christ, for the celebration and pageantry, for the singing of familiar songs and melodies. We wait for the lighting of candles, pans of latkes, stories of the past. We wait. And we wait. Our plans to put up our tree last weekend were derailed by a monster storm, and a death in the family, so we waited for a week of busy days to pass for a few free hours to seek out a perfect tree for us. We wait for cookies to bake. We wait for the celebrations that come. And we wait while aromatic fruit bread bakes in the oven, filling the home with nostalgic memories.
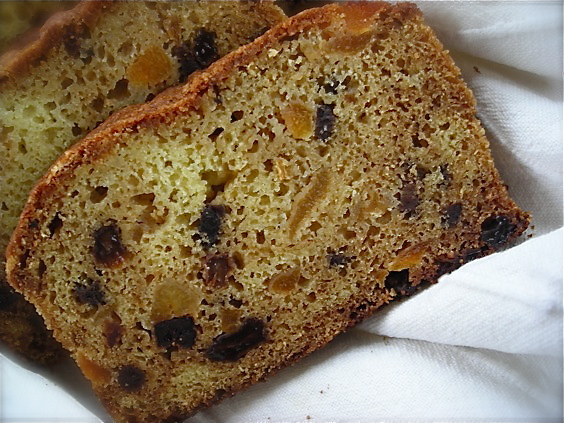
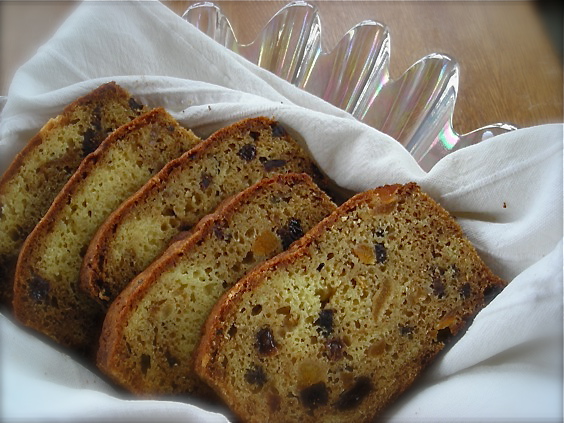
The first time I made this bread three years ago, the smell of dried fruit macerating in apple cider on the counter drove such a knife of remembrance through me that it stopped me cold. Try as I might, I couldn’t dredge up where it originated, what brought it on. Somewhere in a long ago year, most likely around Christmas and in the waiting, I was enveloped by a smell, or tasted a bread like this one, rich with dried fruit, sweet with a butter crumb. It made an impression on me that never left, though it dove deep beneath the surface to linger without my knowledge.
I find that happens a lot in December. Keeping company with our waiting are the memories of a lifetime of Decembers, wrapped up in dusty boxes that we pull out and unwrap, willingly remembered or the unplanned ones that throw us off kilter. I’m always surprised when I open the decorations from last year because there will always be something I’ve forgotten, a new ornament or tabletop decoration that came late to the party, or in the aftermath of Christmas that gets tucked away. I love these surprises, along with the waiting, and I love the way our brains can rightly kick out something at the most opportune time for us to recall with fondness or joy. I don’t know where the memory came from, triggered by the making of this sweet bread, but it left me feeling comforted and at ease, so I know it has to be from a happy time. Whatever the origin, I can draw on it’s feeling with one breath, and a simple recipe each December, enjoying this bread while I wait for the 25th to come.
Fruktkaka
4 oz. each dried figs, apricots and raisins- fine chop figs and apricots
1/2 c. dark rum (use apple cider for a non-alcoholic option)
1 T. orange zest
1-1/2 t. lemon zest
12 T. unsalted butter, softened
1-3/4 c. AP flour
1 t. baking soda
1 c. superfine sugar
4 eggs
Combine figs, apricots, raisins and both fruit zest with rum (or cider) and stir to combine. Cover and allow to sit at room temperature for up to 4 hours, and as long as overnight. Stir the mixture on occasion.
Heat oven to 350°. Grease the bottom and sides of a standard 9×5 loaf pan and dust with flour. Tap out excess and set aside.
Whisk flour and baking soda in a measuring cup and set aside. Combine the sugar and butter in the bowl of a stand mixer, and blend on medium speed until pale and fluffy, about 3-4 minutes. Scrape the bowl a few times to make sure it’s uniform. Add the eggs one at a time and blend thoroughly after each one. Add the fruit, then the flour mixture and blend until fully combined. Scrape the batter into the prepared pan, smooth the top and bake for 40-45 minutes, or until a toothpick inserted into the middle of the loaf comes out clean. Unmold cake after 15-20 minutes, then cool completely on a wire rack before slicing.
From the December 2009 issue of Saveur magazine
November 29th, 2012
| 2 Comments »
Thanksgiving is done, the month is nearly over and December looms on the horizon. Holiday plans are in full swing, decorations are coming out of storage and right on schedule, the air turned cold and brisk. There’s not much snow yet. Only enough to change the landscape from late Fall to Winter, but enough to get everyone’s thoughts on the next big holiday activity; baking. While I do a fair amount of baking year round, during the holiday season, I make more cookies than any other time of the year.
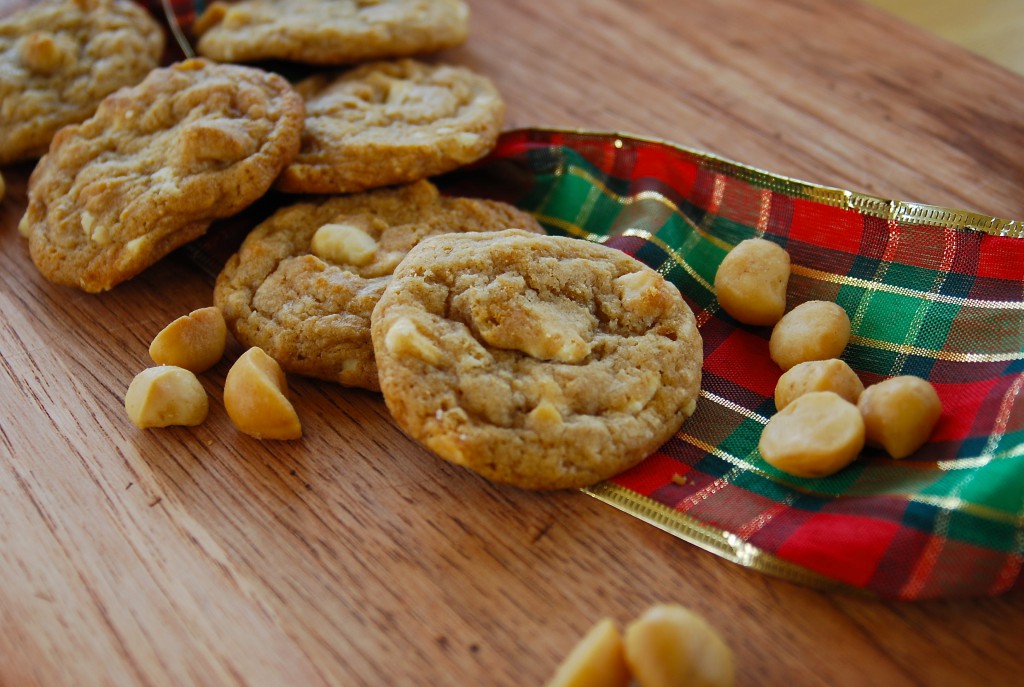
These cookies are a classic combination; soft and luscious white chocolate with buttery, rich macadamia nuts. A terrific cookie for holiday baking, or any time of the year, really. Something about white chocolate, to me anyway, speaks of winter. Maybe it’s the resemblance to soft snow, the pristine look of it, the clean taste. Not all white chocolate is the same though; in the current edition of Saveur magazine, they did a huge taste test on white chocolates and came up with some of the best available. Thankfully, Ghiradelli white chocolate made the cut, as it’s the one that’s most readily available to me.
Every Christmas season for the past few years I’ve been blessed with a gift box from Oh! Nuts! for baking, or just decadent snacking. Oh! Nuts! has a full selection of premium dried fruits, chocolates, candy and high quality nuts for home cooks, as well as exquisite gift baskets for everyday or special occasions. Of all their products I have tasted over the years, I’ve never had anything less than stellar quality. I’m not one to purchase macadamia nuts all that often; once in a while I indulge in a small bag for ‘mouth therapy’, as they are one of the finest nuts ever that have crossed my tongue, but their price is often prohibitive, and a gift of them is wonderful. Macadamia nuts have the highest amount of monounsaturated fats of any of the nuts or seeds that we consume, and are a good source of a long list of minerals and vitamins. But go easy on them, as that fat content doesn’t come without a price, unless you use it’s oil on your skin. And don’t ever let your pup eat them; macadamia nuts are toxic to dogs.In these cookies, those rich nuts just shine. The buttery base aside, a crunch of the moist nut next to the vanilla-sweet bite of white chocolate is, as I already mentioned, a classic combination. Based on this recipe from Joy the Baker, the end result of this cookie is a moist and tender little mass of cookie goodness. These turned out so perfectly that I almost wanted to box up the entire batch and give them away as a means to prevent me from tip-toeing into a closet with the container and nibbling them to oblivion and a whopping belly ache. I don’t know what’s worse in terms of temptation; having a sack of macadamia nuts in the house, or these cookies.
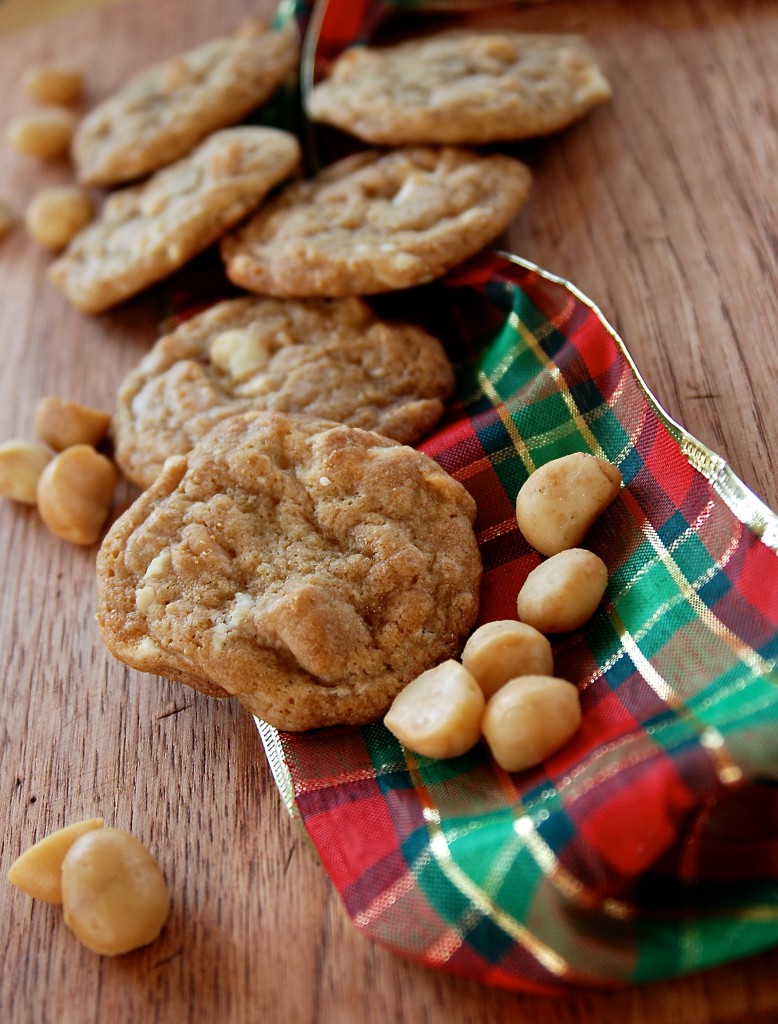
Brown Butter White Chocolate
Macadamia Nut Cookies
1/2 cup (1 stick) butter, don’t even think of using margarine, shortening or fake non-dairy butter
1 cup packed light or dark brown sugar
2 Tablespoons milk
1 large egg
1 teaspoon vanilla extract
1 3/4 cup all-purpose flour
1/2 teaspoon baking soda
1/8 teaspoon salt
1/2 coarsely chopped macadamia nuts
1 cup white chocolate chunks
Preheat oven to 350 degrees F. In a medium saucepan melt the butter, swirling and stirring the butter until nicely browned bits appear in the bottom of the pan. This may take about 5-7 minutes. Once the butter is browned, remove pan from heat and set aside to cool a bit while you measure out the dry ingredients and set them aside.
In the bowl of a stand mixer add the brown sugar and slightly cooled butter. Beat on medium speed for about 2 minutes. Add egg and beat for one minute more. Add milk and vanilla extract and beat to incorporate.
Turn the mixer off, scrape down the sides of the bowl and add the dry ingredients all at once. With either the stand mixer on low, or by hand with a spatula, incorporate the dry ingredients until just mixed in. Fold in the chopped nuts and white chocolate chips.
Scoop two teaspoon sized balls onto a lined baking sheet. Bake for 9-11 minutes or until cookies are deliciously golden. Remove from oven and let rest of the baking sheet for 3 minutes before removing to a cooling rack.
Recipe reprinted verbatim from Joy the Baker
KATE’S NOTES:
The only process I changed in this was to add the white chocolate and the nuts when I added the flour. I find that folding in those extras at the end makes the dough too uneven. This spreads them out perfectly.
I did not brown the butter, as I’ve had some disasters with that process and have lost my mojo on it. I know. Sad, huh?
As it was, without that step these cookies still rocked.
As stated in the post, I used Ghirardelli white chocolate, a 4-oz bar and chopped up the entire thing, using every last shred.
I also added in way more than half a cup of chopped macadamia nuts because I’m a rebel like that.
And as if that isn’t enough, I used vanilla greek yogurt in place of the milk, mostly because I had a container of it that I didn’t want to eat. (ugh….don’t buy Dannon Light Greek yogurt. Bleah)
I think it contributed nicely to the very moist end result.
DISCLAIMER:
I was provided with the macadamia nuts free of charge as a gift.
No blog post was expected for the offering of this gift and all words and opinions in this post are solely my own.
November 26th, 2012
| 4 Comments »
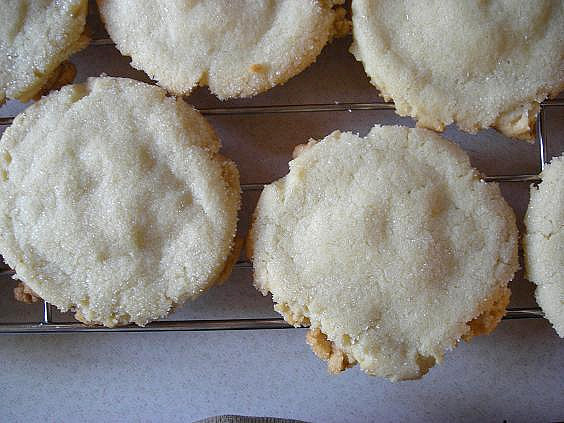
This is one of my ‘tried and true’ recipes; the one to turn to for comfort and understanding that you know will never let you down. Not that I can’t find a million cookie recipes at the touch of my fingers, for cookies that look amazingly thick, decadent, and pillowy, with that perfect blend of crisp edges and soft interiors and I’m certain that they would be delightful and all, but there’s this thing about cookies and my taste for them; I don’t like to stretch myself all that much. I don’t need fancy in a cookie; I crave basic and and elementary. I might sub in a fancy ingredient, like good quality chocolate chunks for a bag of chocolate chips, but there’s a ceiling of cookie indulgence above me and it’s solidly in place. Give me a straightforward cookie, please.
These Sugar Cookies are perfect. They’re quietly uncomplicated, yet worthy in flavor of bringing back memories of a Sugar Cookie I loved as a child. I’ve passed this recipe on to many people and all the feedback I’ve had has been nothing short of glowing. Stellar all on their own, they accept decorative toppings in any form, making them a must for holiday cookie-making. You can scoop the dough or roll it out and use cookie cutters too. It freezes beautifully too, as do the finished cookies themselves.
Basic Sugar Cookies
1 c. softened butter, no substitutes (reserve one of the wrappers)
1-1/2 c. white sugar
2 t. pure vanilla extract
1 egg
2-3/4 c. AP flour
1 t. baking soda
1/2 t. baking powder
Heat the oven to 375° and line two cookie sheets with parchment paper. Place about 1/3 of a cup of white sugar on a small plate and set aside.
Cream butter and the 1-1/2 cups of sugar together until very light and fluffy. Add in egg and vanilla extract and blend thoroughly until smooth and creamy. You really can’t overmix at this point. You want a base that is smooth and creamy as it makes the end result stupendous. Stir together flour, baking soda and powder, and with mixer on low, gradually add to butter until fully incorporated and mixture is in large, somewhat dry chunks. It will not be a smooth batter, but granular, like pie crust. The dough should hold together when pressed between your fingertips. If it doesn’t, give it a few more turns with the mixer. Here’s where you don’t want to mix more than necessary. The dough will come together when it bakes.
Using a small scoop (I used a #60 sized) press dough tight into a ball and drop onto cookie sheet. With your butter wrapper, wipe the bottom of a smooth glass, then dip the glass onto the sugar you’ve set aside. Gently press down on the cookie dough, dipping the glass before each one. If any dough falls loose, lightly push the pieces into the sides of the cookie. Bake for 8-10 minutes, reversing trays from front to back, and swapping top to bottom about halfway through. Allow to cool slightly on the sheet, then remove to a cooling rack.
KATE’S NOTES: I find that the super fine bakers sugar elevates the texture of these cookies quite a bit. You can mix up white and wheat flour if you wish, the end result will be darker though. I have substituted 1/2 c. of honey for the white sugar and love how tender it makes them.
November 5th, 2012
| 3 Comments »
I’m a total rebel.
It’s November, and everywhere you look is pumpkin. In everything. Or butternut squash. In everything. There’s sweet potatoes lurking over there; an acorn squash holding an adorable filling, perfectly browned edge glinting just so. It’s the season for all things roots and orange.
People are already gearing up for Thanksgiving, too. Decorations for Christmas have come out in certain stores. WHAT!!? Gah.
And here I am, dreaming of gooey dates and a crumbly oat bar.
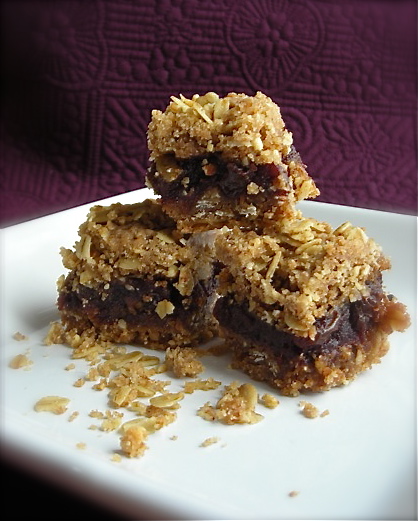
Sarah at The Yellow House recently wrote a post about her Mother’s recipe box, and a particular recipe memory she was seeking, in the stumbling way that a motherless daughter tries to find answers to the questions that can never be solved. Sarah’s post, even in it’s despair and sadness, triggered something in me because I know all about that bitter walk after your Mother dies, the questions you wish you could ask, the reassurance like an anchor, that a Mother brings. She sought answers about a particular barbecue sauce recipe, and for me, the always unattainable answer I sought from my Mom’s spirit was for a treasured Date Bar recipe.
I’m pretty biased towards these iconic baked goods as they’ve been a favorite ever since I could remember stepping up to a kitchen counter, reaching up to place my hands on the worn edge and leaning hard around my Mom’s arm to see what she was doing. A recipe box open, the mass of dates simmering on the stove, the bowl of oats and sugar standing silently, waiting. The small pan ready. A kitchen warmed by an oven.
But then in a flash, I’m grown up, and my childhood kitchen dissipates. I’m a parent now, too. When my tiny boy reached his own chubby fingers towards that kitchen counter, I pulled up a chair and got him situated. We stirred together. We mixed and measured, my hand over his as his blue eyes watched closely. I gave him a knife and he carefully trimmed vegetables. He pushed his luck against my stern warning that yes, indeed that stovetop is still hot even though the burners are no longer red. I dried those tears and soothed the burns. We soldiered on. Pans of Brownies and chocolate cake came and went. Chocolate chip cookies- of course!- and Oatmeal Raisin, Snickerdoodles and Dark Chocolate Drops; Oatmeal Scotchies and Applesauce Cake, cookies every Christmas. Full bellies and full hearts, him and I. His interest wavered, waned and often, he was absent as he grew too cool to stand by my side. Then, in some great moment of clarity, he returned to the kitchen again, a young man. Now he cooks his own food. Experiments. Expands. Still, if he said to me ‘Can you please make ______ ?’ I would likely tell him ‘Yes.’ and reach for the flour canister.
Because when I would sidle up next to my Mom as she thumbed through a cookbook, or pulled out her recipe card file for inspiration, often she would turn to me and say ‘Got any requests?’ and in my little girl, eager way, I would say “Please make those Date Bars!” And she would, smiling as she pulled the corner piece out of the pan to hand to me, it’s edges chewy and firm and we’d eat ’til our bellies were full, her and I. Eighteen years after her passing, her words still ring strong in my mind, for her baking was her love language, her moment to tell us how much she adored our faces, upturned and eager towards her as she pulled down worn metal tins of flour and sugar, turned the knob on the stove and sought out the warped, old cookie sheets, the favorite baking pan, drawing the aging cookie tin from the cupboard, the big round one with the roses on the top. I still have her recipe box, and I’ve poured over her it in vain, searching for that Date Bar recipe that she made for me, the one that was always just perfect, but I never found it. I poured pan after pan of warm date puree over an oat crust, trying to replicate the taste, seeking her smile in my memory and the love from a chewy corner piece but every time I bit down, the past wasn’t there. I wanted it to be, so badly. I reach for a container of flour, a sack of sugar, thinking it will restore the dull ache in me that still echoes after nearly two decades. Sometimes the very act of baking will quiet the roar; other times, those first bites just make it more acute.
Then I find this one, a perfect Date Bar with a crunchy oat crust that browns and crisps in the oven, snapping apart to shower on the plate, crumbs falling in your lap that you happily pick up on moist fingertip, the rich dates cooked to a tender chew, gooey edge and all.
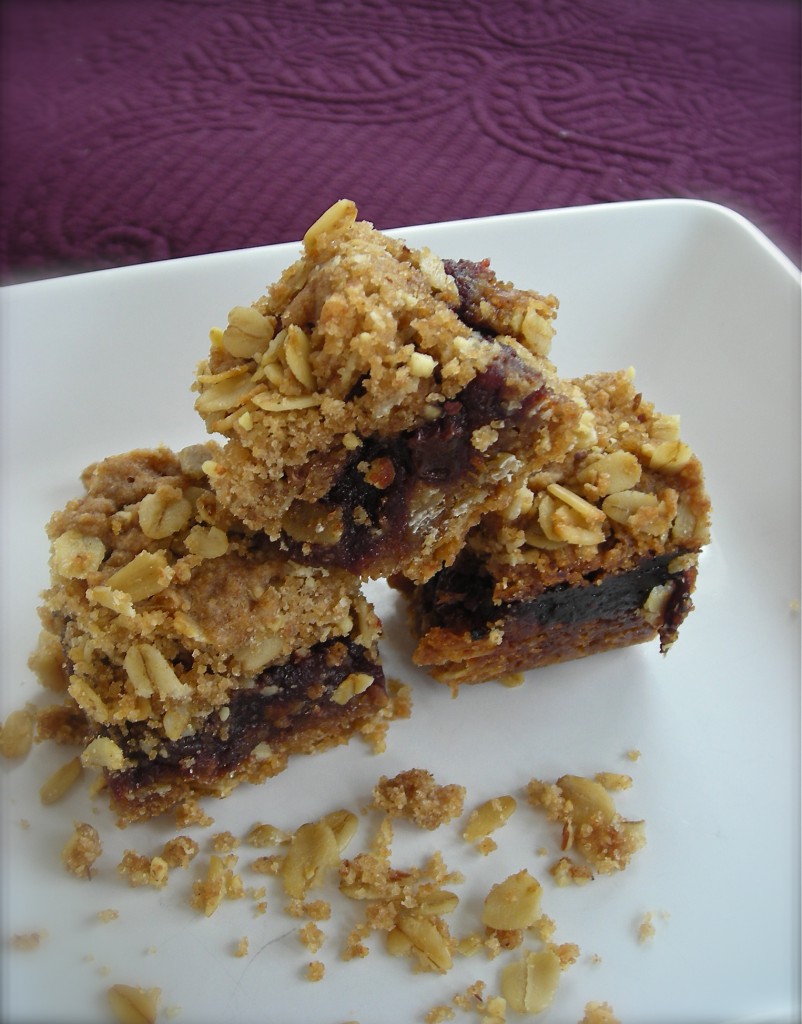
And the taste, smell and memory all come together in a tiny piece of cookie, too undeserving to be saddled with the burden of answering the questions of our past, but when I shut my eyes and bite, it’s all there. She’s all there. It’s swift and sharp, a nick of knife metal, barbed hooks caught against the heart. A moment meshes between child and adult, past and painful present wrapped in one oat crust, me as Mom and then, my Mother, with so many similarities between.
Oat and Nut Date Squares
1 8-oz package chopped dates (or equivalent of fresh)
1/4 c. black raisins
1 c. water
Zest from half an orange
2 t. orange juice
1/2 c. ground almonds ( sub in walnuts or pecans if desired)
1/2 c. each whole wheat flour and all-purpose flour
1/2 t. sea salt
1/2 t. baking soda
1 t. ground cinnamon
1/2 t. ground nutmeg
1/8 t. ground cloves
1 c. packed brown sugar
1-1/2 sticks unsalted butter, diced, softened but still fairly cold.
1 c. old fashioned rolled oats
Preheat oven to 350° and spray an 8×8 baking pan with cooking spray. Line with parchment paper so that it hangs over edge of pan, then spray the paper.
In small saucepan, combine dates, raisins and water. Bring to a boil, then reduce heat and simmer, stirring occasionally until all liquid has been absorbed and fruit is a thick, concentrated paste. This should take about 10 minutes. Remove from heat, stir in orange zest and juice and blend well. Scrape onto a plate and spread to cool.
In the bowl of a food processor, place ground almonds, both flours, salt, soda and spices. Pulse to combine. Add in brown sugar and pulse to blend. Scatter butter over top and pulse until mixture is like coarse uneven meal. There should be lumps of butter in all sizes. Pour this into a large bowl and stir in the oats.
Press 2/3 of the mixture into the prepared pan, pressing down firmly. Spoon cooled date mixture over, spreading it to cover crust completely. Sprinkle remaining oat mixture over the top. Bake until top crust is golden brown and crisp, 30-40 minutes.
Cool bars completely on a rack, still in the pan. Once bars are at room temperature, gently lift them out of the pan using the parchment paper. Slice into 2″ squares to serve. These bars are delicious when chilled. Keep in airtight container or refrigerated.
{{adapted from an original recipe, author unknown}}
February 5th, 2012
| 4 Comments »
This post could also be aptly titled “The end of searching for the perfect banana bread” but that just seemed too long and a bit too final. I should never think I’ve ‘arrived’ at any destination, be it a quest for knowledge, a higher level of health and well-being or never-ending search for perfect banana bread, as somewhere out there, a recipe may exist that could bring this loaf to shame, but for now, I’m sticking with what I’ve got.
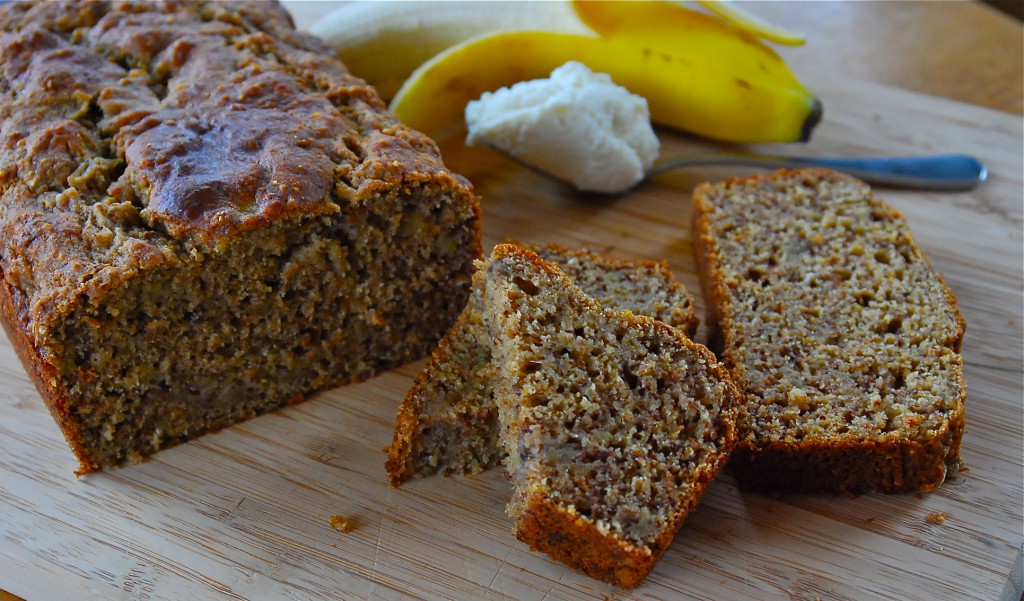
I grew up eating banana bread, from the earliest memories that I have. My Mom made it almost weekly, in fact, I’m pretty sure she bought way more bananas than she needed just so she’d have an excuse. She put walnuts in it, which I despised, so these days, my banana bread is always without nuts. When I got old enough to make my own banana bread, I turned to her tried and true recipe from my youth, and as an adult, I found it sorely lacking, so I moved on. And on. And on.
The goal that I’ve strived for, over recipes and time and growing older, was pure banana bread bliss and perfection that existed as a mental taste somewhere in my mind. And with the first bite of this grain-studded loaf, rich with banana flavor, I about leapt in the air with delight, shouting ‘Eureka!! I have found it!’ while my son chuckled in delight at my antics, he himself wide-eyed and excited over the taste of his piece. This IS pure banana bread delight, and I don’t say that lightly. Folks, I have made and eaten A LOT of banana breads in my lifetime, as I sought out that elusive fine balance of moist and tender crumb, ultimate banana taste and now, a higher level of health than a loaf crushing the scales with sugar and fat. After researching low-fat, and healthier banana bread options for over an hour, I settled on one recipe that gave me a pretty good start, and then started tweaking it to my liking.
I think my biggest disappointment with banana bread has always been that it just doesn’t have as much banana flavor as I want. I add more banana to any number of recipes, and I get mushy bread that turns soggy after a few days, so clearly, without some changes to the base, that’s not a workable option. And I needed a substantial heft other than what flour and leavening can offer in order to stand against that large dose of delicious bananas. When making muffins, I’ve turned to the use of cereals and grains to add more heft, and to make them a bit more nutritious. When faced with adjusting a banana bread recipe in the same way, that’s where I went as well. This recipe has whole rolled oats, All-Bran cereal and a commercial 10-grain cereal as a majority of the dry base. Cutting back on the use of eggs, I added some ground flaxseed for binder (you could also use unsweetened applesauce for this as well). The ricotta cheese, along with a small amount of milk, provides a richness in the texture that’s particularly pleasing to the mouth. The sugar was another matter; I took a gamble, using only a mere half cup in a recipe that makes two loaves. Most tea-bread recipes that I come across have, at least in my opinion, way, way too much sugar, and this amount was perfect. The end result is a bread without the teeth clenching sweetness, so the rich banana flavor just shines through. The cereal and grain base makes the texture nubbly and firm, and helps it retain a lot of moisture. Best of all, the loaves are simply packed with banana flavor.
A lot of this was pure kitchen chemistry, mixed with a lifetime of learning why the recipes I tried were so disappointing. After so many experiments, it’s nice to finally land on something that lifts your heart and elevates your taste-buds, all the while being reasonably healthy enough to enjoy without much guilt.
If you’re like me, when bananas get past the point of consumption in your house, they get tossed in the freezer to await a baking urge, and this recipe is perfect for when you’ve gotten a large stockpile of them.
Whole Grain Banana Ricotta Bread
Yield: Two loaves. It can easily be cut in half.
Preheat the oven to 350°. Spray two 9×5 standard loaf pans with cooking spray.
In a large bowl, mix together the following:
6 large, very ripe bananas, mashed
3/4 c. ricotta cheese
1/3 c. milk of choice
1/2 c. sugar
3 T. grape-seed oil (or other neutral flavored oil)
1 t. pure vanilla extract
1 egg
2 T. ground flaxseed
1/2 c. whole rolled oats
1/2 c. All-Bran cereal
1/2 c. commercial 10-grain cereal, such as Bob’s Red Mill (sub 7-Grain, or 5-Grain if you can only find those)
Whisk this until well blended and allow to sit for about 15 minutes to soften the grains.
In a large measuring cup, combine the following:
2 c. whole wheat flour
1 c. unbleached AP flour
1 t. sea salt
1-1/2 t. baking soda
2 t. baking powder
Add the dry ingredients to the bowl with the banana mixture, and with a rubber spatula, gently fold them together until all the dry ingredients are incorporated. Be careful not to overmix. The batter will be very thick.
Divide the batter between the two loaf pans and smooth the top. Drop the pans on the counter a few times to settle the batter and release any air pockets. Bake for 50-60 minutes, or until a toothpick inserted in the center comes out clean. Allow loaves to cool in pan for up to a half hour before turning them out to cool completely on a rack.
RECIPE NOTES: I use All-Bran cereal a lot in baking, and it keeps a long time in your cupboard. Bob’s Red Mill 10-grain cereal is not only a delicious breakfast cereal, but it’s wonderful for breads too, and I’ve also used it in muffins. I keep it in a plastic bag in the freezer and it lasts indefinitely. I also keep a baggie of ground flaxseed in the freezer.
If all you have on hand is whole rolled oats, this recipe would work just fine to use those in the full amount.
If you wish to cut the recipe in half, don’t use the flaxseed, as it acts as a second ‘egg’.
December 27th, 2011
| 2 Comments »
There isn’t much now, that signifies Christmas was only two days ago, other than the abundance of chocolate in the house, the presence still of a tree with glittering ornaments and other holiday decor. The gift bags are empty and some treasured new items have been absorbed in to our days. Everyone seemed to have a good time this year. The stocking hunt was successful…..

The cats received fun new toys that they enjoyed…..
 
And there was plenty of gatherings, with laughter, delicious food and wine, more cookies than one could shake a leg at, and little children with bright happy faces. But just like that, the planning and preparing and decorating and plotting and going and coming and caroling and waiting waiting waiting was over…… *poof*…… just like that. You wake up on the 26th and it’s back to normal, back to reality, back to work (for some) and another Christmas is done. It seems like so much anticipation, and then in a blink it’s gone.
Some aspects remain, memories made and smiles shared and a new gift to use or enjoy. Or maybe, what remains most prominently is a smidgen of the amazing Cranberry Pound Cake that, on a whim, I whipped together and pushed in to the oven, before dashing upstairs to shower an hour before guests were due to arrive. It was still baking, rich and fragrant and eliciting all sorts of ‘What IS that in the oven?’ queries when my family arrived, and before coats were even shed.
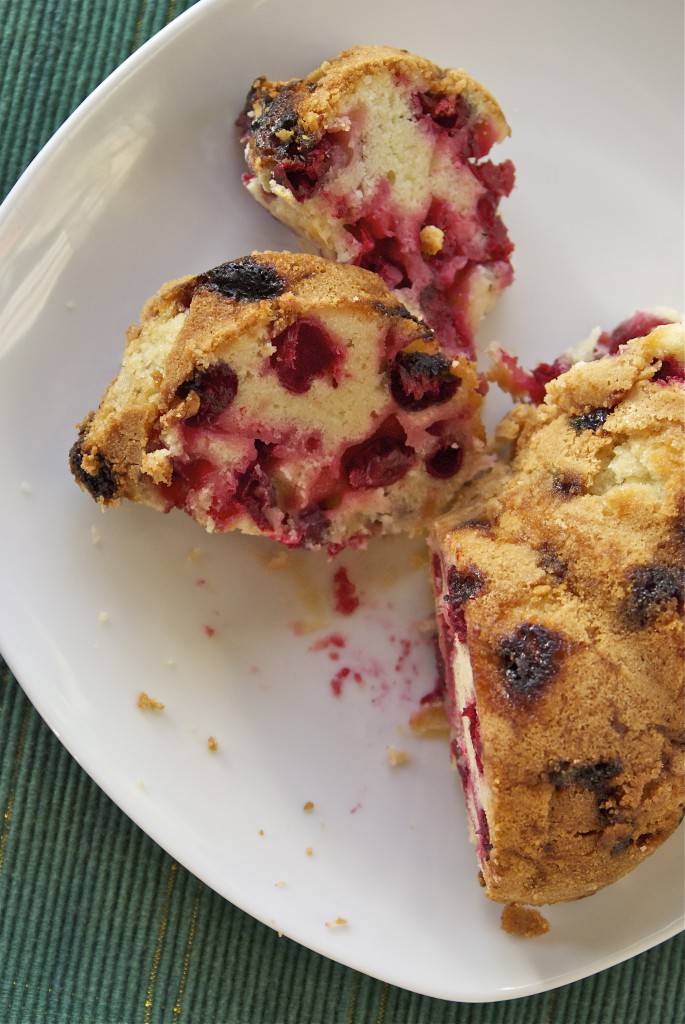
And me, nonchalantly trying to avoid panicking, since the cake seemed off when I shoved the pan in the oven and raced off with a prayer, I just shrugged and said ‘Cranberry cake’ as if I’d just, you know, trimmed a nail or something because I really had little confidence it was going to be worthy of Christmas dessert. It was a blind preparation, something I’d never made before and I had everything I needed and took a chance. It seemed simple enough.
And thankfully, the alchemy of eggs, sugar, butter, flour and a hot oven created a masterpiece that I can’t wait to make again.
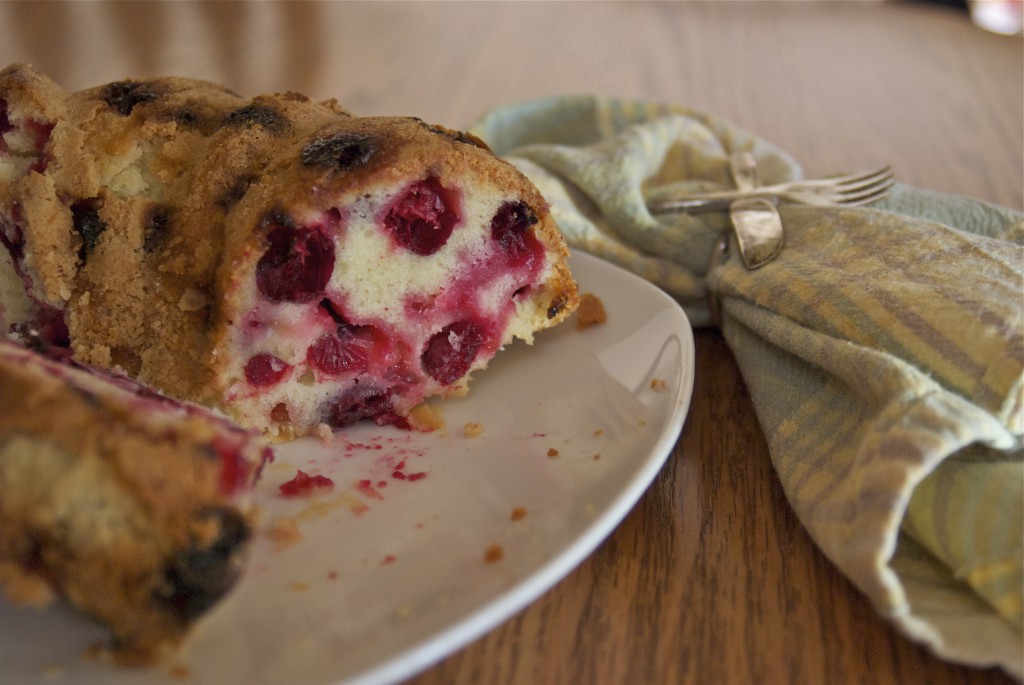
I get a bit overly excited each year when faced with orbs of fresh deep red cranberries in the store, and often stockpile as many bags as I dare in the freezer to use over the winter months. I spotted this recipe at Apartment Therapy (as usual….) and tucked it away to try, then of course, got caught up in the crazy whirlwind of pre-Christmas and neglected to make a dessert for our family gathering. But…. like I said, it worked despite a few reservations. In fact, it worked so well that I already am thinking about another go of it. I mean, by golly the initial cake isn’t even gone from it’s plate and I want another one. That HAS to be a good cake, right? It’s got an amazingly rich, yet light taste and a dense sponge to the cake, sweet but not cloying. Pops of deep cranberry flavor are laced with pure almond taste, and the crumbly sugary crust is simply divine. You could make this for an amazing dessert to impress, or you could just make it for yourself as a phenomenal treat.
Cranberry Cake
3 eggs
2 cups sugar
3/4 cup unsalted butter, slightly softened and cut into chunks
1 teaspoon vanilla
1 teaspoon almond extract (optional)
1 tablespoon kirsch (optional)
2 cups flour
2 1/2 cups cranberries (1 bag)
Preheat oven to 350°F. Lightly grease a 9×13 pan or a 10″ springform pan. You can also use a standard Bundt pan, or 10″ tube pan with removable bottom.
Beat eggs and sugar together for 8-10 minutes —no, this is not a misprint! …. the egg and sugar mixture should double in volume and turn pale yellow, leaving thick and shiny ribbons of batter when you lift the beaters. This is the only leavening in the cake so make it good and fluffy.
Add the butter and flavorings and beat for 2 more minutes. Stir in flour and fold in cranberries. Pour into greased pan.
Bake 45-50 minutes for a 9×13, or a little over an hour for the springform, bundt or tube pan. You made need to tent the cake with foil in the last 15 minutes or so to keep the top from browning too much.
Cool completely before serving.
Optional pecan topping:
1/4 cup butter
1/4 cup brown sugar
1 cup pecans, toasted
Heat the butter in a pan over medium-high heat. Add the sugar and stir. Add the toasted pecans and cook for several minutes, stirring, until the butter and sugar mixture is shiny and smooth and the nuts smell toasted. Spread over the cake batter and bake as above.
Original recipe, from Faith Durand at Apartment Therapy, The Kitchn.
~~~Next time I make this cake, I think the addition of fresh orange juice and freshly grated orange zest would be wonderful. Also, a scant 1/2 teaspoon of fresh grated nutmeg would also be marvelous. So many possibilities!!!
December 10th, 2011
| 4 Comments »
For starters, there are WAY too many vowels in this muffin description!!
But they are worth every twisted tongue and exhaustible explanation because they are fragrant, tropical and fabulous.
About a month ago I was contacted by a company called Oh! Nuts! and asked if I wanted some products to use for my holiday baking. I’d done some business with Oh! Nuts! before and was really pleased with the quality and freshness of their bulk nuts and dried fruits. Oh! Nuts! has a lot of attractive gift options for holiday giving, as well as fresh nuts, dried fruits, candy and other items for year-round baking. I highly recommend their products and can personally vouch for the quality. I was more than happy to have another chance to use some of their items.
For my personal use this time around, I requested Macadamia Nuts and Calymyrna Figs, and within a week, they landed on my doorstep. The figs are gigantic and sweet with a soft bite, and the macadamia nuts are perfectly tender and moist. I’ve been just tickled with both products and decided that before I gobble them all up in my adoration, I would at least make an attempt to bake something with them. It isn’t often you get a world class nut like macadamia gracing your pantry.
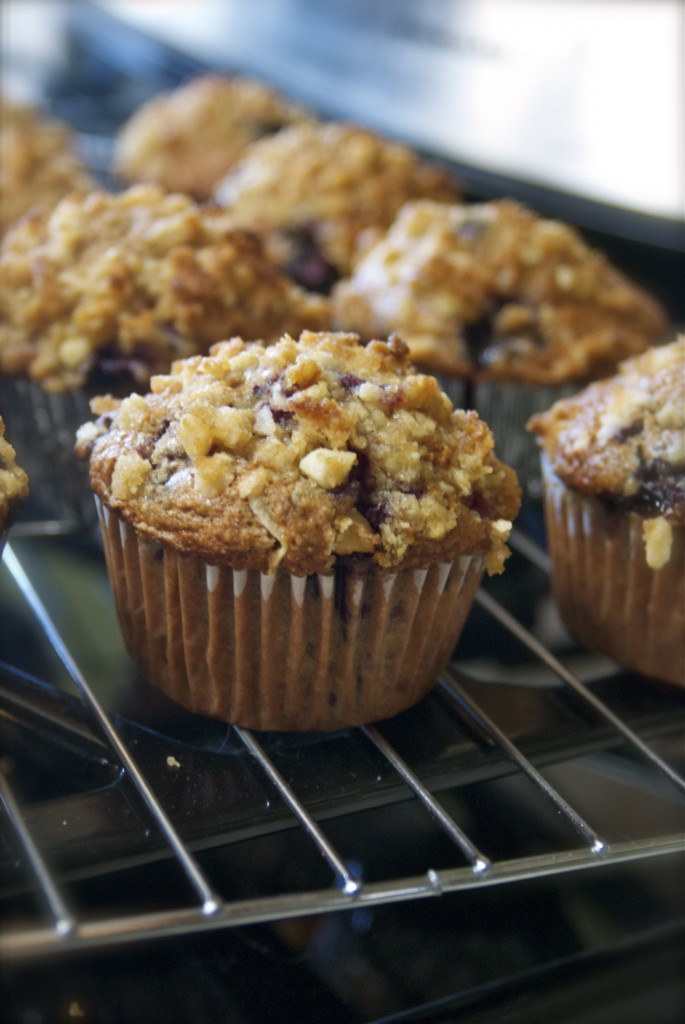
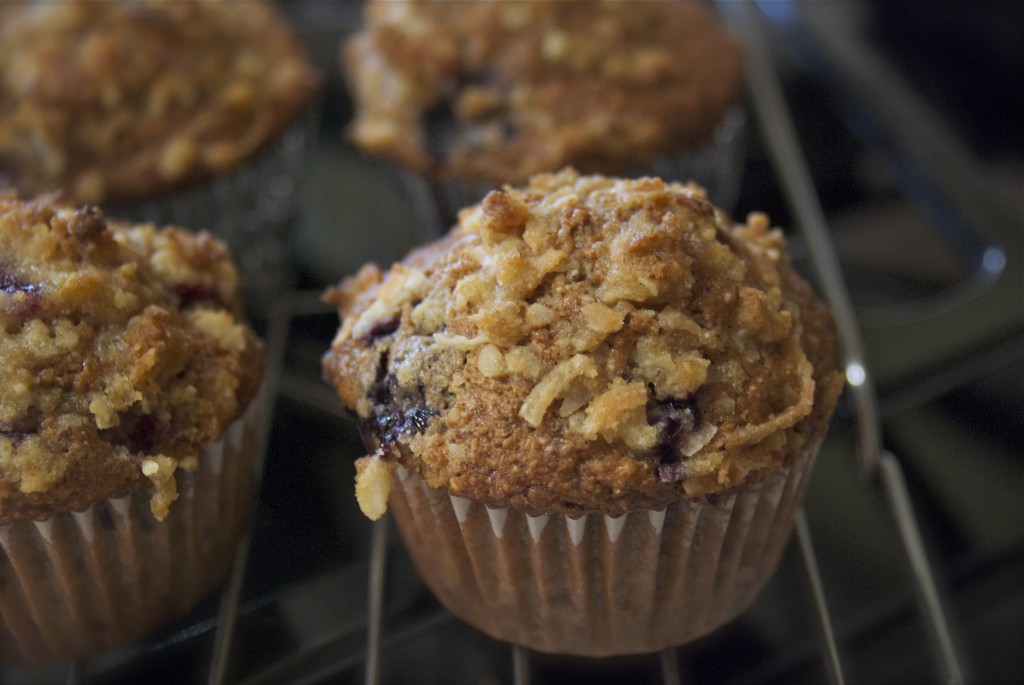
This muffin recipe has been hanging around my kitchen for some time now; originally it’s from the Fall 2006 issue of Eating Well magazine. And in a current frenzy through the recipe stack threatening to take over it’s designated drawer, I serendipitously came across it, magically having everything on hand to whisk up a batch of these to make a sunny, yet chilly December day feel a bit more cozy.
The recipe itself is without a great deal of fat or sugar, thankfully. But the muffin doesn’t suffer in the loss of theses tasty ingredients. They burst with blueberry taste, crunchy bits of chopped macadamia nuts and a hearty, nutty crumb that is moist but not at all cake like. If it’s supposed to be a muffin, I want a muffin, not a cupcake disguised as something else. With it’s crunchy streusel-like topping and tender fruit, this will be a repeat in my kitchen, a perfect means to use the frozen berries in my freezer, and to draw more warmth to our frozen landscape.
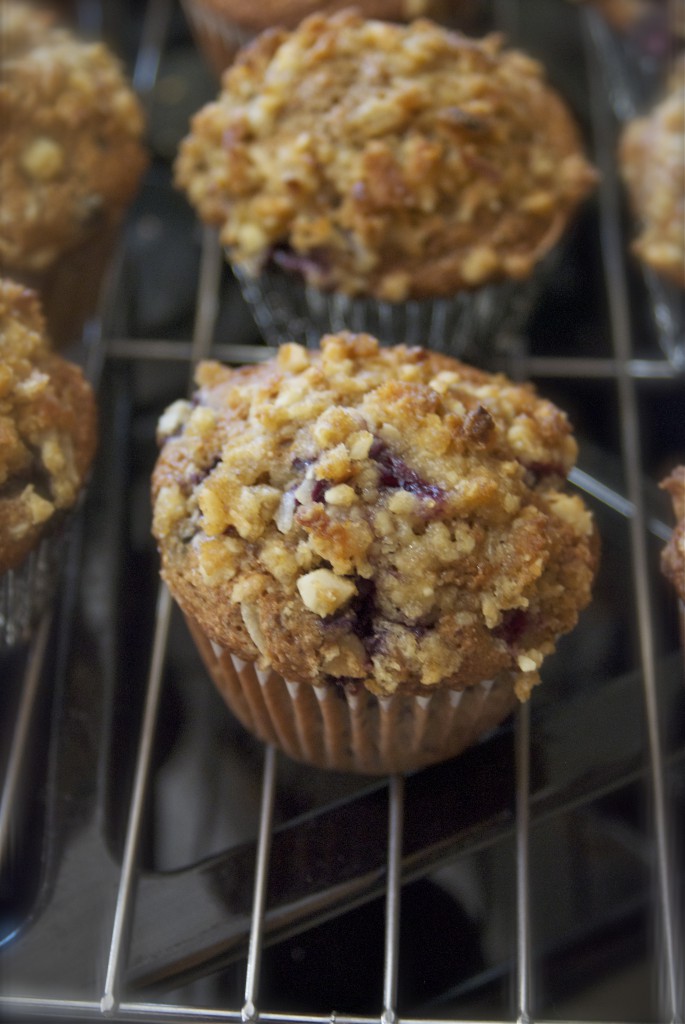
Blueberry Coconut Macadamia Nut Muffins
1/4 c. unsweetened flake coconut
3/4 c. + 2 T. AP flour (divided)
1/2 c. + 2 T. packed brown sugar (divided)
1/2 c. chopped macadamia nuts
3 T. good quality olive oil
1 c. whole wheat flour
2 T. ground flaxseed
1 t. baking powder
1/2 t. baking soda
1/8 t. sea salt
1 T. ground cinnamon
1 large egg
1 large egg white
3/4 c. skim milk
2 T. plain or vanilla lowfat yogurt
1 t. lemon extract (can sub vanilla, or coconut as well)
1-1/2 c. fresh or frozen (not thawed) blueberries
Heat your oven to 400°. Line two six-cup muffin tins with papers. Alternately, spray the muffin pans with non-stick cooking spray.
In a small bowl, combine the coconut with 2 Tablespoons each of AP flour and brown sugar with 2 Tablespoons of the chopped macadamia nuts. Drizzle this with one Tablespoon of the olive oil and stir to combine. Set aside for muffin topping.
Whisk together the remaining 3/4 cup of AP flour, the whole wheat flour, flaxseed, baking powder and soda, salt and cinnamon until well combined. In a large measuring cup, whisk the 1/2 cup of brown sugar, the egg and egg white, skim milk, yogurt and extract until smooth. Make a well in the dry ingredients and whisk in the wet until only just mixed. Add the blueberries, and the remaining macadamia nuts and carefully fold in until blended.
Spoon batter equally in to the muffin tins, then sprinkle a bit of the reserved coconut topping on each muffin. Press gently in to the batter, and bake for 20-25 minutes until golden brown and a tester inserted in the center comes out clean. Allow to cool in muffin pans for 15 minutes, then turn on to a wire rack to cool completely.
Original recipe from Eating Well magazine; posted here with heavy modifications.
DISCLAIMER:
Oh! Nuts! provided me with both the macadamia nuts and the calymyrna figs free of charge
and without expectation of any reciprocal endorsement. Everything stated in this post are
my own thoughts and are freely expressed.
November 13th, 2011
| 2 Comments »
There are dozens of recipes in my Recipe Index. I’ve been writing this blog for 5-1/2 years, and the content is huge, but my audience doesn’t go back that far. I could write forever about what’s been covered in the past, but instead, for this post, I’m culling together an entire array of quick bread baking options- muffins and tea breads alike- for you to enjoy. There are a lot of really good recipes for warming up your kitchen on these chilly November days.
I think there is nary a food item more perfect than a muffin; and I don’t mean a muffin so sweet and cloying that you might as well slap buttercream on it and call it a cupcake, I mean a MUFFIN. I real, honest to goodness muffin, made for breakfast, or a snack. I mean a substantial, hand held baked good. I’m talking MUFFINS, one of the baking world’s most perfect little foods, in my well-explored opinion. I love a good muffin, and have no less than eight in my Recipe Index. Muffins lend well to just about any flavor, take only a few minutes to put together and let’s face it, everyone loves them, right? Got flour, baking powder and a few spotty bananas? Make a muffin. Leftover grains from dinner? Make muffins! Blueberries? Raspberries? Nuts? Oats? Bulgur?? It’s all good for going in a muffin.
And oh, how I do love these fragrant and simple little things!!
Oatmeal Sweet Potato Muffins
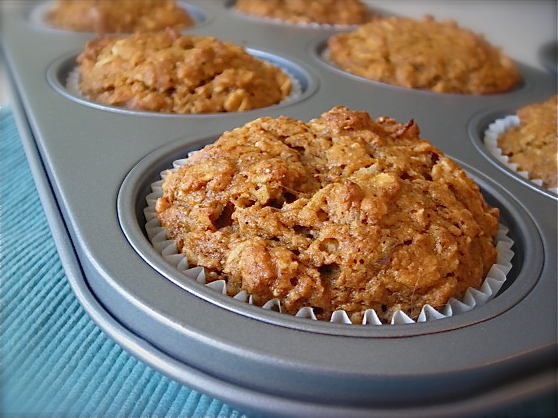
Apple Bran Muffins
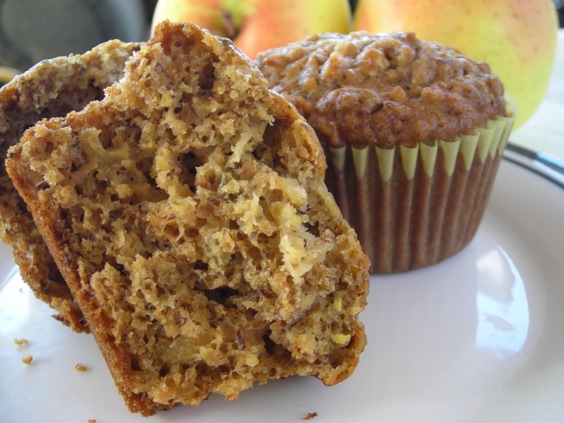
Fig Muffins with Honey-Lemon Cream Cheese
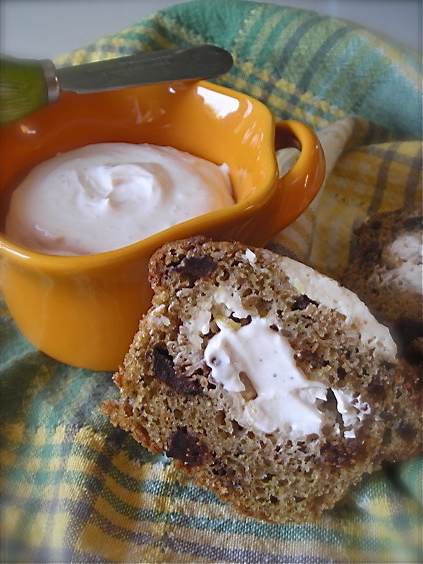
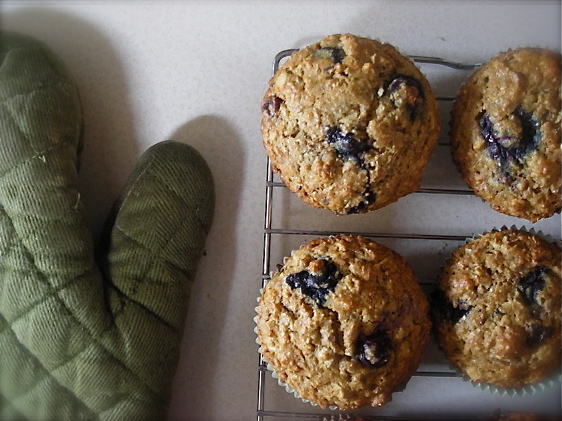
Whole Grain Blueberry Muffins
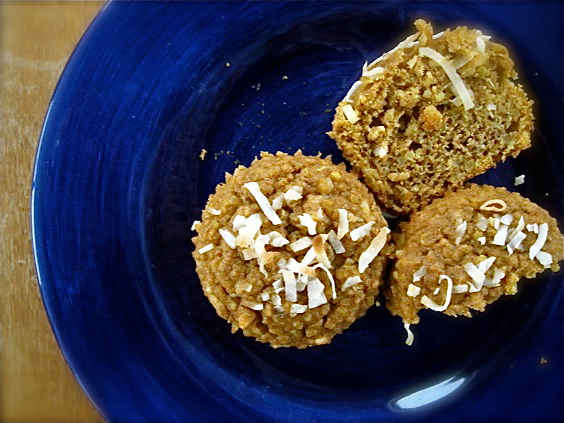
Squash and Quinoa Muffins with Toasted Coconut
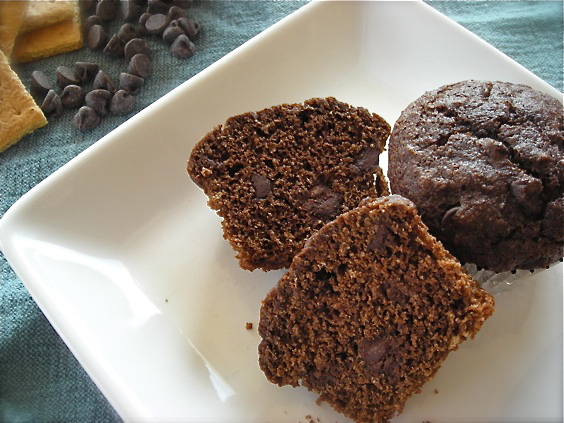
Chocolate Graham Muffins
And then there are a few recipes without photos:
Pumpkin Maple Muffins
Apple Cheddar Muffins
And….. because quick breads are created the same way, only baked in a loaf pan, they too can be stellar muffin options and I have plenty of those as well.
Applesauce Banana Bread
Banana Chocolate Chip Bread
Cherry Fig Tea Bread
Moist Date Nut Bread
Harvest Tea Bread
Peanut Butter Banana Bread
Cranberry Orange Date Bread
What’s on YOUR plate this month??

|


