December 10th, 2011
| 4 Comments »
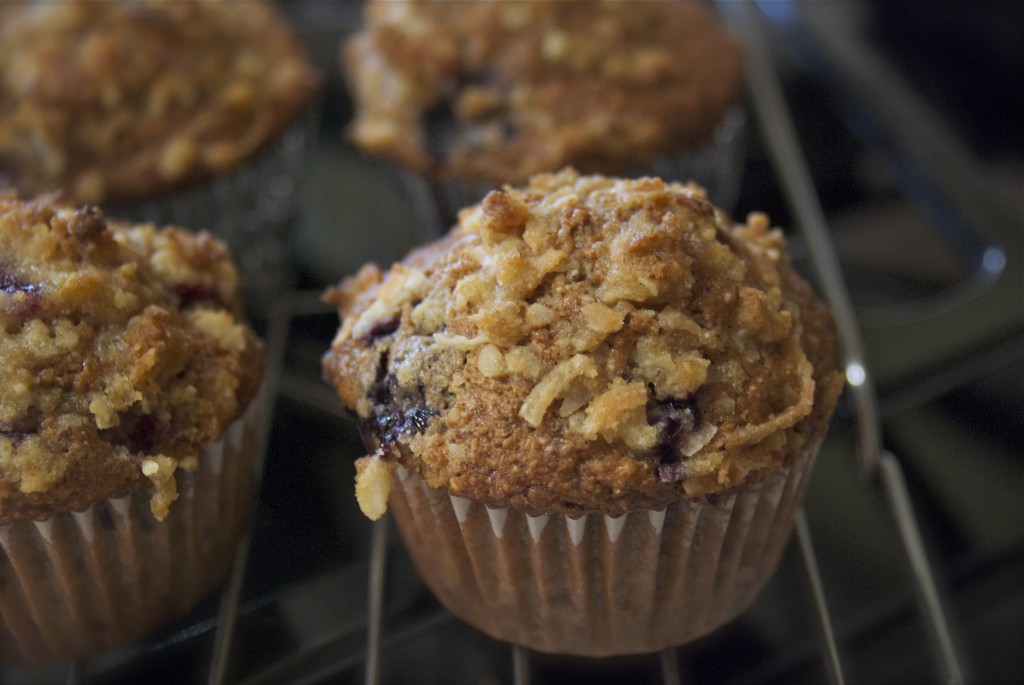
For starters, there are WAY too many vowels in this muffin description!!
But they are worth every twisted tongue and exhaustible explanation because they are fragrant, tropical and fabulous.
About a month ago I was contacted by a company called Oh! Nuts! and asked if I wanted some products to use for my holiday baking. I’d done some business with Oh! Nuts! before and was really pleased with the quality and freshness of their bulk nuts and dried fruits. Oh! Nuts! has a lot of attractive gift options for holiday giving, as well as fresh nuts, dried fruits, candy and other items for year-round baking. I highly recommend their products and can personally vouch for the quality. I was more than happy to have another chance to use some of their items.
For my personal use this time around, I requested Macadamia Nuts and Calymyrna Figs, and within a week, they landed on my doorstep. The figs are gigantic and sweet with a soft bite, and the macadamia nuts are perfectly tender and moist. I’ve been just tickled with both products and decided that before I gobble them all up in my adoration, I would at least make an attempt to bake something with them. It isn’t often you get a world class nut like macadamia gracing your pantry.
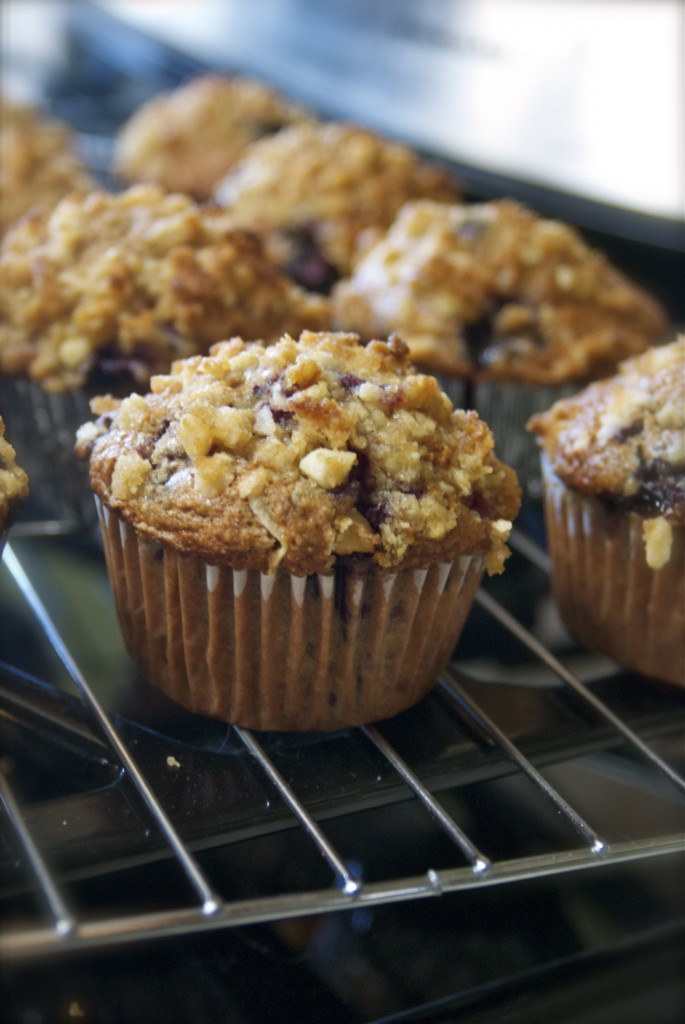
This muffin recipe has been hanging around my kitchen for some time now; originally it’s from the Fall 2006 issue of Eating Well magazine. And in a current frenzy through the recipe stack threatening to take over it’s designated drawer, I serendipitously came across it, magically having everything on hand to whisk up a batch of these to make a sunny, yet chilly December day feel a bit more cozy.
The recipe itself is without a great deal of fat or sugar, thankfully. But the muffin doesn’t suffer in the loss of theses tasty ingredients. They burst with blueberry taste, crunchy bits of chopped macadamia nuts and a hearty, nutty crumb that is moist but not at all cake like. If it’s supposed to be a muffin, I want a muffin, not a cupcake disguised as something else. With it’s crunchy streusel-like topping and tender fruit, this will be a repeat in my kitchen, a perfect means to use the frozen berries in my freezer, and to draw more warmth to our frozen landscape.
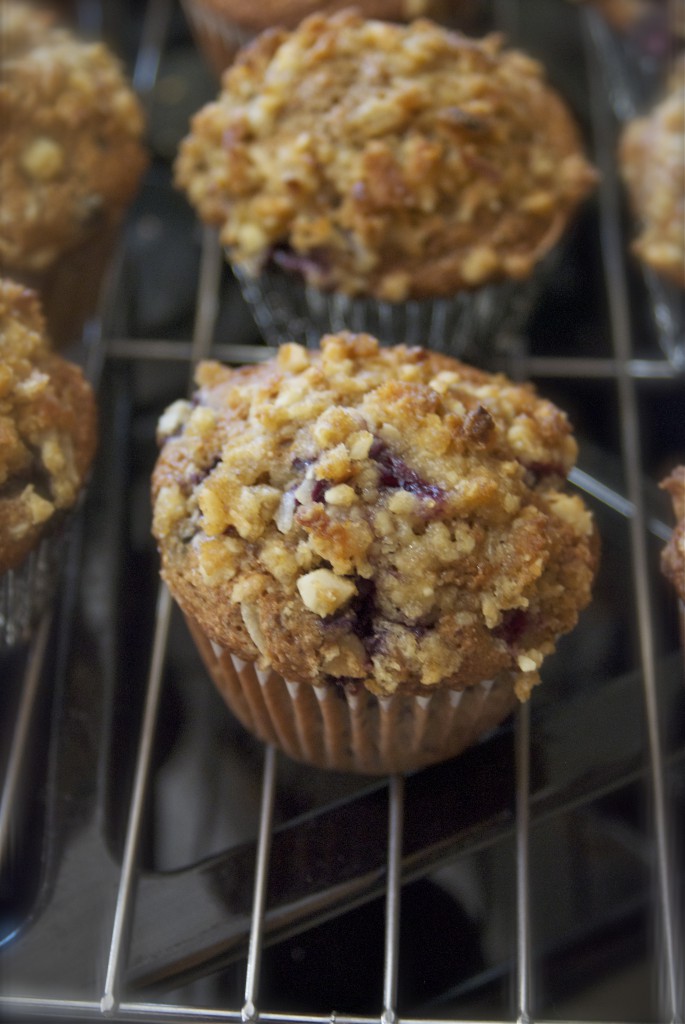
Blueberry Coconut Macadamia Nut Muffins
1/4 c. unsweetened flake coconut
3/4 c. + 2 T. AP flour (divided)
1/2 c. + 2 T. packed brown sugar (divided)
1/2 c. chopped macadamia nuts
3 T. good quality olive oil
1 c. whole wheat flour
2 T. ground flaxseed
1 t. baking powder
1/2 t. baking soda
1/8 t. sea salt
1 T. ground cinnamon
1 large egg
1 large egg white
3/4 c. skim milk
2 T. plain or vanilla lowfat yogurt
1 t. lemon extract (can sub vanilla, or coconut as well)
1-1/2 c. fresh or frozen (not thawed) blueberries
Heat your oven to 400°. Line two six-cup muffin tins with papers. Alternately, spray the muffin pans with non-stick cooking spray.
In a small bowl, combine the coconut with 2 Tablespoons each of AP flour and brown sugar with 2 Tablespoons of the chopped macadamia nuts. Drizzle this with one Tablespoon of the olive oil and stir to combine. Set aside for muffin topping.
Whisk together the remaining 3/4 cup of AP flour, the whole wheat flour, flaxseed, baking powder and soda, salt and cinnamon until well combined. In a large measuring cup, whisk the 1/2 cup of brown sugar, the egg and egg white, skim milk, yogurt and extract until smooth. Make a well in the dry ingredients and whisk in the wet until only just mixed. Add the blueberries, and the remaining macadamia nuts and carefully fold in until blended.
Spoon batter equally in to the muffin tins, then sprinkle a bit of the reserved coconut topping on each muffin. Press gently in to the batter, and bake for 20-25 minutes until golden brown and a tester inserted in the center comes out clean. Allow to cool in muffin pans for 15 minutes, then turn on to a wire rack to cool completely.
Original recipe from Eating Well magazine; posted here with heavy modifications.
DISCLAIMER:
Oh! Nuts! provided me with both the macadamia nuts and the calymyrna figs free of charge
and without expectation of any reciprocal endorsement. Everything stated in this post are
my own thoughts and are freely expressed.
December 7th, 2011
| 4 Comments »
I collect a lot of recipes. Papers overflow the corner of our counter where they tend to land; recipes of all types from desserts to main dishes. Trouble is, I rarely use them, verbatim anyway. They serve as a sort of spiritual guidance, infusing me with inspiration to cull what I need to make up a dish all on my own. I’m only home a few nights a week to cook these days. And although I could give any one of the recipes to my guys and they’d likely be able to pull it off, there’s no way I could hand them two or three, with all sorts of odd instructions such as ‘Take this part’ and ‘Do this but not this’ and expect it will come out the way I envision it. My brain works way differently than theirs when it comes to putting recipes together.
Still, even with all the inspiration at my fingertips (or these days, stuffed in a drawer) sometimes the meals I create are derived from a leap or two of inspiration that comes not from a printed source, but from a few wild ideas my brain churns out that I think sound good together.
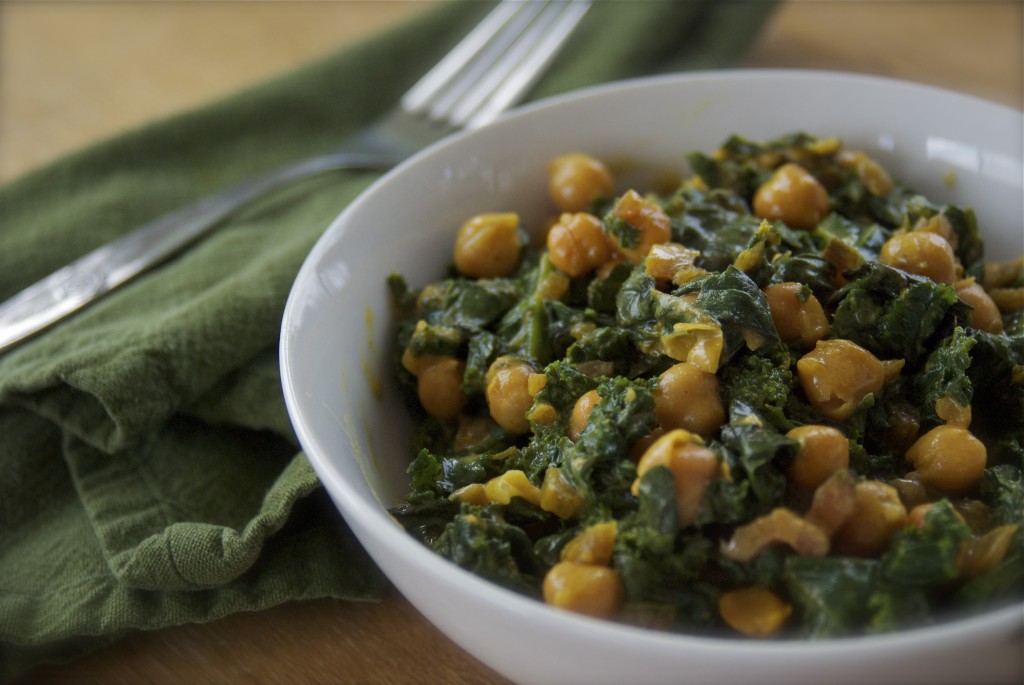
I certainly had no doubt that we would enjoy this silky braised kale, infused with coconut milk and some fragrant curry powder, but I had no idea that it would swirl through my mouth with such immense flavors, causing me to think almost obsessively about it, plotting the exact next time I could simmer up a large pan of it for us to enjoy. Griffin won’t eat it, and that’s fine. He has tried a few bites of cooked greens that we consume but he’s just not there yet. Mike and I fell over ourselves in adoration for this dish, easily a complete meal. Alone with a large helping of kale, it’s perfect as is, but the second go-round I made of it, I added a large bunch of red chard, complete with the chopped stems and if it’s even possible, the dish was so much better, with richer, deeper flavor and much more balanced.

The best part about making this dish on one of the first bone-chillingly cold days of December, was placing my nose down among the wisps of steam that rose from the pan and breathing in the fresh green scent of kale and chard. It easily transported my mind back to late summer, the bounty of chard bunches to be had for a dollar apiece that I would bring home from the markets each week. Thankfully I can find inexpensive one pound bags of prepared kale, and chard is reasonable for the taking so I won’t be missing my greens all that much. I just won’t be shopping in a flippy skirt and tank top when I buy them.
Braised Kale and Chickpeas in Coconut Milk
1/2# prepared kale, tough stems removed, roughly chopped
1 15-oz can lite coconut milk (you can use full-fat as well)
1 15-oz can chickpeas, rinsed well
2 garlic cloves, minced
2-3 t. prepared curry powder, or curry paste (both red or yellow would be perfect- adjust to taste)
In a large deep skillet with a lid, heat about a tablespoon of olive oil, and add garlic. Cook and stir for a few minutes until garlic becomes opaque. Add kale in handfuls, stirring continually, until it’s all in the pan. Continue to stir until it turns a very bright and dark green and has taken on the oil in the pan. Add about a half cup of water and cover the pan, allowing to simmer for about 10 minutes. Stir in the chickpeas, coconut milk and curry powder. Cover and allow to cook, slowly, anywhere from 5-15 minutes more, depending on how you like your kale to taste. Stir again, seasoning with salt and pepper, if desired. If the kale seems a bit watery, remove the lid and allow some of the liquid to cook off.
Kate’s Notes: If you wish to use chard as well, you can add that after the kale has simmered for the first 10 minutes. Stir in the rough chopped chard and allow the heat to steam it tender. If using the stems too, chop them fine and add them with the garlic in the beginning.
November 30th, 2011
| 5 Comments »
Pretty fantastic ending….. wouldn’t you agree???
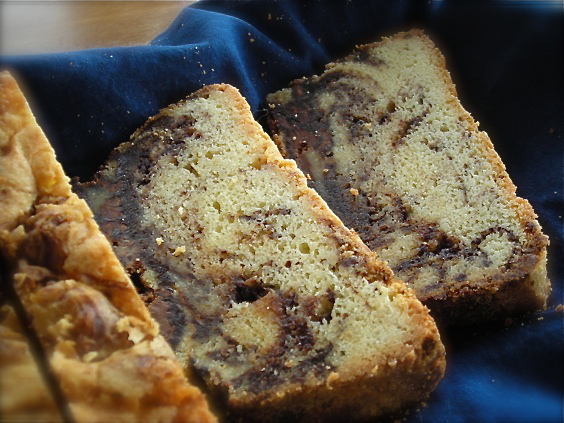
There is a class of food folks that live for dessert. No meal is complete without some amazing sweet at the end of it- a slice of cake, a bowl of ice cream, some creamy gelato, a chewy brownie or a few crisp cookies; there is just no way any good meal is worth it’s weight in gustatory delights without dessert.
I do love something sweet at the end of a meal, but it doesn’t need to be anything very fancy. A cookie or a piece of really good chocolate is sufficient. We don’t have cake around unless it’s a special occasion or I get fixated on bundt cakes, and I can make a slice of banana bread, or sweet potato bread into a delightful ending to a meal. Brownies? Hello! Love them. Still, once I’m through with a wonderful meal, and feel stuffed to the gills with good food, dessert becomes an afterthought.
This Nutella Pound Cake is an amazing dessert. It’s amazing any time of day; with coffee in the morning, with afternoon tea, as a late night snack. It’s perfect because it’s rich, luscious and indulgent, certainly not something out of an ordinary day. Don’t slaughter me…. but I’ve never really been on the whole Nutella bandwagon. I don’t get vapors over the stuff, and once I used part of the jar for this recipe, the rest sat in my fridge and languished, untouched. For more than a month, in fact. This cake was excellent, but it’s a pound cake. Butter. Sugar. What’s not to adore about that? The Nutella was a bonus.
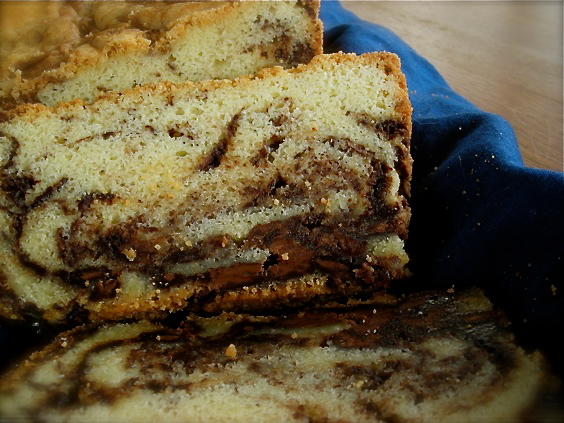
This recipe graced my blog just about two years ago. And I felt it to be a fitting end to National Blog Posting Month, my third go-round of posting every day for November. I’ve shared some good recipes with you, and this one needs another look. It’s that time of year when special treats are brought out, even ones as indulgent as a pound cake with half a jar of Nutella swirled through it. This would be a wonderful treat to make as a gift, or to bring to work to share with co-workers as a means of saying ‘Thank you’ for the past year. Share it with family. Bring a loaf to a treasured friend. Make one for a neighbor that needs a boost, or someone who hasn’t got the ability to make themselves a homemade treat. The recipe can be broken down in to smaller loaf pans, perfect for sharing. And any Nutella that’s left in your fridge? Well, I hope yours doesn’t sit for a month, ignored.
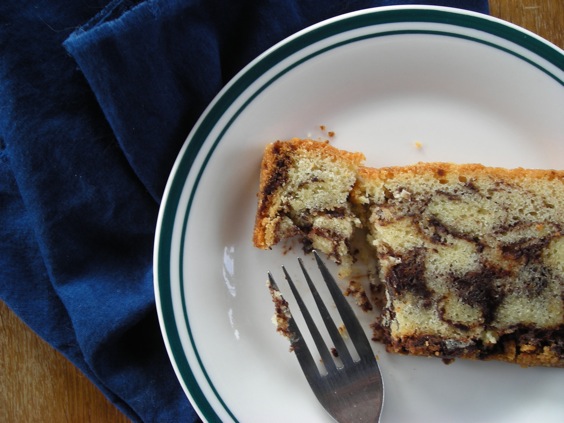
Onward in to December!!!!
Nutella Swirl Pound Cake
4 large eggs, at room temperature
2 t. pure vanilla extract
1-1/2 c. unbleached AP flour
3/4 t. baking powder
1/4 t. salt
1 c. butter, softened
1-1/4 c. sugar
1 13-oz jar Nutella spread
Heat oven to 325°. Spray a 9×5 cake pan with cooking spray. Dust with flour. Fill a bowl with hot tap water and place entire jar of Nutella in it to soften. Place the eggs and vanilla in a small bowl and whisk lightly to combine. Blend dry ingredients together in another small bowl.
In a stand mixer, blend the butter and sugar on medium speed until light and fluffy, about 3 minutes, scraping down the sides at least twice. Turn the mixer to medium-low and add the egg mixture in a steady stream, stopping to scrape down the bowl once or twice. Reduce mixer speed to low and add the flour mixture, about a half cup at a time, scraping the bowl after each addition. After the last addition, blend the full mixture together for 30 seconds on medium speed. {{Be sure to scrape across the bottom of the mixer bowl too. Lots of stuff gets unmixed down in there.}}
Scrape 1/3 of the batter into the prepared pan. Smooth with a spatula. With a clean spatula, spread half the Nutella on the batter and smooth. Add in another 1/3 of the cake batter, then the remaining Nutella. Spread the last of the cake batter on the top. With a clean butter knife, swirl the batter and Nutella together to create a marbling effect. Don’t overmix the two! {{Kate’s Notes: The ‘spreading’ of the Nutella is impossible; try warming the mixture and drizzling it for ease. And I think the cake would come out better if you DON’T swirl the mixture, but that’s just my thoughts}}
Bake the cake until it’s golden on top and a toothpick inserted in the center comes out clean. Cool for 15 minutes in the pan, then turn cake out onto a wire rack to cool completely. This cake tastes excellent after spending a night in the refrigerator, wrapped tight in plastic. I don’t know why. But trust me on that. {{Yes, trust us on this; WAY better chilled. As in OMG I could eat the entire thing COLD it’s so good.}}
From Food and Wine magazine, originally by Lauren Chattman, Cake Keeper Cakes

COMPLETED!!!!
November 26th, 2011
| Comments Off on thanksgiving recovery
Thanksgiving is over, and with it goes the indulgent meals and heavy, rich food. I was exhausted by the time dinner was over on Thursday, and was asleep by 9pm or so. The following day, Mike and I took a nice hike through Otter Lake Regional Park, stretching our legs, pumping oxygen and working off the calories from the day before. It felt really good, but later in the afternoon, a mix of hunger and nausea took over my belly. I felt shaky and off, and I felt like my tummy desperately needed something other than rich carbs.
Thankfully there was a large bag of kale in the refrigerator, and some rutabagas that needed to be consumed. These rutabagas had begun to look a little unusual on the counter.
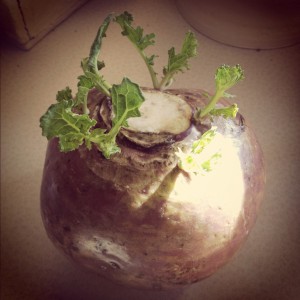
So I chopped them, seasoned them and placed them in a hot oven to roast. Then an entire pile of kale went in to a hot skillet to slowly braise.
I’ve really grown to enjoy kale this past year, and have found that when I let it cook slowly in a little liquid for about 20 minutes or so, it becomes silky and tender and incredibly flavorful. Recently I learned that coconut milk makes for a delicious addition on that kale, and last night, on a whim, I shook some curry powder in to the pan, as well as a can of chickpeas.
With a small pile of roasted rutabagas and a mound of this steaming kale, fragrant and lush, my belly began to forgive the indulgence of Thanksgiving and settle down to it’s more normal state. It was satisfying without being heavy or overwhelming to the body. And I felt stabilized, even-keeled. My hands stopped shaking and the nausea went away completely so that I was able to take a trip to the shopping mall with Griffin so he could buy a book he’s been wanting and spend a little bit of quality time with him.
The procedure for this method of cooking kale is quite simple. Heat a little oil in a large deep skillet and saute a few cloves of minced garlic for a minute or two. Add the kale in handfuls, stirring to sear; I used about a half pound of it and like any other dark leafy green, it will overwhelm the skillet at first, but cook down to a manageable amount in no time. Stir and cook the kale until it’s all turned a rich deep green, about 5 minutes. Add a half cup of water and cover the pan, allowing the kale to simmer on a low temp, and stirring the pot occasionally. You do this for about 20 minutes, adding more water if needed to keep the kale moist. Taste a few leaves to insure that it’s tender and not at all rough any longer. If you wish to use coconut milk instead of water, it adds a lot of terrific flavor. For this batch, I used about a half a can of it, plus a tablespoon or two of curry powder, and one can of drained and rinsed chickpeas. It was divine. To reduce the liquid, simply take off the cover and let it cook down a bit before you eat.
IS THERE ANYTHING YOU DO OR EAT THE DAY AFTER A HOLIDAY TO RECOVER FROM OVERINDULGENCE???
What’s on YOUR plate this month??

November 23rd, 2011
| 2 Comments »
There’s almost as much talk about re-purposing leftovers from Thanksgiving as there is talk of how to prepare the meal. Everyone loves something unique about the Thanksgiving meal; for one person it’s the succulent bird, for another they can’t get enough of the stuffing (or dressing, depending on regional dialect). Someone else loves the potatoes, or the vegetables, or sweet potatoes or dessert.
Thankfully, it’s a meal with appeal. To everyone. One of my favorites aspects of Thanksgiving is the stuffing. I do love a good aromatic, herb infused stuffing and every year I create a masterpiece with cornbread, fresh croutons and herbs, lots of celery and onion and a good dosing of broth. Rarely is it ever the same twice. But this year, because of my work schedule, I made a purchase of prepared stuffing from the deli at the grocery store where I work. I had reservations about this, especially with the final price, but for me, I’ve worked every day for the last week straight. I’ve been on my feet constantly, getting home well after dinner. That’s life in the grocery business. The last thing I want to do tomorrow is rise early in the morning tomorrow and cook all day. Cooking is a pleasure for me, but when I’m worn out, it’s really the last thing I want to do. My boy is willing to help me out this year, and with him being home all day, I can assign him tasks to make tomorrow easier for all of us. Still, I bit the bullet and bought some stuffing to lessen the task list.
But that stuffing, back to the topic at hand, is still a favorite for leftover use. I love to take a handful of it the next day, press it in to a cake and sear it in a pan for breakfast, topping it with a cooked egg. Mashed potatoes are good for this too. Dredge a potato patty in seasoned flour and sear in butter until a golden crust forms. Then flip it and repeat on the other side. A frittata of turkey and any leftover roasted vegetables is another favorite. One year I made a huge pan of roasted root vegetables and had plenty left, so this was breakfast the next day and it was divine.
Cranberry sauce, or any kind of relish or chutney made with cranberries turns in to a delicious spread for bread when making a turkey sandwich. Leftover dinner rolls can be split, toasted and topped with slices of turkey, add a spoonful of cranberries to make an excellent lunch.
Of course, the most popular option for leftovers is soup, especially if you’ve got some wild rice on hand. Turkey wild rice soup was a mainstay in our house after Thanksgiving, always a hearty and creamy welcome to the inevitably chilly days that follow. Got a good White Chicken Chili recipe? Try using turkey instead. Add turkey to regular chili as well, or make a Turkey Tetrazzini. How about Turkey Lasagna? Turkey Enchiladas?
I’ve made a delicious pasta salad with turkey as well, stirring in a spoonful or two of cranberries for that perfect tart flavor. My most favorite Curry Chicken salad is also delicious with turkey.
WHAT’S YOUR FAVORITE WAY TO RE-PURPOSE YOUR THANKSGIVING LEFTOVERS???
Curry Cashew Chicken Salad
2 c. cooked chicken
1/2 c. dried cherries, cranberries or raisins
1/2 c. chopped roasted salted cashews
2 green onions, finely chopped
Dressing:
1/2 c. mayo or preferred creamy spread
2 T. mango chutney or fruit spread of choice
2 t. curry powder
2 t. red wine vinegar
1/4 t. fresh ground pepper
1 t. dijon mustard
Combine chicken, fruit, nuts and onion in bowl. Separately, mix together dressing ingredients and stir until combined and creamy. Pour over salad and stir thoroughly to coat. Chill. Eat.
Turkey & Dried Cherry Pasta Salad
1# pasta of choice
2 c. cooked turkey, chopped
1 c. dried cherries (sub cranberries, or even raisins)
1/2 c. minced red onion
1/2 c. minced celery
1/2 c. chopped toasted almonds
Dressing:
1/4 c. powdered sugar
2 T. white vinegar
1-1/2 c. mayonnaise
2 T. cold water
2 T. poppyseeds
Salt and Pepper to taste
Combine cooked pasta, turkey, dried fruit, onion, celery and almonds in a bowl. Whisk dressing ingredients together until smooth and pour over pasta mixture, tossing to coat. Serve topped with extra almonds, if desired.
What’s on YOUR plate this month??

{{there's only 7 days left of Nablopomo 2011!!}}
November 21st, 2011
| 2 Comments »
This dish, if I wanted something really meaty and amazing, would be the first thing I turn to in order to quench that carnivorous desire.
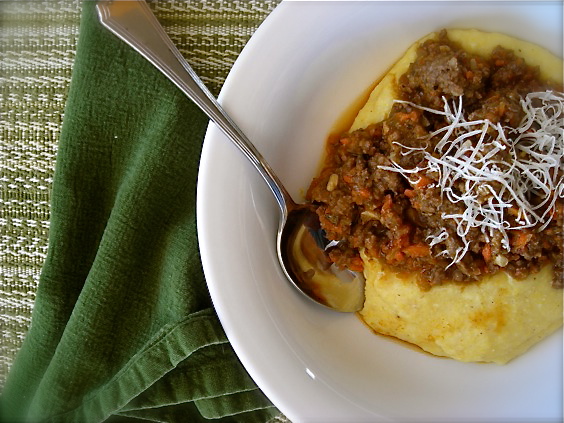
I made this back in late winter, in that transitional time between seasons where it isn’t always cold but it’s not exactly warm either, and it was perfect to fill our bellies with a heated depth to fend off the last of winter. The flavor is out-of-this-world good; rich and deep and lush on the tongue, and after the initial prep period, this is a no-brainer as it sits on the stove and gently simmers to a thick and delicious dish. Your house will smell amazing, and once it’s done, it can be spooned over pasta, grains or egg noodles, or like this version, atop a creamy dish of soft polenta.
With the onset of snow in Minnesota, this is a welcome choice for a cozy dinner.
Hearty Ragù with Soft Polenta
1# each ground beef and ground pork (i used 93/7 ground beef)
1/2 t. salt
1/4 t. fresh ground black pepper
2 small onions, peeled and cut to large pieces
2 carrots, peeled and cut to large pieces
2 stalks celery, with leaves, cut to large pieces
4 cloves garlic, peeled
2 T. olive oil
1 t. crushed dried rosemary leaves
1 14.5-oz can Muir Glen Organic Meridian Ruby tomatoes (or use equivalent of other kind)
1 c. dry red wine
1 quart good chicken stock
1/2 t. ground nutmeg
In a 4-qt dutch oven, brown the meat with salt and pepper over medium heat until no longer pink. Drain fat using a colander over a large bowl. Discard fat, set meat aside.
In large food processor, place onions, carrots, celery and garlic and process until finely chopped. In same dutch oven, add olive oil, vegetables and rosemary, cooking for about 15 minutes or until vegetables start to brown.
Add tomatoes and meat to pan, stir to combine. Cook approximately 15 minutes, until tomatoes darken slightly. Add red wine, increase heat to medium-high and cook until liquid reduces by about half. Add chicken stock, reduce heat to low and simmer, stirring occasionally, for 3-4 hours. Stir in nutmeg in final minutes of cook time.
KATE’S NOTES: For extra richness in this dish, I added about a half cup of heavy cream with the chicken stock. I think it made an exceptional addition. When you add the stock, the mixture will be very loose, like a soup. It will reduce as it simmers though. I did not cover the pan as it cooked, but I doubt it will make much difference, although it may take longer for the liquid to reduce if it’s covered.
From Cascina Spinasse, Seattle Washington, and Chef Jason Stratton
from the Muir Glen Tomato Vine Dining Tour recipe booklet
Creamy Soft Polenta
1/2 c. stone ground corn meal
1 c. fat free milk
1 c. water
1 t. butter
Salt and pepper as needed
In a heavy medium saucepan, bring milk, water and butter to a boil then add cornmeal in a thin stream, whisking constantly. Once cornmeal is added, whisk for several minutes to insure smooth consistency. Bring to a simmer, reduce heat to low and cover the pan, leaving lid ajar to release steam. Simmer polenta for about 10 minutes, stirring often to keep it from scorching, then add 2-3 tablespoons of water. Stir to combine, replace cover (leaving it ajar) and simmer for 10-15 minutes more, stirring regularly, scraping the bottom to prevent scorching. Add about 2-3 more tablespoons of water at this point, stir to combine and cook for about 5 more minutes, stirring regularly. Taste for texture; it should be smooth, and not at all grainy. If any graininess remains, add a few more tablespoons of water and cook until smooth. Serve immediately. Makes about 2 servings
KATE’S NOTES: Be aware that Polenta, as it cooks, bubbles like molten lava, and it can be dangerous if not kept partially covered. Keep the heat low to prevent the bubbles from exploding violently. And when you stir the polenta as it cooks, make sure you are scraping the pan bottom thoroughly. I used a flat edge wooden spatula for this. A heat resistant rubber spatula would also be a good option.
November 18th, 2011
| 2 Comments »
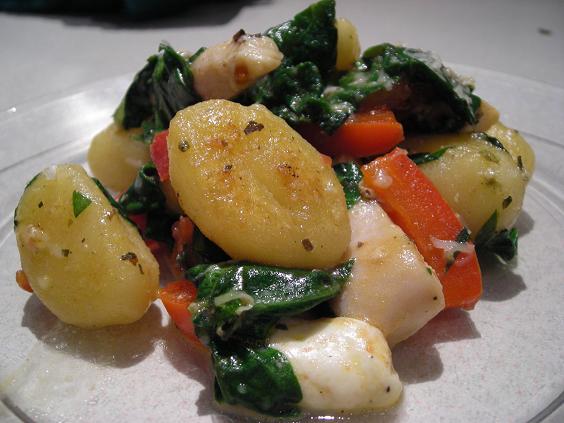
I started using gnocchi a few years ago and love how it can make such a quick seamless meal. A few sauteed veggies, a protein option and a bit of sauce makes dinner in less than 15 minutes. This quick little potato dumpling is mainstream now, on dinner plates everywhere. I suppose it’s pretty simple to make, but the few times I gave it a go from scratch it came out gluey and heavy. Now I just purchase packages of shelf-stable gnocchi and save myself the time and energy.
My favorite method for cooking gnocchi is to sauté them in a skillet with a bit of butter and olive oil until they plump up and brown on the outside. The texture is a bit better than what you get from boiling them. I’m not a huge fan of dousing these with sauce either, as the texture gets too soggy so when I use them in a meal, it’s a little more spartan. A plate of gnocchi, with sauteed greens and roasted chickpeas sounds really good right about now, but this is the recipe in my archives, which is golden for versatility.
Gnocchi In a Flash
1 pkg shelf stable gnocchi
2-3 boneless chicken breasts, cut to strips
1 medium red pepper, cored and seeded, cut to strips
1 bunch spinach, washed and de-stemmed* (equal to a 10-oz bag)
1/4 c. canned diced tomato with italian seasonings
1/2 c. fresh mozzarella, cut into small dice
1/3 c. fresh grated parmesan cheese
Fresh basil to garnish
Season chicken breast strips with salt and pepper. Heat oil in 10-inch skillet, add chicken and cook, stirring occasionally, until strips are cooked through, about 5 minutes. Remove to bowl. Add red pepper and cook 3-5 minutes until tender. Add to chicken. Wipe out skillet with paper towel and add about a teaspoon of oil. When hot, add gnocchi and cook about 5 minutes until browned and slightly puffy. Add chicken and pepper to pan, and in bunches, add in spinach, stirring quickly until it’s all wilted. Toss in diced tomato and mozzarella cubes and shave some parmesan over the top. Stir to mix and allow to cook for 3 minutes or so until hot. Serve immediately topped with fresh basil.
What’s on YOUR plate this month??

November 17th, 2011
| 1 Comment »
Who doesn’t like a good cake?
 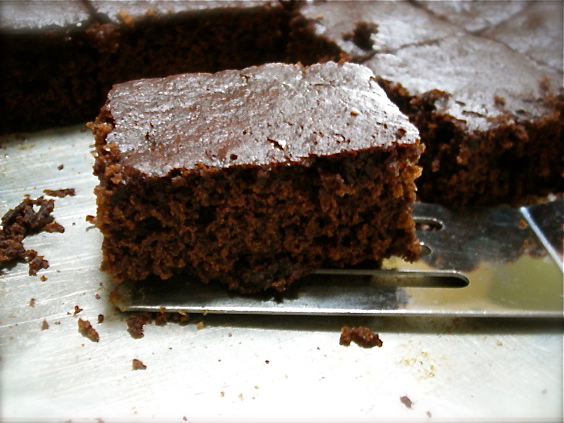
Especially one that combines the best of two important cake flavors; chocolate and gingerbread. I admit a bit of skepticism when I first saw the recipe, but I love chocolate and I adore gingerbread so I took a deep breath and cranked out the recipe.
And then over the course of two days, it magically kept disappearing every time I looked in the pan.
It’s from Martha. Can we really go wrong here? She doesn’t do much that makes me shrug with indifference. And I tend not to favor many of her recipes, but I loved this cake. My guys did too, hence the magic ‘poof and it’s gone’ act. It’s a snack cake, a breakfast cake, a perfect dessert with ice cream or yogurt and it just plain tastes delicious. It’s chocolate. It’s gingerbread. It’s a keeper.
Martha Stewart’s Chocolate Gingerbread Cake
- 4 tablespoons (1/2 stick) unsalted butter, melted, plus more for pan
- 1/4 cup unsweetened cocoa powder, plus more for pan
- 3/4 cup all-purpose flour (spooned and leveled)
- 1 teaspoon ground ginger
- 1 teaspoon pumpkin-pie spice
- 1/2 teaspoon baking soda
- 1/2 cup packed dark-brown sugar
- 1/4 cup unsulfured molasses
- 1 large egg
- 1/4 cup sour cream
- 1/2 cup semisweet chocolate chips
- confectioners’ sugar, for dusting (optional)
- Preheat oven to 350 degrees. Butter an 8-inch square baking pan. Line bottom with a strip of parchment paper, leaving an overhang on two sides; butter paper. Dust paper and sides of pan with cocoa; set aside. In a medium bowl, whisk together cocoa, flour, ginger, pumpkin-pie spice, and baking soda; set aside.
- In a large bowl, whisk together butter, brown sugar, molasses, egg, and sour cream until smooth. Add flour mixture; stir just until moistened (do not overmix). Stir in chocolate chips. Transfer batter to prepared pan; smooth top.
- Bake until a toothpick inserted in center comes out clean, 30 to 35 minutes. Transfer to a wire rack; let cool completely. Using paper overhang, lift gingerbread from pan. Transfer to a cutting board, and cut into 16 squares. Before serving, dust bars with confectioners sugar, if desired. (To store, keep in an airtight container at room temperature, up to 3 days.)
What’s on YOUR plate for November??
{{{Yesterday's post included a pretty awesome giveaway for a gift code to Red Envelope.
Go back and comment on the post for a chance to win. That's all you do!!}}}
November 14th, 2011
| 3 Comments »
This has to be one of my most favorite recipes.
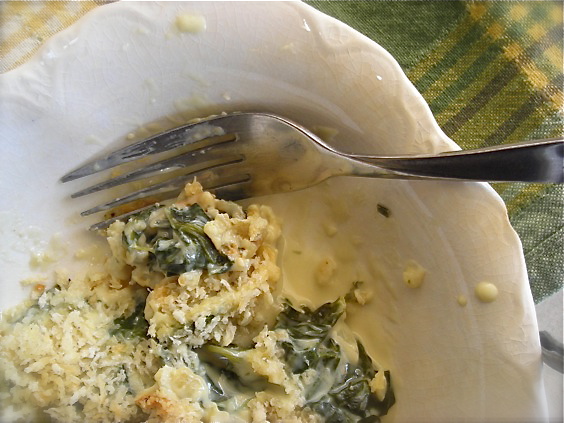 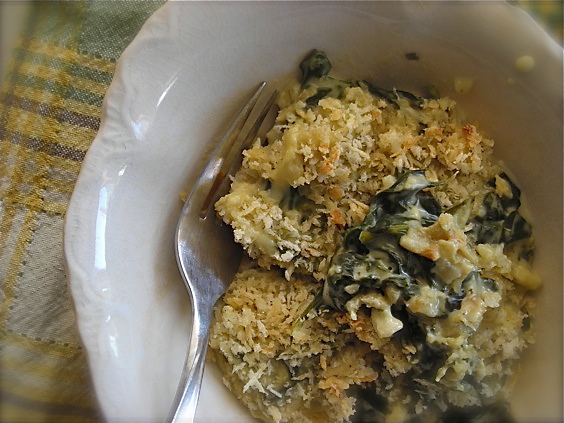
It’s rich, delectable and creamy….. I could go on and on. It would be equally welcome, that wealth of rich Boursin cheese sauce, when mixed with silky braised kale or chard too. Or! Or! Take an entire rainbow of vegetables and roast them, dress them to the nines with this coat of luscious sauce, topped with the toasted Panko crumbs and then a few minutes under a broiler to sputtering browned perfection and you’ve got a side dish worthy of any celebration. Or, just an ordinary dinner at home.
Believe me, there is nothing boring about this dish. Nothing run-of-the-mill, or plain or anything. This is one of those weapons in your recipe arsenal that you pull out for the good friends who grace your table, the ones who kick off their shoes without being asked, who bring wine while wearing faded blue jeans because you just don’t need to be fancy with your closest companions. And when they lift the first fork to their mouths, tasting the herbs, the seasoning of the succulent Boursin cheese, you know that smile that forms on their face tells it all. It’s impressive, yes. But simple and quick and anyone can make it. And it leaves you looking like a superstar, because it’s just that good.
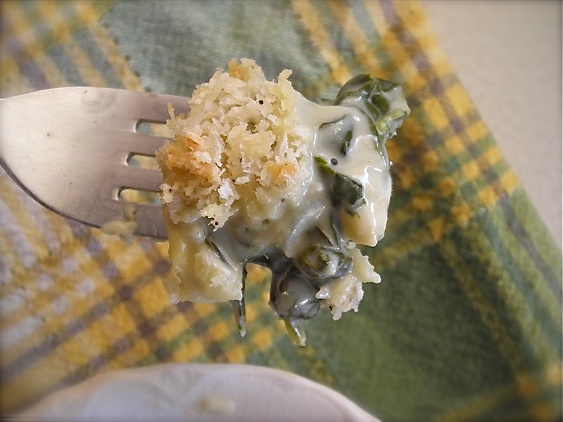
Boursin Spinach Gratin
1 bunch fresh spinach, destemmed, washed well and spun very dry ( sub in kale or chard too)
1 t. unsalted butter
1 small shallot, minced
3 T. AP flour
1-1/2 c. whole milk (alternately, use soymilk- it works perfectly!- or equivalent of 2%, or 1 c. skim & 1/2 c. heavy cream)
1 container Boursin Herb and Garlic cheese, 5.2oz
3 T. fresh shredded parmesan, or other hard cheese of choice
1 t. each fresh squeezed lemon juice and fresh grated lemon zest
2/3 c. panko bread crumbs
1 T. melted butter
Salt and pepper to tasteHeat oven to 425°In a medium oven proof skillet, melt butter and add shallot, cooking and stirring until soft, about 5 minutes. Stir in flour to coat and then slowly begin whisking in milk until fully incorporated. Stirring constantly, bring sauce to a gentle simmer to thicken slightly, then add in Boursin cheese, a small amount at a time, until all of it is blended into the sauce.Drop a handful of spinach leaves into sauce and stir to coat. Add more, a handful at a time, until all spinach is mixed well with the sauce. Bring to a simmer, cover and simmer for about 5 minutes. Mix panko, salt and pepper and melted butter, sprinkle over top of spinach and place pan, uncovered, into oven. Bake for 10 minutes, until bubbly and crumbs are browned. Remove from oven, allow to cool slightly (remember that pan handle is HOT!) and serve immediately, sprinkled with parmesan cheese.Alternately, mixture can be divided among smaller ovenproof ramekins to be baked. Divide spinach into ramekins before topping with bread crumbs. Baking time will be shorter.
What’s on YOUR plate this month??

November 13th, 2011
| 2 Comments »
There are dozens of recipes in my Recipe Index. I’ve been writing this blog for 5-1/2 years, and the content is huge, but my audience doesn’t go back that far. I could write forever about what’s been covered in the past, but instead, for this post, I’m culling together an entire array of quick bread baking options- muffins and tea breads alike- for you to enjoy. There are a lot of really good recipes for warming up your kitchen on these chilly November days.
I think there is nary a food item more perfect than a muffin; and I don’t mean a muffin so sweet and cloying that you might as well slap buttercream on it and call it a cupcake, I mean a MUFFIN. I real, honest to goodness muffin, made for breakfast, or a snack. I mean a substantial, hand held baked good. I’m talking MUFFINS, one of the baking world’s most perfect little foods, in my well-explored opinion. I love a good muffin, and have no less than eight in my Recipe Index. Muffins lend well to just about any flavor, take only a few minutes to put together and let’s face it, everyone loves them, right? Got flour, baking powder and a few spotty bananas? Make a muffin. Leftover grains from dinner? Make muffins! Blueberries? Raspberries? Nuts? Oats? Bulgur?? It’s all good for going in a muffin.
And oh, how I do love these fragrant and simple little things!!
Oatmeal Sweet Potato Muffins
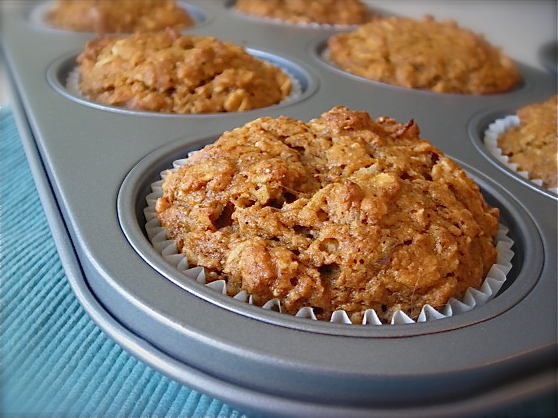
Apple Bran Muffins
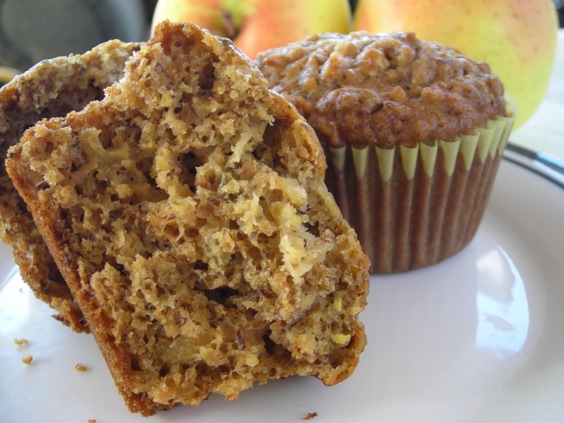
Fig Muffins with Honey-Lemon Cream Cheese
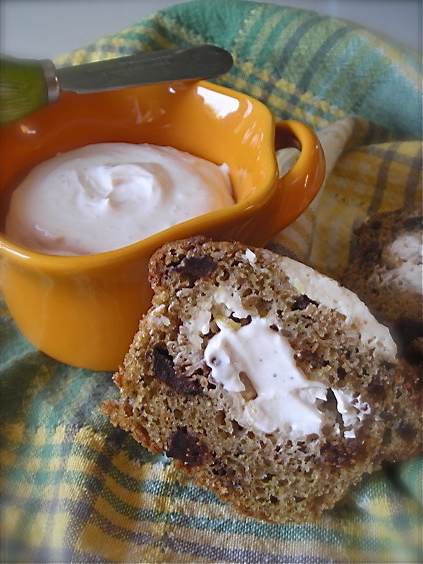
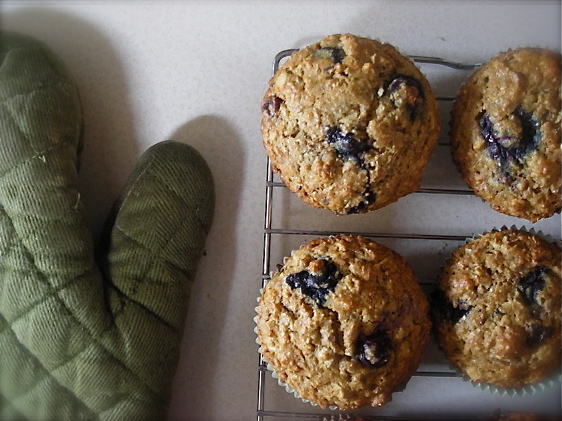
Whole Grain Blueberry Muffins
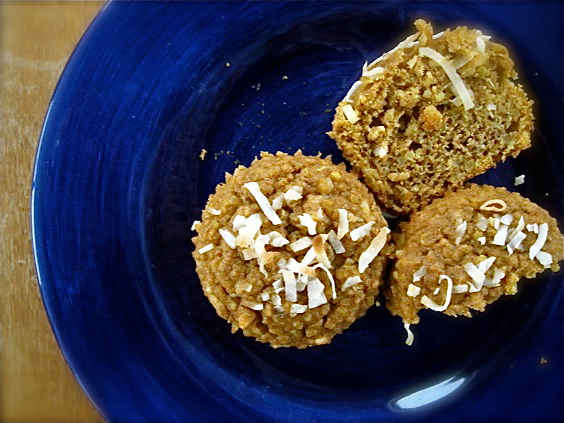
Squash and Quinoa Muffins with Toasted Coconut
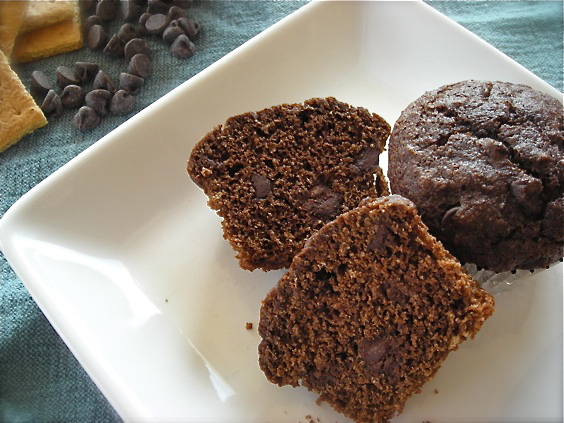
Chocolate Graham Muffins
And then there are a few recipes without photos:
Pumpkin Maple Muffins
Apple Cheddar Muffins
And….. because quick breads are created the same way, only baked in a loaf pan, they too can be stellar muffin options and I have plenty of those as well.
Applesauce Banana Bread
Banana Chocolate Chip Bread
Cherry Fig Tea Bread
Moist Date Nut Bread
Harvest Tea Bread
Peanut Butter Banana Bread
Cranberry Orange Date Bread
What’s on YOUR plate this month??

|


