March 13th, 2011
| 5 Comments »
A few recipes have crossed my path lately that call for crushed graham crackers in the base. If this is a trend, it’s one I can get behind 100%. There is little else that will swiftly chuck me deep into a well of nostalgia quite like biting into a crisp graham cracker, especially one spread with butter and sprinkled with a little cinnamon sugar.
But to come across a muffin recipe, with chocolate AND graham crackers in it? To quietly utter the words ‘Oh my’ accompanied by a deep sigh of contentment doesn’t even begin to tell you how that made me feel.
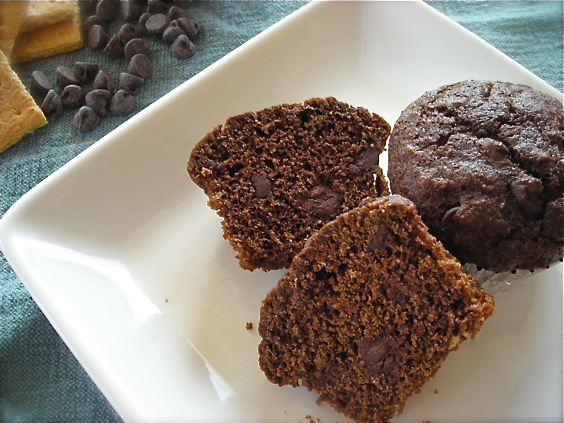
And you know I love muffins, a primordial love for a small palm sized bit of moist cake-like goodness. But it has to solidly BE a muffin, as so many of them are nothing short of a dumbed down cupcake. This was a muffin, through and through, although to the eye it was cake at it’s finest. I loved the trickery; the coy visual tease that delivered an altogether different taste once the rich dark crumbs burst across your mouth, scattered with soft chocolate chips to satisfy a sweet tooth.
Yet the word ‘sweet’ wouldn’t be what I would use to describe these muffins. I expected sweet; like chocolate-y cake kind of sweet and I didn’t get that. It solidified further the rather unscientific findings that I am coming across by removing all refined white sugar from anything I bake. Almost everything I’ve baked since last Fall has been with some alternative form of sugar, usually drastically reduced, in an effort to remove products with poor nutritional value from what I eat.
Now please, let me be clear; I have no illusions that any form of sugar is healthy; sugar is sugar and too much of it is problematic. I know this. I’m not pulling a thick armor of wool over my eyes and happily drowning myself in cookies and cake. I love to bake, but the idea of white refined sugar, and also white processed flour has quietly taken siege on my common sense and demanded change. So…. gone is white flour and in it’s place is stone ground whole wheat flour. Gone is white sugar, to be replaced by pure maple syrup, artisan honey, organic natural cane sugar and on occasion, like in these muffins, brown sugar. And yes, I do know brown sugar is refined white sugar costumed with molasses, and in this form I use much less when I bake. But from all the research I’ve read on the use of sugar, when substituting a natural form of it- as in the maple syrup, honey or natural cane sugar- you avoid the chemicals found in the processing of the product. Natural forms of sugar are more readily digestible for humans than anything refined, and have less of an adverse effect on the blood sugar levels in your body. And while I’ll never advocate relentless consumption of anything chock full of sugar, regardless of it’s origin, I will quietly say that a little sweet treat is acceptable, at least for me and my guys. And I’ll feel better about giving them some indulgent goodies, especially when I can pronounce all the ingredients.
I’m planning to write a bit more on this topic at a later date, but really….. if you sat through my little science class, you deserve a Chocolate Graham Muffin.
Chocolate Graham Muffins
1 sleeve regular (or chocolate) graham crackers
1-1/2 c. whole wheat flour
1/3 c. cocoa powder
1-1/2 t. baking powder
1/2 t. baking soda
1/4 t. sea salt
2 large eggs
1/2 c. packed brown sugar
1/4 c. pure maple syrup
1 c. buttermilk
3 T. canola oil
1 heaping teaspoon instant espresso powder
1 t. vanilla extract
1/2 c. semi-sweet chocolate chips
Preheat oven to 400°. Line muffin tins with paper liners. The recipe makes between 12 and 18 depending on the size of your tins.
Crush graham crackers, either in a food processor, or by placing contents of the sleeve in a large plastic bag and using a rolling pin to crush. In a large bowl, whisk crumbs with flour, cocoa powder, baking powder, soda and salt.
In another large bowl, whisk eggs, brown sugar, syrup, buttermilk, oil, espresso powder and vanilla until smooth and well blended. Pour into bowl with dry ingredients, and using a rubber spatula, gently fold together until just combined. Add chocolate chips and turn them carefully into batter.
Spoon into muffin tins and bake approximately 15-18 minutes. Check for doneness by either using a toothpick or touching the top of the muffin to see if it springs back. You may need a little more time if your oven, like mine, tends to be fussy. Cool muffins in pans on counter for 15 minutes or so, then turn out to cool completely.
Recipe adapted from Eating Well magazine
Other Muffin Recipes from my Kitchen:
Healthy Whole Grain Muffins
Whole Wheat Muffins with Squash and Quinoa
Oatmeal Sweet Potato Muffins
Fig Muffins with Honey Lemon Cream Cheese
Blueberry Bran Muffins
Pumpkin Maple Muffins
Apple Cheddar Muffins with Almonds
March 6th, 2011
| 2 Comments »
Sometimes I come across a recipe by accident, through a bevy of channels found by clicking here, clicking there, following some promising links and then WHAM! you spot something that looks so delicious that you know you have to make it, right there and right now.

Of course, it helps when I have everything on hand to make it, with the bonus of it being a much healthier version of tea bread, which, let’s face it, is just a big oblong cake, isn’t it? Most tea bread recipes could easily be baked in a bundt pan, or as rounds, covered with frosting of any sort and masqueraded as a cake. No one would really know the difference.
But this tea bread, with it’s luscious compote of cooked sweet dried cherries and figs comes out as something else. It’s dense and moist, yes, but it’s much more bread-like than your typical rectangular 9×5 offering. And I’m kind of a sucker for anything with figs in it. Back to my childhood, when a Fig Newton, fresh and cakey filled with thick pureed figs was my most favorite store-bought cookie, to the now of my adult life, and the soft magical collapse of a fresh fig in my mouth, or the sweet bite of a dried one in my morning oatmeal, there really isn’t a time that I’ll pass up noshing on figs. The glorious fig has no fat whatsoever, no saturated fat, and no cholesterol or sodium. They’re loaded with calcium too, a half cup worth of dried figs fills your entire daily requirement for calcium intake. They’re a complex carbohydrate, rich in fiber and loaded with essential minerals like potassium and iron. Excellence all around.
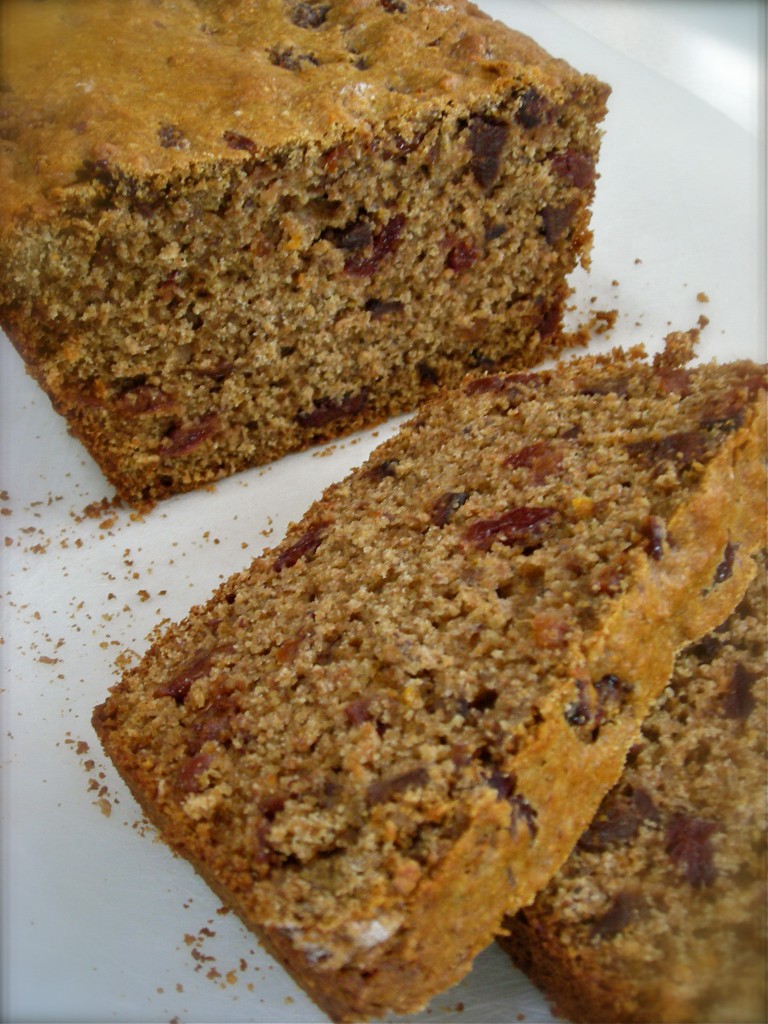
The recipe comes, not surprisingly, from Eating Well magazine, a publication that consistently offers up health, nutrition and simple good taste. You don’t need much in the way of fancy ingredients or advanced cooking skills to make the majority of offerings in the magazines, and along with consistently good recipes, they offer plenty of up to date nutritional information and honest discourse about food trends.
And recipes with figs. Enough said.
Cherry Fig Tea Loaf
1 c. dried tart cherries
1 c. chopped dried figs
1 c. orange juice
2 c. whole wheat flour
1/2 c. honey
1/4 c. wheat bran
2 t. freshly grated orange zest
2 t. baking powder
1 t. baking soda
1/2 t. salt
2 large eggs
2/3 c. plain soy milk
3 T canola oil
1 t. pure vanilla extract
Preheat oven to 350°F. Coat a 9 1/2-by-5 1/2-inch loaf pan with cooking spray.
Combine cherries, figs and orange juice in a medium saucepan. Bring to a simmer over low heat. Simmer, covered, for 5 minutes. Strain, reserving 1/3 cup of the fruit-cooking liquid. Set the fruit and liquid aside in separate bowls.
Stir together flour, sugar, wheat bran, orange zest, baking powder, baking soda and salt in a large bowl. Whisk together eggs, buttermilk, oil, vanilla and the reserved 1/3 cup fruit-cooking liquid in another large bowl. Add to the flour mixture and stir with a rubber spatula until just combined. Fold in the reserved fruit. Turn the batter into the prepared pan.
Bake until the top is golden and a cake tester inserted in the center of the loaf comes out clean, 35 to 45 minutes. Let cool in the pan on a rack for 10 minutes. Loosen edges and invert the loaf onto a rack to cool. Serve warm or at room temperature.
This version was adapted slightly from the original one published by Eating Well magazine. To view that, please go here.
February 20th, 2011
| 6 Comments »
There’s still enough wintertime for this dish…….. especially with yet another major storm bearing down on Minnesota.
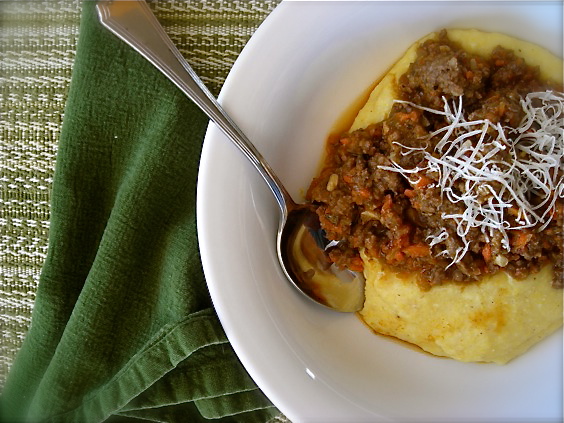
There’s still enough of winter for a slow stove-top meal, one that fills your kitchen with a heady fragrance, a simmer that beckons one and all from the cold and wind to a wide shallow bowl of tender meat and vegetables, rich with rosemary and basil. Winter still has us in it’s grasp despite the longer hours of the day, our luck changing as we see traces of the sun through our dinner hour, a few more precious hours of light in the afternoon when school is done. Pick a slow weekend day if you can, to enjoy the hours with a bubbling pot on the stove, as sun moves to twilight. Or place it all in a crock pot before you head out the door for work, then come home to a sensational smell, and a hearty rustic dinner. This is the quintessential Winter meal; it’s warm and rich and soothing and amazingly good. It’s rustic and simple and easy to prepare. And it makes good on the promise of chasing the cold away.
Recently I attended a dinner that featured organic Muir Glen tomatoes, and as we gathered our coats to leave, smiling from content tummies, chatting heartily with each other, the sponsor of the meal handed everyone a gift bag that held a small cookbook of tomato recipes, plus a sampling of some of Muir Glen’s finest canned tomatoes. The dinner, highlighting Muir Glen’s specialty selection of canned tomatoes, the Meridian Ruby variety, was held at five locations with their resident chefs around the country, the local establishment being Corner Table in Minneapolis. The small booklet that came with the gift bag had recipes that made my eyes dance with delight, and the very first one listed was the traditional Ragù recipe from Cascina Spinasse in Seattle. The restaurant serves traditional Northern Italian fare, which includes this hearty meat-based sauce; slowly simmered pork and beef, with minced carrot, celery, onion and garlic to round out the flavors. Add wine, Muir Glen’s fresh and flavorful Meridian Ruby tomatoes and let it bubble contentedly on the stove for a few hours. Who needs a plane ticket?
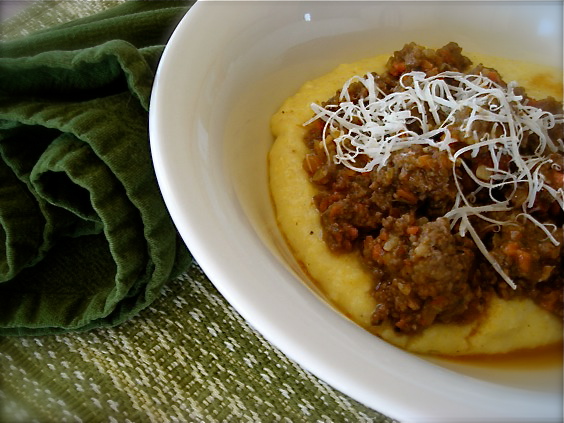
Ok, I agree…. a plane ticket to Italy would be fine, yes. BUT…. this dish is far cheaper.
As it cooked, simmered and blended on the stove, filling my kitchen with it’s rich scent, I felt like I’d be selling such a beauty short by serving it over boring old pasta. I know it would taste fine, sure…. but its decadence and hearty flavor made me wish for a creamy soft polenta to top it with. After all, if this Ragù was traditional Northern Italian fare, then a bowl of creamy polenta would be a natural base. And there I kind of balked. It’s a good thing the pot went in the refrigerator overnight so I could mull on how best to tackle this need.
Because you see, several years ago I went through a phase where I repeatedly tried polenta, in as many forms as I could manage. I tried it with white corn meal, in true Southern Grits fashion; I tried it in solid form, broiling or searing small cakes of it to golden perfection before topping it with whatever I was experimenting with at the time. I tried recipe after recipe of soft polenta and every single time I ended up disappointed, or worse, really turned off. I decided that maybe I just didn’t like polenta, but then I’d try it in a restaurant and be bowled over with how delicious it was. And I loved cornbread, corn muffins, hush puppies and corn fritters, so what was it about polenta that I couldn’t manage? I’m pretty sure it was the cooking method, but by the time I figured it out, I was so over making it at home. And I haven’t attempted it since.
This time, I was determined, and after consulting with my friend Shaina, I armed myself with some of her knowledge and feedback and headed into the kitchen. Thirty minutes later, a pot of superbly creamy and flavorful polenta was waiting for the rich and hearty Ragù. The first bite made me swoon, eyes rolling in delight. It was, through my hands and a little attention, the most delicious food I’ve ever made at home, and it was happily making it’s way to my mouth. I cook a lot. And I cook really well, but this was the first time I think anything I’d made could stand up to the food served in a good restaurant.
But then, I suppose when you have with a recipe that comes from one of Food and Wine’s Best New Chefs of 2010, that’s probably a good start.
Spinasse Ragù
1# each ground beef and ground pork (i used 93/7 ground beef)
1/2 t. salt
1/4 t. fresh ground black pepper
2 small onions, peeled and cut to large pieces
2 carrots, peeled and cut to large pieces
2 stalks celery, with leaves, cut to large pieces
4 cloves garlic, peeled
2 T. olive oil
1 t. crushed dried rosemary leaves
1 14.5-oz can Muir Glen Organic Meridian Ruby tomatoes (or use equivalent of other kind)
1 c. dry red wine
1 quart good chicken stock
1/2 t. ground nutmeg
In a 4-qt dutch oven, brown the meat with salt and pepper over medium heat until no longer pink. Drain fat using a colander over a large bowl. Discard fat, set meat aside.
In large food processor, place onions, carrots, celery and garlic and process until finely chopped. In same dutch oven, add olive oil, vegetables and rosemary, cooking for about 15 minutes or until vegetables start to brown.
Add tomatoes and meat to pan, stir to combine. Cook approximately 15 minutes, until tomatoes darken slightly. Add red wine, increase heat to medium-high and cook until liquid reduces by about half. Add chicken stock, reduce heat to low and simmer, stirring occasionally, for 3-4 hours. Stir in nutmeg in final minutes of cook time.
KATE’S NOTES: For extra richness in this dish, I added about a half cup of heavy cream with the chicken stock. I think it made an exceptional addition. When you add the stock, the mixture will be very loose, like a soup. It will reduce as it simmers though. I did not cover the pan as it cooked, but I doubt it will make much difference, although it may take longer for the liquid to reduce if it’s covered.
From Cascina Spinasse, Seattle Washington, and Chef Jason Stratton
from the Muir Glen Tomato Vine Dining Tour recipe booklet
Creamy Soft Polenta
1/2 c. stone ground corn meal
1 c. fat free milk
1 c. water
1 t. butter
Salt and pepper as needed
In a heavy medium saucepan, bring milk, water and butter to a boil then add cornmeal in a thin stream, whisking constantly. Once cornmeal is added, whisk for several minutes to insure smooth consistency. Bring to a simmer, reduce heat to low and cover the pan, leaving lid ajar to release steam. Simmer polenta for about 10 minutes, stirring often to keep it from scorching, then add 2-3 tablespoons of water. Stir to combine, replace cover (leaving it ajar) and simmer for 10-15 minutes more, stirring regularly, scraping the bottom to prevent scorching. Add about 2-3 more tablespoons of water at this point, stir to combine and cook for about 5 more minutes, stirring regularly. Taste for texture; it should be smooth, and not at all grainy. If any graininess remains, add a few more tablespoons of water and cook until smooth. Serve immediately. Makes about 2 servings
KATE’S NOTES: Be aware that Polenta, as it cooks, bubbles like molten lava, and it can be dangerous if not kept partially covered. Keep the heat low to prevent the bubbles from exploding violently. And when you stir the polenta as it cooks, make sure you are scraping the pan bottom thoroughly. I used a flat edge wooden spatula for this. A heat resistant rubber spatula would also be a good option.
DISCLAIMER:
I attended the dinner at Corner Table as a guest of Muir Glen and did not pay for my meal. The promotional products were
free of charge as well. I was not paid to endorse or even mention Muir Glen Meridian Ruby tomatoes, Chef Stratton’s restaurant, his recipe or any other information found here. The opinions in this post are strictly my own.
February 10th, 2011
| 4 Comments »
All right, all right…. you don’t want to talk about Winter anymore. I get it. How about we talk Banana Bread?
I grew up with regular and repeated doses of good banana bread. How about you? In our house, Mom would watch those bananas closely, and as soon as a few of them turned to the perfect spotty stage of brown, she would snatch them from the basket, peel them and put them on waxed paper, then mash them to mush with a fork for her golden fragrant loaves of banana bread. With walnuts. Which I hated, and yet, the banana bread was so glorious and perfect that I would carefully pick out the icky nuts and eat the rest. My favorite was the top of each slice, the softest part that often got so moist and tender. I always saved it for last.
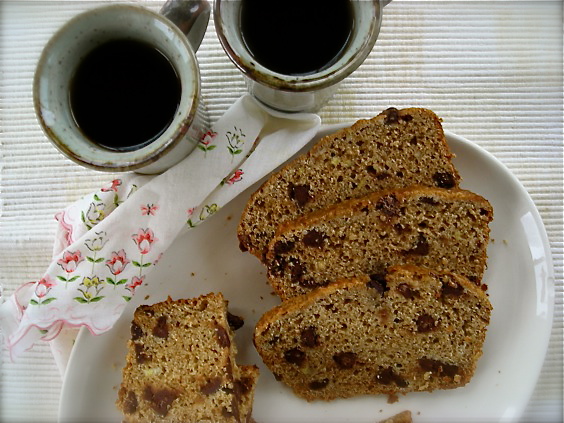
I never varied from that banana bread recipe I had. Whenever bananas in my first kitchen made it further than a bowl of cereal, or an afternoon snack smeared with peanut butter, I would do as Mom did, peel them down, mash them with a fork and make a loaf of banana bread. But, as I could now do as an adult, with my own hand mixer, a container for flour and sugar in my cupboard that was always full, with the familiar can of baking powder next to them, I would leave out those gross nuts. My banana bread was spartan. All it needed was banana. Sometimes a smear of soft butter would coat the slice, or maybe peanut butter went on the bread too. But I never needed a reason to stray from the recipe that I’d known all my life. It was banana bread perfection and it was Mom and it was all I needed. When she died, making a loaf of her banana bread was like evoking her memory in my kitchen, with my heart breaking again, through each press of a fork into the banana, turning the flesh to the proper level of mashed for the recipe. Then each bite of her bread would send my very adult mind reeling backwards into the kitchen of childhood, the sunny window, the deeply patterned blue carpet and my Mom, happily peeling spotty brown bananas, the old familiar bread pan on the counter next to her.
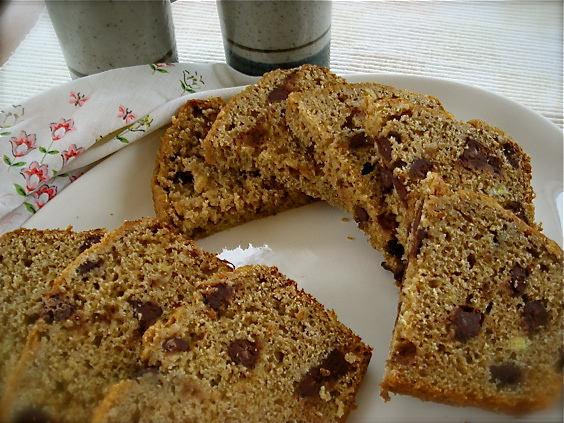
I’m not sure what happened the last time I made Mom’s Banana bread recipe, but the first bite put me off quite a bit. It tasted…. I don’t know, odd. Fake, I guess. I was really kind of shocked by the flavor. I’d grown up with this recipe; I’d made it dozens of times since I was a kid and here I was, by leaps and bounds an adult and quite the responsible one too, with a good job, a home and a child and yet, I looked at the slice of banana bread in my hand and it didn’t fit anywhere with the life that I’d found. It didn’t even bring Mom’s face to mind, her laughing smile and the way she would grab my shoulders and squeeze me just a little, making a delighted teeny squeak of her love for me. My mouth, my taste and my opinion had grown right alongside my life, and this recipe didn’t do it for me anymore. Part of me was crushed. It was the familiar flavor of a life that was now gone, and it was failing to bring to me the comfort I was seeking, comfort away from a world of bills, deadlines, a hectic job and single parenting. I didn’t get rid of the recipe because that might feel a little like experiencing Mom’s death all over again. But I haven’t made that particular version for a long, long time.
Ever since then, I’ve been on the lookout for the next best Banana Bread recipe. When the bananas in my house get past their prime, I simply place them in the freezer and wait it out. I search the wide range of recipes available for one that might take me home again, a feeling of nostalgia, of banana bread perfection, a slice that might elicit that memorable squeak of love I recall. At one point, I think I had 10 frozen bananas in there, and part of me mourns the loss of that constant. I have looked over dozens of recipes and rejected most of them; too much fat, too much oil, wayyyyyy too much sugar and in almost all of them, not enough Mom. So I keep searching, finding a few gems here and there to sample in my own sunny kitchen, with it’s warped old bread pans. And the bananas meanwhile, well, they tend to pile up in the freezer, silently waiting to succumb to a fork, a whisk and a hot oven to be baked into a memory that will sustain me through the years ahead.
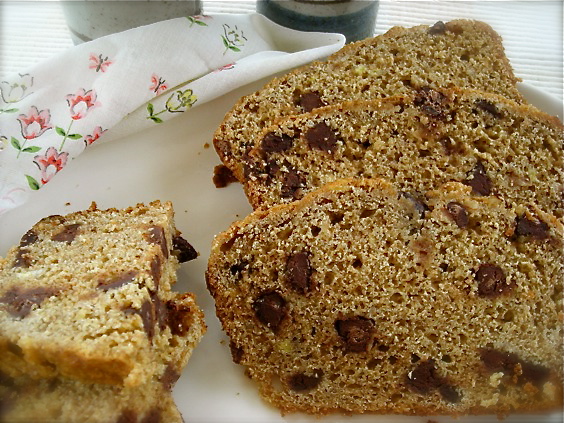
I’m still looking for that ultimate, that perfect banana bread, and I find that I’m really enjoying the experiments I’m coming across. This current one I’ve found is really quite good, in a clever and surprising way. What appeals to me about this particular recipe is that it includes crushed graham crackers crumbs in the base. This gives it a texture that’s a bit more crunchy than you would expect, and the taste of the graham crackers is really pronounced if you share the slice with a steaming cup of coffee. It’s perfect together, like banana and chocolate, like mothers and baking; with the familiarity of ritual, an old trusted bread pan and a freezer full of fruit at the ready.
Banana Chocolate Chip Bread
1-2/3 c. graham cracker crumbs (approx. one standard package from a box)
1-1/2 c. whole wheat flour
1/2 c. natural cane sugar (you can use regular granulated too)
1 T. baking powder
1/2 t. sea salt
3 medium bananas (i like to mash two of them fully, then leave the third in chunks for texture)
1/2 c. milk (any kind will do- I like vanilla soy, and almond would be wonderful)
3 T. canola oil (or get crazy and use olive oil- it tastes wonderful)
2 eggs, lightly beaten
6-oz semi-sweet chocolate chips
Preheat oven to 350°. Spray a standard 9×5 loaf pan with cooking spray.
Place graham cracker crumbs, flour, sugar, baking powder and salt in a bowl, and whisk well to combine.
In a large measuring cup, add bananas, oil, milk and eggs. Beat lightly with a fork to combine, then add to flour mixture. With a rubber spatula, carefully stir together until just blended with some streaks of flour remaining. Add in the chocolate chips and combine until mixture is fully incorporated. Scrape into prepared pan and bake for 50-60 minutes, or until top springs back when lightly touched and toothpick test comes out clean.
Allow to cool in pan for 30 minutes, then remove to wire rack to cool completely.
Need some other inspiration for banana baking? Try these:
Applesauce Banana Bread
Banana Poppyseed Bread
Peanut Butter Banana Bread
Whole Wheat Banana Pancakes
January 28th, 2011
| 10 Comments »
Sometimes all it takes for me to leap into a new recipe idea is something completely random that I either read or hear. It makes my culinary brain start spinning, usually because it’s a food item I’ve never heard of and have no clue as to what it is. I am nothing without my near obsessive need to understand all aspects of food, and when faced with this empty space in my food dictionary, I am unable to resist the urge to learn, to know more and to understand.
Take Horchata, for example. I’d never heard of it before seeing one brief mention of it from someone on Twitter, along with the question of how it could possibly create a stunning French Toast, and I basically leapt into researching it like I’d been shot from a rocket. Strange, I know, but my brain likes to evolve; I’m not content to rest on any kind of laurels with my quest to find out as much as I can about the cuisines of the world. Horchata, for those uninitiated, is a cool and refreshing drink, usually a type of aqua fresca, served traditionally with Mexican style meals. It’s light, creamy and easily pairs with most any foods, especially dishes with a lot of spice and heat. It’s not, however, made with milk so it’s a lovely dairy free beverage.
The standard Horchata recipe combines ground rice and almonds with water, lime juice and zest and cinnamon. This mixture is saturated with water and allowed to stand overnight, then it’s drained, resulting in a delicious liquid that you sweeten with either white or brown sugar. I wasn’t at all certain how it would taste, but my first sip dashed away any doubt; this was stellar, and here I was enjoying it zealously during some of the coldest days of our Minnesota winter. For a hot summer day, I would imagine this is a perfect accompaniment to a sultry afternoon, and I look forward to the day that I can test that theory. For now, I’ll settle with it being the base to the best tasting french toast that’s crossed my kitchen counters in a long, long time.
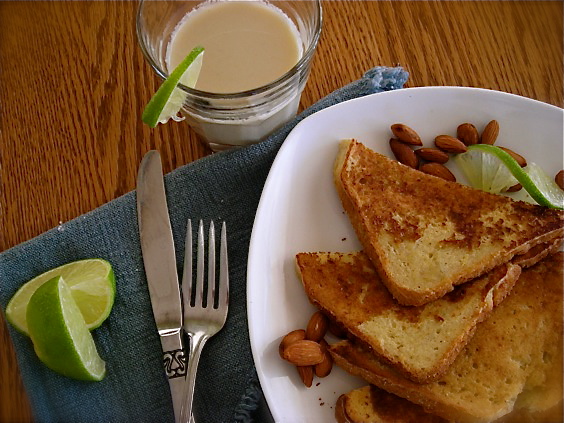
French toast is really not that interesting of a dish. There’s a creamy custard that you dip slices of bread into, which are then cooked on a hot skillet, doused with syrup, spread with jam or maybe sprinkled with powdered sugar. It’s simple and basic, and really, the bread you use can make or break the final result. But overall, there’s little you can do to make the dish leap from it’s ubiquitous nature to something altogether stunning. Unless you start with Horchata as your base.
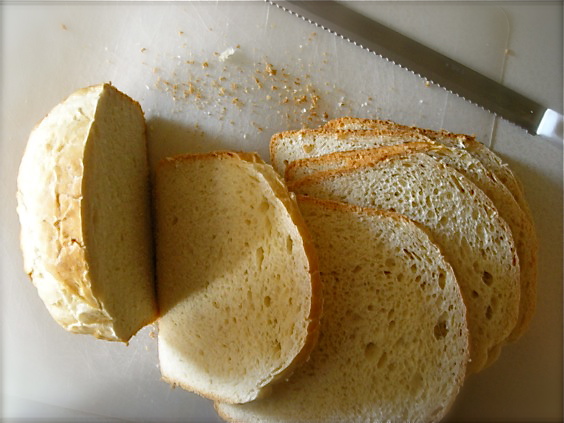
The Horchata, when made from scratch, only requires forethought to prepare. Most of the work is done as it sits on your counter, marrying the amazing flavors of almond, lime and cinnamon together. Strain it, sweeten it and chill it and you’ve got a pitcher of perfection whenever you need cool refreshment. I looked to the most trusted source for South of the border delights, the never fail Lisa of Homesick Texan, and sure enough, she had a recipe for Horchata that came straight from Rick Bayless. Between those two, there was no way this would disappoint.
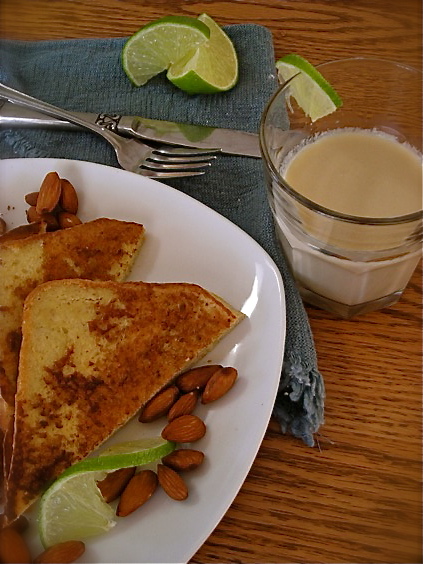
And it didn’t. Nutty from the almonds, zesty with lime and lush with light, refreshing flavor, the French Toast was a delight from first bite to last. It needed only a minimal drizzle of maple syrup to make it perfect. Make up a big batch if you can; the flavor sustains itself in your refrigerator, making it perfect to have on hand for a delicious and quick breakfast.
Horchata
Ingredients:
2/3 cup of uncooked rice
1 1/4 cups of blanched almonds
1 teaspoon of lime juice
Zest from one lime
1 cinnamon stick
1 teaspoon vanilla extract
1 cup of sugar or brown sugar, depending on how dark you want the drink
Method:
In a blender or spice grinder, grind the rice until it’s powdery. Place ground rice, almonds, lime juice, lime zest and the cinnamon stick in a pot and cover with two cups of warm water. Let stand overnight or for eight hours.
After the mixture has soaked, take out the cinnamon stick and pour contents into a blender with two cups of water and blend until smooth. Take a mesh colander that has been double lined with cheesecloth, and over a bowl or pitcher slowly pour the mixture, wringing the cheesecloth to get every last drop out. You should have a milky, smooth liquid at this point. If there are still rice and almond bits floating around, strain it again.
In a pot, heat up one cup of sugar and one cup of water on medium heat until the sugar has dissolved. Stir this sugar water into the horchata, along with the vanilla. Add one more cup of water and serve over ice or chilled. Mixture may separate under refrigeration. Just stir to combine.
(From Homesick Texan, and adapted from Rick Bayless)
Horchata French Toast
2 c. prepared Horchata
3 eggs
1 t. ground cinnamon
2 T. natural cane sugar or brown sugar
Whisk custard ingredients in large wide bowl. Heat skillet until a drop of water sizzles and vaporizes on impact. Dip bread into custard and cook until browned on one side; flip over and repeat.
January 24th, 2011
| 7 Comments »
It’s January, and there are a million resolves to make healthier changes; to exercise more, to eat better, to get more sleep, to connect deeper, to make the 180° change that’s going to revolutionize our lives.
And by now, heading towards the end of the month, how’s everyone doing? Still holding on? Going strong? Let’s put our collective fingers on this a moment. We all think about it each year, come January. We’re determined, striving ahead. And somewhere along the way, there comes a realization that change is hard. As a species, we don’t handle change all that well. If you don’t agree, look at the amount of griping that occurs any time Facebook makes changes, or what happened when Twitter recently went through it’s re-design. (for the record, I like BOTH new sites much better) and you realize that it doesn’t take much to make us feel like the earth is being yanked out from underneath us. And inevitably, a lot of those changes we want end up falling by the wayside because if we’re truly honest with ourselves, we will admit that change is very, very hard.
I’ve been there. Done that. It is really hard to make positive and lasting changes, and these will take time, regardless of what they are. In August of 2007, I realized that I needed to lose some weight. What I saw in a photograph made me cringe. It was NOT pretty. Still, I didn’t actively embark on making those changes, much less following through until November of 2008, well over a year later. But by the time I did implement what I needed, I stuck with it, and in the Spring of 2009 I was 25# lighter and down two pants sizes. So the bottom line for me was to get both my head and my heart around what needed to get done. Once that happened, there was little to stop me.
Changes take time. Habits don’t form overnight. If you really want the success of integrating new habits into your life, give it time and give yourself a break. Berating failure only pushes us backwards, and we all have off days. There’s no goal you can reach for that has to have a set time limit, nor any that isn’t amendable along the way. If it’s weight loss you seek, take baby steps and celebrate the first 5 pounds, then the next. Pay attention to how your clothes fit because sometimes that’s a better indication of what your body is achieving than the number on the scale.
And please, please, please…… don’t use the word “DIET”.
For every person alive, “diet” rings with deprivation. A wonderful friend of mine admits she needs to make some big changes in her eating habits, but laments “I don’t want to be eating oatmeal and plain chicken breasts for the rest of my life.” So instead of considering it as a “diet” I suggested she think of it more as a permanent lifestyle change, because that’s what it boils down to in the long run. And it won’t happen overnight. Do the baby steps and celebrate each one instead of dumping the contents of your refrigerator and pantry in the trash and then thinking “What now?” The habits we’re ingrained with didn’t occur in a few days, they took months, and sometimes years to build up. And to reverse them, they could feasibly take months, or maybe even years to become something new, something better for you and wiser, overall.
And food habits are hard to change. Long ago I used to be addicted to Burger King french fries, and Wendy’s Chicken Nuggets. I would see their signs as I drove and get an undeniable craving, so bad that I almost broke out in a sweat. I know! It was awful! And on one occasion as I stuffed those first hot golden french fries in my mouth, I was hit with the realization that they tasted simply awful. But guess what I did? Yep. I ate the entire order anyway. My mouth felt like it had been assaulted; it was coated with this horrible aftertaste, heavy and greasy. And my stomach hurt. I was appalled at myself because even when I clearly realized that I didn’t even like the product, I kept eating it anyway. It was the same with Wendy’s; I could consume two orders of their Chicken Nuggets without a single hesitation despite knowing I didn’t even like them, yet the one day that my brain equated those nuggets with warm rubbery sponges was the last time I ever put one in my mouth. Still, I couldn’t tell you how long it took me to get there. It was an embarrassment to me, and I really struggled to kick those habits, as well as many other unhealthy ones I used to have.
I’ve made drastic changes to my eating in the last 5 years, and have noticed immeasurable improvement to my health in the process. It’s no cliche that when you eat better, you feel better. I know through personal experience. Just recently I drank Diet Coke- with fresh squeezed lime wedges in it!- for the first time in ages, and man what a stomachache! It tasted all right, in fact, it tasted really good but I seriously wanted to cry because my stomach was so twisted up in knots. As uncomfortable as I was, I rejoiced also, as it instilled in me the same resolve that the french fries and chicken nugget revelation did; this isn’t good for me, and I shouldn’t be consuming it. But still, it took time for me to get there. And it will take time for you too. Take the baby steps, celebrate the small victories and be kind to yourself in the process.
If there’s one meal you want to change this week, you could try out this nutritional powerhouse of a salad. It requires no special ingredients, and is really inexpensive to make.
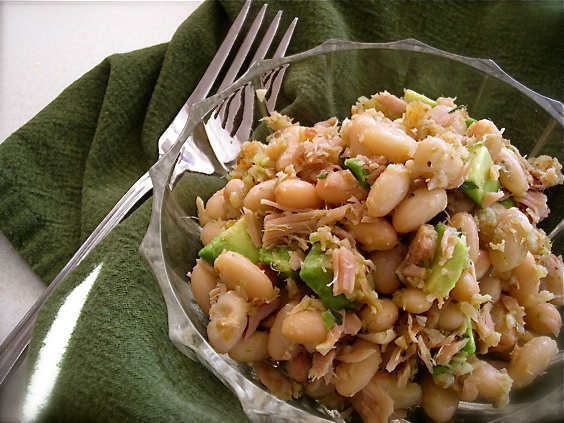
This garlicky White Bean Salad with Tuna and Avocado is a super-bomb of good food to put in your body. It’s full of fiber to keep you satiated and operating at open throttle all afternoon, with the very important Omega-3, and monounsaturated fats that our bodies need. It’s also quick, and works equally well as a warm main dish with a few good sides, or a quick cold salad for your lunch. And the garlic is cooked, so your family and co-workers are safe. I had a small bowl of this for lunch, along with some fruit and by dinnertime I wasn’t even hungry. I love meals like that.
Garlicky White Bean Salad with Tuna and Avocado
2 15-oz cans Great Northern Beans, rinsed well
1 3-oz can tuna in olive oil, drained
2-3 garlic cloves, finely minced
1 T. fresh thyme (use 1 t. of dried)
1 medium avocado, diced
Drain tuna well and place in a large bowl. Flake with fork until shredded.
Heat a skillet on the stove and add about a tablespoon of olive oil and the garlic. Heat gently over medium-low heat, stirring occasionally until the garlic is translucent and fragrant, 3-5 minutes. Be careful not to burn the garlic!! Stir in herbs and great northern beans. Heat through, stirring, for about 5 minutes more, drizzling in a bit more olive oil to coat. Remove from heat and add to bowl with tuna, mixing well. Stir in avocado, season with salt and pepper and serve warm. Can be chilled as well.
KATE’S NOTES:
Canned salmon can be subbed for the tuna, or chopped sardines if it’s your thing. You can add finely chopped veggies as well, like celery or red pepper or cucumber. Rosemary is really flavorful in this too. If you want to get creative with it, the entire dish can be put through a food processor and used as a spread for a wrap, on top of toasted baguette slices or thinned a little with milk or water and used as a dip for fresh vegetables.
January 17th, 2011
| 9 Comments »
And I don’t just say that to reel you in. If you enjoy a good creamy and altogether crazy delicious flavorful spread for that corn chip addiction in your life, then look no further than this recipe. Because once you lifted that first chip to your mouth, dripping with this vegetable laden, kicky dip, my friends, you will never again look at bean dip the same way.
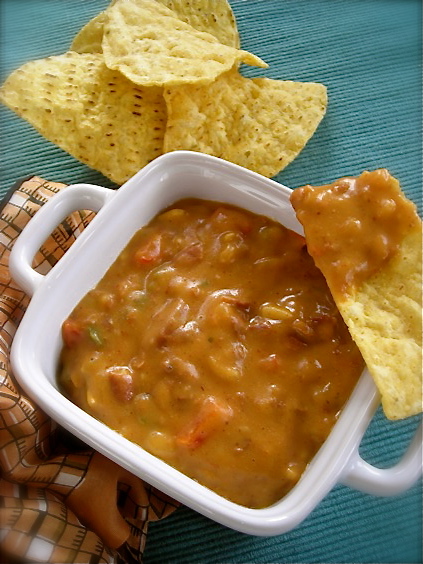
And what better option to have on hand for the any upcoming major sporting events, you know, like Football or something? As I was making this, and then after that first heady bite, where I swooned and ‘Oooh’d and ‘Aaaah’d myself into a tizzy, I had this thought that it was too bad we weren’t football folks, because this dip would be a welcomed addition to any snack table, kept warm in a crock-pot, ready for copious scooping. So if you like throwing a big gathering to cheer on your favorite team, you can’t really go wrong with this.
The key for the extreme delicious flavor is two things: one, you use Chili flavored beans to make it, and two, you stir creamy mexican style cheese dip into the final product, creating a 1-2 punch of taste, worthy of swooning and lots of compliments. Not to mention corn chips. Although any gooey cheese dip will work, I can’t recommend enough making a cheese dip from scratch, and not only from scratch, but from the authority of all things Texan in style, please do yourself the Rio Grande favor of making Lisa’s Chile Con Queso as it too will knock your socks off. With that recipe bubbling on the stove, you make this fantastic bean dip, whisk some of the Queso into it and you’ll have not one, but TWO awesome options for the next party that graces your house. Or just a delicious snack to chase away a chilly winter evening.
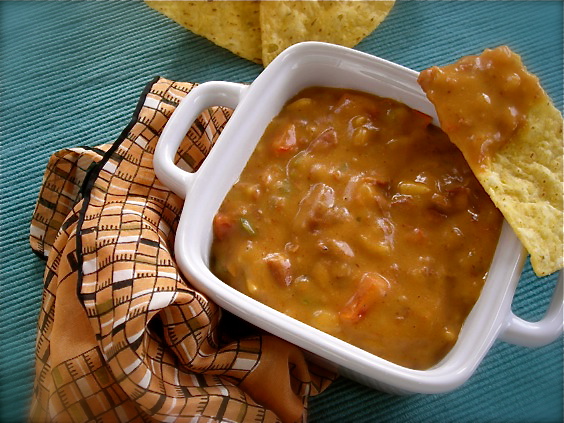
Chili Bean & Queso Dip
1 red bell pepper, chopped
1 poblano pepper, chopped
1 jalapeno pepper, chopped
1 medium onion, chopped
2 cans chili flavored beans (DO NOT drain)
1/2 c. frozen corn kernels
1 can Hunts Fire Roasted Tomatoes (or equivalent)
1 T. chiopotle en adobo sauce (optional)
2 t. ground cumin
Approximately 2 cups Chile Con Queso cheese sauce, either scratch made or commercial.
In a deep skillet, saute chopped onion and peppers until very soft and beginning to turn brown in spots, about 10-15 minutes, stirring occasionally. Add the beans with their liquid, scraping the cans with a rubber spatula, and stir them into the vegetables. Heat for about 5 minutes. Using a heavy spoon or potato masher, mash the mixture until most of the beans are broken up and smooth. Leave some pieces whole for good texture. Stir in the corn, tomato, chipotle and cumin. Heat until bubbling.
When bean mixture is hot all the way through, add in about 1 cup of the cheese sauce. Stir quickly to incorporate the cheese into the bean dip, making sure no lumps are left behind. Add the remaining cup and stir to mix this in as well. Heat through and taste to adjust seasonings. Make it spicier if you like it that way.
The dip can be kept warm in a crock pot, or on the stove. Stir occasionally to keep blended. This reheats beautifully.
January 9th, 2011
| 6 Comments »
I know, I know…. there you all are, patiently waiting for me to get my caboose in gear and start posting the food posts again. Enough of the extraneous stuff! Bring on the food! Get cooking again, would you? I can hear you all, I promise. And it’s good too, because it’s tossing me head-long back into the kitchen to start these next 12 months off in style.
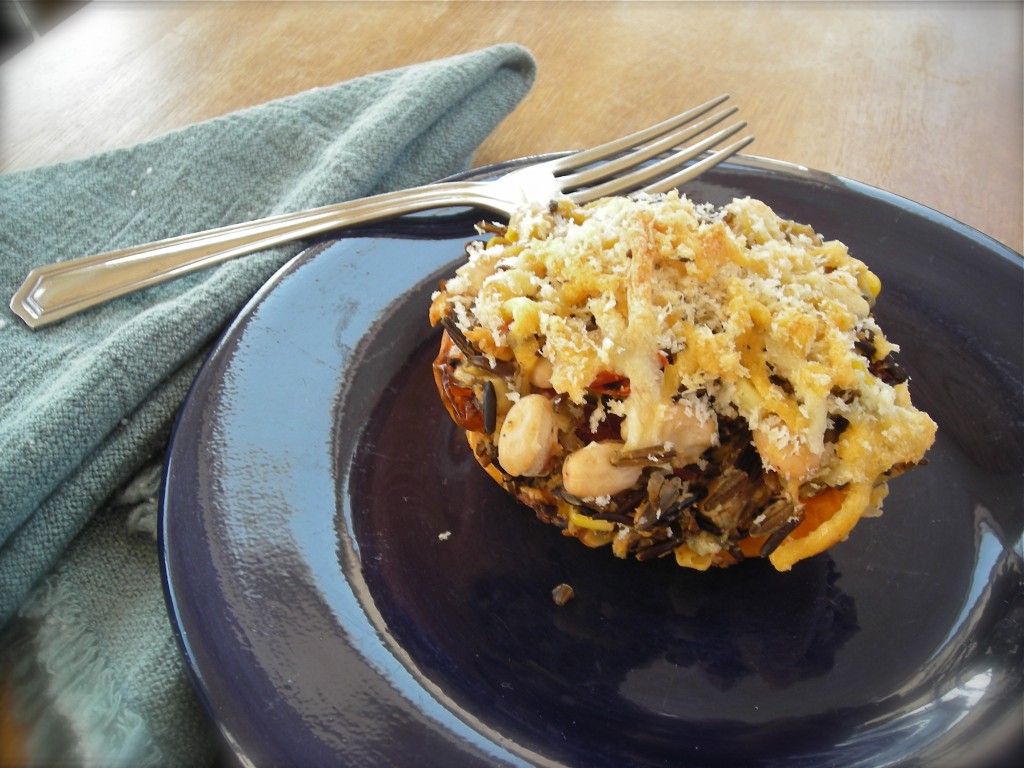
With Amazing Wild Rice Stuffed Peppers
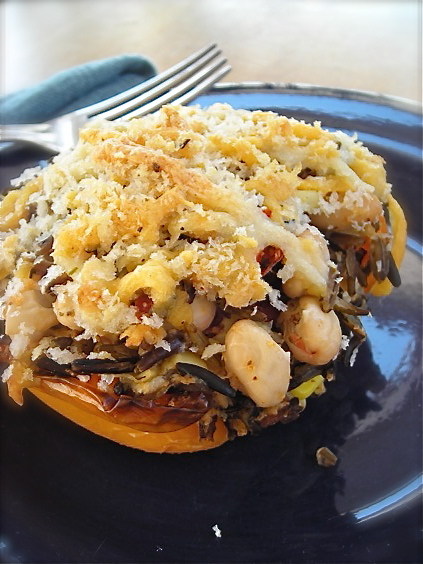
Honestly, I have no clue what happened to me between Christmas and New Years but I had ZERO desire to cook a thing. Nothing. Who was that girl? I get an extreme amount of pleasure in the kitchen; I love the act and the art of cooking, pulling something from the stovetop or oven that fills the room with incredible smells, moving tastes about on my tongue and delighting in the flavors within. This is who I am, it’s what I love. But there was that week, that flux week between holidays that always just feels odd, like the end of something when we’re not quite ready for the new thing to begin and everything in me just went swirling down the proverbial toilet. Good thing for a loving spouse who made a few meals and for copious amounts of leftovers.
But then, I came roaring back with an idea, a brainstorm that drove me to a creative new height. I wanted something light, healthy and easy to put together. I wanted to add a new line to my ever burgeoning arsenal of recipes, the list I go to time and again, options that fall into place in our dining repertoire with ease. What jumped out from under my hands was this Wild Rice Stuffed Pepper, that despite being completely meat-free, the Teen did eat part of his without one iota of complaint. There was no suspicious poking at it, no scowling or contempt.
Yeah, who was that kid, you say? Mine. The young man who seems to be changing every day that I look at him, the one approaching his 17th birthday. He’s become a bit more acceptable to new things, less rigid about what he won’t eat. I’m liking the results.
Really, the adjectives necessary to describe this dish are extravagant. Mind-boggling. Flavorful and light, but hearty and comforting as well. Mike and I loved these too, but then, I knew we would. We’d be meat-free more often if it weren’t for the Carnivore. This dish, once the lovely colored peppers were home from the market, came together entirely from my pantry and freezer. I love those types of meals. Opt in the fresh produce, fill the edges with staples and sit down to a lovely meal. This is the cooking I like.
Wild Rice Stuffed Peppers
3 colored peppers of choice, sliced in half and cored
1 cup wild rice, washed and picked over
1 small shallot, minced
2 cloves garlic, minced
1 15-oz can great northern beans, rinsed
1 c. frozen corn kernels
1/2 c. canned tomatoes, or 2 chopped fresh Roma tomatoes
1 c. panko breadcrumbs
1 c. shredded cheese of choice, plus more for topping (I used cheddar and pepper jack together)
1/3 c. shredded parmesan, with more for topping
Salt and pepper to taste
In a medium saucepan, bring 4 cups of water to a boil. Add the wild rice, return to a simmer and cook, covered until the rice is tender 30-40 minutes. I used long grain, or regular wild rice so it took longer than if you use the cracked version. Adjust simmering time accordingly. Once rice is tender, drain excess water in a wire strainer and set aside.
Meanwhile, set your oven to Broil. Line a baking sheet with foil. Place prepared peppers on sheet, cut side up and broil for about 5-7 minutes, until edges are slightly browned and peppers are softened just a little. Remove from oven, set aside and set oven temperature to 400°.
In a deep skillet, saute shallot in oil for about 5 minutes, then add garlic and cook about a minute longer. Add the beans and corn, and heat through. Stir in the tomato and wild rice until just combined and remove from heat. Add the cheese and panko. Season to taste with salt and pepper.
When mixture is cool enough to handle, pick up a generous handful and press it together slightly, then mound it into a pepper half. Repeat with remaining peppers and filling, mounding the peppers full. You may not use all the filling but be generous. In a small bowl, place about a half cup of the shredded cheese and several tablespoons of shredded parmesan. Add two tablespoon of panko bread crumbs and toss to coat. Top the peppers with this and place in the oven for about 15 minutes, or until the filling is hot and the cheese on top has melted. Serve immediately.
KATE’S NOTES:
Look for good sturdy peppers that are heavy and full for this dish. They’ll hold the filling better. I like to find ones that have four ‘knobs’ on the bottom if I can. It makes for a more even cut. If you like to make stuffed peppers the regular way, by coring the entire pepper instead of cutting it in half, by all means do so. I like this method for the ease of eating them.
There is endless versatility in this recipe: use brown rice and black beans, or regular rice and red beans. Add frozen peas or even cooked cubes of squash. Add in a host of fresh herbs. Skip the panko to make them gluten-free. It helps to bind the ingredients but I will say that it’s not necessary at all. Change up your cheese, or add chopped leftover meat if you have it.
December 29th, 2010
| 6 Comments »
Every year seems to pass a bit more quickly than the last, or seem to anyway. I find myself peering at December’s calendar page often wondering how I got there; it’s not like I didn’t watch a glorious Spring burst into bloom in my yard, and beyond, or scuttle my way through the intensely hot summer, sweating in the kitchen at work and honing muscles I never thought I had. I did get all the freedom available to be able to fully appreciate the amazing and wondrous Autumn that landed in our midst, full of stunning color and temperate days of endless blue skies. I know all those seasons passed me, but still, here I am facing the last few weeks of 2010 and I find myself wondering “Just what did I DO this past year?”
And oh folks, when I think about that, I kind of get chills.
Because last year at this time, when I reflected over 2009, I was nearly in tears. Well, I was in tears. 2009 was hard. Very hard. Maybe you’ve noticed I’m a bit tender-hearted? That I feel my life pretty deeply? 2009 was like a constant rasp on my skin that I couldn’t get away from. I was so eager for another year, for the flip of the calendar page that spoke of new promise, of opportunity and chances to climb out of the darkness that seemed to chase after me in 2009. I wanted life to get better, and it far and away surpassed my expectations. 2010 had copious fanfare, waving flags and plenty of ‘Hip, Hip, Hooray!’ moments.
January
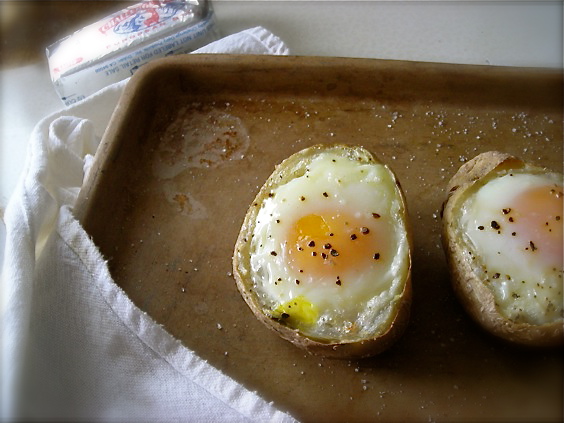
How can you NOT think your year will be amazing when in the very first month your life changes dramatically in one night, your simplest food idea ends up on The Kitchn website and sends 1000’s of hits to your humble little blog and you find the world’s most perfect waffle recipe ever?
I knew after I met up with 40 other bloggers from Minnesota last January that something very fundamental began shifting in my life, but I had no idea the lengths it would go to infiltrate the kind of friendships it has. The women I met that night have changed my life, and I don’t say that lightly. They are amazing. And God sent. And beautiful. And real. A year later and I feel as if we’ve only scratched the surface of where it will go. That in itself is incredible. I can’t wait to see where this leads in the year ahead.
February
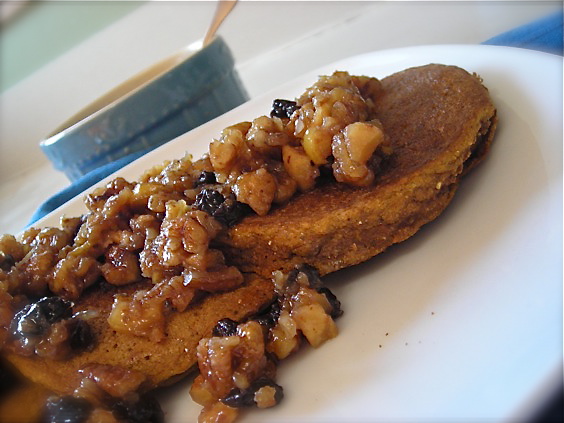
The second month brought an increased desire to really stop and look at the world around me each day, as I dove into Project 365 with a photo a day. I was posting on Flickr, then stopped, but the habit has more or less continued and I love scrolling back over my photos, seeing what life was showing me each day. This month was filled with some really simple pleasures like Chocolate Toll House Bars, Pumpkin Pancakes and White Bean Salads. It was also the month that a part of my past went up in flames in South Minneapolis.
It was a month where I began to be less concerned about deviating from food posts on this blog, and started exploring other means of using it to talk about my life.
March

March always starts with my birthday. 2009 was a stellar celebration as I turned 45 with a blow-out party. It was quieter this year. There were Oatmeal Pancakes, a pan of Gingerbread that kept mysteriously disappearing every time I looked at it and the discovery of one of my most favorite simple meals. But it ended in a life-changing halt when my beloved Harmon became so sick that we needed to put him to sleep. His 17 years in my life still grips at my heart sometimes with a sorrow that dissolves me.
But then came
April
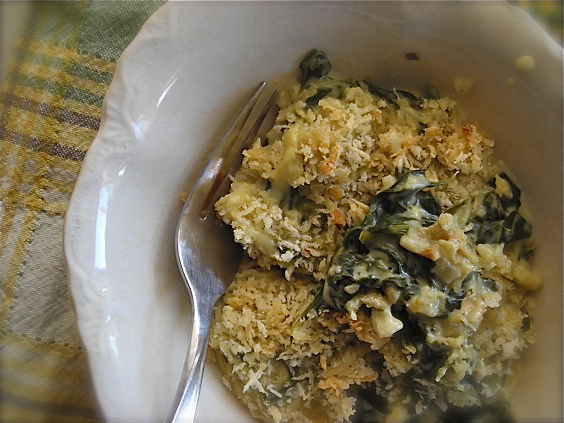
We renewed ourselves, I discovered how incredible Boursin cheese could be when blended with Spinach, I started seeking out more memories of my life through baking childhood favorites and Eli came bouncing noisily into our lives spreading love and affection at every turn. I also became gainfully employed again, as the Pantry Chef at a local Yacht Club. It was a palpable relief to our finances.
May
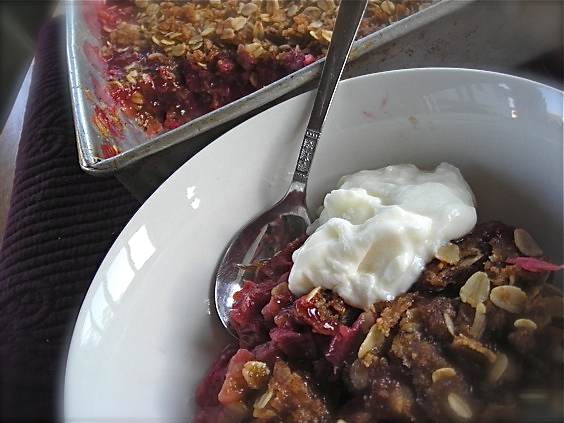
I worked. A lot. I thought it was a lot anyway, but in May I had no clue how hard and how much I was about to work. I managed to enjoy the fruits of Spring with Cardamom Spiked Rhubarb Crisp, and Roasted Apricots in Cardamom Syrup. But little else came from my kitchen, as I was absorbed and enfolded into a job that would push me through the next five months like a tsunami in my life.
June

I managed to blog about strawberries soaked in brown sugar and balsamic vinegar, and share a superbly simple and delicious Fish Taco with you all, not to mention a post about the beauty that was bursting out all over my garden. But that was about it. The job engulfed my life. And me.
July
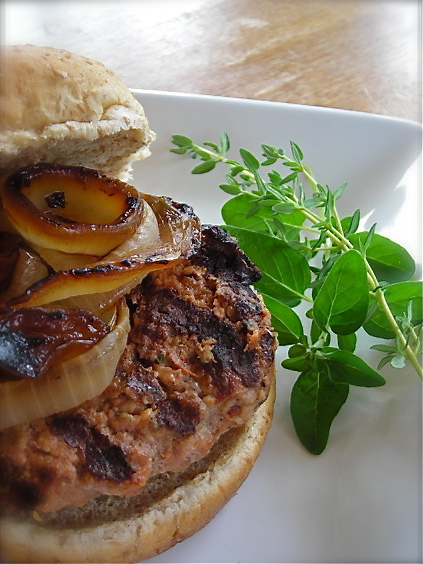
How was your July? Hot? Fun? Did you take a vacation, go to the beach, explore somewhere new? I managed to make a stellar Pizza Burger, found out how wonderful Guacamole can be when you grill all the items first, and captured high summer in my garden. But that was it for me. July? What July? At least I managed to pick Blueberries.
August
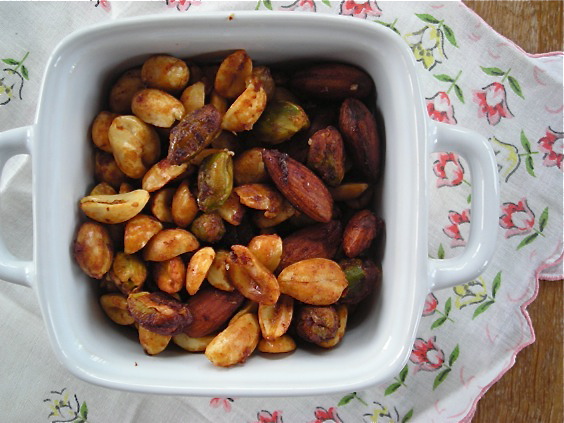
Huh? August? Really? I dealt with a bounty of garden tomatoes and I made Chipotle Lime Roasted Nuts. Someone hold me back from the excitement. I worked and sweated more than I thought was possible. At home, I did little else but drink coffee and do laundry. However, at night when I was done and life quieted down, the summer unfolded some amazing night-time weather to enjoy.
September
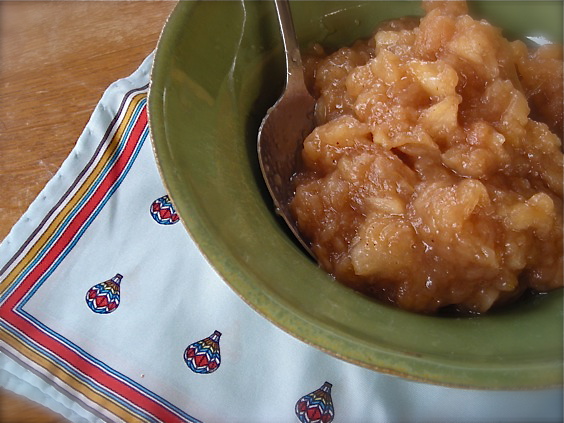
The ninth month was like one long deep breath for me. Work slowed down enough for me to be able to look around and really see what kind of life was going on. Griffin started 11th grade, the weather turned and I made Applesauce. The colors began unfolding their glory and soup started simmering on the stove. I reflected heavily on ‘Where I’m From’.
October
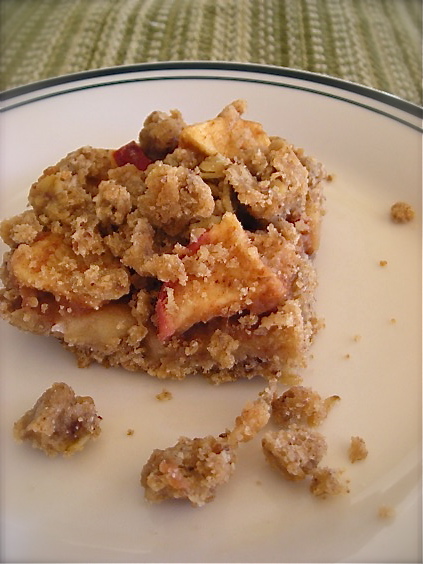
Glorious, delirious October. Probably the most stunning Fall season I have ever known. Warm days, cool nights and color splashes everywhere, beyond your craziest imagination. We walked around in a fog of delight, enraptured of the weather. Really, it was all we talked about. And work ended in a wave that was full of bittersweet relief. I utilized thinking on a different view of life, made Apple Streusel Bars and a Blueberry Coffee Cake out of Rice Krispies. But the month ended with a cracked up car and a messed up skull despite the joy of saving 6 feline lives.
November
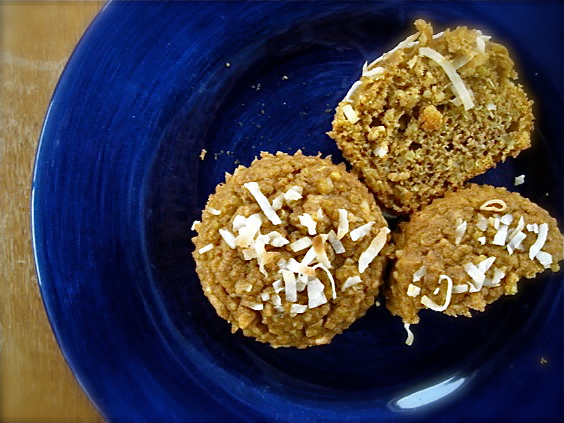
It was National Blog Posting Month. I blogged every. single. day. I loved it, but I’ll spare you a recap of it all as I mostly resuscitated recipes from my archives (did you KNOW I have a Recipe Index? It’s up at the top of the page!). There was, however, a stellar Peanut Butter Banana Bread, Sweet Potato Biscuits and Whole Wheat Muffins with Quinoa and Squash. It was a delicious month.
And now, it’s
December
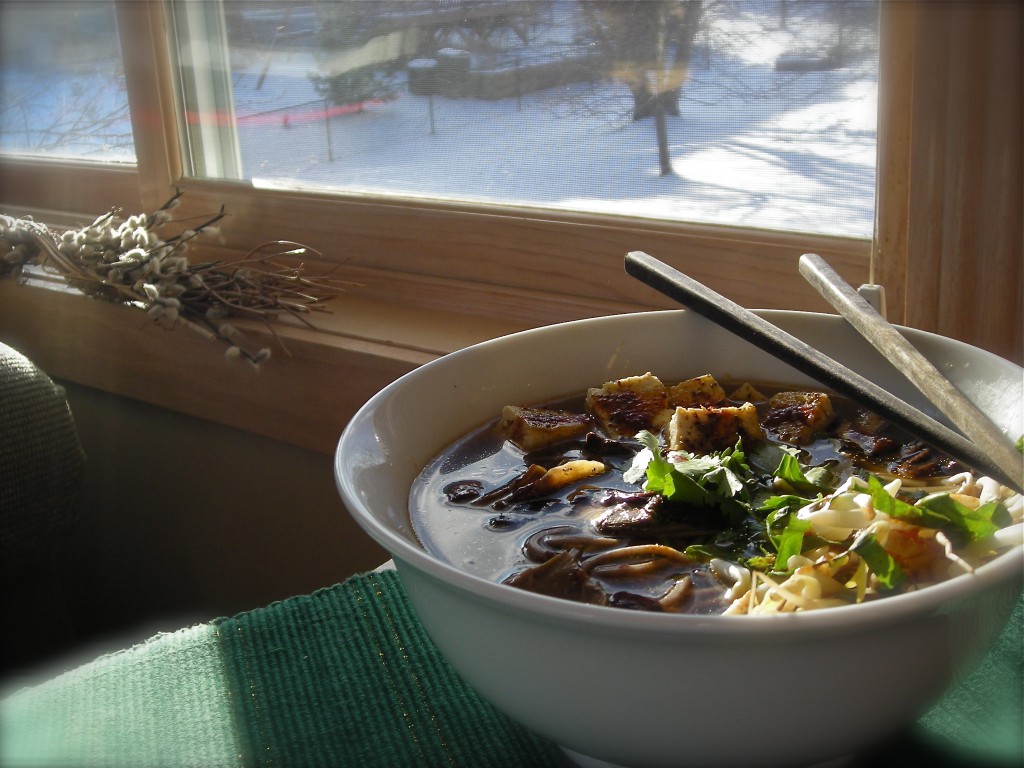
I entered a contest and my recipe took 2nd Place. I got paid to write a blog post, my very first paid blogging job, and I created an amazing Curried Squash and Corn Risotto. I also baked another memory, which I am swiftly finding to be my most favorite aspect of writing this blog.
And now, time to move on again into 2011. Again I feel that something big is on the horizon, and there is promise already with this blog, which you will read about as it unfolds after the new year begins. It’s going to be a good start to 2011, and one that I hope will lead to a lot of other opportunities. It’s nice at this point to feel so blessed by the past 12 months. It gives me much more hope for the next 12.
December 16th, 2010
| 7 Comments »
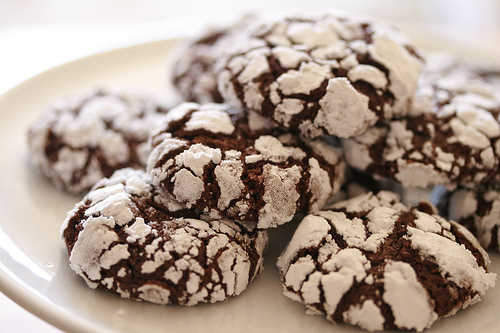
Baking has always been about connections for me, most importantly, to my Mom. I treasure many of the delicious recipes that defined my childhood and love seeing some of those old favorites show up in the multiple blogs I follow. Cookies like Chocolate Crackles, a moist fudgey cake-like cookie with a powdered sugar coating,
 {photo courtesy of Food Librarian} {photo courtesy of Food Librarian}
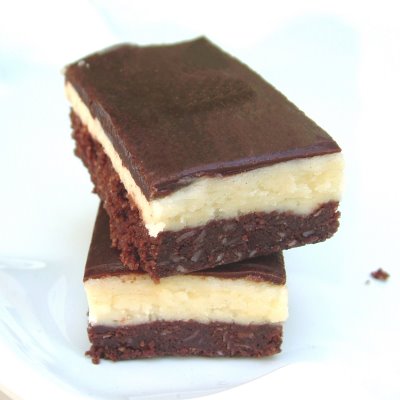
and Nainamo Bars, or as we grew up with, Three Layer Bars, a superbly decadent blend of nuts, chocolate, coconut and vanilla pudding, carefully constructed into a glamorous tower that delights not only the eye but the tastebuds as well.
{photo courtesy of small home, big start}
These treats played a significant role in our lives, and it’s been such a joy to re-create these for family gatherings and be able to see my siblings once again appreciate some of the tastes of our past.
I personally have been searching for yet another taste of childhood, one that’s eluded me up until now- the taste of my Mom’s Date Bars. She made these especially for me, and for my sister Karen. We both loved the chewy date filling and crunchy oat topping. I was known to seek out the treasured edge pieces where the dates caramelized in the baking process, becoming firm and chewy, like date jerky if you will. I loved how it kind of stuck in my teeth, a sugary toffee feel in my mouth and I loved the anticipation of how the topping would crumble as I bit into it, catching the errant bits in my hand as they fell.
My Mom’s recipe box sits in my cupboard, but no matter how many times I combed through it, I never found that particular recipe, the only one over the years that’s been outside my grasp. I’ve tried several other versions that have passed my eyes and not one has even been close. It was probably one of those recipes that came on a carton of oatmeal, that she made a few times and somehow lost it in a move, or quite possibly, it was something she’d memorized, a small part of my growing up that went dark when she passed away. I could make her Peanut Butter Fingers, and the Coffee Toffee Bars that we loved; I could make the Sour Cream Drop cookies with the mocha frosting and pan after pan of Oatmeal Scotchies, even a batch of her famous Banana Bread but I could never find a recipe that brought back those Date Bars. I scanned dozens of them, and each one was cast aside, as I knew just looking at it that it would never be what I expected.
Then I happened upon a recipe that sounded like the siren call bringing me back to that sunny kitchen, my Mom’s smiling face and those chewy caramelized edges of a bar that was just perfect.
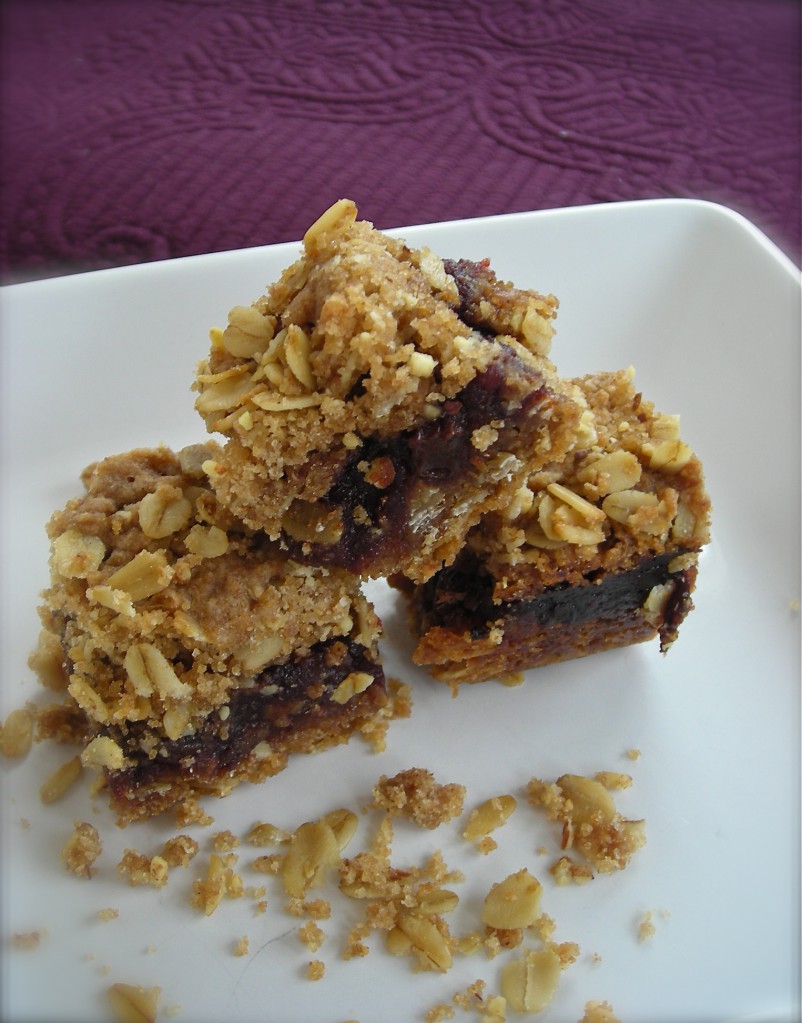
And years of wishing for one thing, one perfect treat from a time when I was small enough to lean an arm on the kitchen counter and be soothed by a crunchy and chewy bar made just for me, well that all fell away as I lifted the parchment sheet holding the thick mass out of the pan in my own sunny kitchen. The smell of these fragrant date bars made its way to my nose and the memory caught in my throat, threatening to send the tear ducts into overdrive. Smell and taste are so powerful in us, so driving us to seek those parts of our lives that have faded, sometimes too far for us to even recognize any longer. But this one had stayed, regardless of how long it had been, how far back I had to go to retrieve it, one whiff of this recipe and I was a tiny girl again, watching my Mom, with the scent of cooked dates in my head and the anticipation of that first bite, the shards of crunchy oats falling to my open palm, and her smile warm in my eyes.
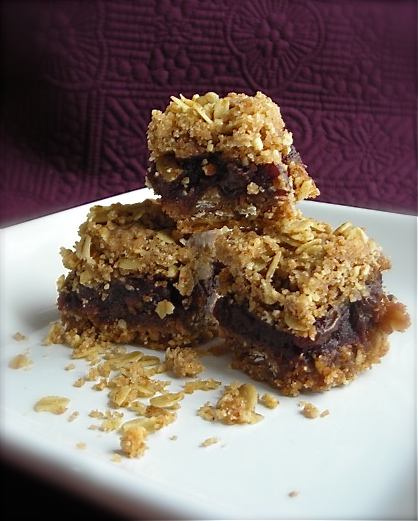
And I happily welcome back this treasured memory. I’ve been patiently waiting for it to return and now it will have a permanent spot in my kitchen.
Oat and Nut Date Squares
adapted from an original recipe, author unknown.
1 8-oz package chopped dates (or equivalent of fresh)
1/4 c. black raisins
1 c. water
Zest from half a clementine (you can use orange zest, but measure 2 teaspoons for equivalent)
1-2 t. clementine juice (use 1 t. fresh orange juice)
1/2 c. ground almonds ( sub in walnuts or pecans if desired)
1/2 c. each whole wheat flour and all-purpose flour
1/2 t. table salt
1/2 t. baking soda
1 t. ground cinnamon
1/2 t. ground nutmeg
1/8 t. ground cloves
1 c. packed brown sugar
1-1/2 sticks unsalted butter, diced, softened but still fairly cold.
1 c. old fashioned rolled oats
Preheat oven to 350° and spray an 8×8 baking pan with cooking spray. Line with parchment paper so that it hangs over edge of pan.
In small saucepan, combine dates, raisins and water. Bring to a boil, then reduce heat and simmer, stirring occasionally until all liquid has been absorbed and fruit is a thick, concentrated paste. This should take about 10 minutes. Remove from heat, stir in clementine zest and juice and blend well. Scrape onto a plate and spread to cool.
In the bowl of a food processor, place ground almonds, both flours, salt, soda and spices. Pulse to combine. Add in brown sugar and pulse to blend. Scatter butter over top and pulse until mixture is like coarse uneven meal. There should be lumps of butter in all sizes. Pour this into a large bowl and stir in the oats.
Press 2/3 of the mixture into the prepared pan, pressing down firmly. Spoon cooled date mixture over, spreading it to cover crust completely. Sprinkle remaining oat mixture over the top. Bake until top crust is golden brown and crisp, 30-40 minutes.
Cool bars completely on a rack, still in the pan. Once bars are at room temperature, gently lift them out of the pan using the parchment paper. Slice into 2″ squares to serve. These bars are delicious when chilled. Keep in airtight container or refrigerated.
|


